Why Configure Payment Methods?
-
Faster Checkout: One tap on a button is faster than manually typing “External Payment” every time.
-
Automated Reconciliation: At the end of the day, the system tells you exactly how much Cash vs. Card you should have, making closing shifts effortless.
-
Smart Rounding: Automatically round grand totals (e.g., $10.03 becomes $10.00) to keep your cash handling simple and customer-friendly.
Add Custom Payment Methods
Define non-integrated payment options like Cash, Bank Transfer, or External Terminals.
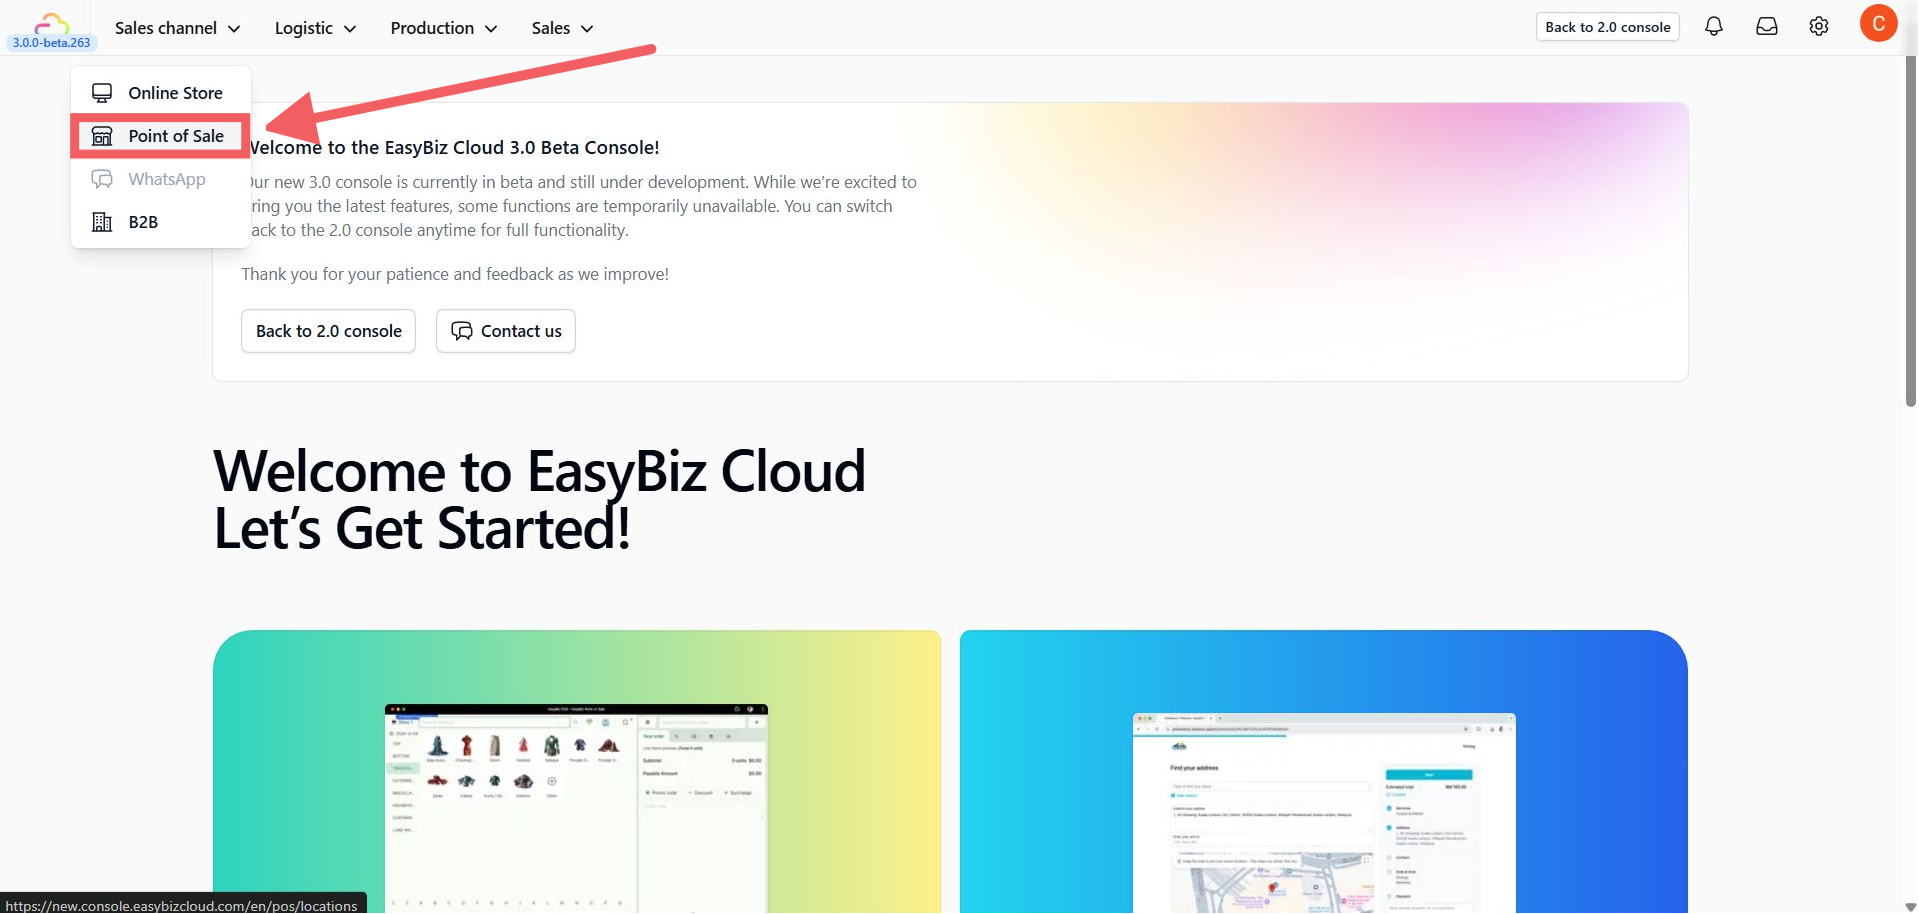
- Go to Sales Channel > Point of Sale.
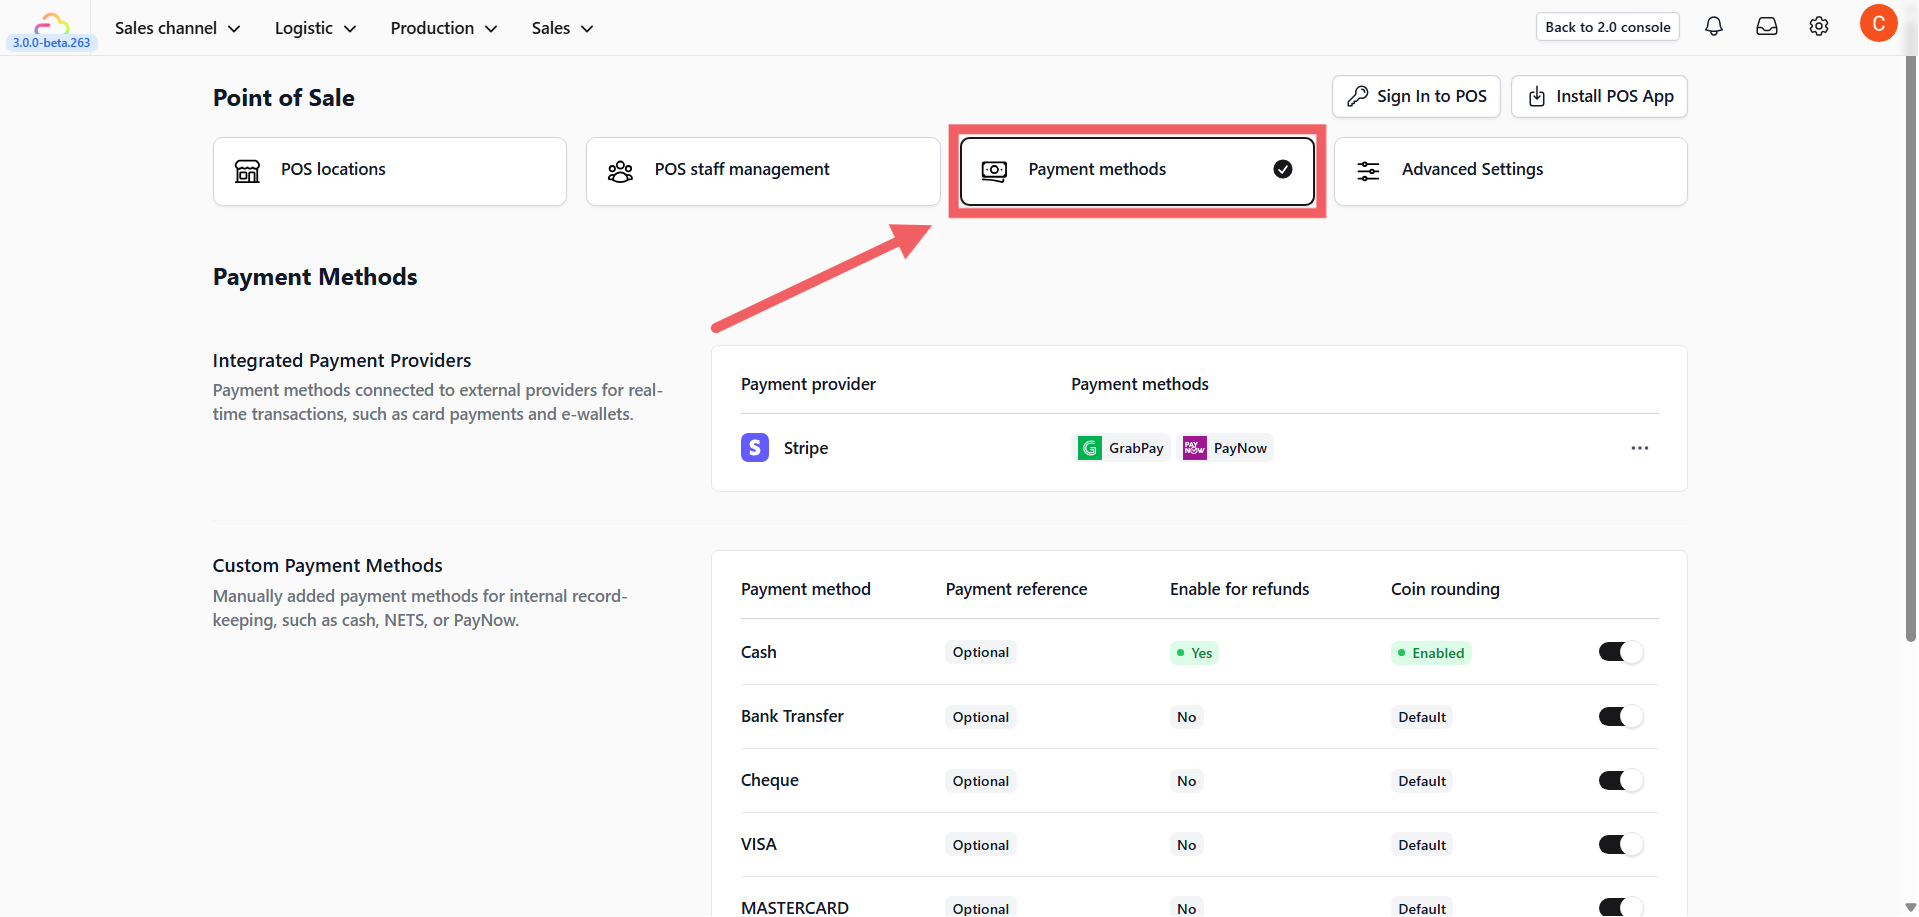
- Click the Payment Methods card.
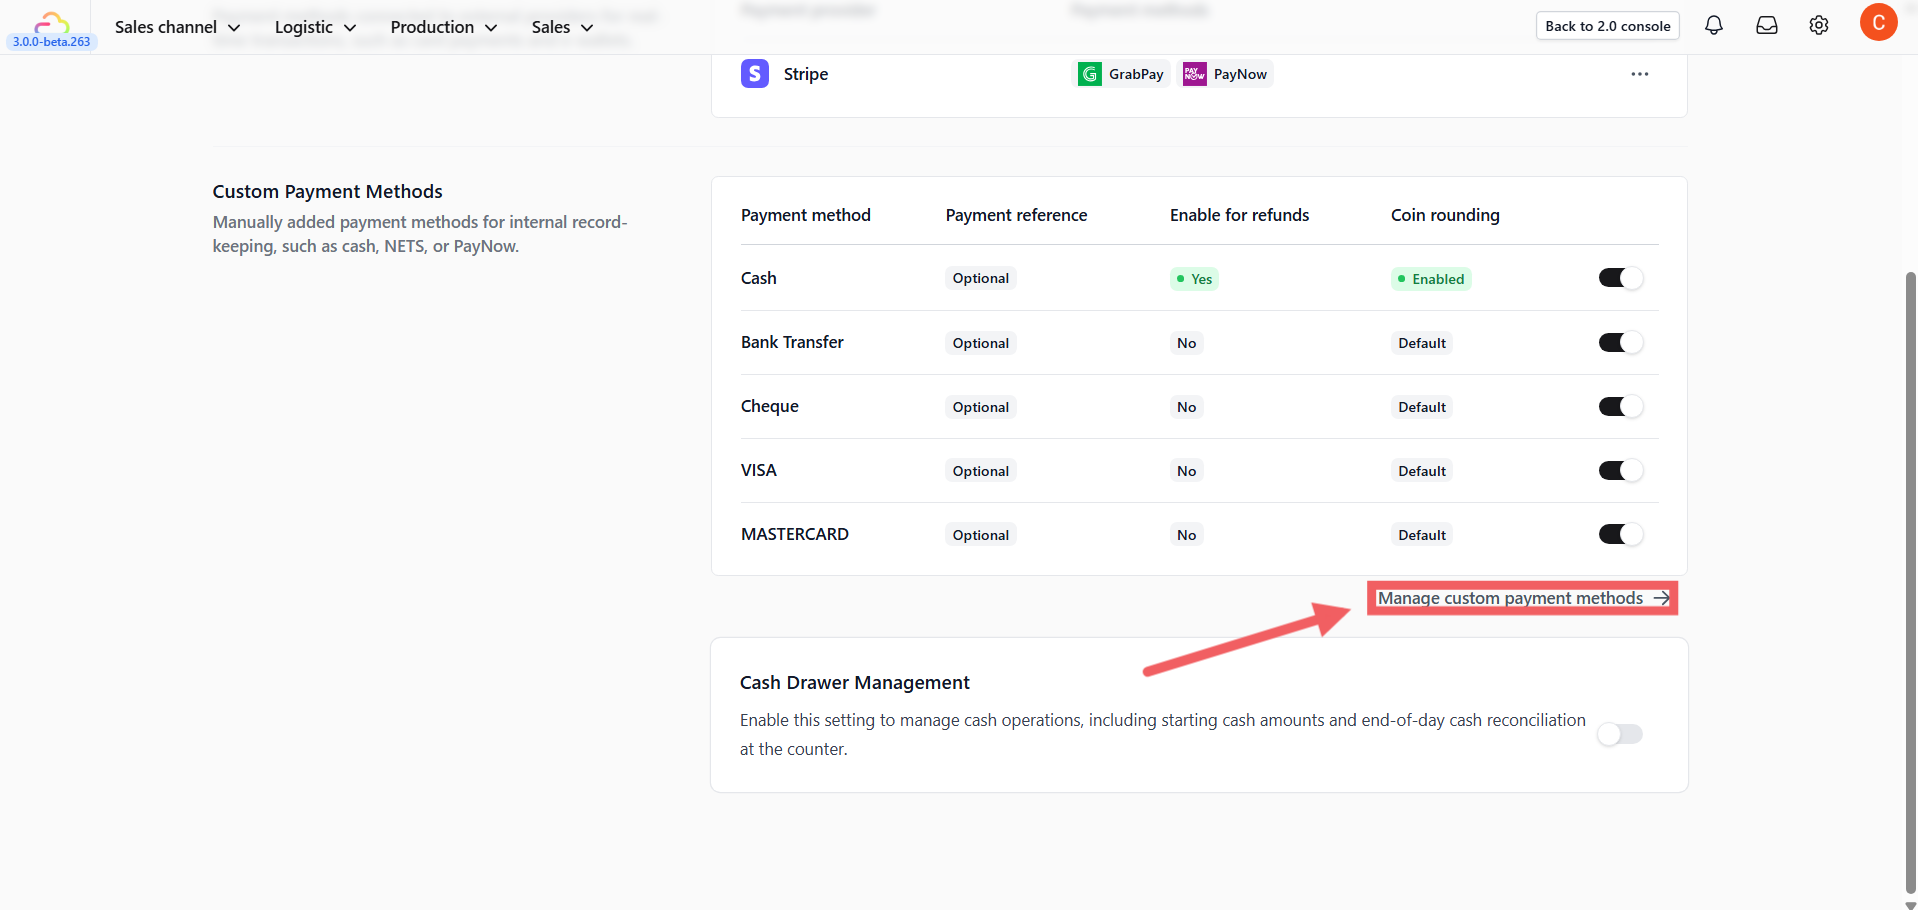
- Under “Custom Payment Methods”, click Manage custom payment methods.
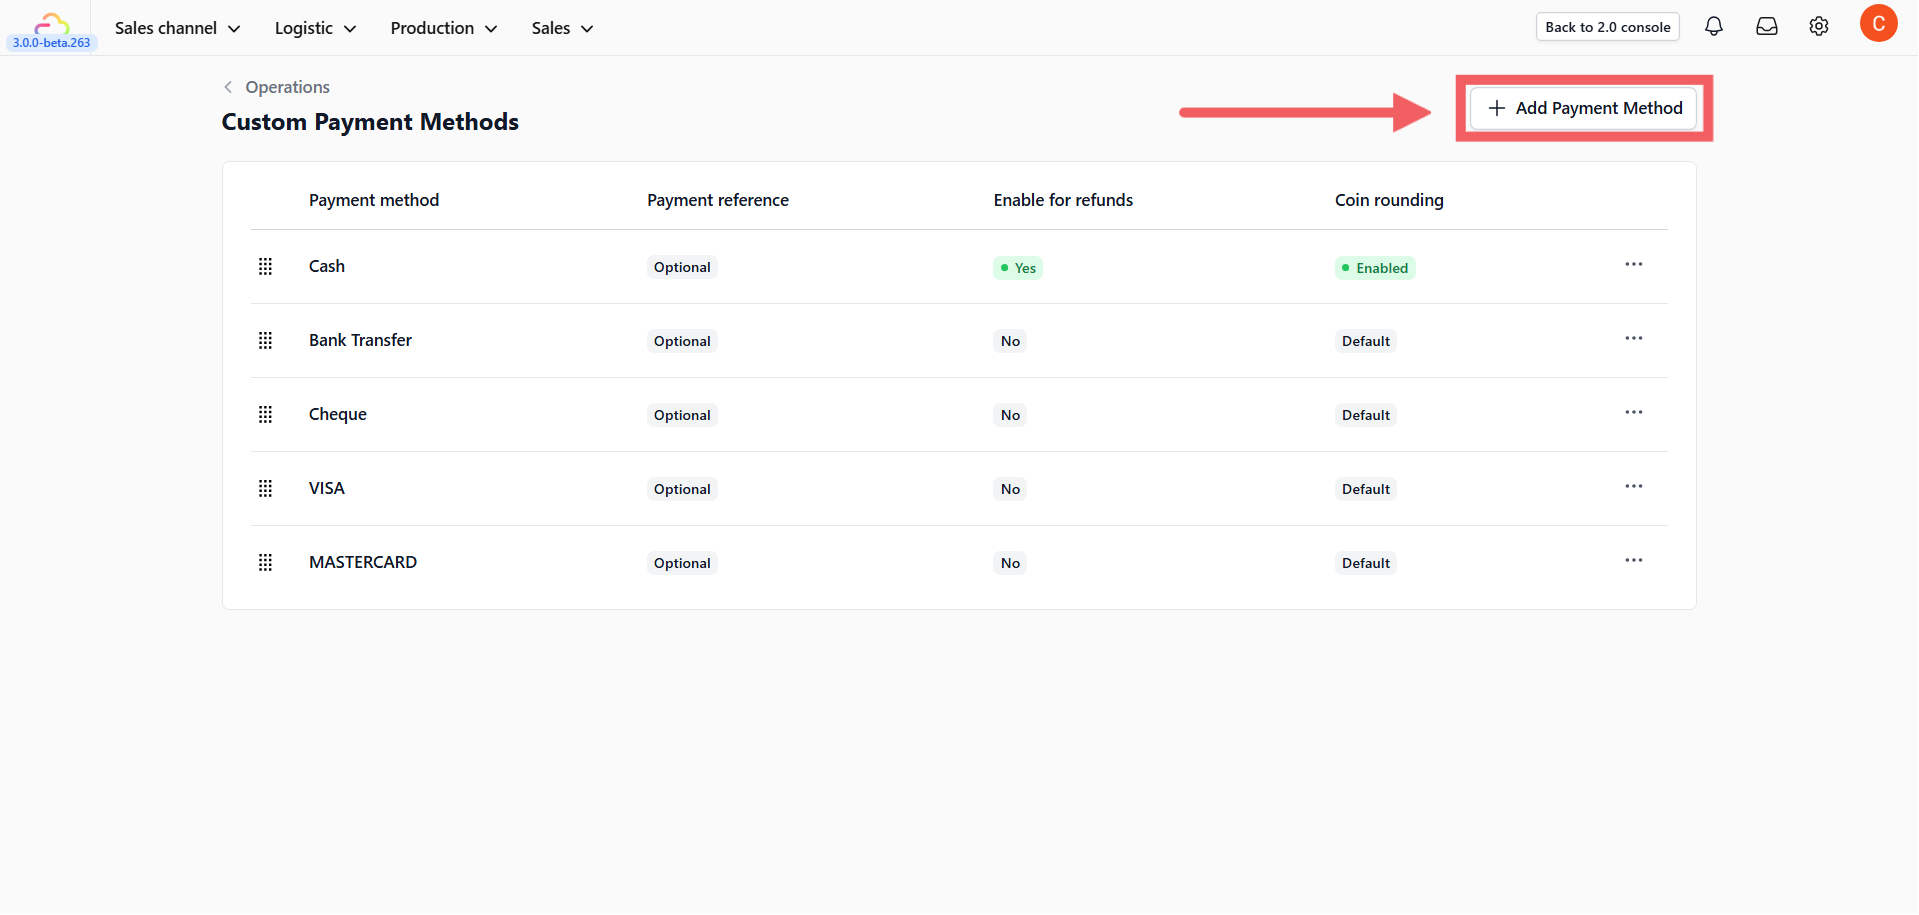
- Click + Add Payment Method.
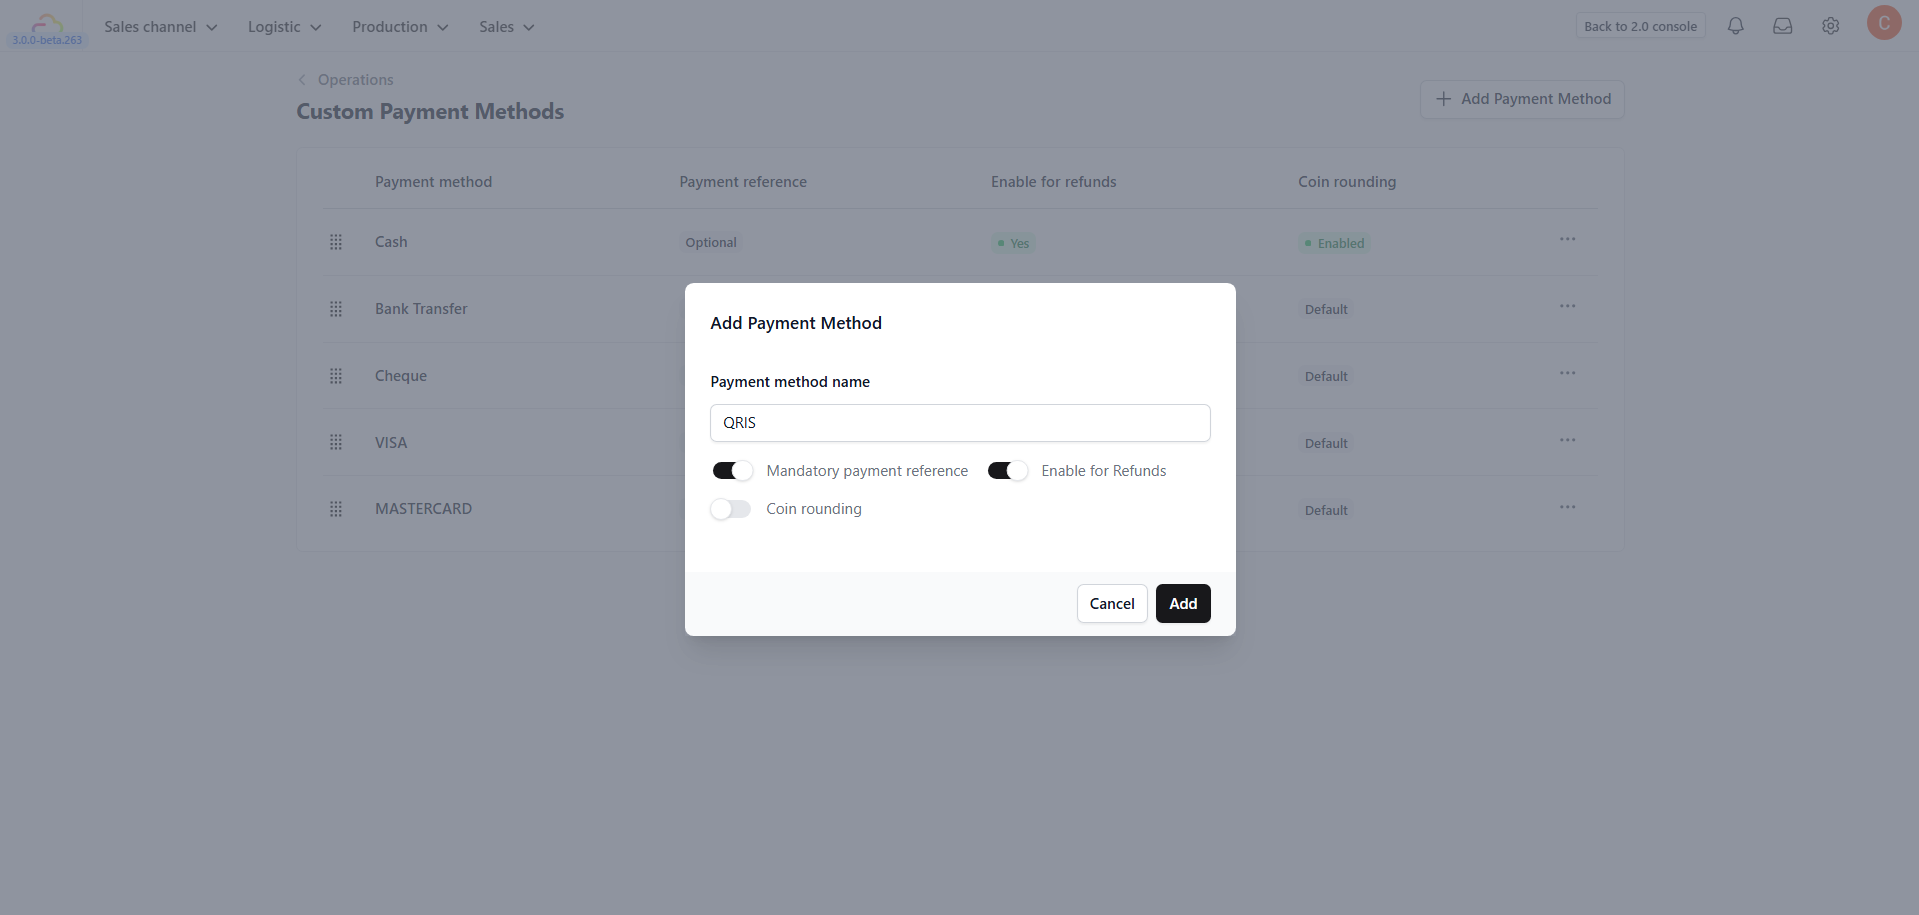
- Configure the details in the popup:
-
Payment method name: Enter the name (e.g., “Cash”, “QRIS”).
-
Mandatory payment reference: Toggle ON if you require staff to enter a transaction ID (useful for Bank Transfers).
-
Enable for Refunds: Toggle ON if this method can be used to return money to customers.
-
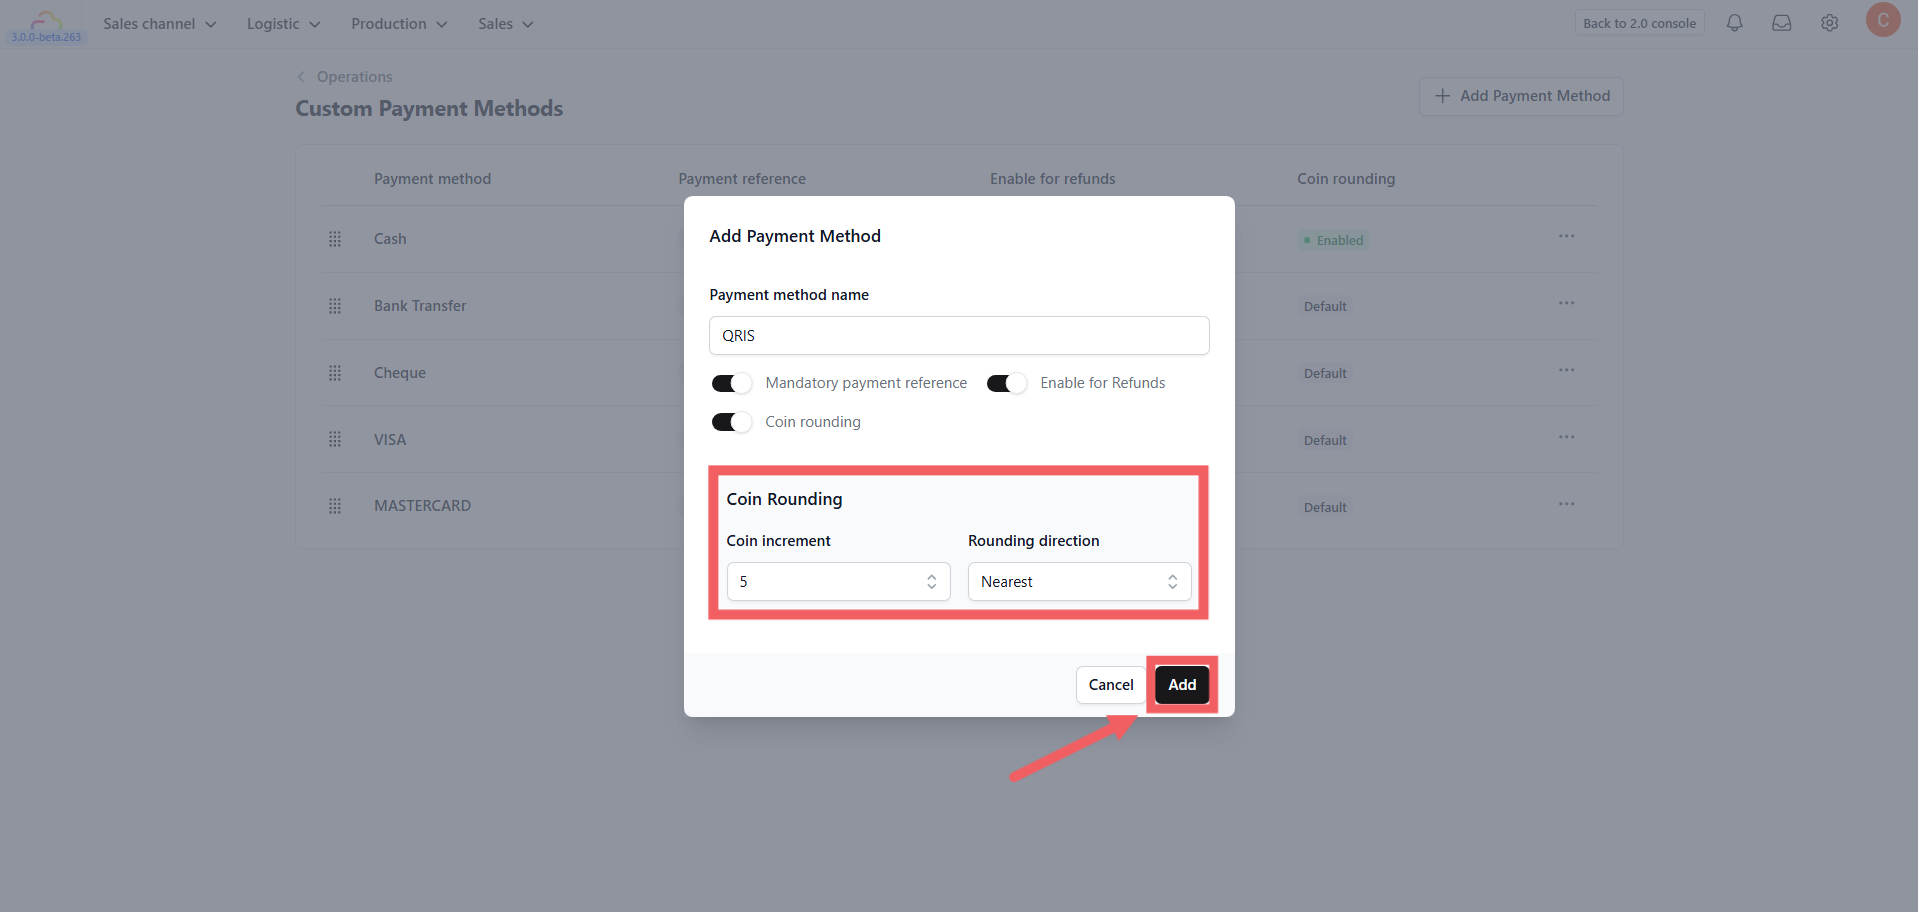
Coin Rounding: Toggle ON specifically for Cash payments if your country stops using small coins.
- Configure Rounding Rules:
-
Coin increment: Select the smallest currency unit (e.g., 5 or 10).
-
Rounding direction: Choose Nearest, Up, or Down.
- Click Add (or Update).
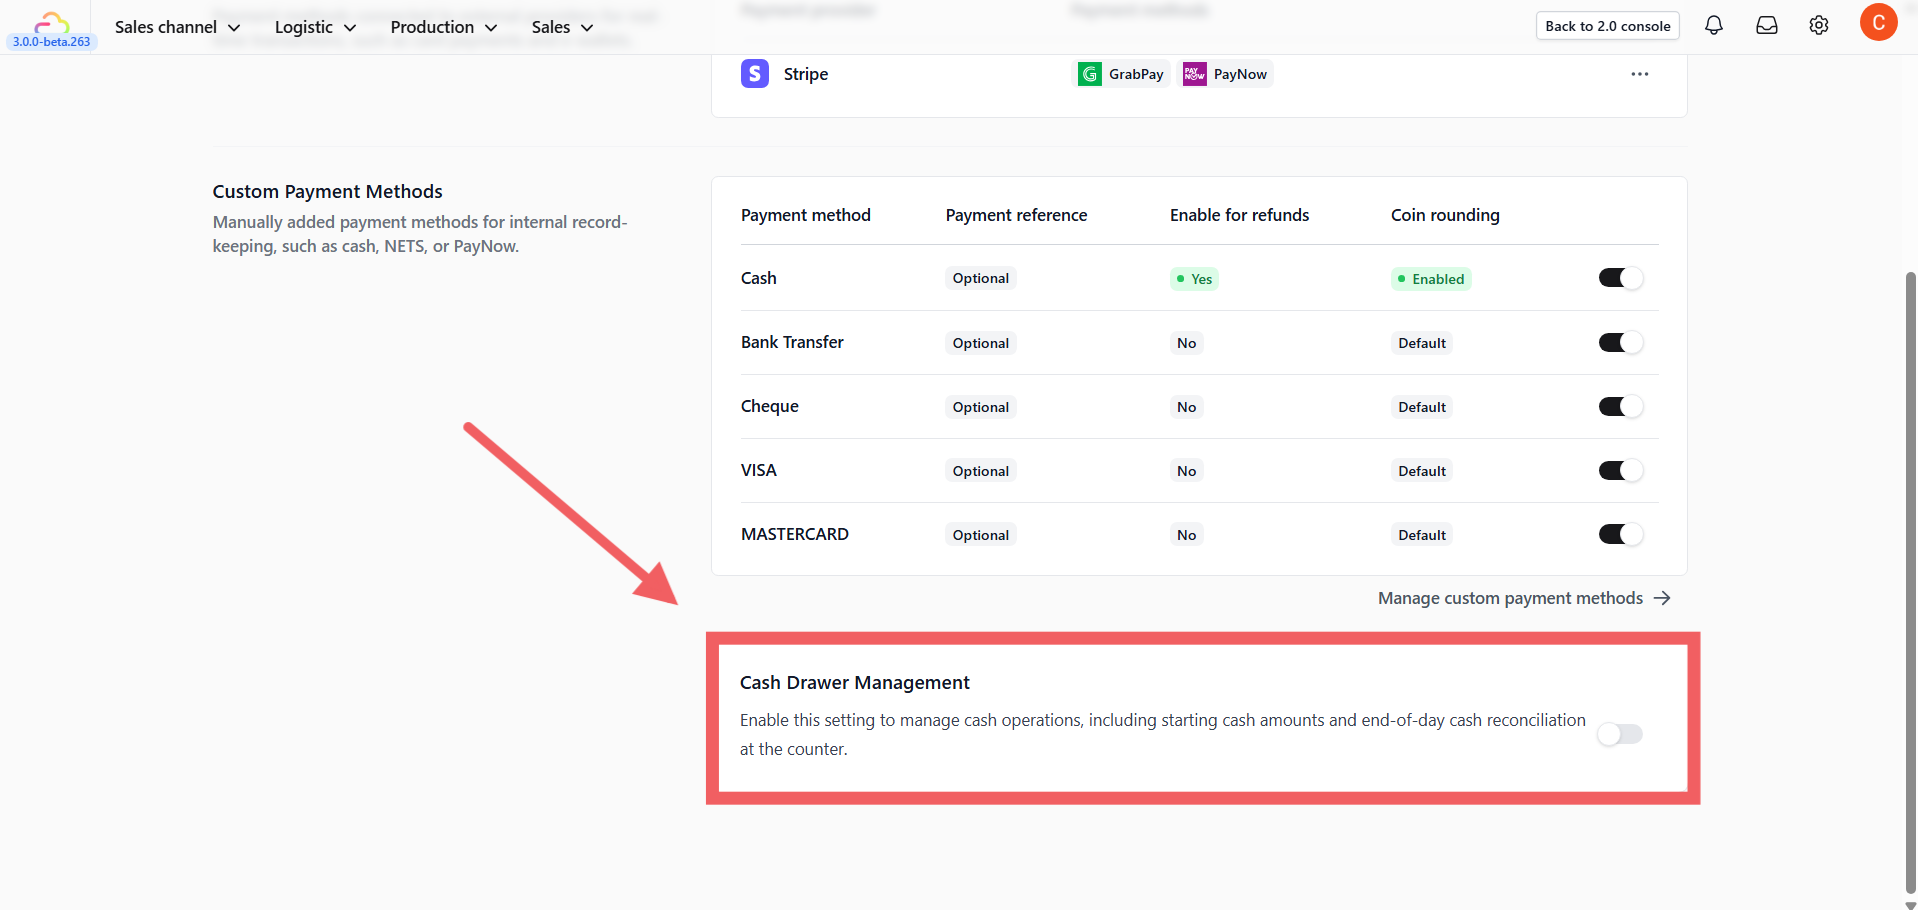
Enable Cash Drawer Management
Track the cash flow (opening amount vs. closing amount) for each shift.
-
Scroll to the bottom section “Cash Drawer Management”.
-
Toggle the switch to Enabled.
-
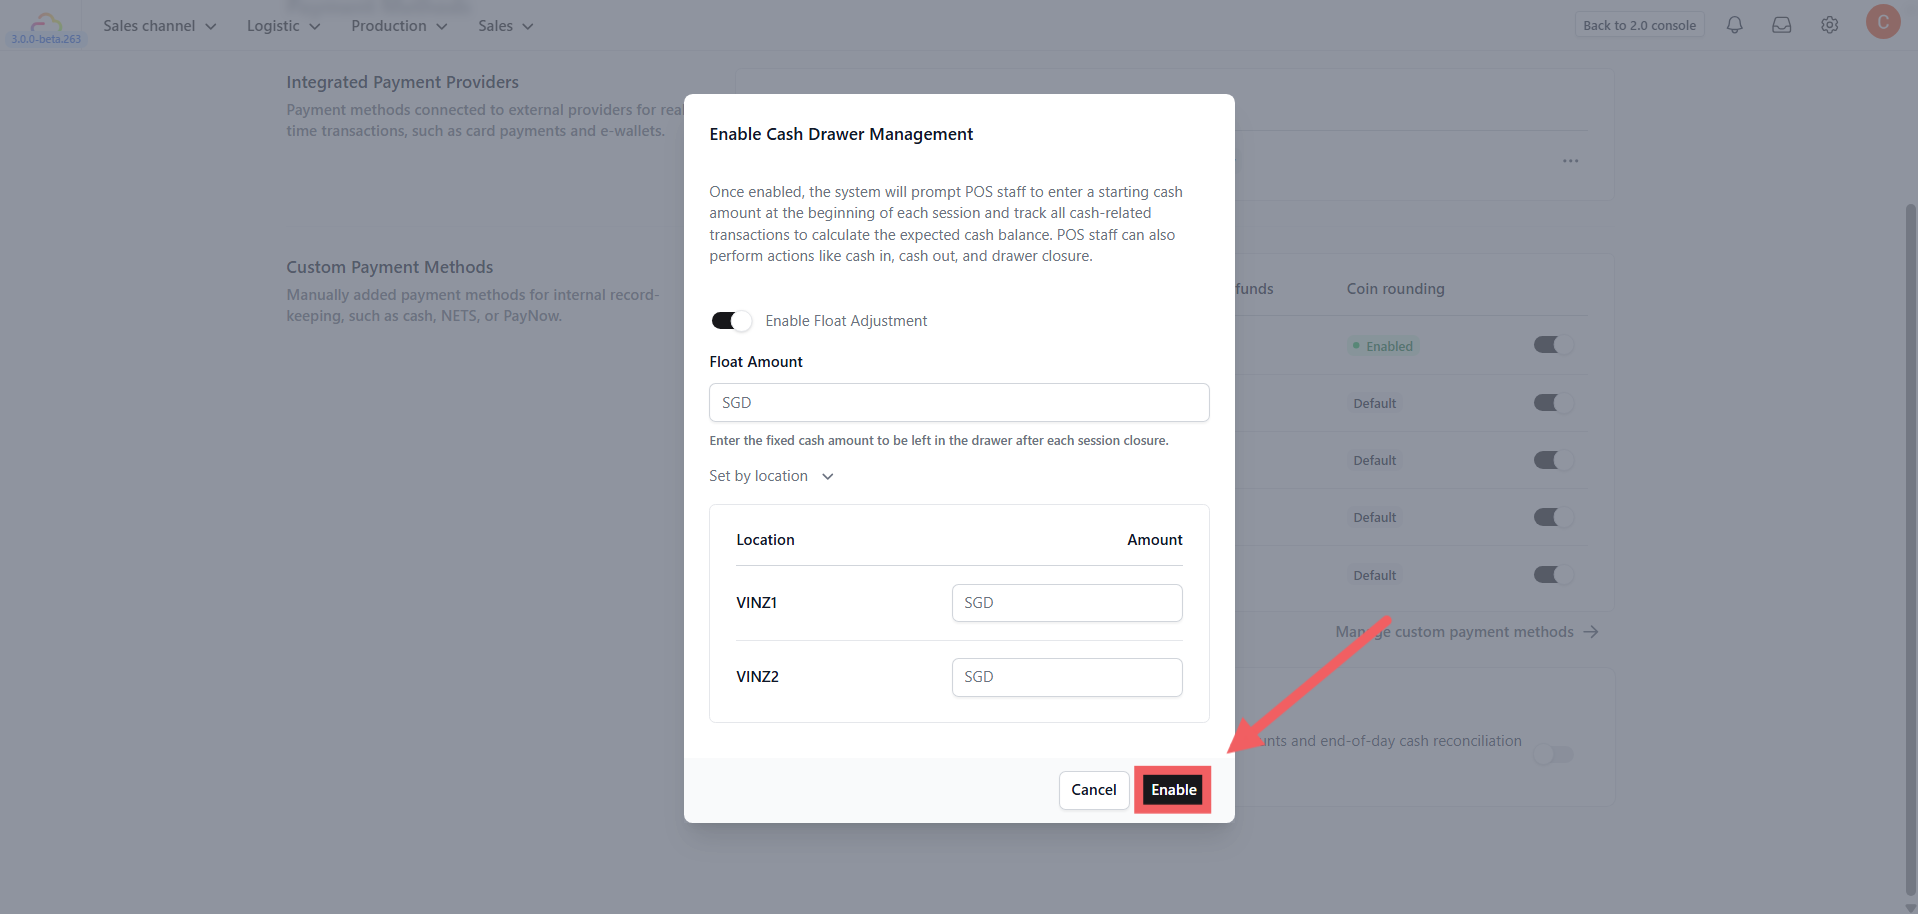
A confirmation popup will appear with an optional setting:
-
Enable Float Adjustment: Toggle this ON if you want the system to automatically reset the cash balance to a fixed deposit amount whenever the drawer is closed.
-
Float Amount: If enabled, enter the default fixed cash amount to be left in the drawer.
-
Set by location: You can also define specific float amounts for different store locations (e.g., VINZ1 vs VINZ2) by expanding this section.
- Click Enable to finish setup.