What is a Shared Variant?
A Shared Variant is a saved set of options you can apply to many products at once. Common examples are sizes like Small, Medium, Large or styles like Standard and Premium. Instead of typing the same options into every product, you set them up once in this tab and pick them from a dropdown when you add a product.
A custom variant is typed onto one product and stays there. A Shared Variant is saved in one place and reused across many products. If you later add a new size or rename an option, the update goes to every product that uses the set.
Before You Start
Take a moment to plan your sets before you create them. A little thought here saves a lot of cleanup later.
-
List the option groups your products have in common. The usual ones are clothing sizes, bag sizes, colours, and tier names.
-
Decide on a clear name for each set, the kind of name your team will recognise on the product form. For example, Sizing or Bag Type.
-
Decide on the short codes you want for each option, such as S, M, L. Codes are optional but useful if your team prints labels or matches stock against an external system.
-
If you already have products in your catalog, open a few of them first to see which options they share. You can replace those custom variants with a Shared Variant later.
How to Add a Shared Variant
-
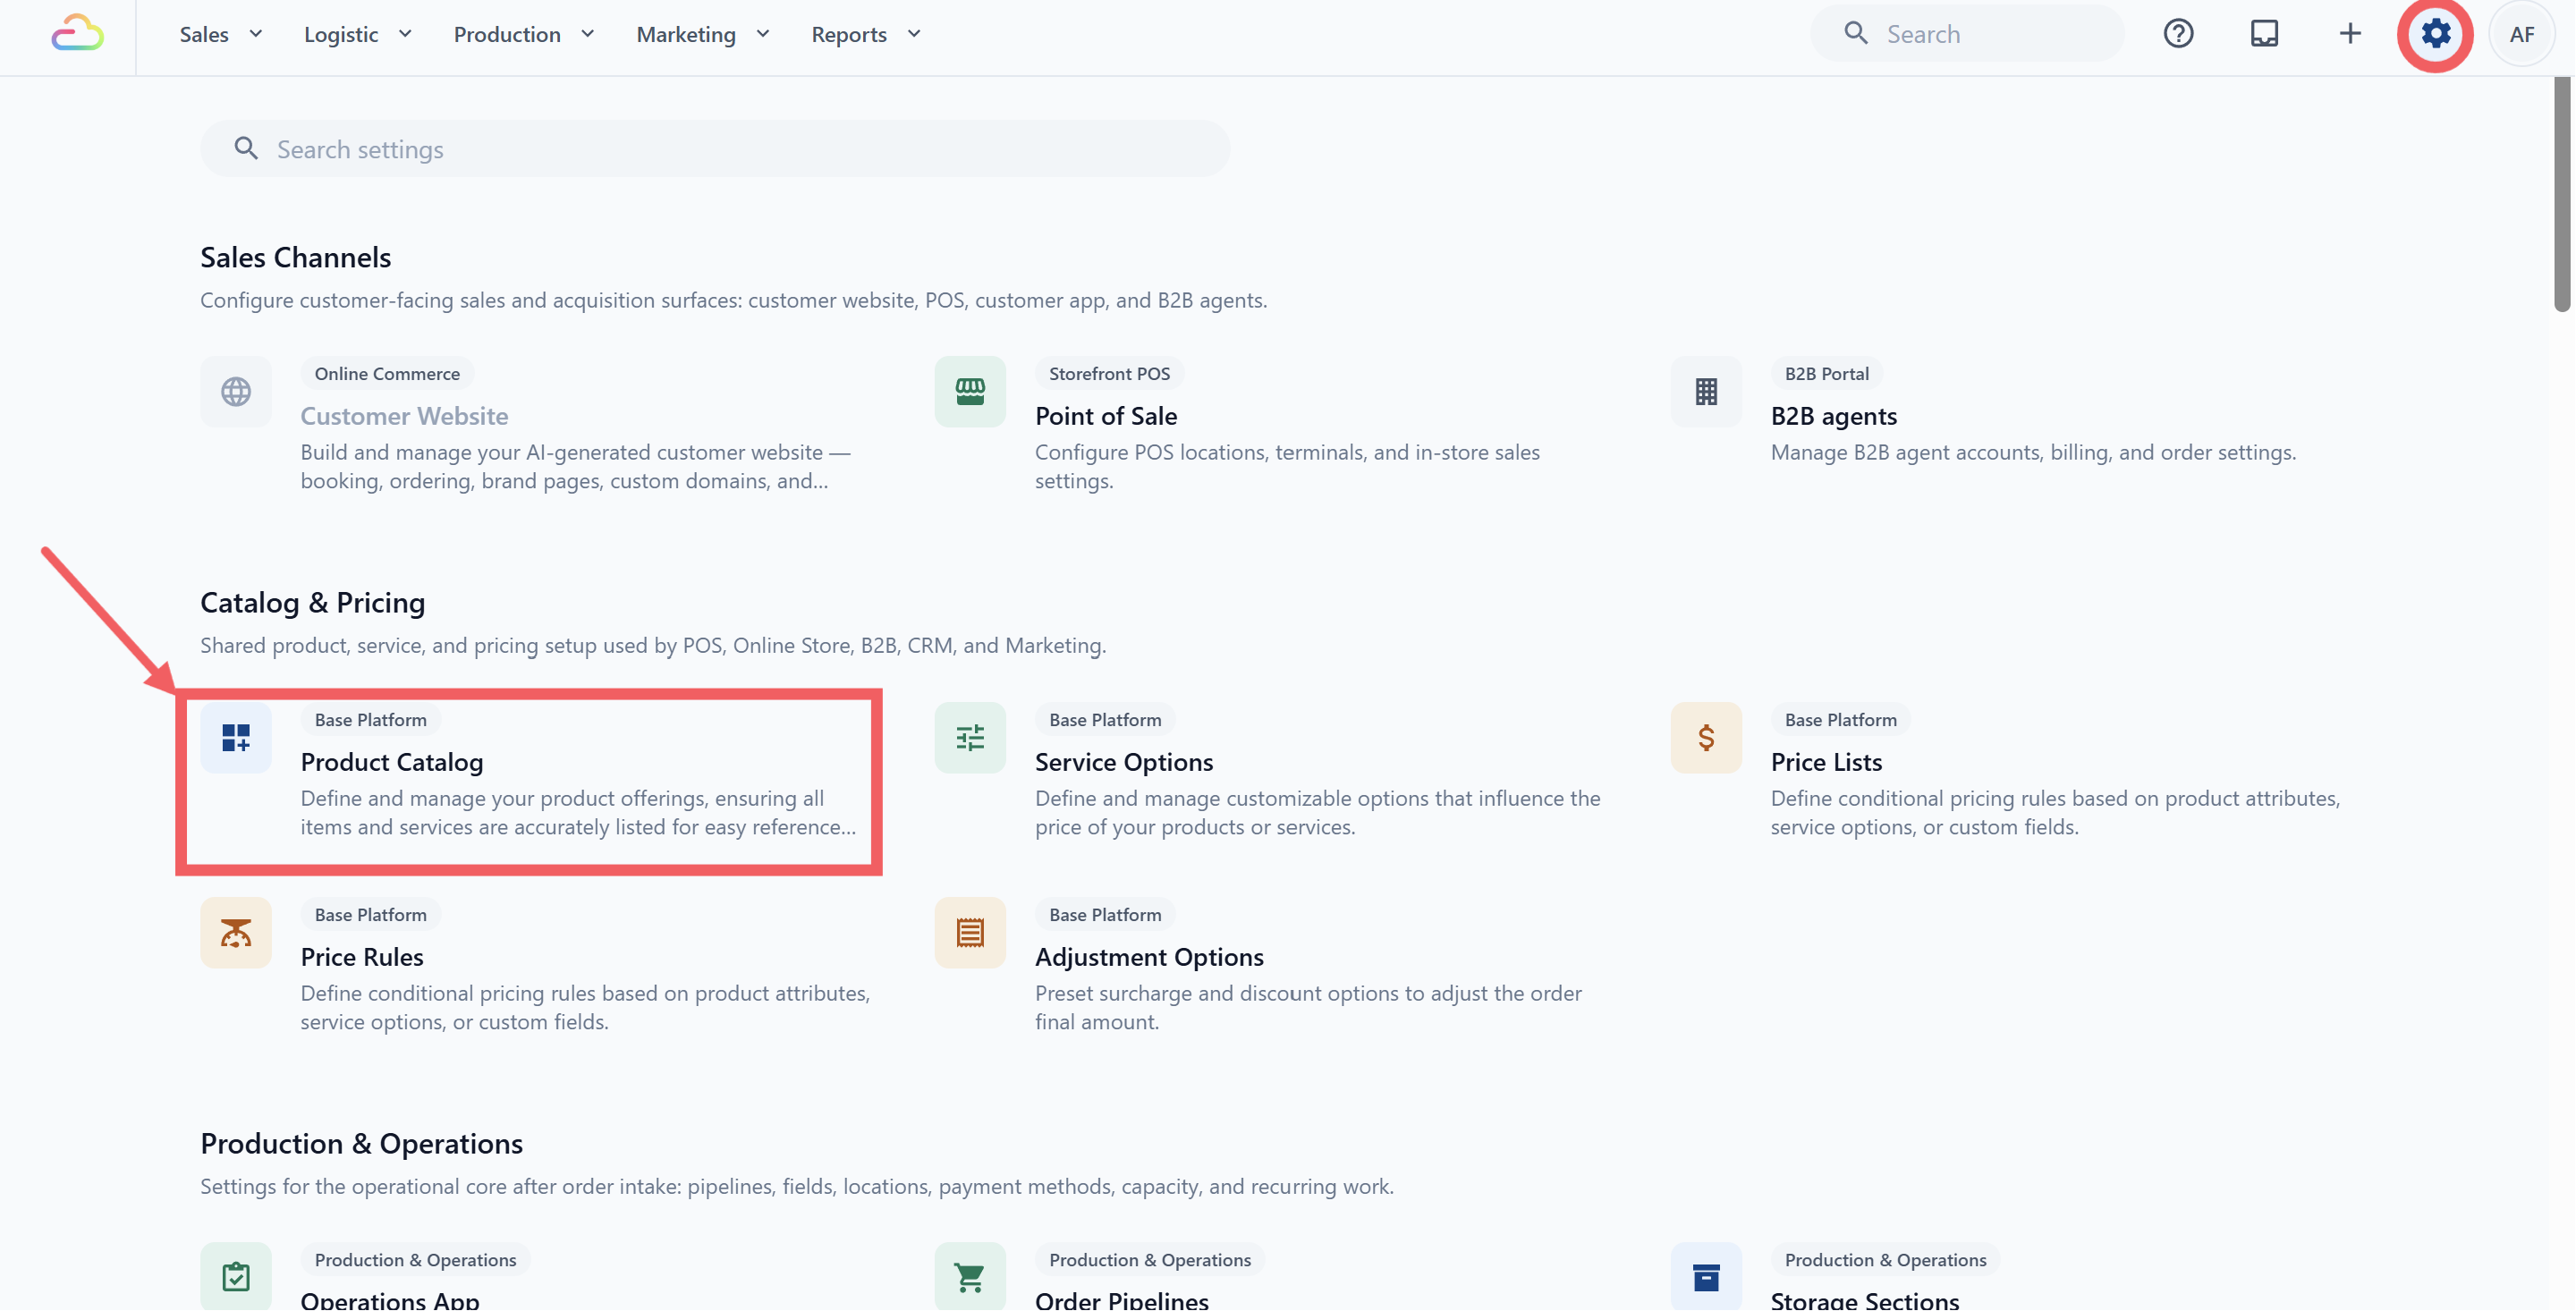
Click the ⚙️ Settings icon in the top-right corner.
-
Under the Catalog & Pricing section, click Product Catalog.
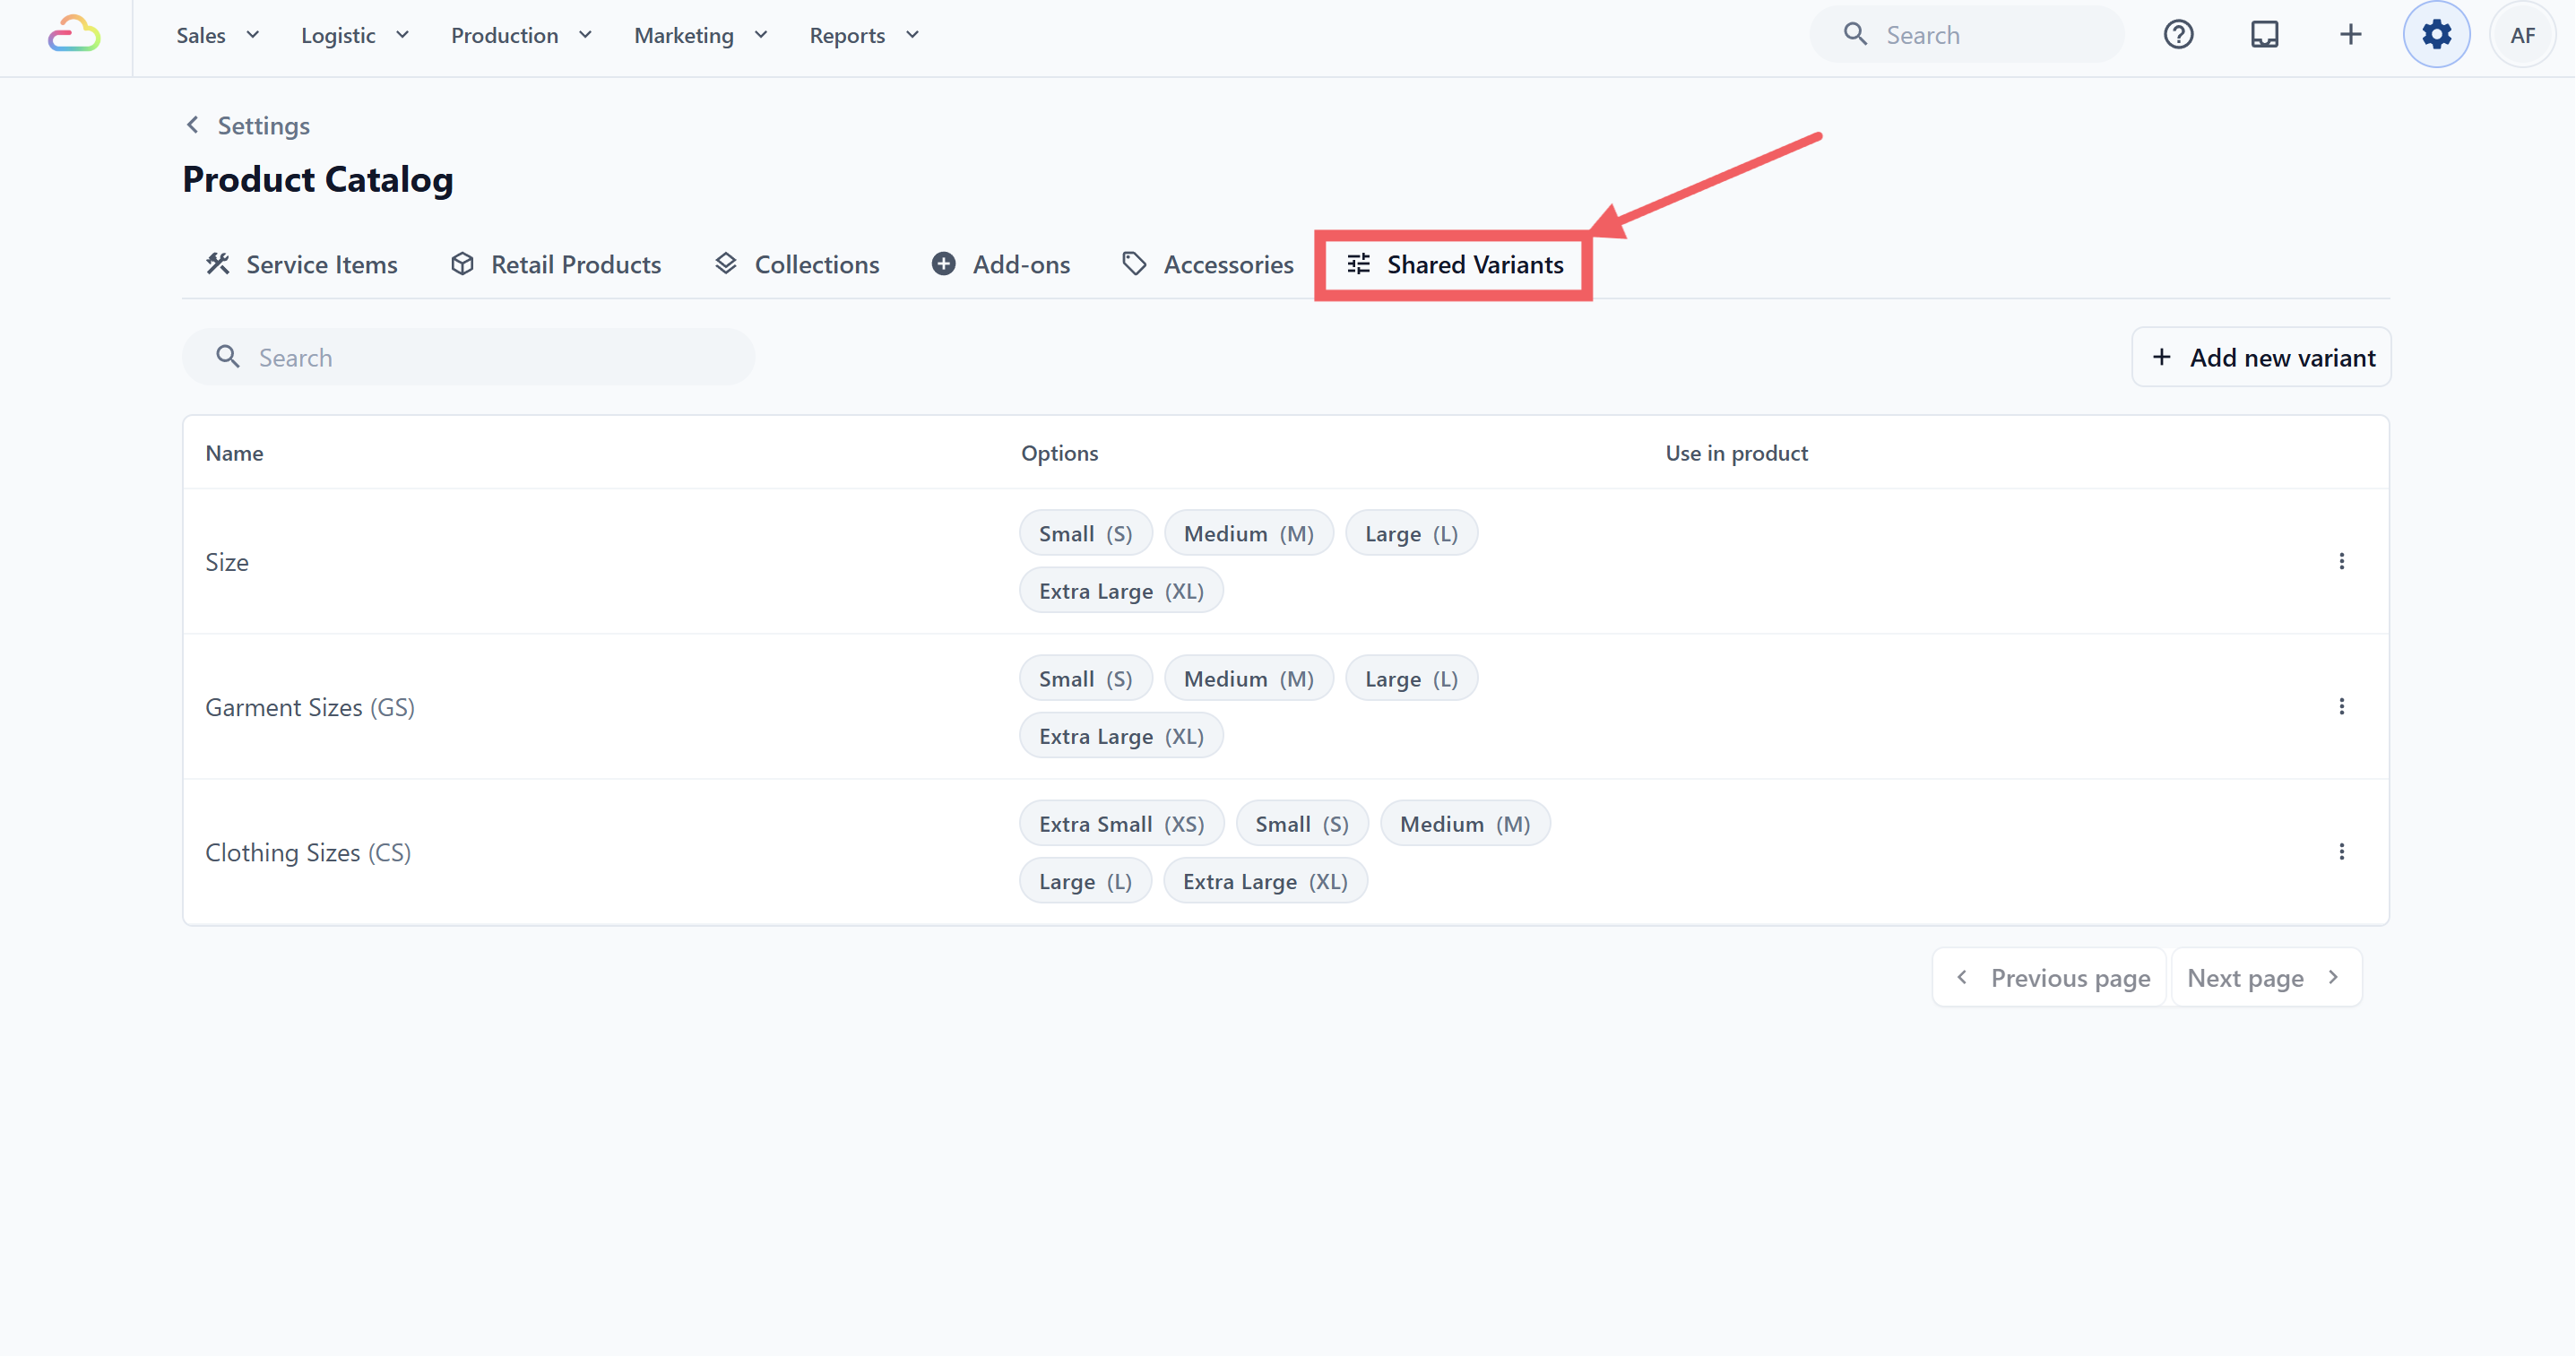
- Click the Shared Variants tab.
Creating a Shared Variant
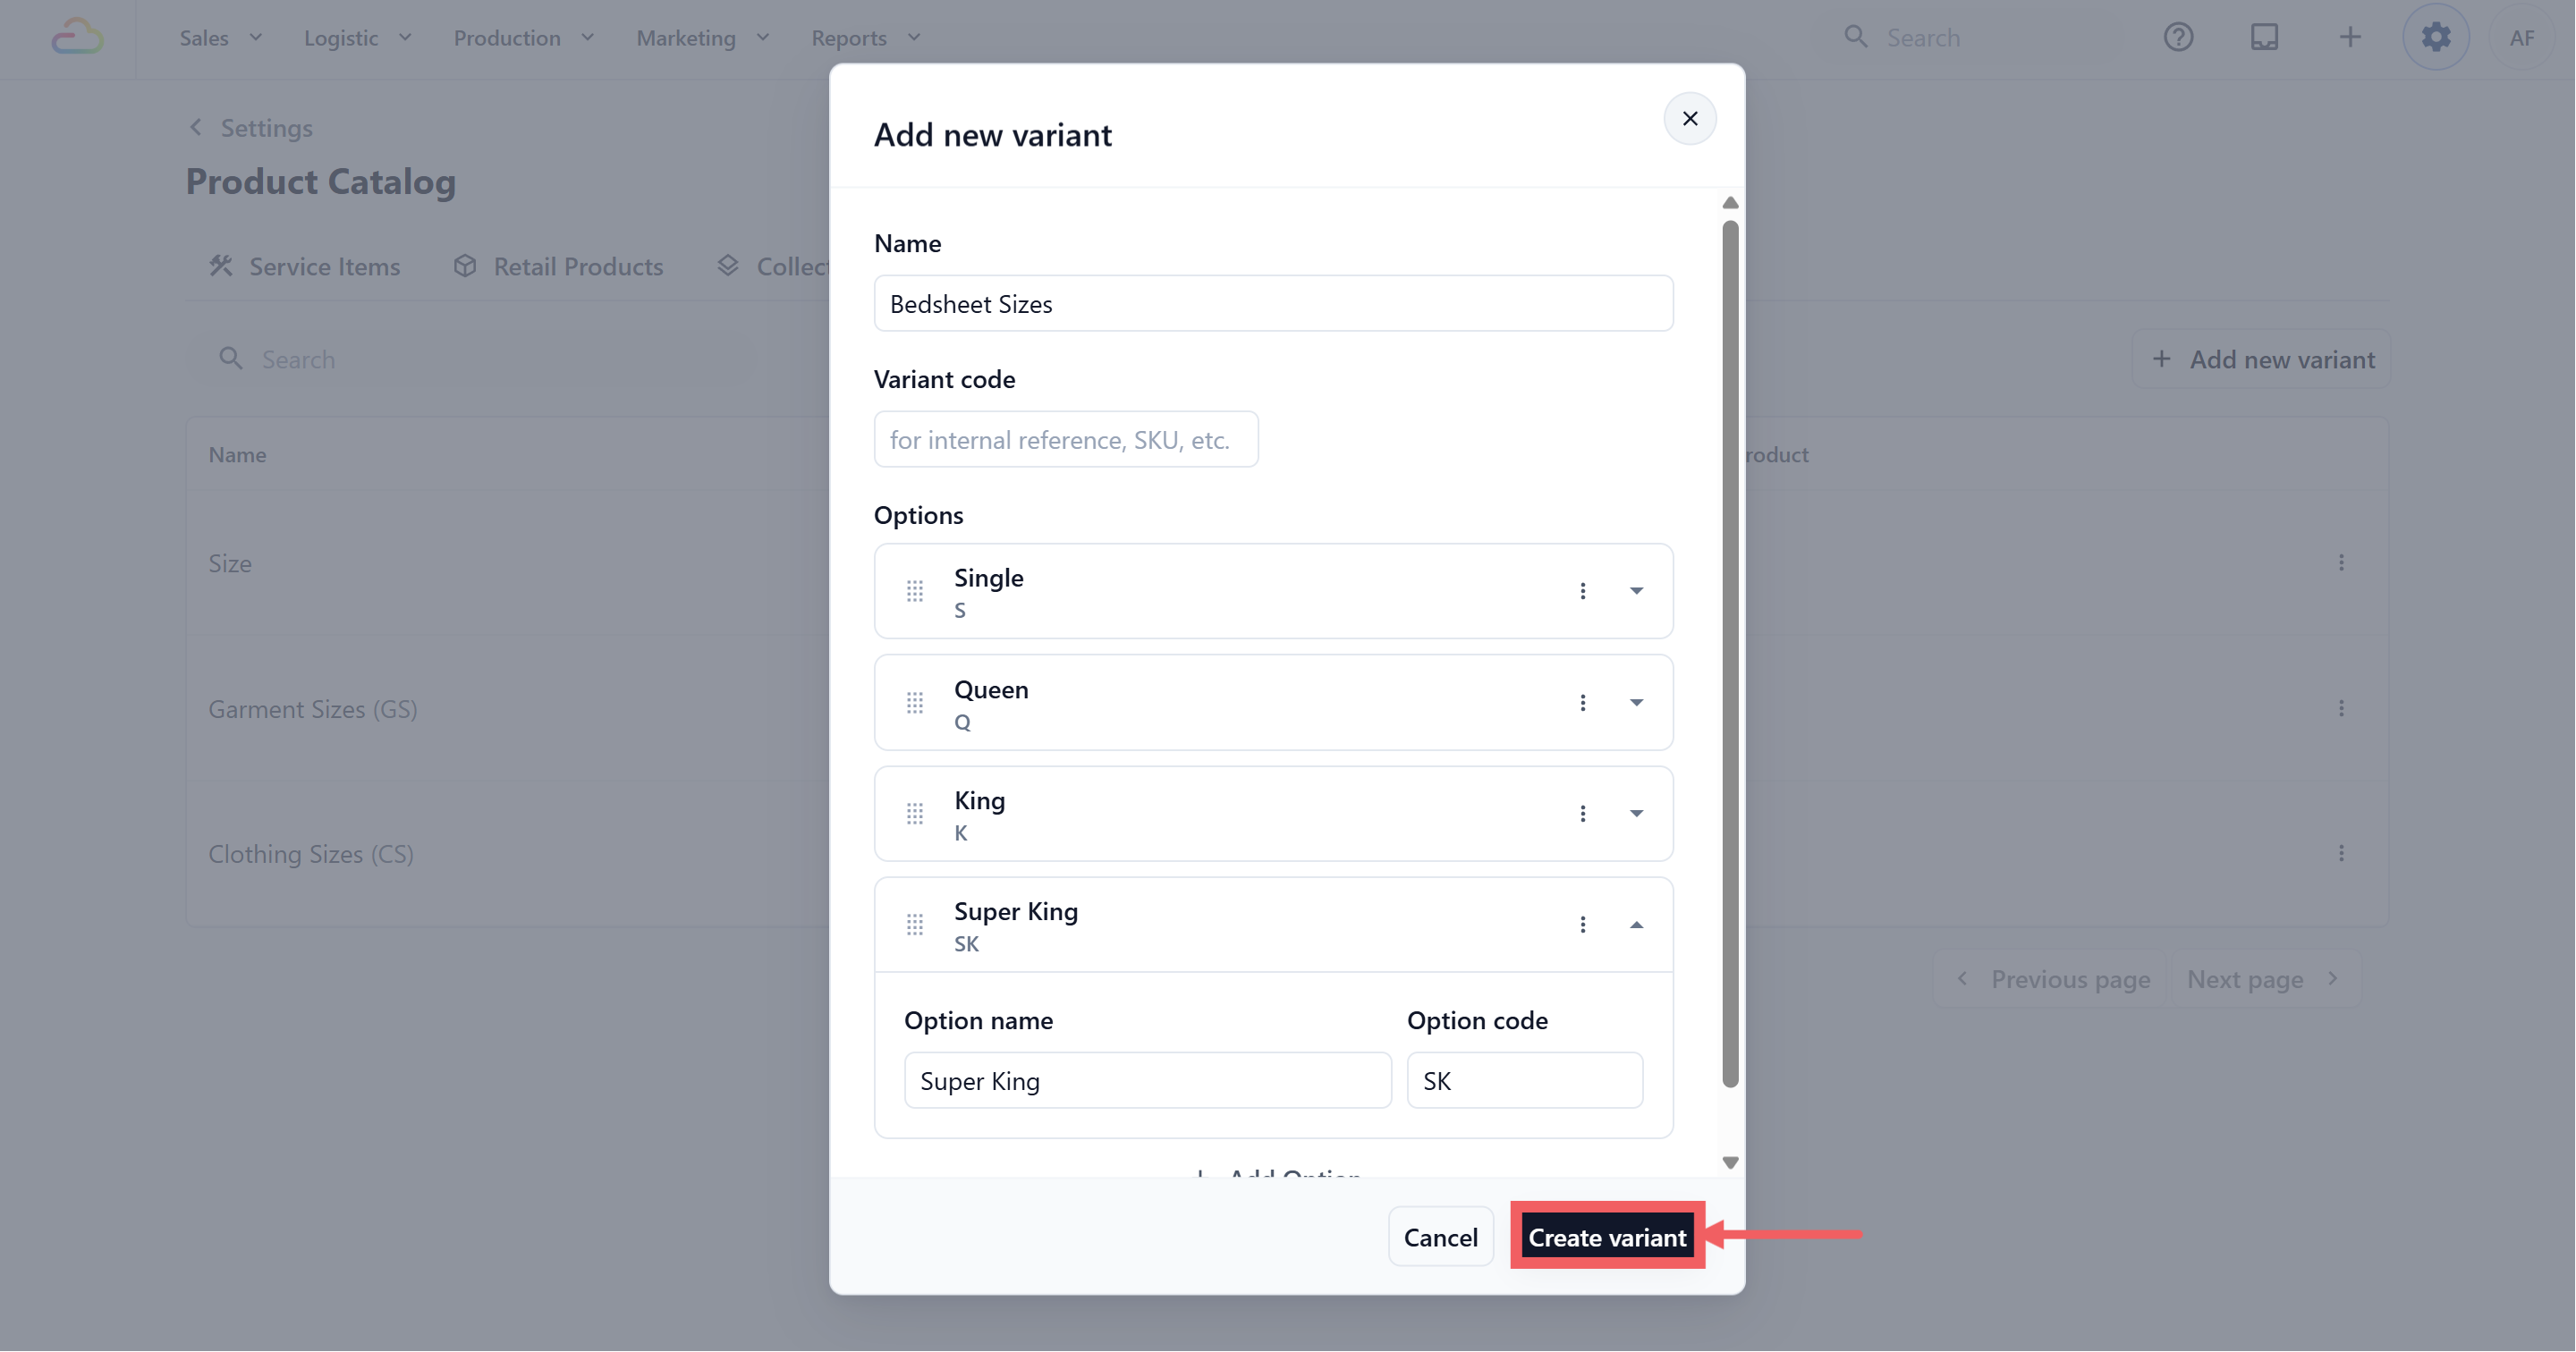
Click Add New Variant in the top-right corner. A dialog titled Add new variant opens.
| Name | Type the name of the set as you want it to appear on the product form. Keep it short and clear, for example Sizing, Bag Type, or Colour. This field is required. | | Variant code | A short code for your own reference, for example BS or SZ. The placeholder reads “for internal reference, SKU, etc.” Leave it blank if you do not use codes. | | Option name | What the option is called, for example Small or Extra Large. This field is required. The card header updates to show this name as soon as you type it. | | Option code | A short code, for example S or XL. Optional. |
To add more options, click Add Option below the option cards and repeat. To reorder options, drag the grid-dots handle on the left of each card. To remove an option, open the three-dot Option actions menu on the card and choose Delete.
When the set is ready, click Create variant at the bottom of the dialog.
Where Shared Variants Appear
Once a set is saved, it becomes available in the places below. Set up your common sets first so your team does not have to retype them every time they add a product.
Service Items
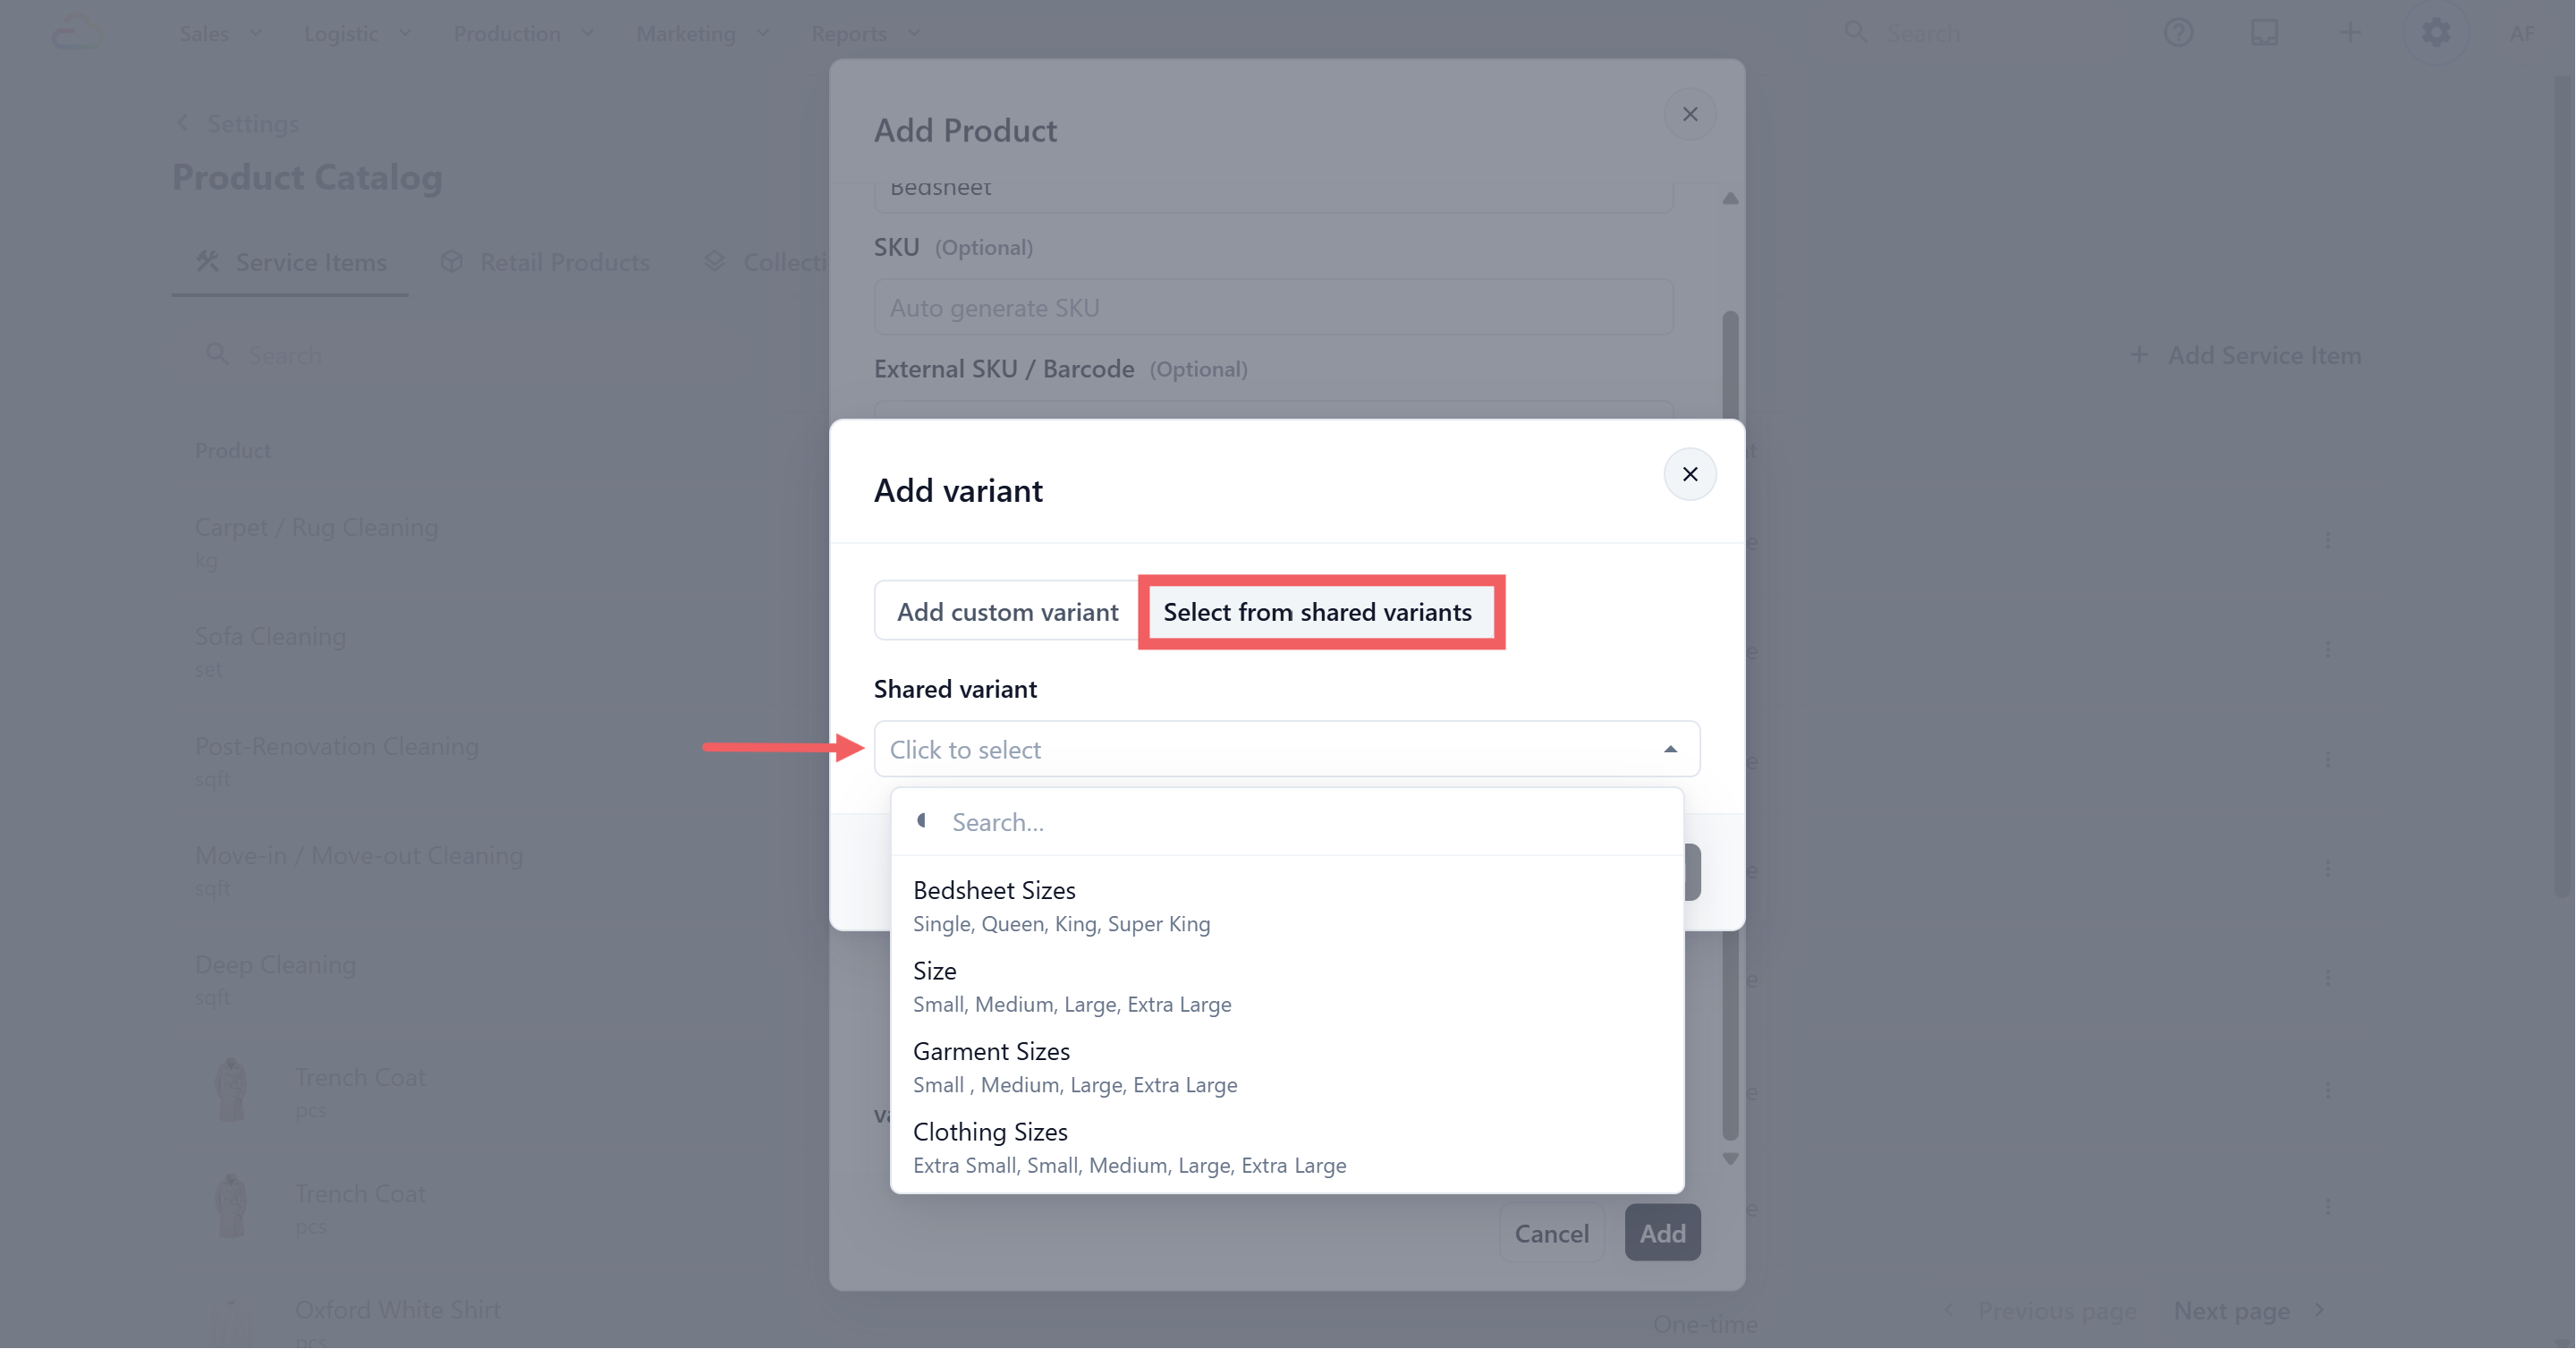
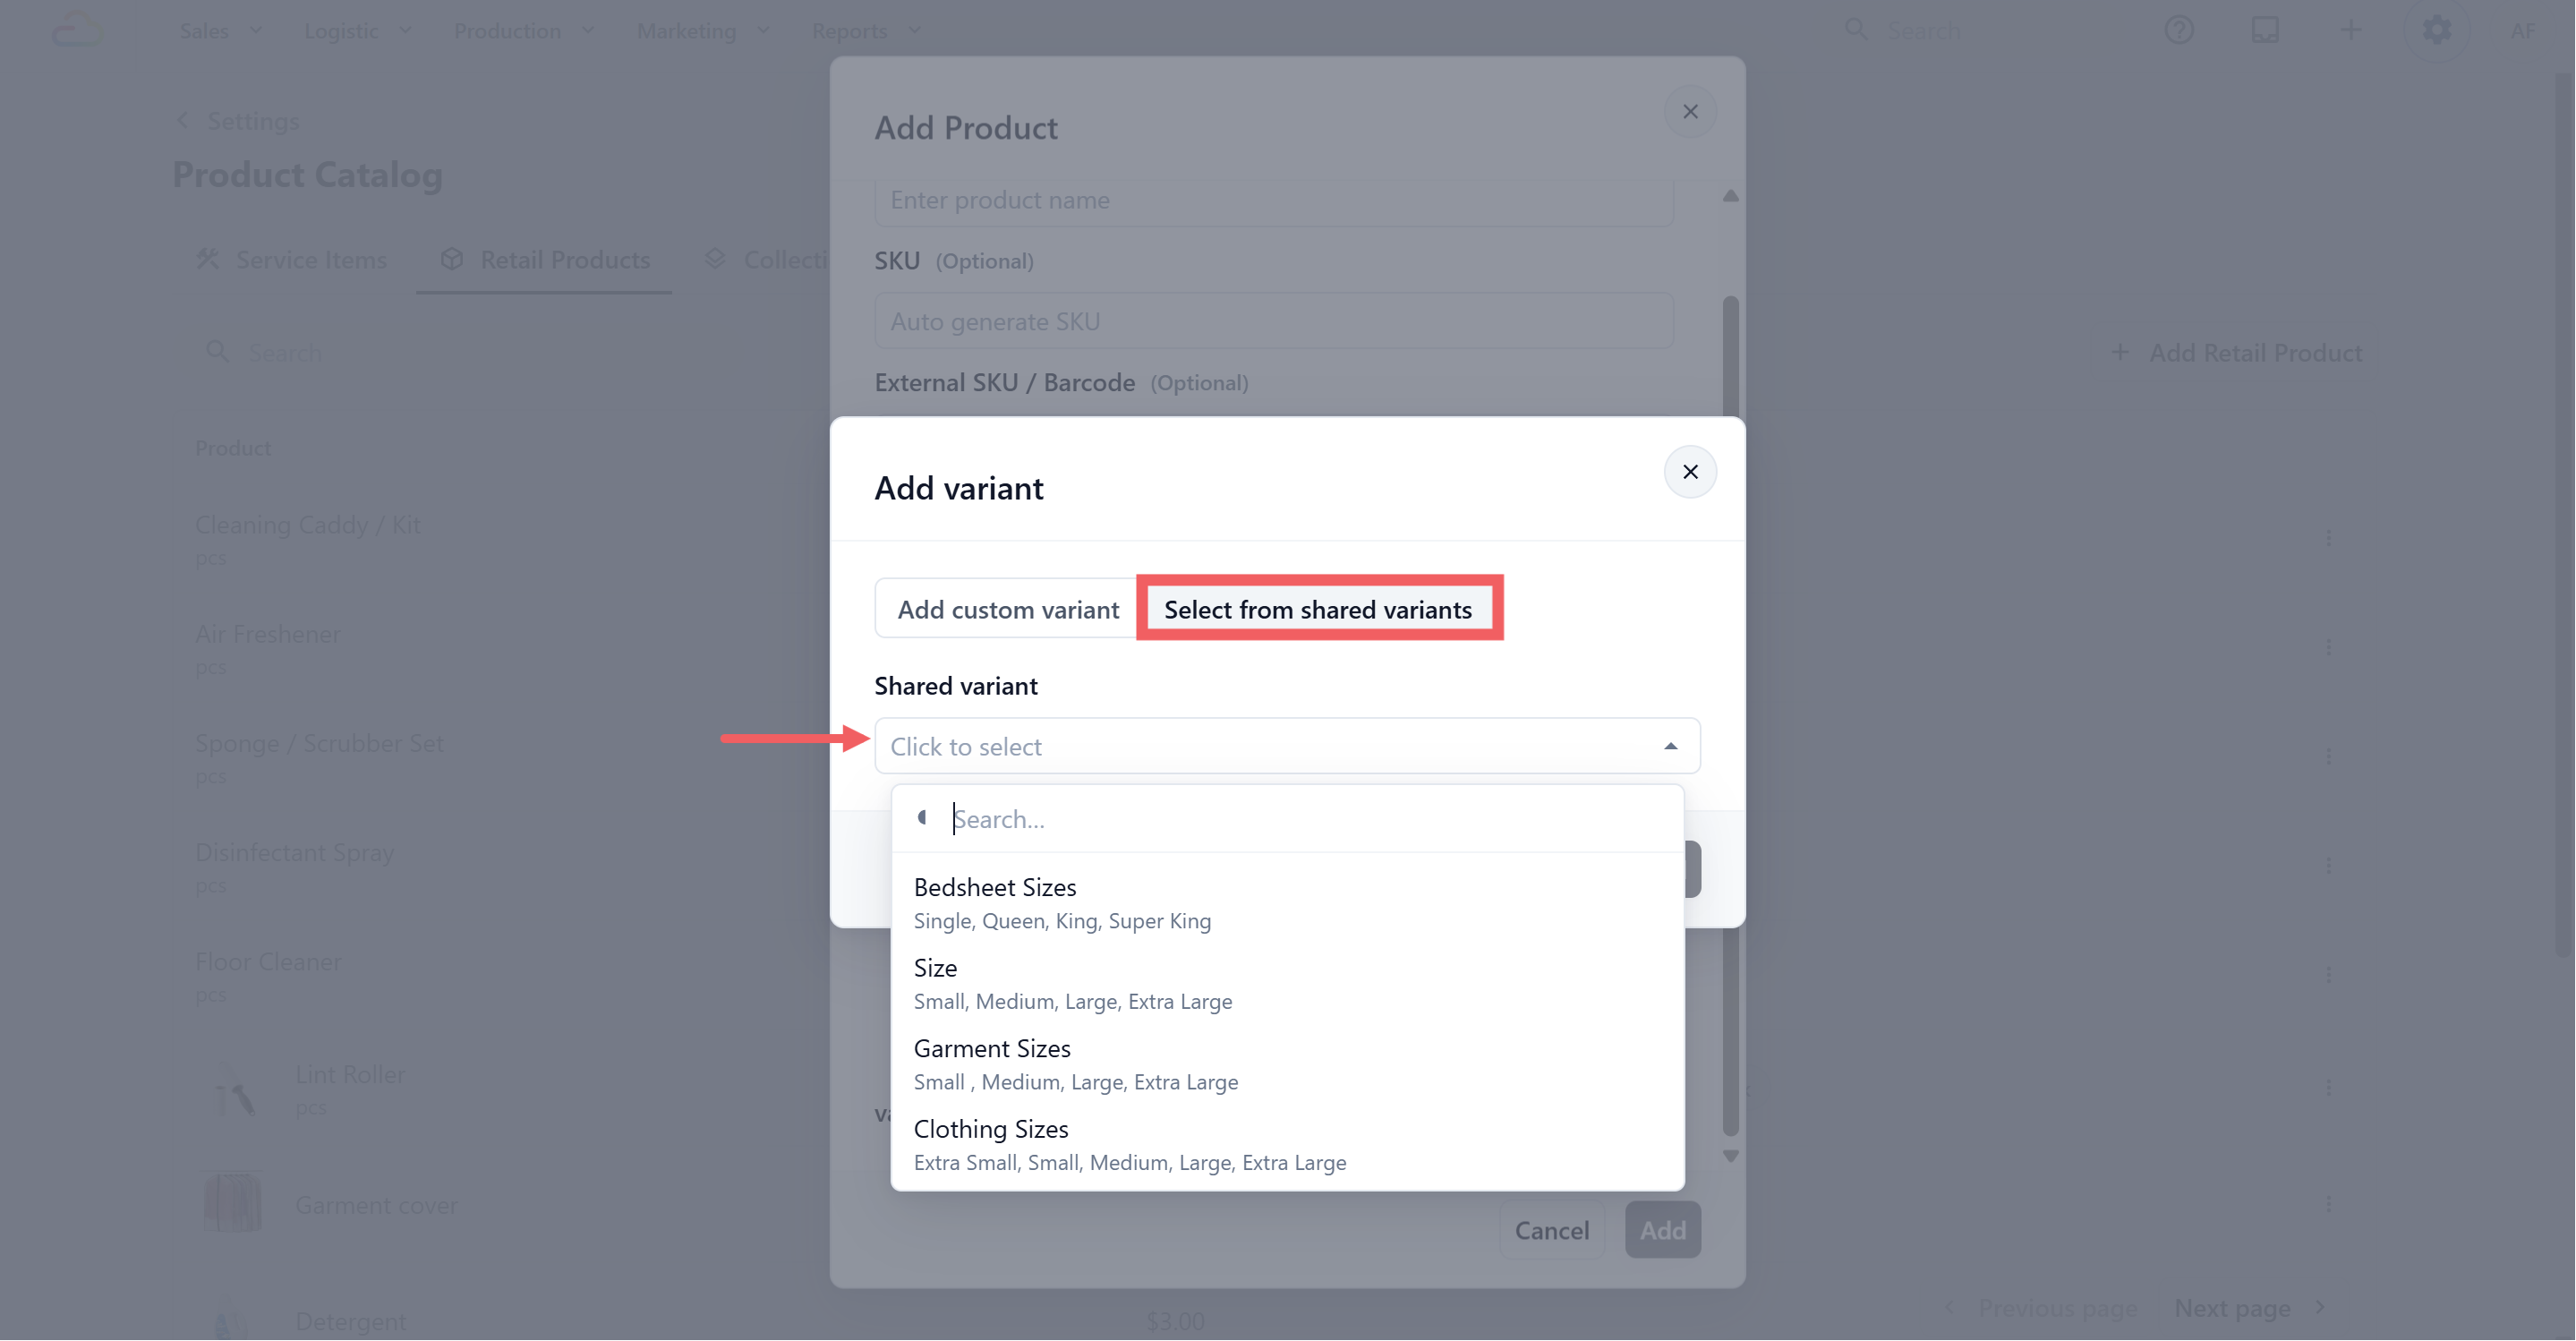
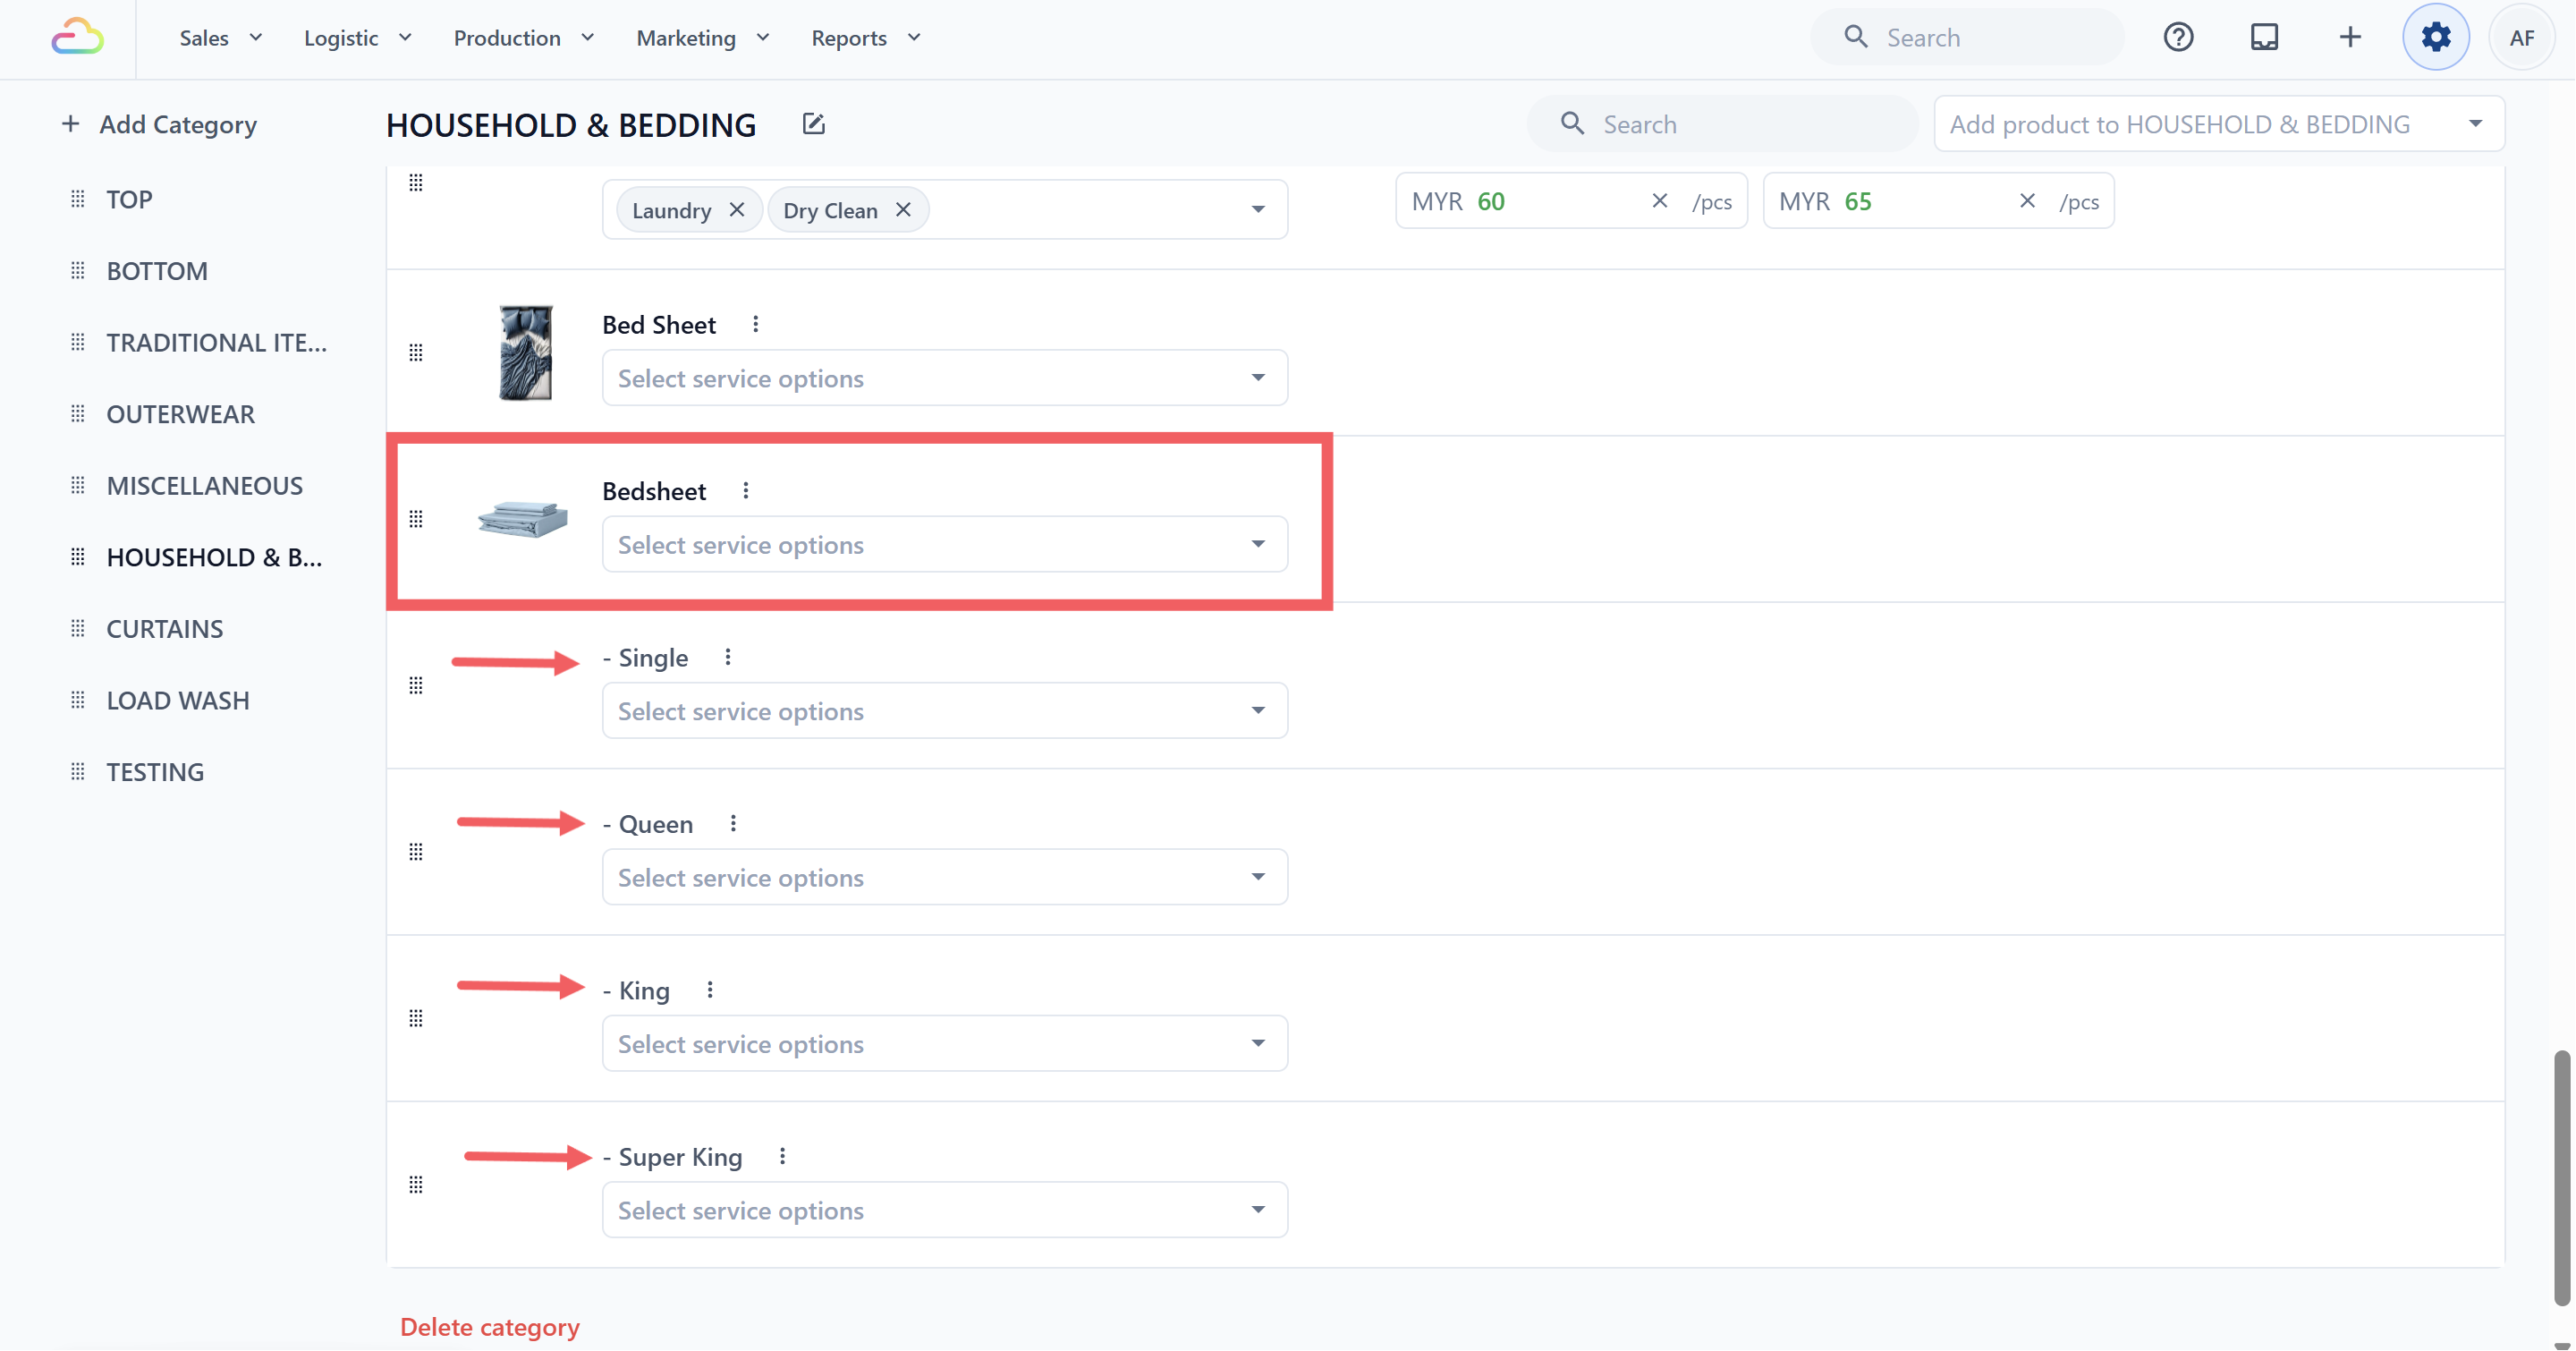
When you click + Add variant on a service item, choose Select from shared variants to apply a saved set.
Retail Products
The workflow is the same as for service items. This is useful when you sell the same product in many sizes or finishes.
Price Lists
When you edit a Shared Variant that is already used by products on an active price list, EasyBiz asks if you want to update those price lists in the same save.
Editing or Deleting a Shared Variant
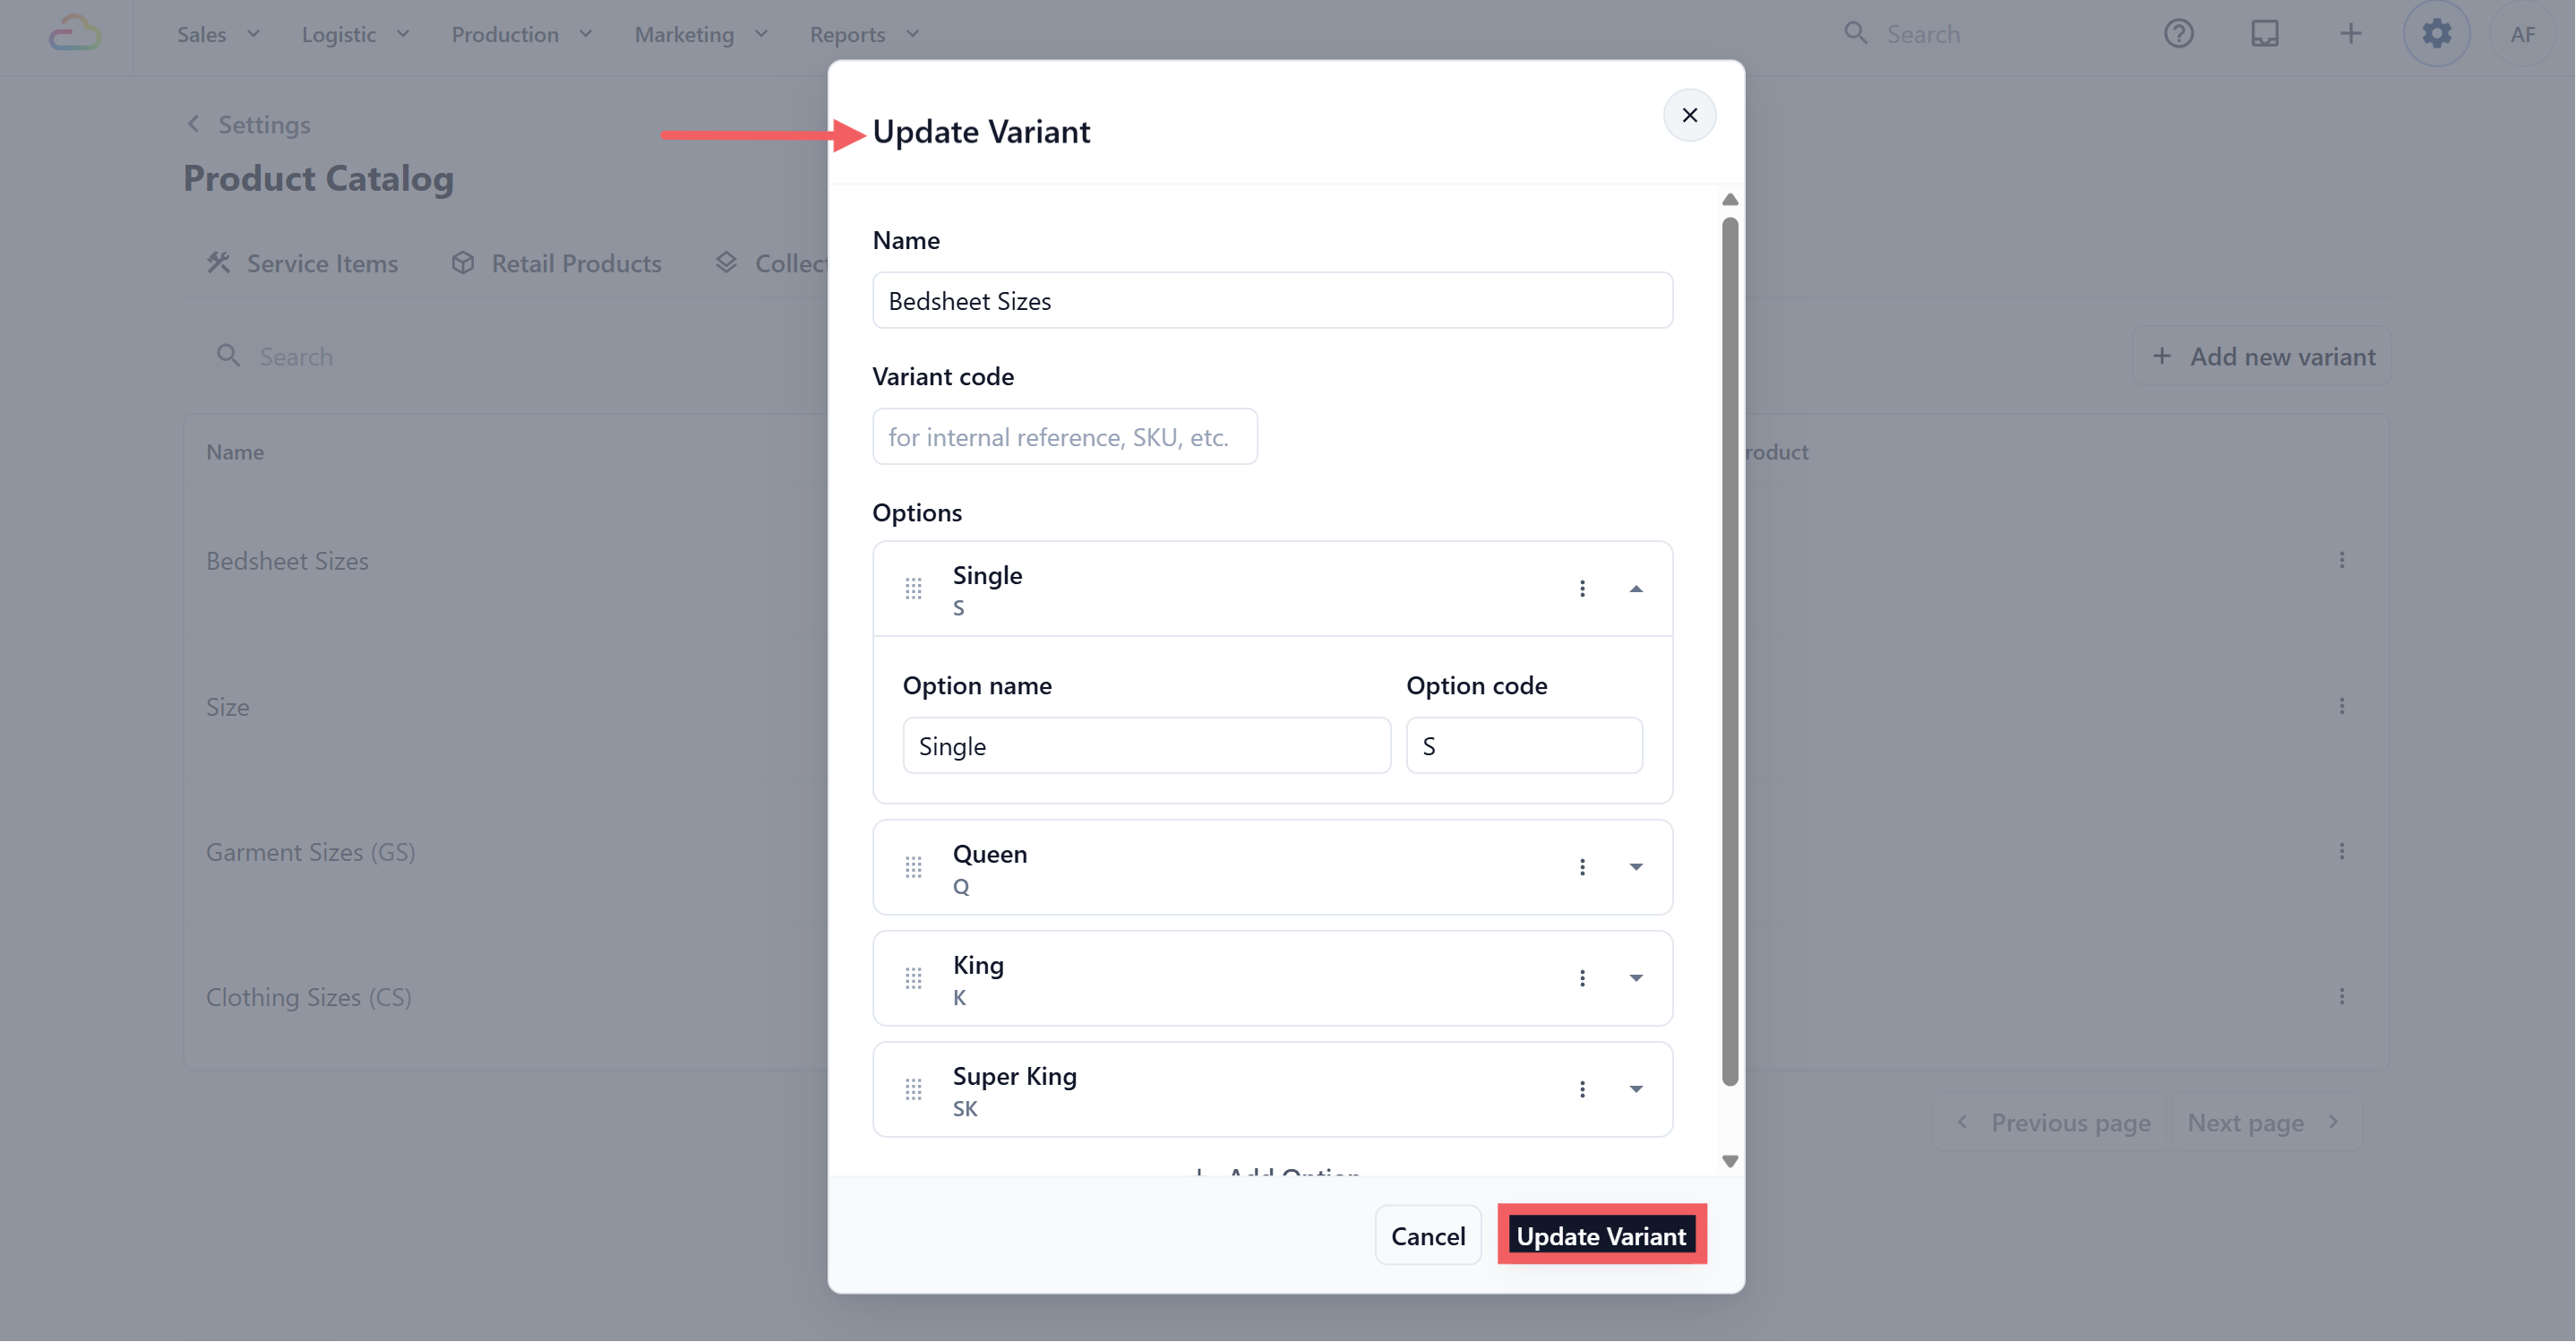
To edit a set, click anywhere on its row. The dialog title changes to Update Variant and the fields are pre-filled. Make your changes and click Update Variant to save.
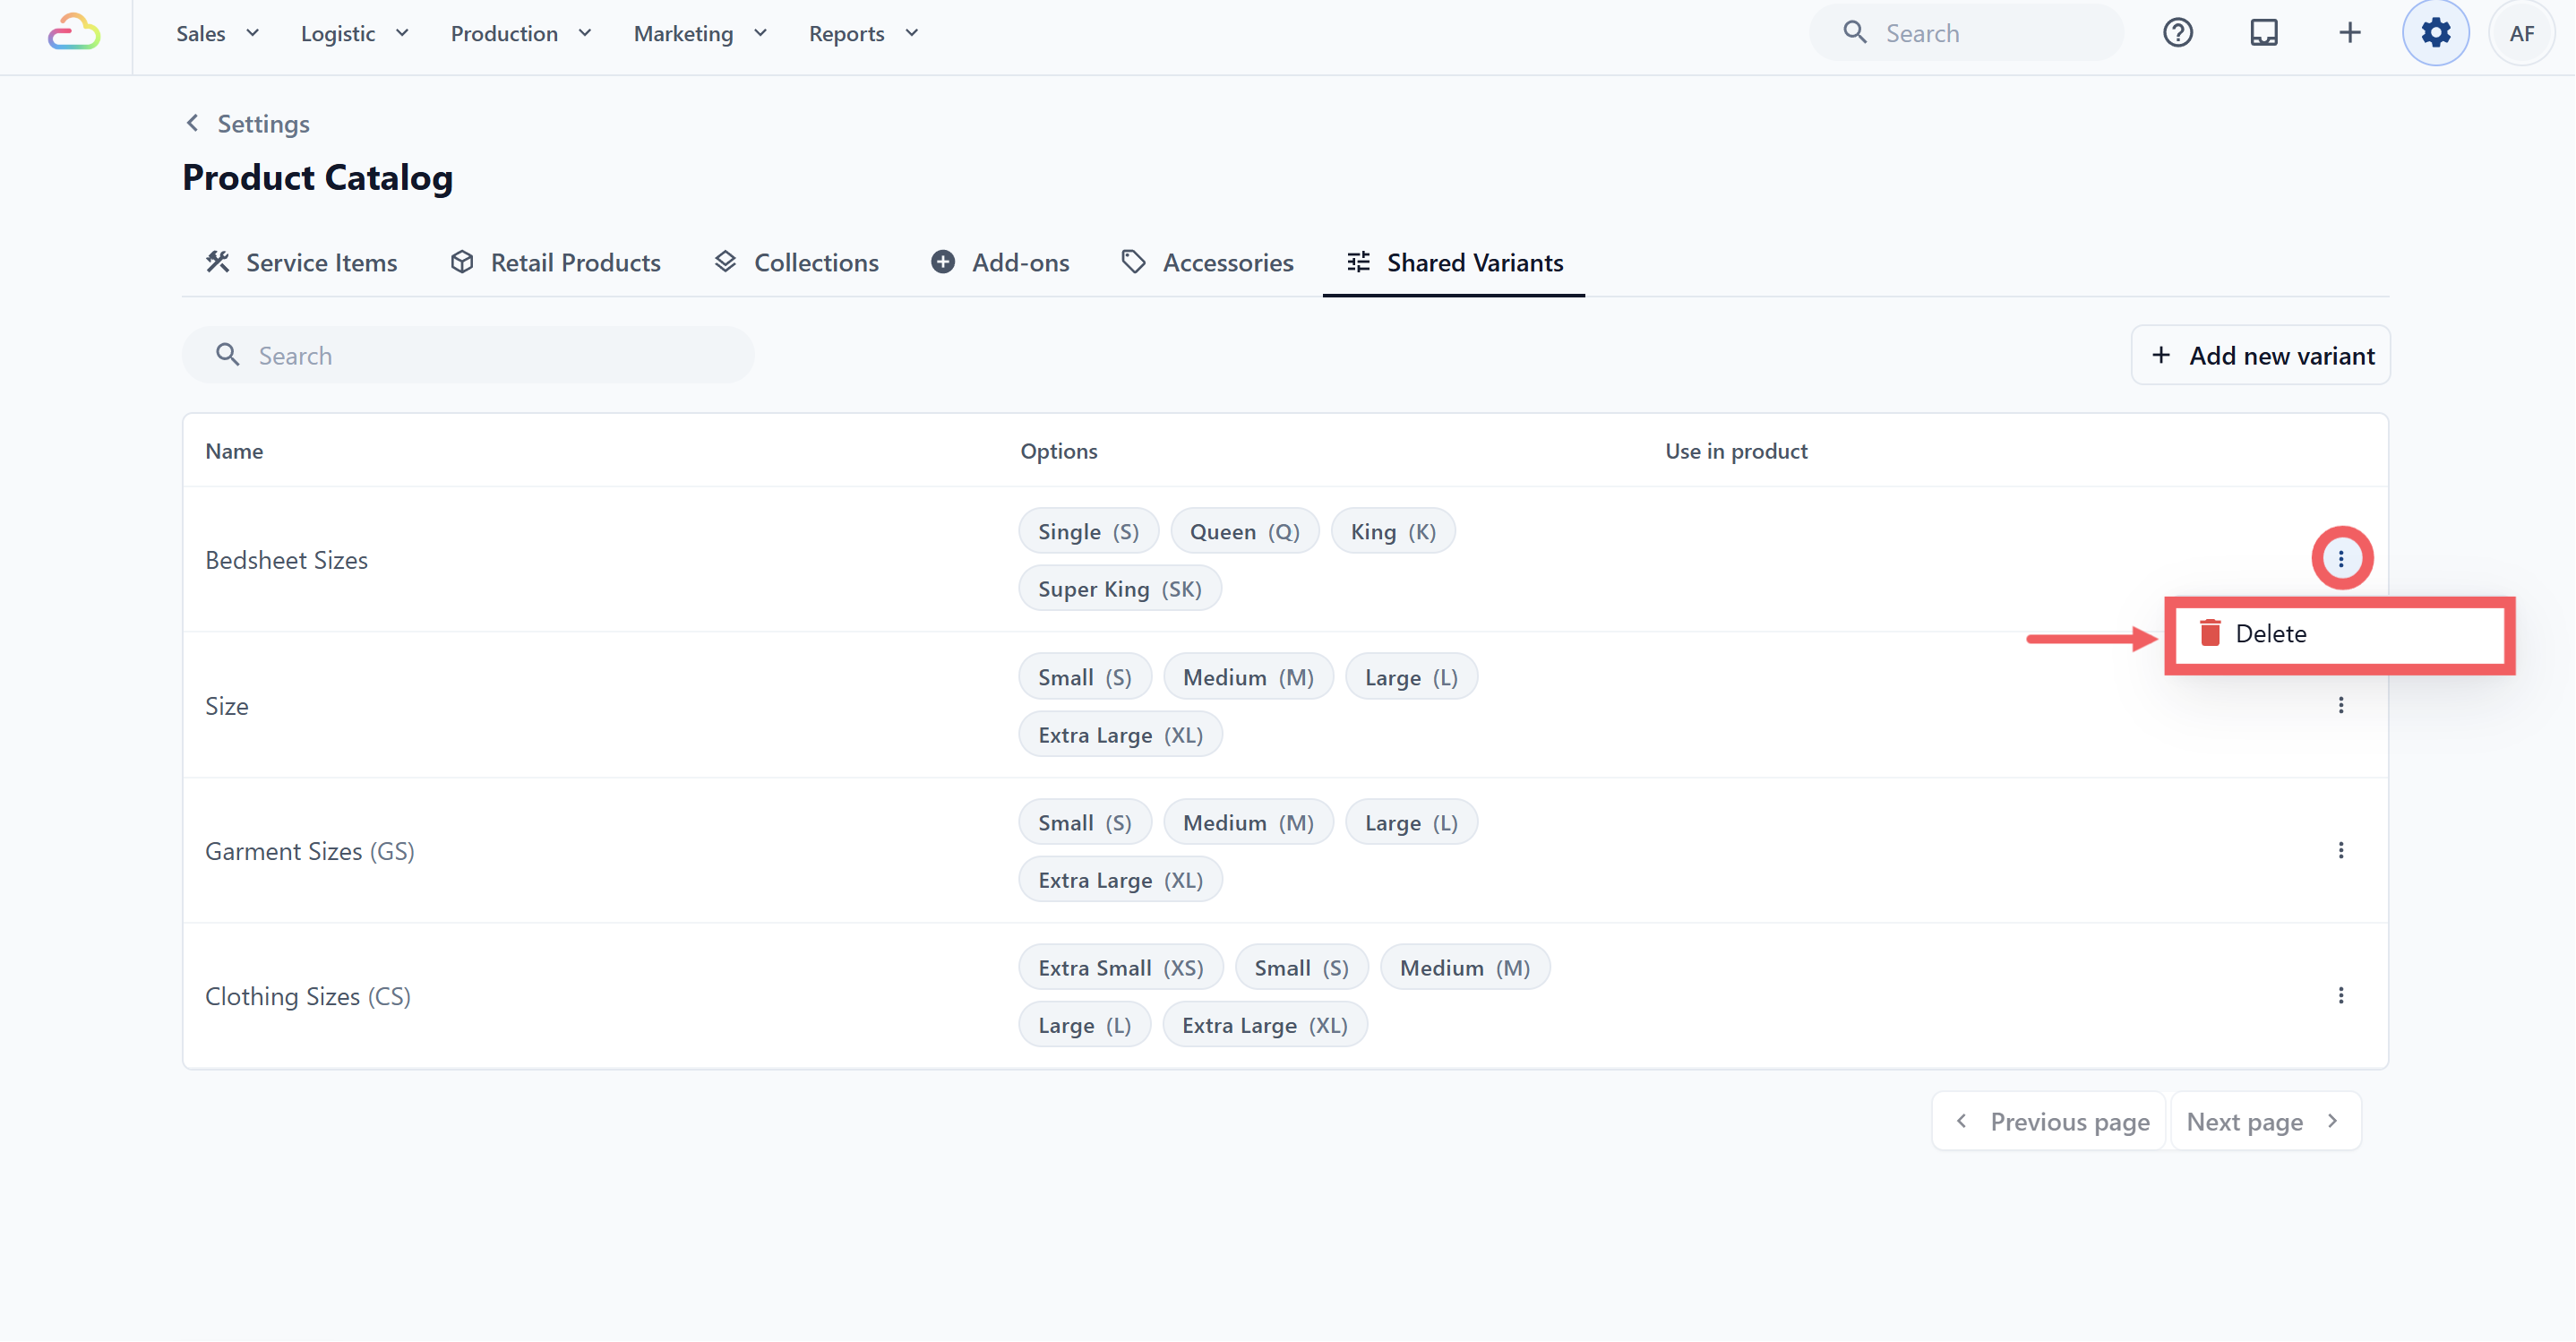
To delete a whole set, click the ••• three-dot menu on the right of the row and choose Delete.
FAQs
What is the difference between a custom variant and a Shared Variant?
A custom variant is typed directly on a single product and stays on that product only. A Shared Variant is saved once in this tab and can be applied to many products. If your products share the same options, the Shared Variant saves time.
Do I need to set up Shared Variants before adding products?
Use this only if you have several products that share the same options. If most of your items have unique variants, custom variants on each product are fine.
Can I delete a Shared Variant that is already used by products?
No. The Delete option is greyed out until the set is no longer used. Open each product that uses the set and remove the variant first.
What does the Used in Products column show?
It shows which products are using this Shared Variant. The column stays empty until the variant set is added to at least one product.
What happens to my price lists when I edit a Shared Variant?
If the set is used by products on an active price list, a confirmation appears when you save. The changes are applied to the affected price lists in the same step.