Why Use Recurring Scheduler?
-
Guaranteed Revenue: By securing repeat orders in advance, you can forecast your income and workload more accurately.
-
Customer Convenience: Your customers don’t need to manually book every time. They appreciate the “set and forget” convenience.
-
Reduce Churn: A scheduled habit makes it much harder for customers to switch to a competitor. You become part of their routine.
The Scheduler Dashboard
To access this feature, go to Settings > Automation > Recurring Scheduler in the 3.0 Console.
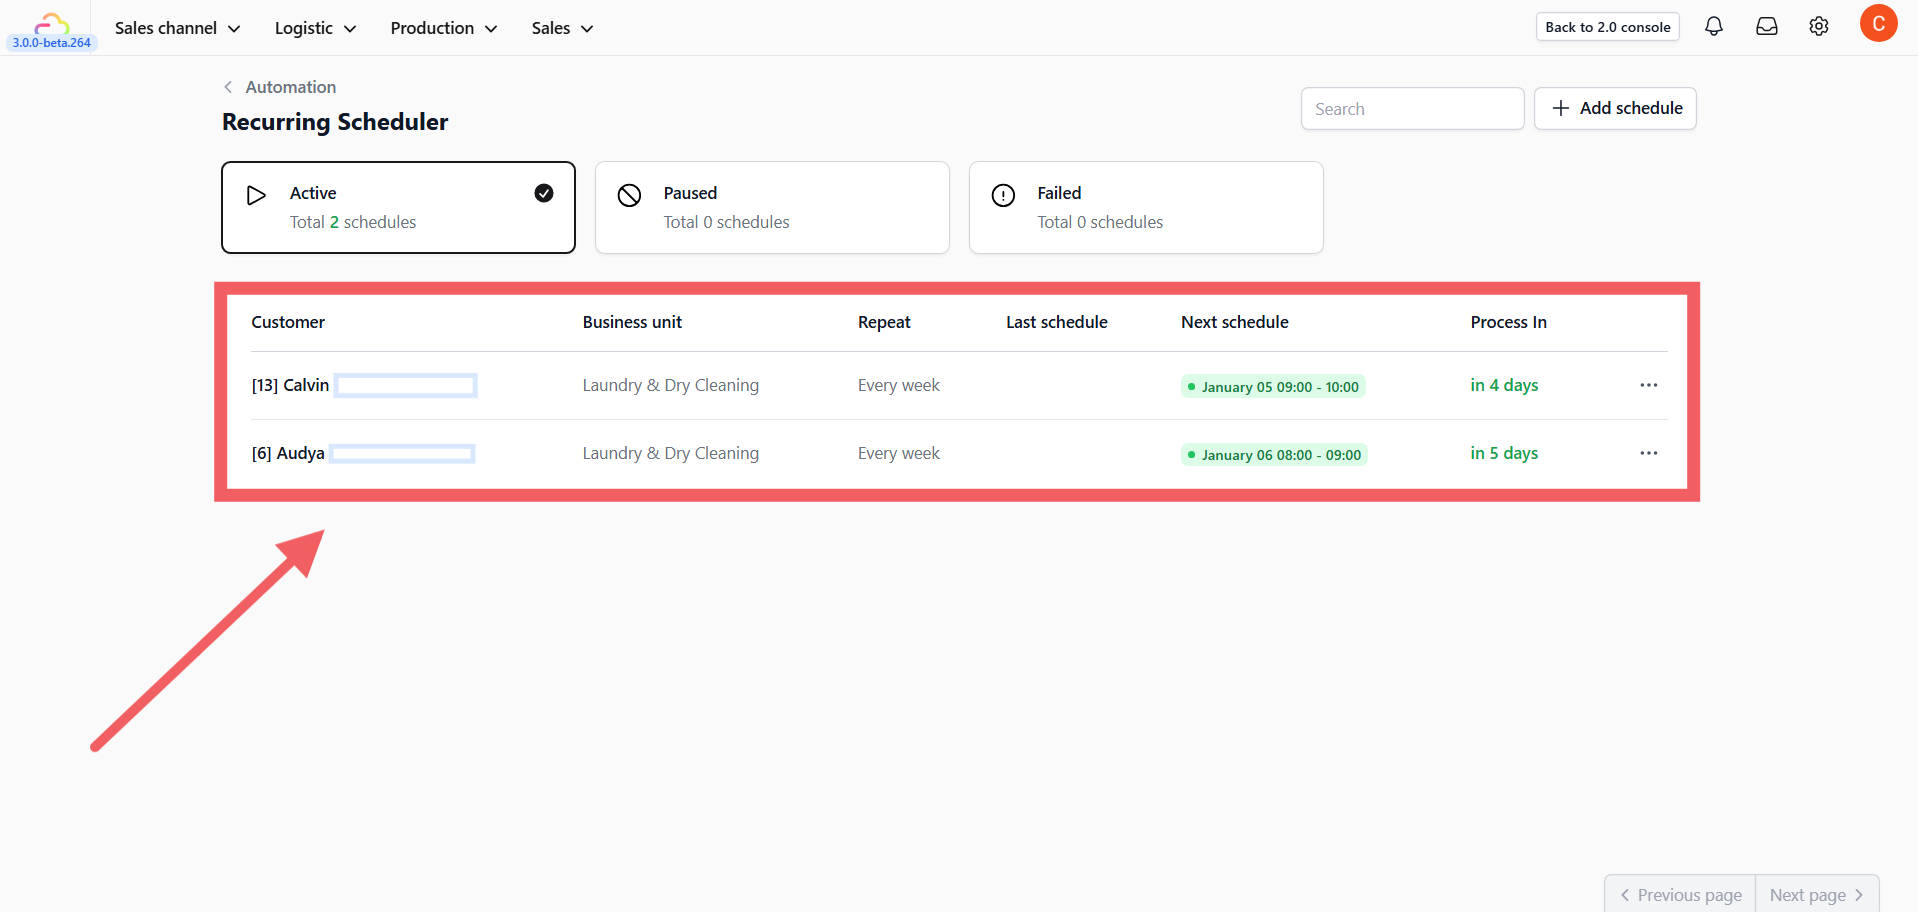
The main dashboard gives you an overview of all schedules, categorized by status:
-
Active: Schedules currently running.
-
Paused: Schedules temporarily stopped.
-
Failed: Schedules that encountered an error (e.g., payment failure).
The table displays key details like the Customer, Repeat Frequency, and the Next Schedule date.
Create a New Schedule
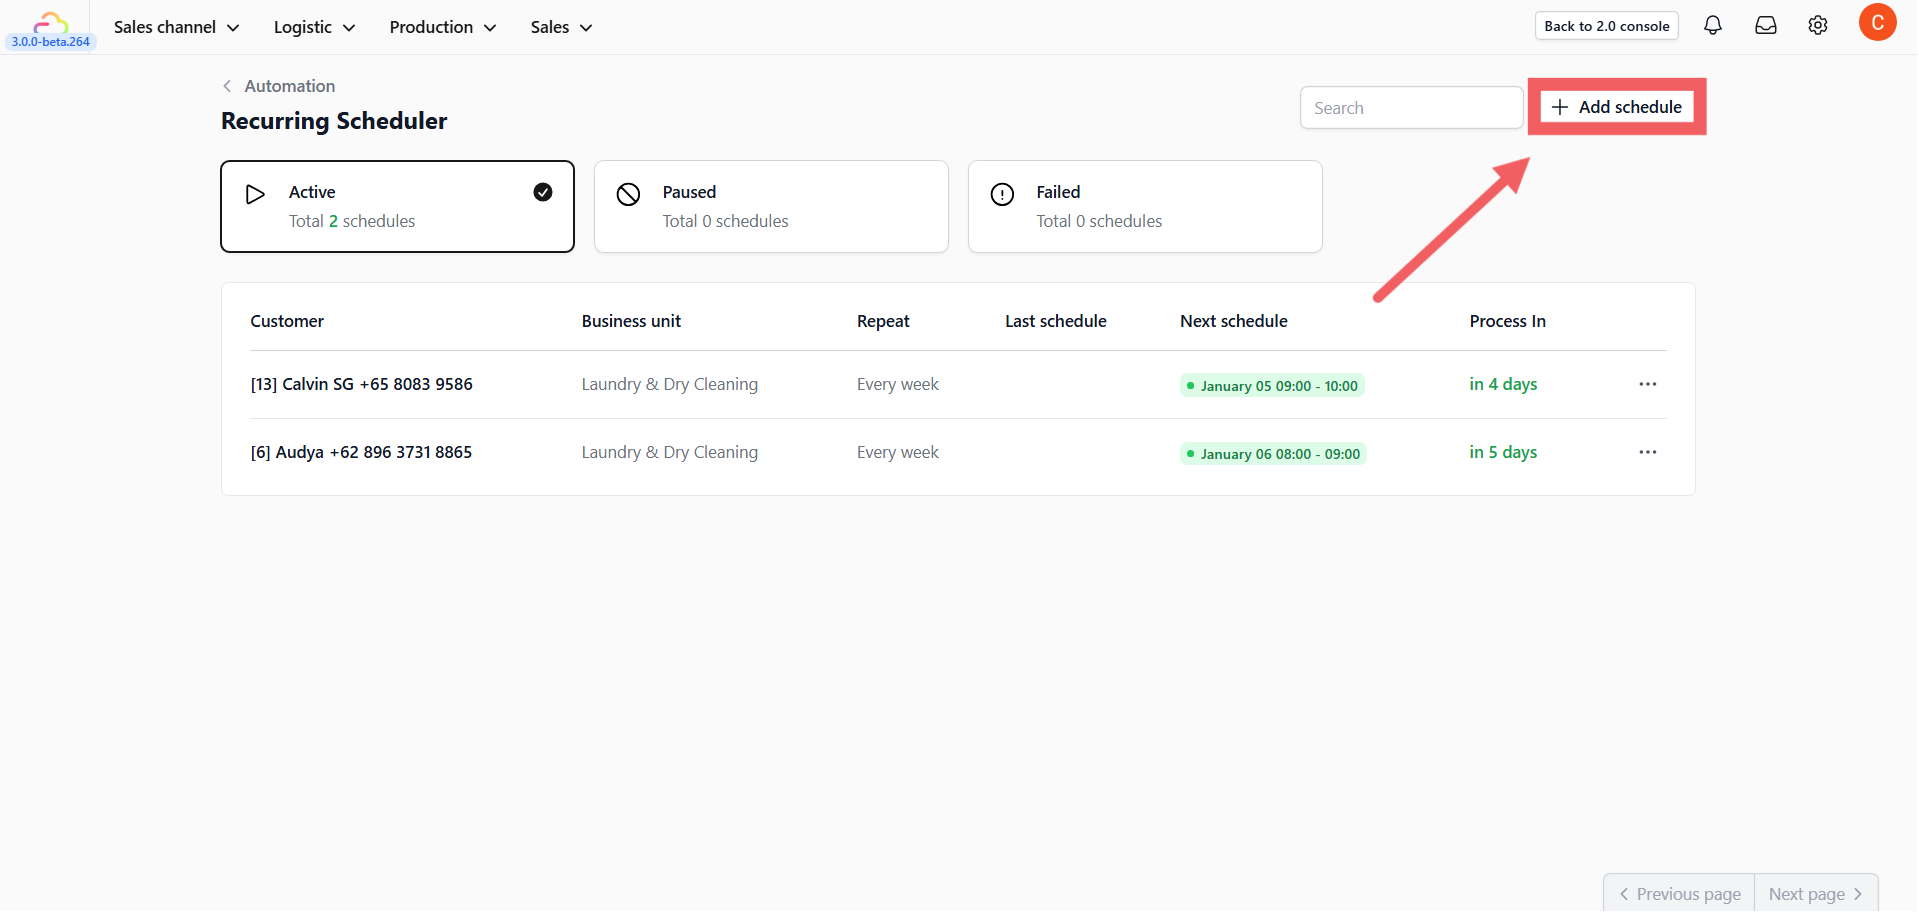
Click the + Add Schedule button to start.
Basic Configuration
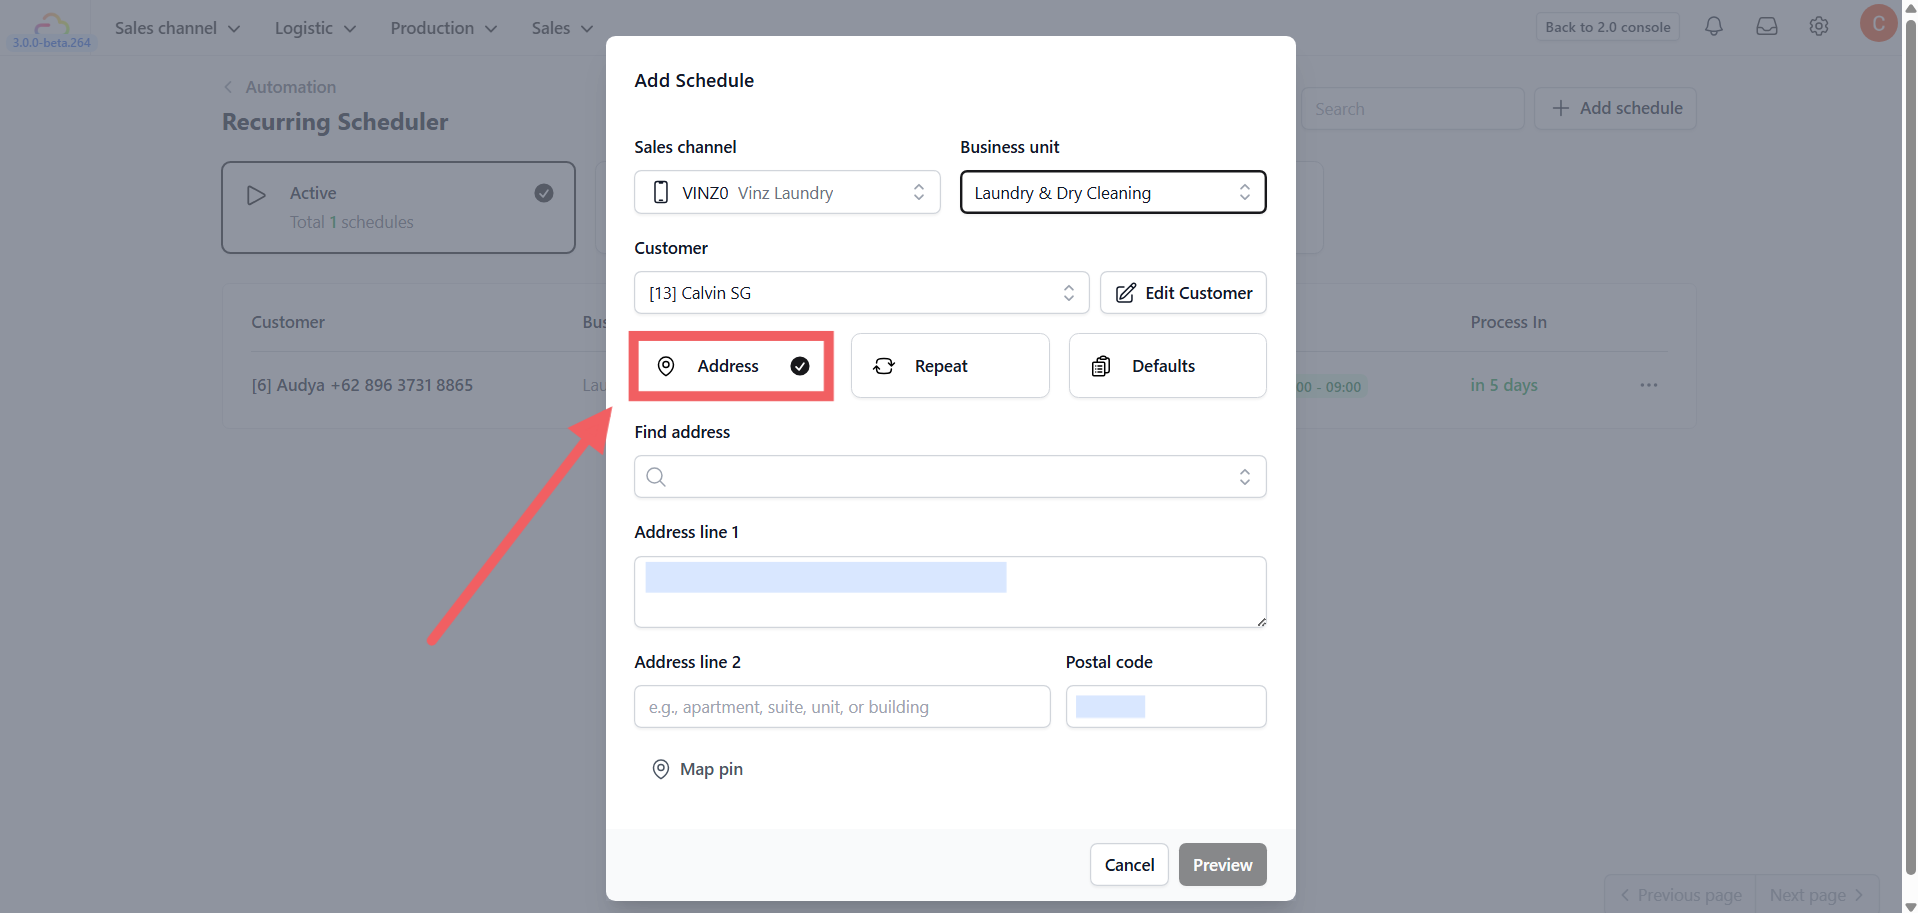
-
Sales Channel: Select the source (Typically “Online Store”).
-
Business Unit: Choose the branch/outlet handling the order.
-
Customer: Select an existing customer or click + New Customer to create one on the spot.
-
Address: Choose the customer’s pickup/delivery address.
Define Frequency & Timing
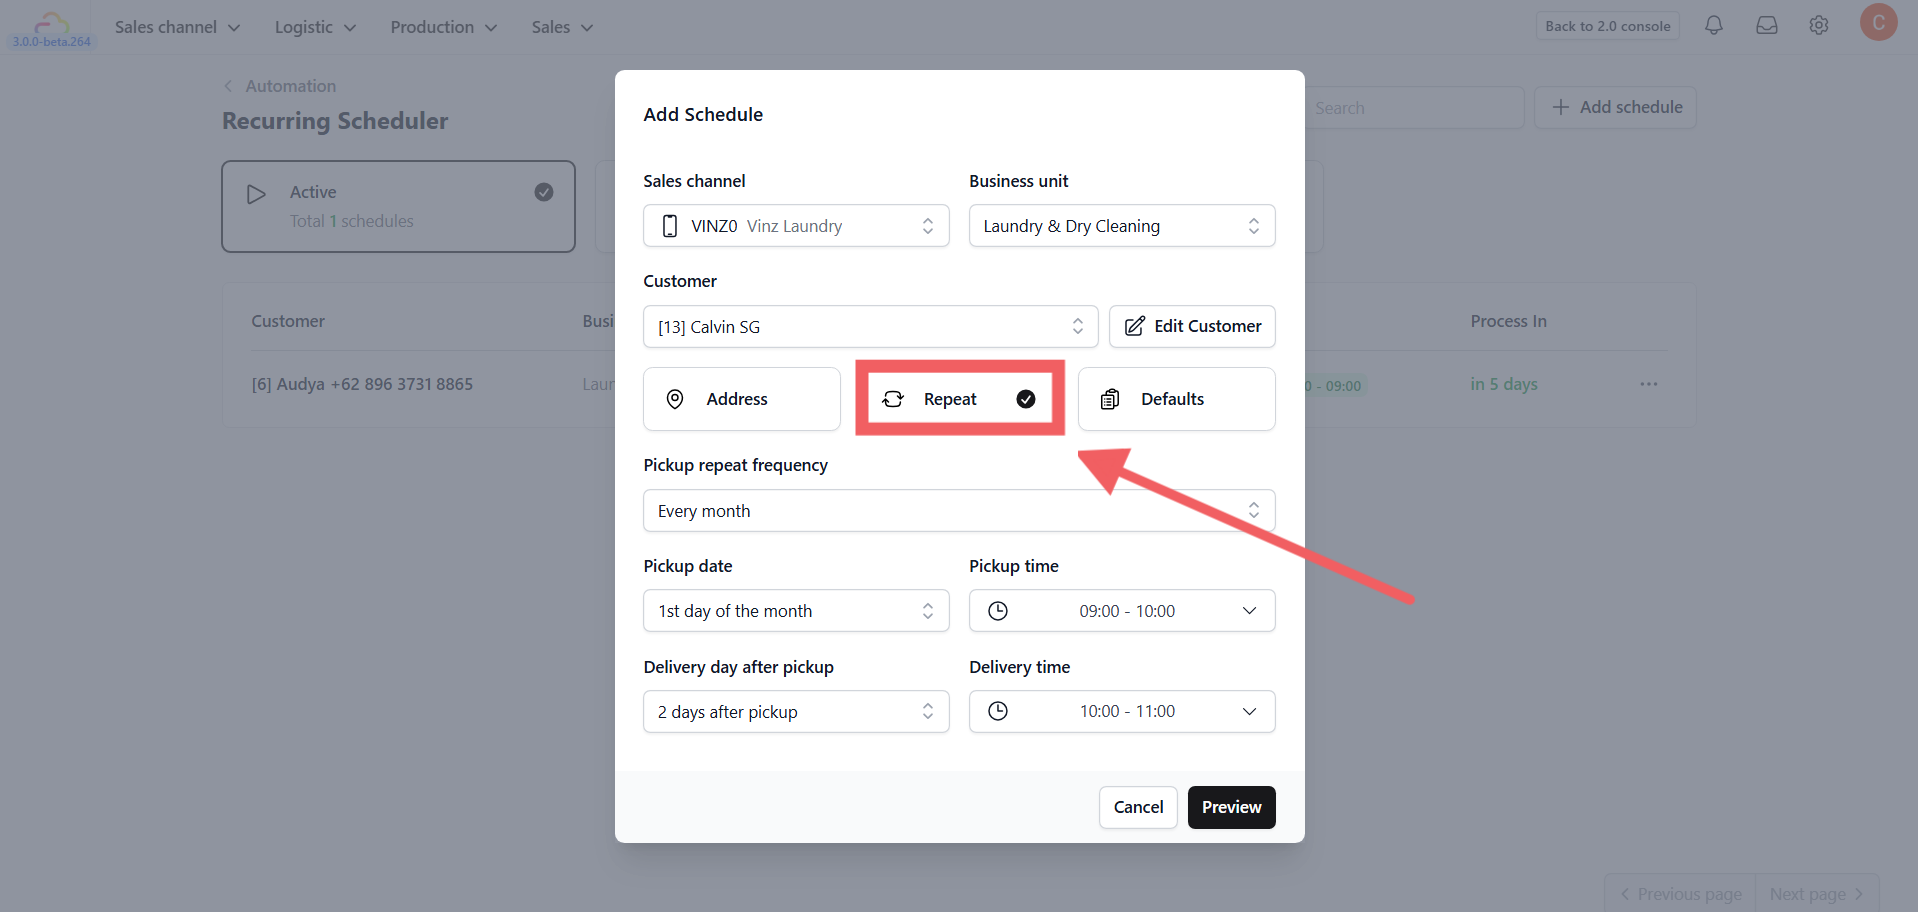
Click the Repeat button. This is the core rule of the schedule. The options change based on your selection:
A. Frequency Types
-
Every Day: Useful for daily services.
-
Every Week (or 2-4 weeks): Useful for weekly subscriptions.
-
Every Month (or 2-4 months): Useful for monthly billings.
B. Setting Pickup & Delivery Logic Depending on the frequency, the settings differ:
-
If “Every Day”: You only set the Pickup Time.
-
If “Every Week”: You must choose the Pickup Day (Monday - Sunday).
-
If “Every Month”: You must choose the Pickup Date (1st - 28th of the month).
Delivery Rules: After setting the Pickup, define when the delivery happens:
-
Same Day: Delivered on the day of pickup.
-
Next Day: Delivered 1 day later.
-
Up to 14 Days: Select the gap between pickup and delivery.
Configure Defaults (Payment & Notes)
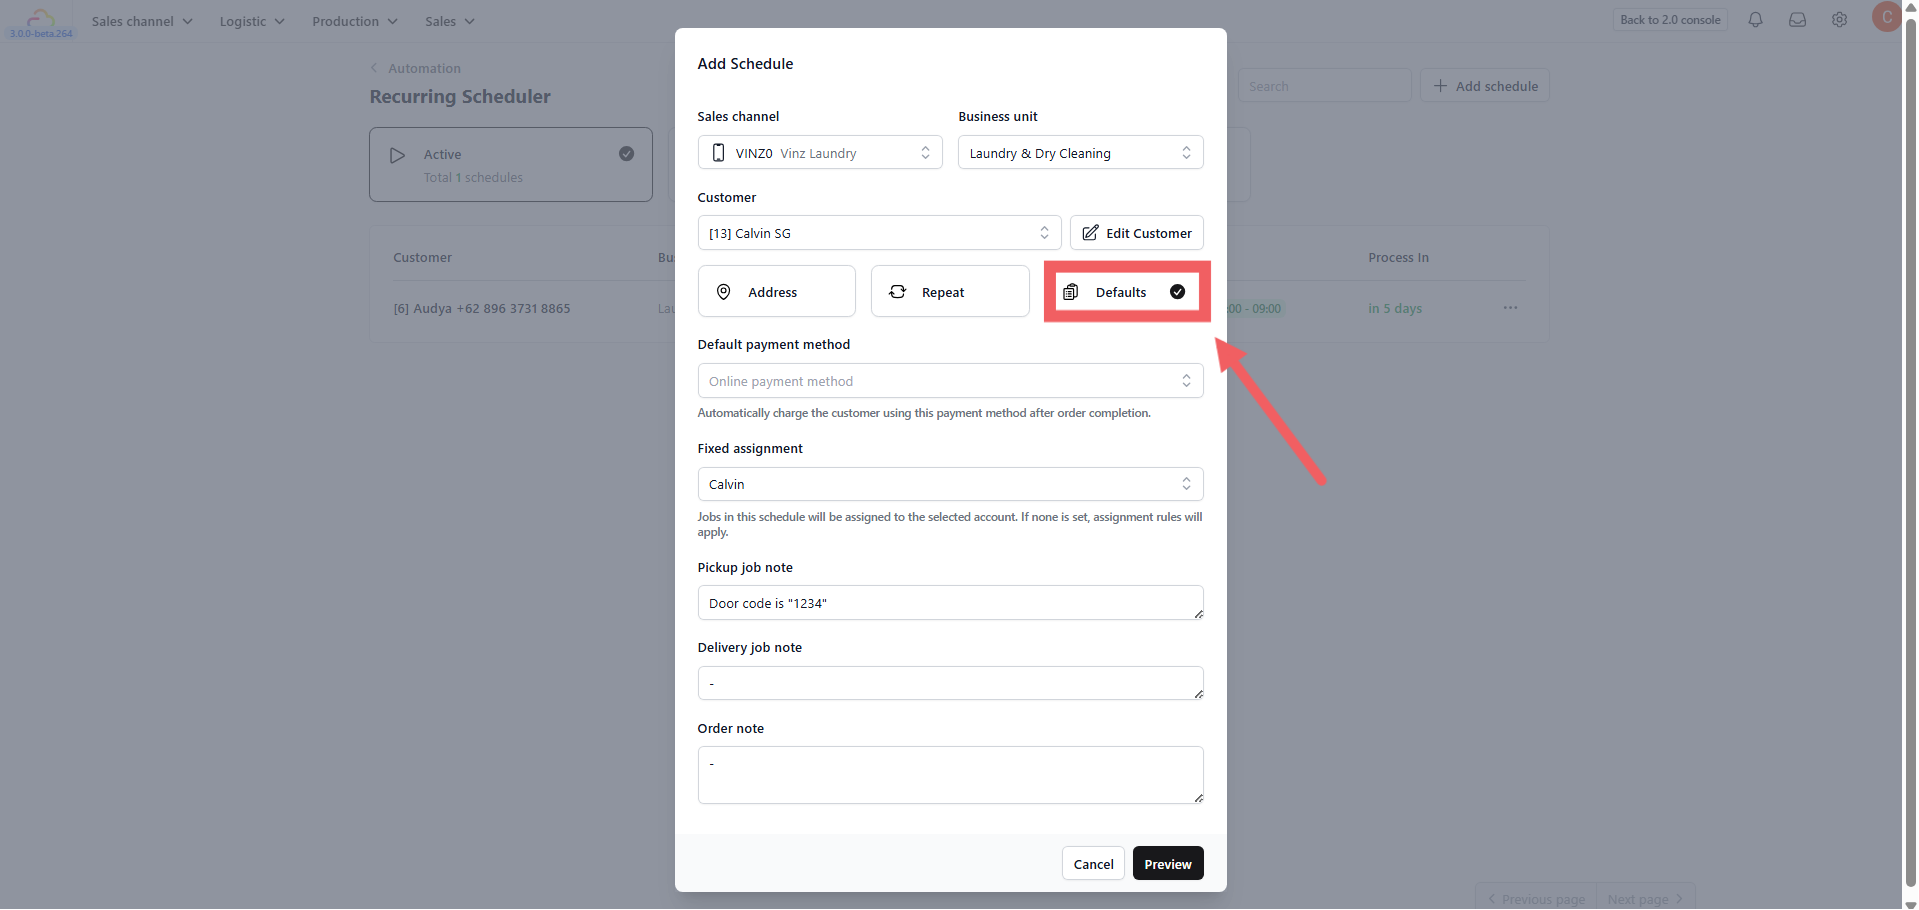
Click to the Defaults section. Here you define how the order handles payment and operations.
-
Payment Method: Currently fixed to Online Payment. The system will automatically charge the customer’s saved method after the order is completed.
-
Fixed Assignment: Assign these recurring jobs to a specific driver or staff member automatically.
-
Notes (Optional): Pre-fill the Job Note, Order Note, or Pickup Note (e.g., “Door code is 1234”).
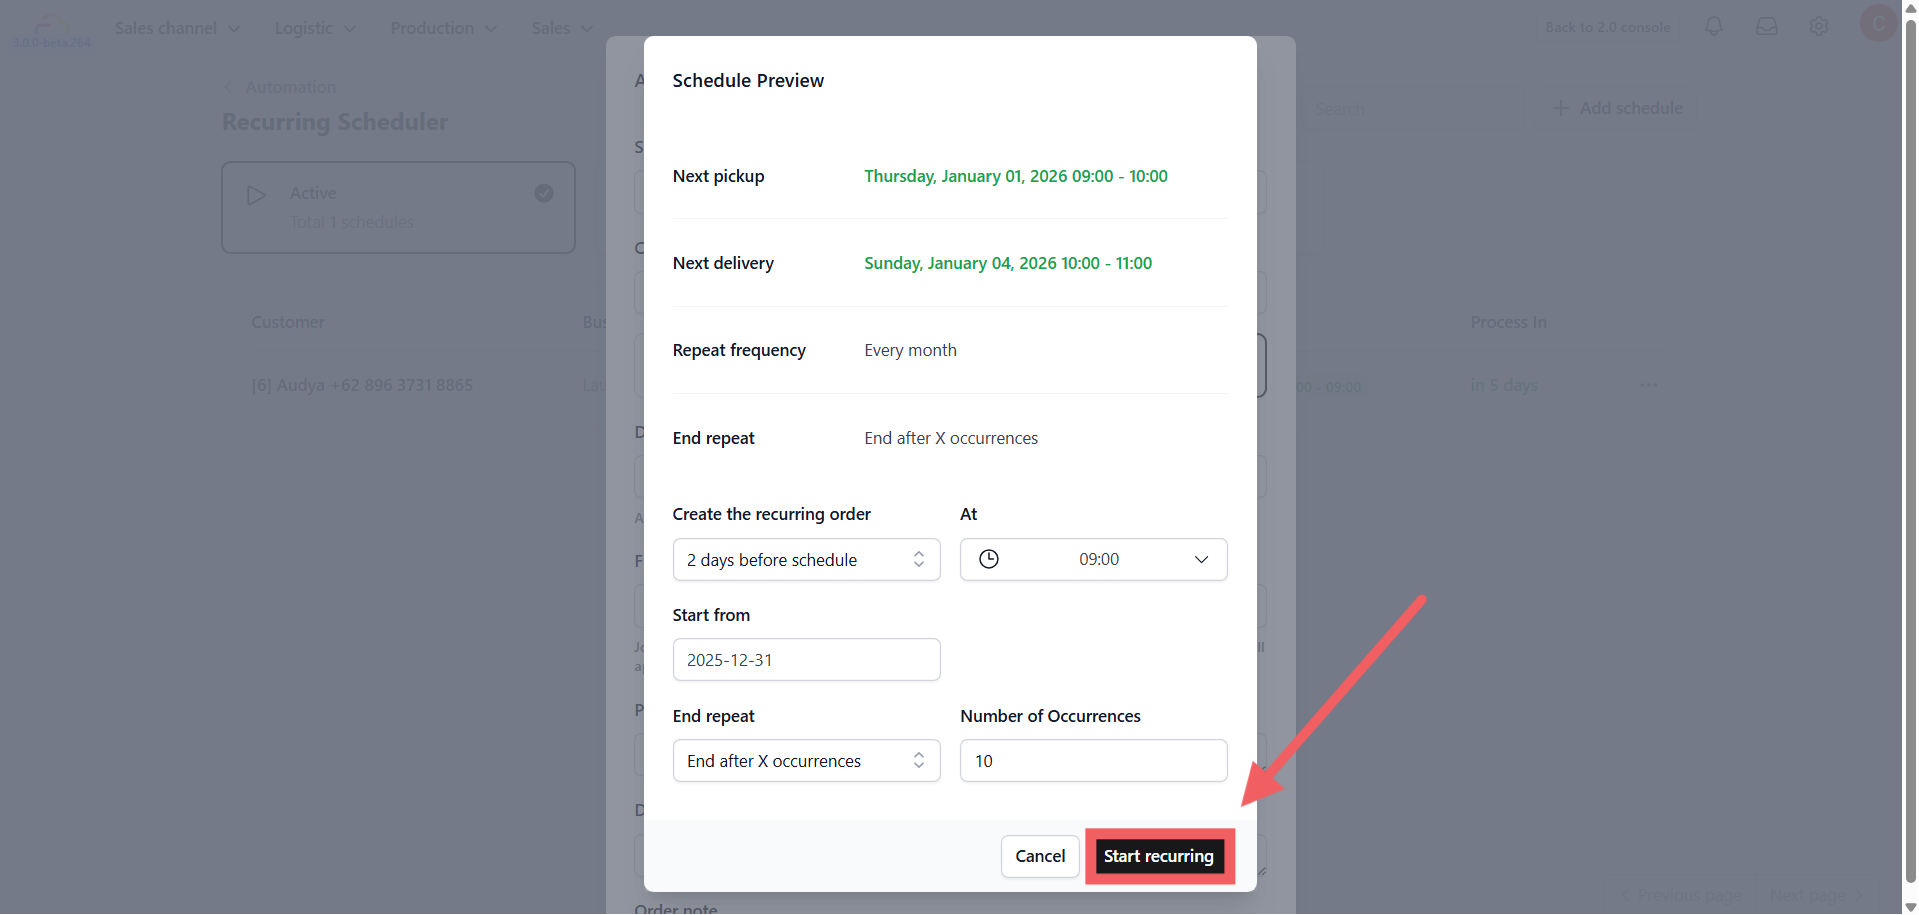
Once configured, you will see a Preview summary on the right/bottom.
1. Review Dates
Check the Next Pickup and Next Delivery timestamps to ensure the logic is correct.
2. Creation Timing
Decide when the system should generate the order ticket:
-
On the schedule day: Creates the order at the exact pickup time.
-
X days before: Creates the order in advance (up to 9 days) at a specific time.
3. Start & End Rules
-
Start Date: When does this subscription begin?
-
End Date:
-
No end date: Runs forever until cancelled.
-
End after X occurrences: Stops after a set number of orders (e.g., 10 times).
-
End by date: Stops on a specific calendar date.
-
Click Start Recurring to activate.
Managing Schedules
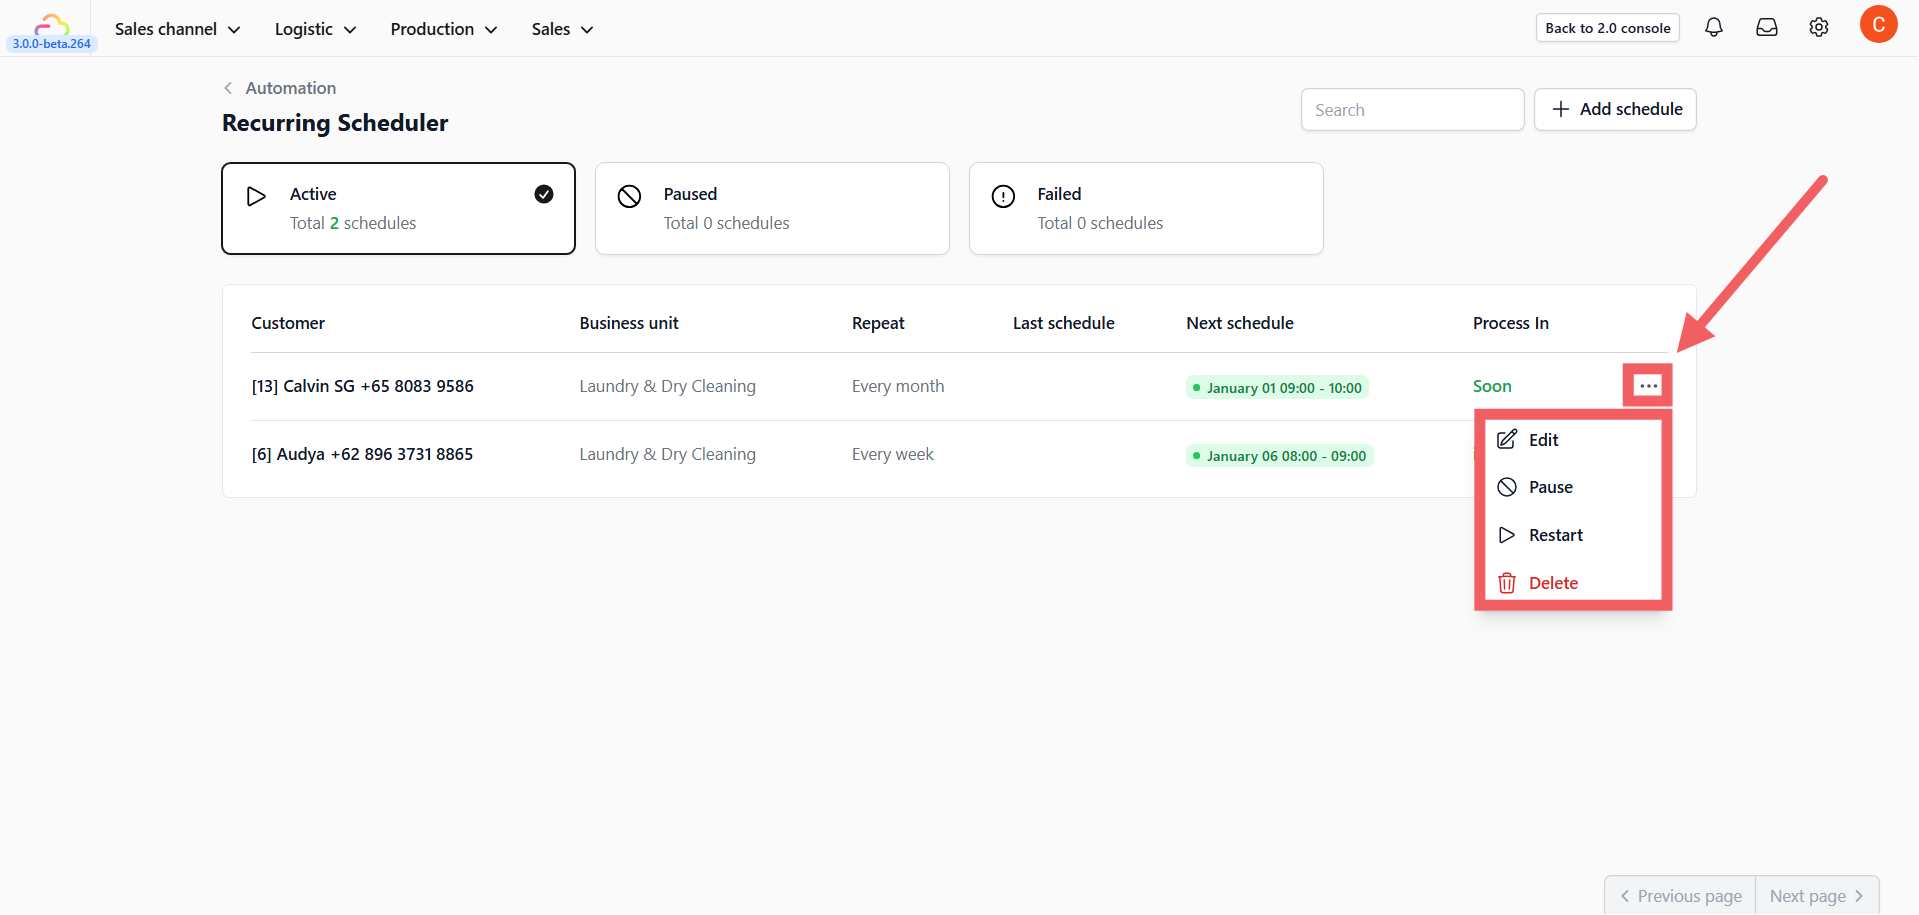
Back on the dashboard, you can manage existing schedules using the Three-dot Menu (⋮) on the right of each row:
-
Edit: Modify the address or frequency.
-
Pause: Temporarily stop the schedule (status becomes Paused).
-
Restart: Resume a paused schedule.
-
Delete: Permanently remove the schedule.