
Add a Customer from the Console
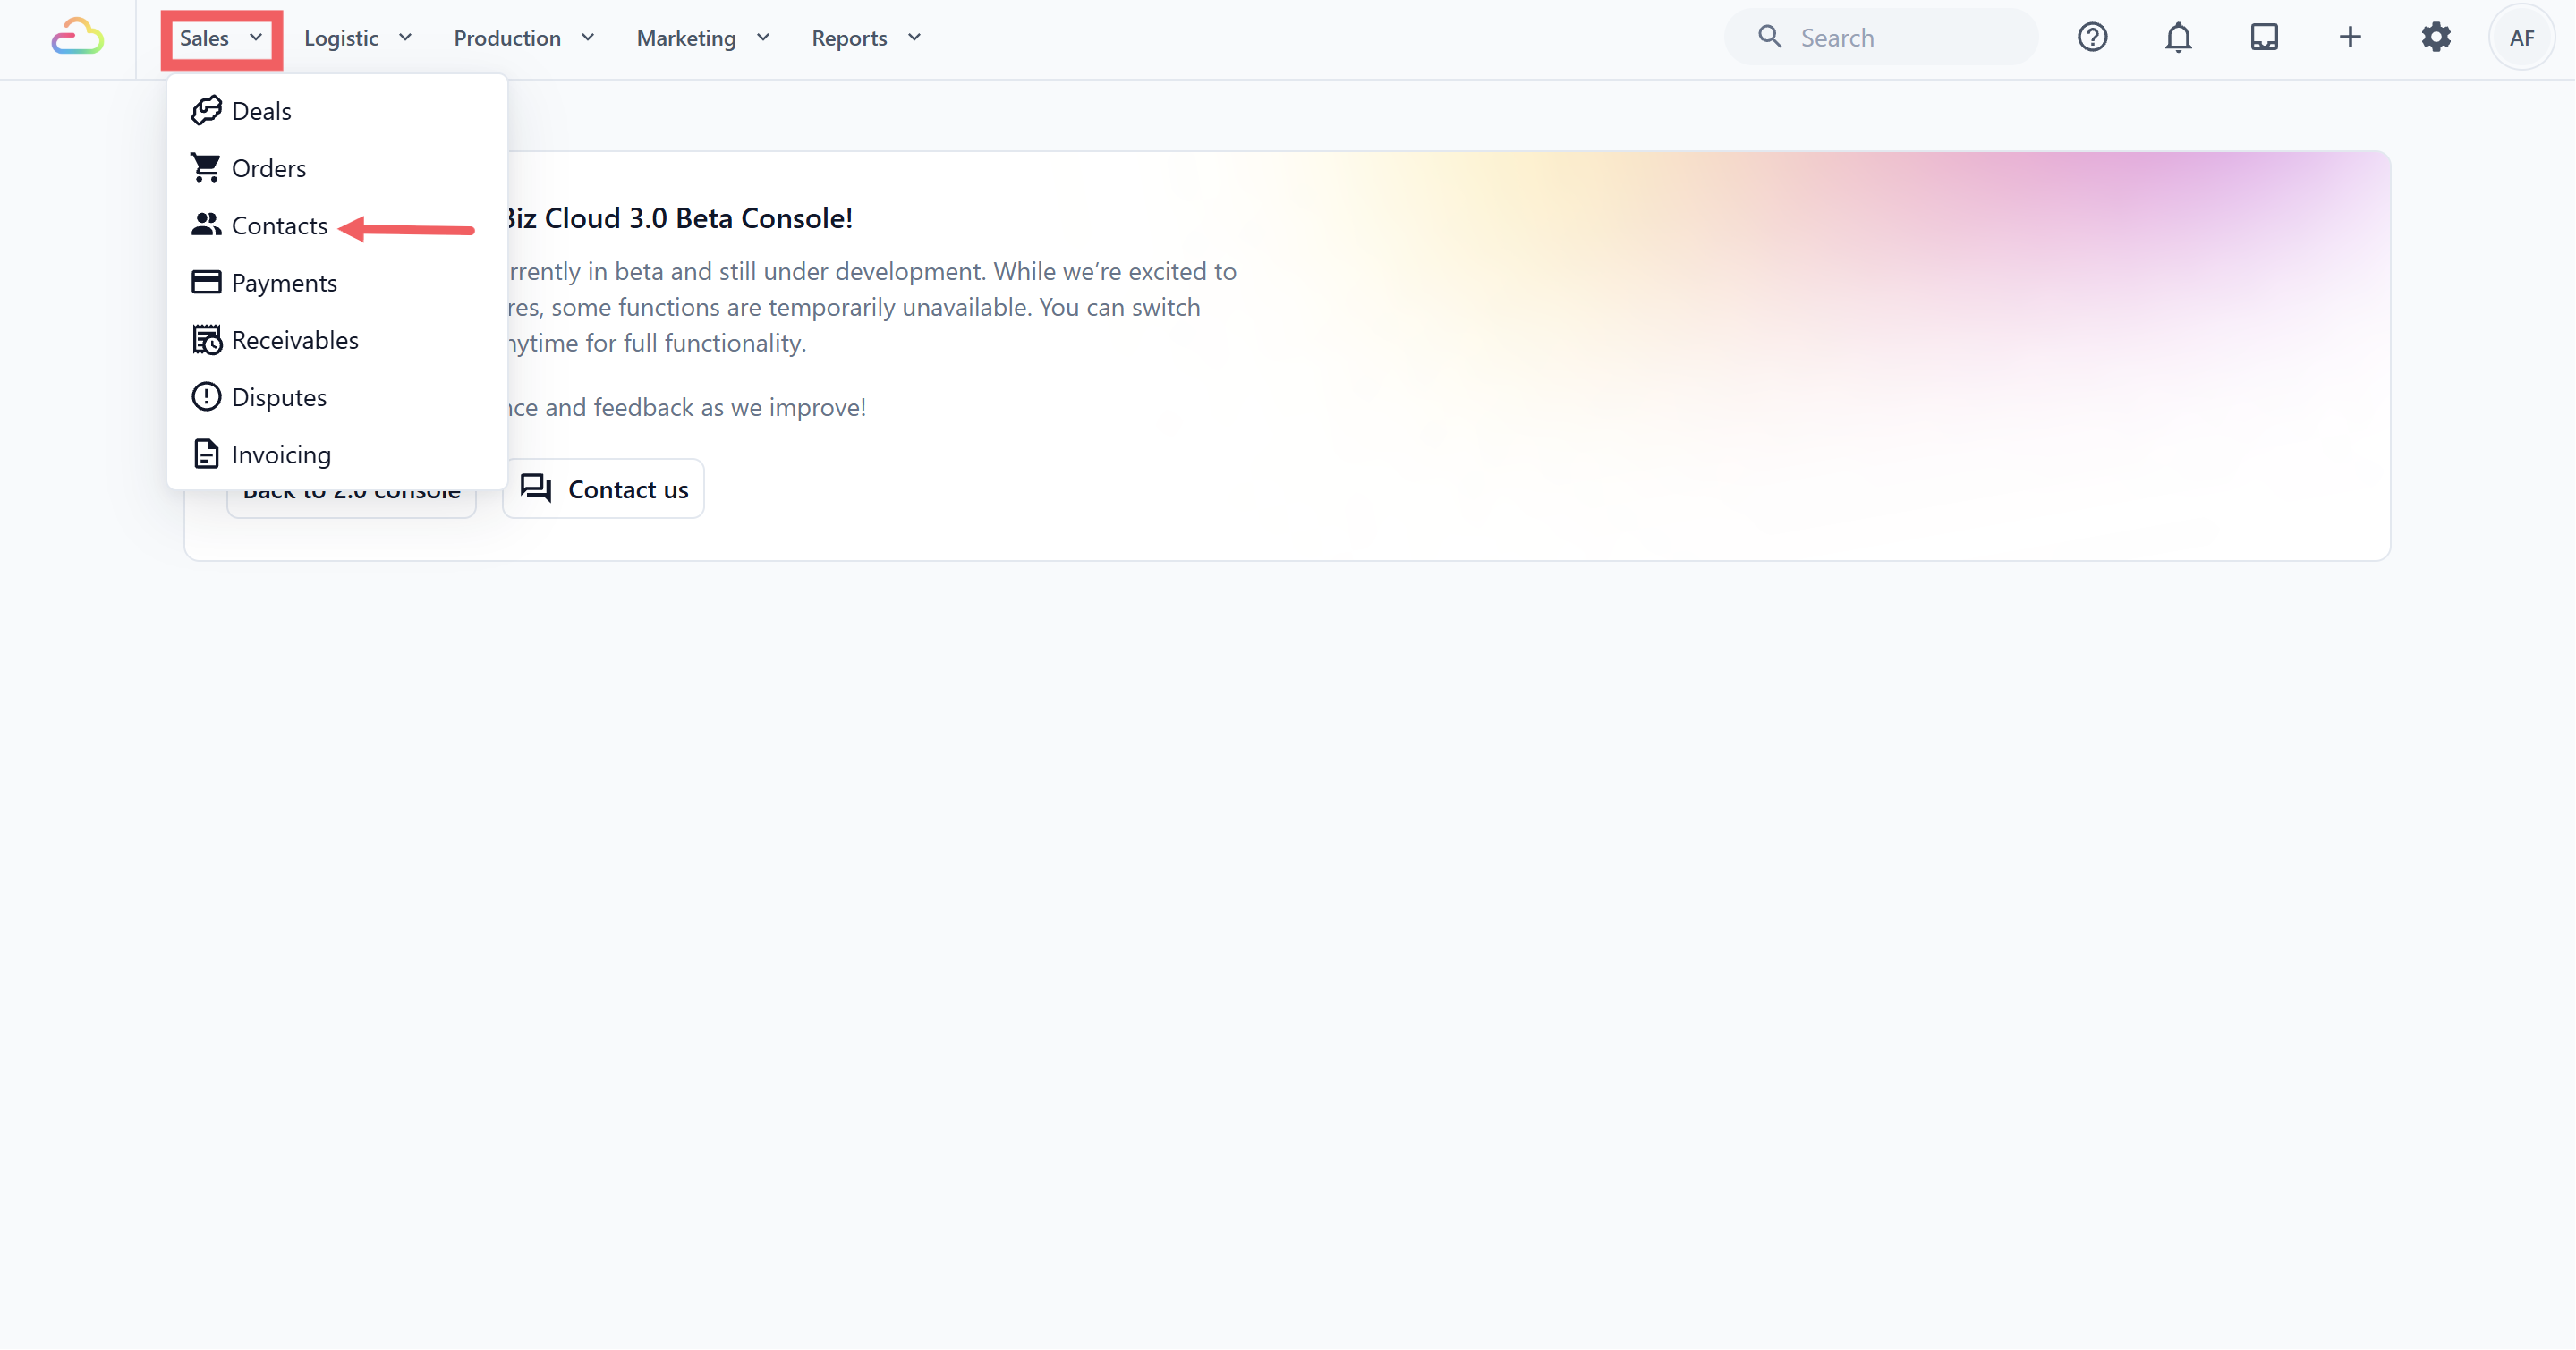
Open Sales → Contacts.
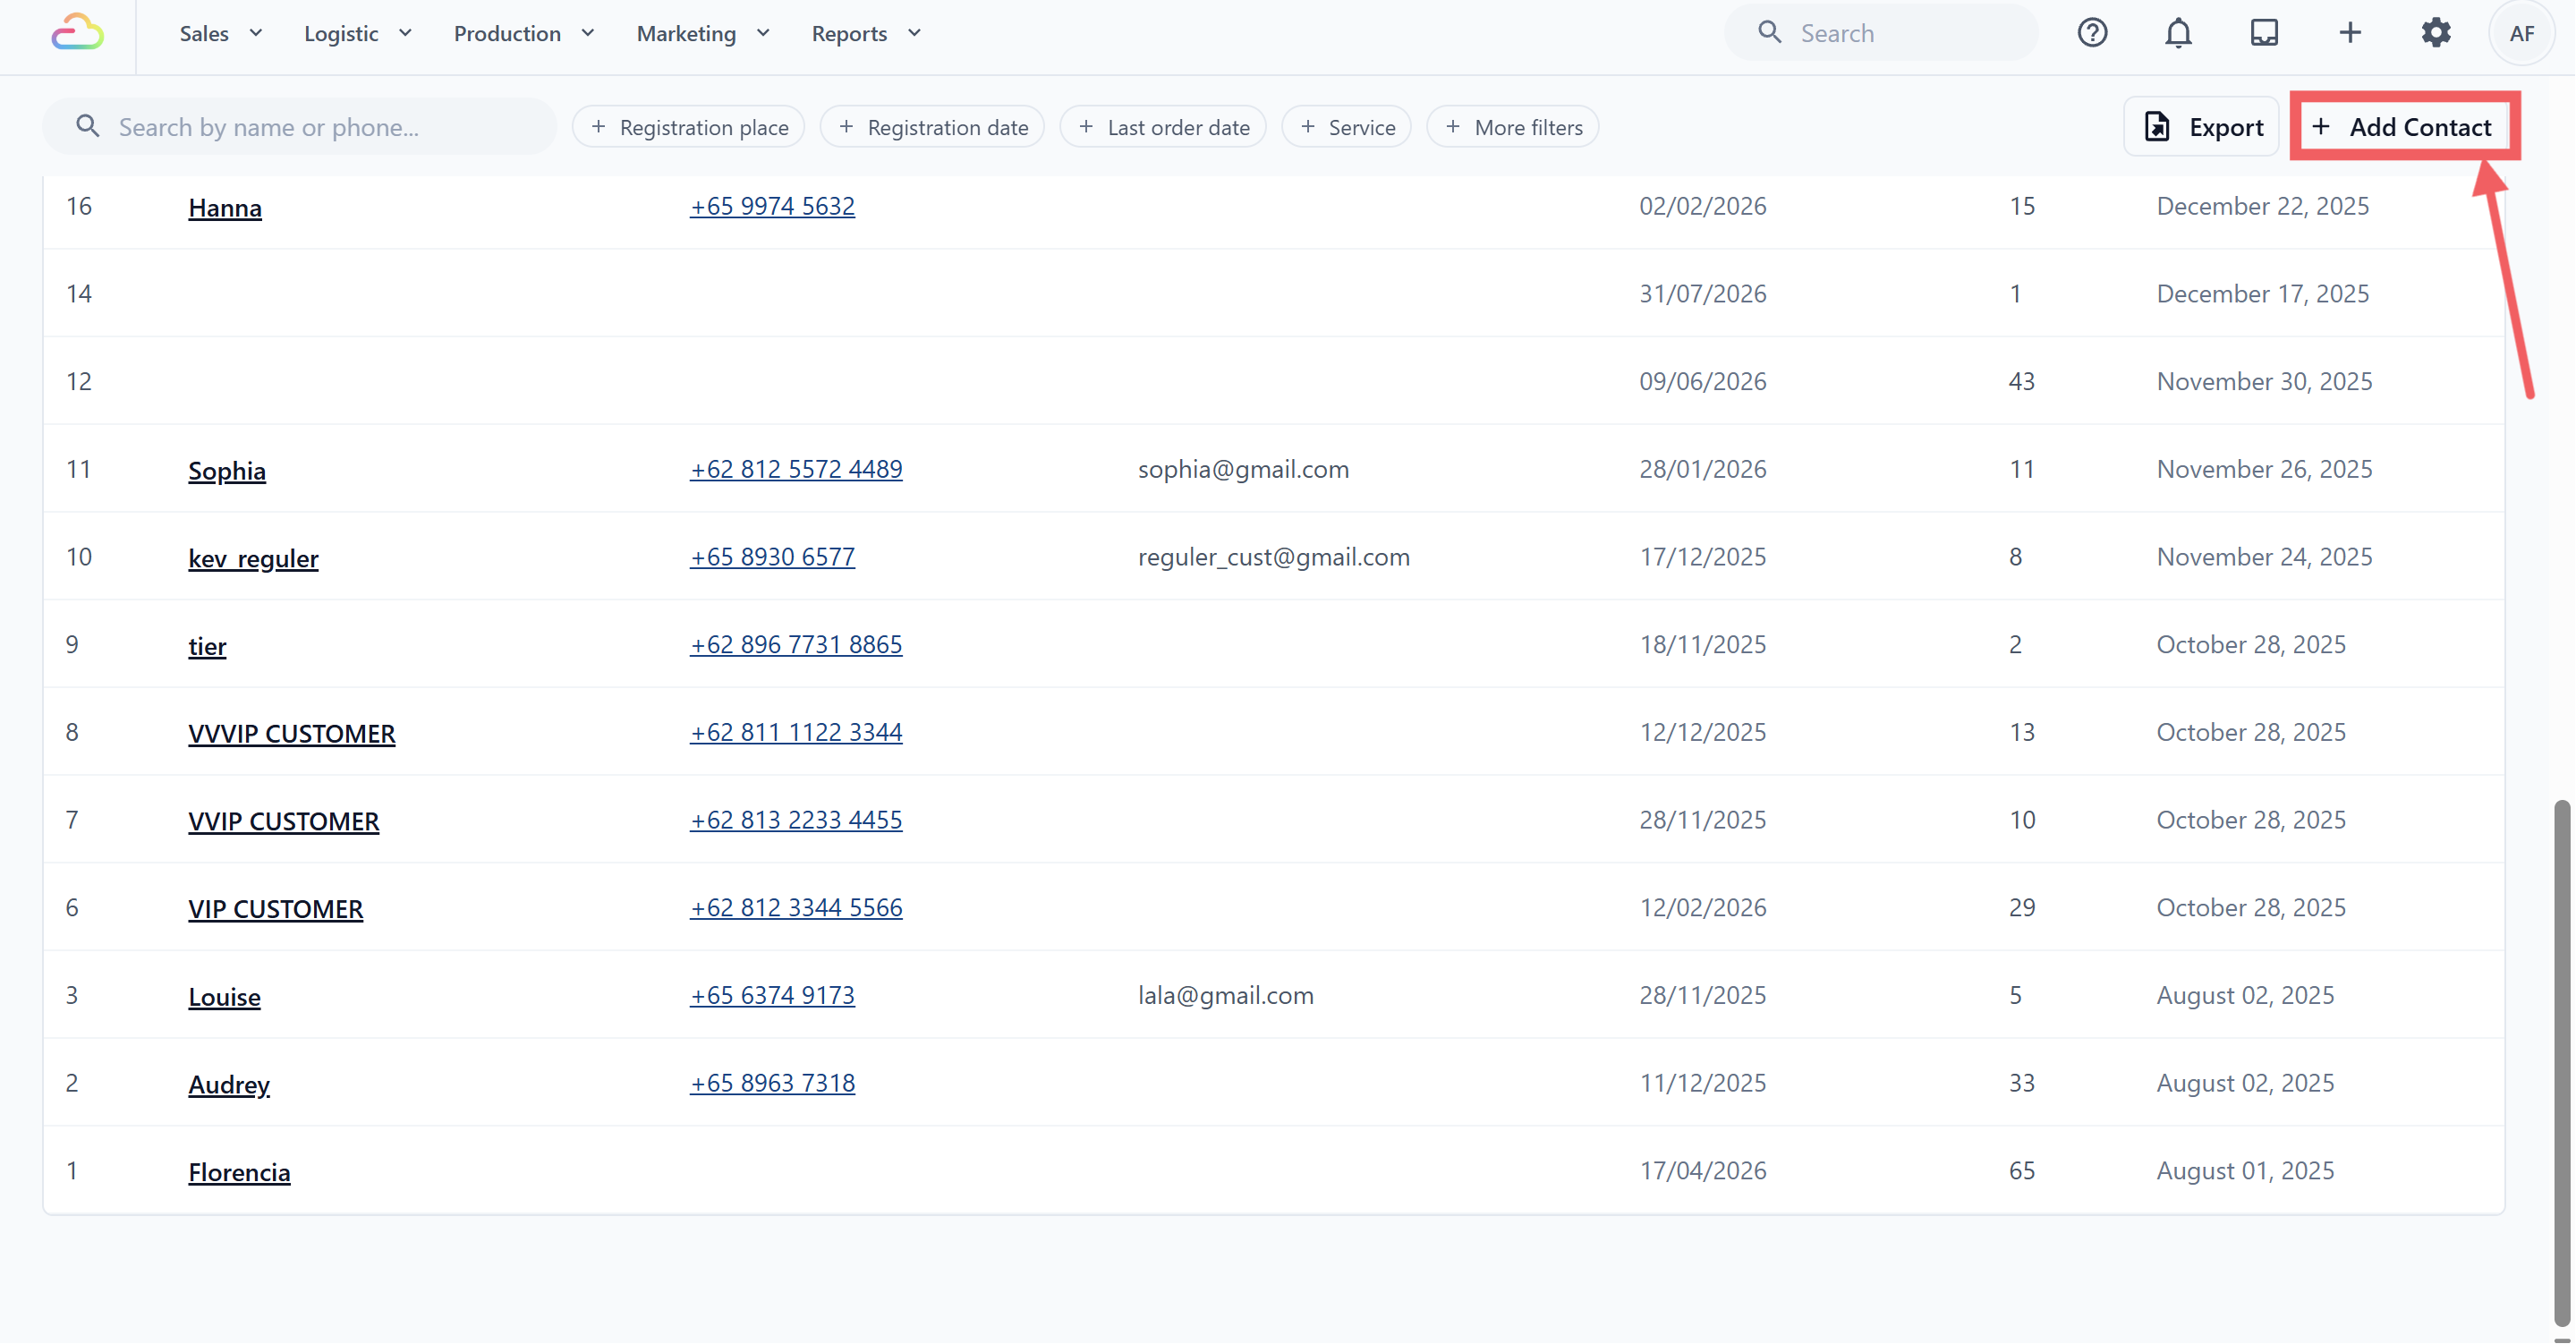
Click Add Contact. A dialog titled Add Account opens.
Fill in the fields below, then click Save.
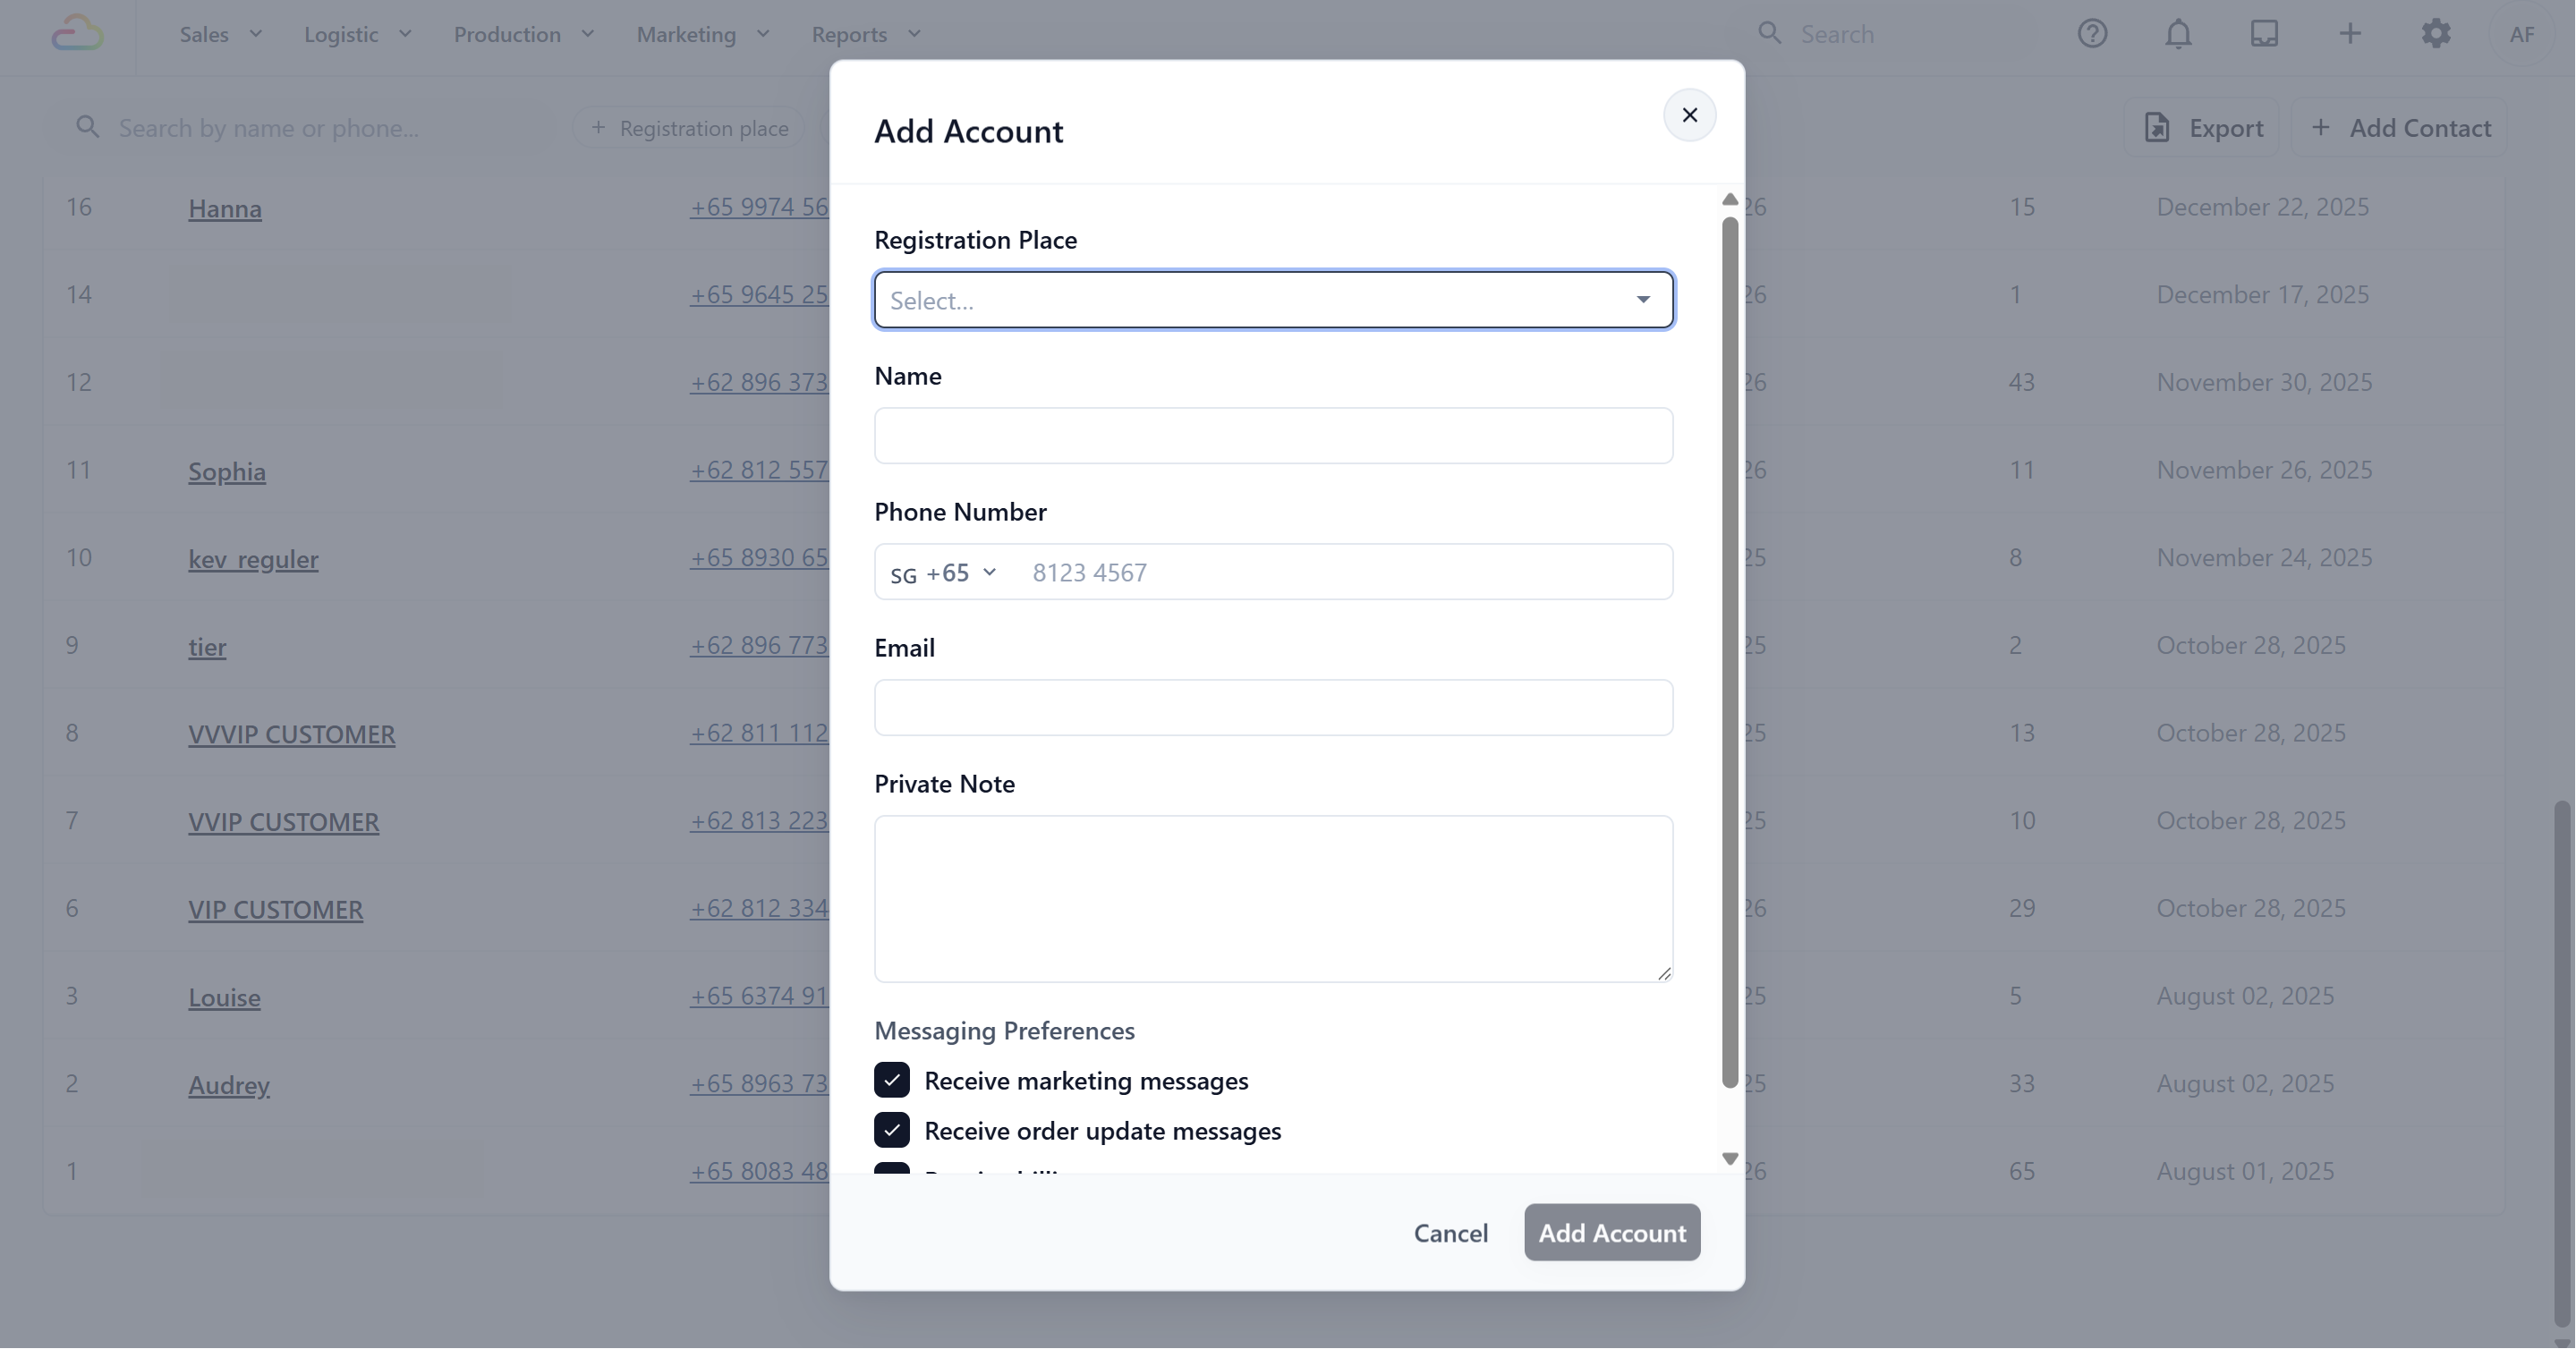
Registration place (required)
The sales channel this customer is registered under — your store, your online channel, and so on. It records where the relationship started and drives the Registration place filter on the contact list. This is chosen once, at creation.
Name (required)
The customer's name as your staff should see it on orders and receipts.
Phone Number
The customer's mobile number, with the country dial code picker. Worth getting right: it powers phone search, WhatsApp messaging, and duplicate-spotting later.
Optional, used for matching and any email-based receipts your setup sends.
Private Note
Internal remarks your team sees on the customer's profile — preferences, standing instructions, things to remember. Customers never see this.
Messaging Preferences
Three checkboxes, all about what EasyBiz is allowed to send this customer:
| Preference | Controls |
|---|---|
| Receive marketing messages | Campaigns, broadcasts, and promotional messages |
| Receive order update messages | Automatic order status notifications |
| Receive billing messages | Payment and billing-related messages |
Untick a box to opt the customer out of that message type. For a full stop on marketing to a customer, there is also a Do Not Contact switch on their profile — see Understanding the Contact Profile.
Private or Global account
This setting decides whether a customer’s contact belongs to one outlet or is shared across your whole business. It can only be chosen when the contact is created.
Private Account ->The contact is available only to the selected Registration place. Other outlets do not share the same customer profile. Choose this when each outlet keeps a separate customer list, or for B2B and partner customers managed by one channel.
Global Account -> The contact is shared across all outlets and online channels. Staff can find and use the same customer profile wherever the customer shops. Choose this when customers may visit more than one outlet.
Where Else Customers Come From
Online -> a customer who orders through your online store or completes a sign-up mini app becomes a contact automatically. See Setting Up a Customer Sign-Up Mini App.
POS and staff app -> staff can register a customer at the counter with the same core fields (name, phone, email, note). The customer is attached to the order and appears in Contacts immediately.
Editing a Customer Later
Open the customer from Sales → Contacts.
In the Contact Info card, click Edit. The same form opens with the customer's current details.
Update and Save.
Addresses are edited separately in the Address card — with address search, unit number, postal code, and a map pin so drivers land at the right door. The profile also holds the customer's default address used to prefill pickup and delivery bookings.
Check It Worked
After saving, search the contact list by the customer's phone number.
The new customer appears with the right name and registration place.
Open their profile and confirm the details and messaging preferences look correct.
FAQs
Can I change the registration place later?
No — it is set at creation and records where the relationship started. If a customer now mostly shops at another outlet, that is fine; orders track their own sales channel.
What is the difference between the Private Note and Do Not Contact note?
The Private Note is general internal remarks about the customer. The Do Not Contact switch (on the profile) suppresses marketing to them, with its own note explaining why.
Can I record a customer's birthday?
The standard Console form does not include a birthday field.
A customer asked to stop receiving promotions — which setting?
Untick Receive marketing messages in their contact form, or use the Do Not Contact switch on their profile for a logged, visible suppression. Order updates and billing messages continue unless you untick those too.
What's Next
See what lives on the customer's profile — orders, payments, loyalty, insights — in Understanding the Contact Profile.