
When you finish, every new customer your staff add, in the Console or at the counter, is saved with the details your shop needs, such as a phone number for WhatsApp updates or a billing address for invoices.
Before You Start
- You need access to ⚙️ Settings in the Console.
- You know how staff add a customer in the Console and at the POS. See Add a New Customer and Choose What Staff Must Fill In.
- If you use the POS, set up your Checkout page first. Its Contact on orders setting (None, Optional or Mandatory) decides whether staff pick a customer for each order. This article decides what staff fill in when that customer is new. See Setting Up the Checkout Page.
- If you set this up before: the customer form has moved. It used to be under Features › Contact in each POS app's editor. It is now set once for your whole account in Settings › Records › Contacts, and the Console, every POS and the staff app follow it. Customer Account Registration under Legacy Settings only applies to shops still on the older POS.
Choose your setup
| Level | Fits shops like | What you set up | Read these sections |
|---|---|---|---|
| Easy | One shop that wants a phone number for every customer | The ready-made form, with Phone Number made required | Where to find it, Making a detail required, What staff see |
| Intermediate | Shops that run birthday offers, want to know how customers found them, or send invoices to companies | Everything in Easy, plus Birthday, Referral Source or Billing Address, and the order the details appear in | Everything in Easy, plus Adding Birthday, Referral Source or Billing Address and Removing and reordering details |
| Advanced | Franchise outlets where each shop keeps its own customers | Everything in Intermediate, plus who can find a new contact at the POS | Everything in Intermediate, plus Who can find a new contact |
With the Easy setup, staff can't save a new customer without a phone number, wherever they add them. Everything else keeps working with the ready-made form, and you can add details later.
Overview
The contact form is the short form your staff fill in when they add a new customer. A contact is the customer's record in EasyBiz: their name, phone number and the other details you collect. You choose which details the form asks for, which ones staff must fill in, and the order they appear in. You set it once for your whole account, and the Console, every POS, the staff app and a paired customer display all use the same form. This keeps your customer list complete, so you can send WhatsApp updates, run birthday offers and find customers again quickly.
Where it works
- Console: you set up the form in Settings. Staff see it when they click Add Contact on the Contacts page, or Register on a chat in the Inbox.
- POS: staff see the form when they tap New Contact at checkout, at every shop.
- Staff app: staff see the same form when they add a customer on their phone.
- Customer-facing display: customers who register themselves on a paired display fill in the same form.
Why set it up
- Fewer missing details. A required detail must be filled in before staff can save. No more customers saved with only a name.
- Customers get their updates. With Phone Number required, every new customer can get WhatsApp messages when their order is ready.
- One place to change it. Change the form once, and the Console and every shop ask for the same details from the next customer onwards.
If you skip it, the Console and POS use the ready-made form: Name, Phone Number, Email and Private Note, with only Name required. Staff can then save a customer without a phone number or email, and those customers won't get order updates.
Where to find it
- Click the ⚙️ Settings icon in the top-right corner.
- Under the Library section, click Records.
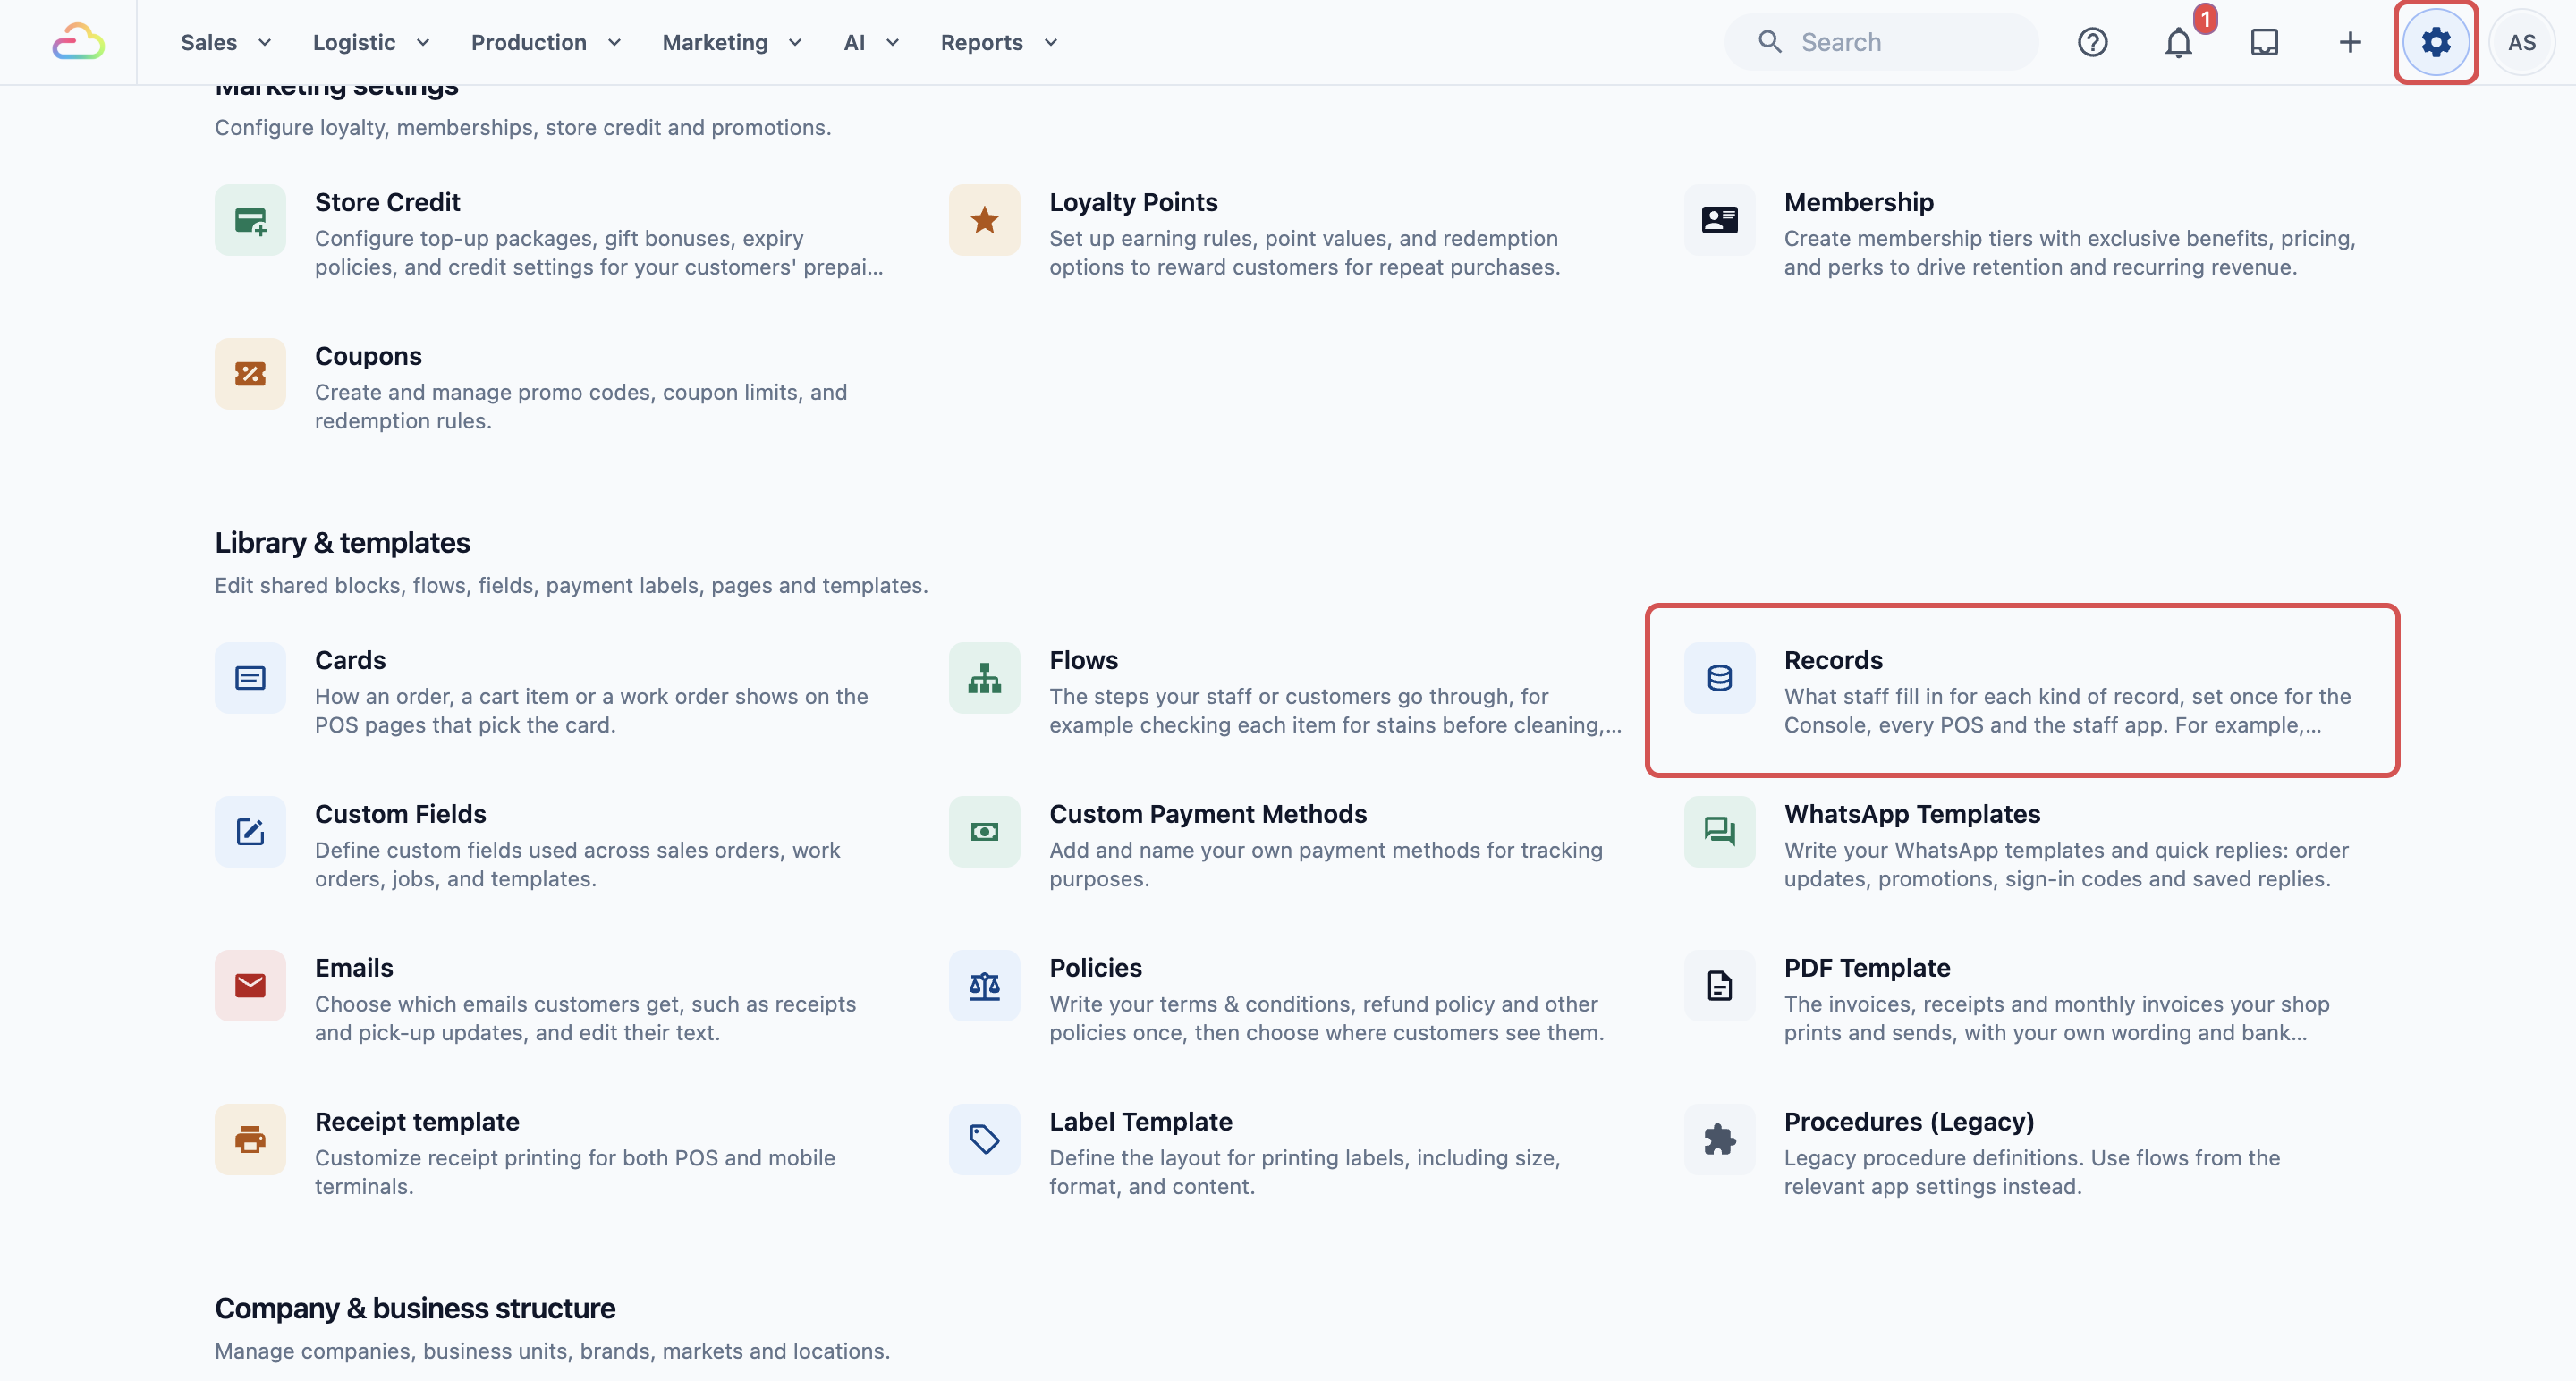
- Click Contacts.
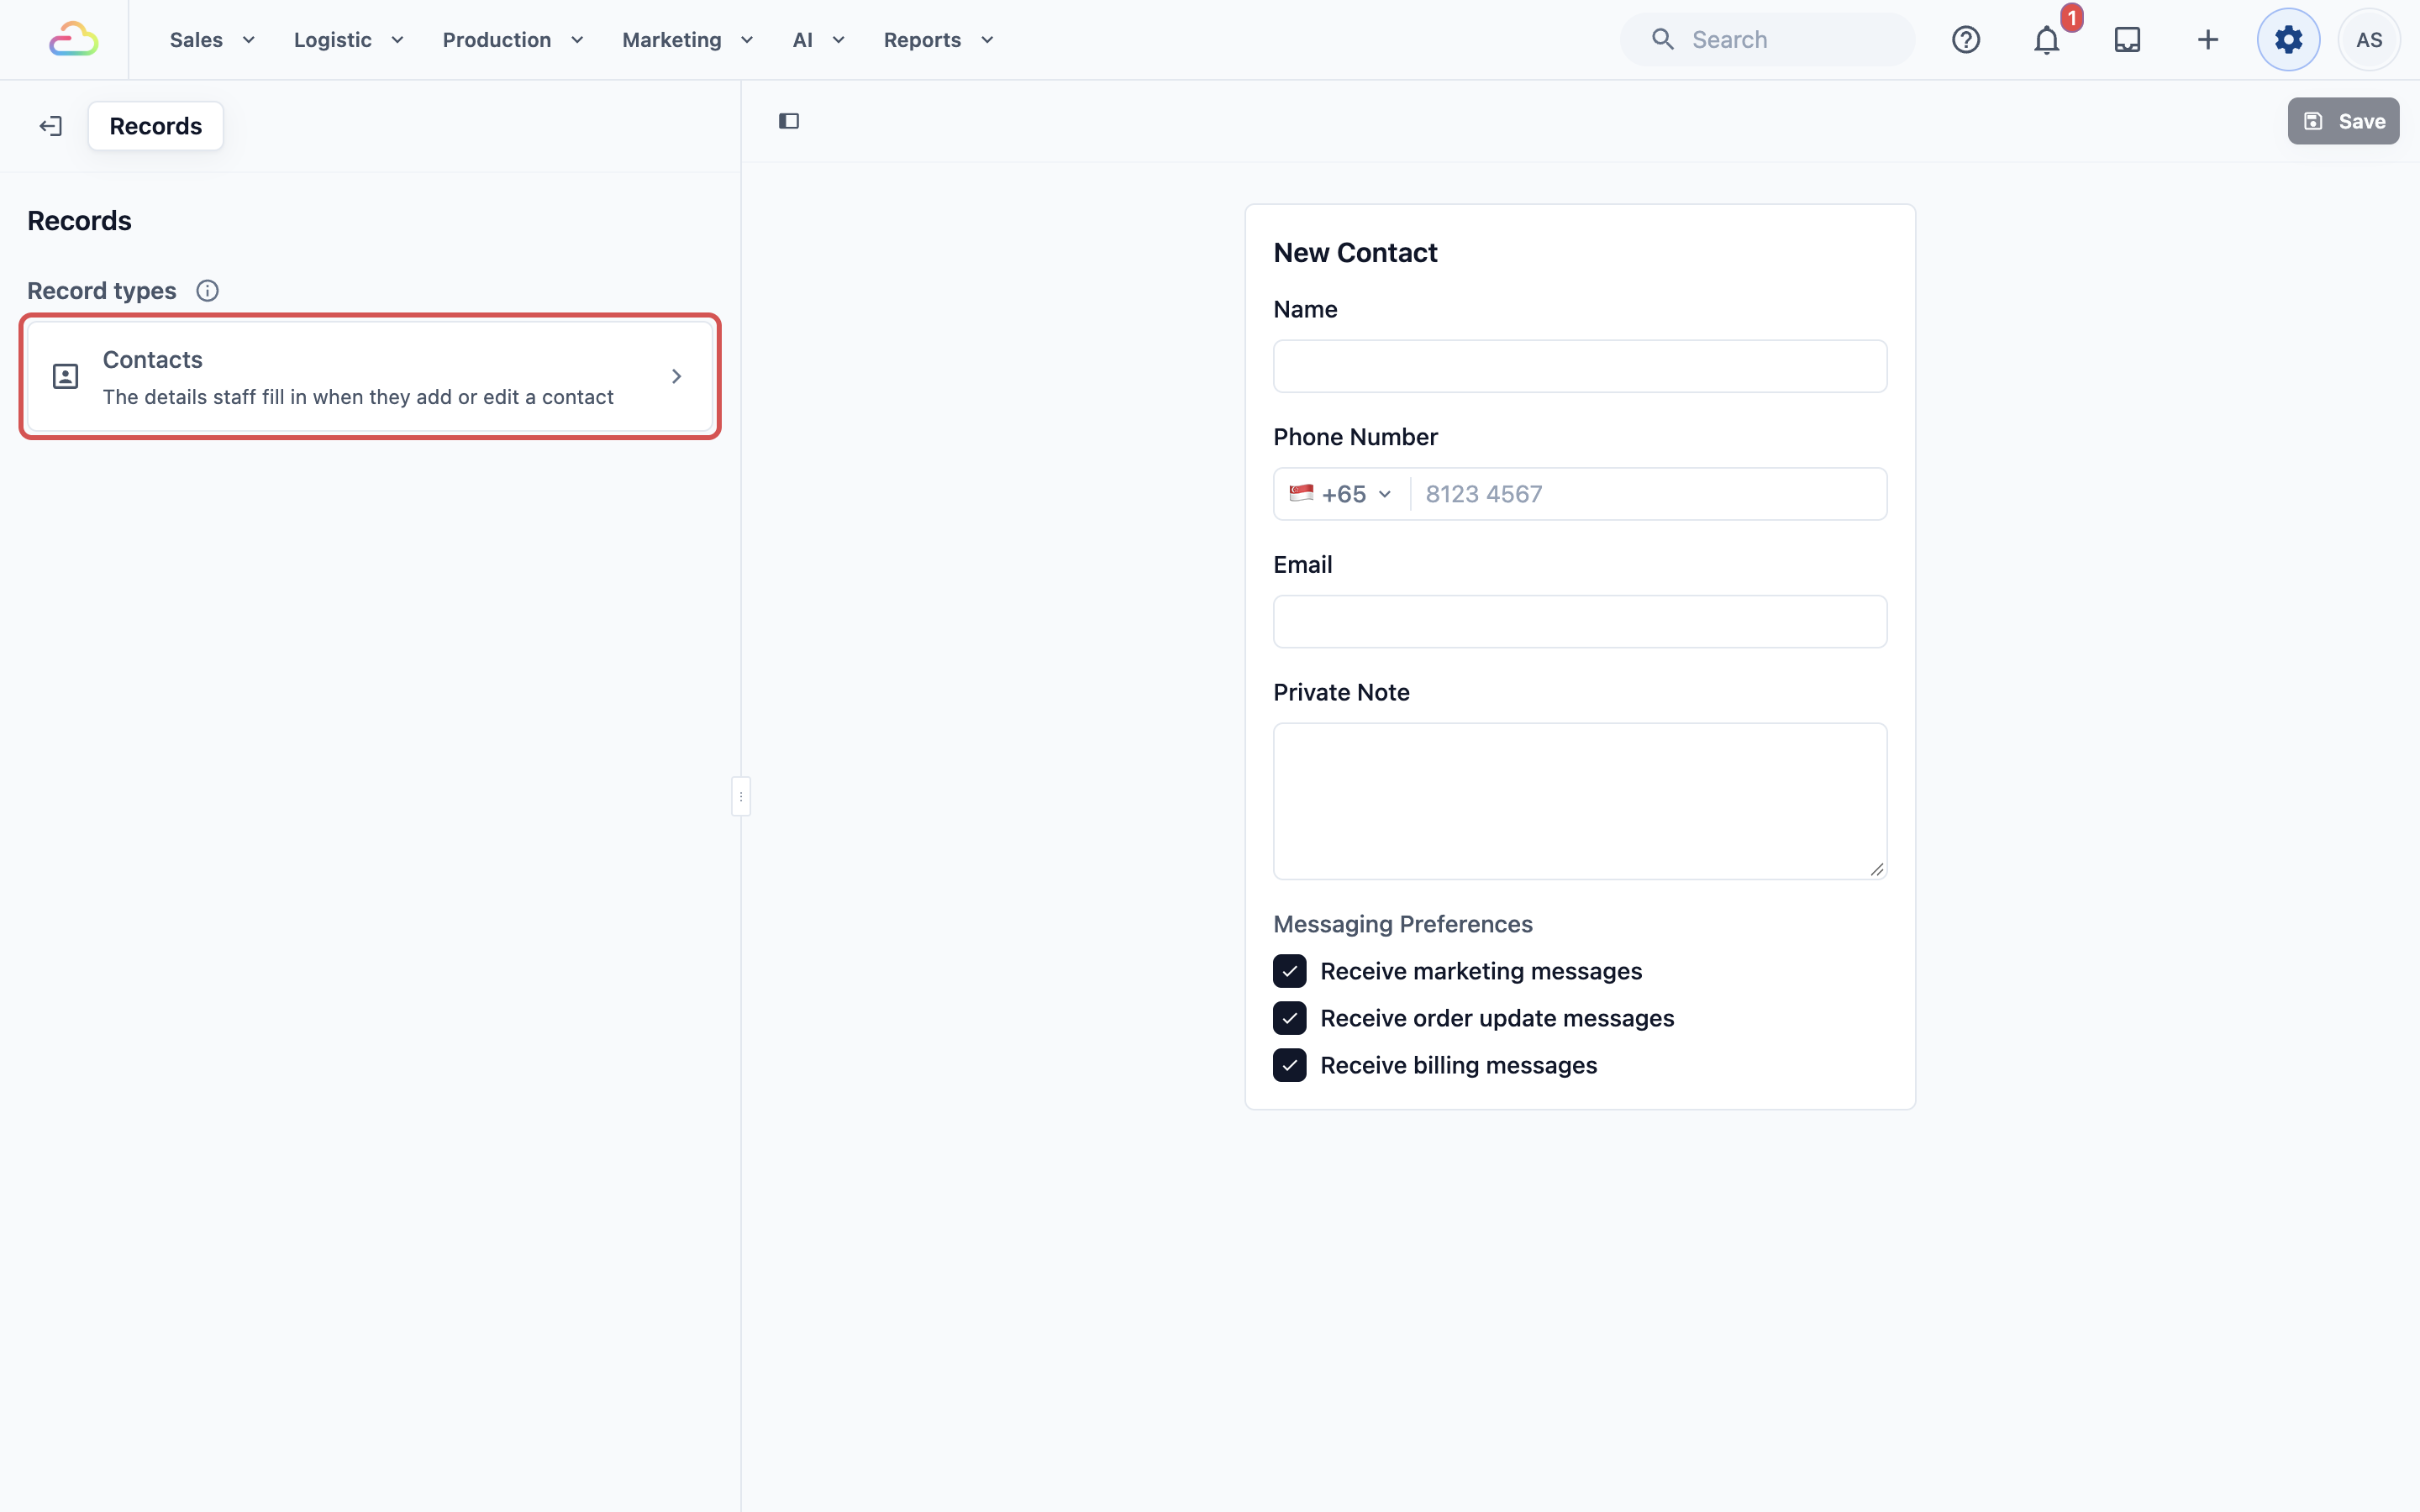
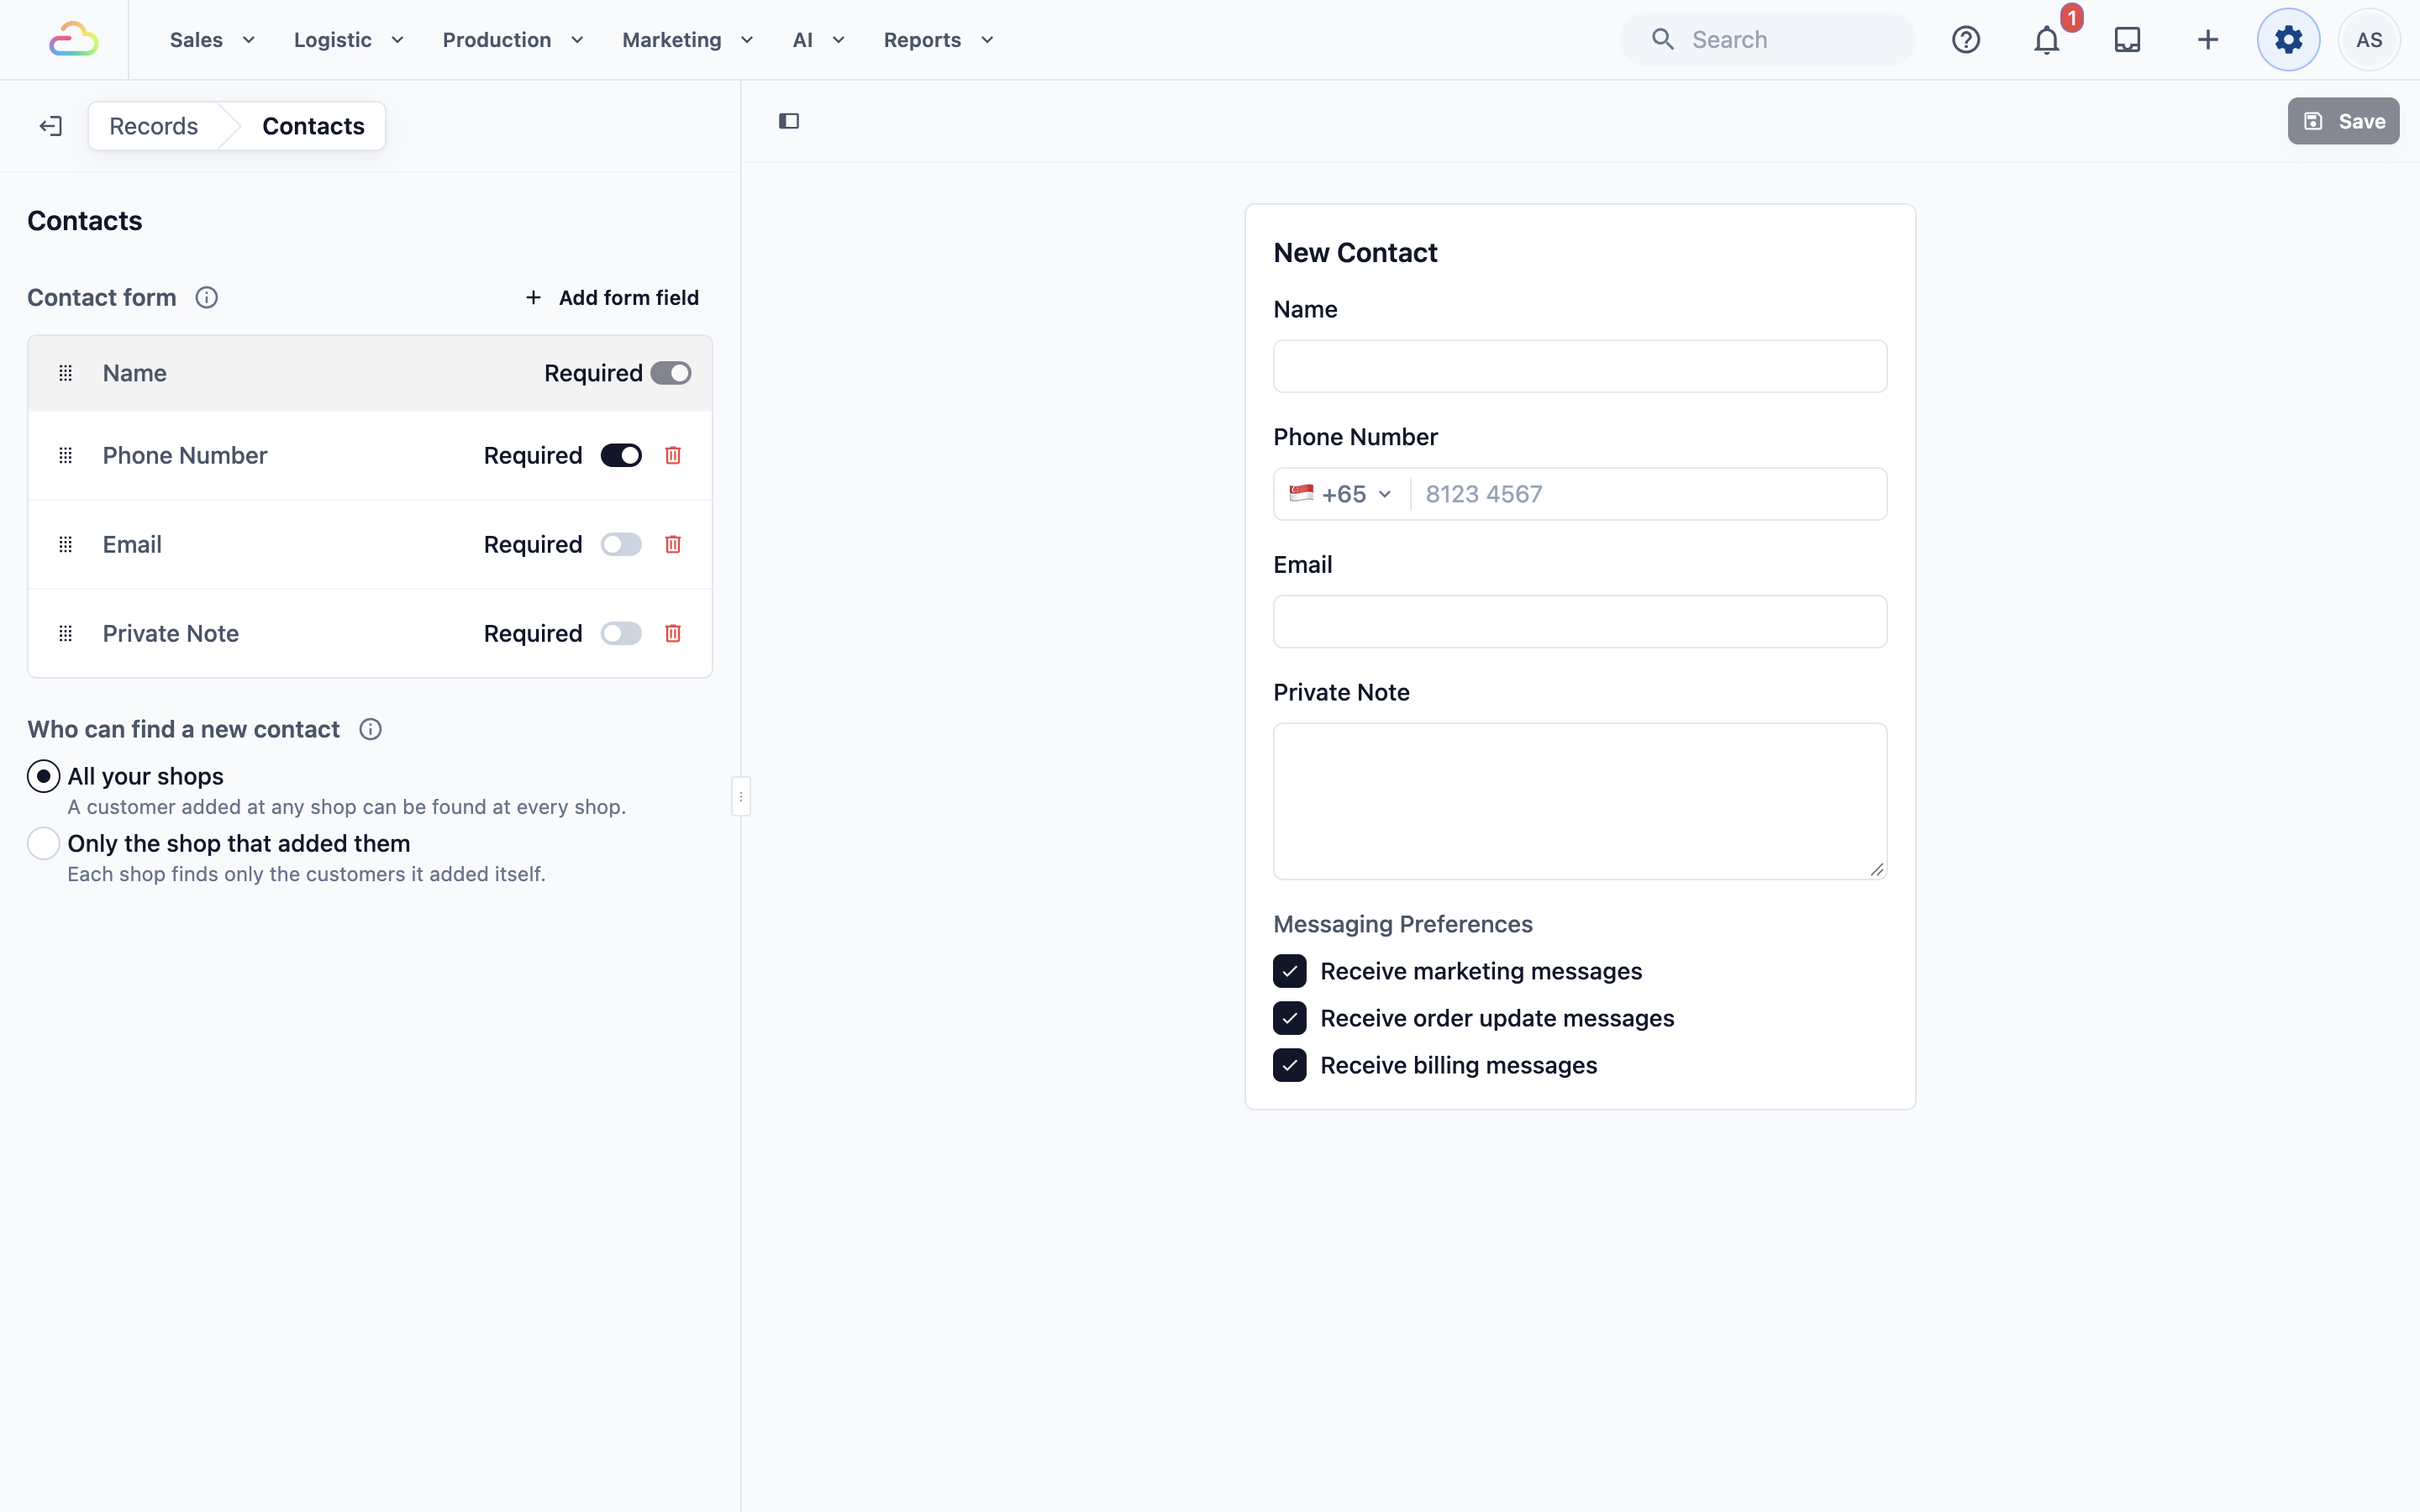
The Contacts page has two parts on the left: Contact form and Who can find a new contact. On the right, a live preview shows the New Contact form exactly as staff will see it. You can type into the preview to try it out. Nothing you type there is saved.
Setting up the contact form
The Contact form lists each detail staff fill in, from top to bottom. Each row has a Required switch.
Name is always on the form and always required. Its switch is locked and it has no remove button, because a contact can't be saved without a name.
These are the details you can put on the form:
| Detail | What staff fill in | On the ready-made form |
|---|---|---|
| Name | The customer's name | Yes, always required |
| Phone Number | The customer's mobile number | Yes |
| The customer's email address | Yes | |
| Private Note | A note only your staff see, for example "Prefers folded, not hung" | Yes |
| Birthday | The customer's date of birth | No, add it with Add form field |
| Referral Source | How the customer heard about your shop | No, add it with Add form field |
| Billing Address | The address to print under Bill to on the customer's invoices, for example a company's office address. Staff can type it on several lines | No, add it with Add form field |
Making a detail required
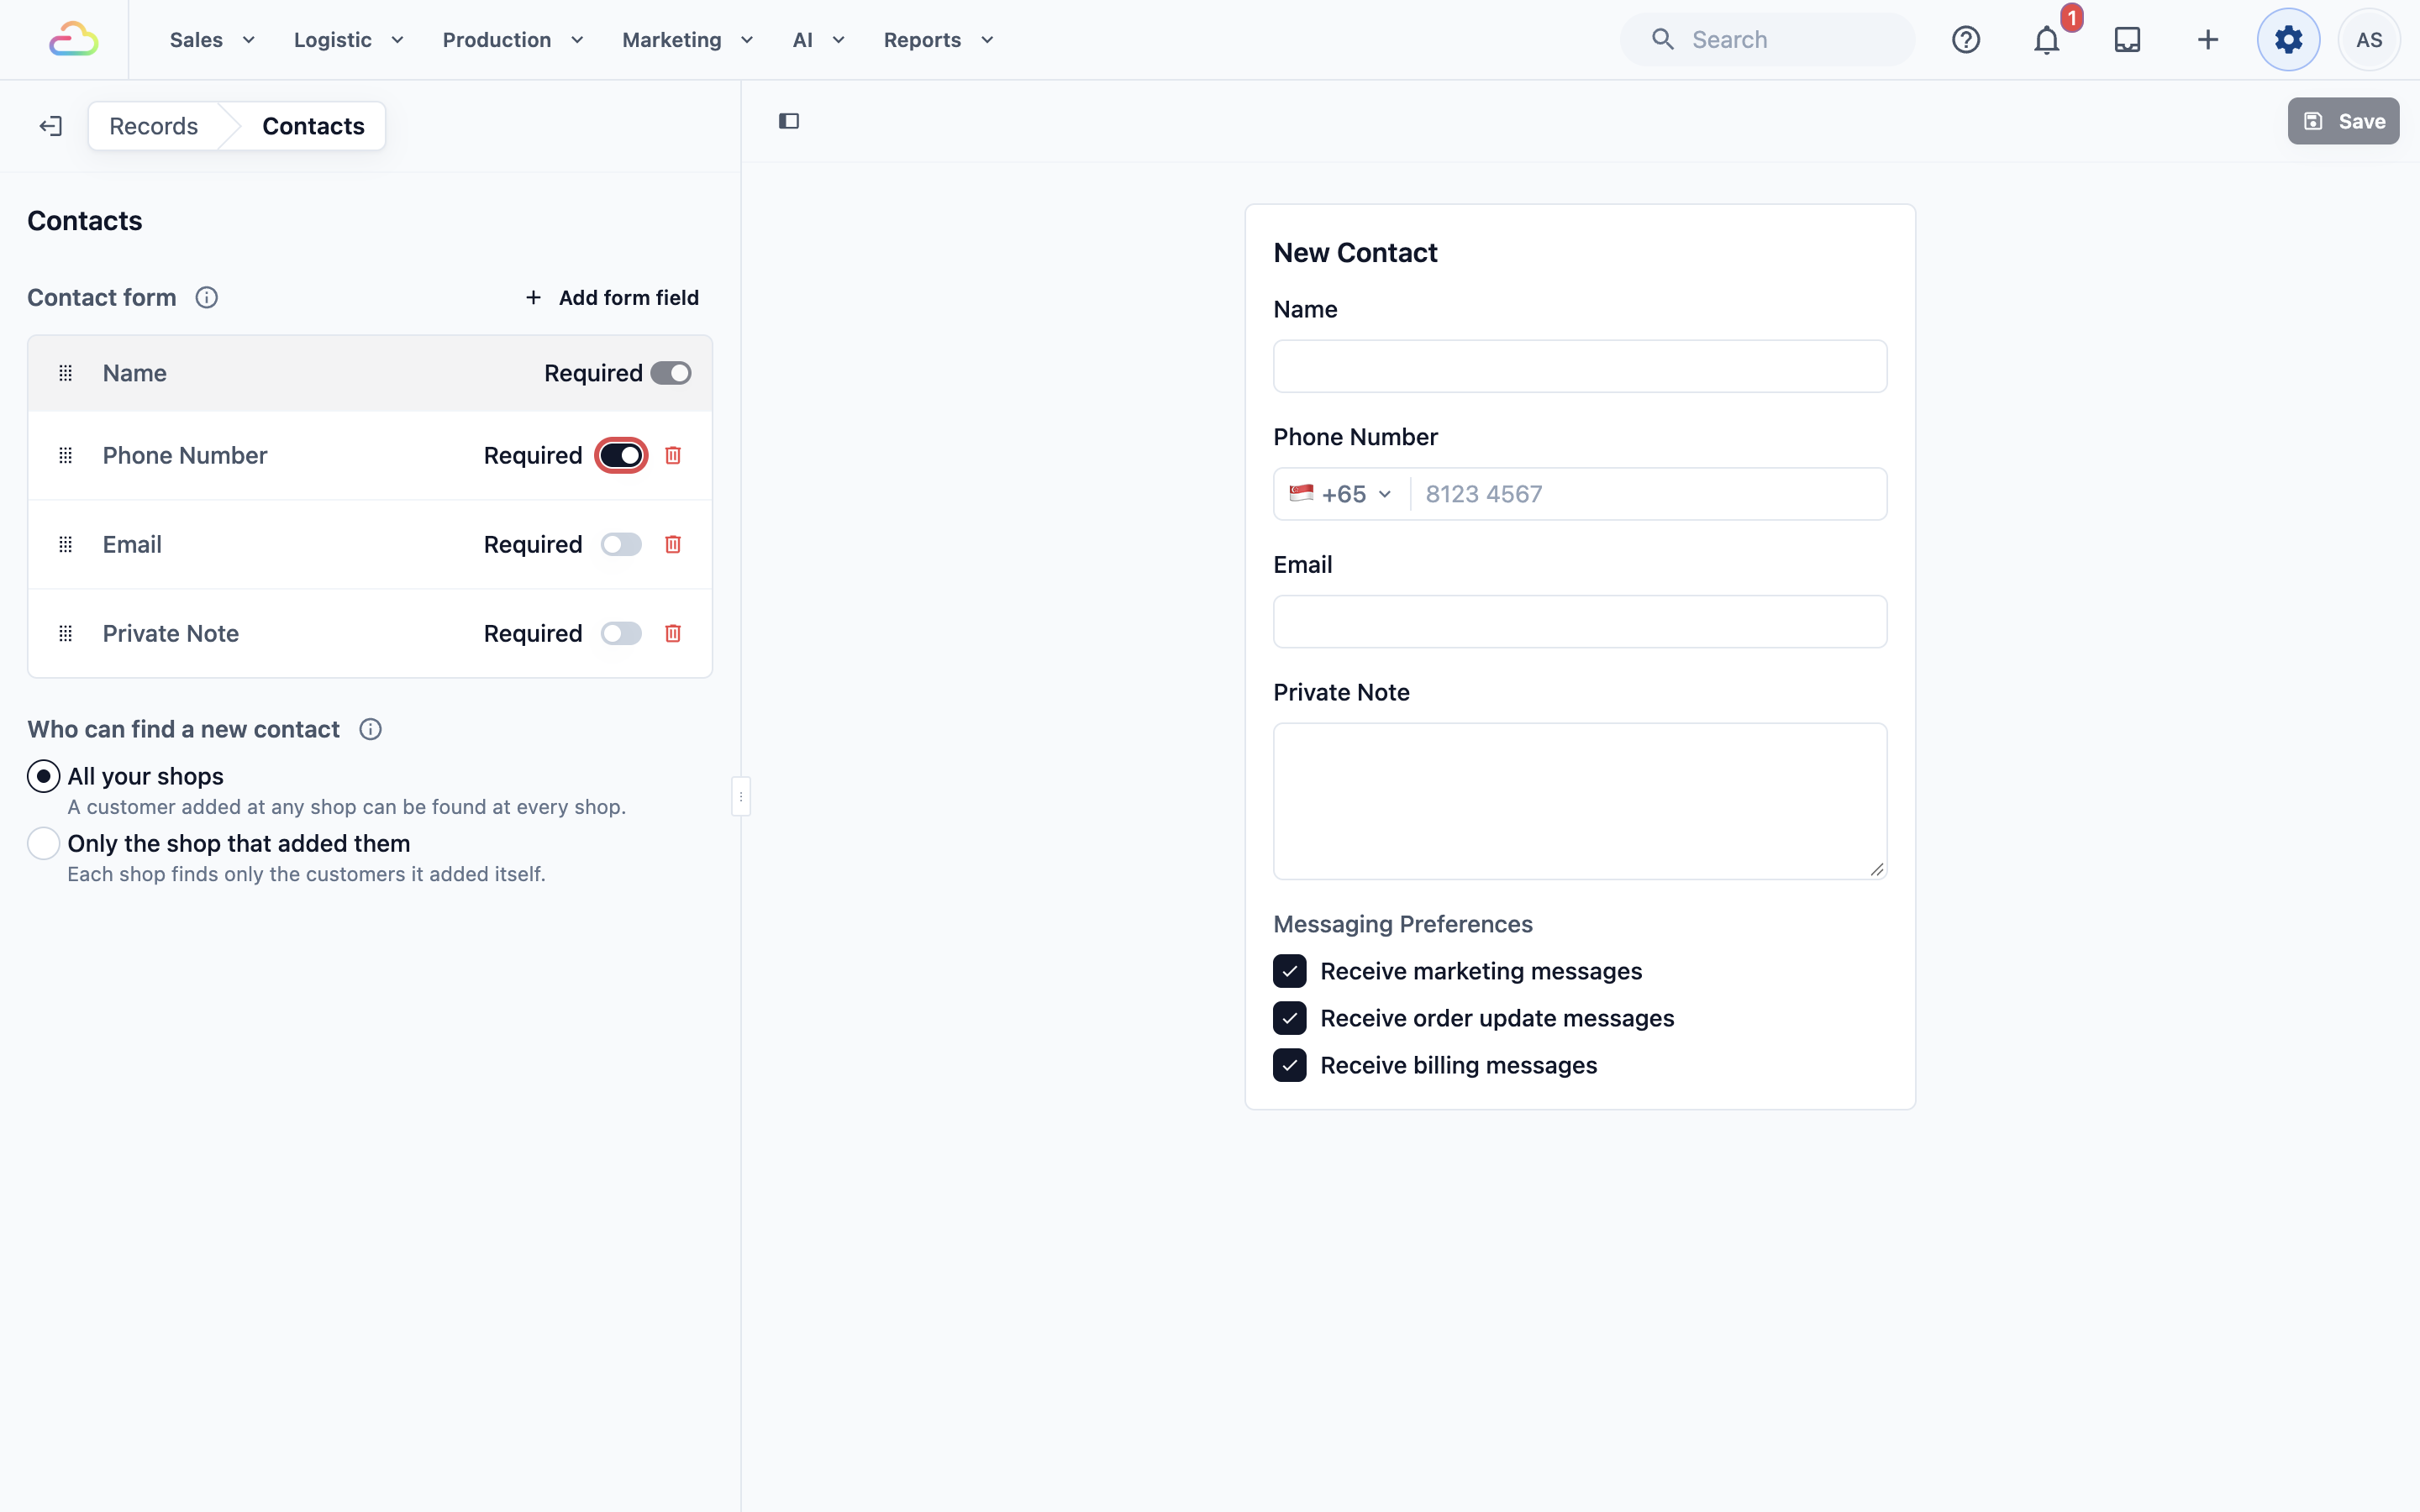
- Find the detail in the Contact form list.
- Turn on its Required switch.
- Click Save at the top right.
If you turn this on, staff can't save a new customer until that detail is filled in, in the Console, on the POS or in the staff app. If you leave it off, the detail still shows on the form, and staff can leave it empty.
Adding Birthday, Referral Source or Billing Address
Use this only if you run birthday offers, want to track how customers find you, or send invoices to companies.
- Click Add form field at the bottom of the Contact form list.
- Choose Birthday, Referral Source or Billing Address. Details already on the form show as "Already added".
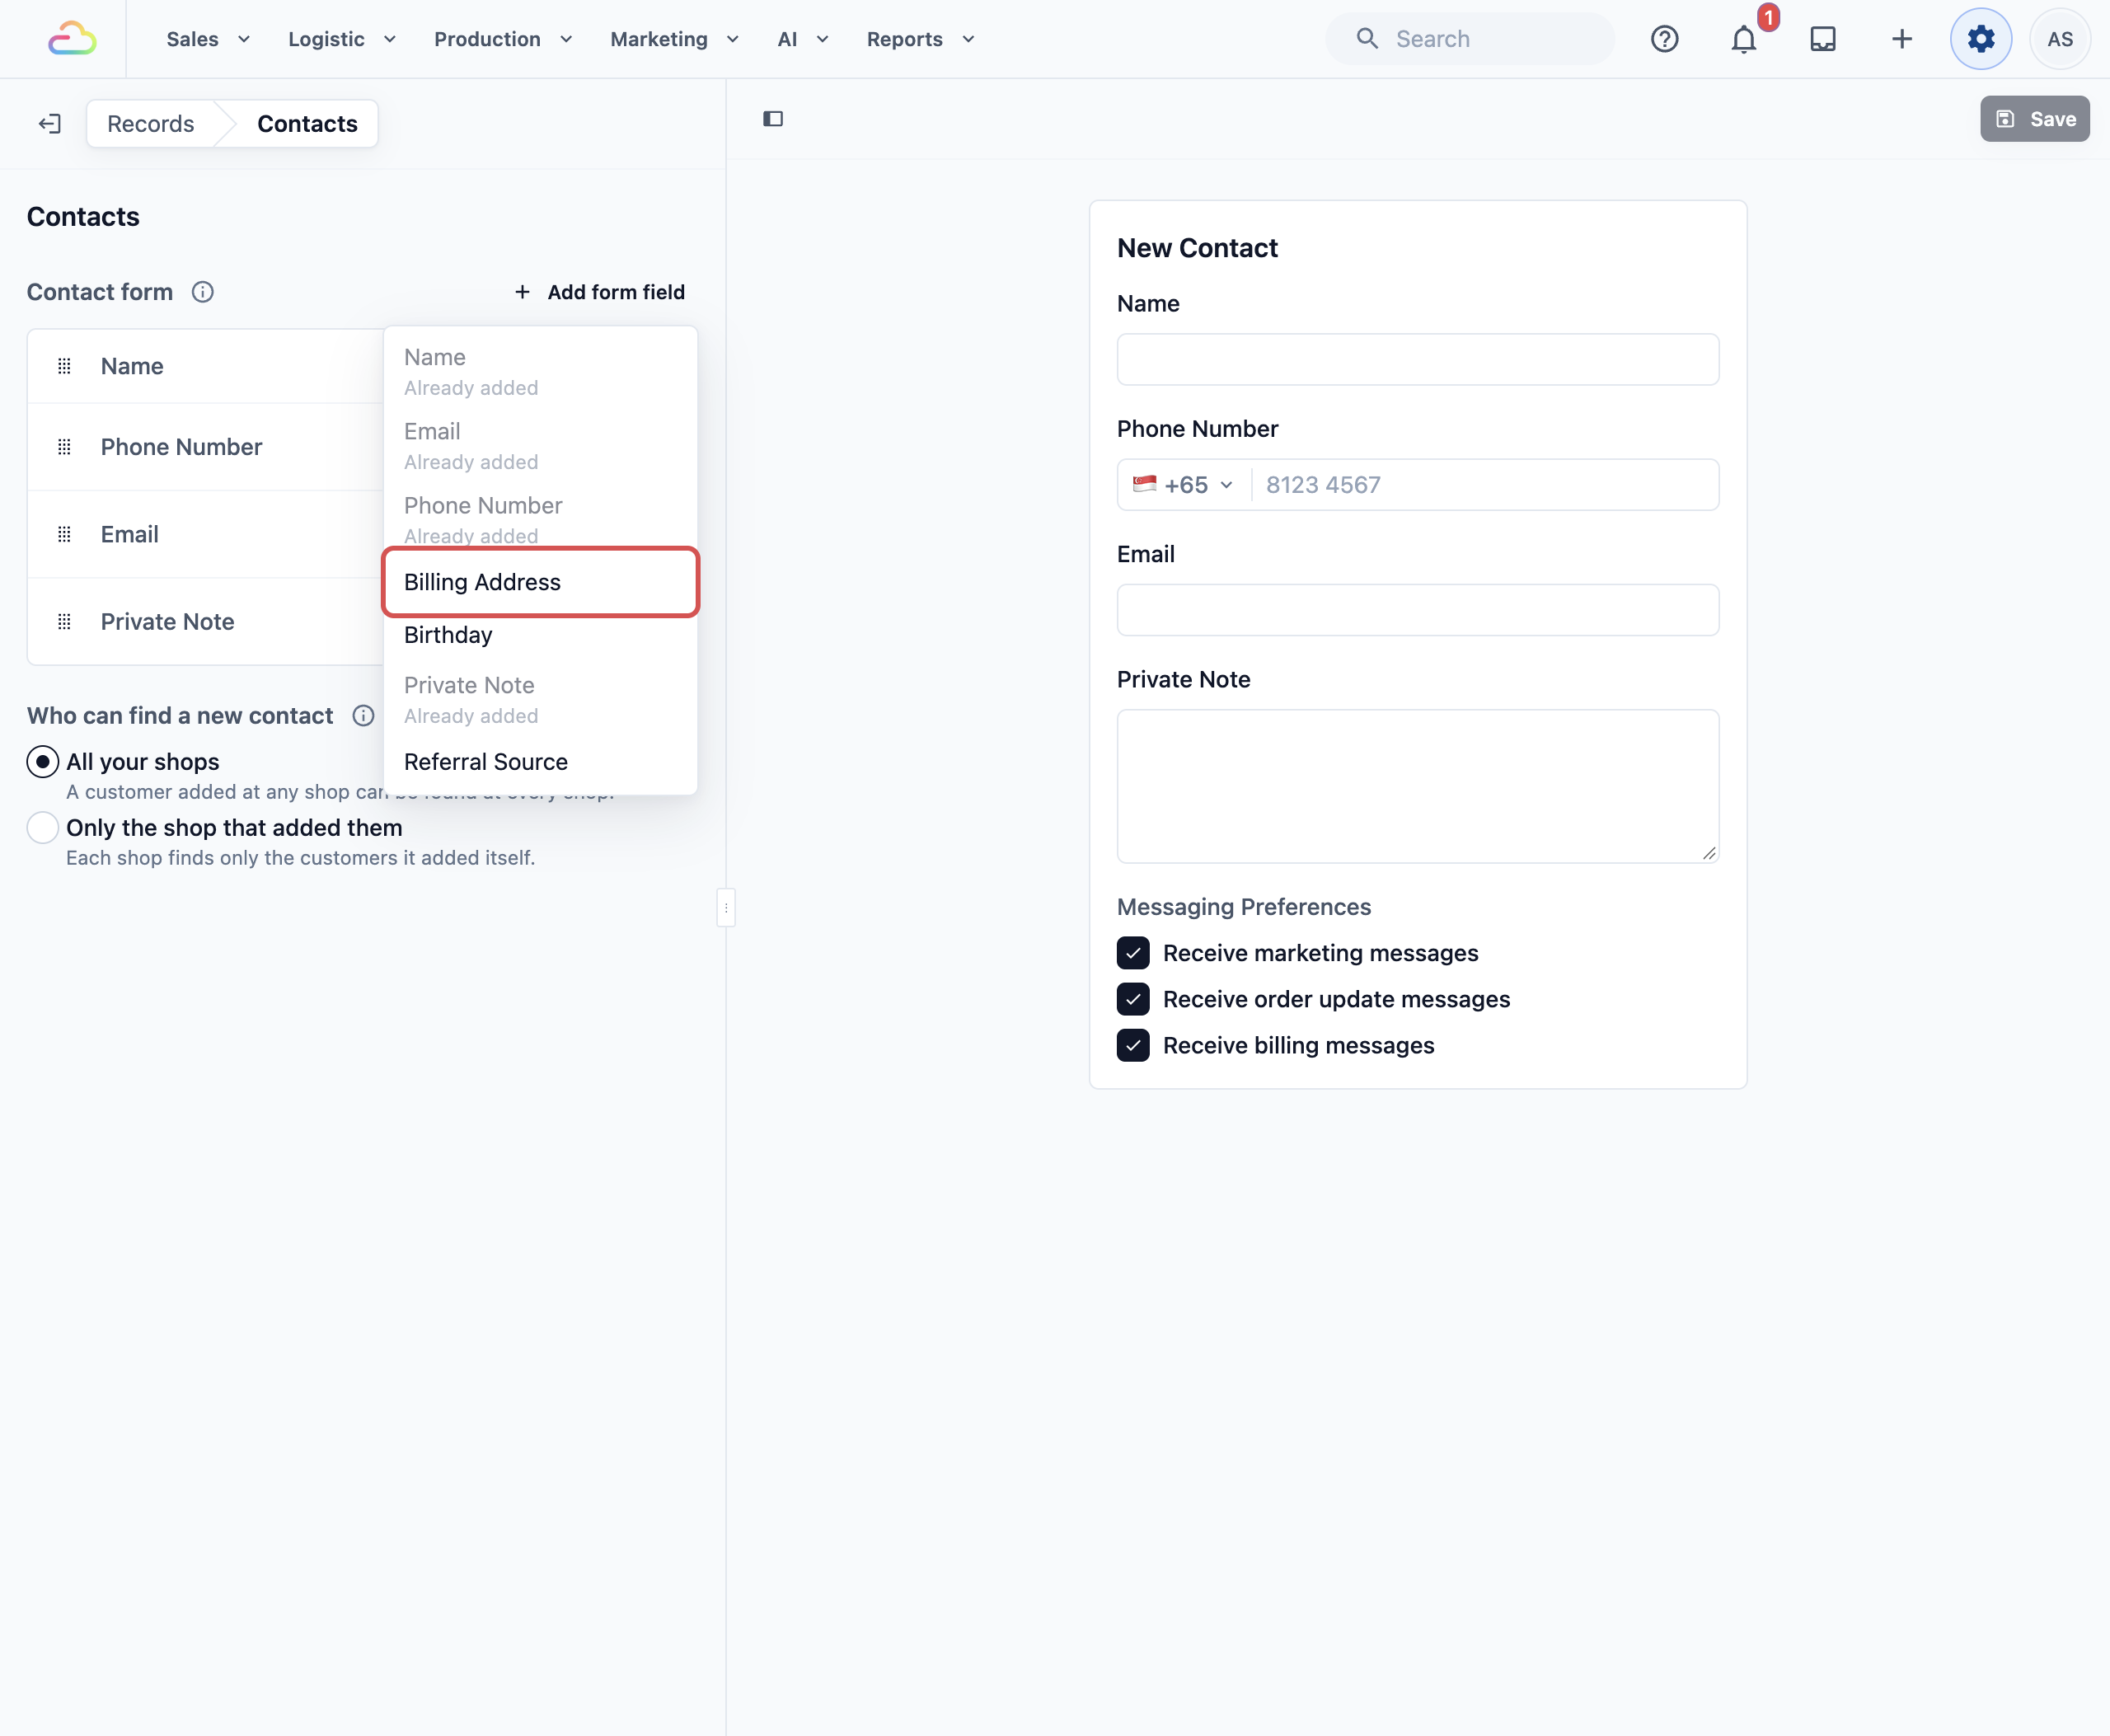
- Turn on its Required switch if staff must always fill it in.
- Click Save.
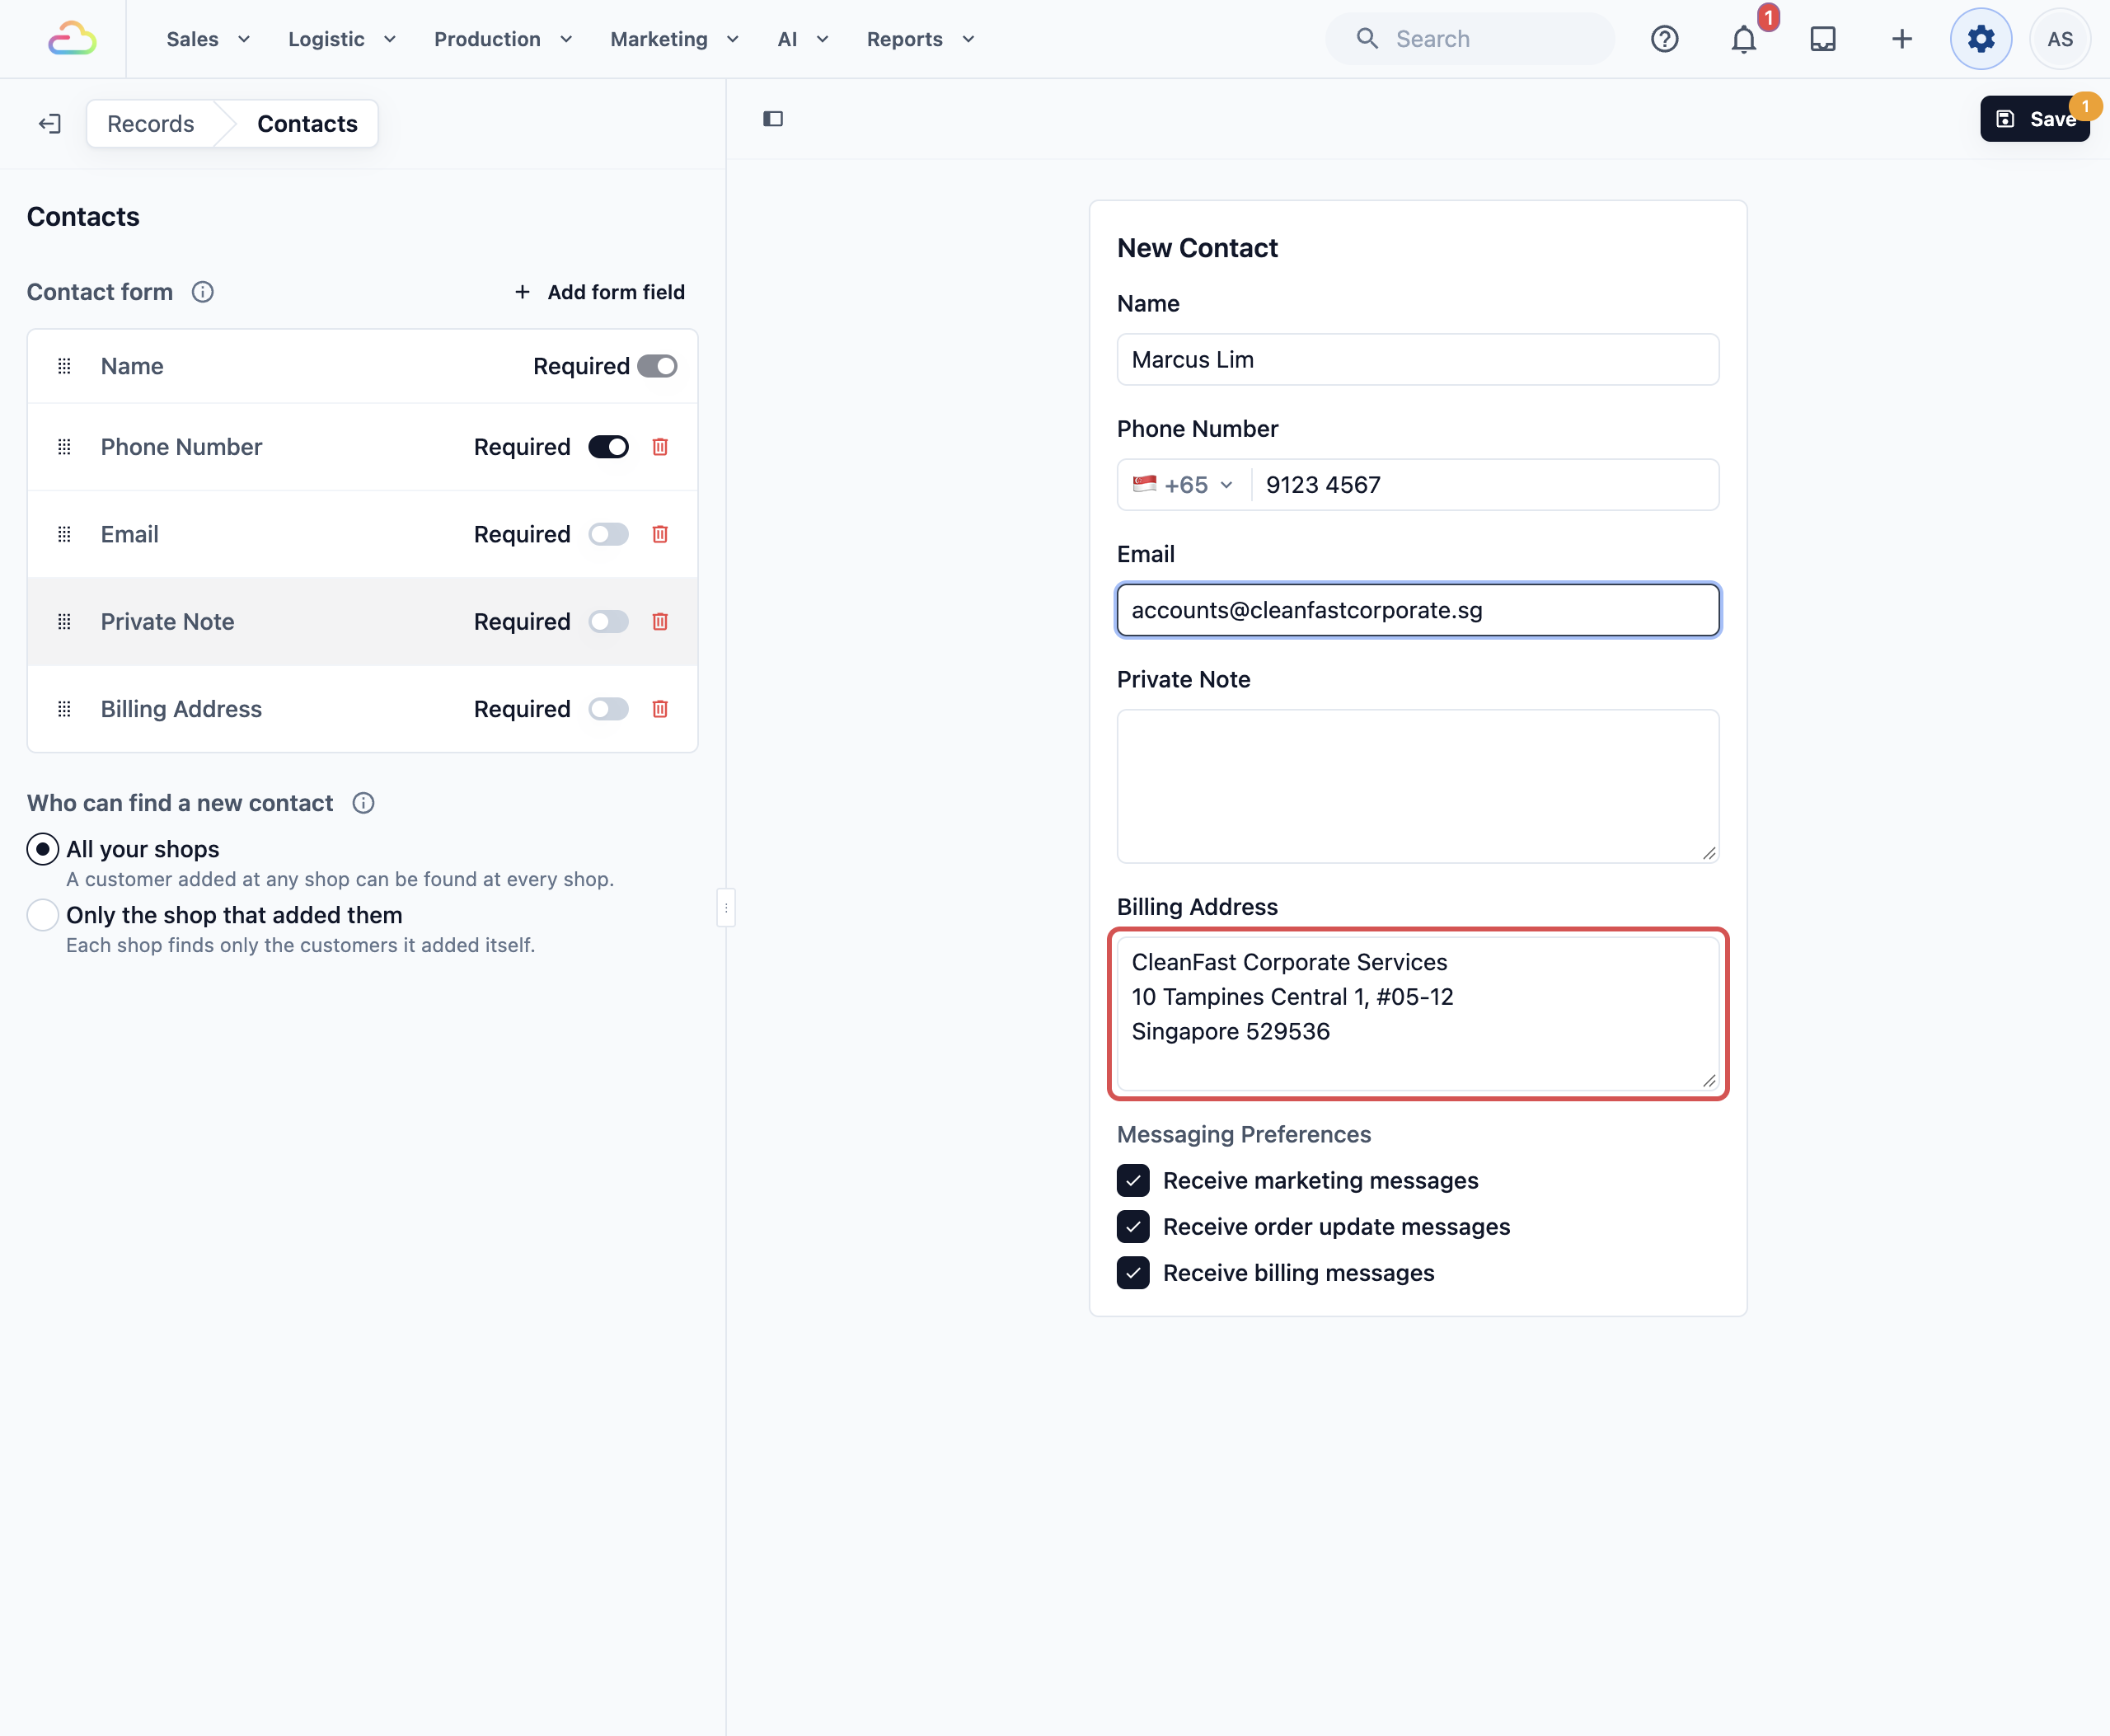
Billing Address
Use this only if some customers ask for invoices addressed to their company or to an address that isn't where you collect or deliver.
- Staff type the billing address in a box that takes several lines, for example the company name, street and postal code.
- The order invoice and the monthly invoice print it under Bill to.
- If a customer has no billing address, the invoice prints their delivery address under Bill to, as before.
- The billing address shows on the customer's contact page, with its line breaks, so staff can check it.
- To stop printing it, staff edit the contact and clear the box. The next invoice prints the delivery address again.
Leave Required off unless every customer you serve needs a billing address. Most walk-in customers don't, and staff would have to type one before they can save.
Removing and reordering details
- To remove a detail, click the bin icon on its row. It leaves the form, but details already saved on your customers stay on their contacts.
- To change the order, drag a row up or down. Staff see the details in this order on the form.
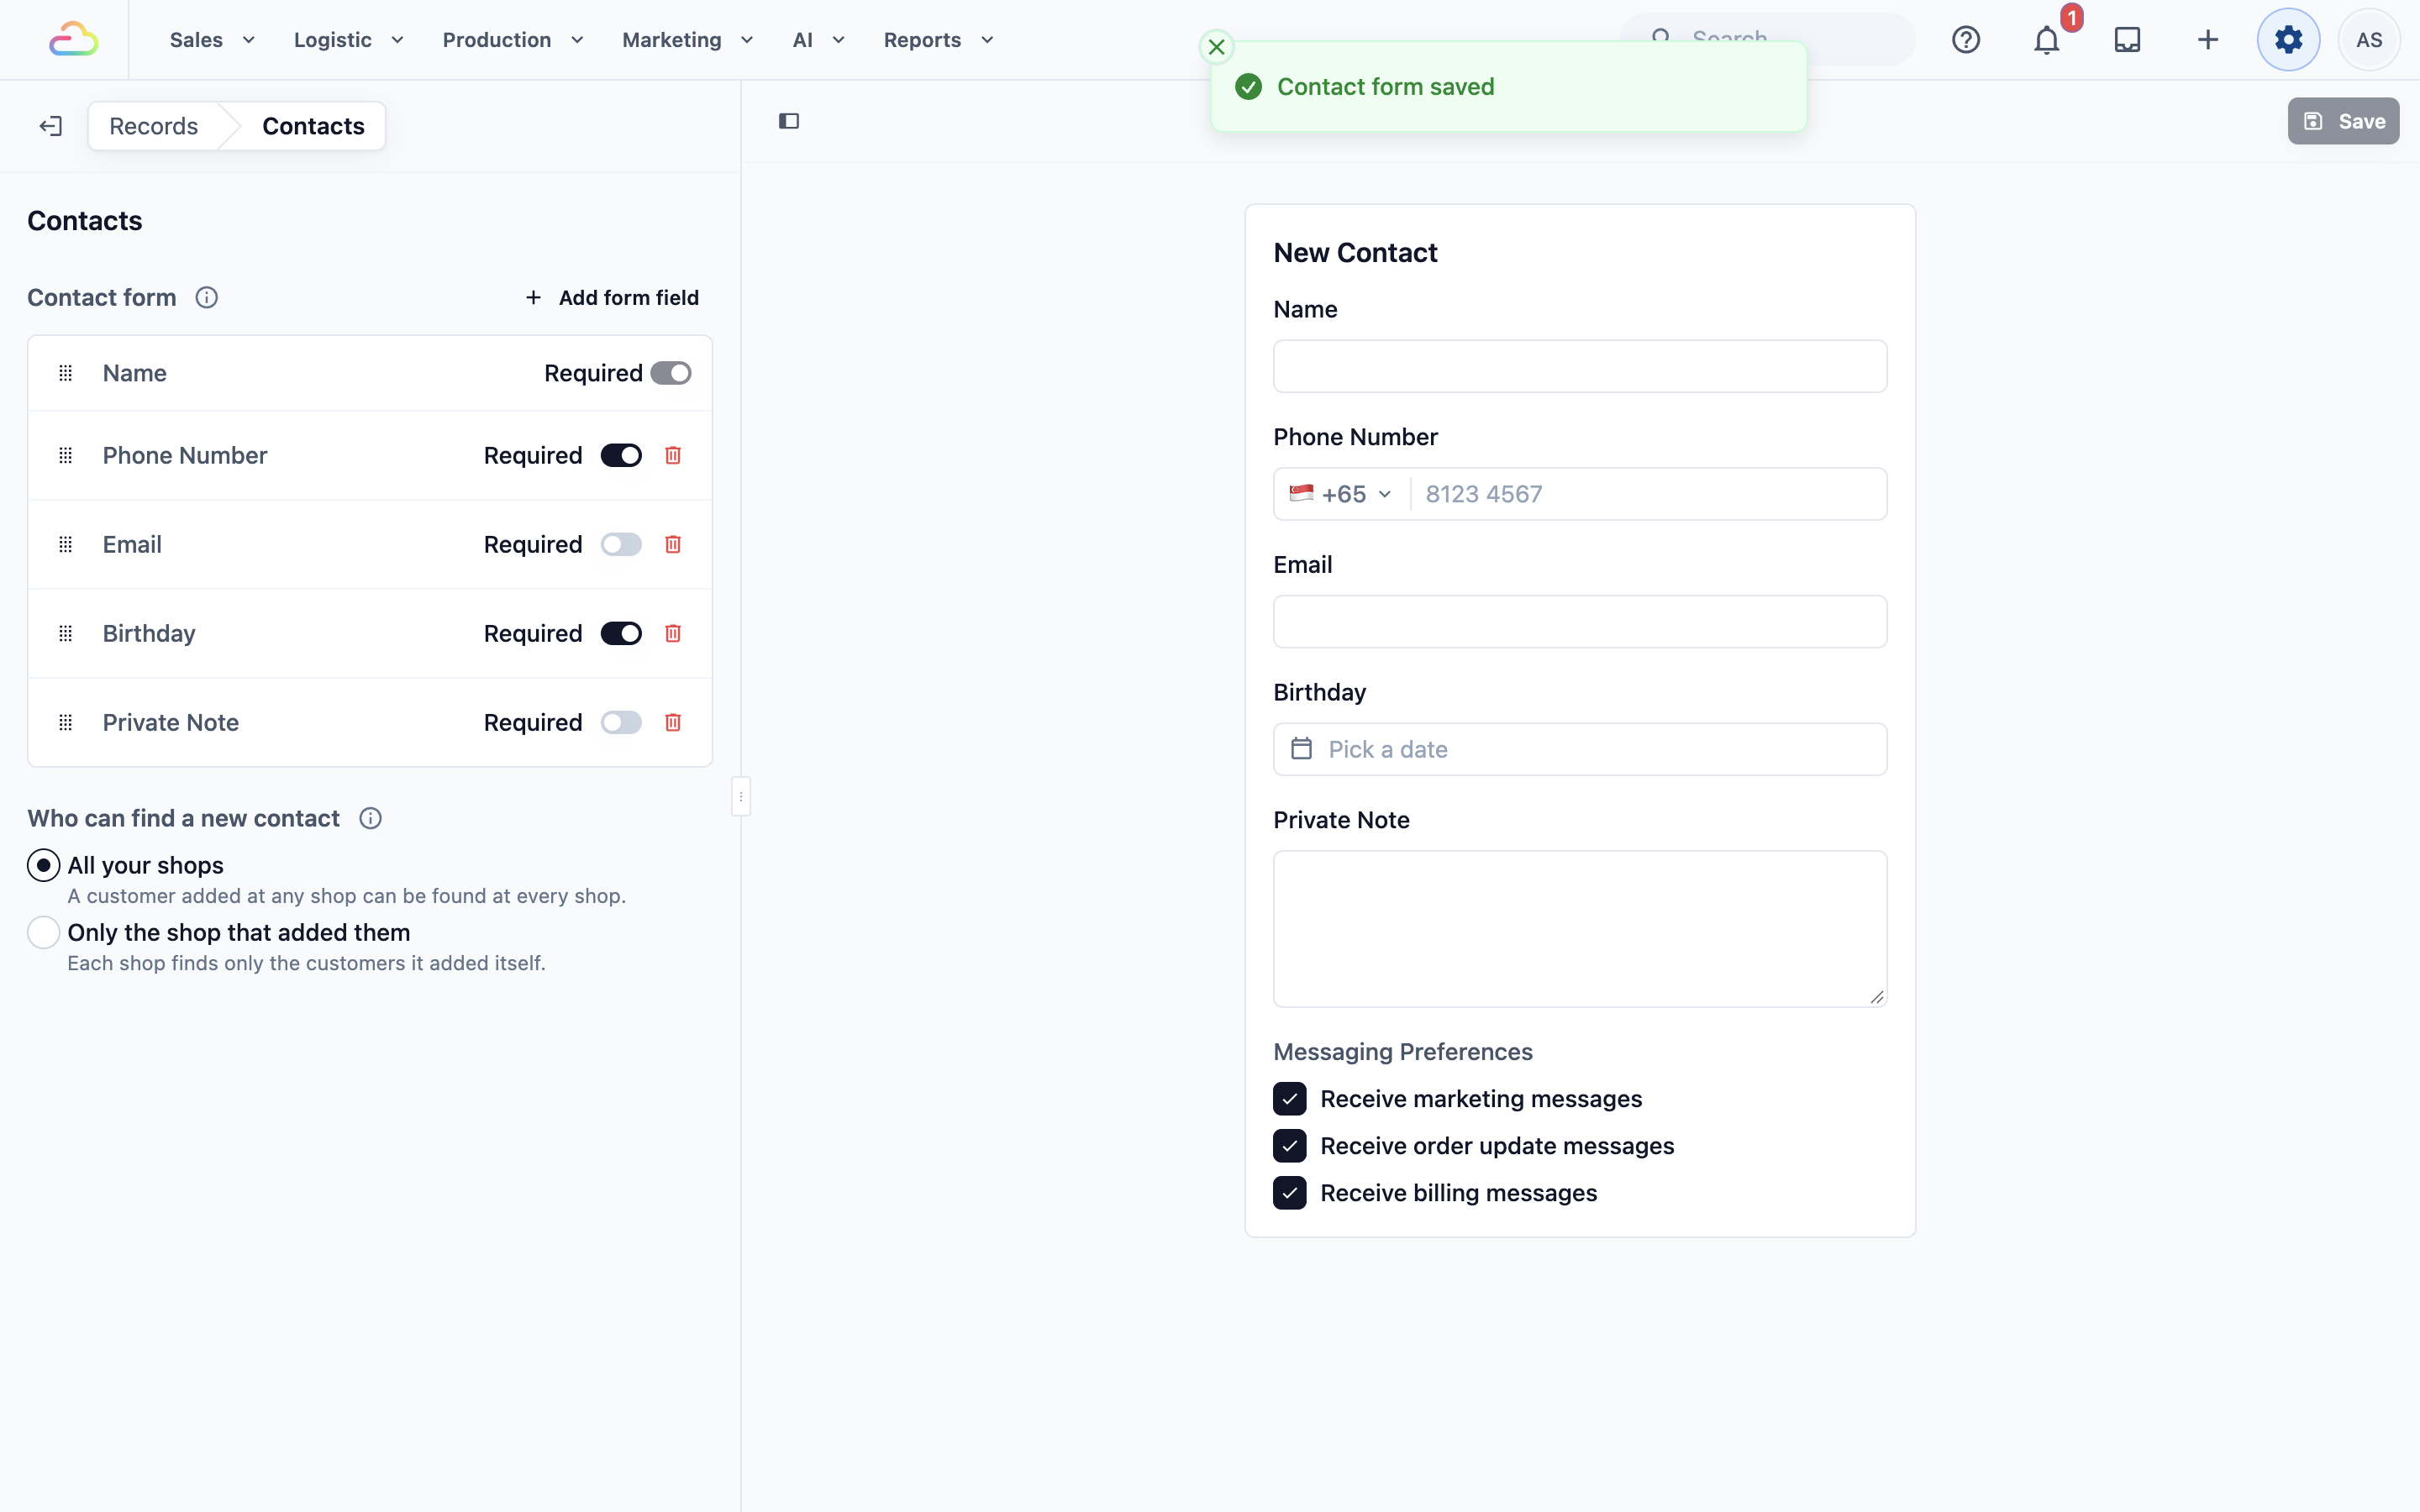
Nothing changes for your staff until you click Save. When you do, you see "Contact form saved", and the Console, every POS and the staff app use the new form from the next customer onwards. You don't need to publish your POS app again.
Who can find a new contact
For Advanced setups only. If you have one shop, or your shops share customers, leave this as it is.
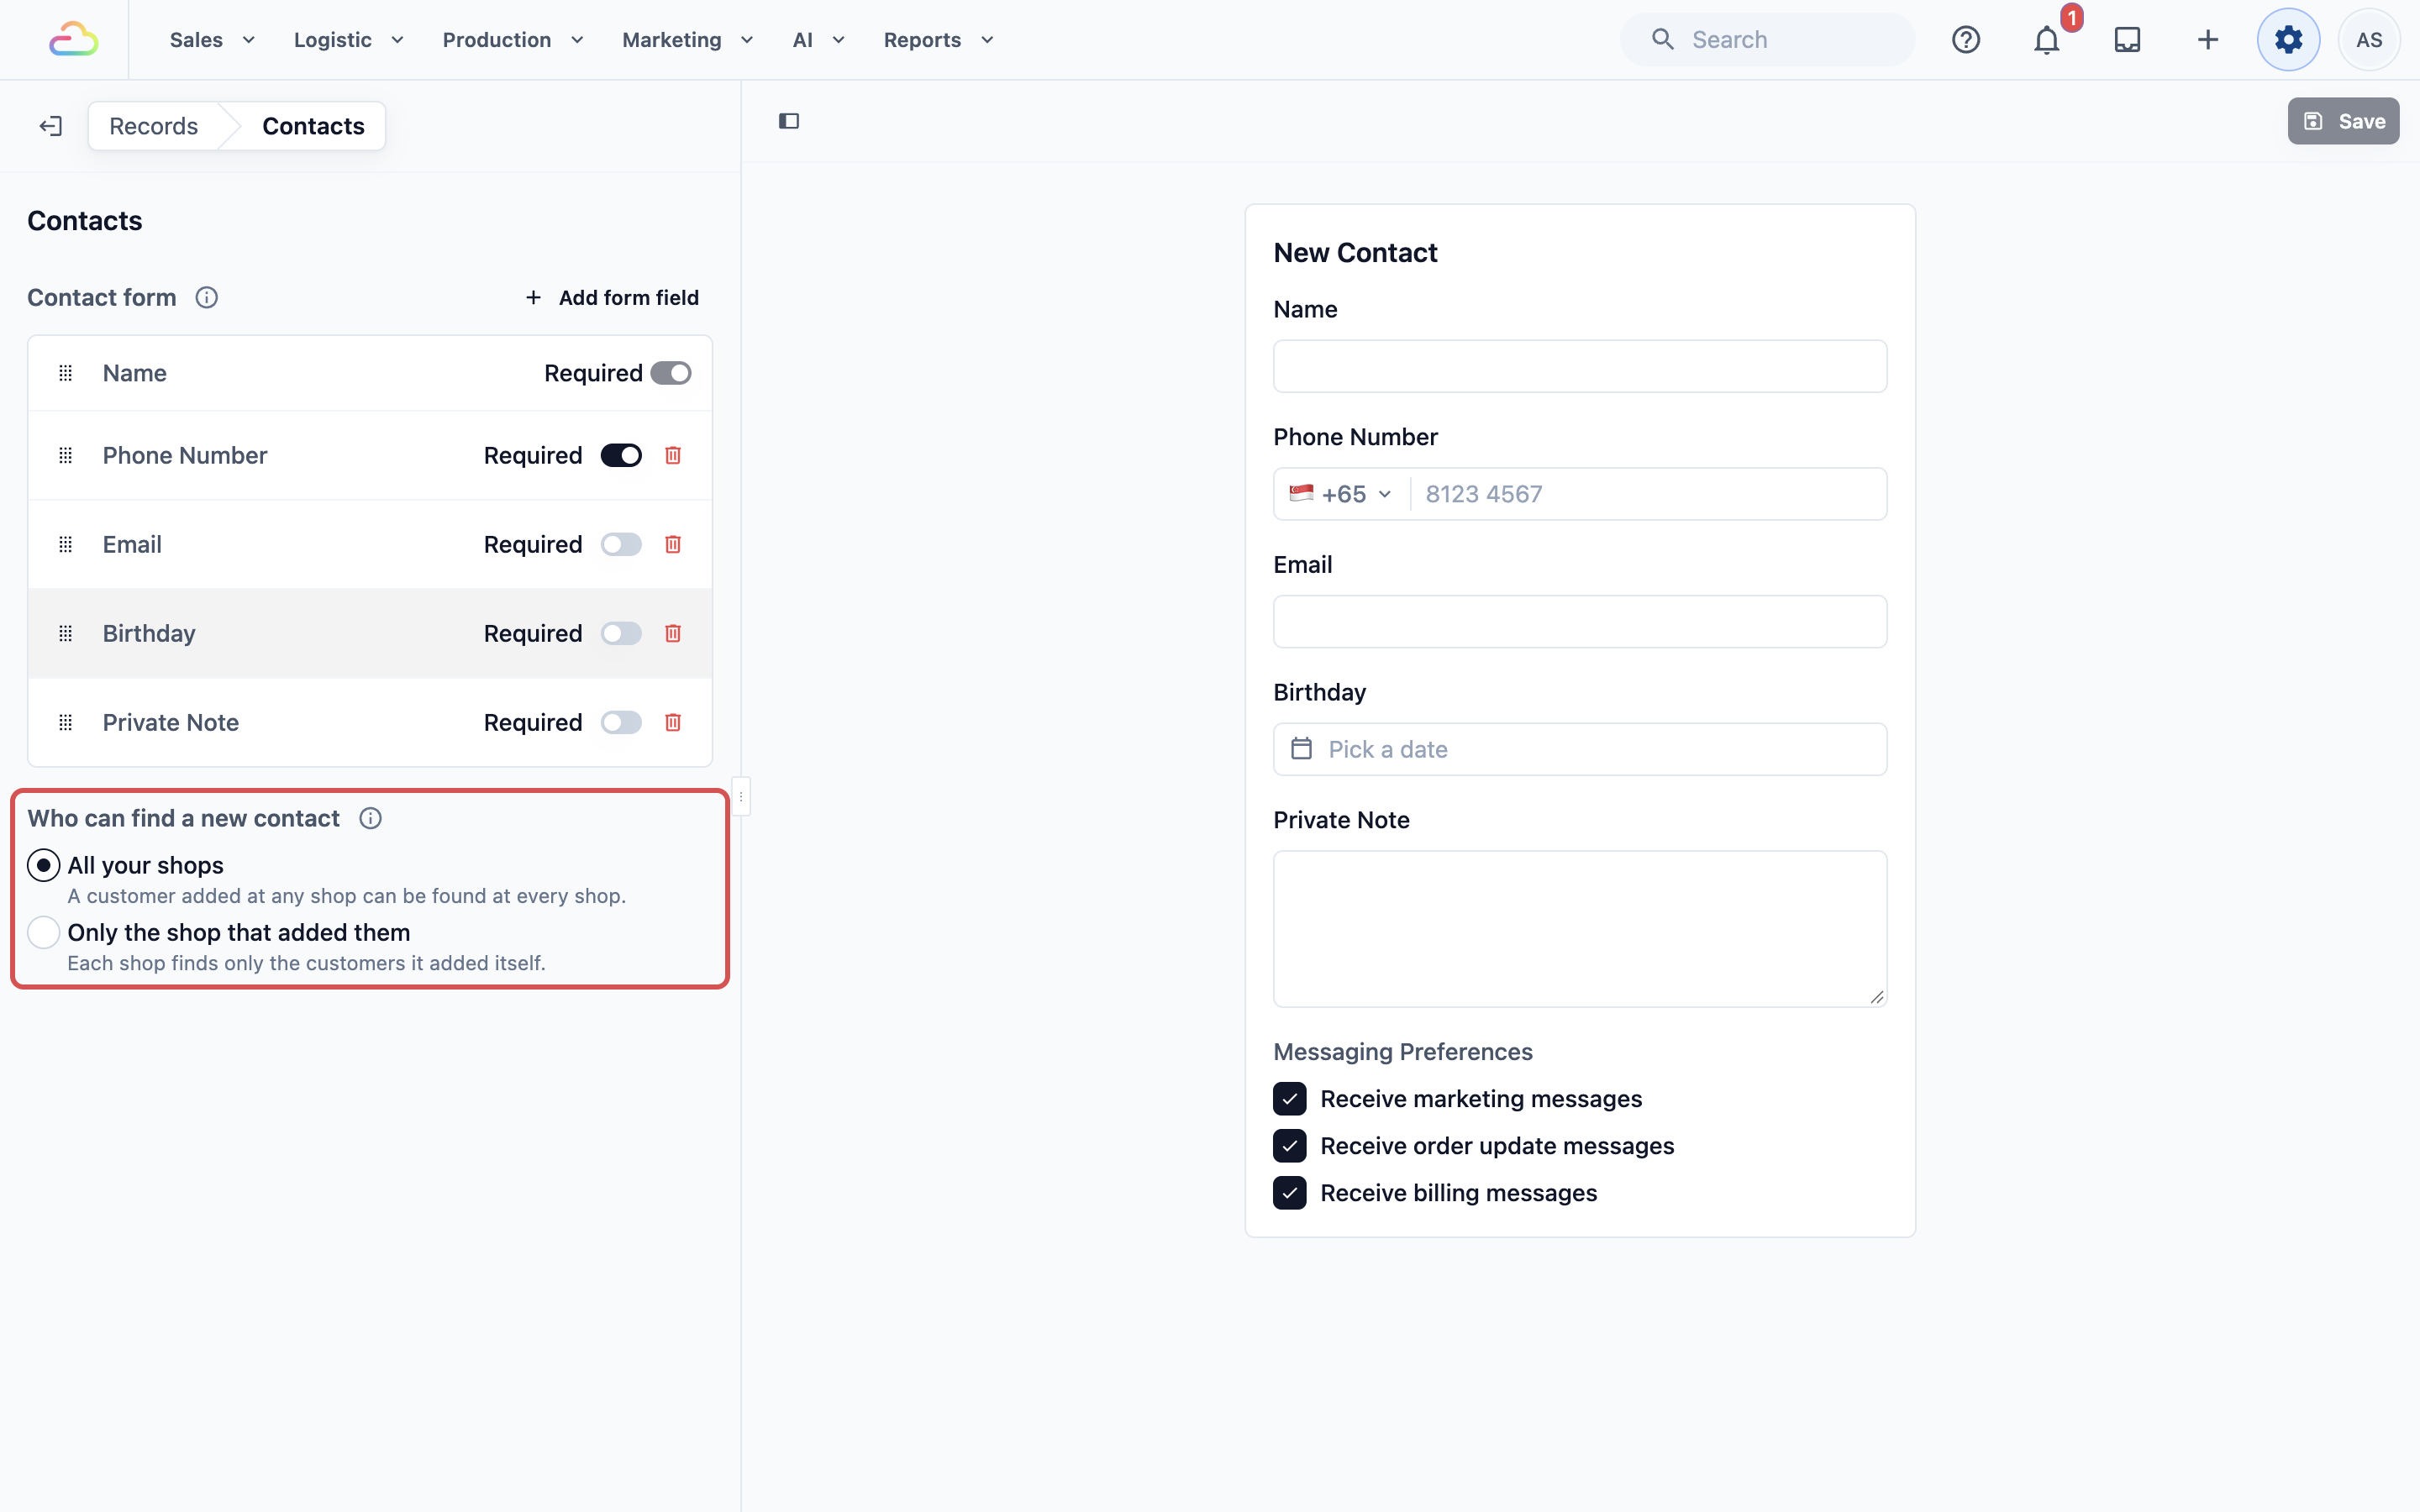
This decides whether a customer added at one shop can be found when staff at your other shops search at the POS.
Who can find a new contact
| Option | What it means |
|---|---|
| All your shops (ready-made choice) | A customer added at any shop can be found at every shop. If staff add a phone number that's already saved, the details go onto that customer instead of making a second one. |
| Only the shop that added them | Each shop's POS finds only the customers that shop added itself. Your other shops can't find them when they search. |
This only changes what staff find on the POS and on a paired customer display. In the Console, the Contacts page still lists every customer from every shop.
Example setup
CleanFast Laundry has POS shops in Tampines and Jurong, and sends a WhatsApp message when each order is ready. It sets up the contact form like this:
- Phone Number: Required on, so every customer gets the "ready for collection" message.
- Email: Required off, for customers who want their receipt by email.
- Birthday: added below Email, Required off, for its birthday-month discount.
- Private Note: kept, for notes such as "Prefers folded, not hung".
- Billing Address: added, Required off, for the corporate customers its office team invoices every month.
- Who can find a new contact: All your shops.
Mrs Tan registers at Tampines on Monday. On Friday she collects at Jurong, and the Jurong staff find her by the last 4 digits of her phone number. When the office team adds a corporate customer from the Console, the same form asks for the phone number too. They type the company's billing address, and its invoices print that address under Bill to, while Mrs Tan's invoices keep showing her delivery address.
What staff see
On the POS
- At checkout, staff search for the customer in the contact search bar.
- If the customer is new, staff tap New Contact.
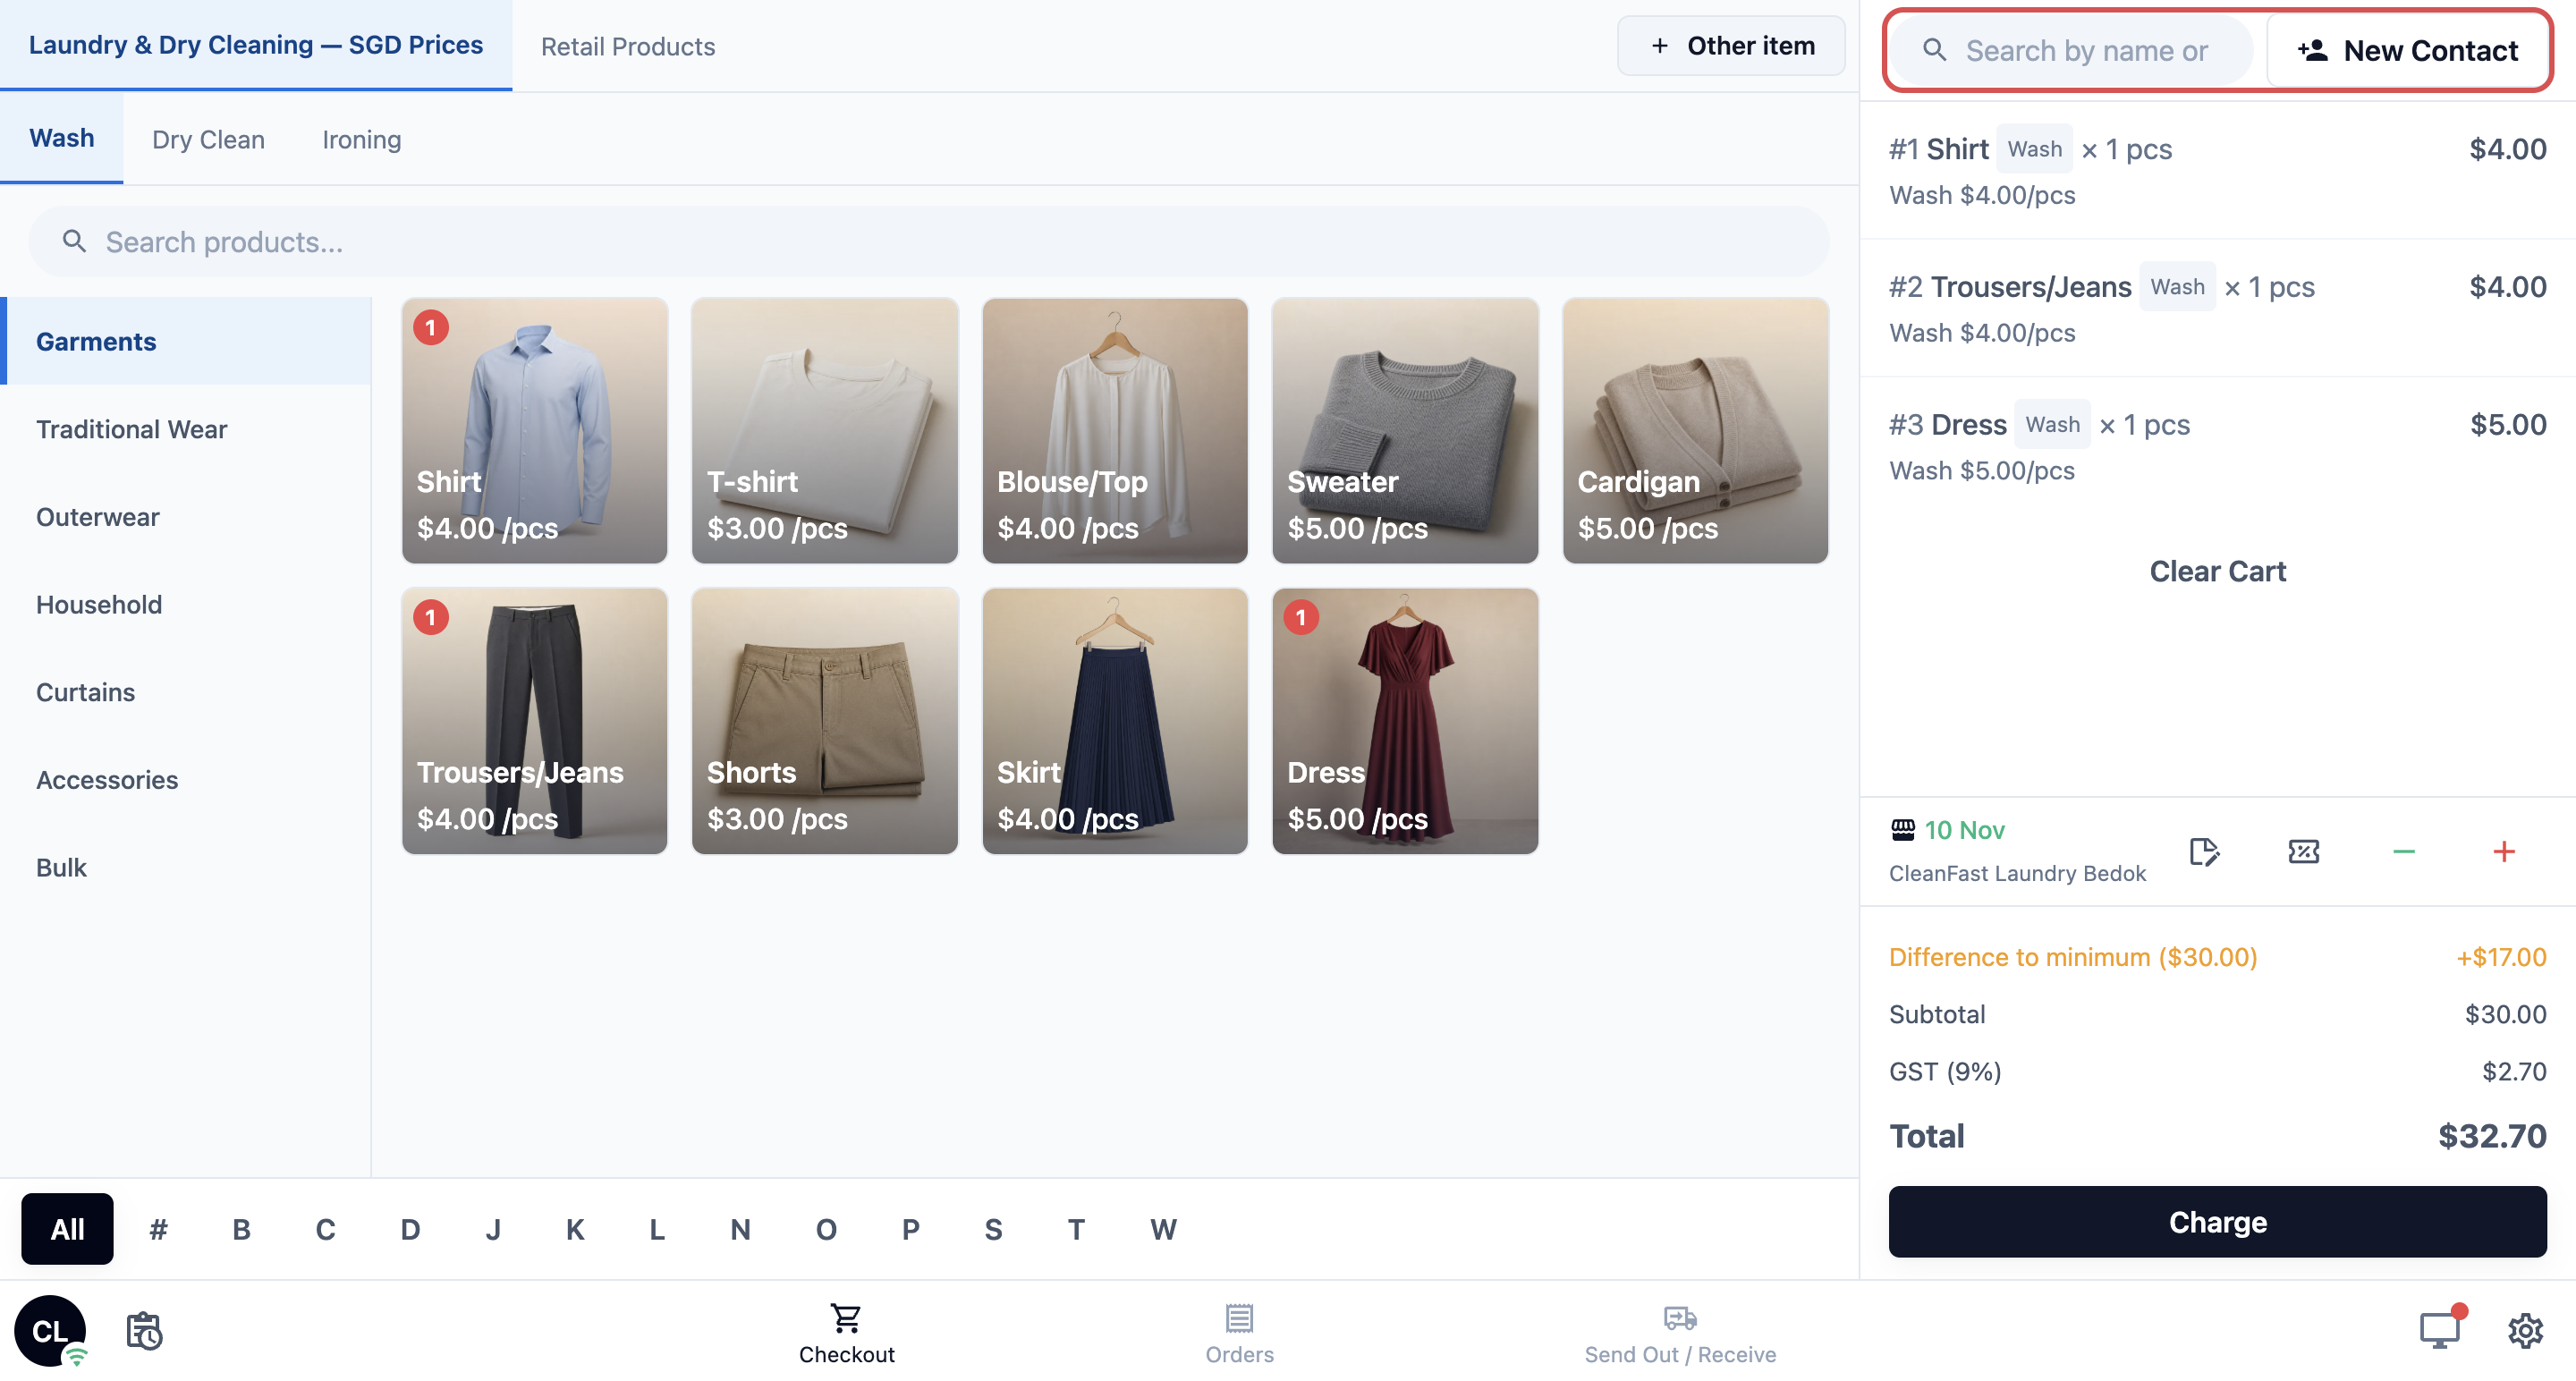
- The New Contact form shows the details from your contact form, in your order.
- Staff fill in the details and tap Save. Save stays greyed out until every required detail is filled in.
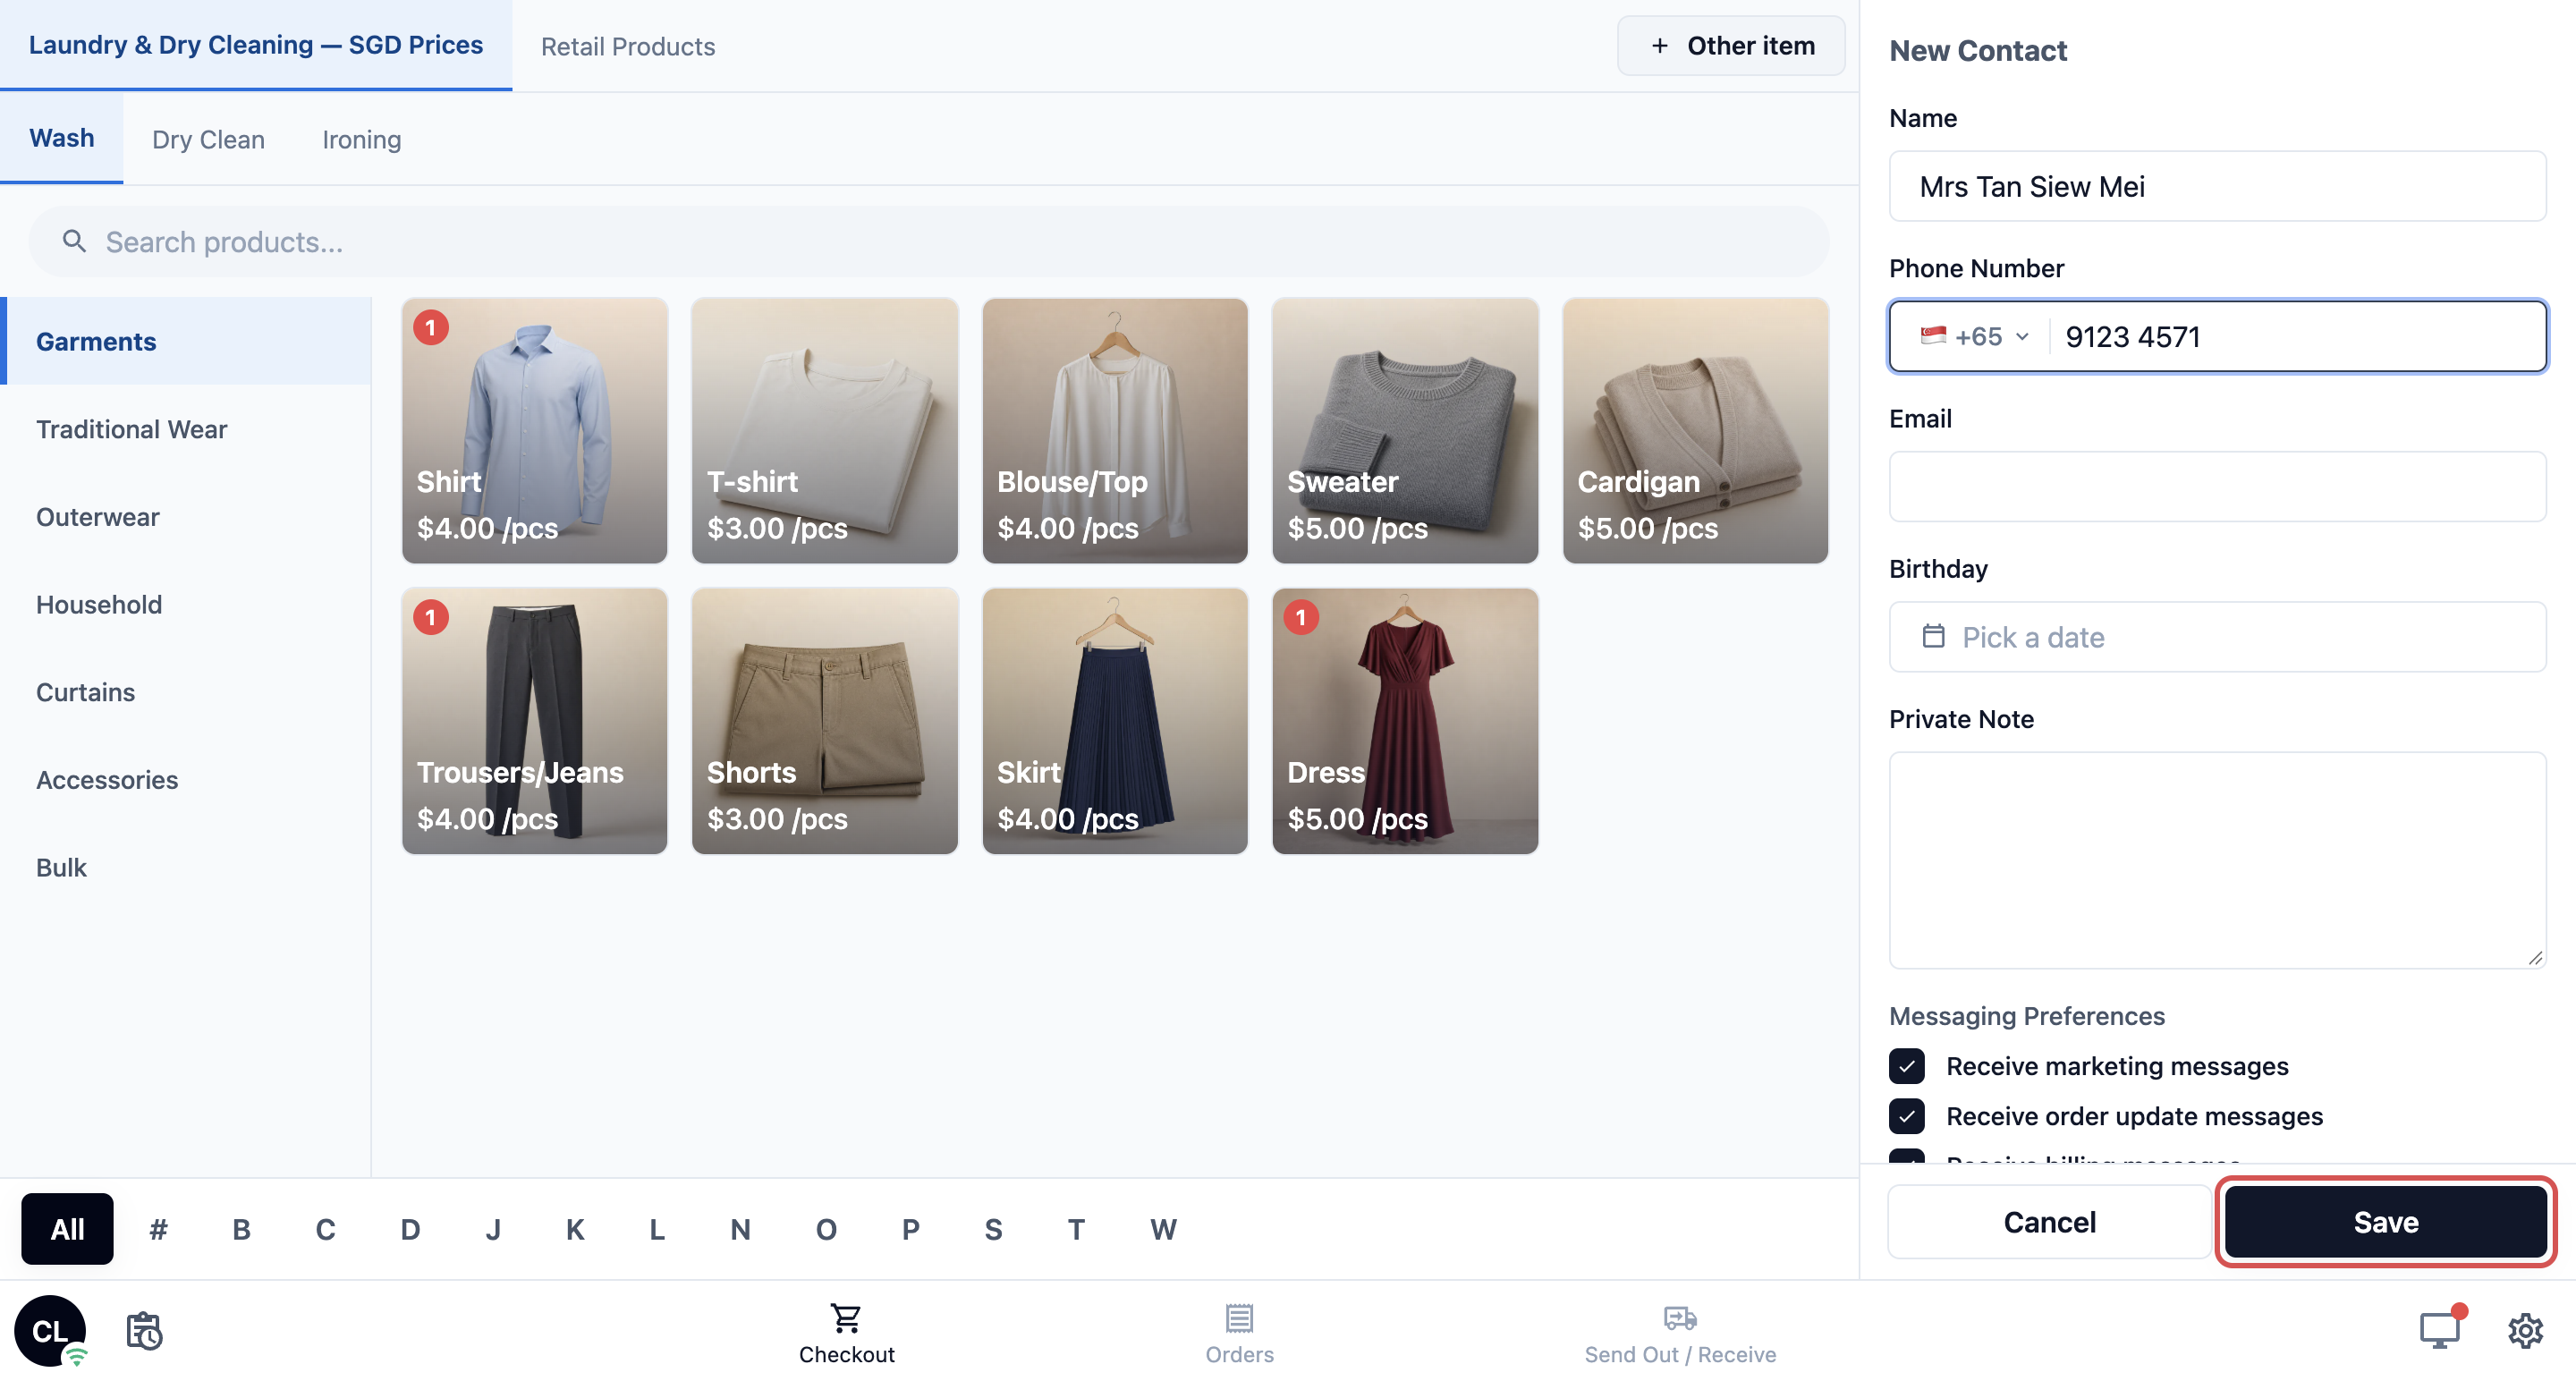
The POS shows "Account added", and the customer is picked for the order.
In the Console
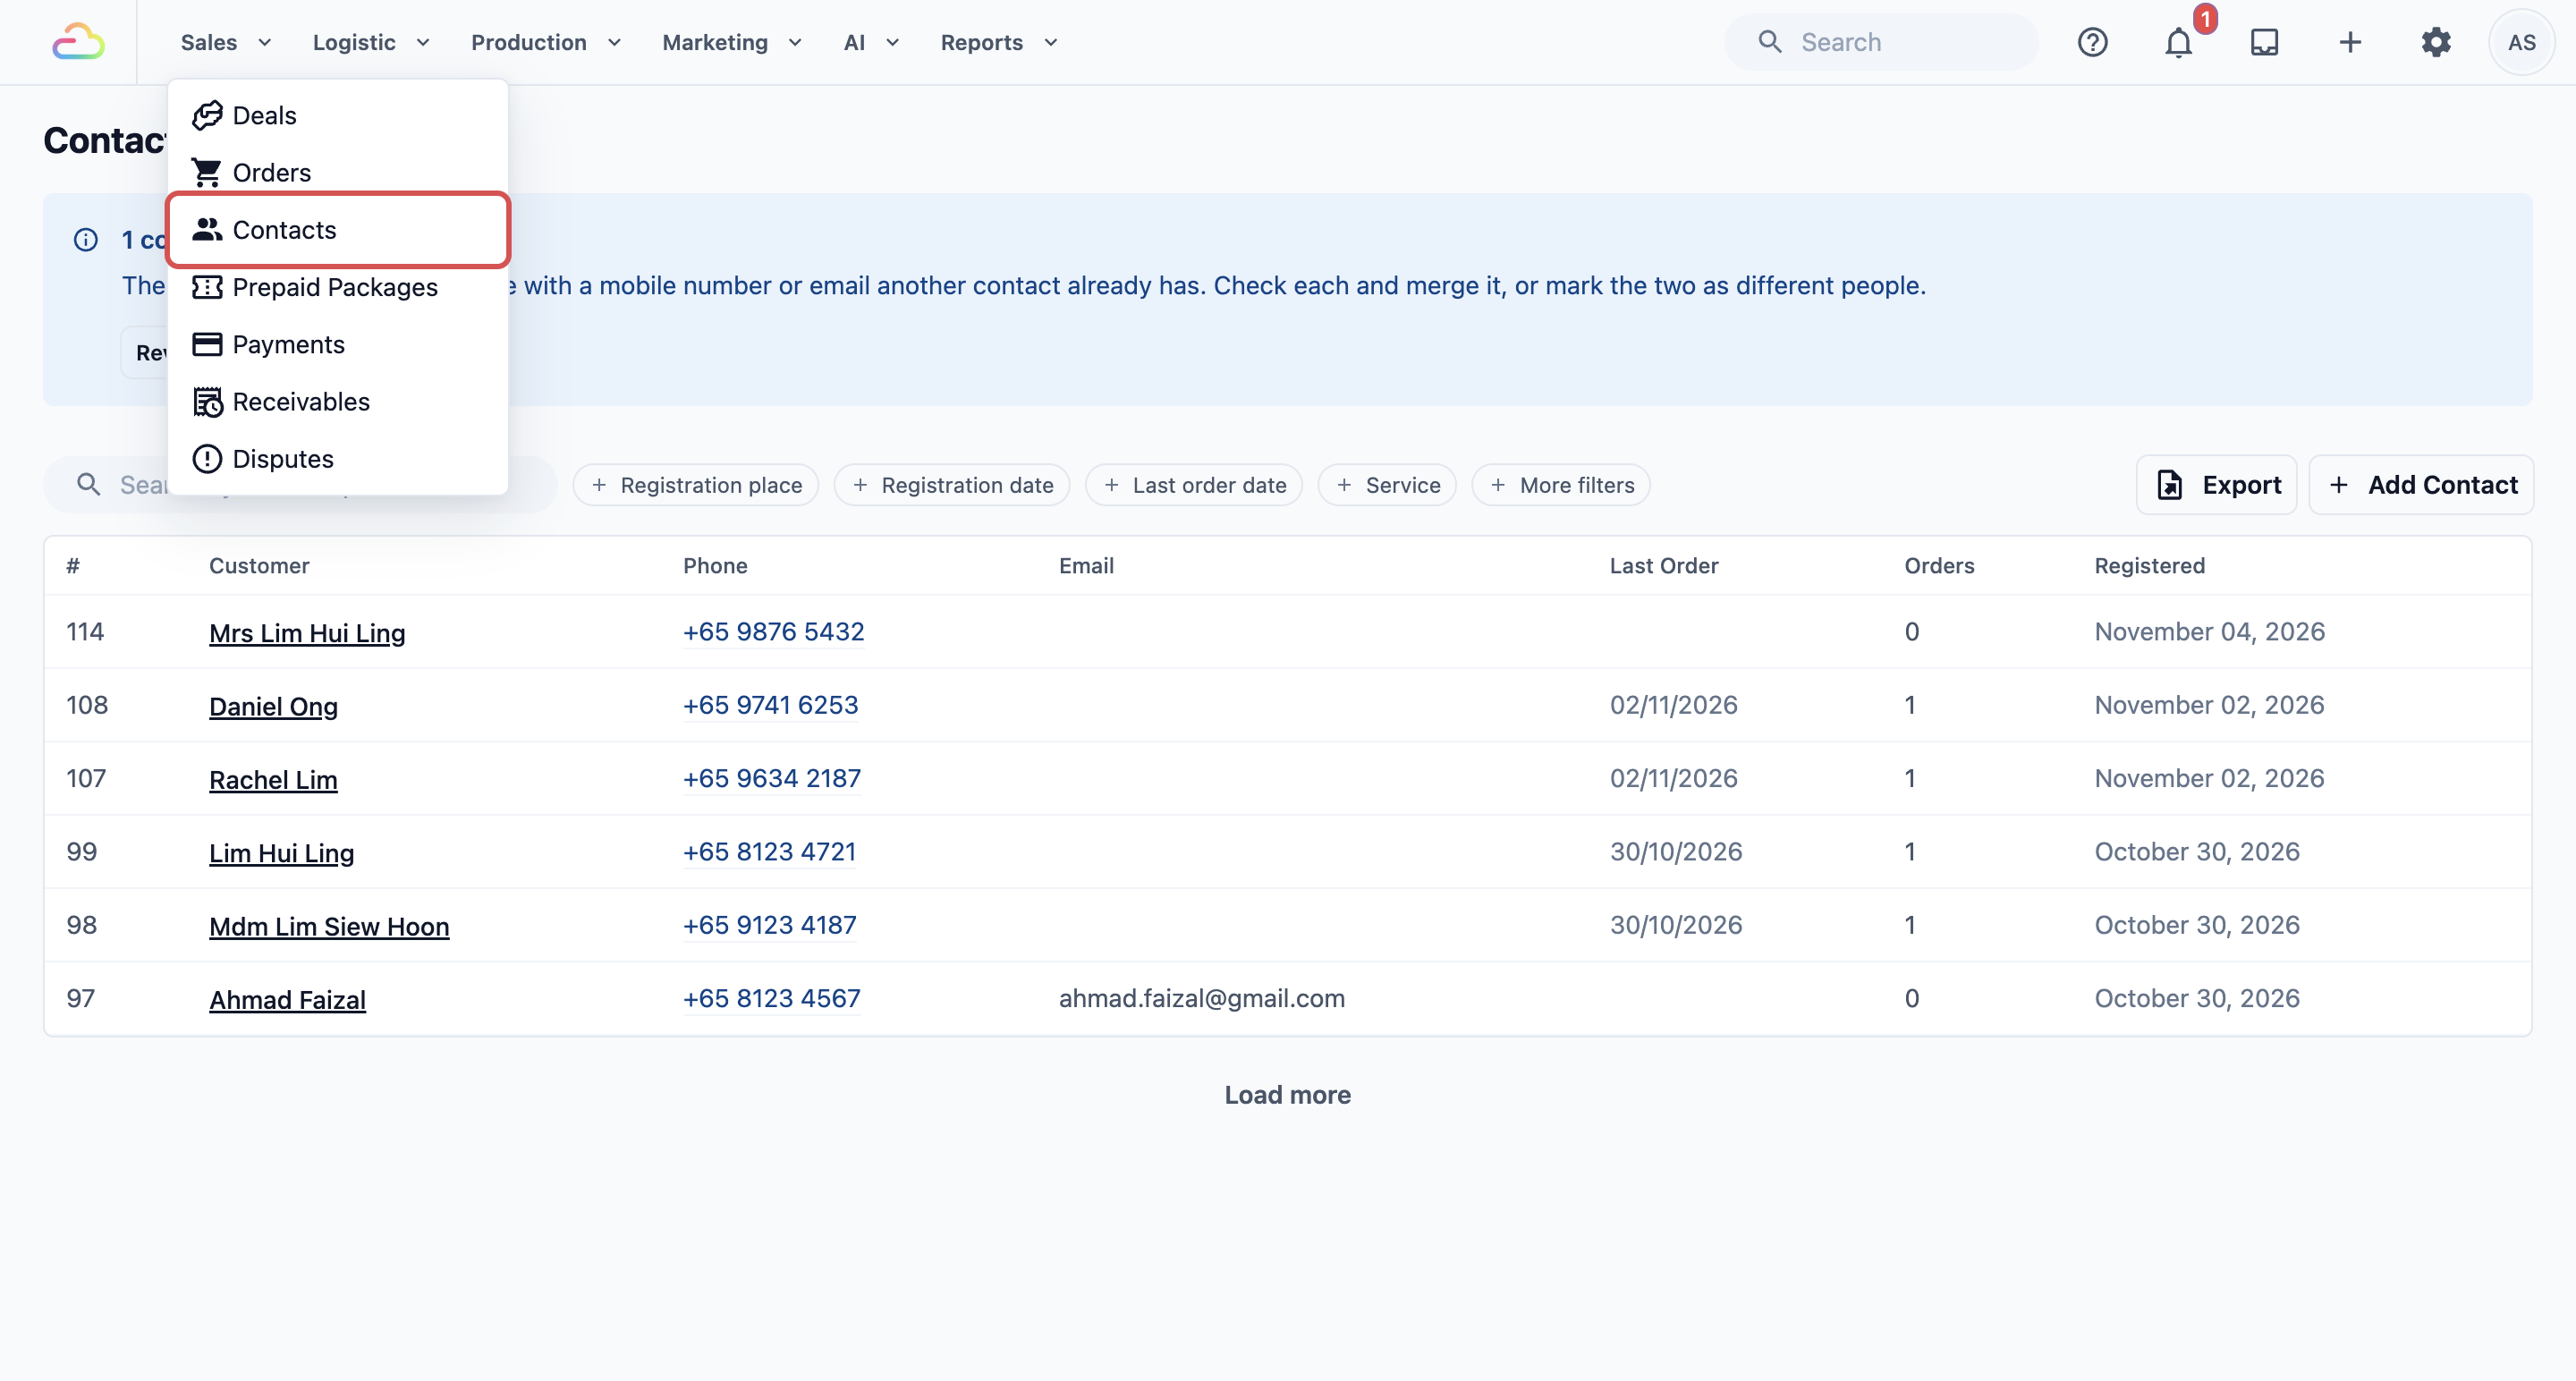
- In the header menu at the top of the Console, click Sales.
- In the dropdown, click Contacts.
- Click Add Contact.
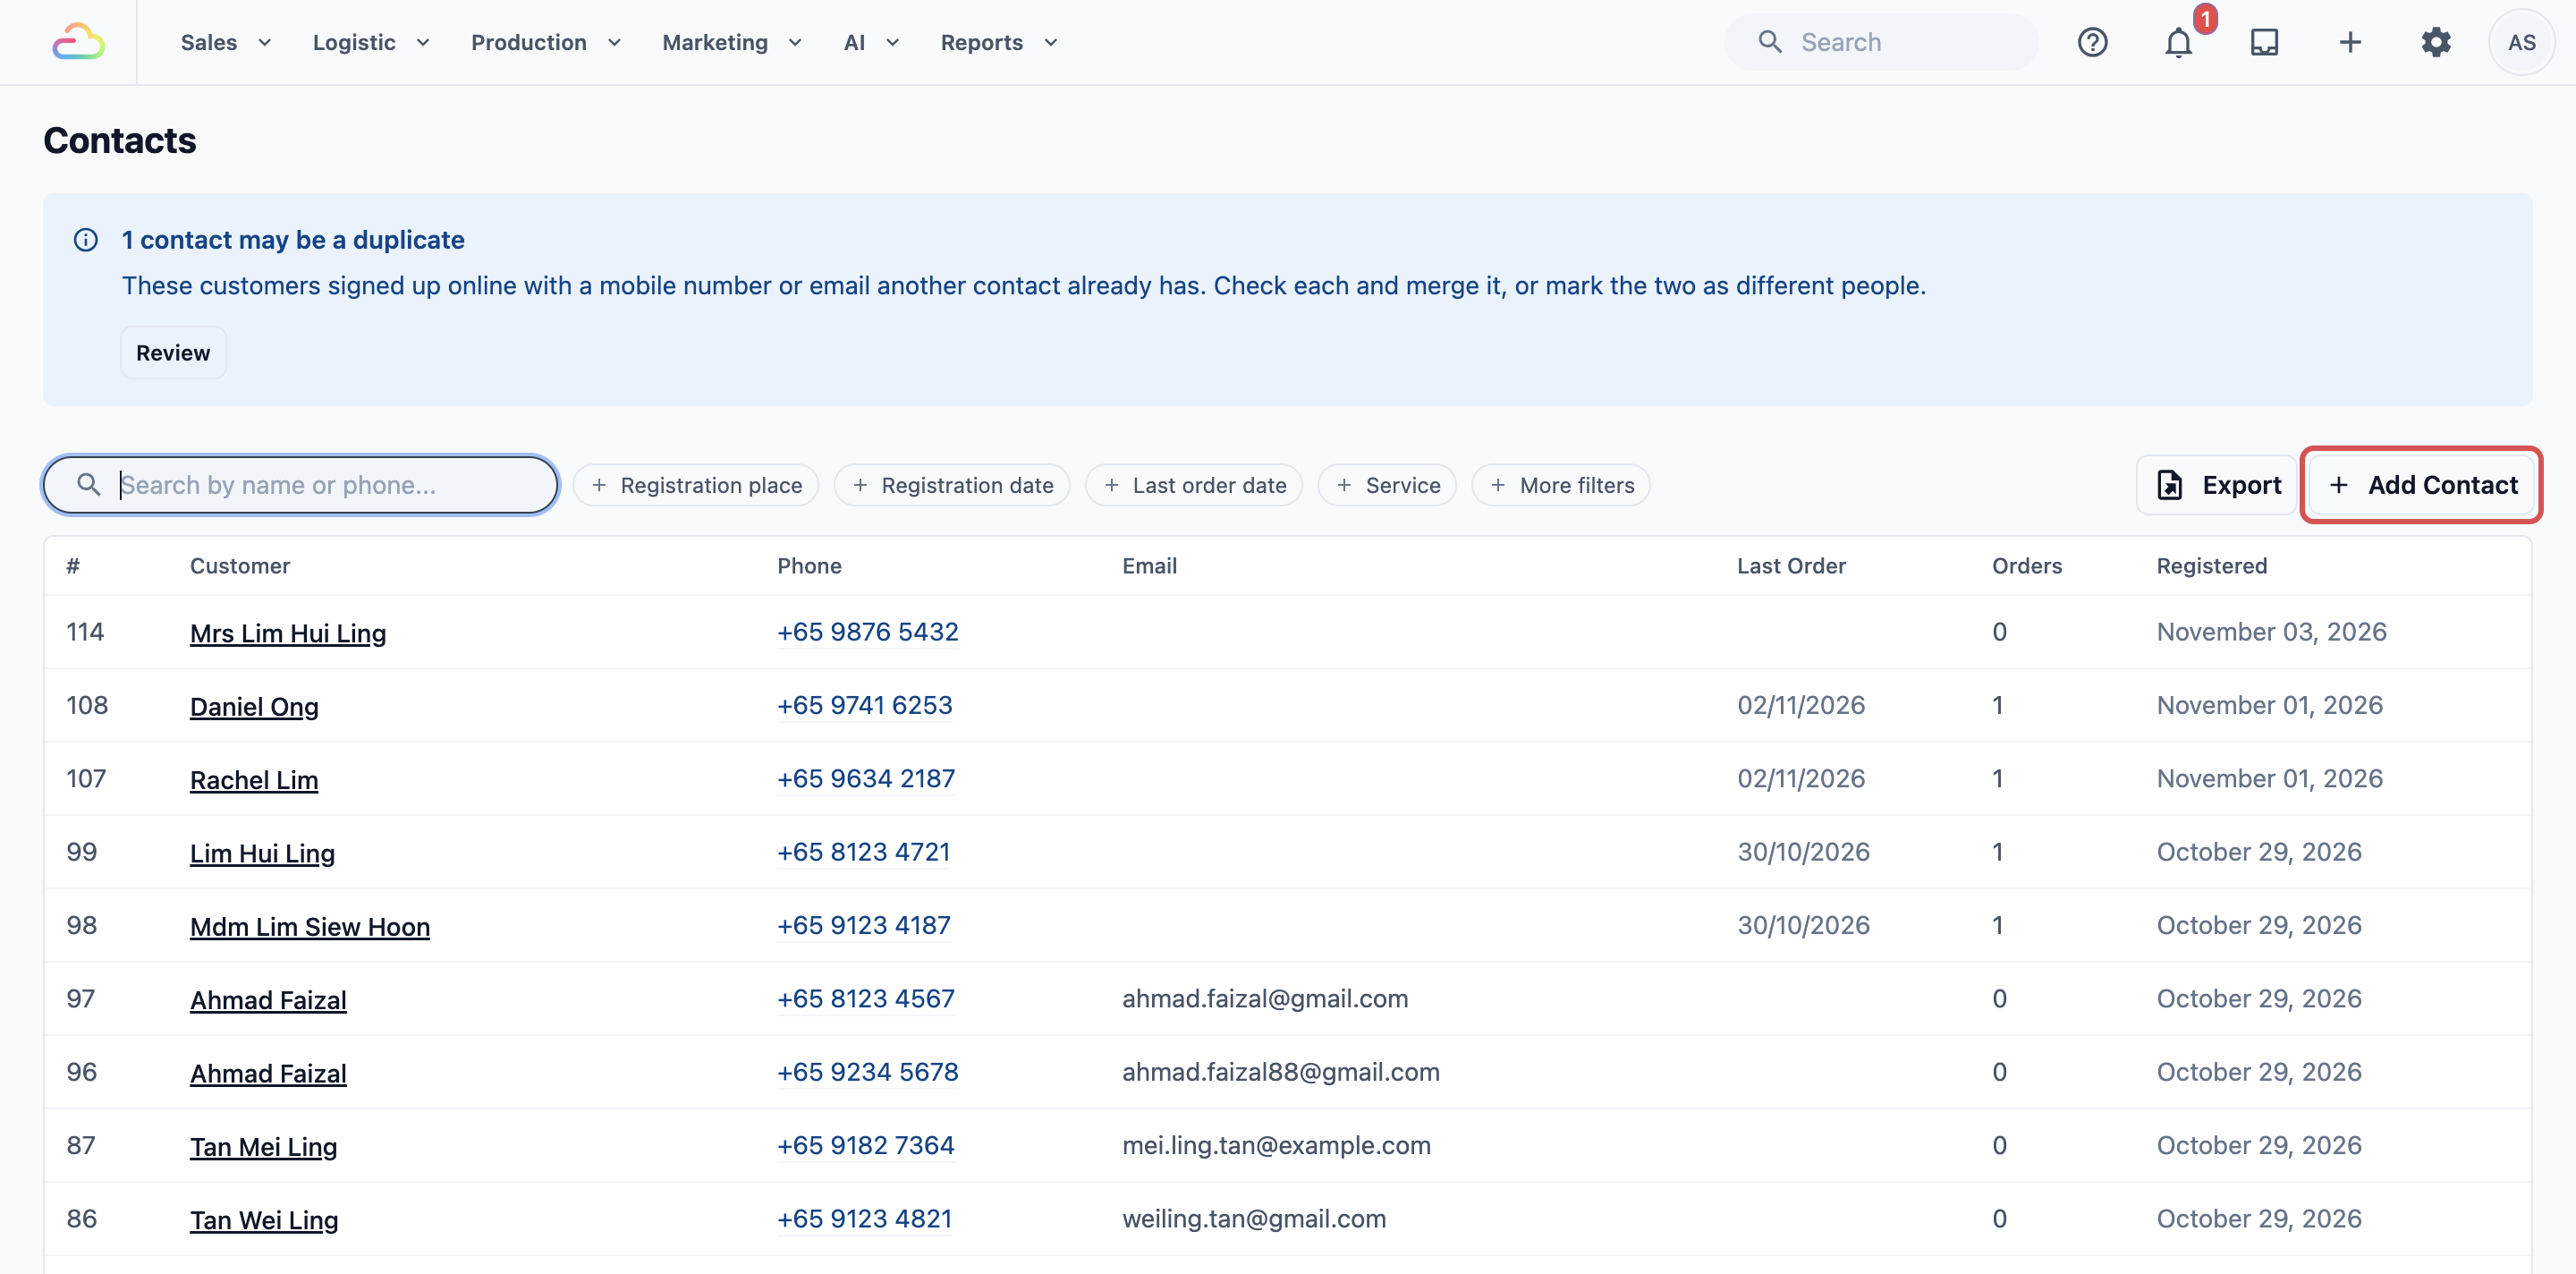
- The Add Account form shows the same details, in the same order, with the same required details.
- Fill in the details and click Add Account. The button stays greyed out until every required detail is filled in. The Console shows "Account added".
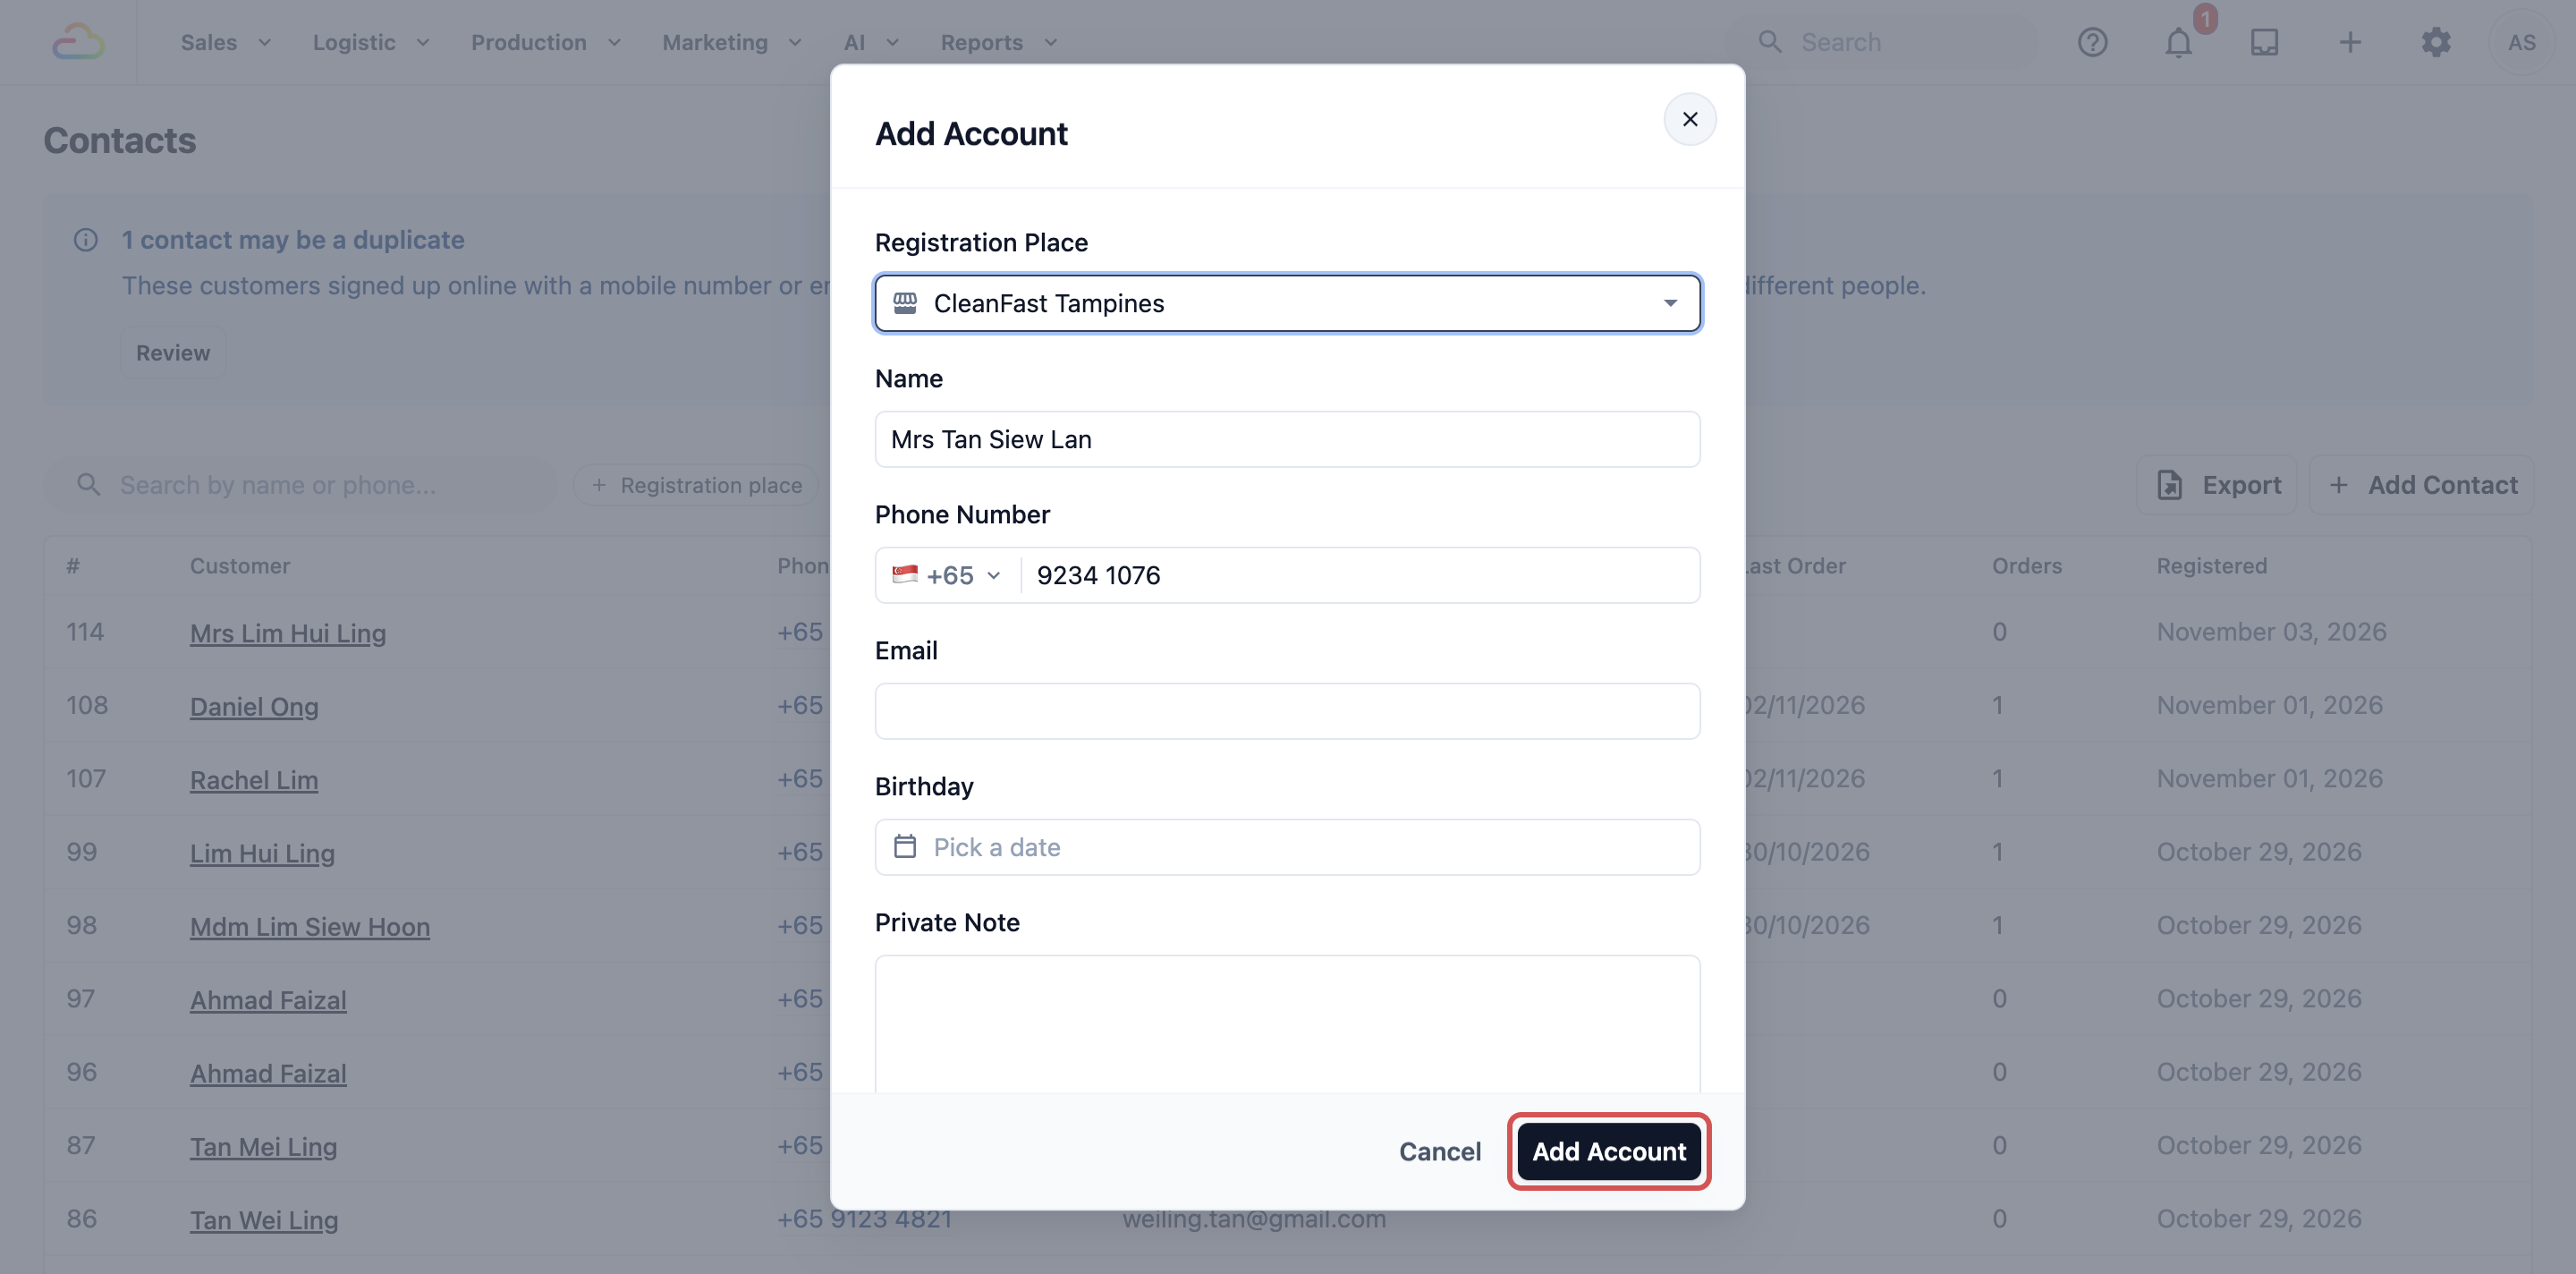
Staff see the same form when they click Register on a chat in the Inbox to save the person as a customer.
How it works with other features
- Birthday discounts: a birthday-month automatic discount only reaches customers with a birthday saved. Adding Birthday to the form is how staff collect it. See Setting Up Automatic Discounts.
- Invoices: the order invoice and the monthly invoice print the customer's billing address under Bill to. Customers without one get their delivery address there instead.
- Customer-facing display: when a customer registers themselves on a paired display, they fill in the same form, with the same required details. See Connect a Customer-Facing Display to Your POS.
FAQs
Does making Phone Number required change my existing customers?
No. Customers already saved stay as they are, and staff can still pick them for orders. When staff open one of them to edit, they need to fill in the missing phone number before they can save the change.
Why can't I remove Name or make it optional?
Every contact needs a name, so staff can find the customer and the customer's orders show who they belong to. That's why Name is always on the form and always required.
Can the Console and each POS have their own customer form?
No. The contact form is one form for your whole account, so the Console and every shop collect the same details. To choose whether staff pick a customer for each order at all, use Contact on orders on each POS app's Checkout page.
I have two shops. Should I choose All your shops or Only the shop that added them?
Choose All your shops if customers may drop off at one shop and collect at another, or if you want one customer list. Choose Only the shop that added them only if each shop runs as its own business, such as franchise outlets.
Can customers fill in their own details?
Yes, on a customer-facing display paired with your POS. The customer registers themselves with the same form and required details. See Connect a Customer-Facing Display to Your POS.
Will my invoices change if I add Billing Address?
Only for customers who have one saved. Invoices for every other customer still print their delivery address under Bill to. Your receipts and labels keep printing the customer's address as before.
Do I need to add Birthday?
Only if you run birthday offers or send birthday messages. Without a birthday saved, a customer can't get a birthday-month discount.
What's Next
Your staff now collect the right details for every new customer, in the Console and at every shop. Next, see a saved customer's orders, payments, balances and notes in one place in See Everything About a Customer on One Page.
Setting up your POS? Go back to the POS series with Adding Counter Staff and Their Clock-In PINs.