
When you finish, every counter staff member has their own name and PIN, ready to clock in on your POS, without adding a cent to your bill.
Before You Start
- You need access to ⚙️ Settings in the Console, and to Users & Access under it.
- Set up your POS app first, as in the earlier articles of this series, ending with After Payment: Receipts, Labels and Auto-Print (Order Confirmation). To choose what staff fill in when they add a new customer, see Choosing What Customer Details Staff Collect.
- If you set this up before: staff are no longer added under Point of Sale › POS Staff Management. Each person and their PIN now live in Settings › Users & Access. An old link to POS Staff Management now shows "POS staff are managed in Users & Access". The old Enable Shift Management switch is now the Clock-in Mode setting of the Time Clock feature, explained in Clocking In and Out (Time Clock).
Overview
A clock-in PIN is a 4-digit number that tells the POS which staff member is at the counter. You add each staff member once, with a name and a PIN. When they clock in on the POS, the orders they take and the shifts they work are saved under their name. A seat is a paid login to the Console, and counter staff who only use the POS don't need one. So you can add as many counter staff as you need, at no extra cost.
Where it works
- Console: you add staff and their PINs in Settings › Users & Access, and change them later on each person's page.
- POS: staff enter their PIN to clock in, and each order they take shows their name.
Why set it up
- Know who did what. Each order shows the staff member who took it, so you can follow up a mistake or thank the right person.
- Track shifts. Clock-in and clock-out times are saved per person, ready for the Time Clock and your payroll.
- No cost for counter staff. PIN-only staff need no seat, so your monthly bill stays the same however many you add.
If you skip it, nobody can clock in on the POS, and orders show your shop's name instead of the person who served the customer.
Where to find it
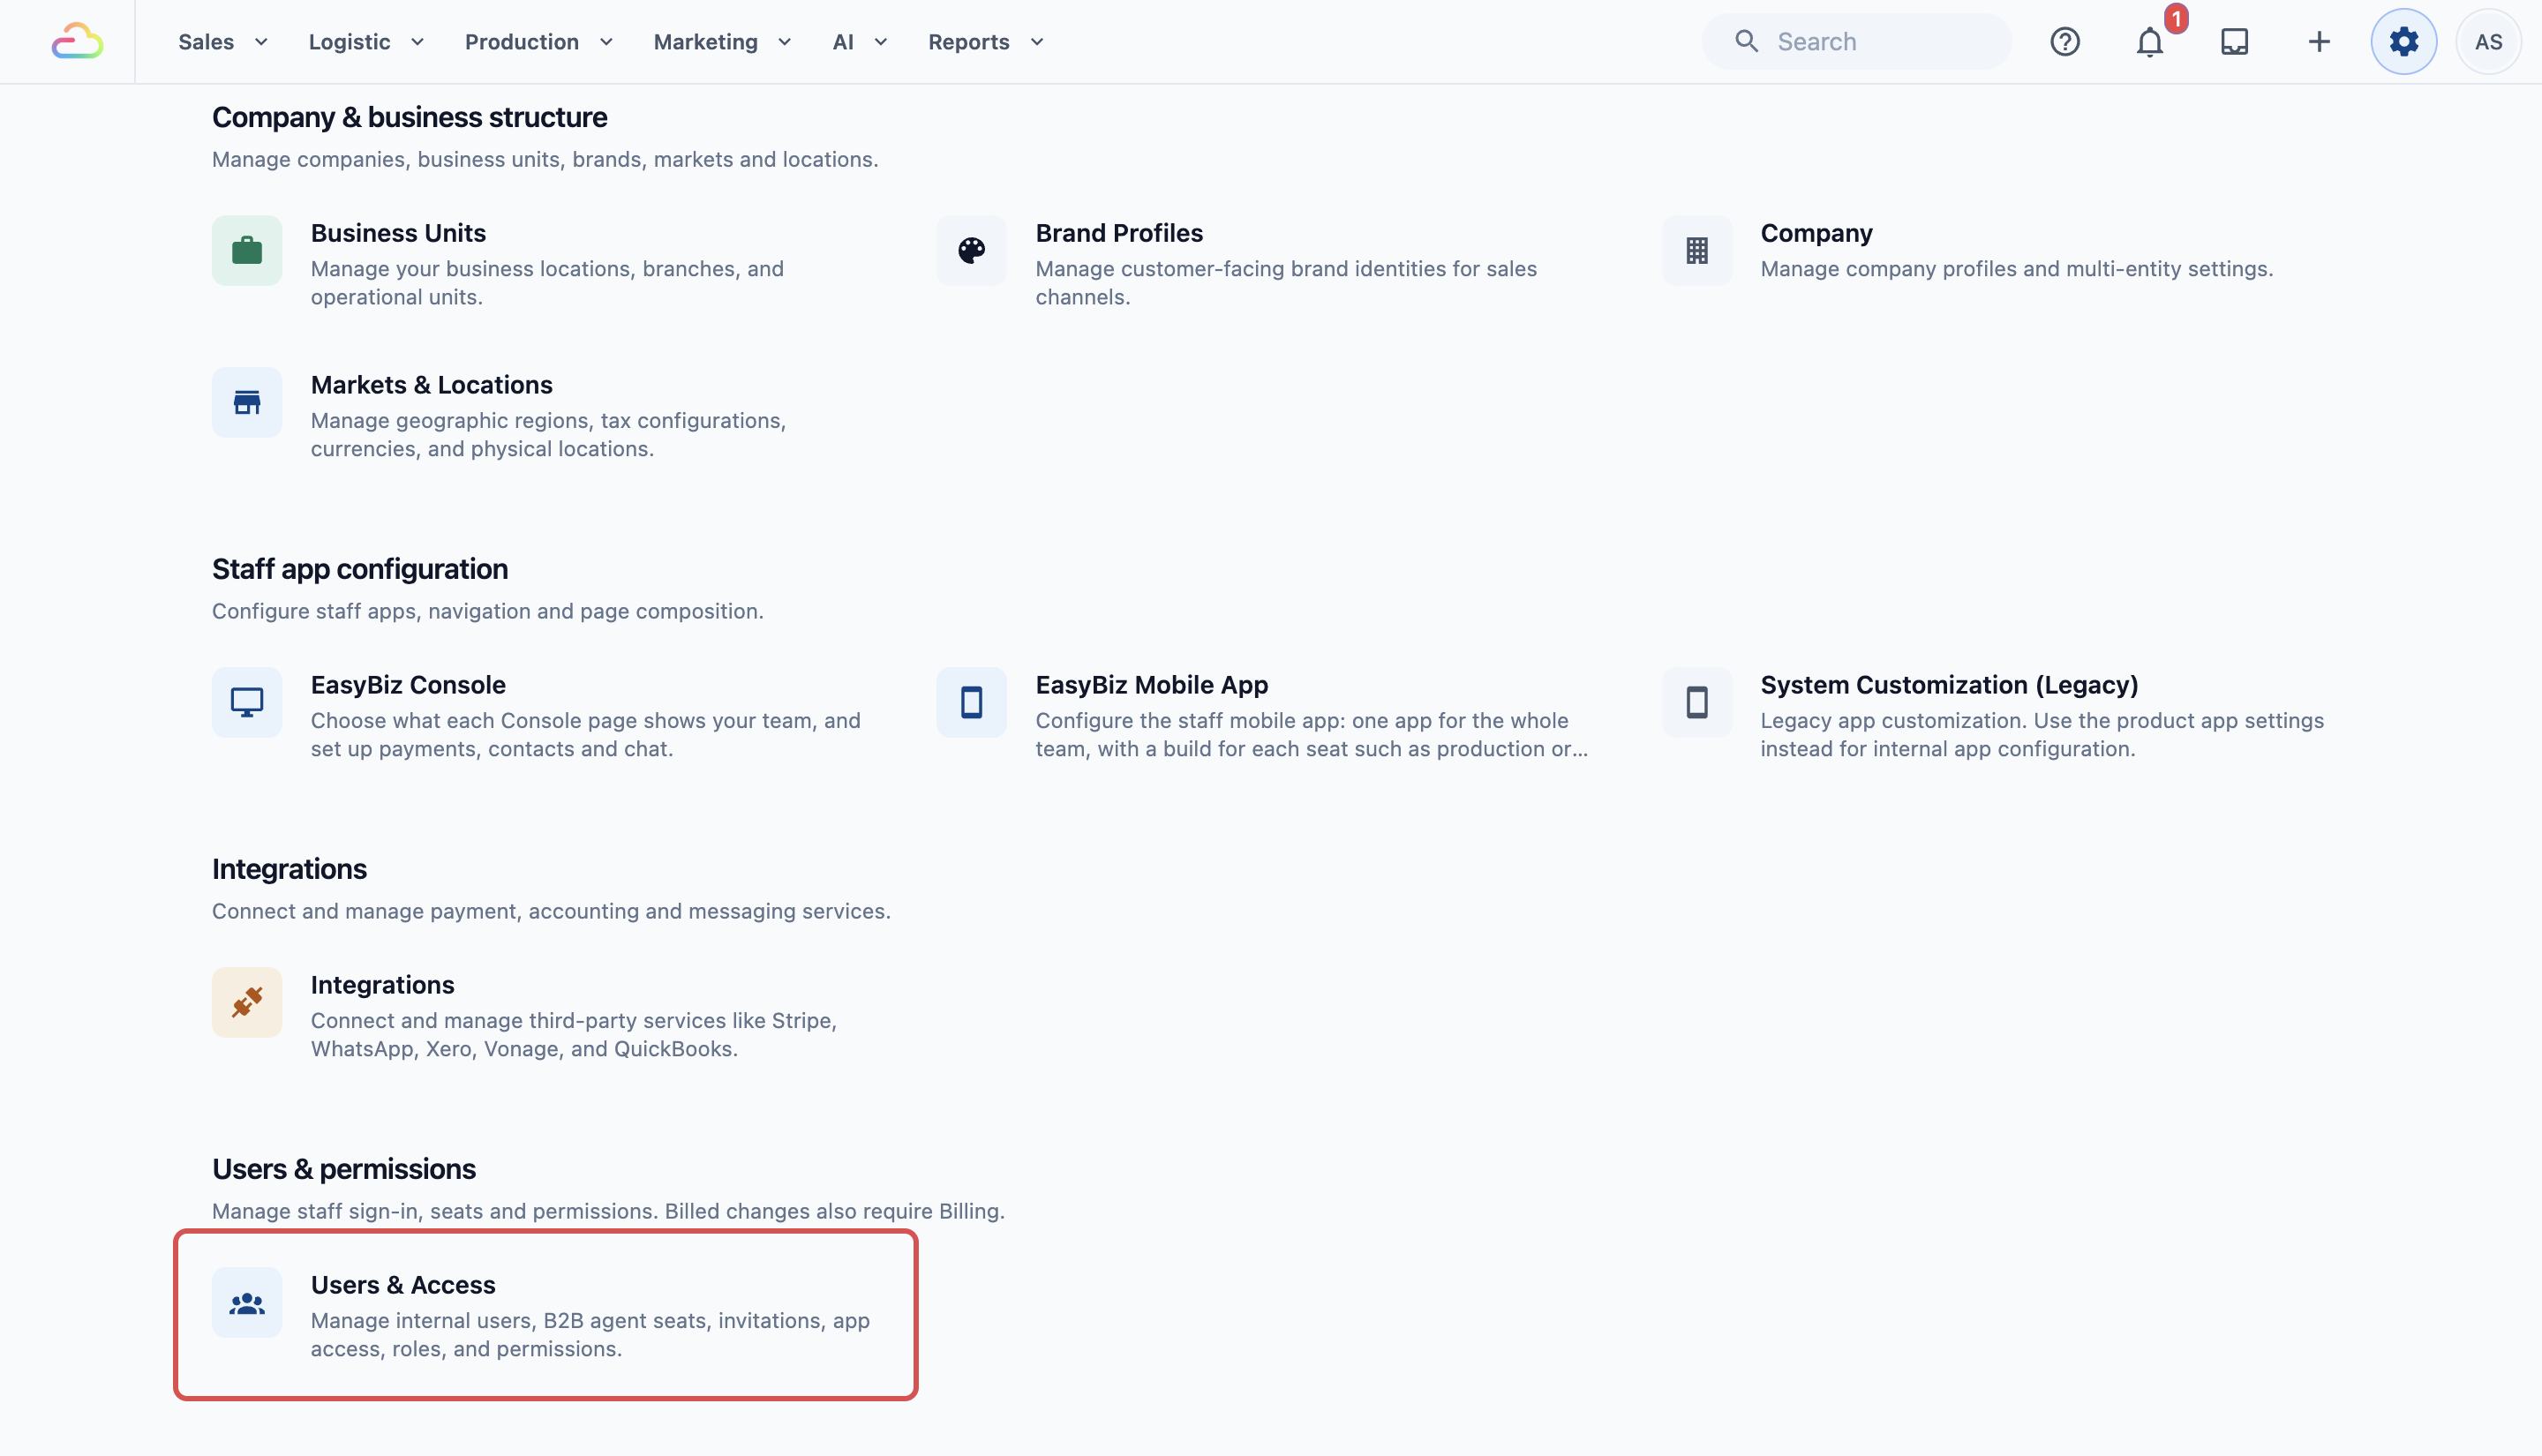
- Click the ⚙️ Settings icon in the top-right corner.
- Under the Users & permissions section, click Users & Access.
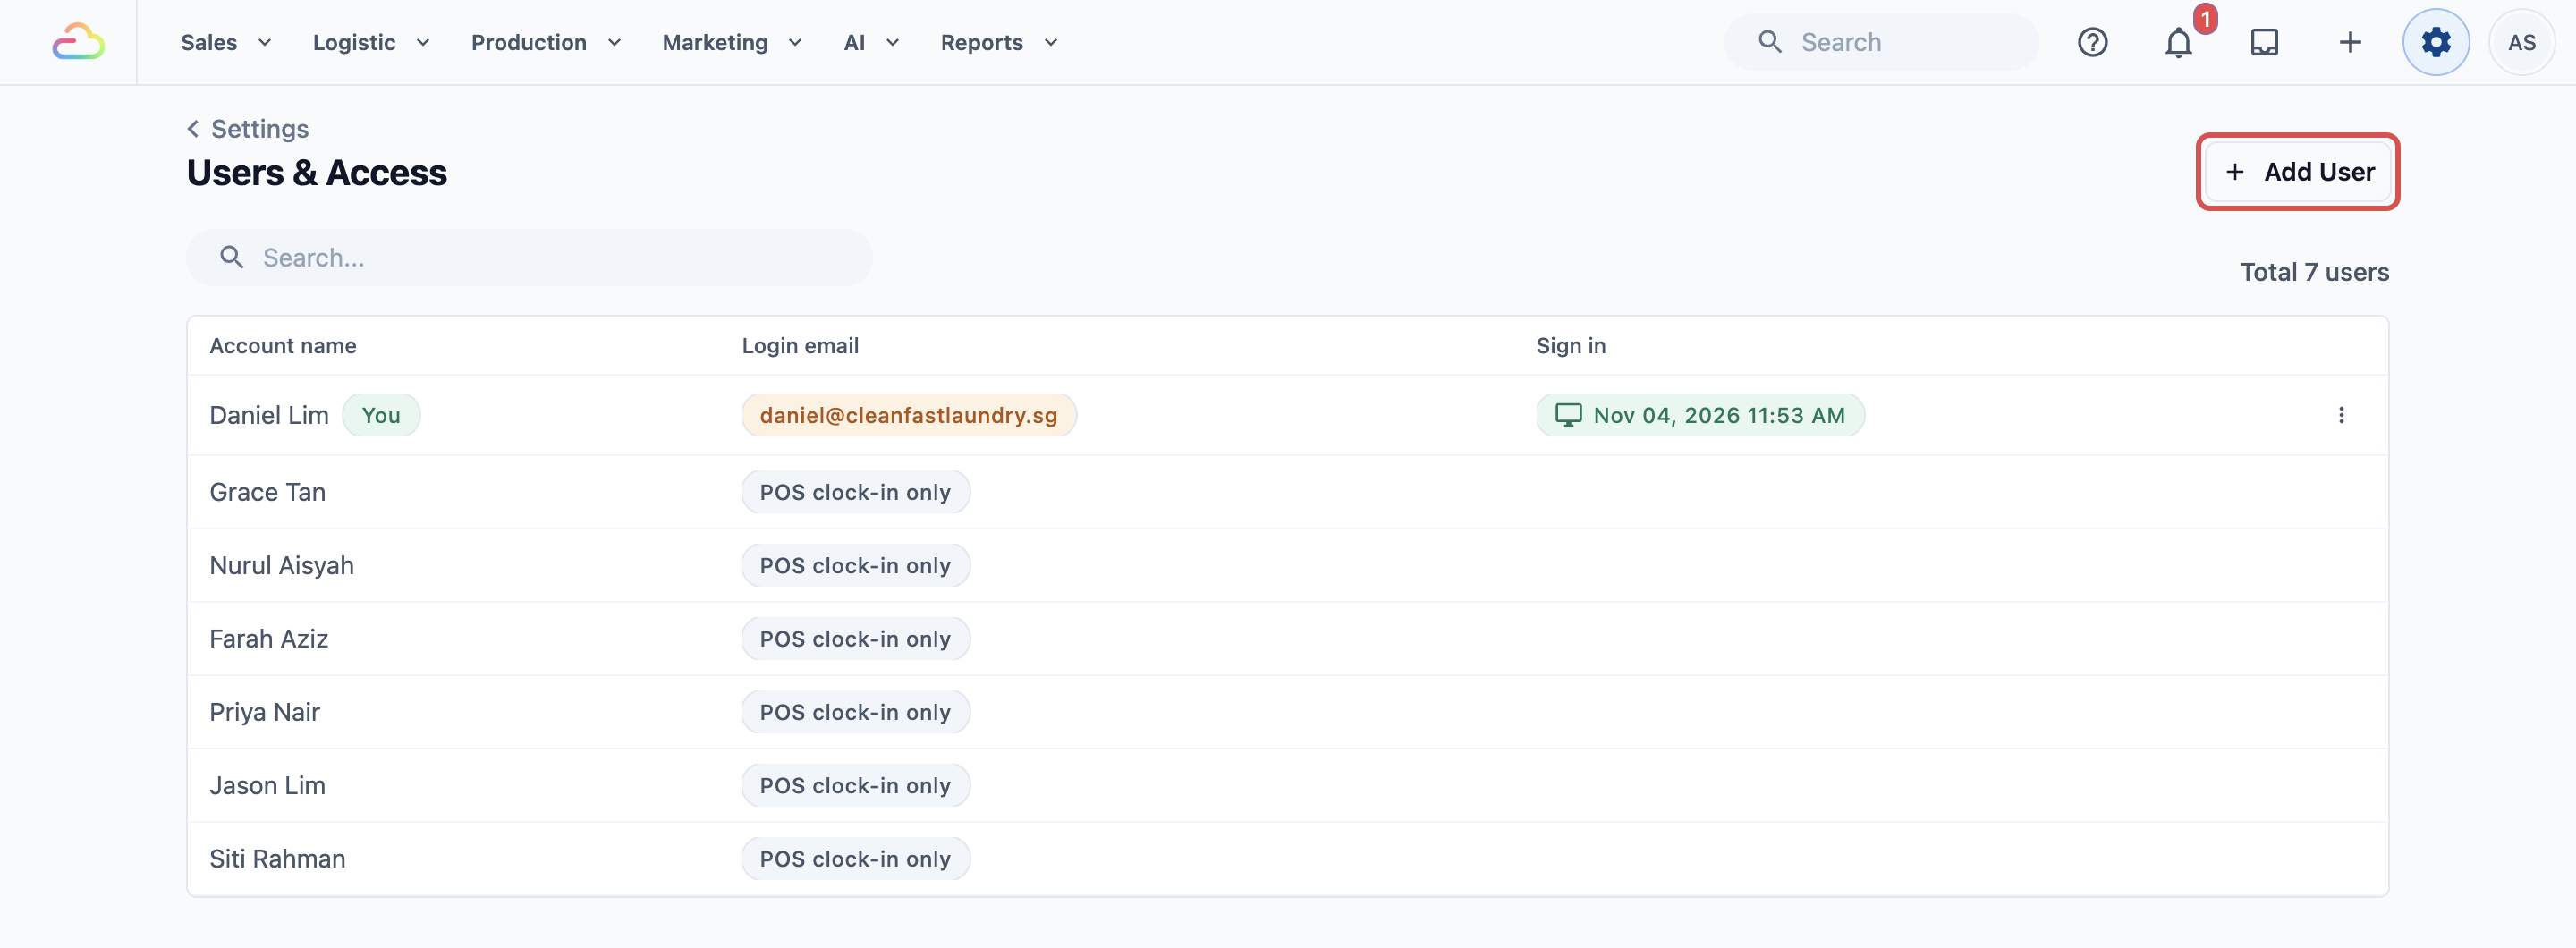
- Click Add User at the top right.
Adding a staff member
The Add user page has two parts: User details and POS clock-in.
- Display name
Type the name your staff and customers know this person by, for example "Mei Ling". It shows on the POS and in your reports.
- Clock-in PIN
Type any 4 digits, or click Generate PIN and the Console fills in a random 4-digit PIN for you. Give the PIN to the staff member in person.
| PIN field | What happens |
|---|---|
| Leave empty | The person is added, but can't clock in on the POS until you give them a PIN. |
| Type or generate 4 digits | The person can clock in on the POS with this PIN. |
- Under User details, type the staff member's name in Display name.
- Under POS clock-in, type a 4-digit Clock-in PIN, or click Generate PIN.
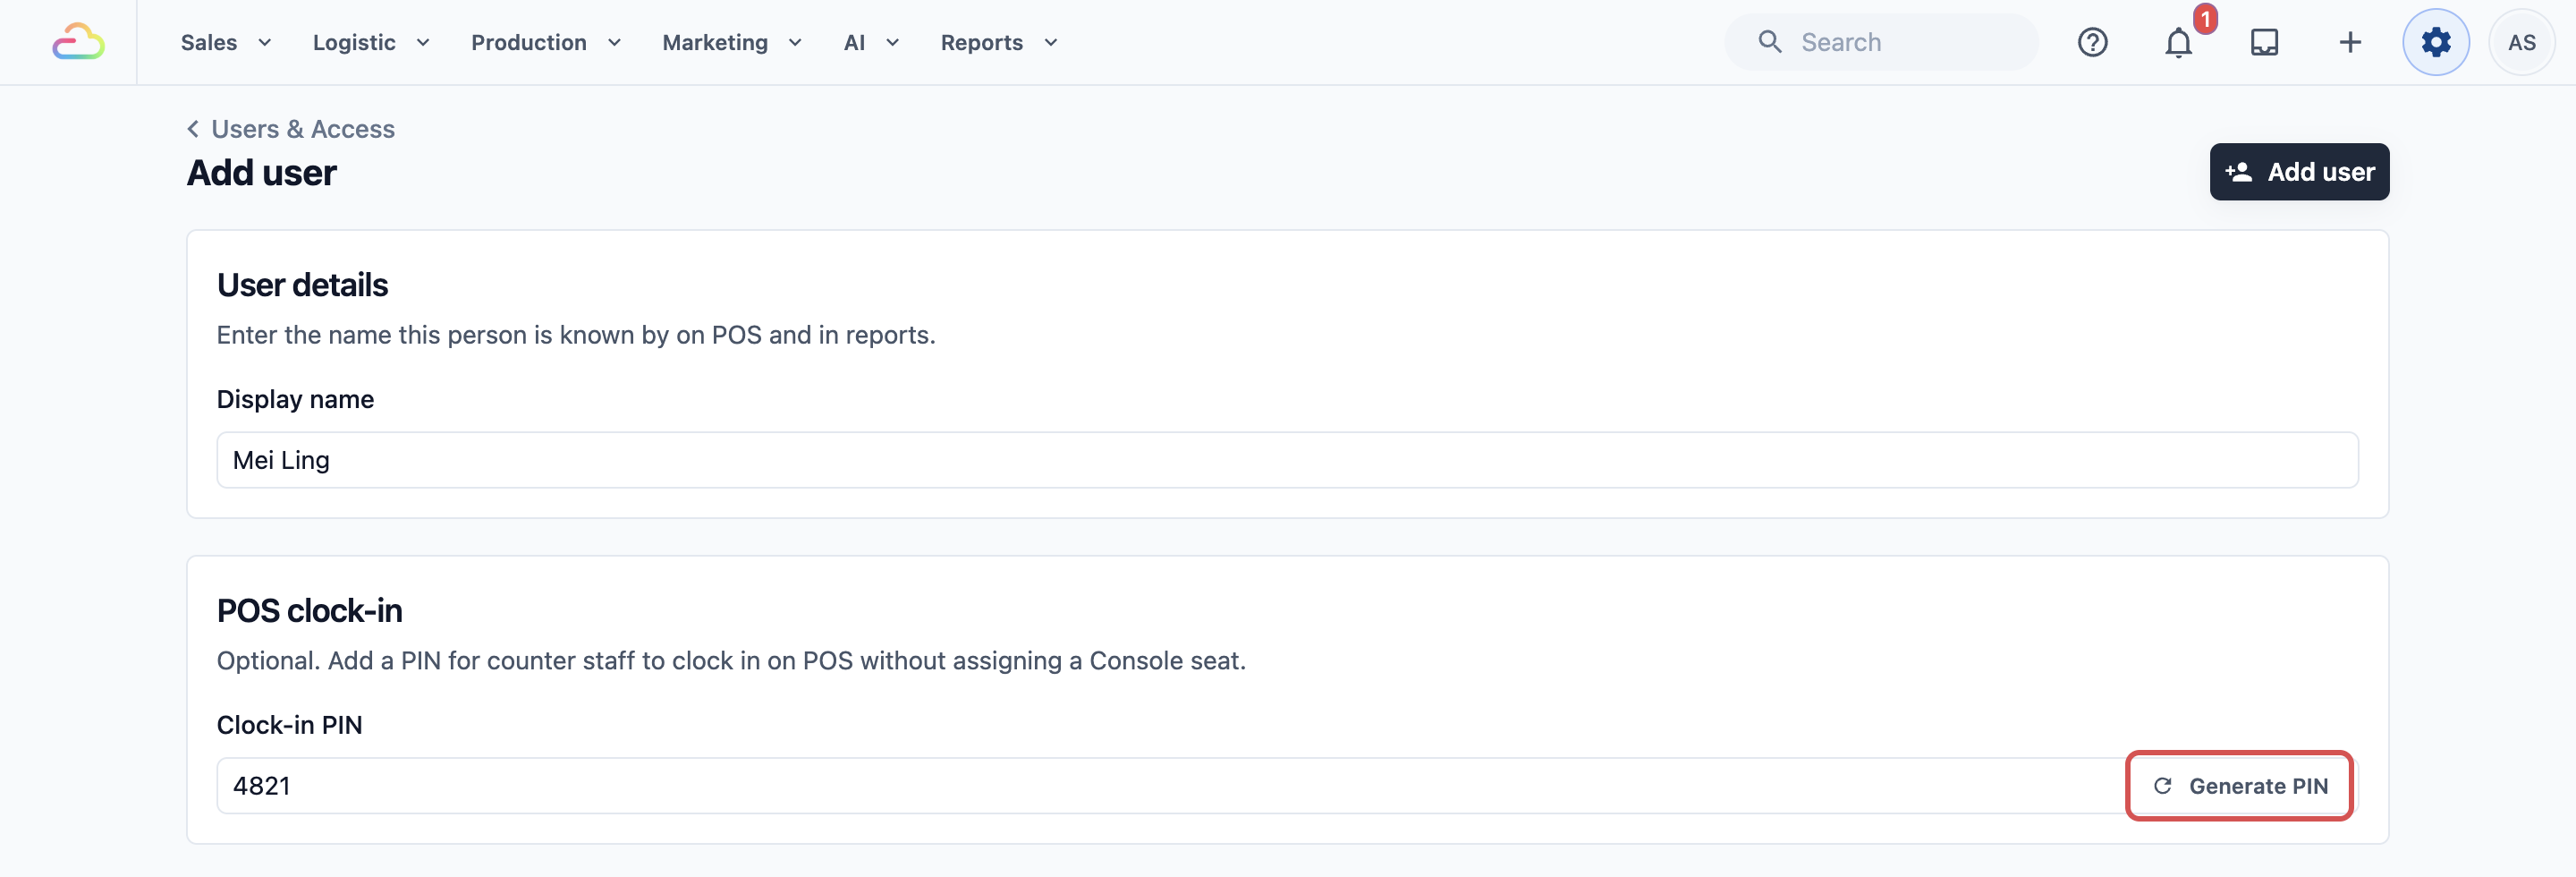
- Click Add user. The Console shows "User added".
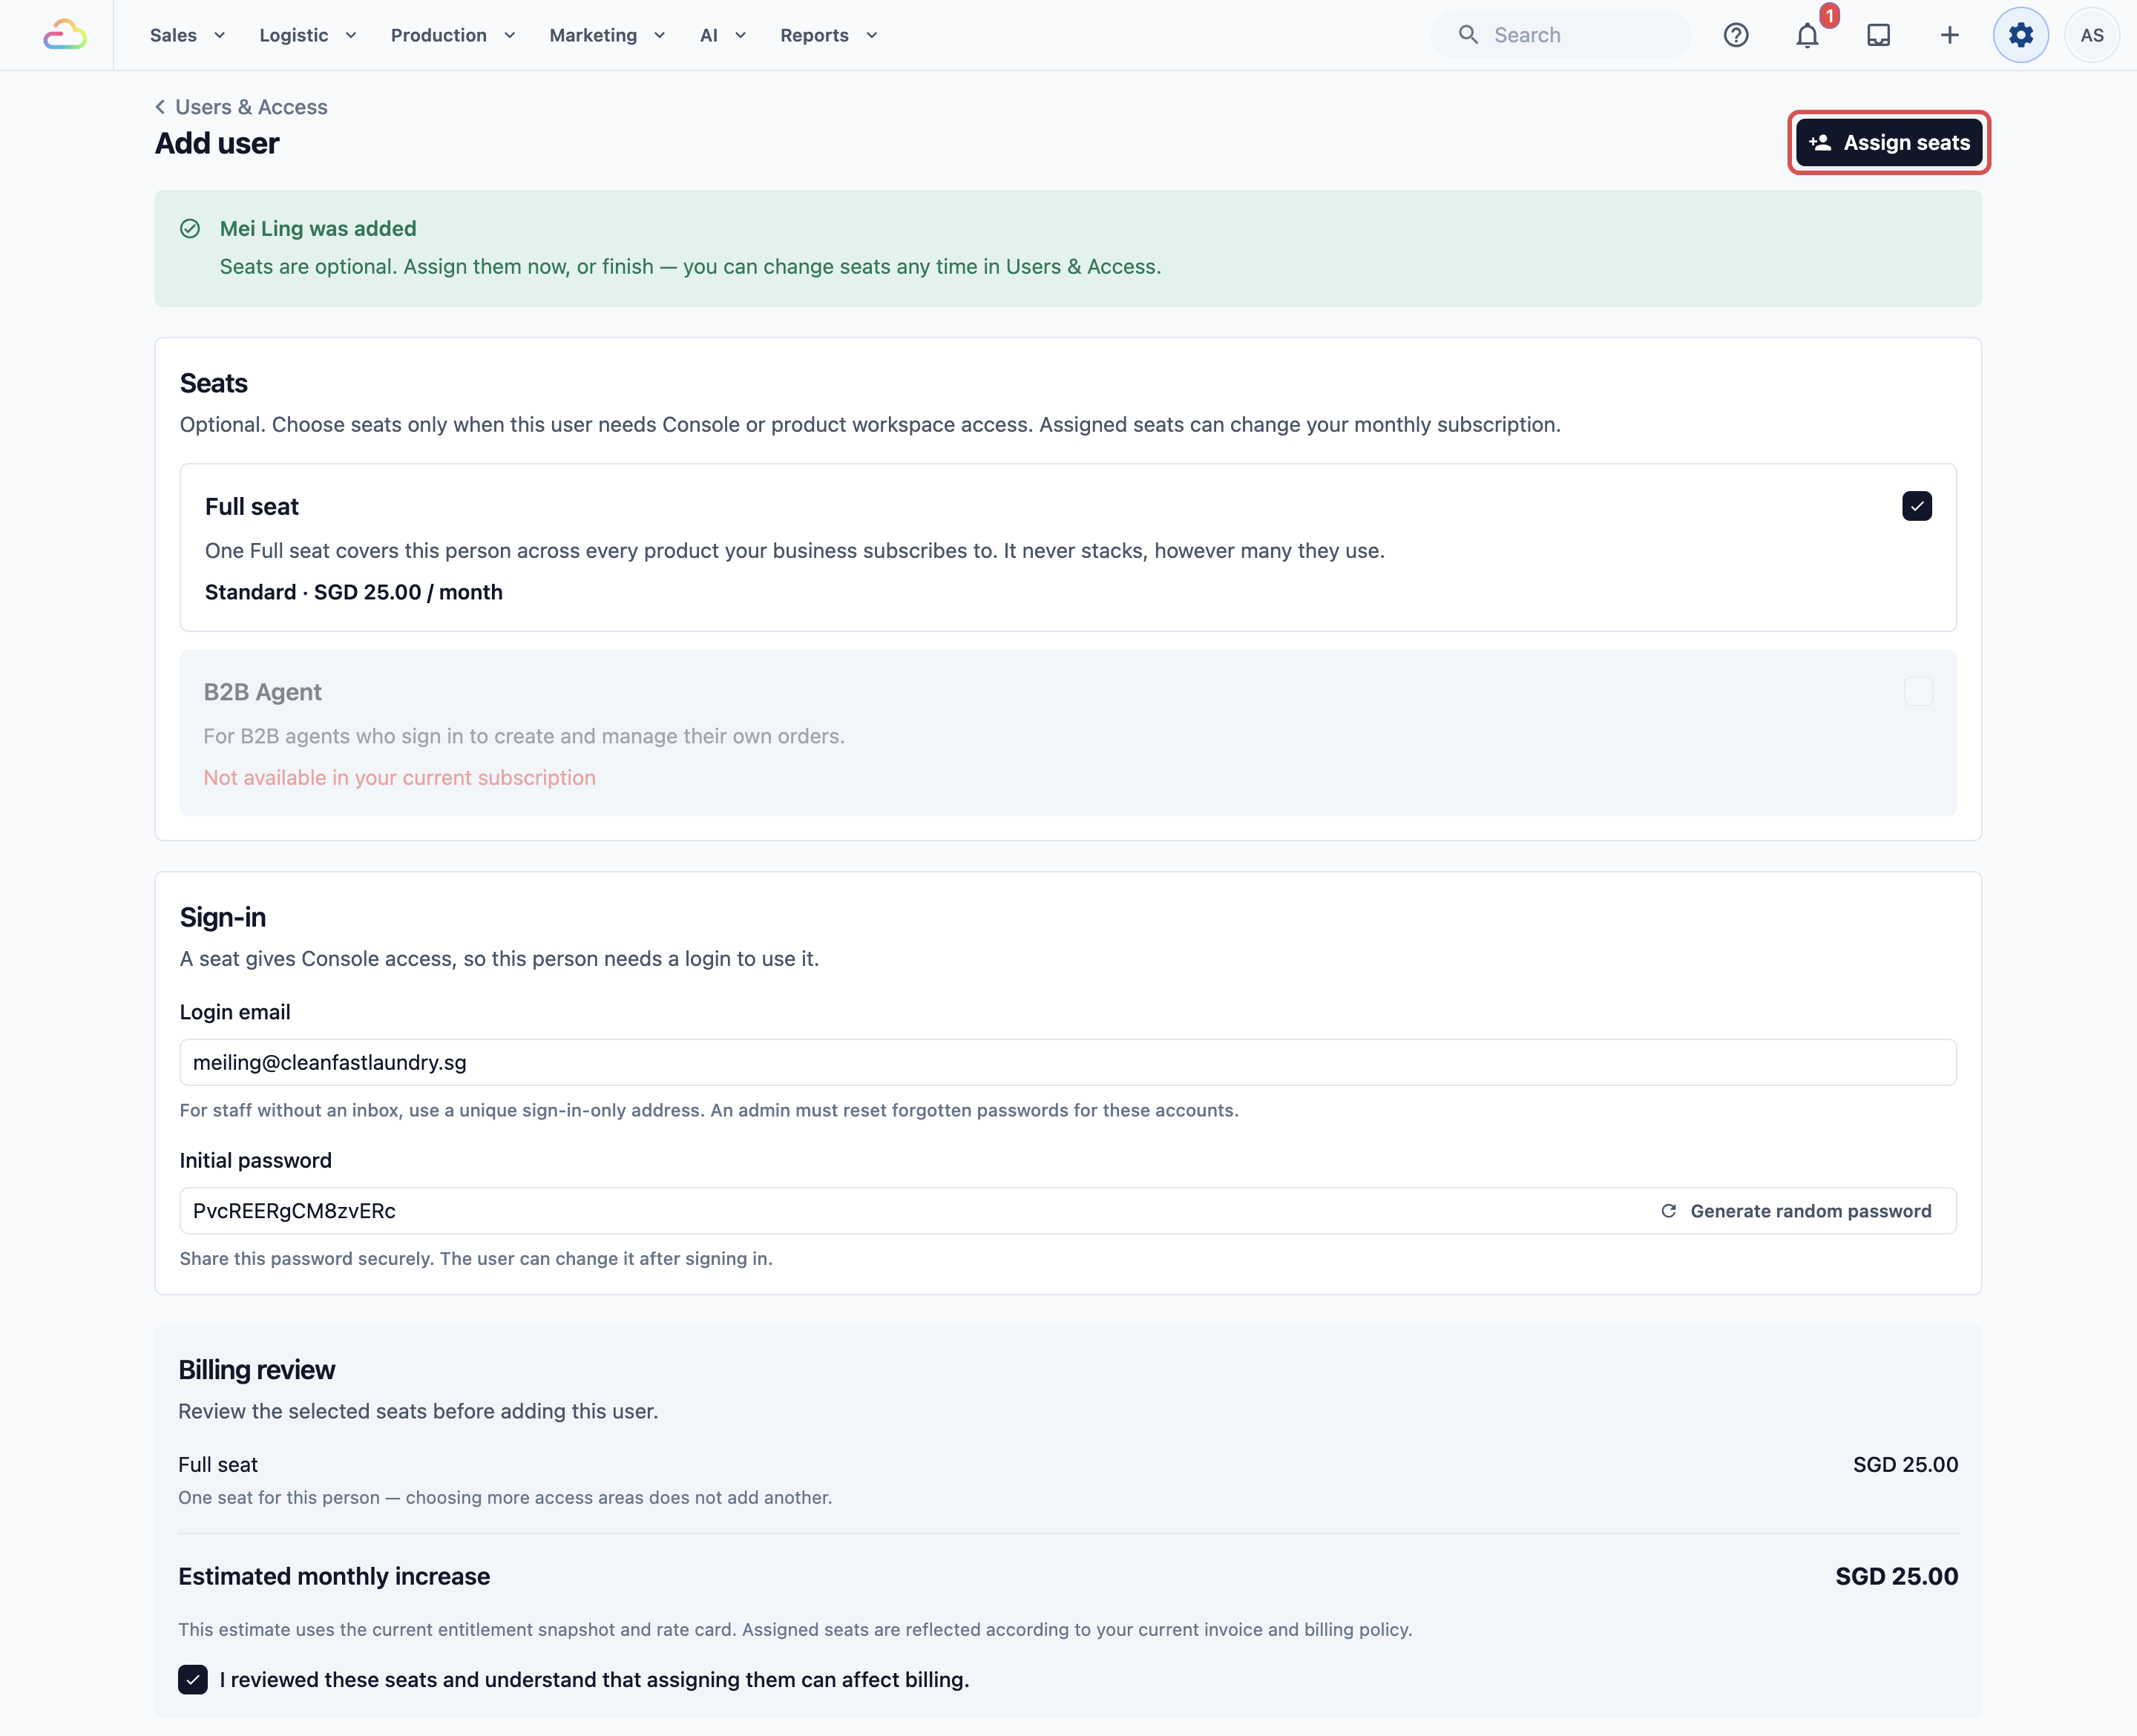
- The next step shows "Mei Ling was added" and a list of Seats. Counter staff need none, so leave every seat unticked.
- Click Finish.
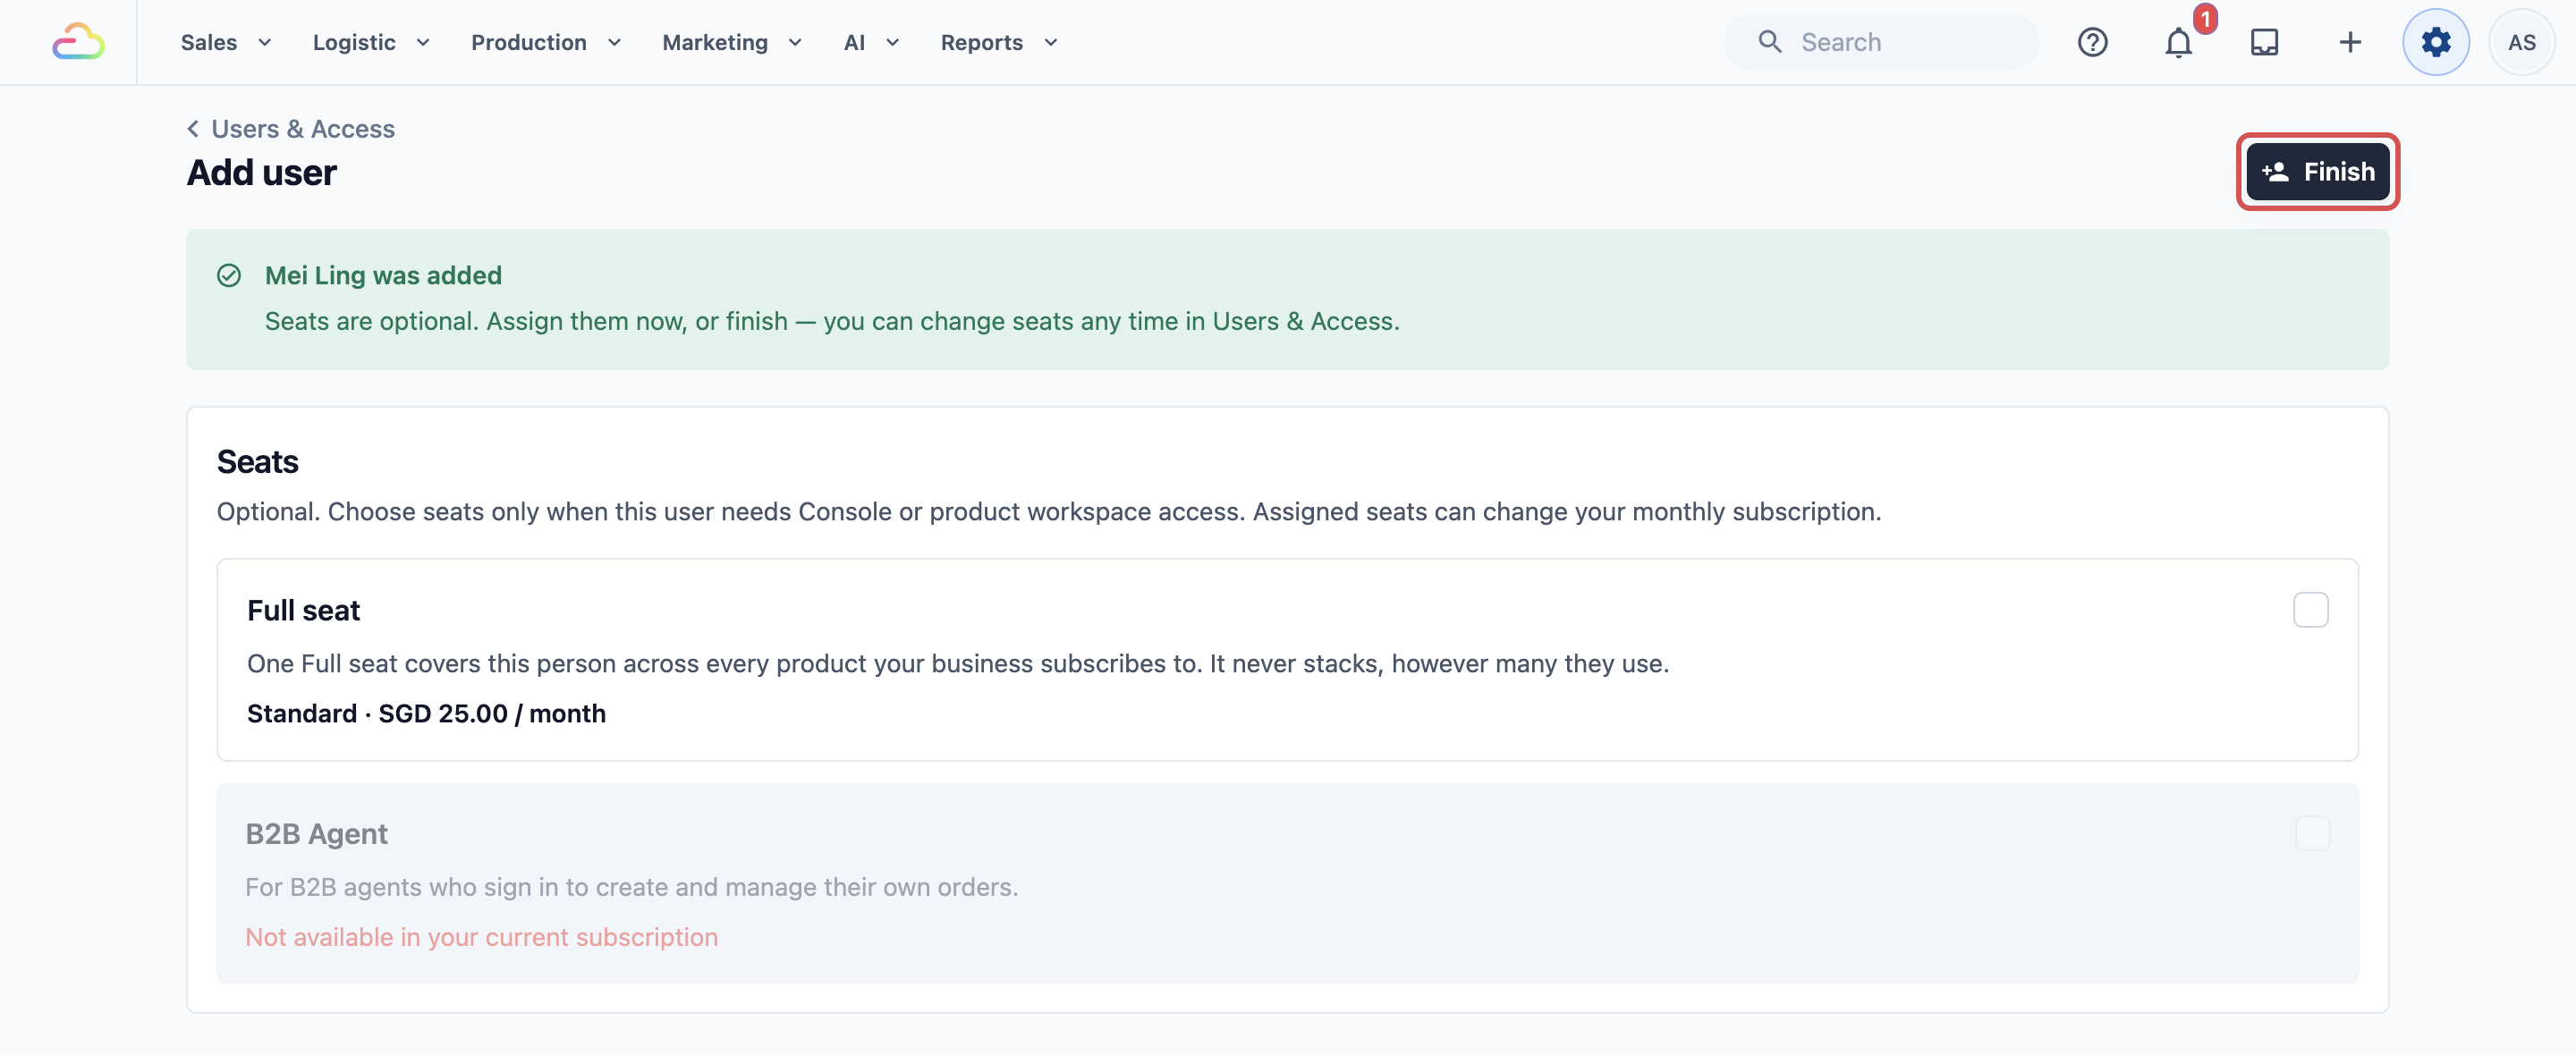
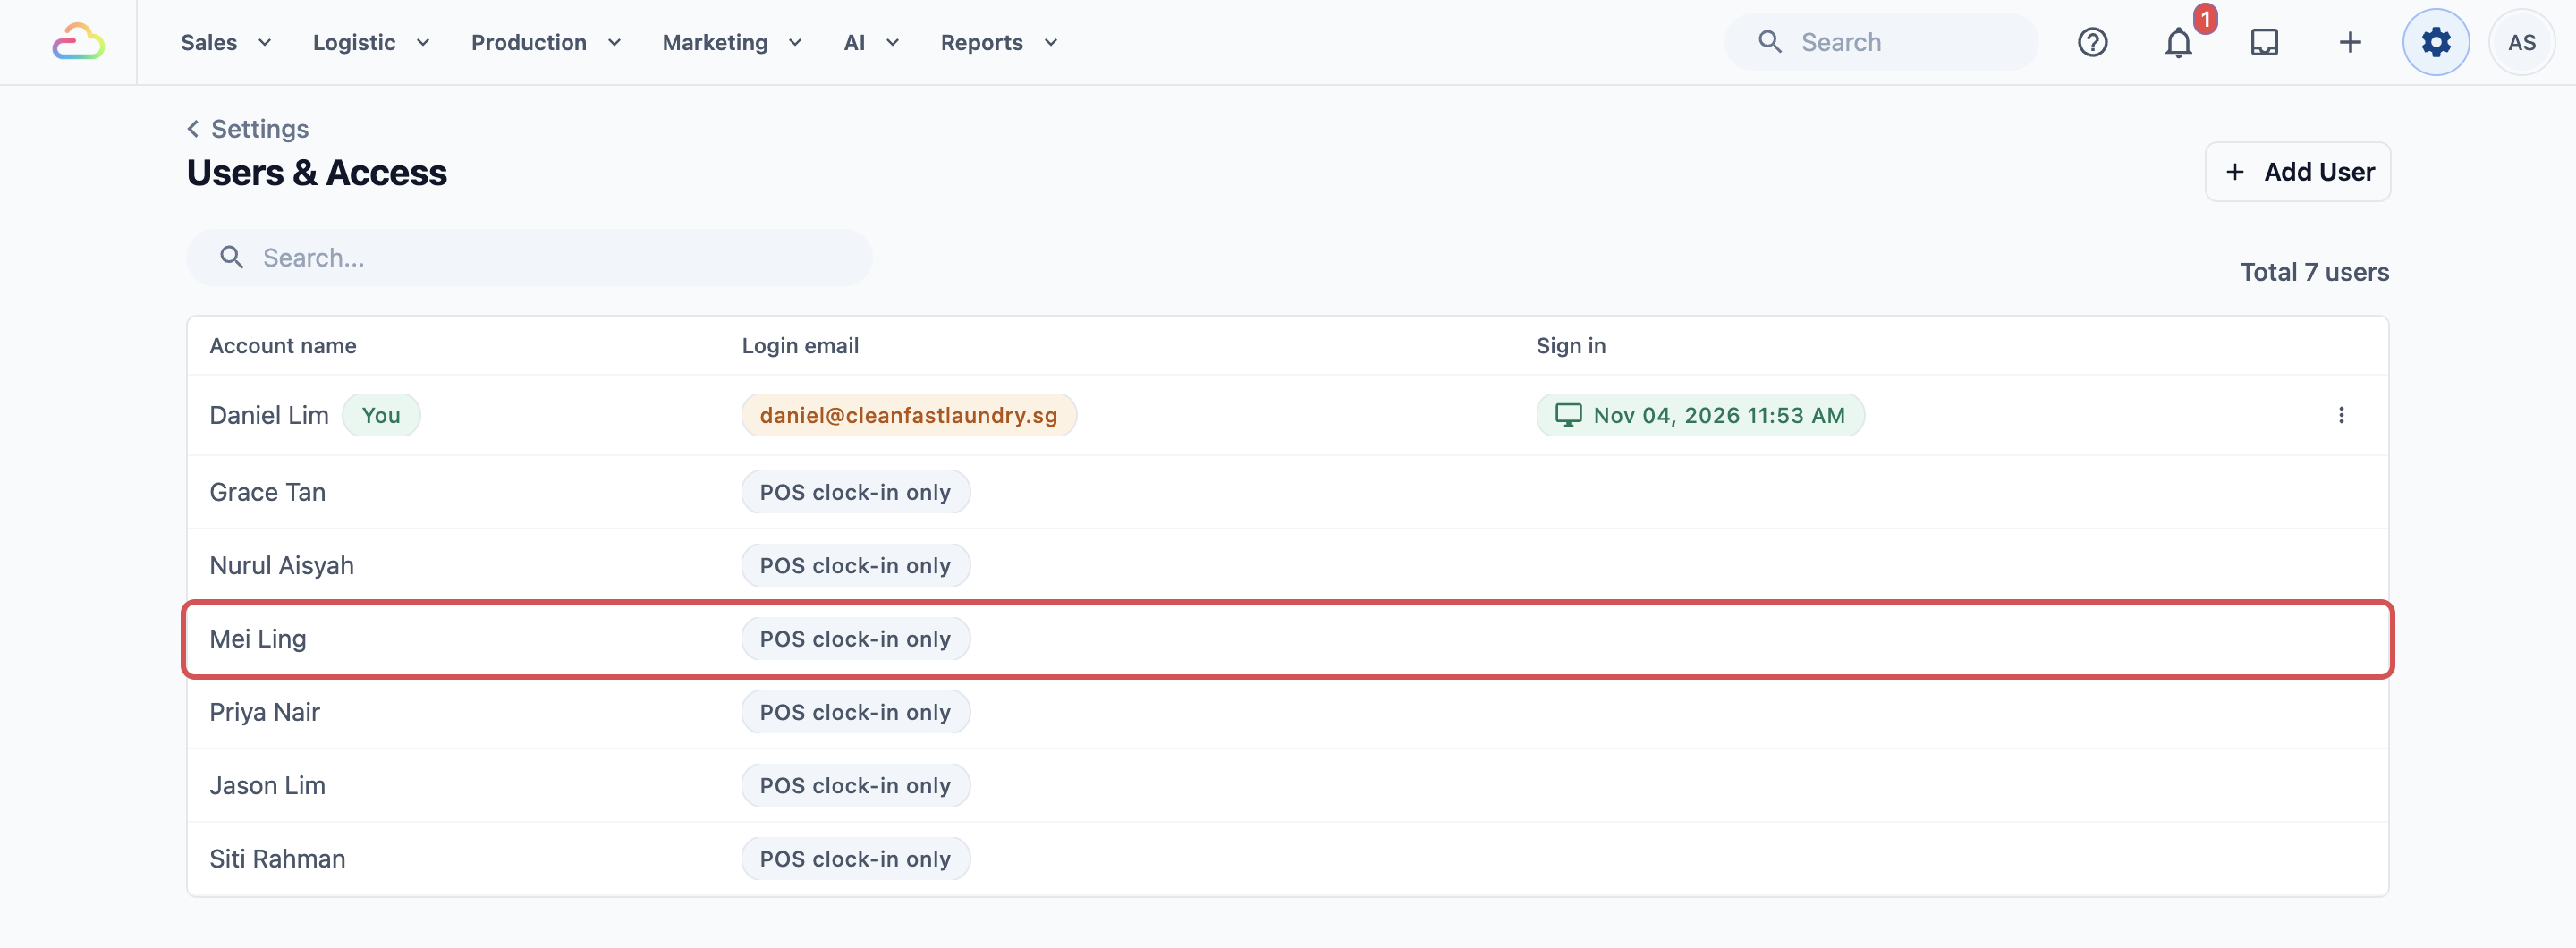
The Console opens the person's page. Back in Users & Access, they show POS clock-in only in the Login email column.
If your subscription has no Console seats
Some subscriptions, such as one with only the POS, have no Console seats to give out. Then the Clock-in PIN is required, because it is the only way this person can use the POS. Clicking Add user finishes the setup, with no seats step.
Seat or no seat
Use this only if a staff member also needs to work in the Console, for example a shop manager who checks reports.
| Choice | What the person can do | What you set up | Your bill |
|---|---|---|---|
| PIN only | Clock in and work on the POS | Display name and Clock-in PIN | No change |
| Seat | Sign in to the Console, plus the POS if they also have a PIN | A seat, then a Login email and Initial password | Changes your monthly bill |
To give a seat, tick it on the seats step instead of clicking Finish. A Sign-in part then asks for a Login email and an Initial password, and a Billing review shows the estimated monthly increase. Tick the box to confirm, then click Assign seats. You can also add or remove a seat later in the Seats part of the person's page.
Example setup
CleanFast Laundry has POS shops in Tampines and Jurong. The owner adds two counter staff, with no seats:
- Mei Ling, who works at Tampines, with the PIN 4821 typed in.
- Ahmad, who works at Jurong, with a PIN made by Generate PIN, for example 7306.
Both show POS clock-in only in Users & Access, and the monthly bill stays the same. On Saturday, Mei Ling clocks in at Tampines with 4821 and takes Mrs Tan's order for 5 shirts. The order shows Mei Ling as the staff member who took it.
What staff see on the POS
Staff use their PIN when they clock in on the POS. Whether clocking in is optional or required is set by the Time Clock feature's Clock-in Mode. With Optional (the ready-made choice), staff can clock in when they want. With Required, the POS asks for a PIN before anyone can start. Clocking In and Out (Time Clock) shows each screen.
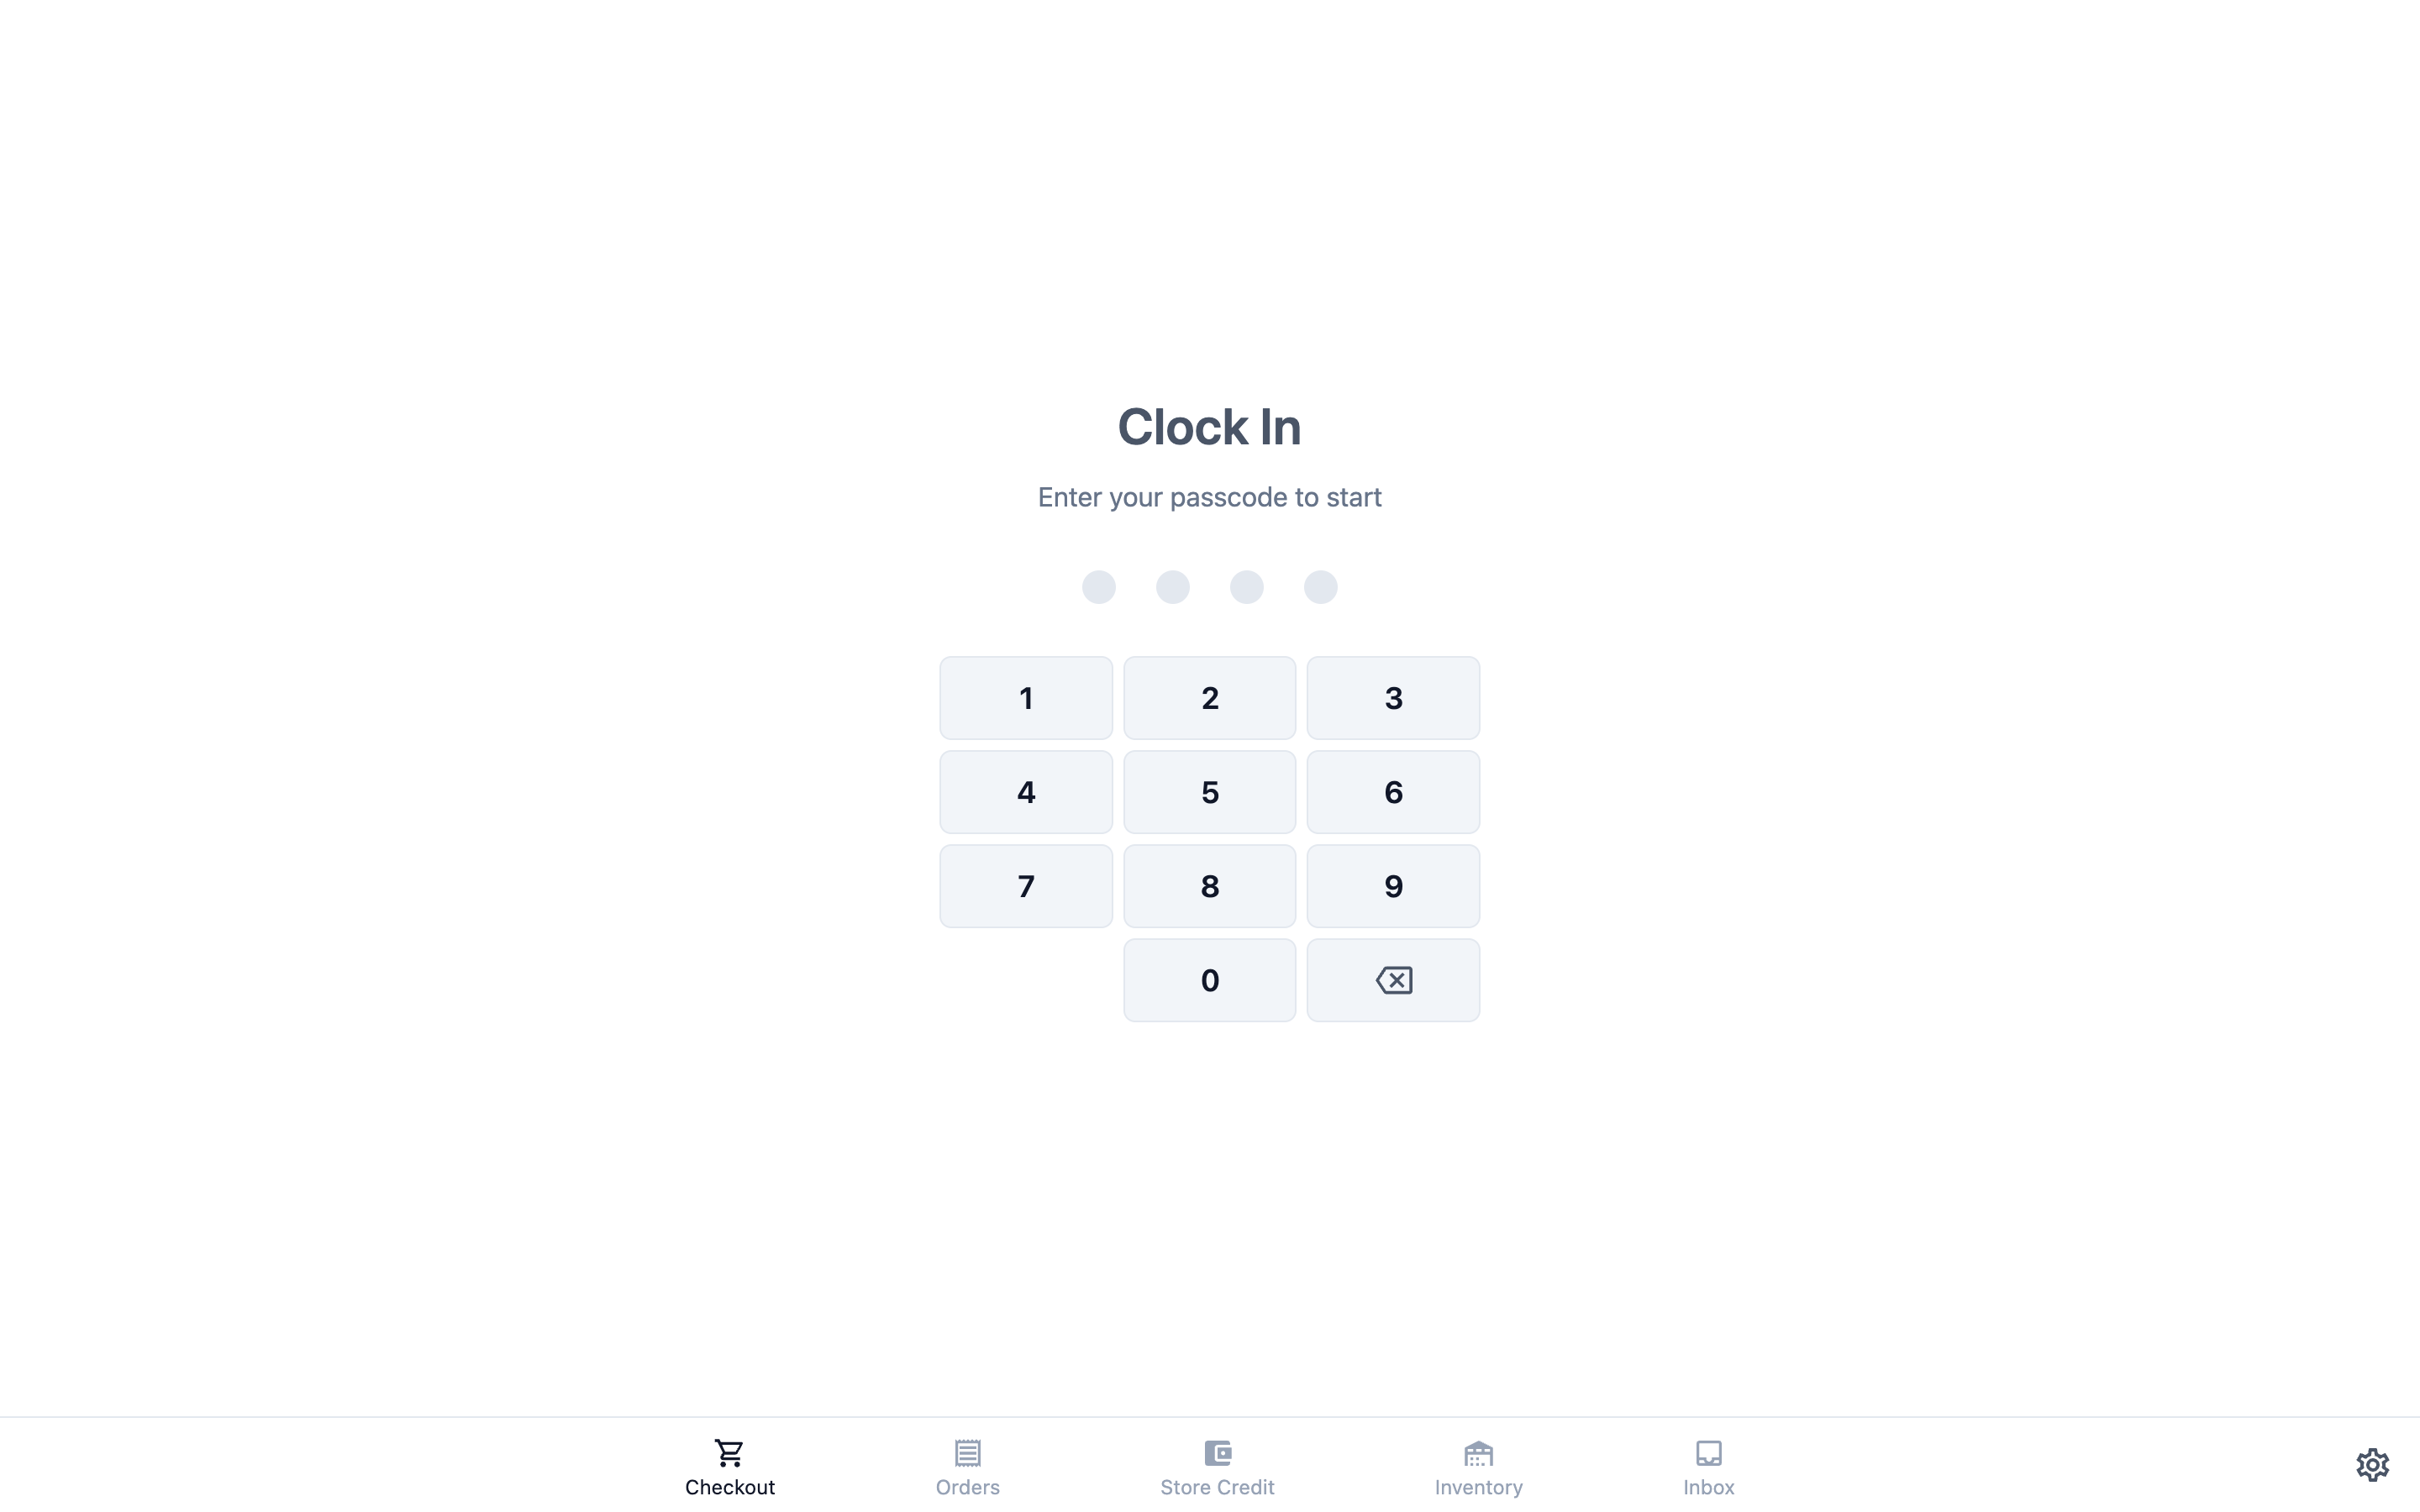
If a staff member types a wrong PIN, the POS shows "Check your passcode and try again."
Managing it later
To change a PIN
- In Users & Access, click the staff member's name.
- In the POS clock-in part, type a new 4-digit Clock-in PIN, or click Generate PIN.
- Click Save. The Console shows "Clock-in PIN updated".
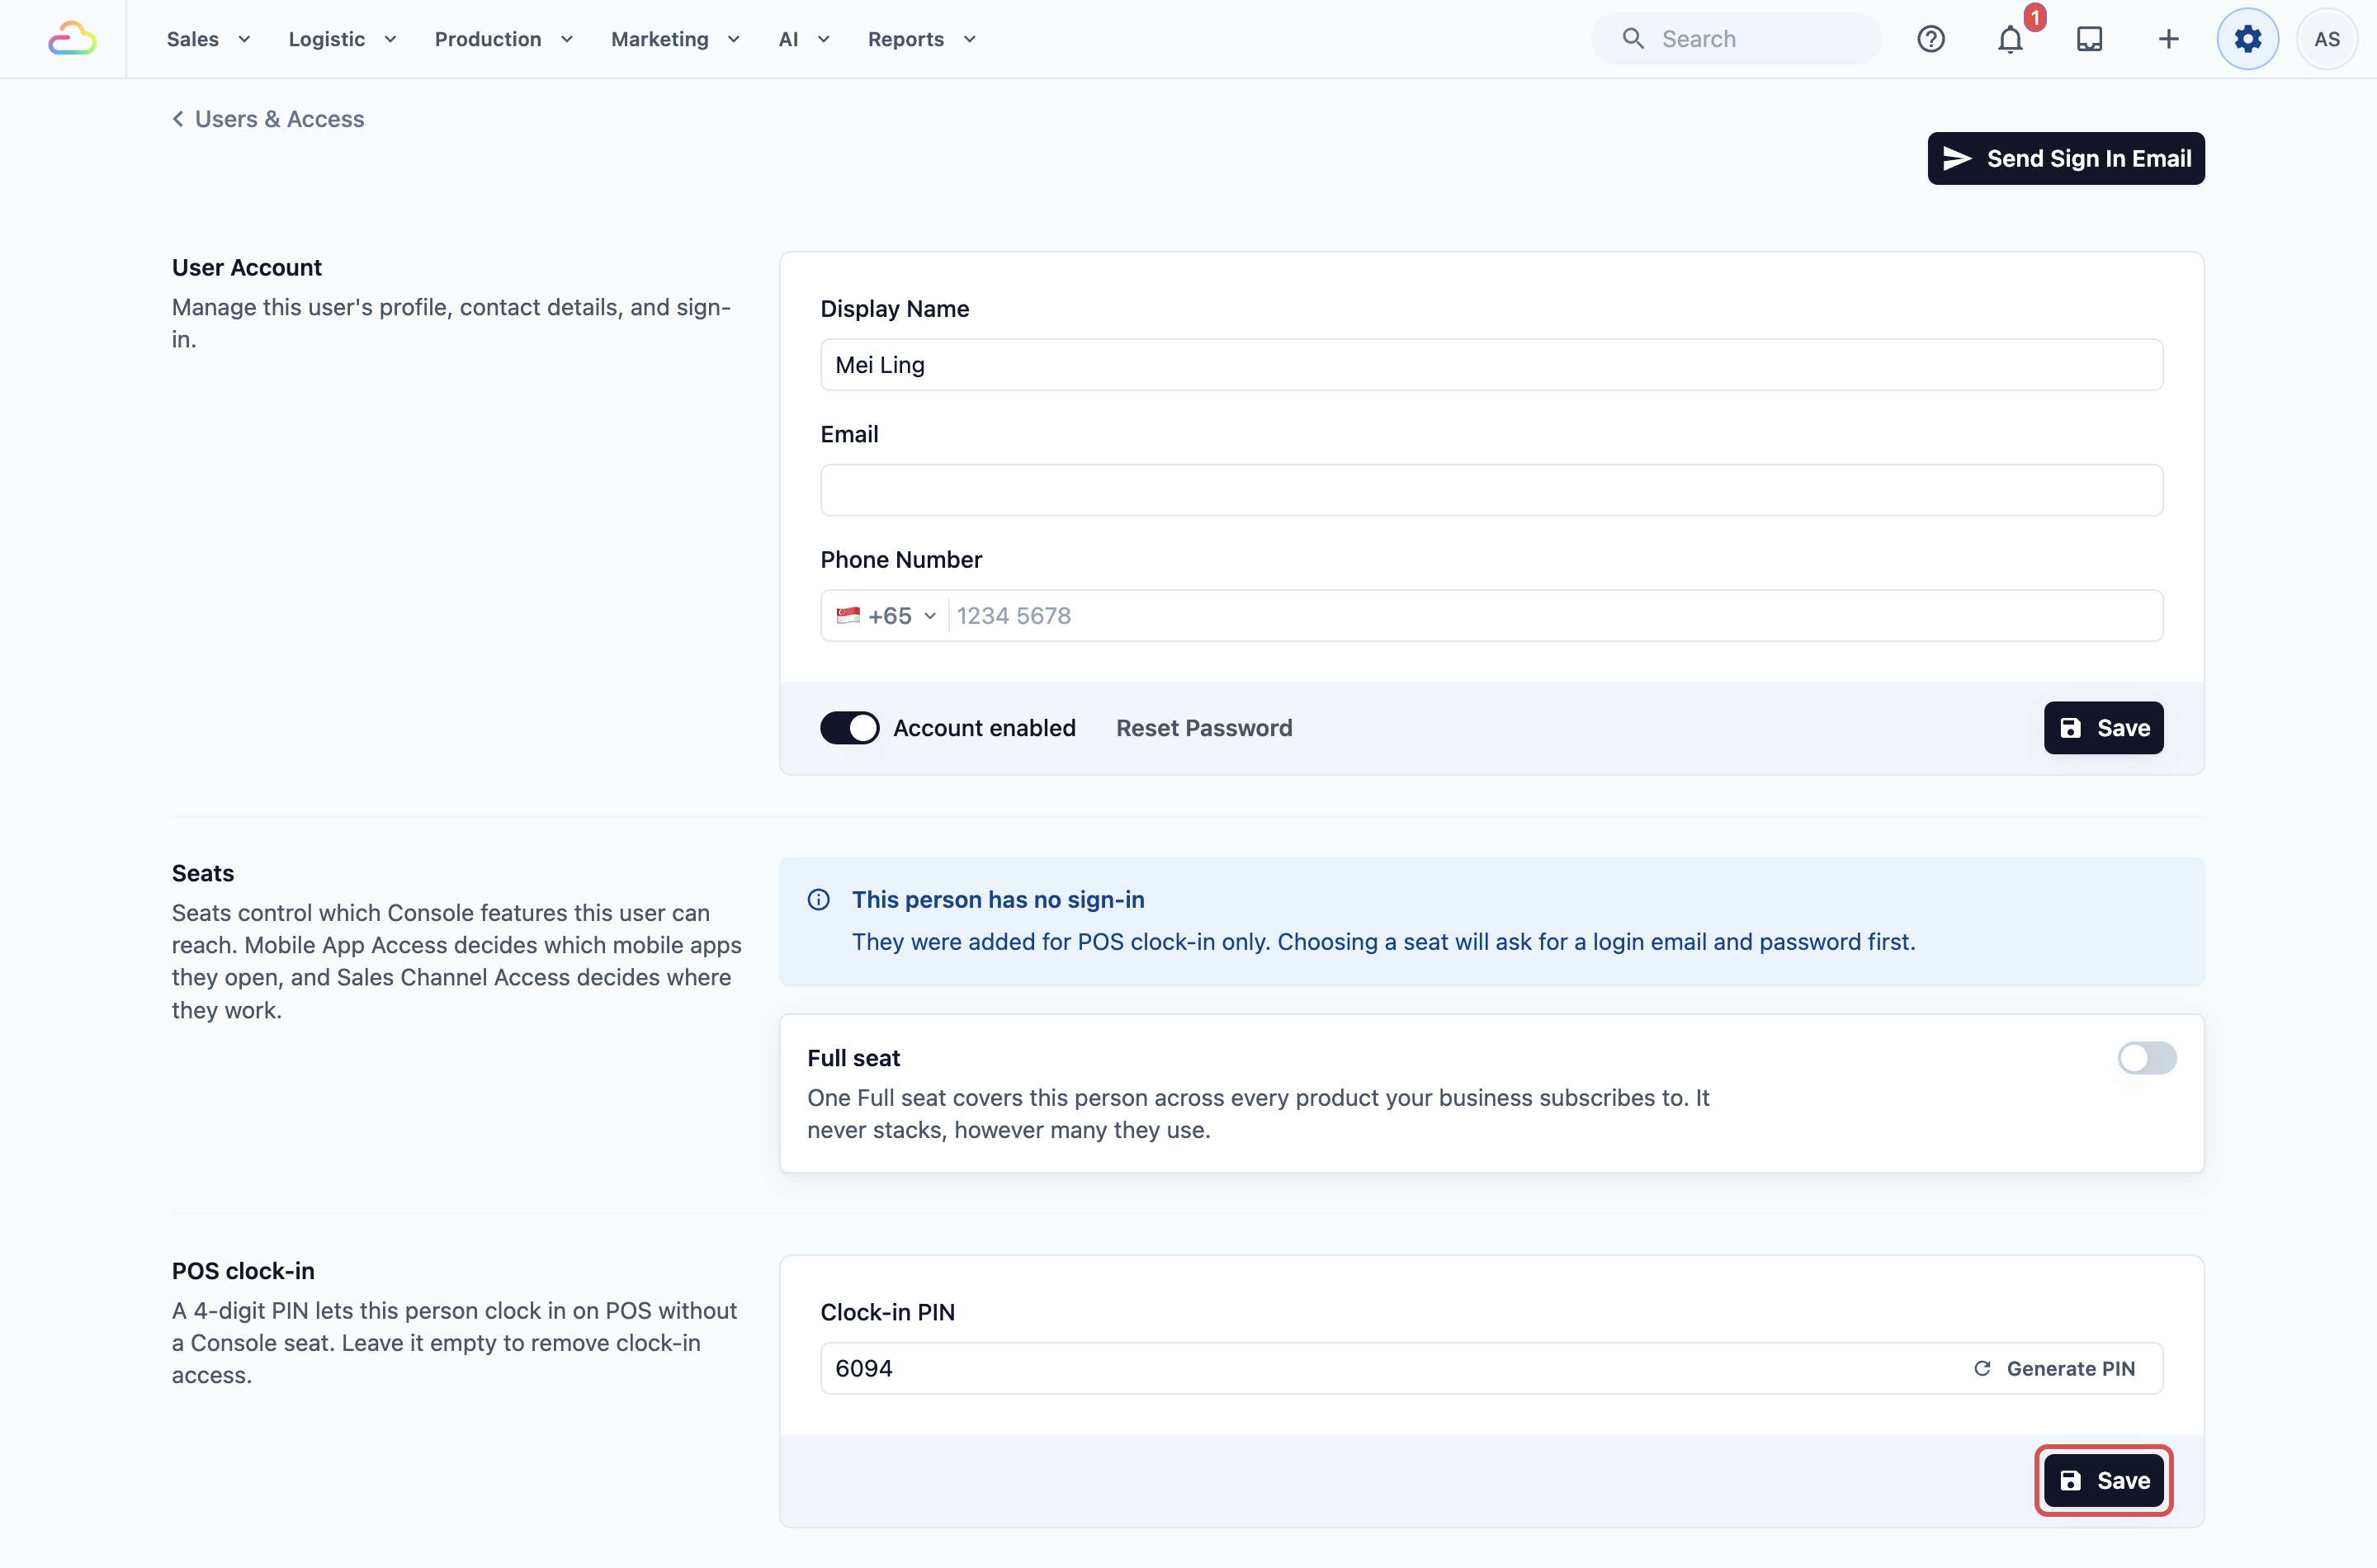
From then on, only the new PIN works on the POS.
To stop someone clocking in
Clear the Clock-in PIN field on their page and click Save. They can no longer clock in on the POS.
FAQs
Do I need to make clock-in required to use the POS?
No. If you leave the Time Clock's Clock-in Mode on Optional, your POS stays open to everyone signed in on it, without a PIN. Staff can still clock in when they want their orders saved under their name.
Can I add staff now and make clock-in required later?
Yes. Your staff and their PINs stay saved whatever the Clock-in Mode is. Change it to Required whenever you're ready.
What happens when clock-in is required?
The POS shows a clock-in screen, and staff enter their PIN to start. For each screen, see Clocking In and Out (Time Clock).
Does a counter staff member need a seat?
No. A staff member with only a clock-in PIN can clock in on the POS without a Console seat, so they don't change your monthly bill.
Can two staff share a PIN?
No. Each PIN belongs to one person across your whole account, so every order shows the right name. If you try to reuse one, you see "Clock-in PIN is already in use".
What if a staff member leaves?
Open their page in Users & Access, clear their Clock-in PIN and click Save, so they can't clock in any more. Orders they already took keep their name. If they also had a seat, remove it in the Seats part of their page so it stops counting on your bill.
What's Next
Your counter staff each have a name and a PIN, ready for the POS. Next, decide whether staff must clock in before they start, and see how they clock in and out, in Clocking In and Out (Time Clock). The Time Clock is already on in every new Service POS app, and staff clock in only when they want. Happy with that? Skip to Tracking Cash in Your POS Drawer (Cash Drawer).