Why do you need to set this up?
Setting up your operational stock might seem like extra data entry, but it solves critical business problems:
-
Prevent Service Disruptions: The biggest risk to service businesses is running out of essential supplies (like running out of soap mid-day). Tracking stock levels helps you ensure operations never stop due to missing materials.
-
Multi-Location Visibility: If you have more than one shop or warehouse, you need to know exactly what holds what. You can see instantly if Branch A is low on supplies while Branch B has surplus, without making phone calls.
-
Smarter Reordering: Instead of guessing when to buy more supplies, you will have data on current levels. This helps you reorder on time, avoiding expensive last-minute emergency purchases.
Defining Your Retail Products
Before you can manage your inventory levels, you must first define the products stocked at your location in the system.
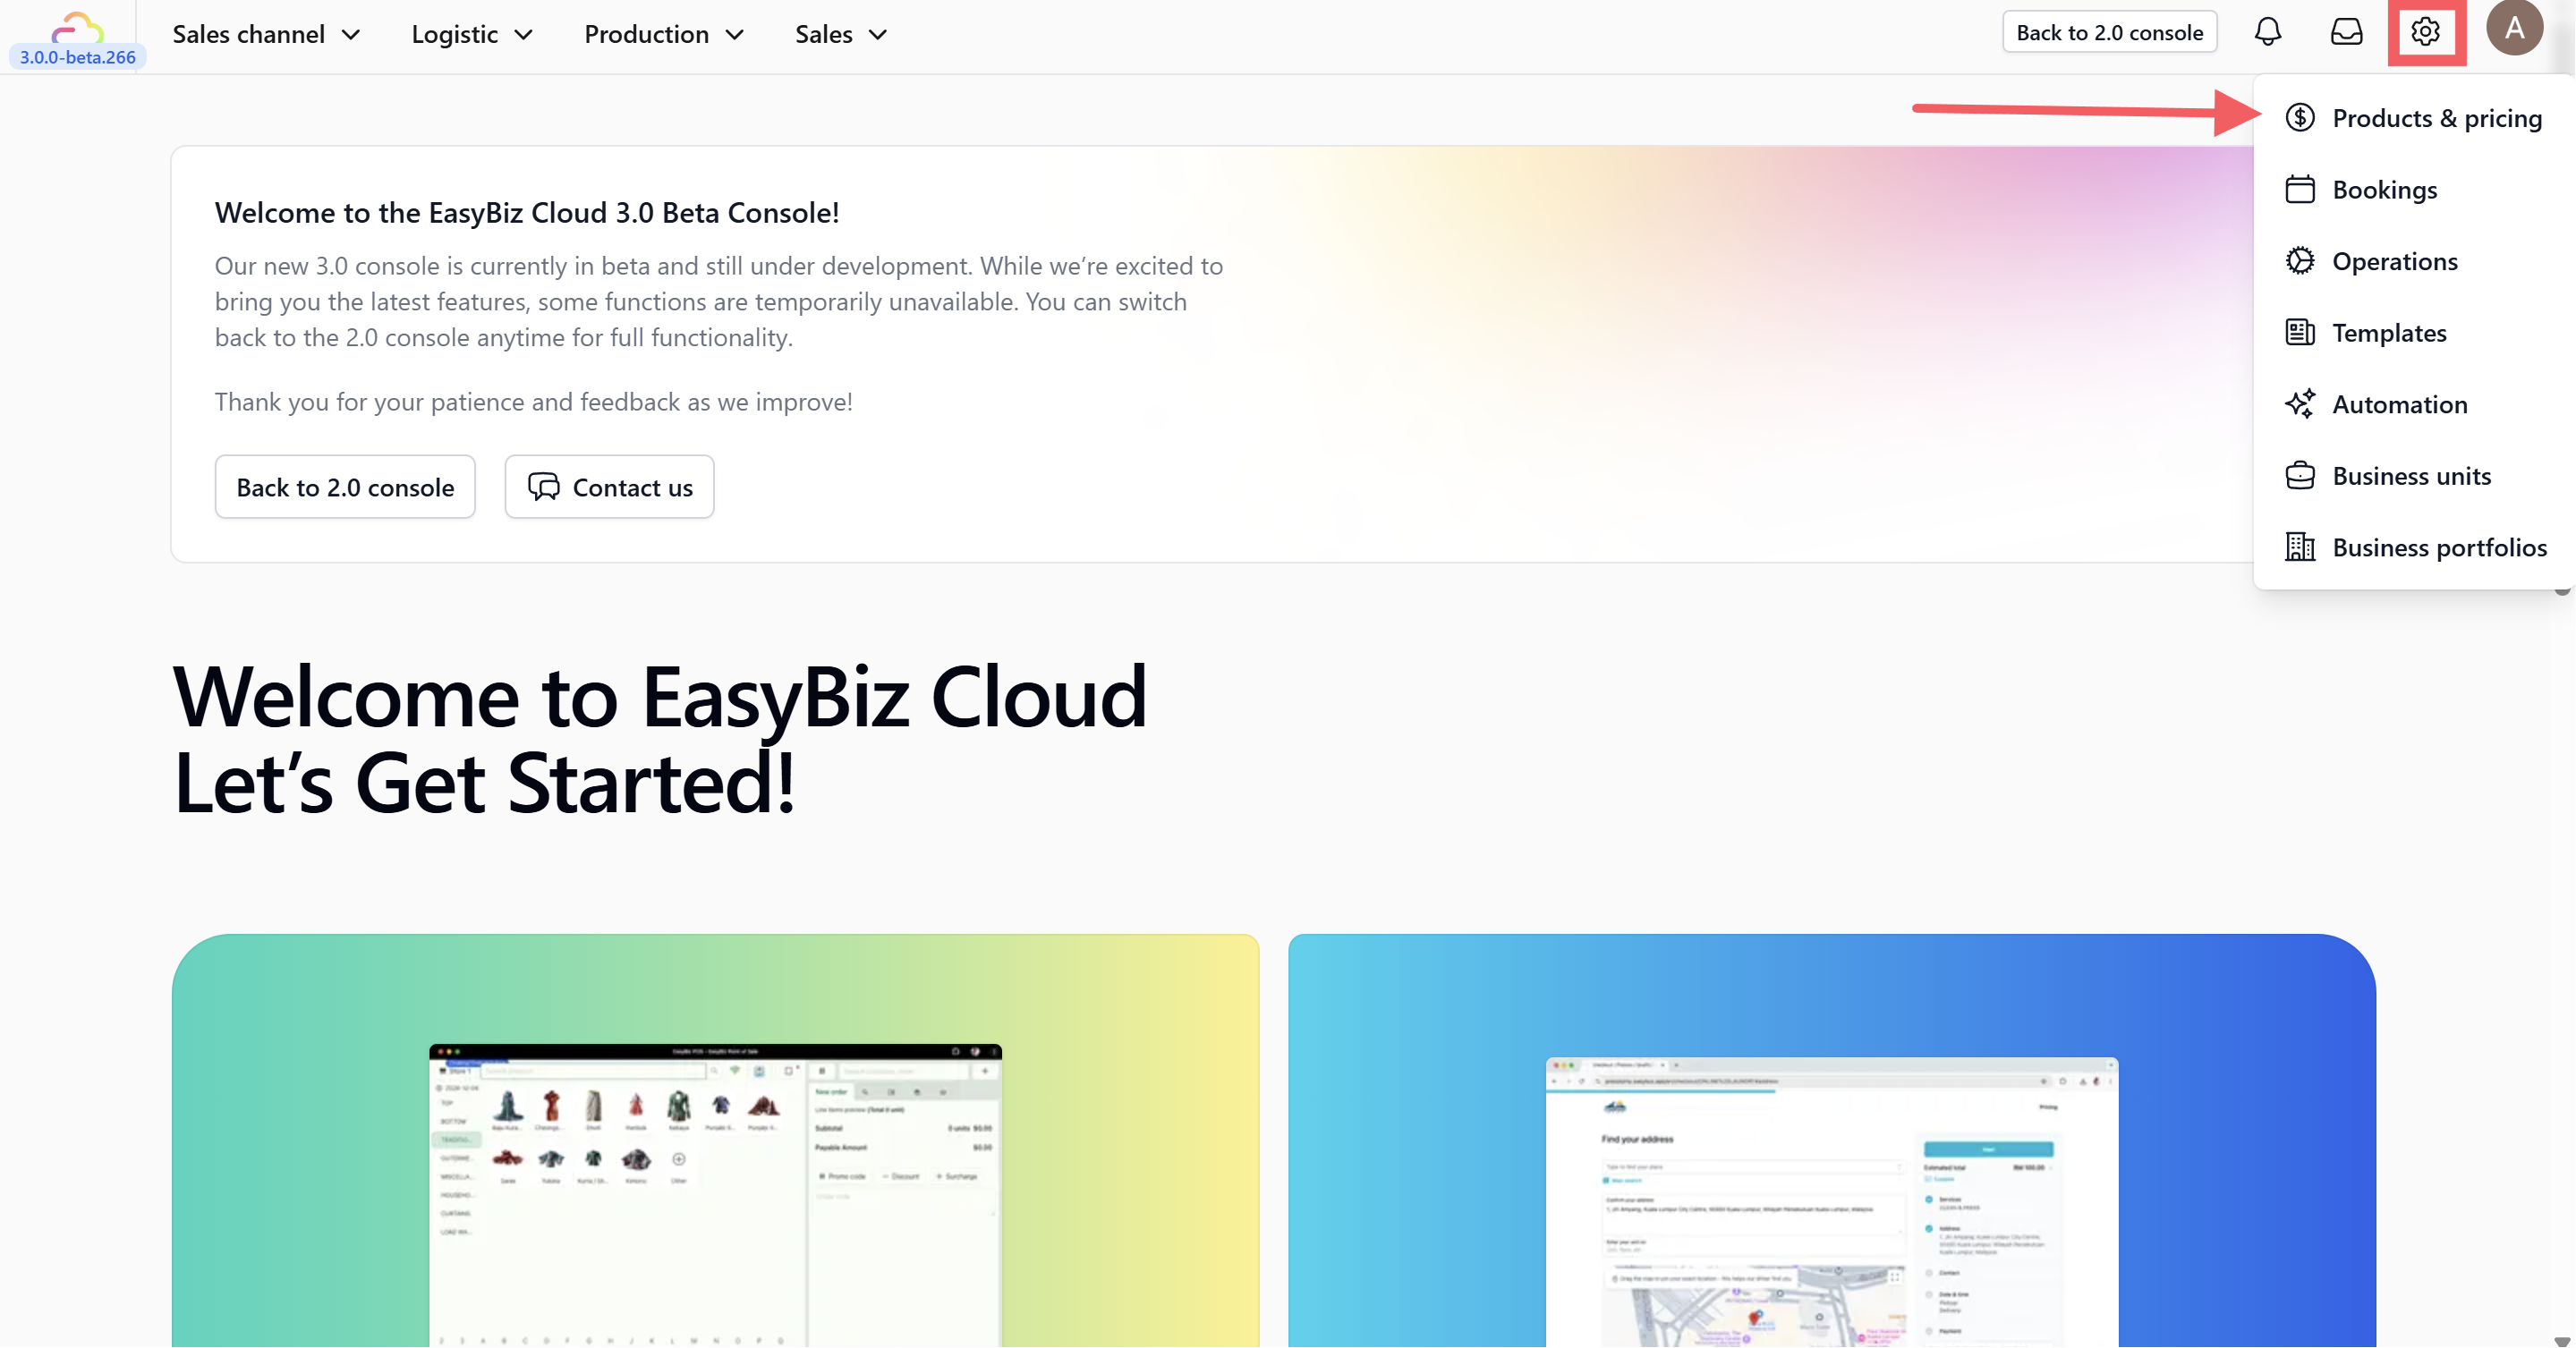
Click the settings icon next to your profile, select the Products and Pricing option.
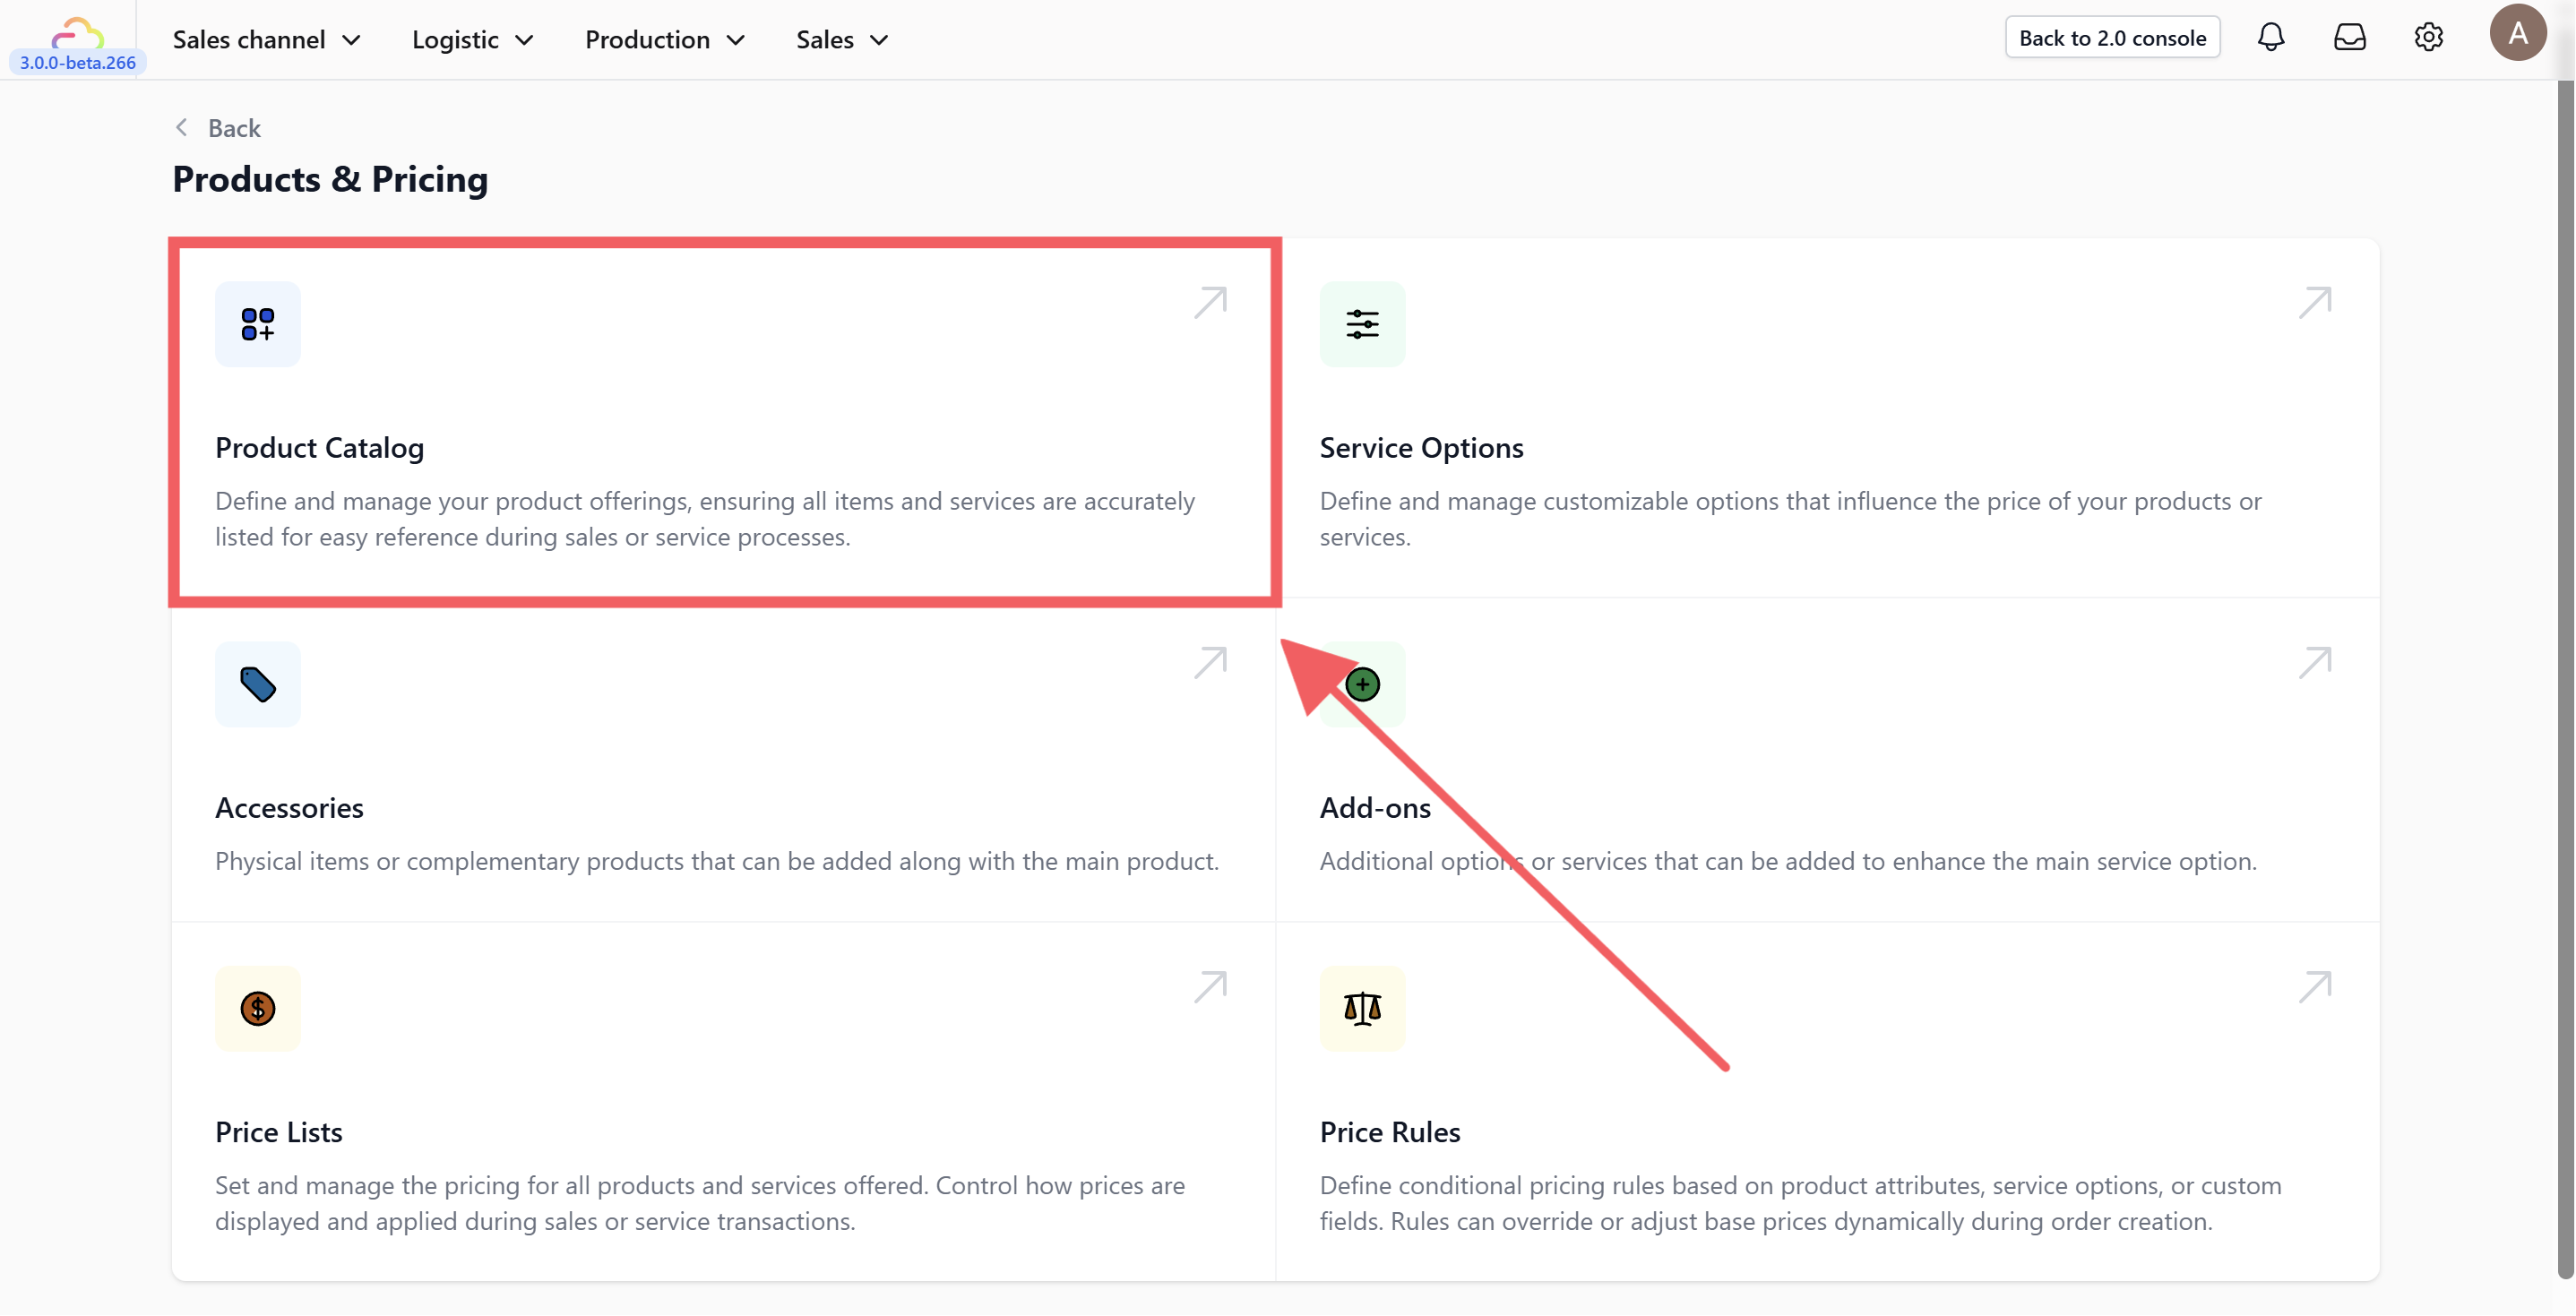
Then click on Product Catalog.
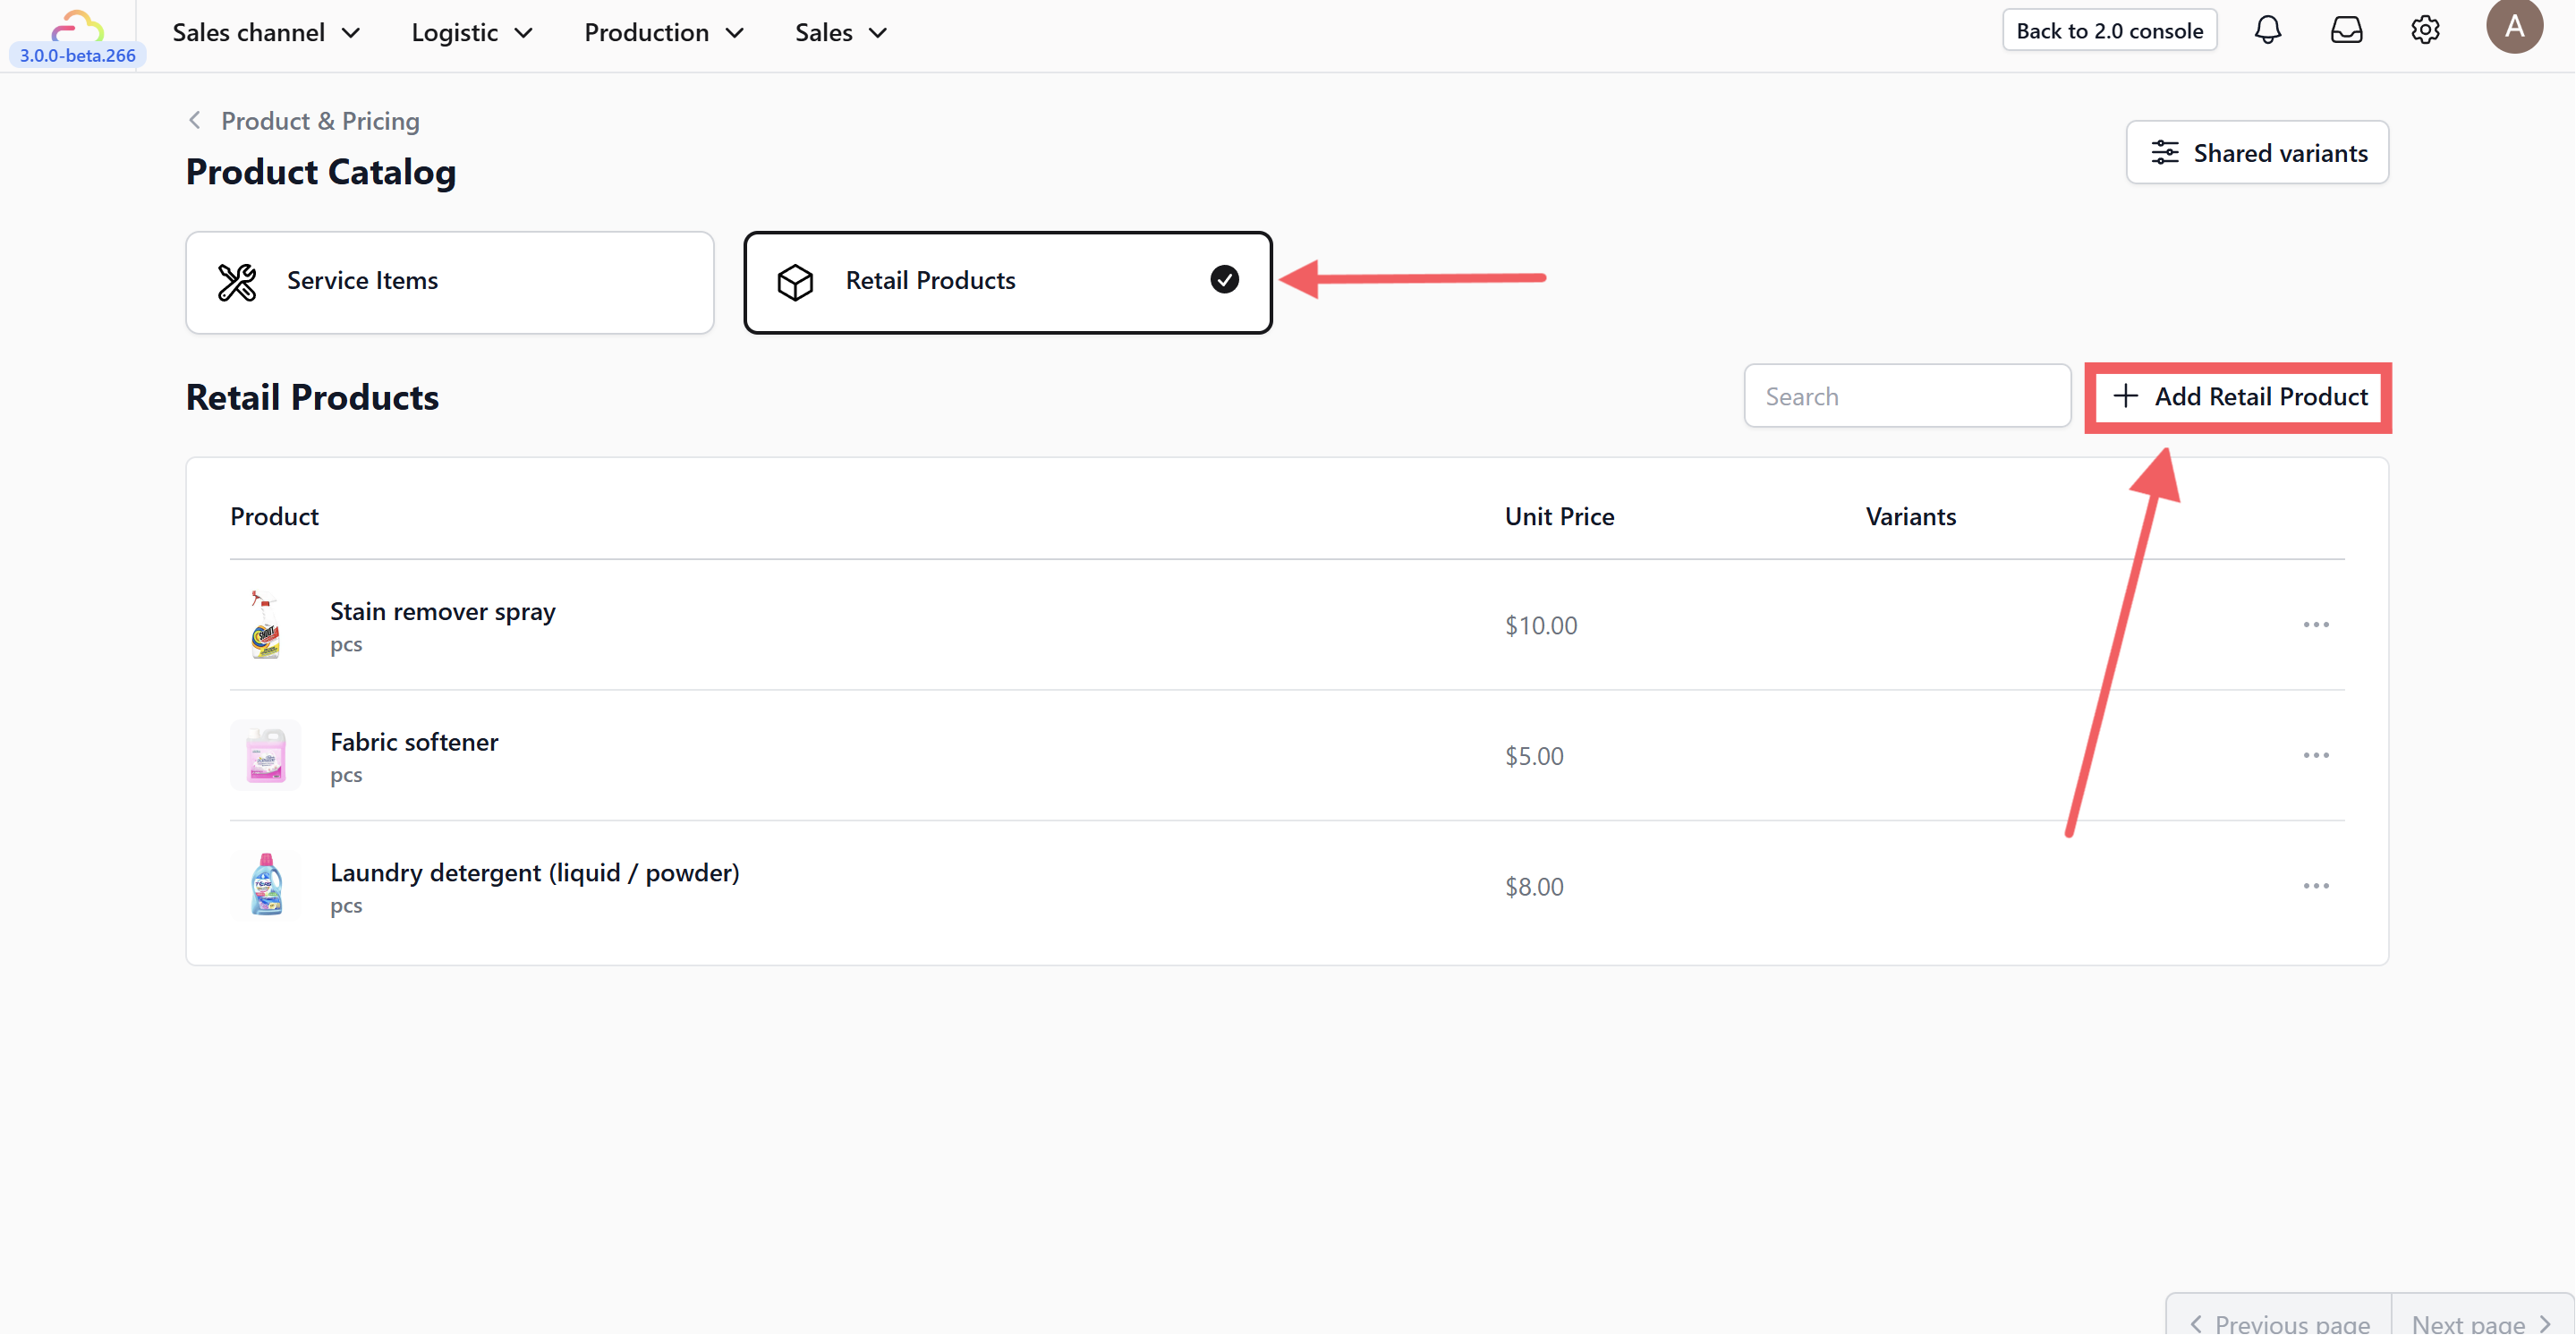
Choose the Retail Products tab to view your current product list, and click the +Add Product button to begin.
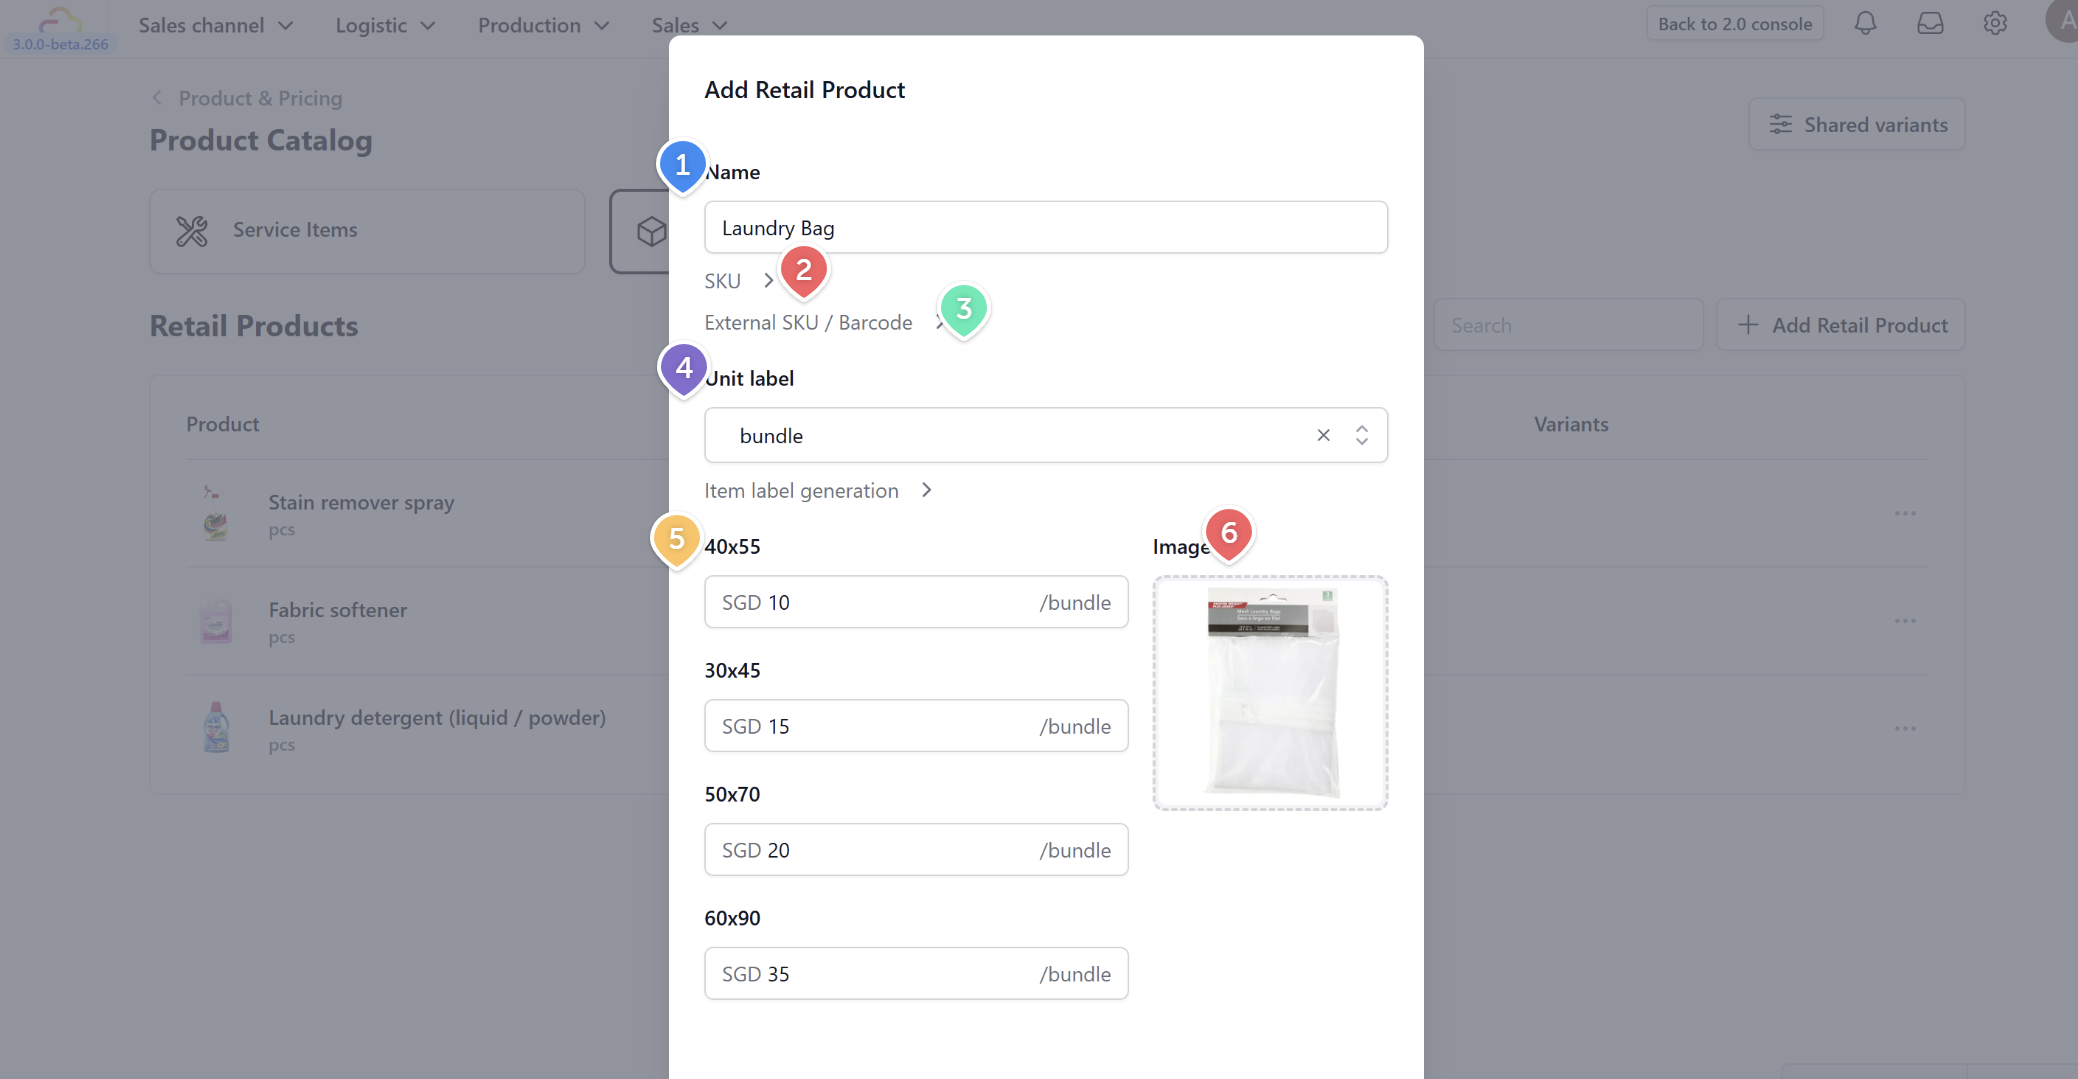
-
Enter the name of the product.
-
Input your SKU. An SKU (Stock Keeping Unit) is a unique internal code used to track specific inventory items.
-
Alternatively, enter an External SKU (a code provided by your supplier/manufacturer) or scan the product’s Barcode.
-
Choose the appropriate unit label from the dropdown options.
-
Input the unit price.
-
Upload an image of the product.
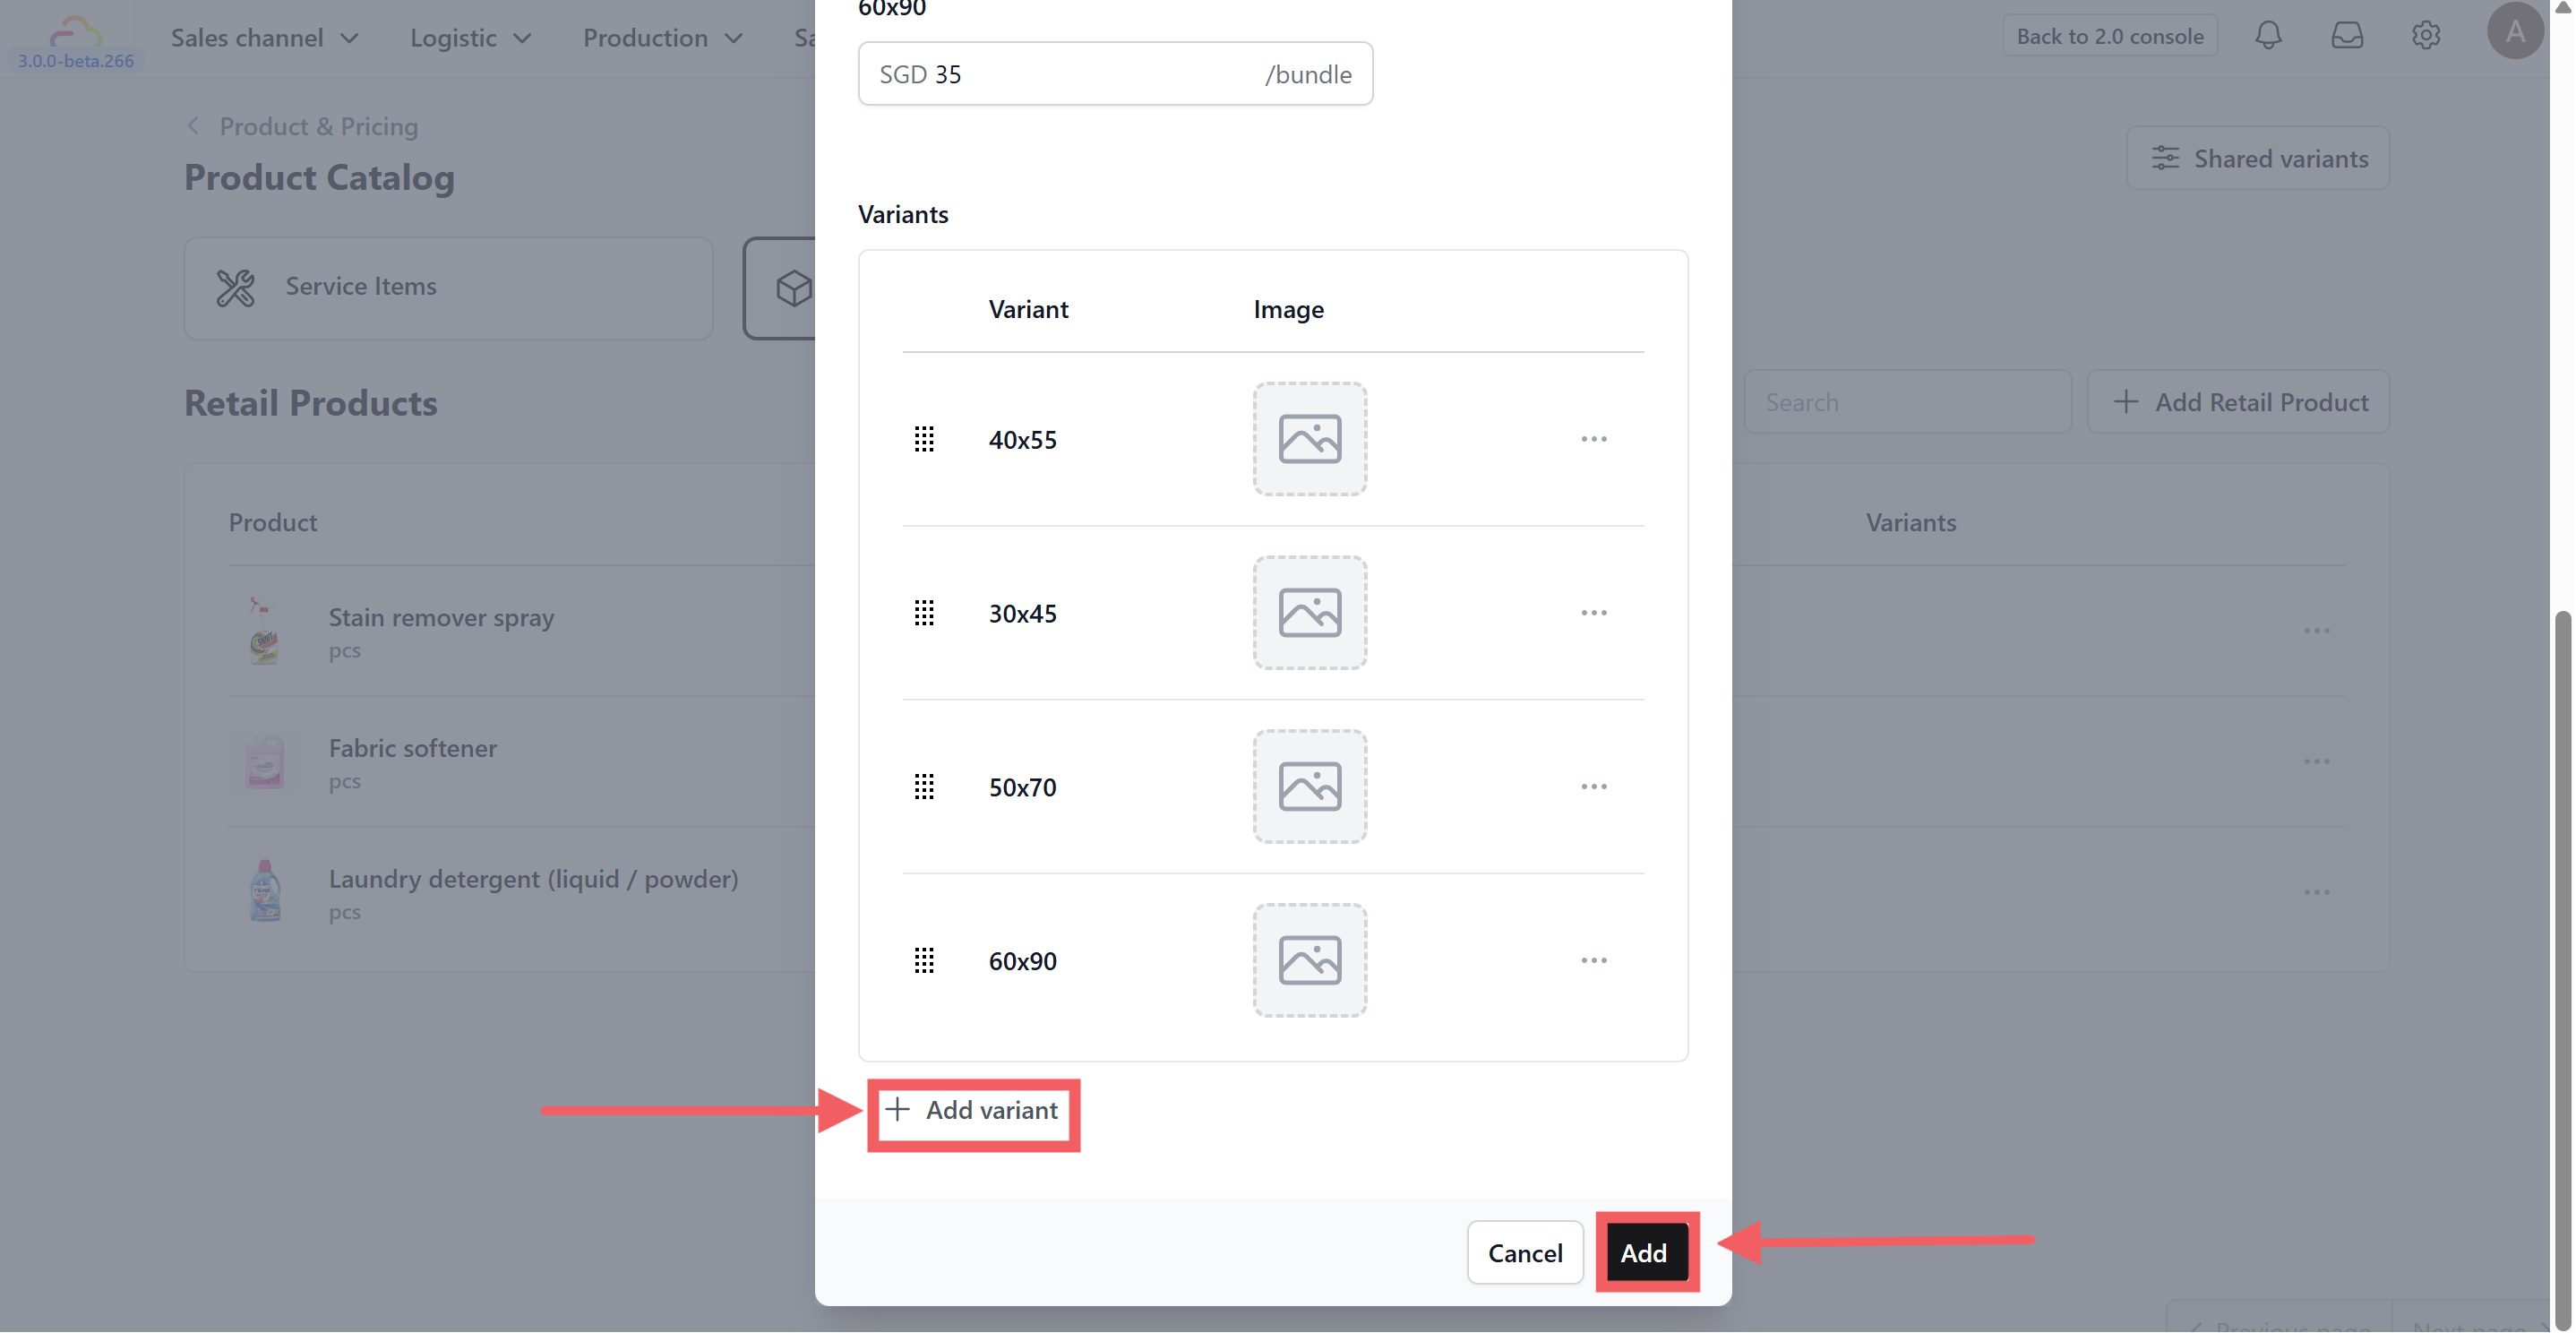
Scroll down to add more variants if necessary, or if you are finished, click Add.
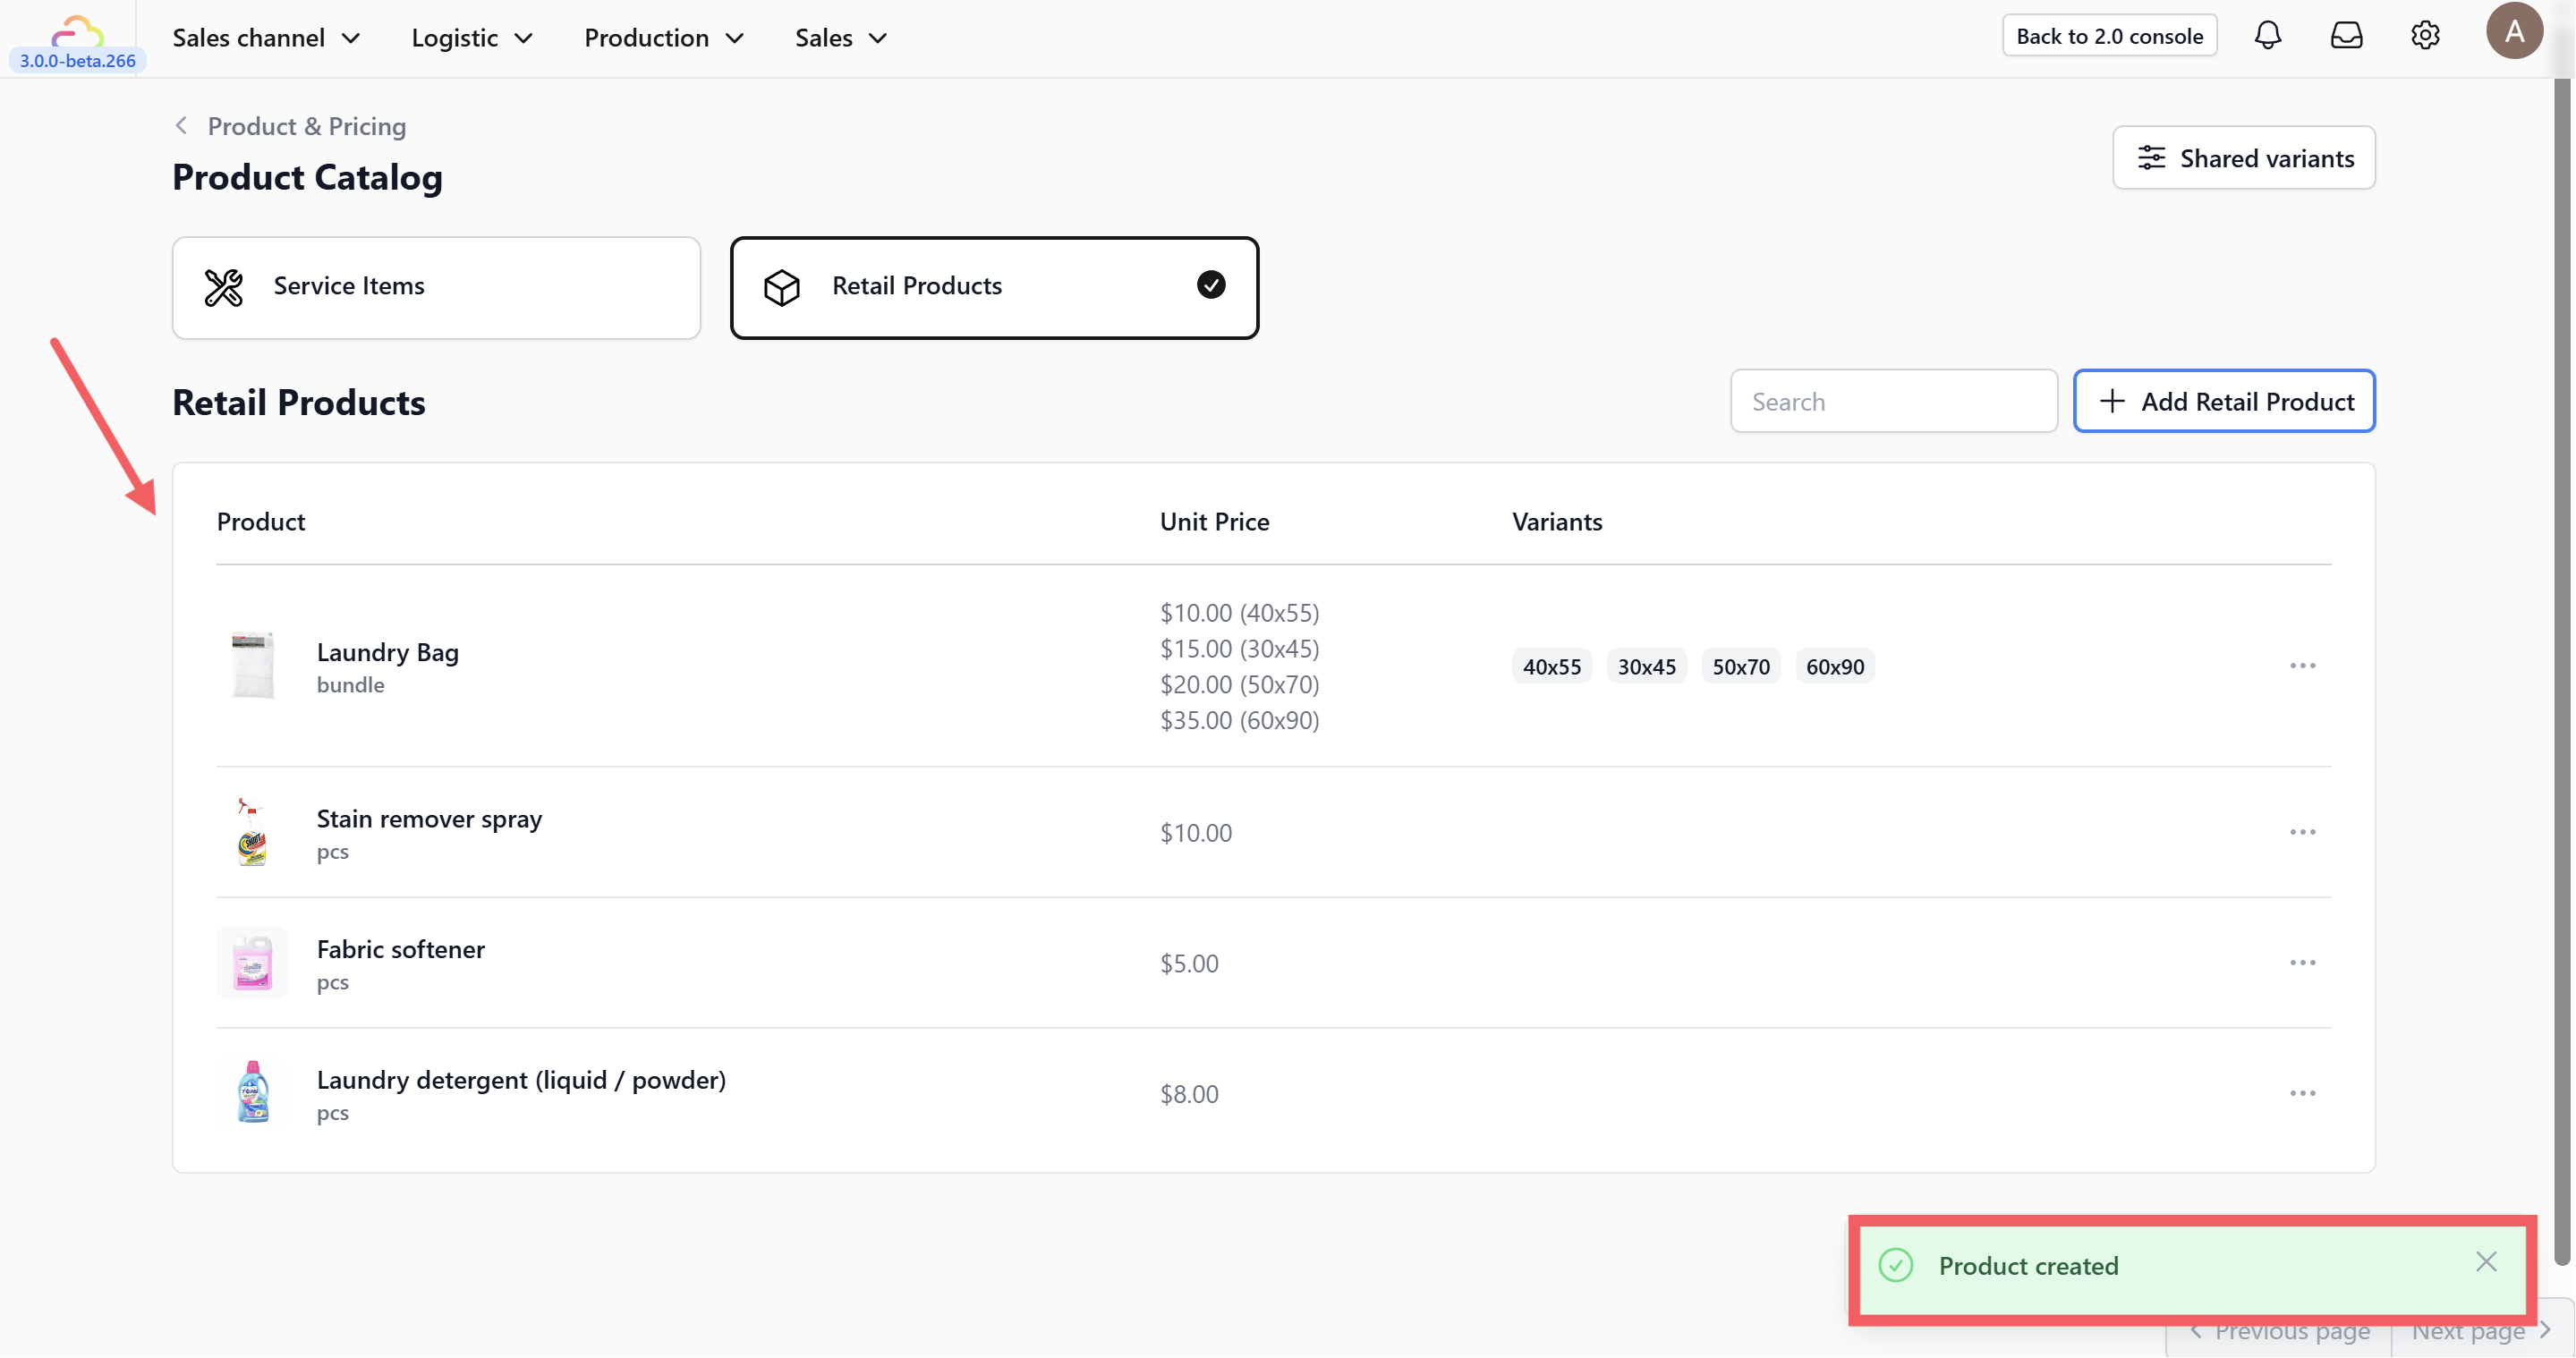
The newly added product will now appear in the product table.
Recording Initial Stock Levels
Now that you have added the items to your catalog, you can record their inventory stocks.
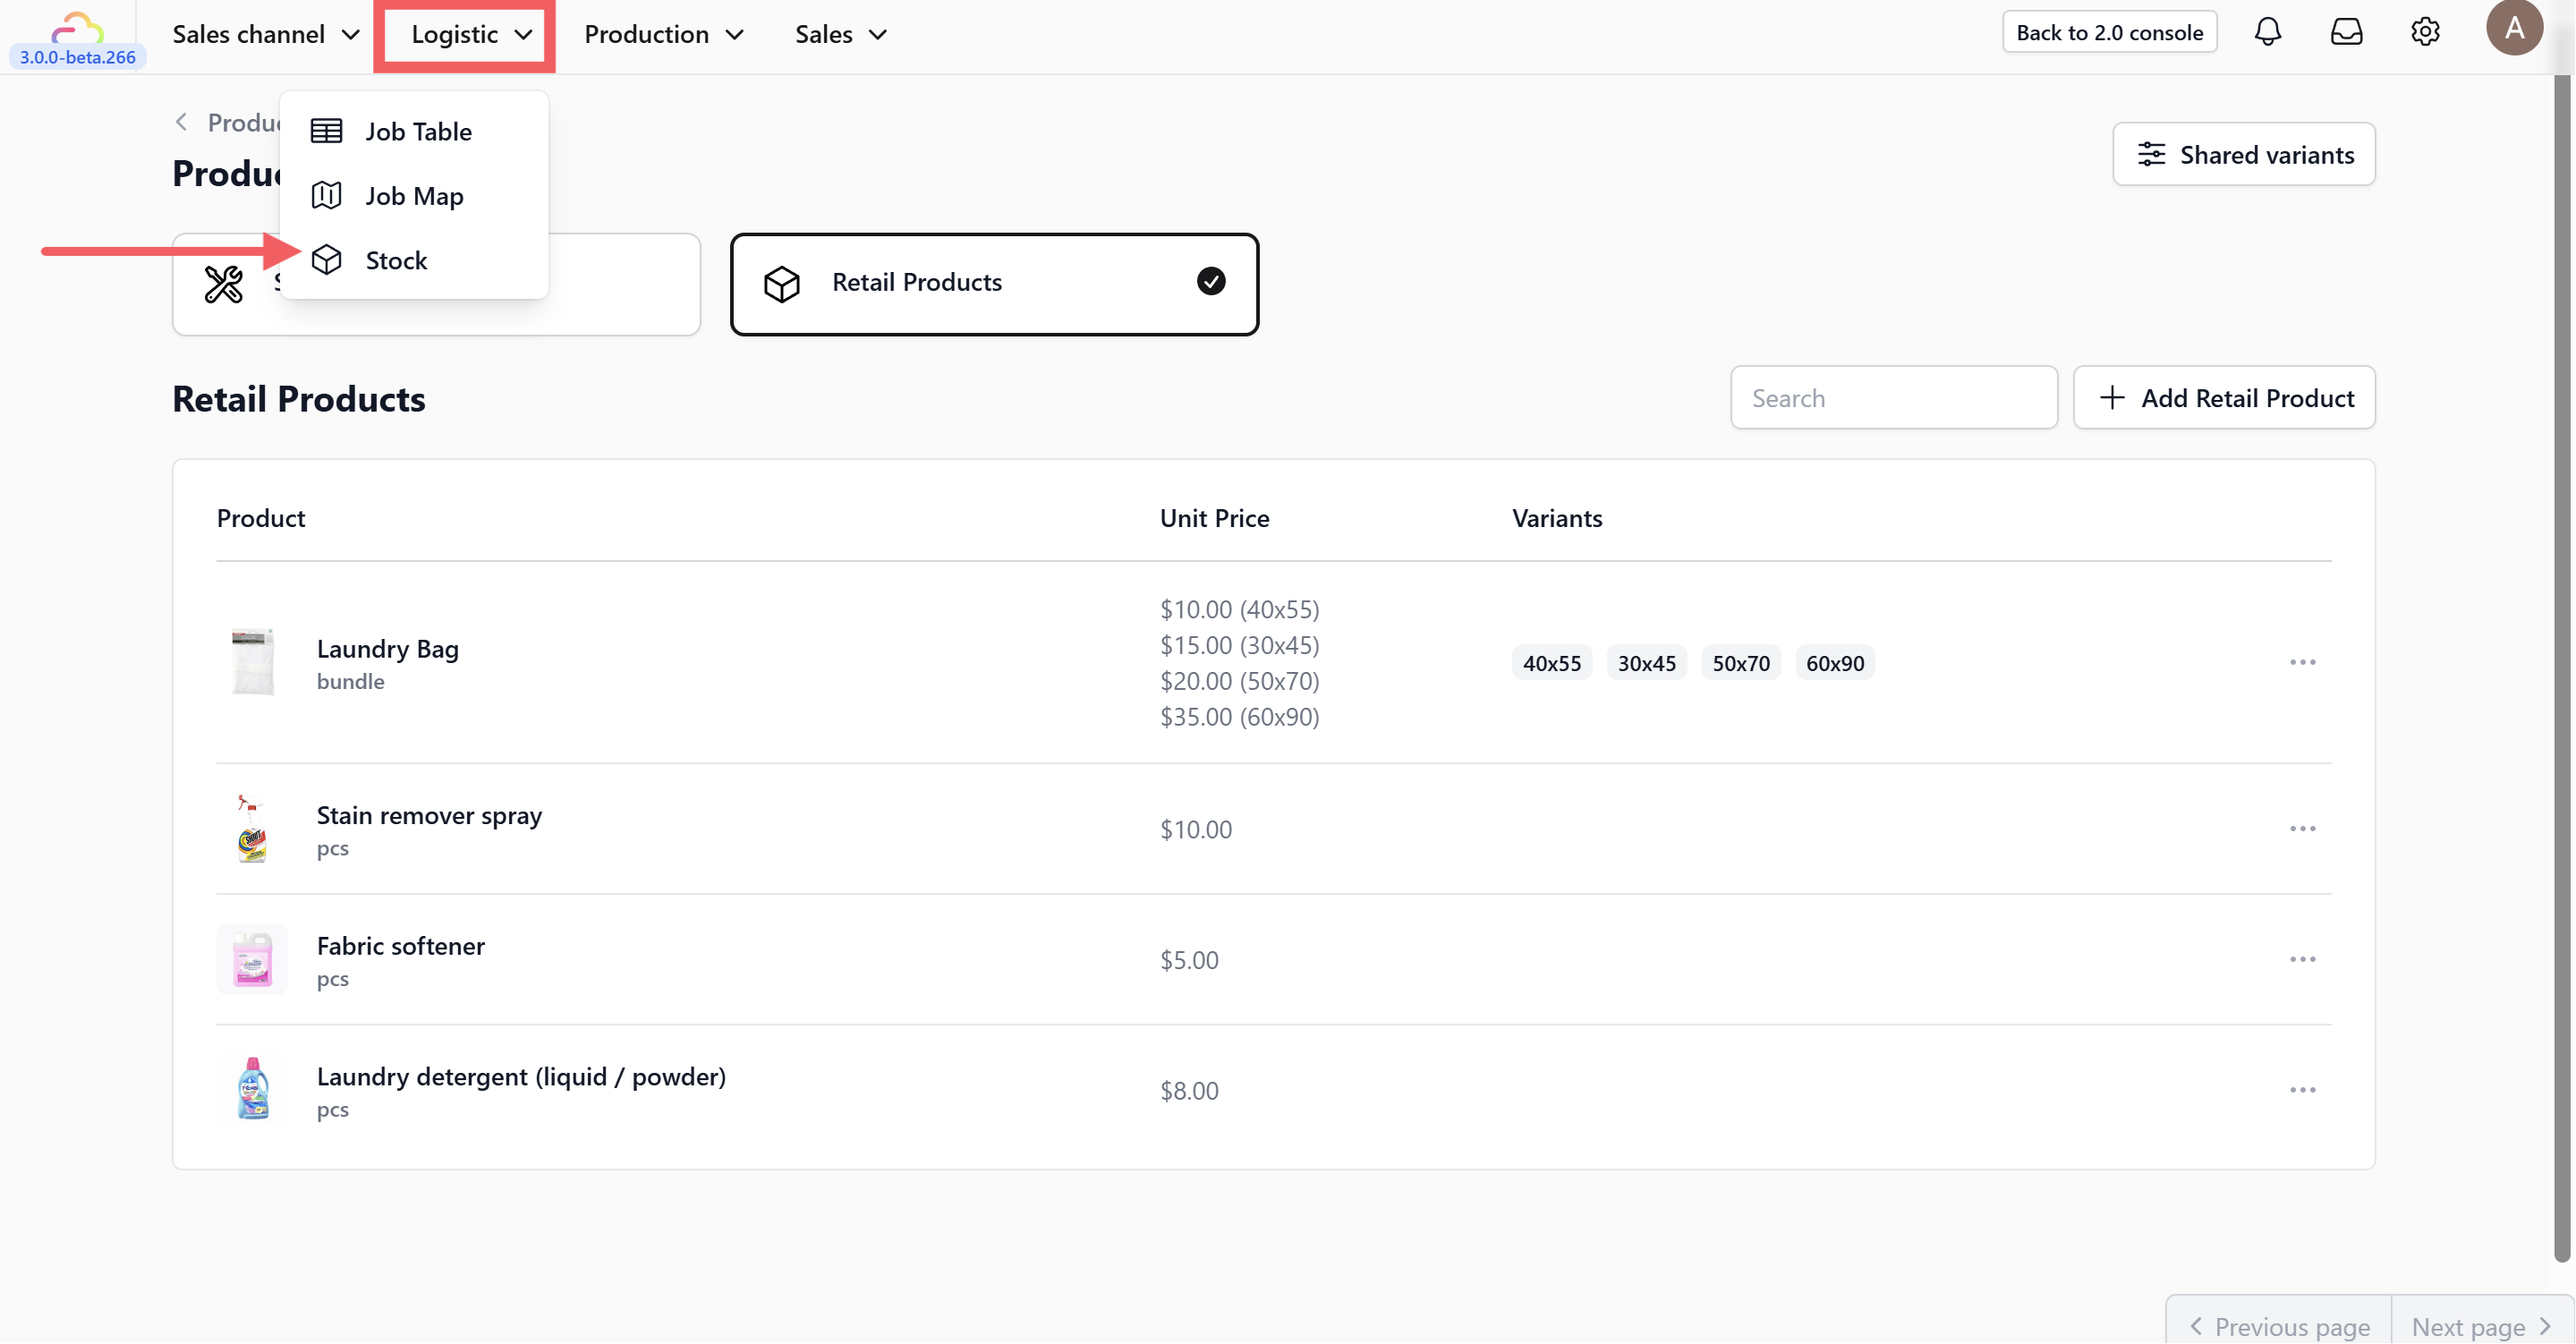
Click on the Logistic section in the menu and choose Stock to manage your inventory.
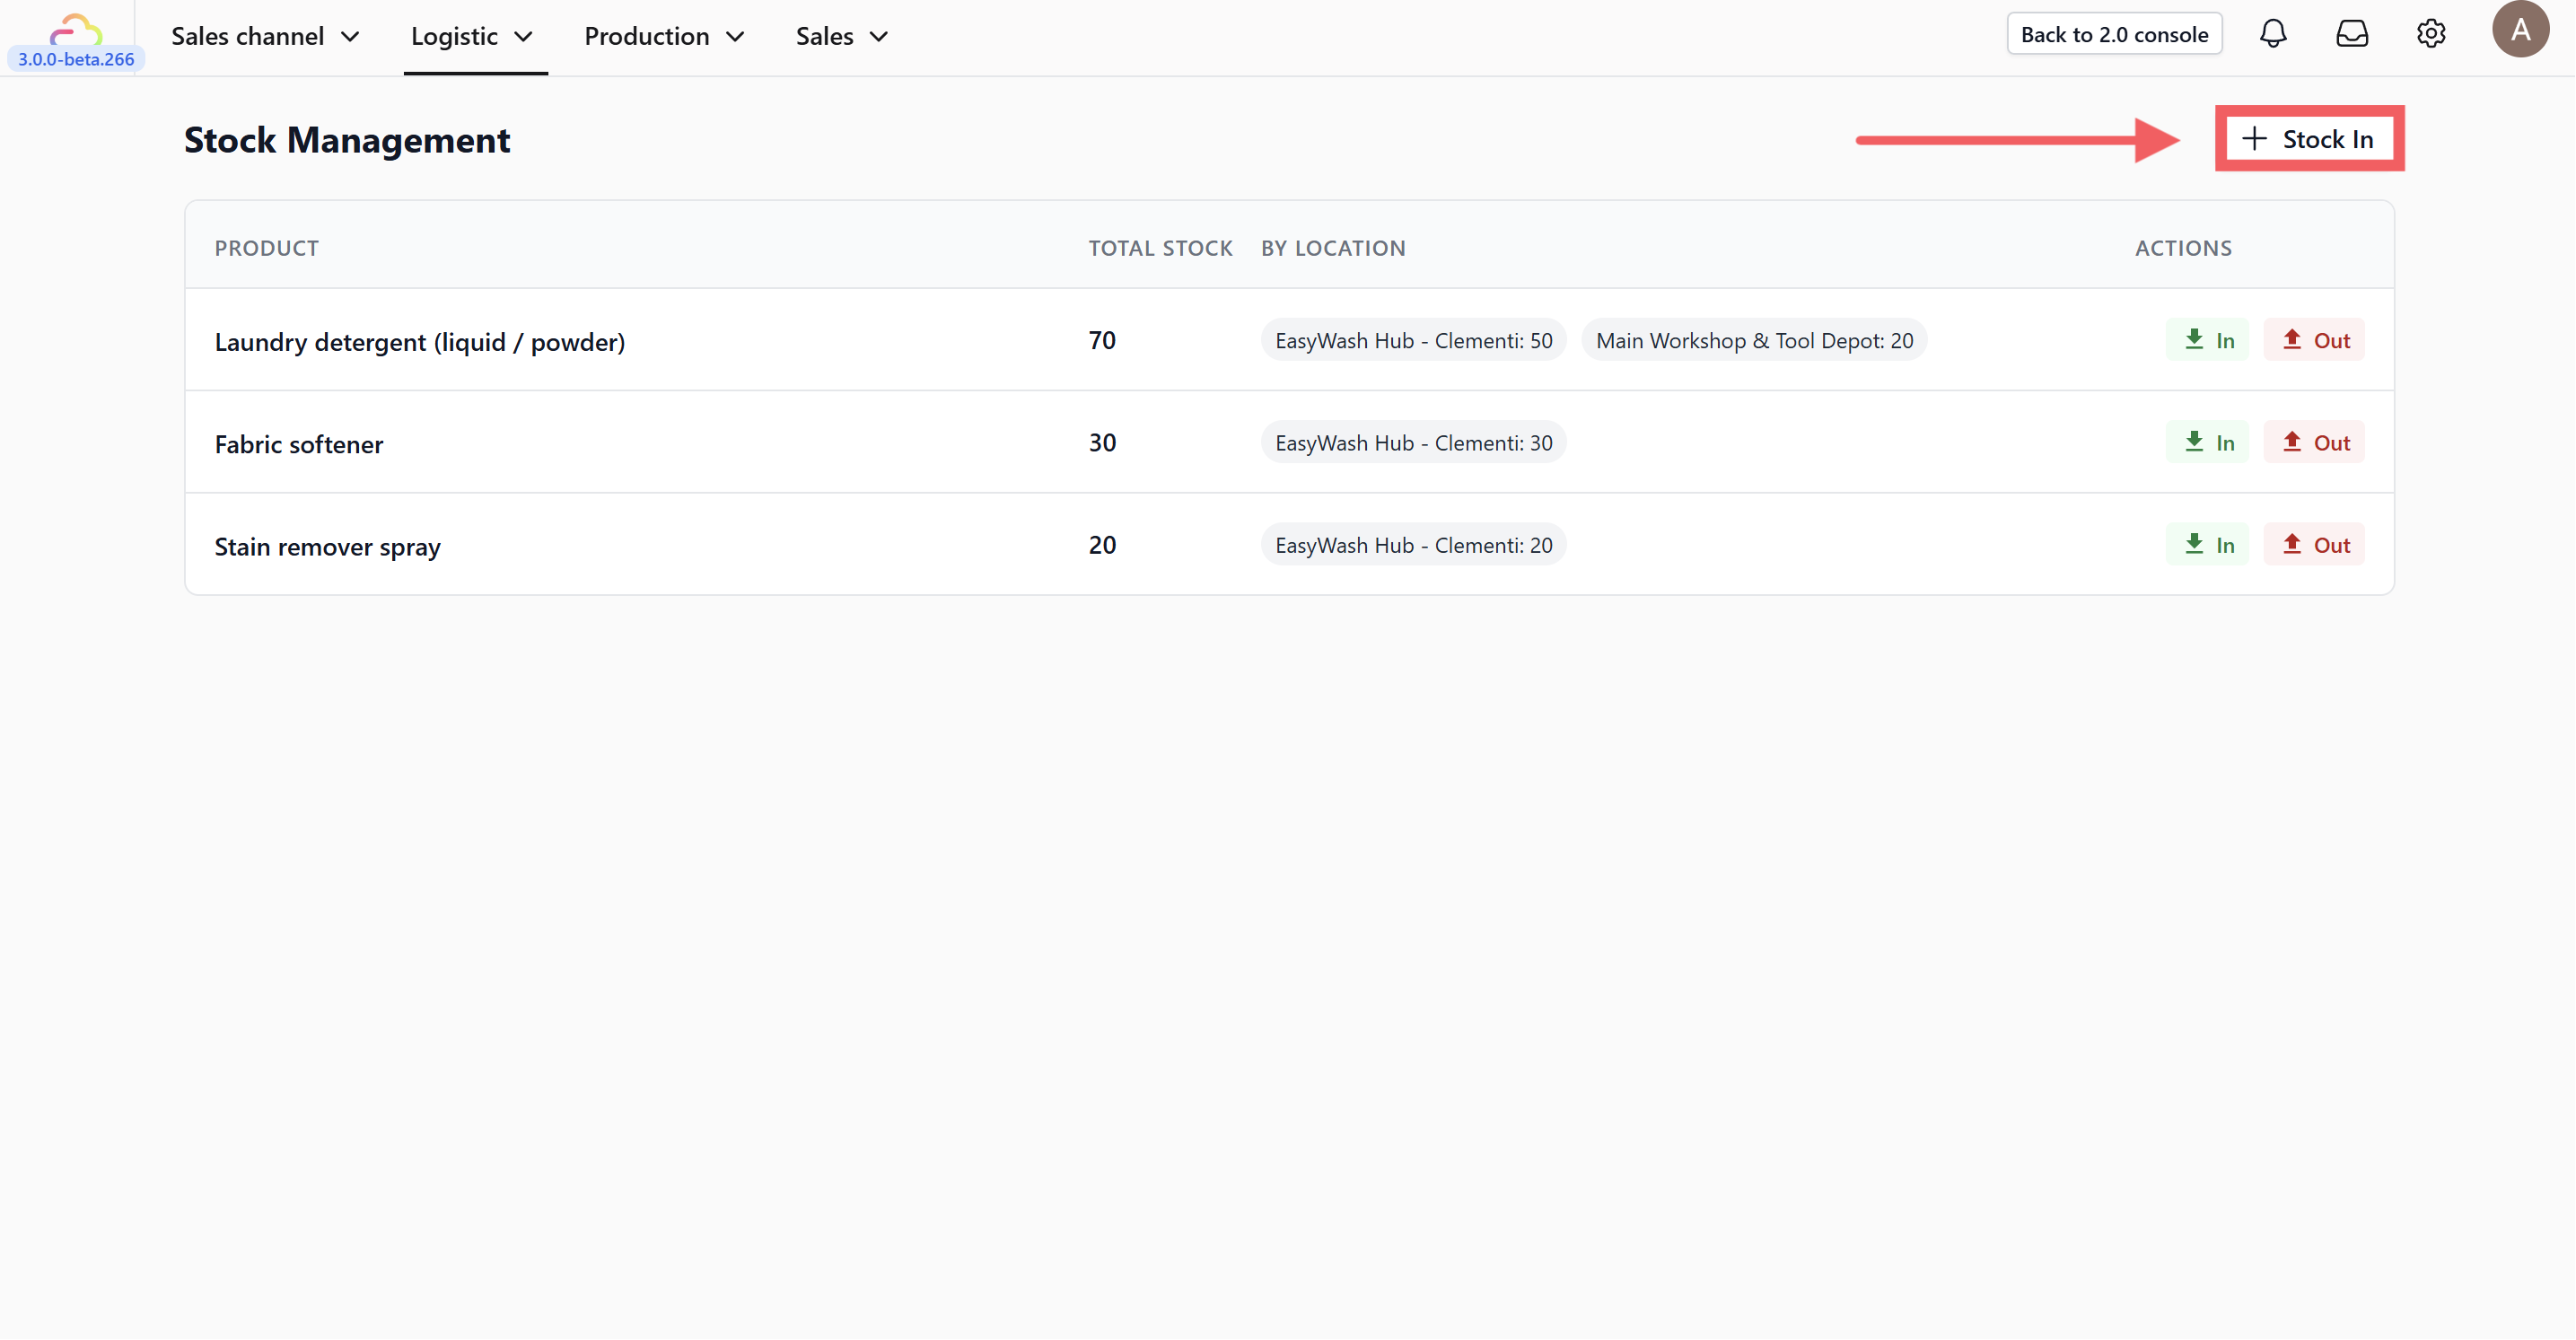
On this page, click the +Stock In button.

Fill in the details to record incoming inventory.
-
Choose the item from the product dropdown menu.
-
Select the specific variant you are stocking in.
-
Choose the location where the item will be stored.
-
Input the quantity of items received.
-
Add a reason for the stock adjustment if needed.
Finally, click Confirm.
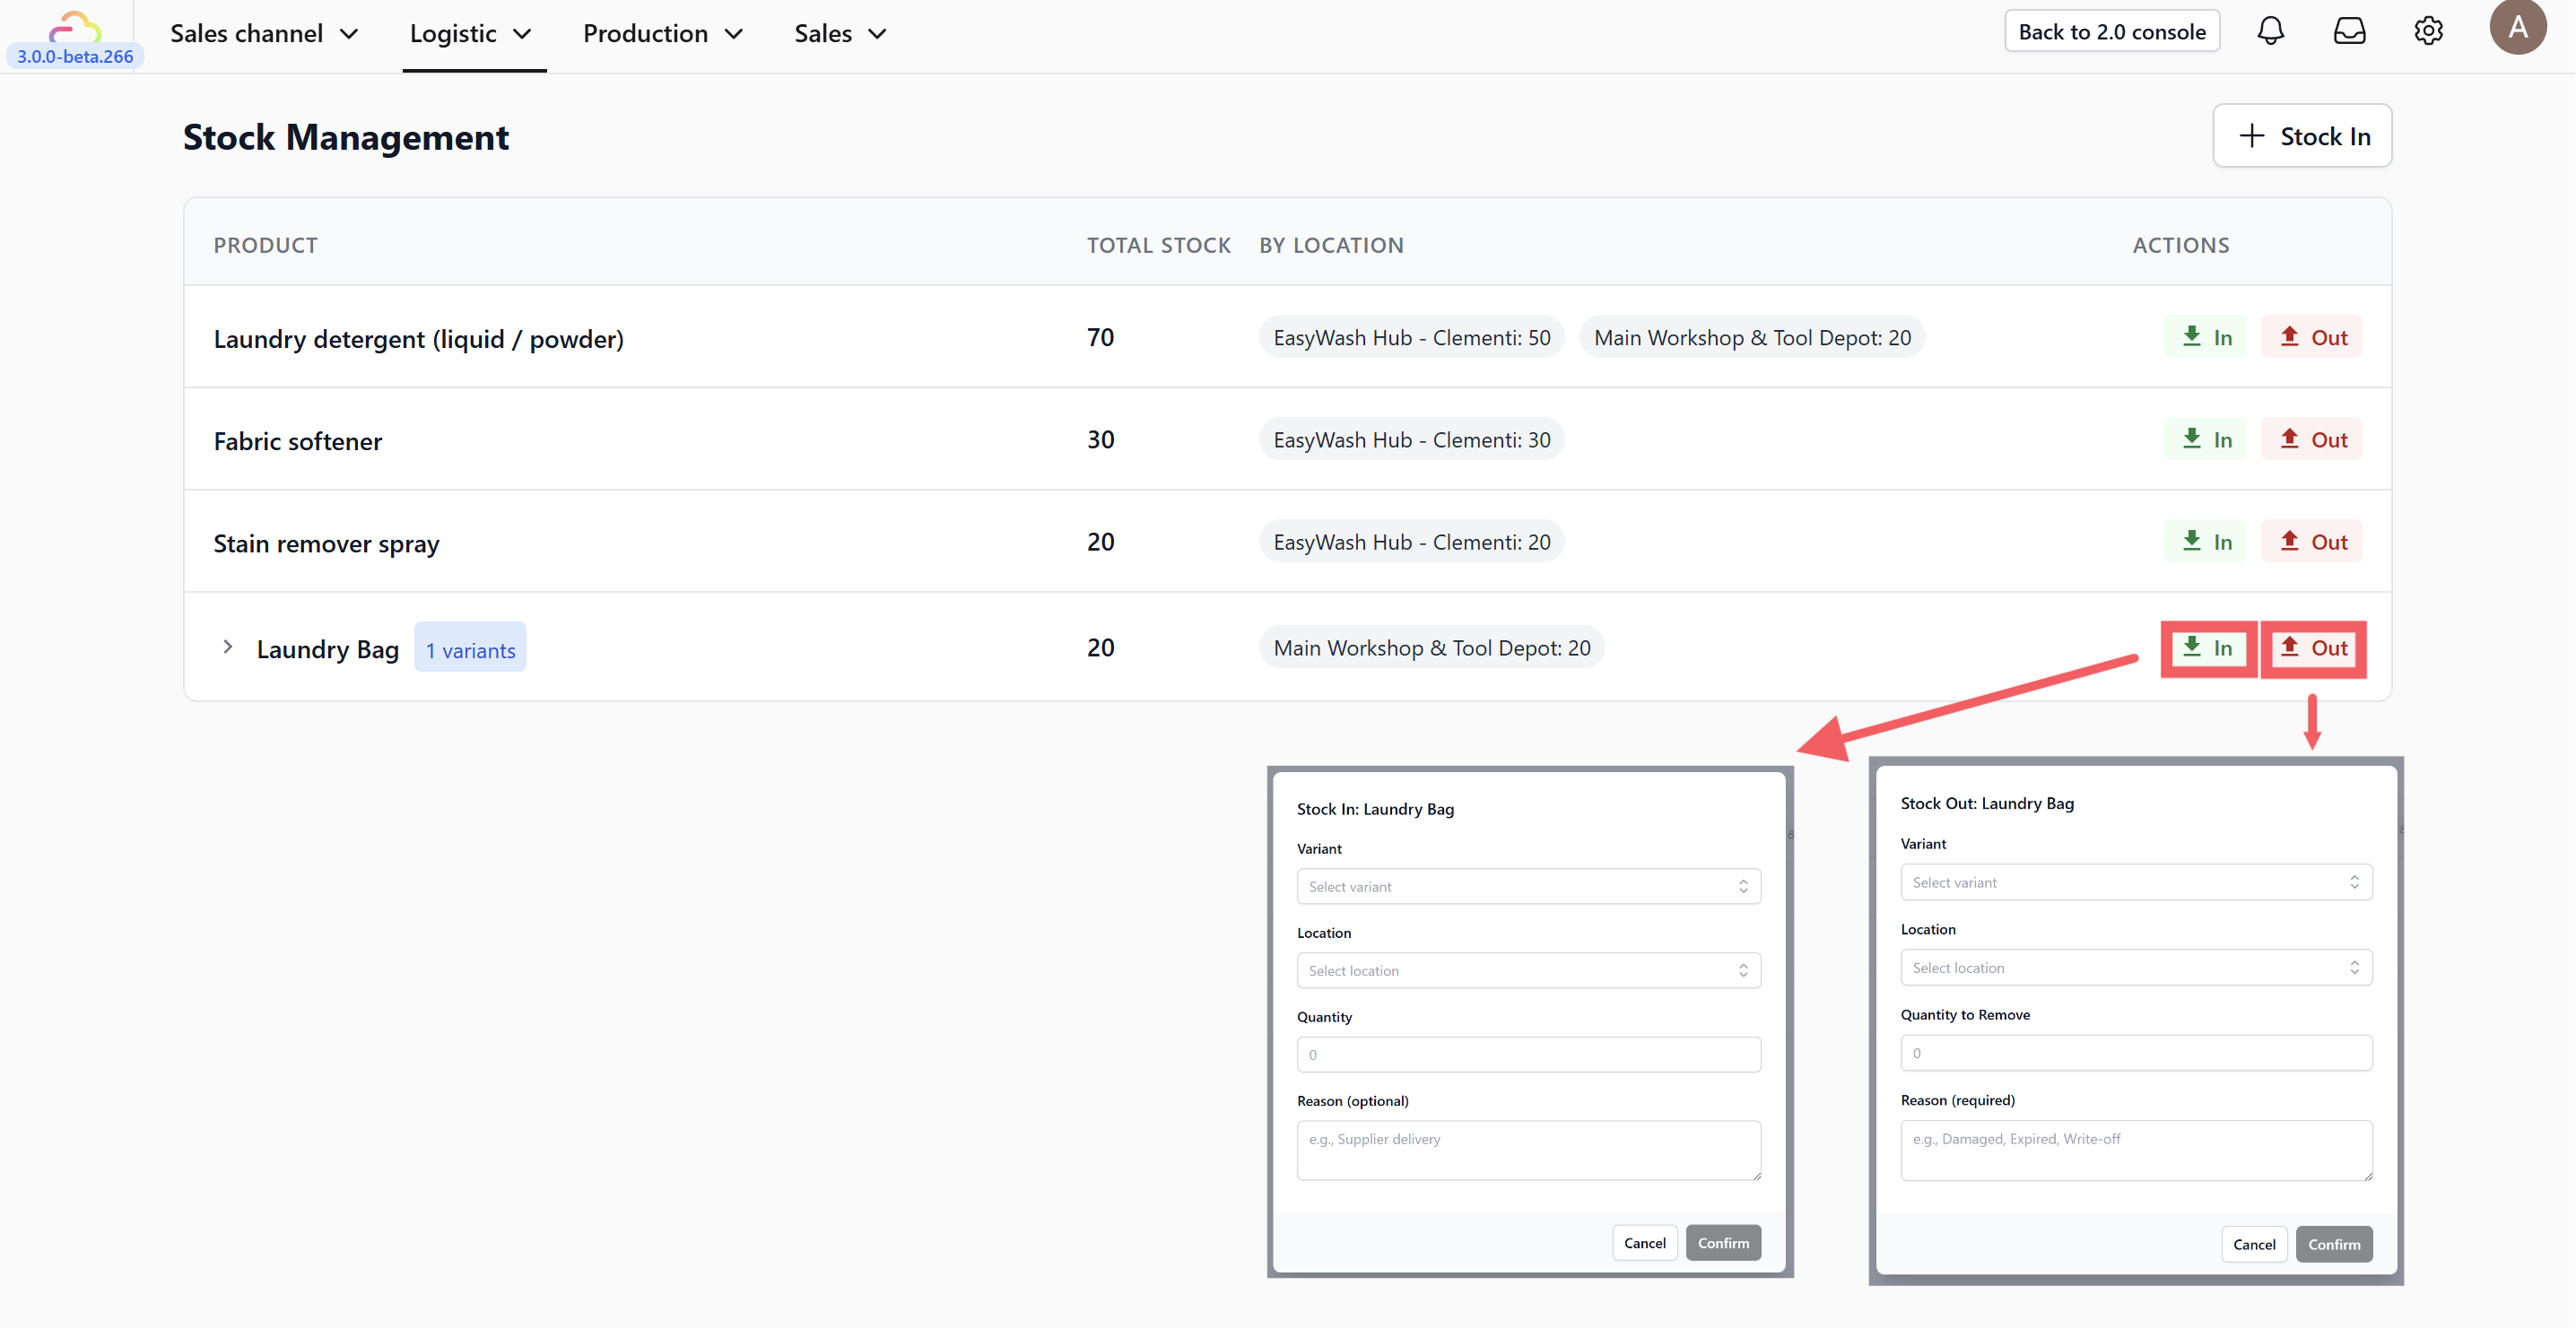
Your new item stock levels will now show up in the stock table. You can click on an item in this table later to record more incoming items (Stock In) or remove items if stock is reduced (Stock Out).