Understanding Deal Information
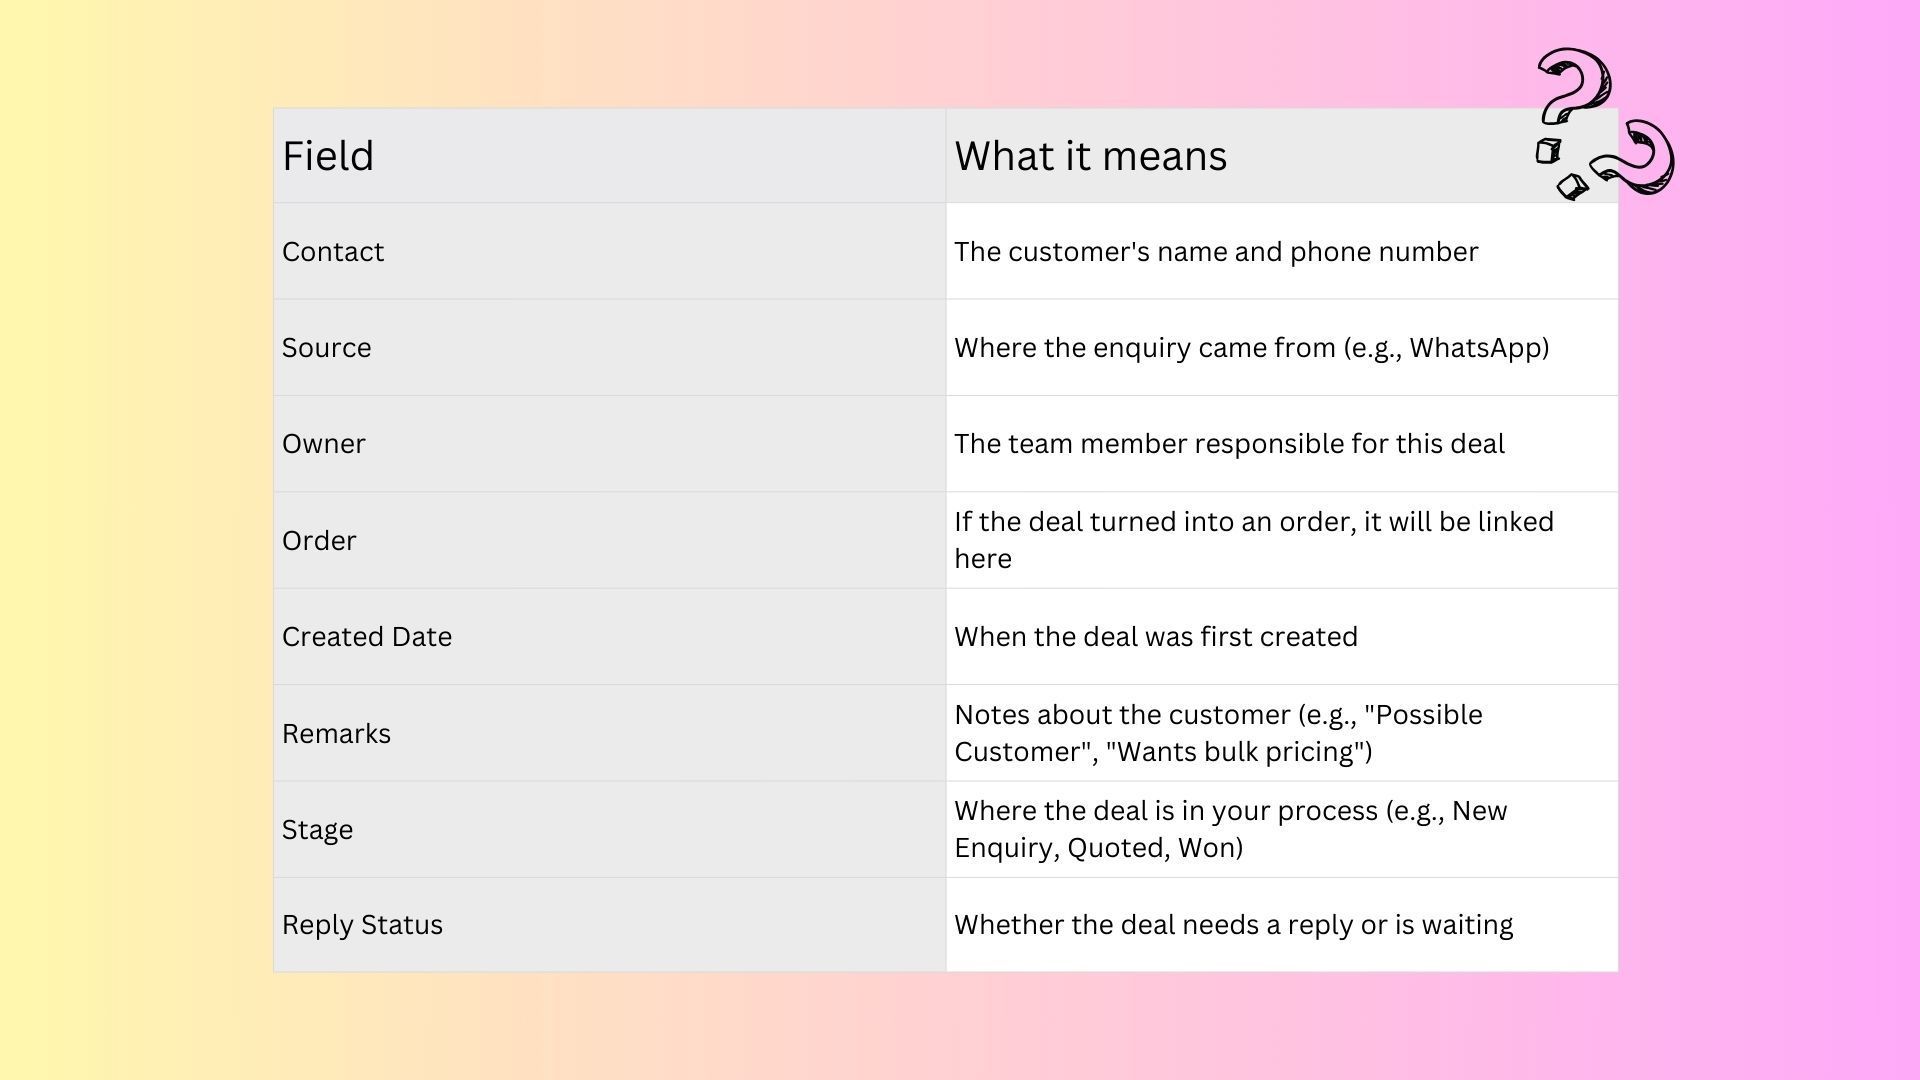
Each deal contains essential information about the customer’s journey.
Moving a Deal to a Different Stage
As your conversation with a customer progresses, you will want to update the deal’s stage. For example, after sending a customer a price quote, you would move the deal from New Enquiry to Quoted. When the customer confirms, move it to Won. If they decide not to proceed, move it to Lost.
Adding Remarks to a Deal
Remarks let you add notes to a deal so your team knows important details at a glance. For example, you might add “Possible Customer” for someone who seems interested, or “Waiting for approval from manager” so the next person who sees this deal knows the context.
Filtering and Sorting Your Deals
When you have many deals, filters help you find what you need quickly.
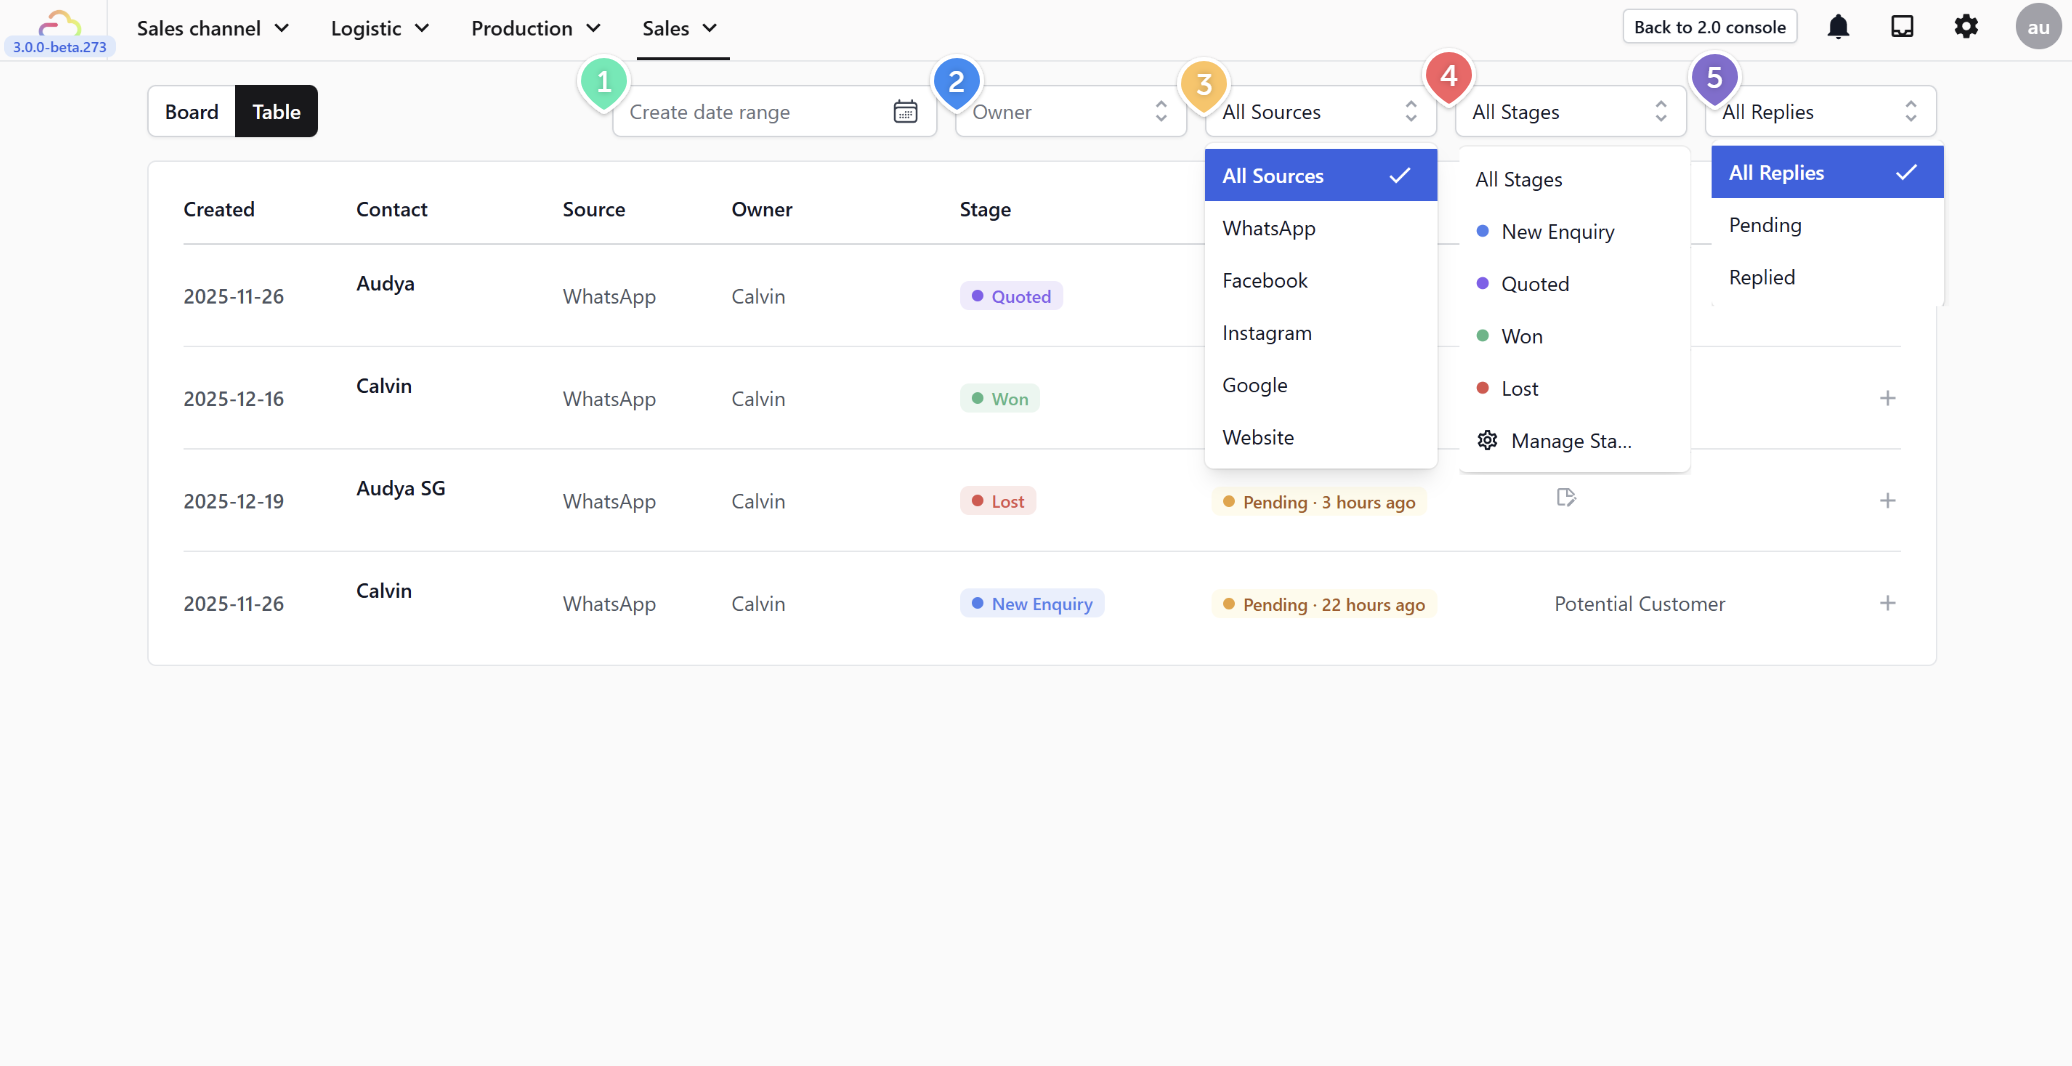
In Table View, you can filter by:
-
Date range — See deals created within a specific period
-
Owner — See only deals assigned to a specific team member
-
Source — See deals from a specific channel (e.g., WhatsApp only)
-
Stage — See deals in a specific stage (e.g., only “New Enquiry”)
-
Reply status — See deals that still need a reply
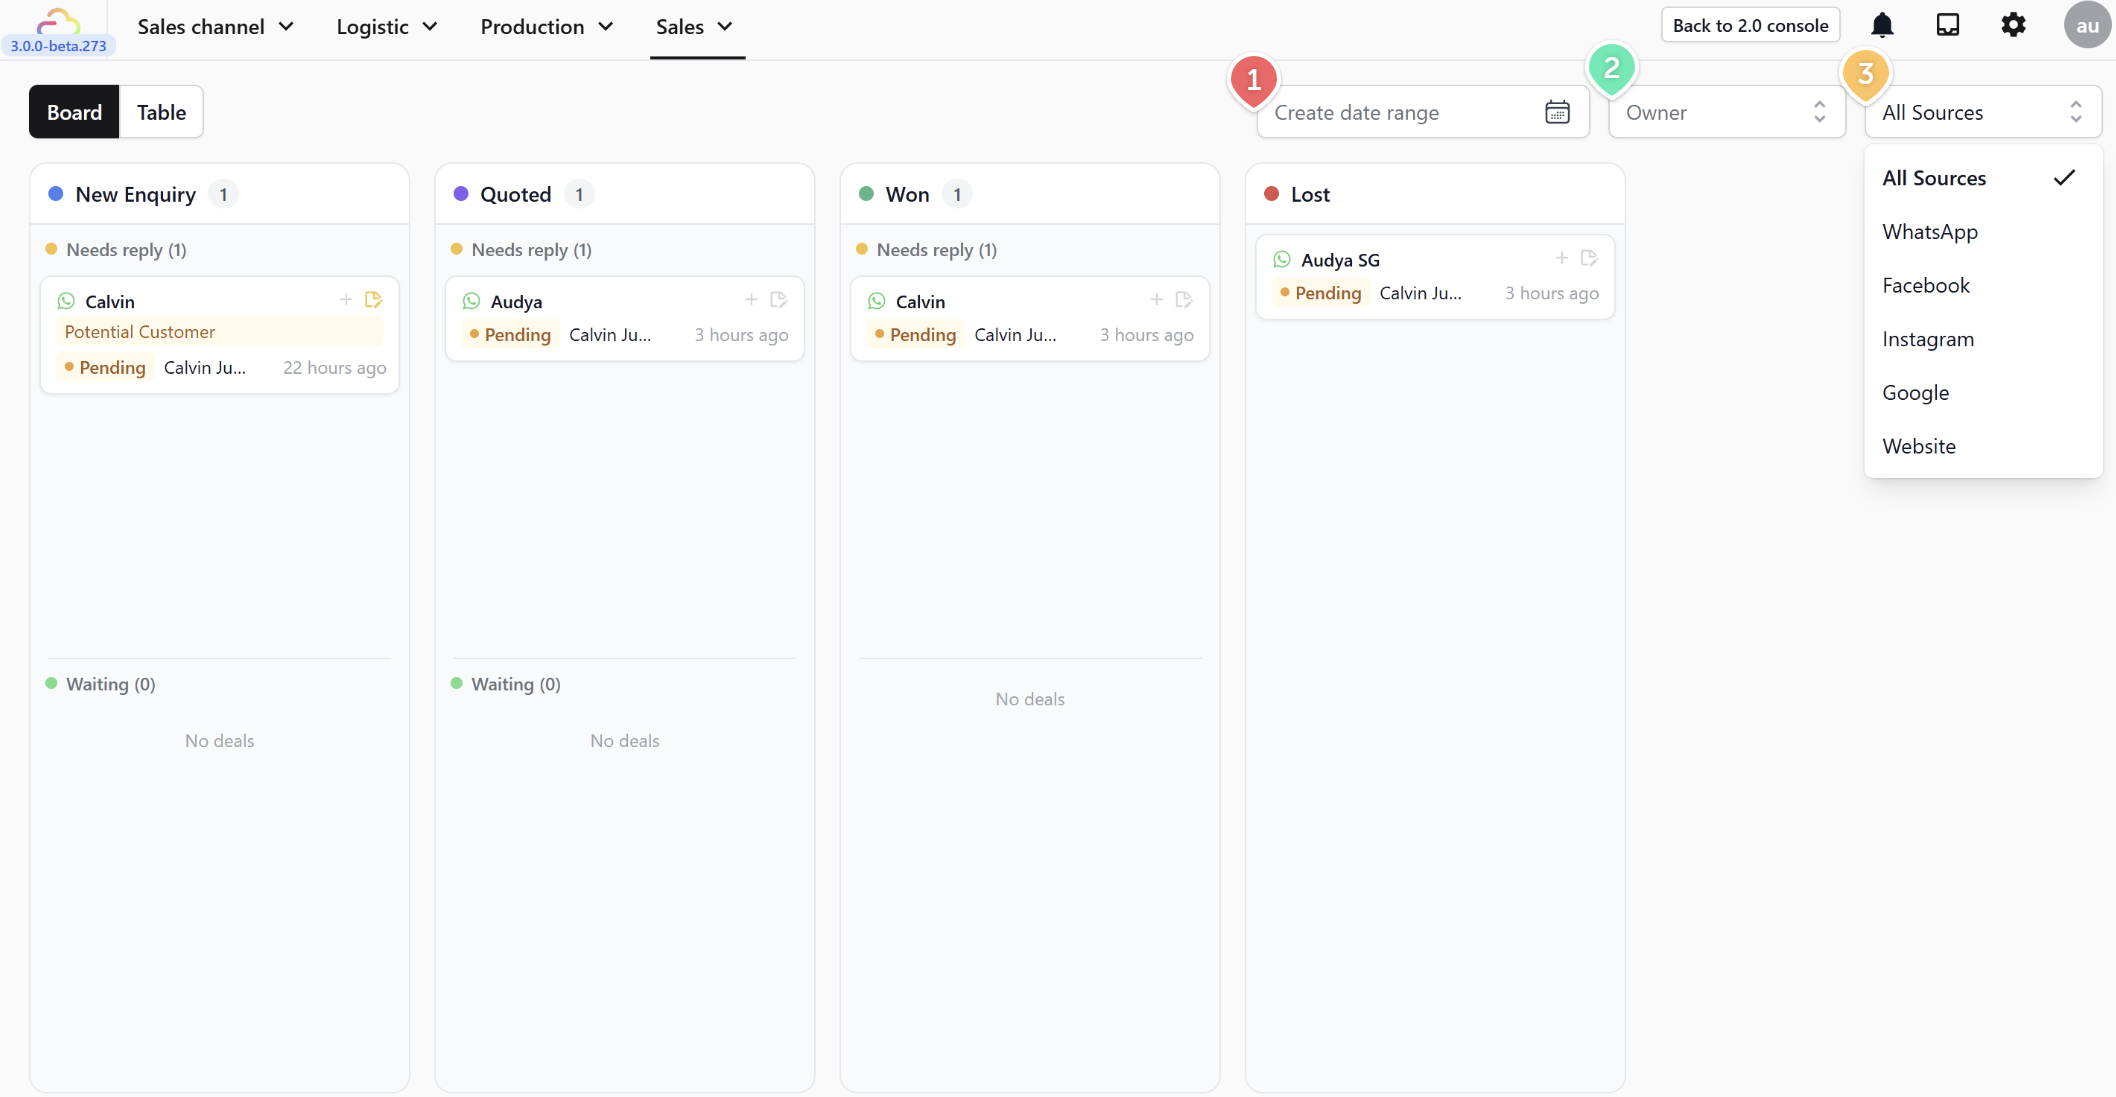
In Board View, you can filter by:
-
Date range — See deals created within a specific period
-
Owner — See only deals assigned to a specific team member
-
Source — See deals from a specific channel (e.g., WhatsApp only)
Creating and Customizing Deal Stages
Once you are comfortable with the basic stages, you can customize your sales pipeline by adding new stages or editing existing ones to fit your exact workflow.
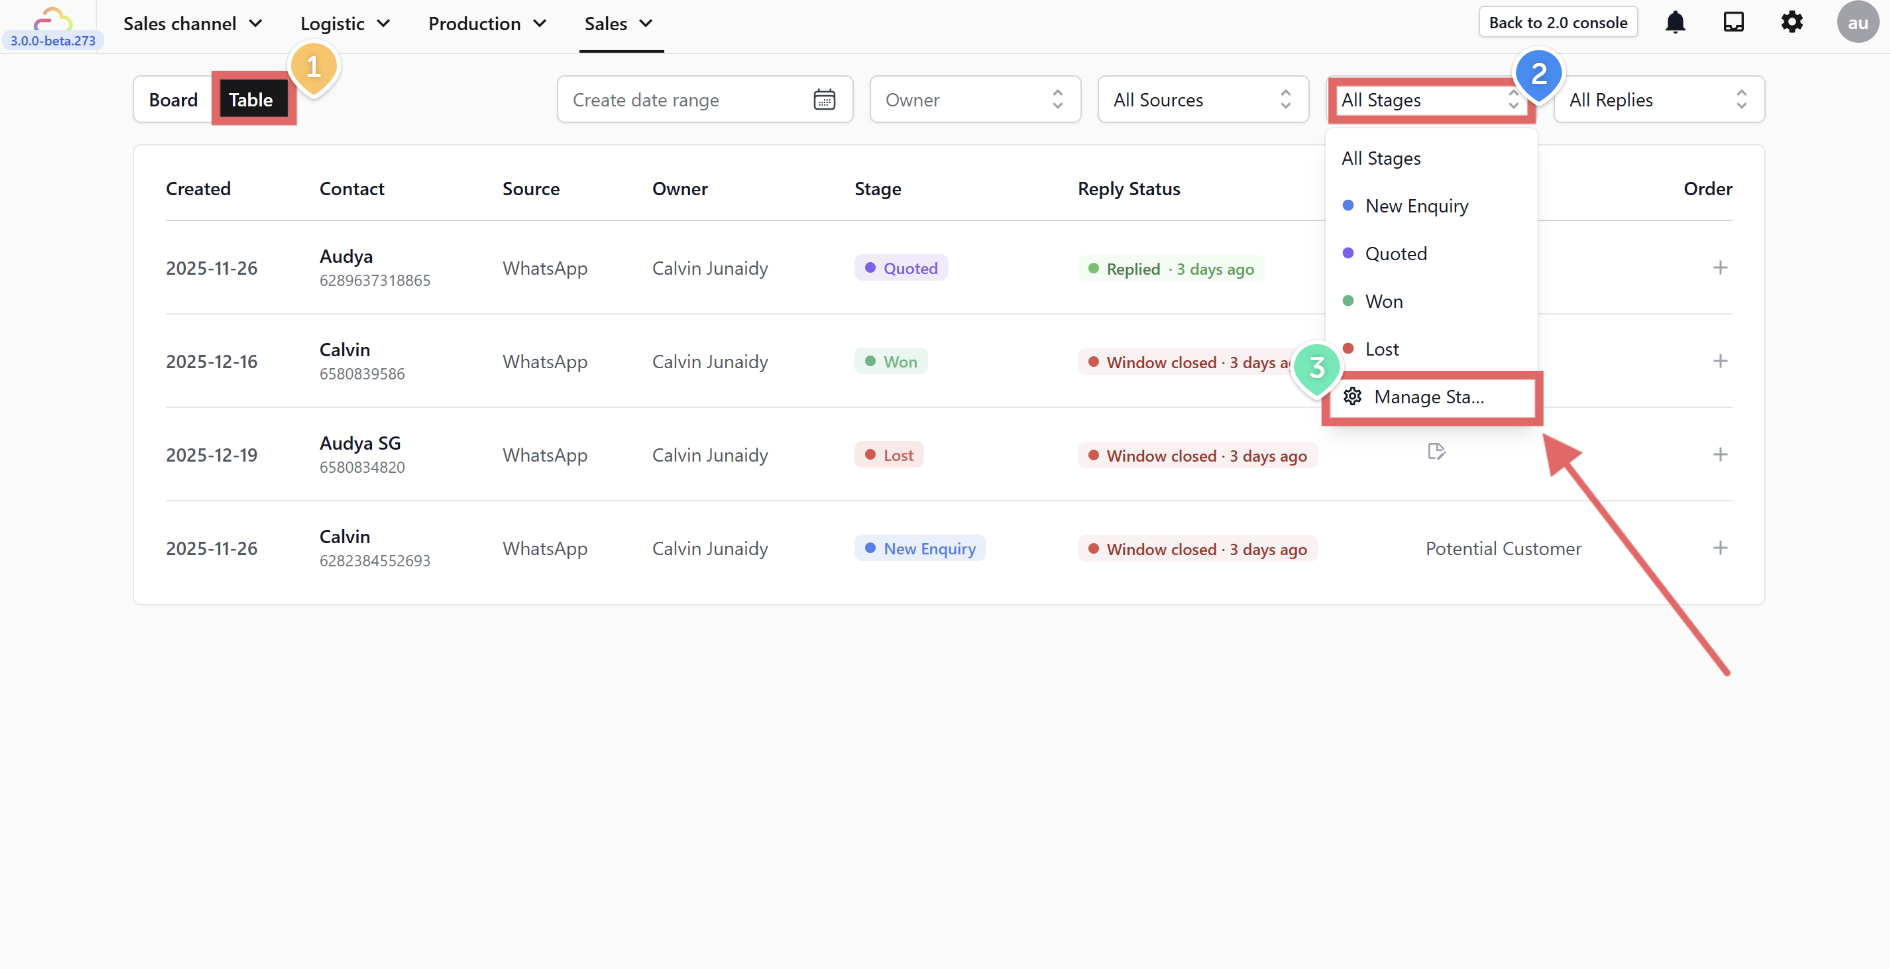
- On the Deals page, make sure you click the Table button at the top left to enter Table View.
-
Click the All Stages filter dropdown at the top right.
-
Select Manage Stages from the bottom of the dropdown list.
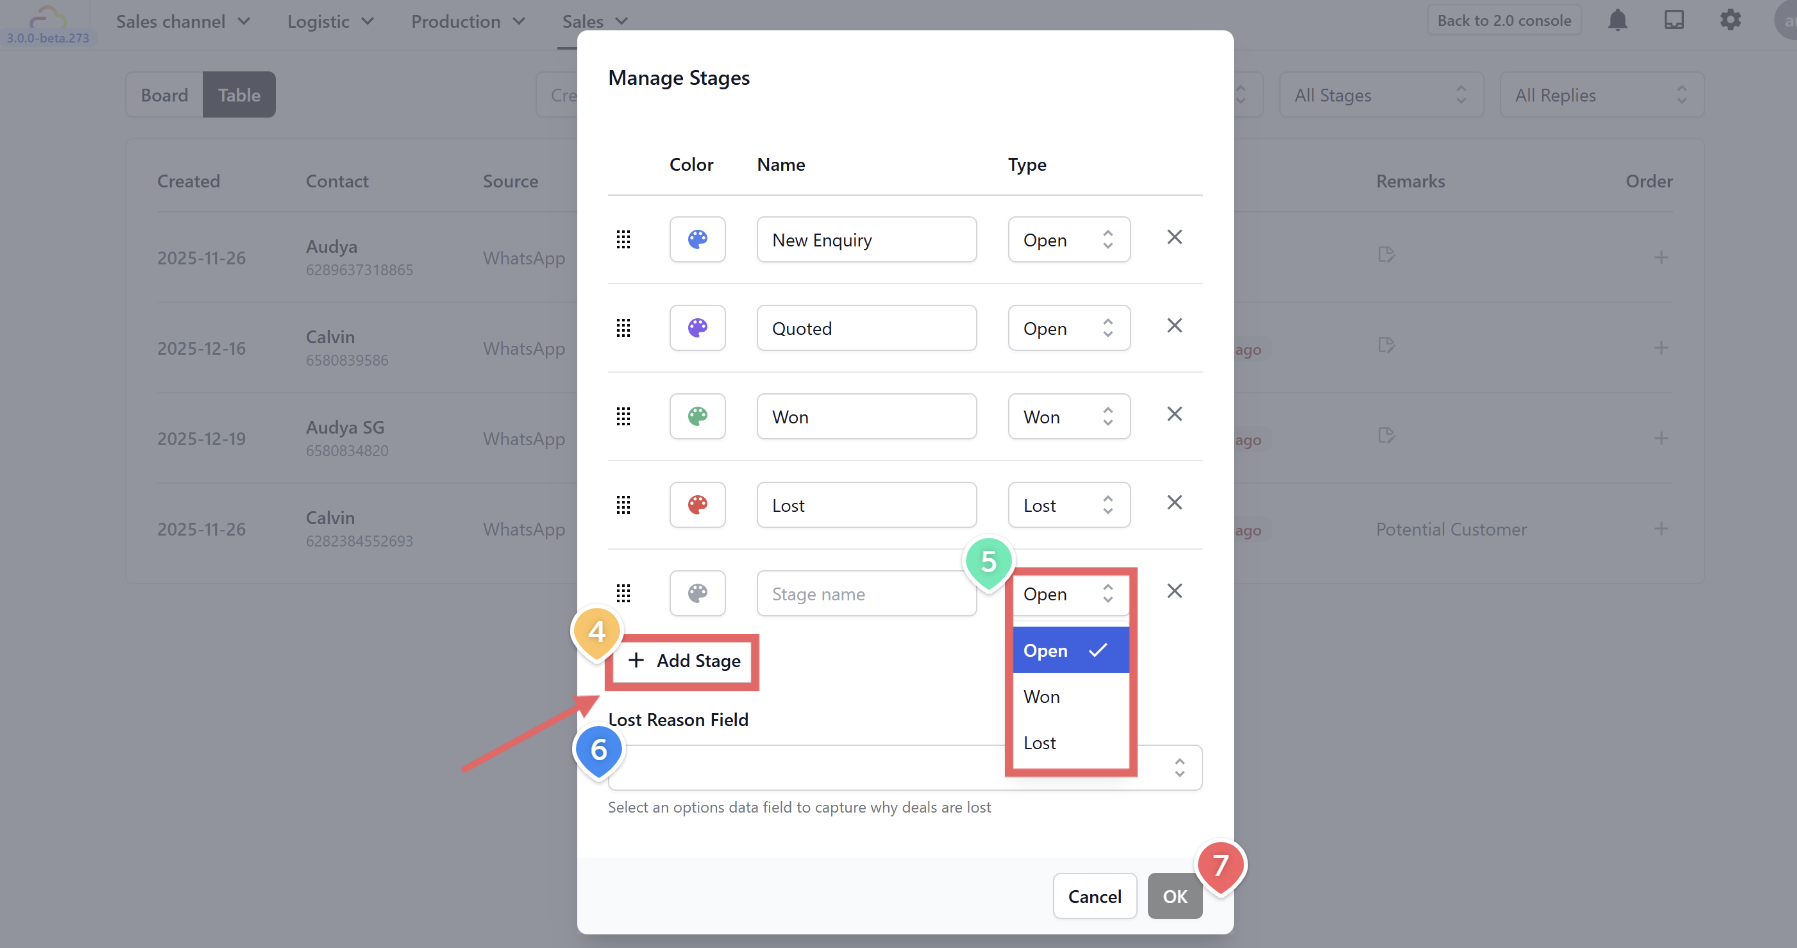
-
In the pop-up window, click + Add Stage to create a new step in your pipeline.
-
For each stage, you can customize the Color, write a custom Name, and select its underlying Type (Open, Won, or Lost).
-
Lost Reason Field (Optional): At the bottom of the window, you can select a data field to capture exactly why deals are lost (for example, keeping track of common reasons customers cancel).
-
Click OK to save your changes.
Automating Deals with WhatsApp Templates
Now that you have your custom stages set up, you can automate your workflow so that sending a specific WhatsApp message automatically moves the customer to a new deal stage.
-
Go to your WhatsApp templates by navigating to Settings > Templates > WhatsApp.
-
Find the specific template you want to link to a deal stage.
-
Click the three dots (•••) at the far right of that template’s row, then select Edit Profile.
-
Look for the Auto-move deal to stage setting and select your target stage (for example, “Quoted”).
-
Click Save.
-
Now, whenever you send that specific template to a customer from your Conversations Inbox, the system will automatically move their deal to the assigned stage!