
EasyBiz POS is the counter screen your staff use every day, set up from the Console as shops, POS apps and devices.
Before You Start
You don't need to set anything up to read this article. It is for two kinds of readers:
- New to EasyBiz: you want to understand the POS before you add your first shop.
- Moving from POS 2.0 or the older POS app: you want to know what changed and where your settings went. Your saved setup is kept.
You need an EasyBiz account. To change POS settings in the Console later, you need access to manage the Point of Sale.
Overview
POS stands for Point of Sale. It is the screen at your shop counter where staff take orders, collect payments, print receipts and labels, and close the day. EasyBiz POS puts all of this on one screen, so staff never write things down twice or add up sales by hand. You set it up once in the EasyBiz Console, and every counter device follows that setup. This article explains the three pieces the POS is built from, the words you will see in every later article, which devices you can use, what it costs, and what moved for existing shops.
Where it works
- Console: you add shops, build the POS app and sign in counter devices.
- POS (Main POS): your staff take orders, payments and close the day at the counter.
- Paired devices: a screen facing customers for their signature, or a staff phone for photos, Send Out and Receive.
- Customers see printed or emailed receipts, and their orders and payments appear in their records.
What EasyBiz POS Does for Your Shop
- Take orders and collect payment in one go: pick items from your price list, choose the customer and collect payment on the same screen.
- Accept many payment methods: cash, card, PayNow and more. Every payment is recorded against its order for you.
- Track every order: staff find any order by number, name or phone and see its items, payments and progress.
- Print labels for every item: tag each piece so nothing gets mixed up between customers.
- Manage your cash drawer: with a cash drawer connected, it opens after cash payments, and every cash amount is tracked.
- See the day's sales instantly: Daily Sales shows sales and payments, and staff complete Close of Day from it.
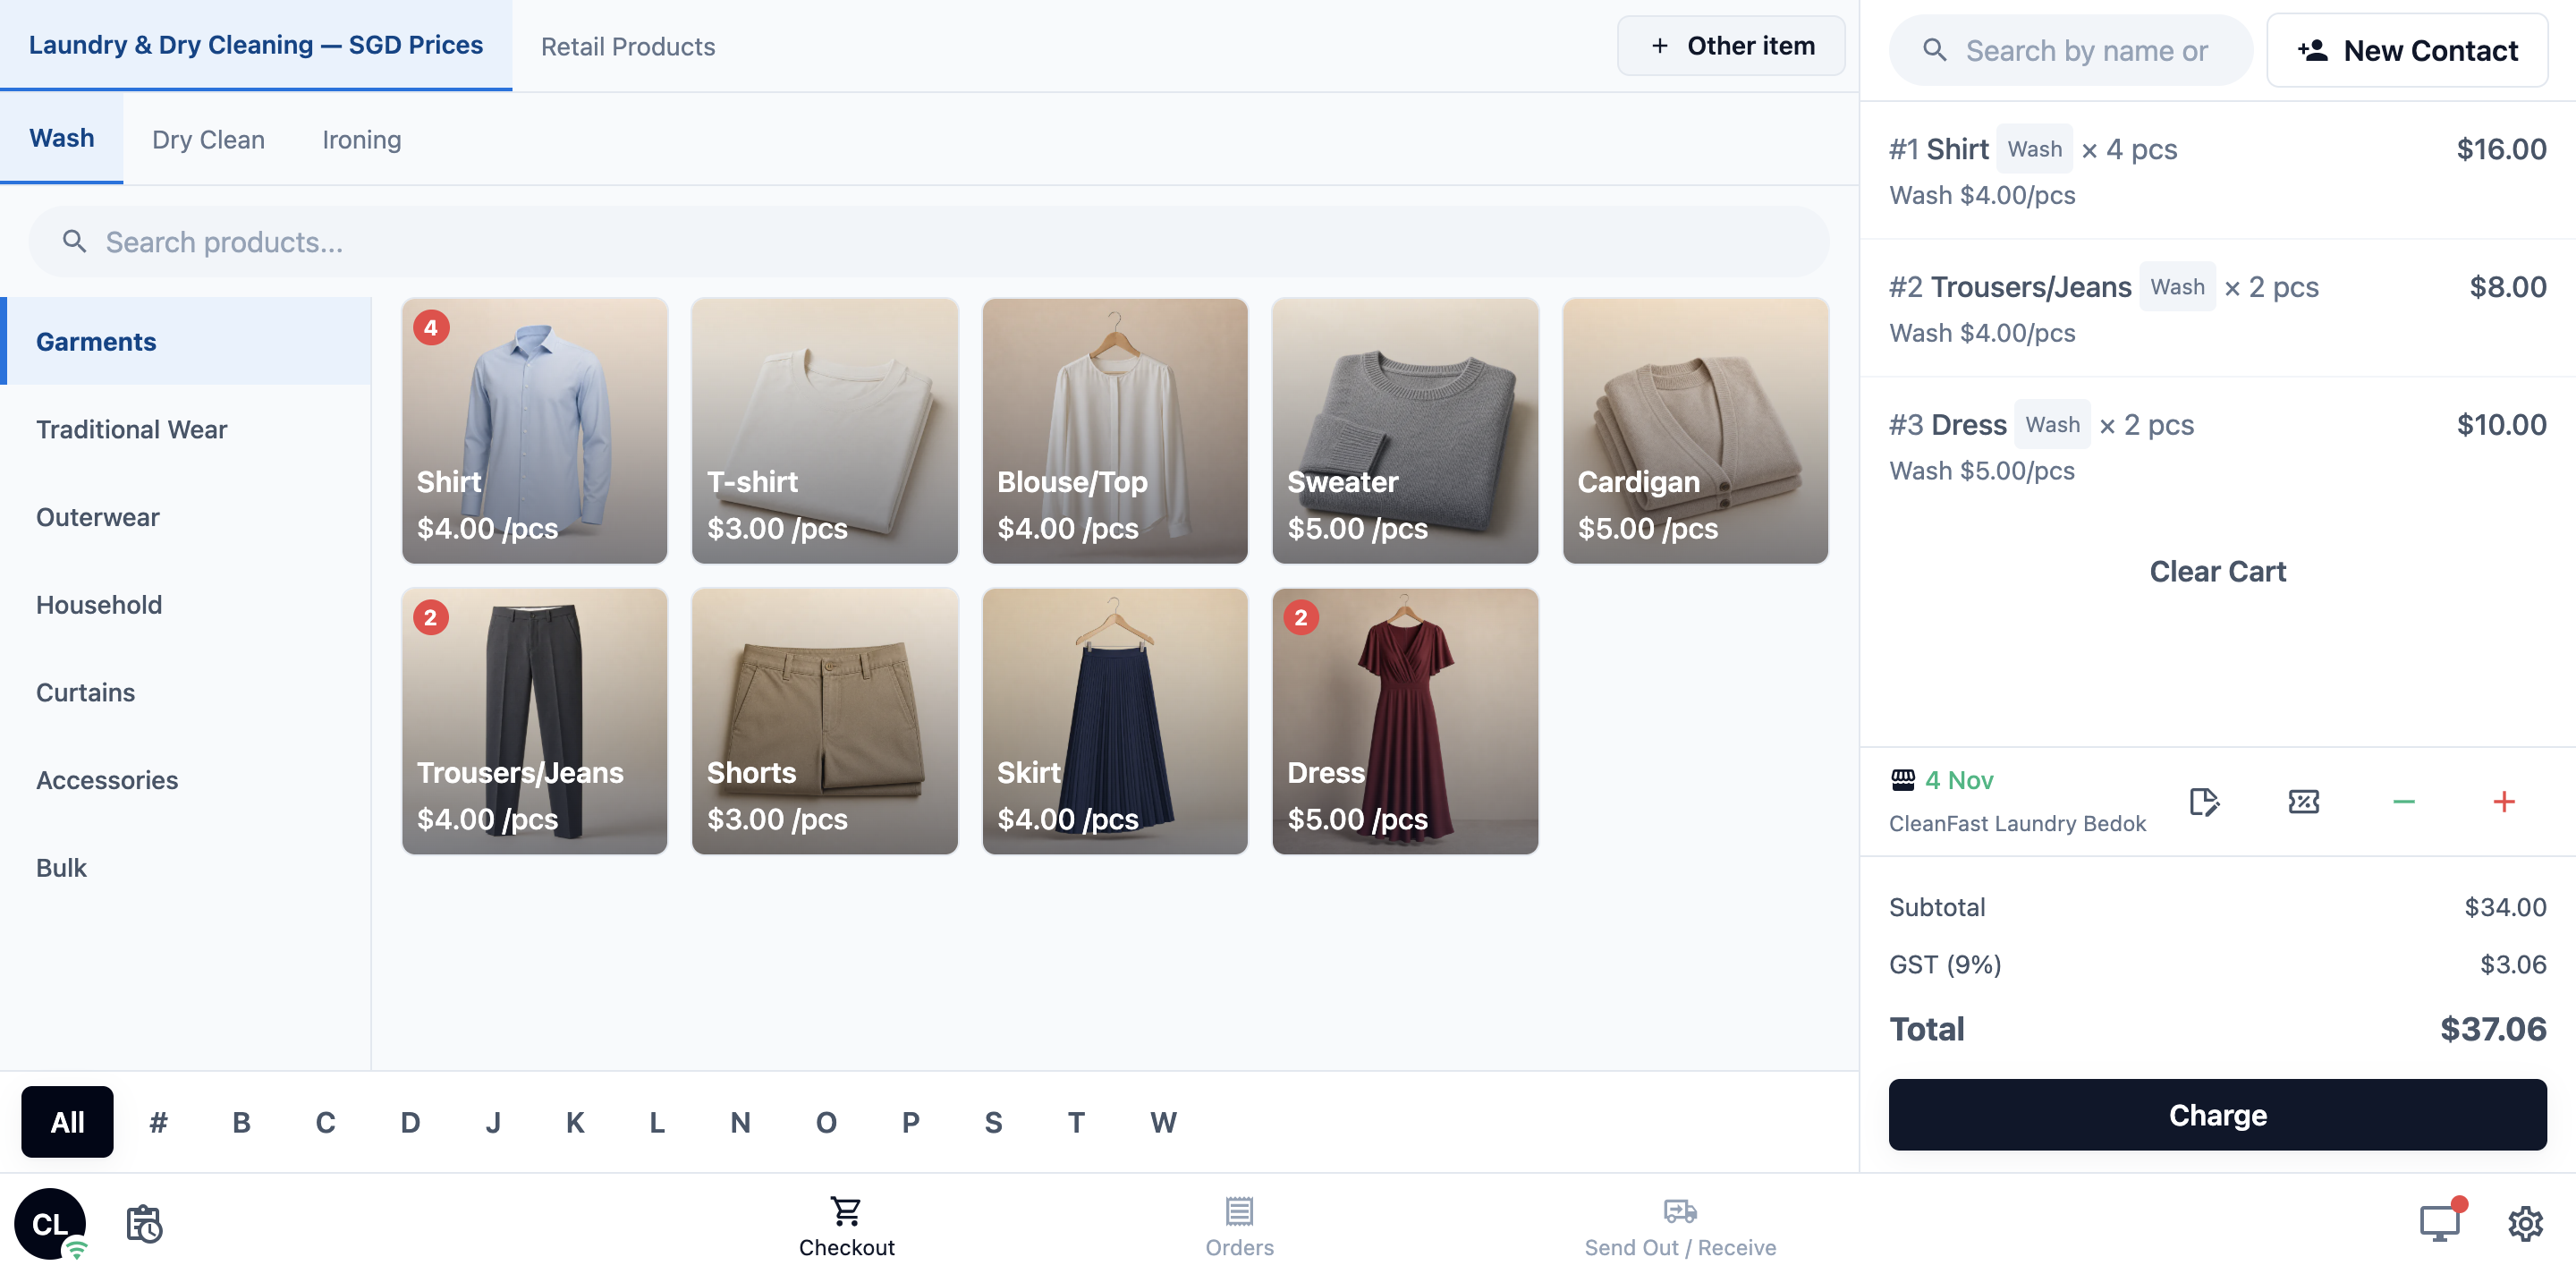
Here is a quick look at a laundry order at the counter:
The 3 Pieces of Your POS
Every POS is made of three pieces. Once you know them, every setup article makes sense.
- A Shop: one physical outlet, such as your Tampines branch. Each shop has its own status, opening hours and order numbers, and it is what you pay for.
- A POS App: the pages and features your staff see on the counter screen. One POS app can run on several shops, so all your branches can share the same screen.
- A device: the screen at the counter (the Main POS), plus any paired devices that work with it.
You choose the shop and the POS app when you sign a device in. So the same tablet always knows which outlet it belongs to and which screen to show.
To see your shops and POS apps:
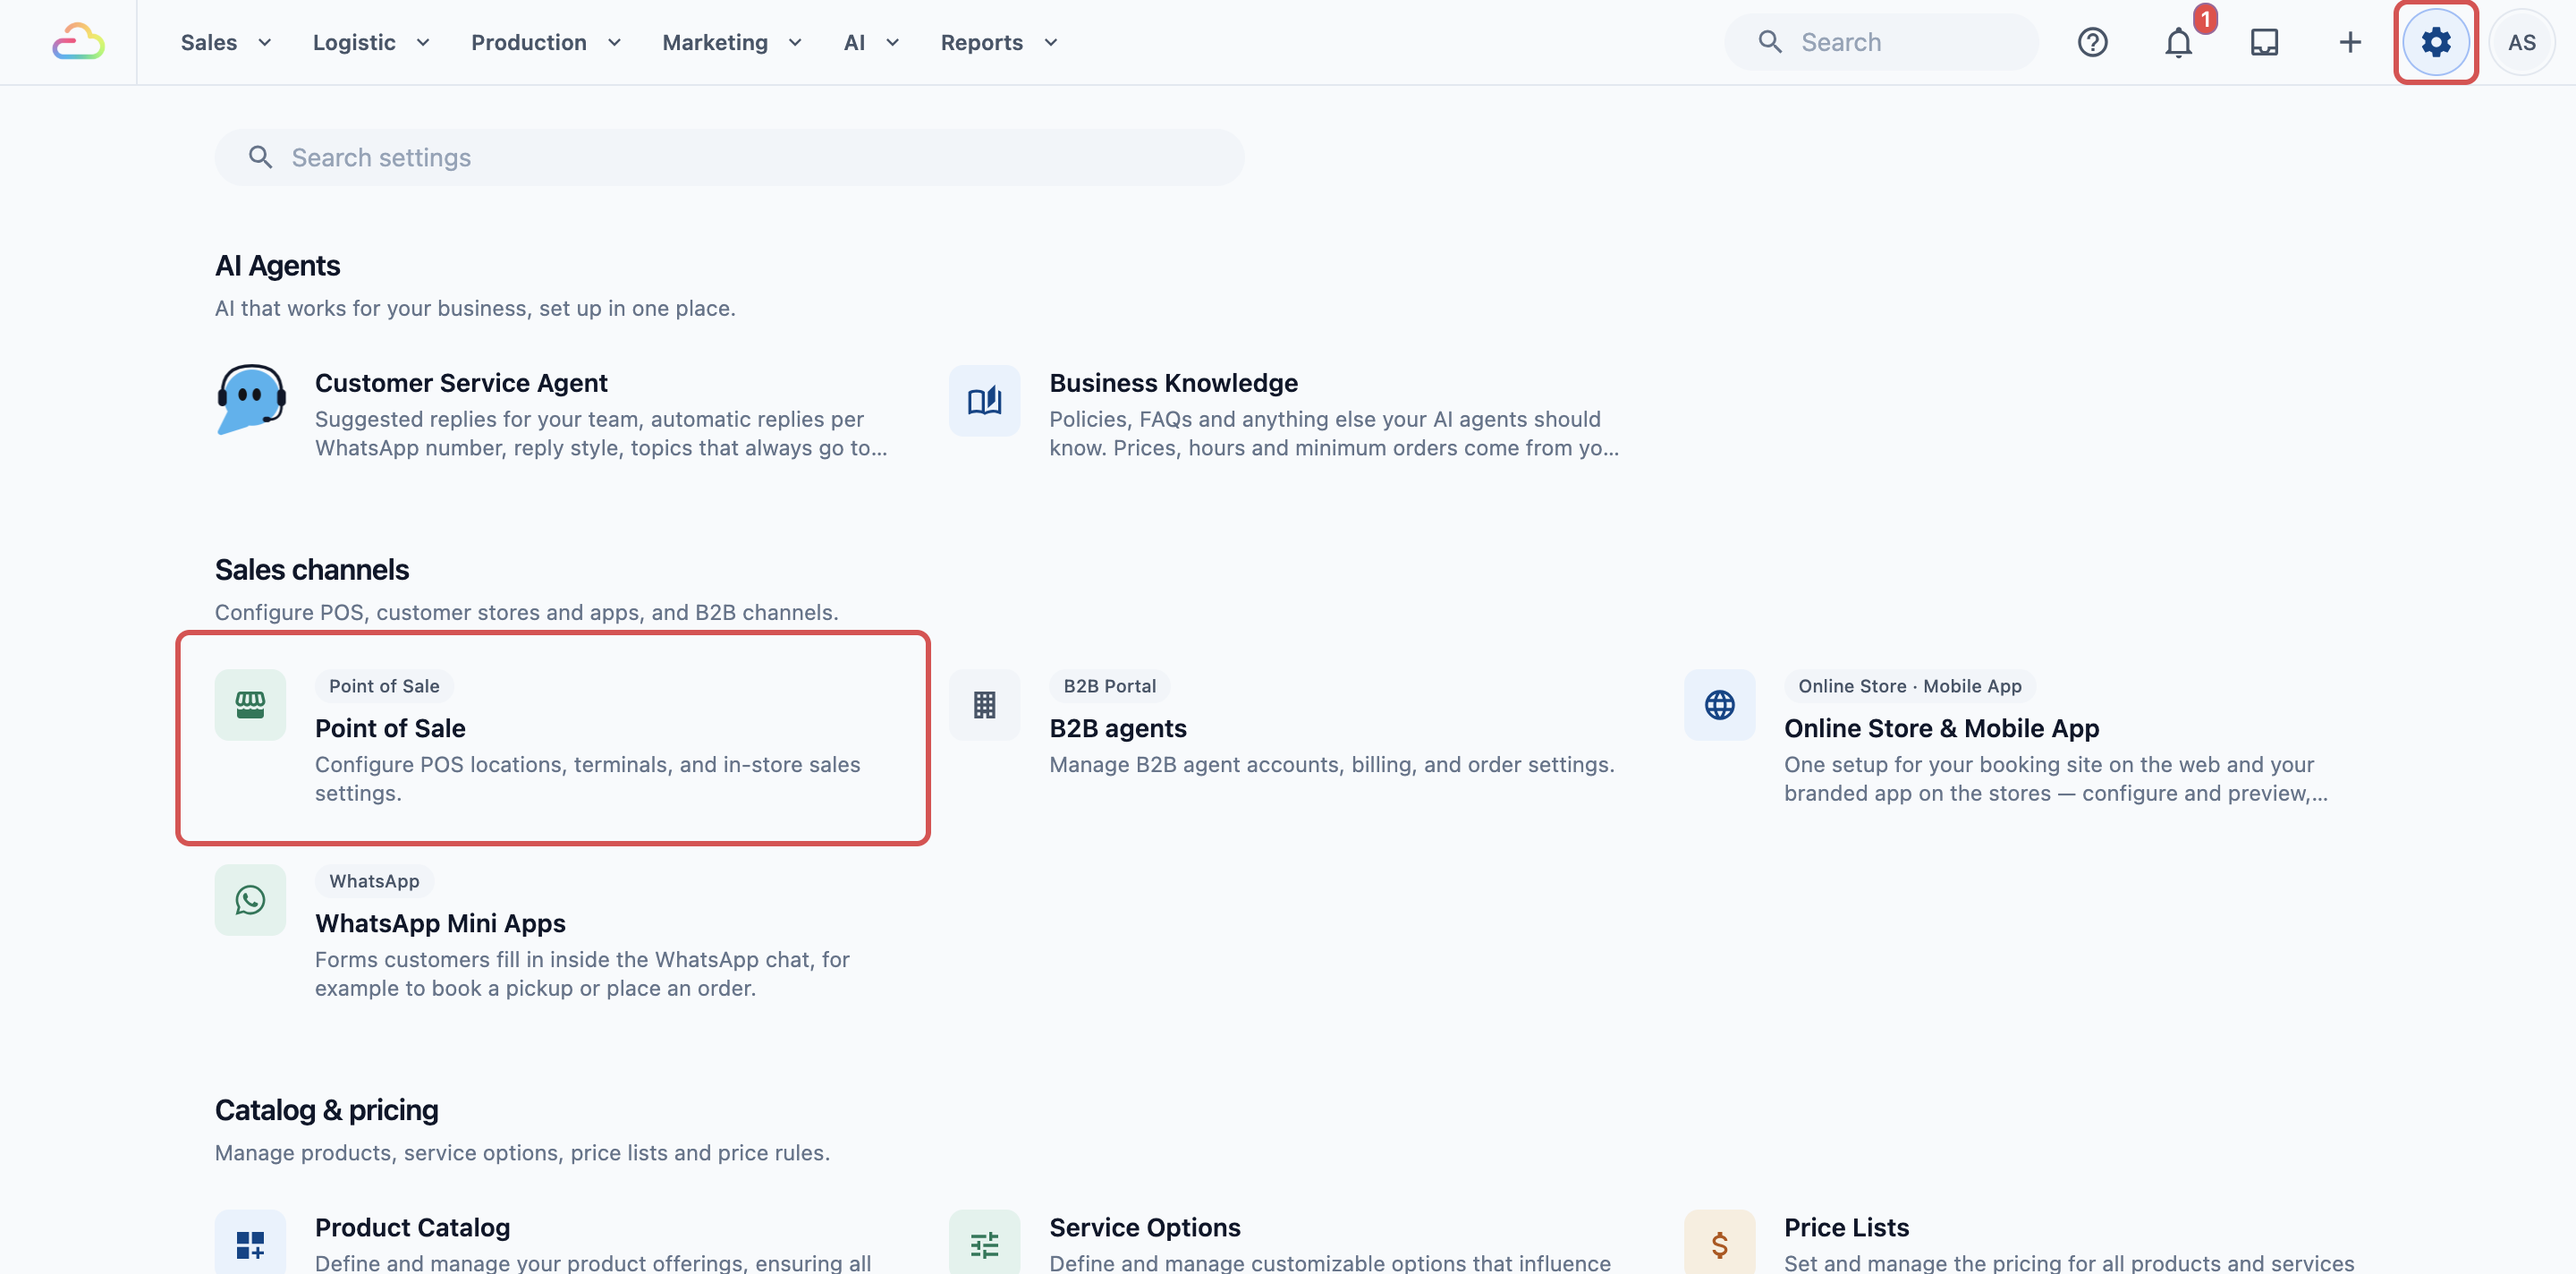
Click the ⚙️ Settings icon in the top-right corner.
Under the Sales Channels section, click Point of Sale.
Click the Shops tab.
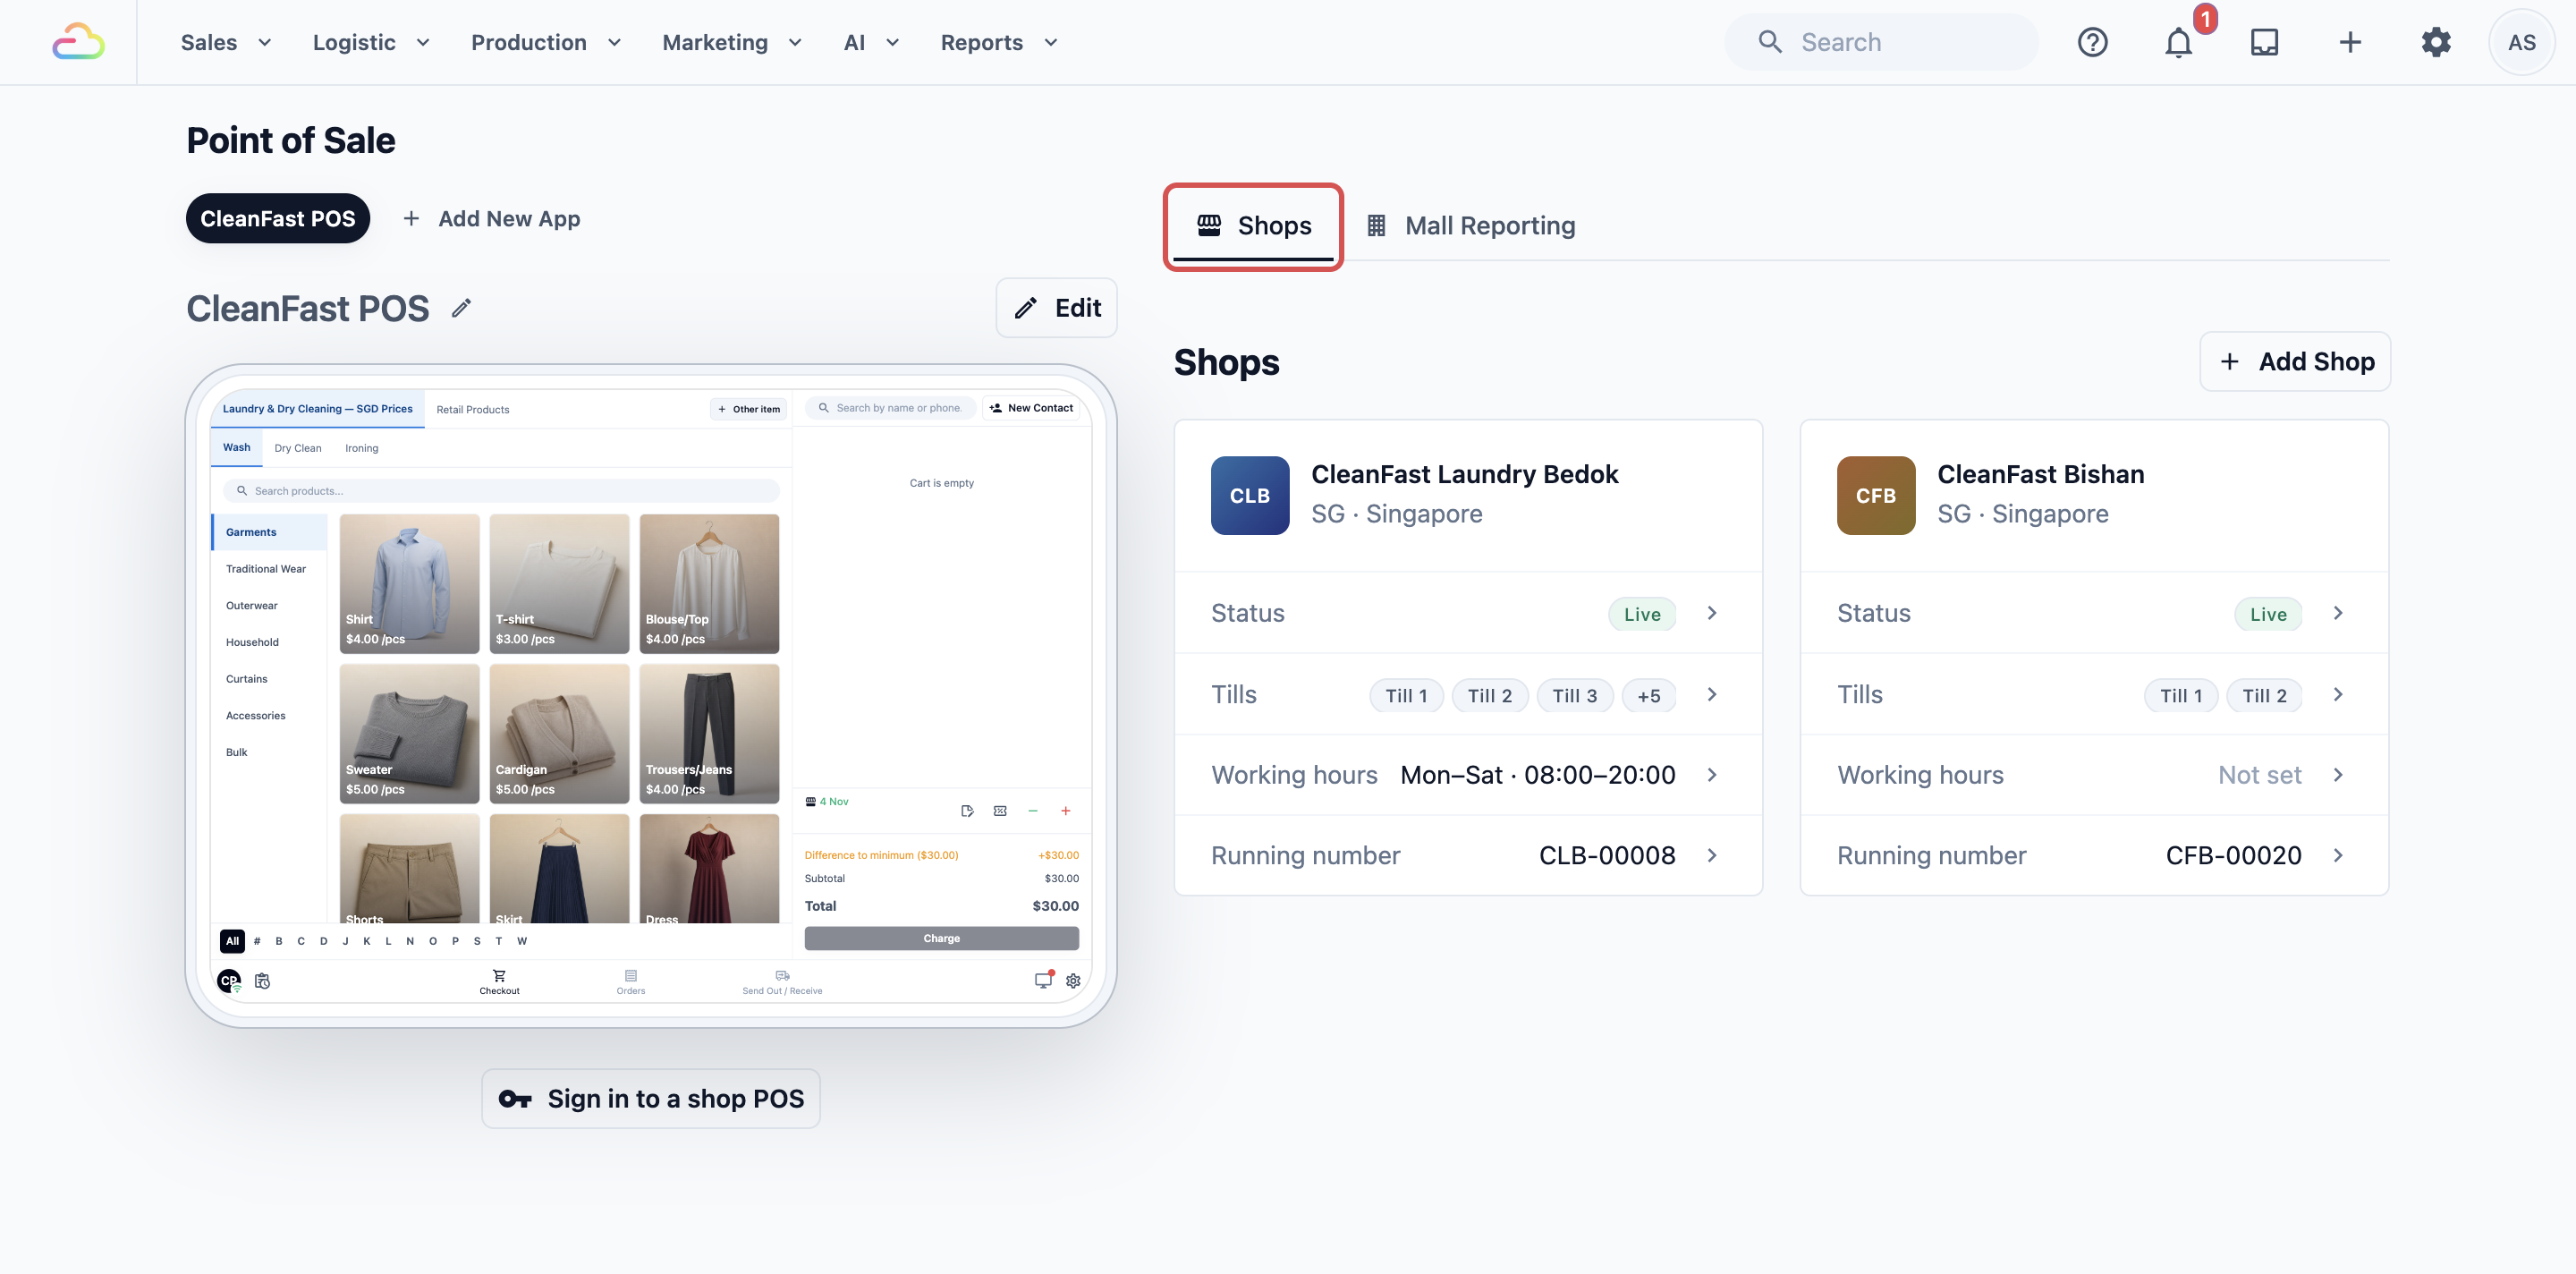
Your POS apps are on the left, each with a live preview of its screen and an Edit button. Your shops are on the right as cards. Each card shows the shop's Status (Live or Training), its Tills, its Working hours and its Running number (the next order number).
Words You Will See
This is the only place these words are explained. Every later article uses them.
| Word | What it means |
|---|---|
| Shop | One physical outlet where orders are taken. You add it in Point of Sale › Shops. |
| Training / Live | A shop's status. A Training shop is for setup and practice: its orders are numbered #T-00001 and up, collect no payment, send customers no notifications, stay out of your sales records, and their receipts print TRAINING ORDER. A Live shop takes real sales. |
| POS App | The set of pages and features your counter shows. You build it in the POS app editor. |
| Page | One tab along the bottom of the counter screen, such as Checkout, Orders, Send Out / Receive, Inventory or WhatsApp Chat. |
| Feature | A part of the POS you set up once, such as Payment, Time Clock, Cash Drawer, Daily Sales, Store Credit or Membership. |
| Main POS | The counter device that takes orders and payments and prints receipts and labels. |
| Paired device | A second device that works with the Main POS in the same shop: a screen facing customers, or a staff phone. |
| Till | Each counter device signed in to a shop. The shop card lists the tills used in the last 30 days. |
| Clock in / Clock out | Staff record the start and end of their shift with their passcode, using the Time Clock feature. |
| Send Out / Receive | Recording orders leaving the shop for your factory or workshop, and coming back, a whole batch at once. |
| Publish | Changes to a POS app reach your counters only after you click Publish in the editor. |
Which Devices You Can Use
| Device | How it works |
|---|---|
| Windows PC or Mac | Open the POS in Chrome or Edge. Nothing to install. |
| Android tablet, 10 inches or more | Install the EasyBiz POS app and choose Main POS. |
| iPad | Install the EasyBiz POS app (version 3.2.0 or later) and choose Main POS. In Safari or another browser, an iPad can't connect to printers. |
| Phone | Paired device only, never the counter. |
When you open the EasyBiz POS app for the first time, it asks how you will use the device.
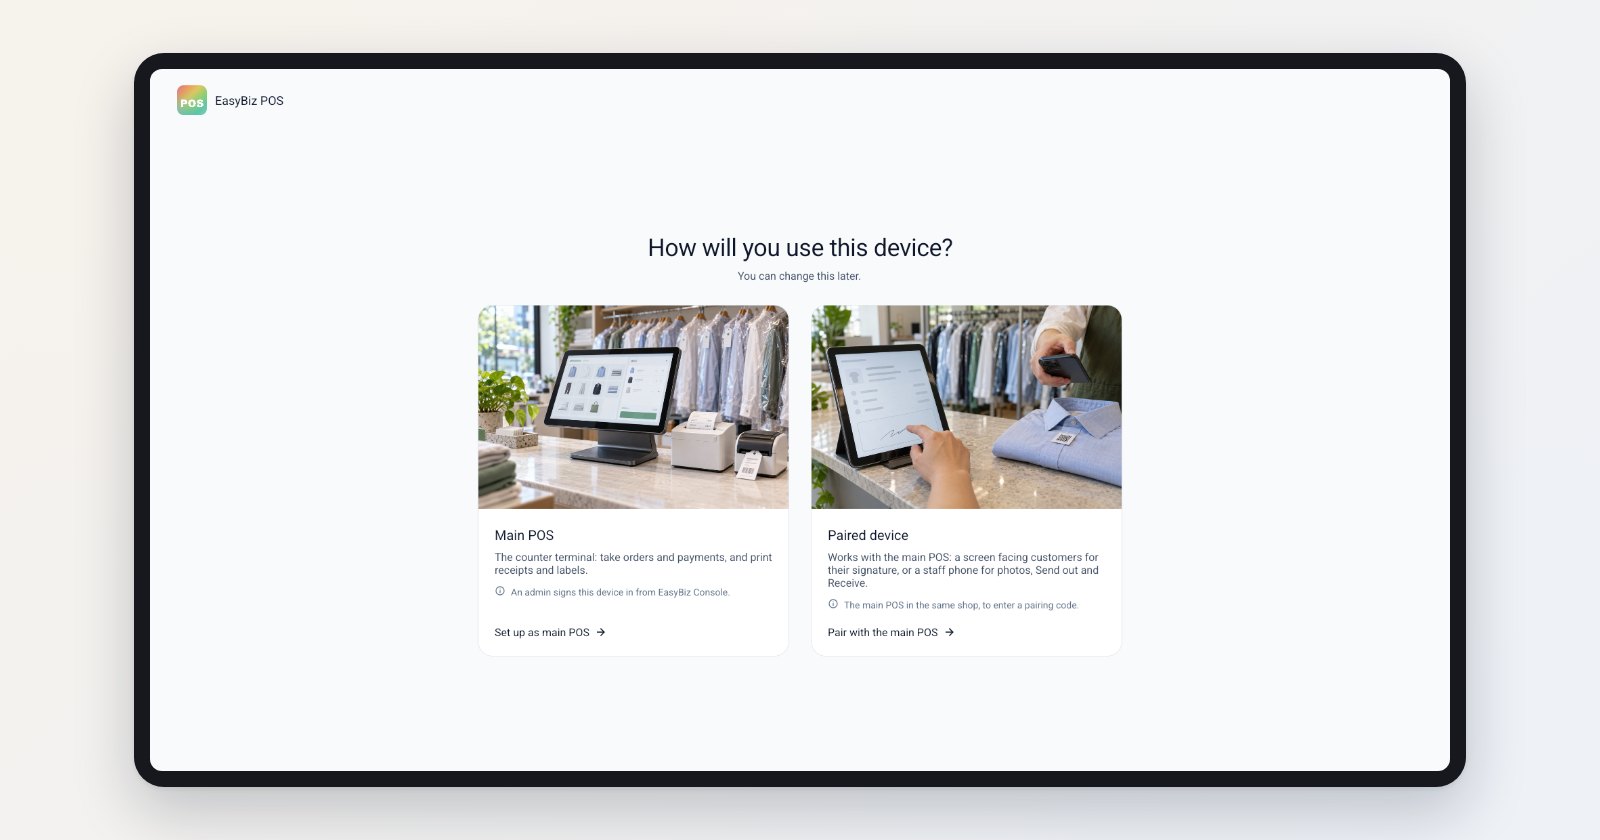
- Set up as main POS makes the device your counter. An admin then signs it in from the EasyBiz Console.
- Pair with the main POS makes it a paired device. You enter a pairing code from the Main POS in the same shop.
On a phone, the Main POS option is not available, and the app says: "To use this device as the main POS, use an iPad or an Android tablet of 10 inches or more."
Standard vs Professional
You pay per shop, not per device or per staff member. One shop covers every till and paired device at that counter.
| Plan | Price | What you get |
|---|---|---|
| Standard | S$99 per shop a month | Counter checkout, customer lookup, card and QR payments, receipts and labels, unlimited counter staff. |
| Professional | S$149 per shop a month | Everything in Standard, plus the WhatsApp chat desk at the counter: staff read and reply to customer messages from the till. |
The plan covers your whole account. Every shop runs the same plan, so upgrading to Professional reprices every shop, and a new shop joins your current plan. Pages that need Professional, such as WhatsApp Chat, show a Pro tag in the POS app editor.
Counter staff are unlimited and need no seat. They sign in with a clock-in passcode.
Example Setup
CleanFast Laundry runs two business units, Laundry and Bag Repair, plus an Online Store.
- Shops: CleanFast Tampines and CleanFast Jurong, both Live.
- POS app: one app, "CleanFast POS", used by both shops, with Checkout, Orders and Send Out / Receive pages.
- Devices: an Android tablet at each counter as the Main POS, plus a paired staff phone in Jurong for item photos and sending batches to the factory.
- Plan: Standard, so the bill is S$99 + S$99 = S$198 a month for both shops. The paired phone and the counter staff cost nothing extra.
After the shops are signed in, Tampines staff see the Checkout page on their tablet and take the first order of the day.
If You Used POS 2.0 or the Older POS App
Your saved setup is kept. Some settings now live in a new place:
| Before | Now |
|---|---|
| POS staff management | Users & Access. Older accounts still see the POS staff management tab until their billing upgrade. |
| App features | Features, in the POS app editor. |
| Store Credit page | Store Credit, opened from the selected customer at checkout. |
| Inbox feature | The WhatsApp Chat page (Professional). |
| Close of Day flow | Daily Sales, where staff complete Close of Day. |
| Training tab | The Training mode switch in the POS Settings screen, and a shop's Training status in the Console. |
| POS Terminal | Main POS. |
| 2.0 batch check-out / check-in | The Send Out / Receive page. |
| Adjustment Options | Settings › Discounts and Settings › Surcharges. See Introduction to Discounts and Surcharges. |
| Advanced settings and other older options | Legacy Settings. |
To find Legacy Settings:
Click the ⚙️ Settings icon in the top-right corner.
Under the Sales Channels section, click Point of Sale.
Click the Mall Reporting tab.
Click Legacy Settings at the top right.
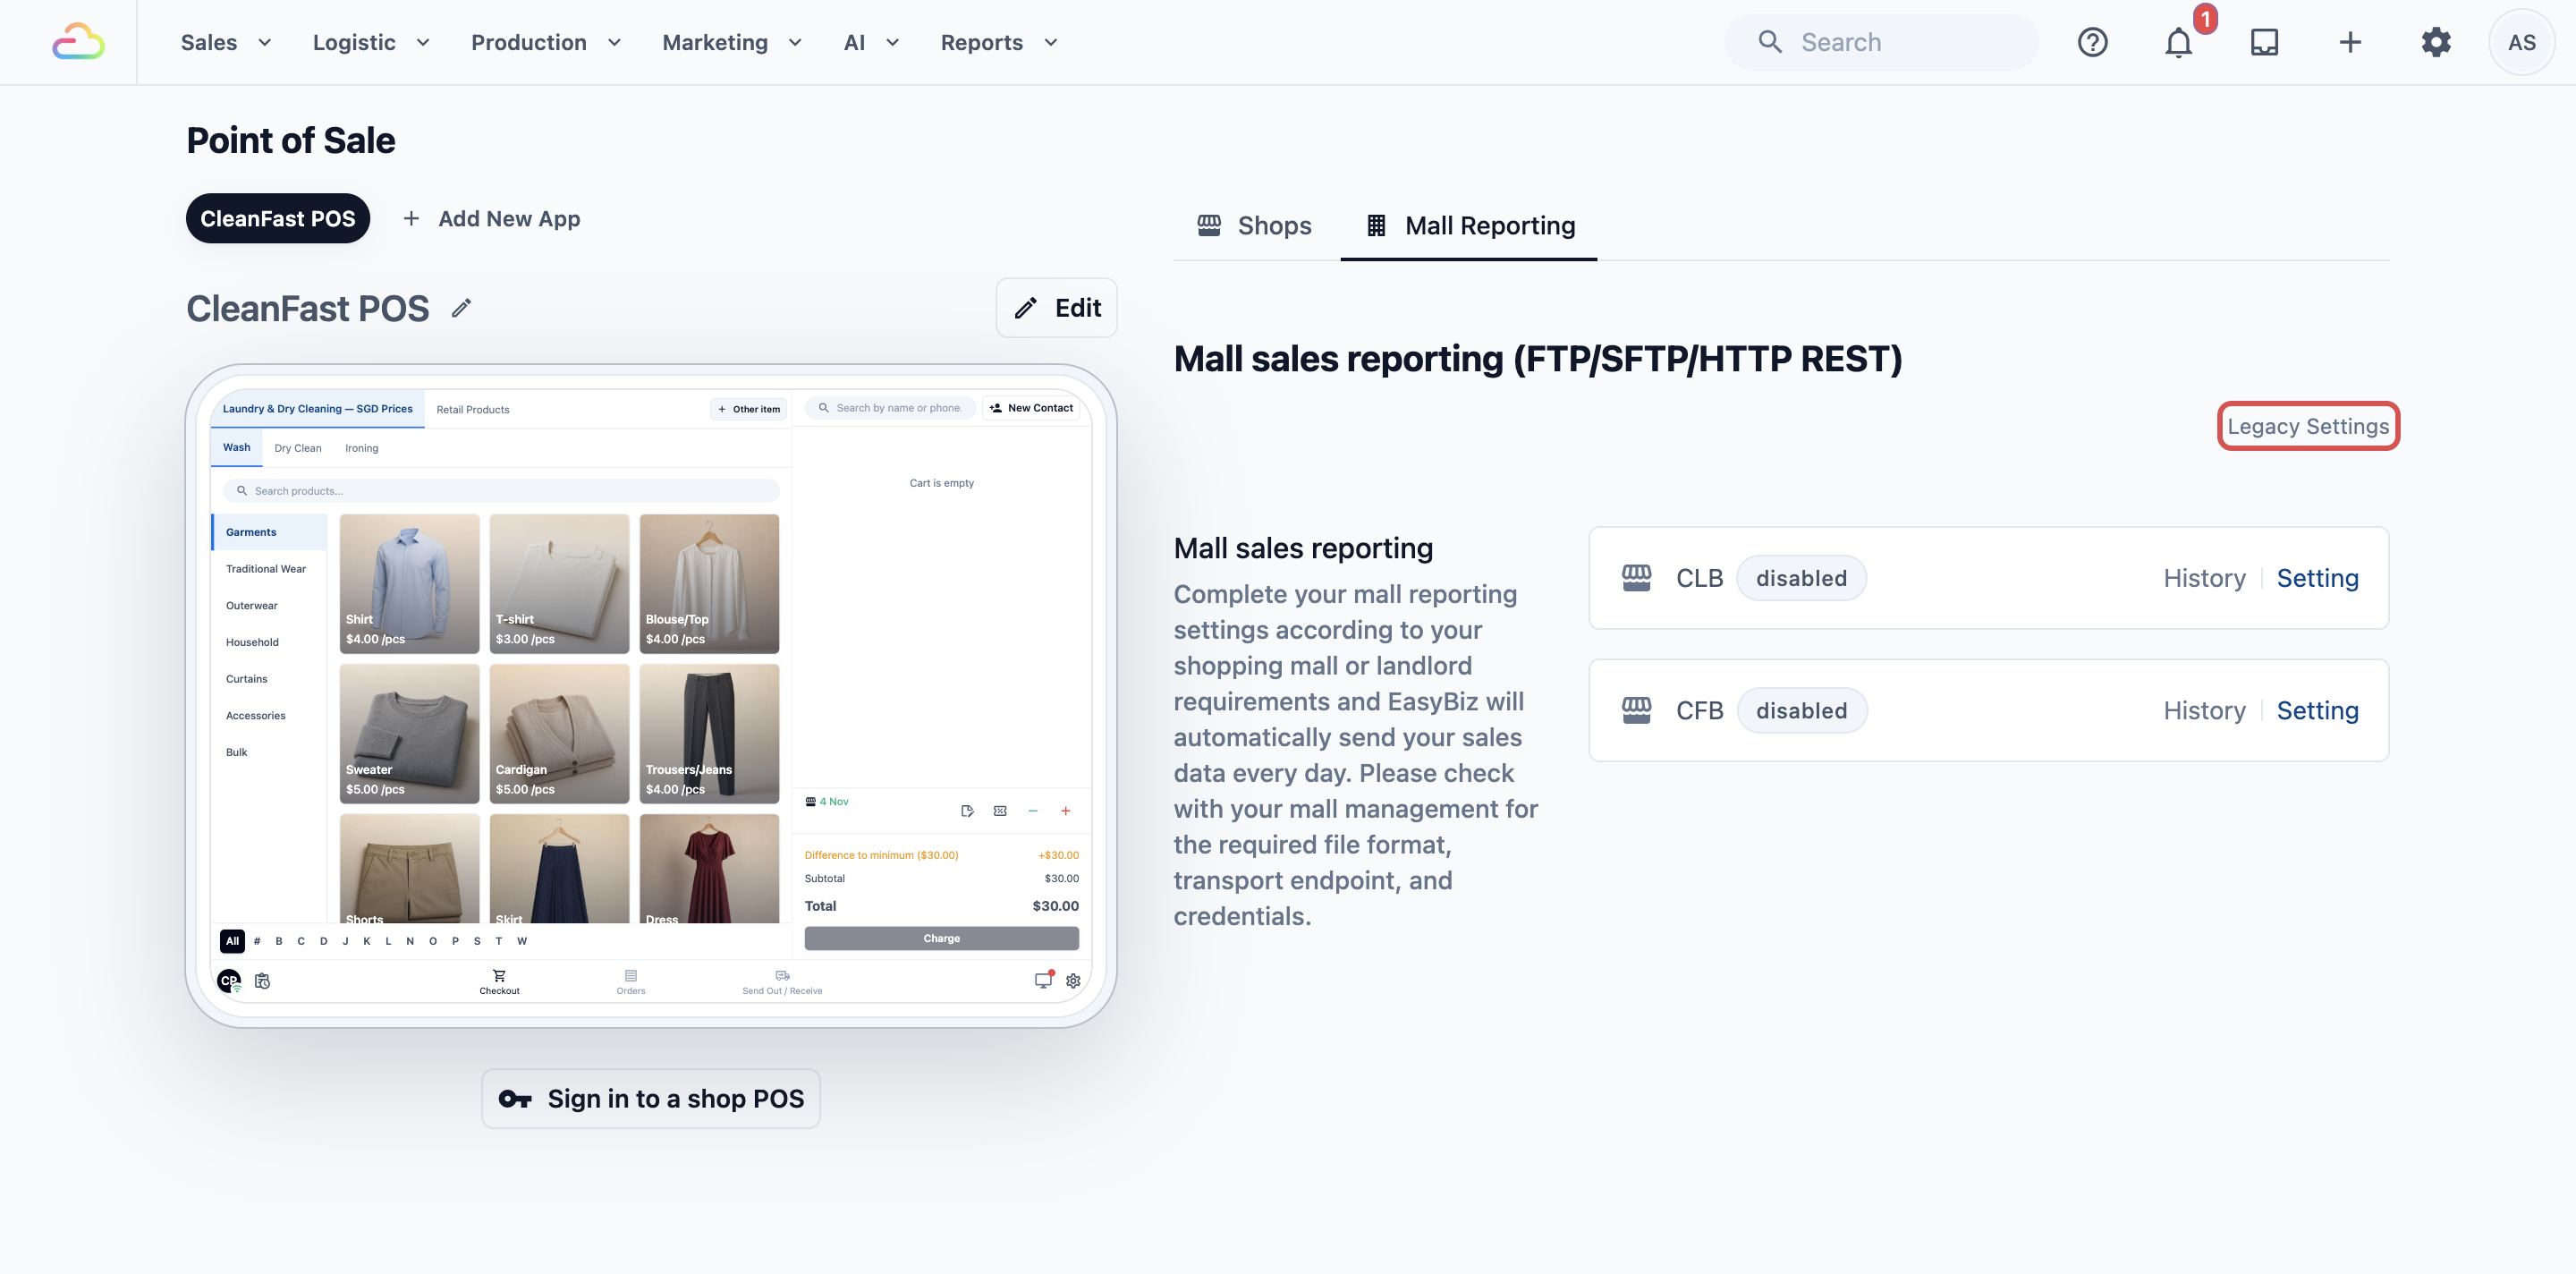
Legacy Settings keeps the options older POS setups still use: Customer screen posters, Handover Receipts, Customer Account Registration, POS Data Access, POS Action Control, Inventory and Payment Settings. They apply to the older POS only. The new POS takes these from the POS app editor.
How This Series Is Organised
- A. Getting Started with Your POS: what the POS is, what to set first, adding a shop, Training and Live, and signing in a device.
- B. Building Your POS App: the editor and each page (Checkout, Orders, Send Out / Receive, Inventory, WhatsApp Chat).
- C. POS Features: payment, receipts, staff, Time Clock, Cash Drawer, Close of Day and Store Credit. What staff fill in for a new customer is set once for your whole business. See Choosing What Customer Details Staff Collect.
- D. Paired Devices: the customer-facing display and the staff phone.
- E. Using the POS Every Day: getting around, collecting payment, updates and help.
Read A to C in order. Use D and E whenever you need them.
FAQs
Do I pay per shop or per device?
Per shop. One shop covers every till and paired device you run at that counter.
Do my counter staff need seats?
No. Counter staff are unlimited and sign in with a clock-in passcode. You pay a seat only for people working in the back office.
Can one shop be Professional and another Standard?
No. The plan covers your whole account, so every shop runs the same plan and upgrading reprices all of them.
Will my POS 2.0 setup carry over?
Yes. Your saved setup is kept. Use the table above to find where each setting moved, and check Legacy Settings for older options.
Can I use the POS without internet?
No. There is no offline mode, so keep the counter connected while the shop is open.
Can a phone be my counter?
No. A phone can only be a paired device, for example to take item photos or Send Out and Receive. Use a PC, Mac, iPad or Android tablet of 10 inches or more as the Main POS.
Does a Training shop cost money or affect my sales?
Training orders collect no payment and stay out of your sales records. Moving a live shop back to Training doesn't change its billing or its POS licence, and taking a new training shop live adds it to your subscription.
What's Next
You now know the three pieces of EasyBiz POS, the words used in this series, which devices work, and what changed for existing shops. Next, check what to have ready in the Console before you add your first shop in What to Set Up Before Your First Shop.
Already running a shop and opening another branch? Your market, company, business unit and prices are already in place, so go straight to Adding a Shop and Practising in Training Mode.