
Before You Start
New to campaigns? Read Introduction to WhatsApp Campaigns first. It explains what a campaign can and cannot do, and who charges you.
Your WhatsApp business number must be connected. See Connect and Configure WhatsApp.
You need a Marketing template already approved by Meta. See Setting Up Marketing Templates.
Your customers must be saved in EasyBiz with valid WhatsApp numbers. A campaign cannot message an uploaded phone list.
Step 1: Create the Draft
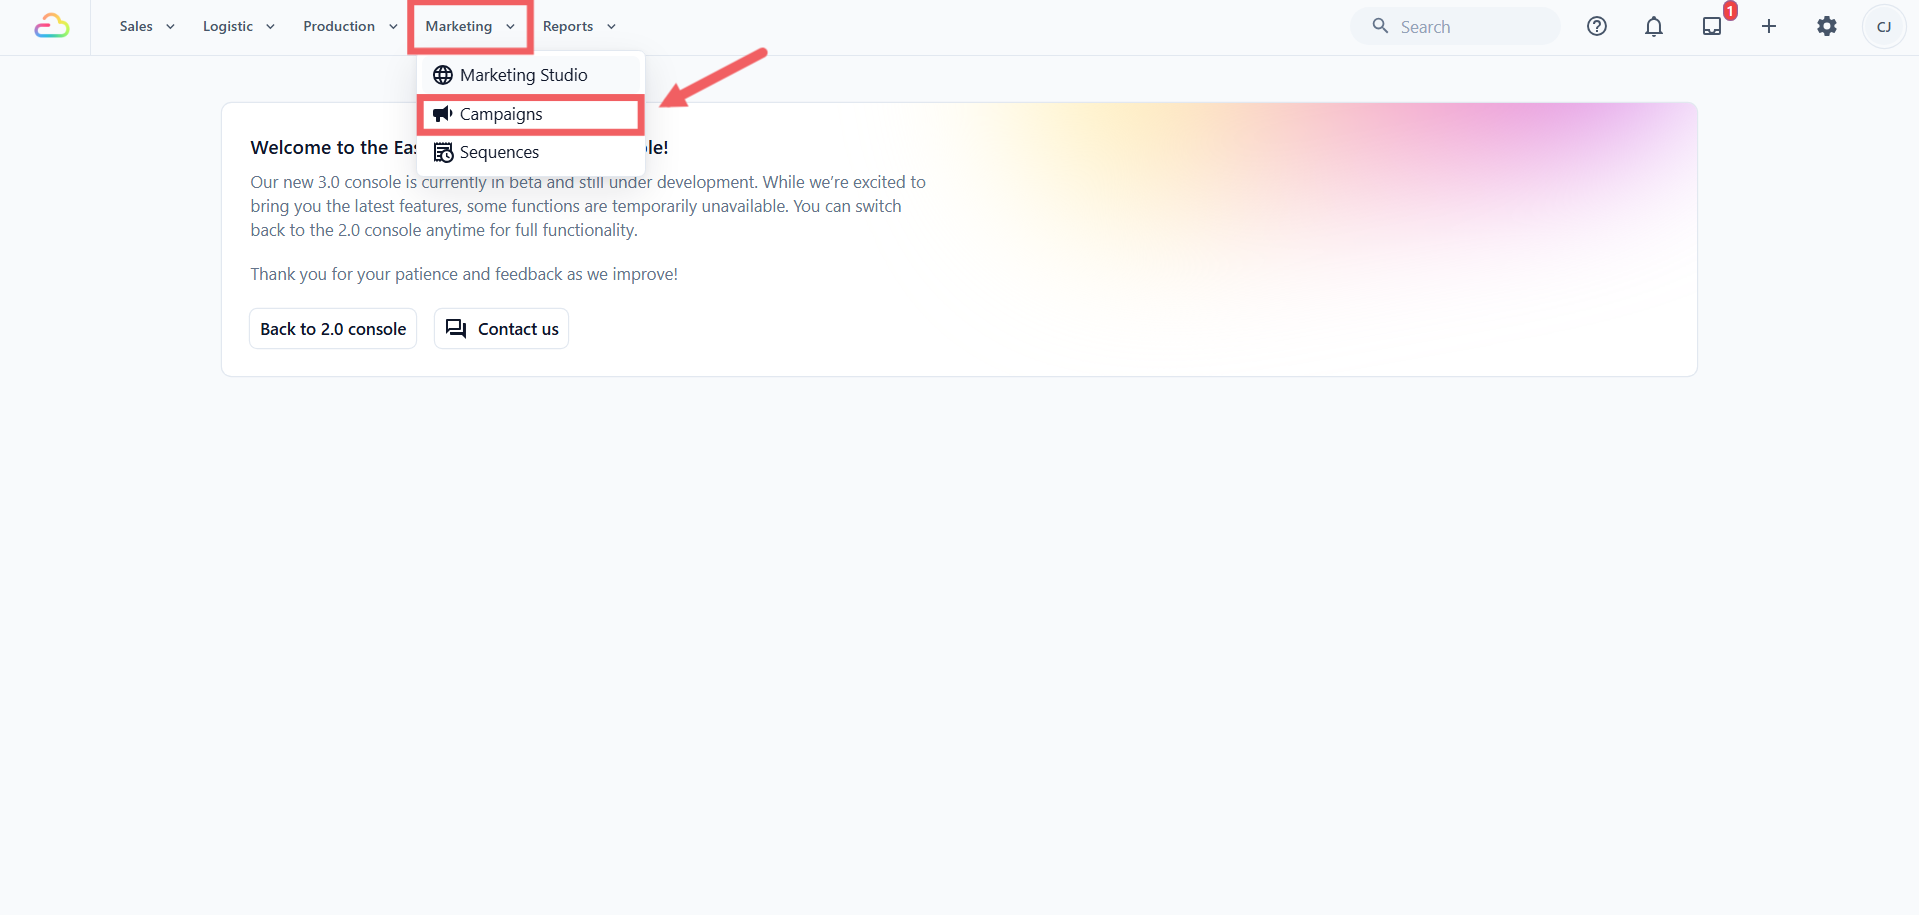
- From the top navigation, click Marketing, then Campaigns.
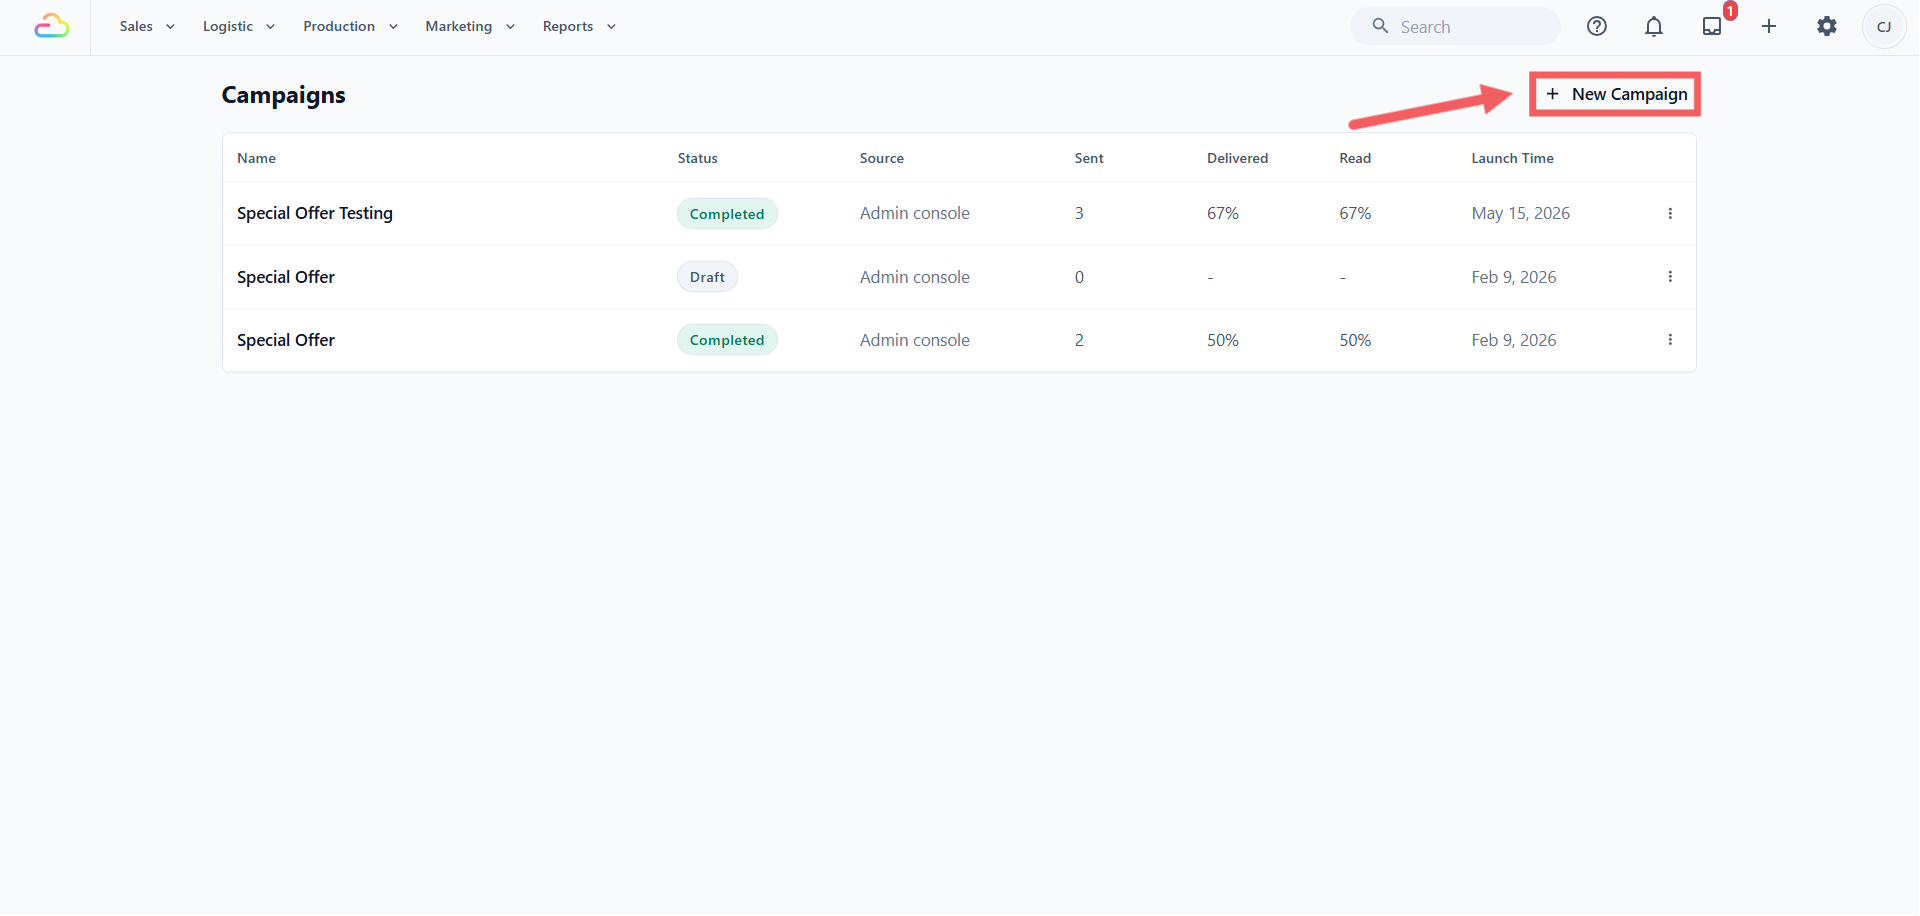
- Click New Campaign.
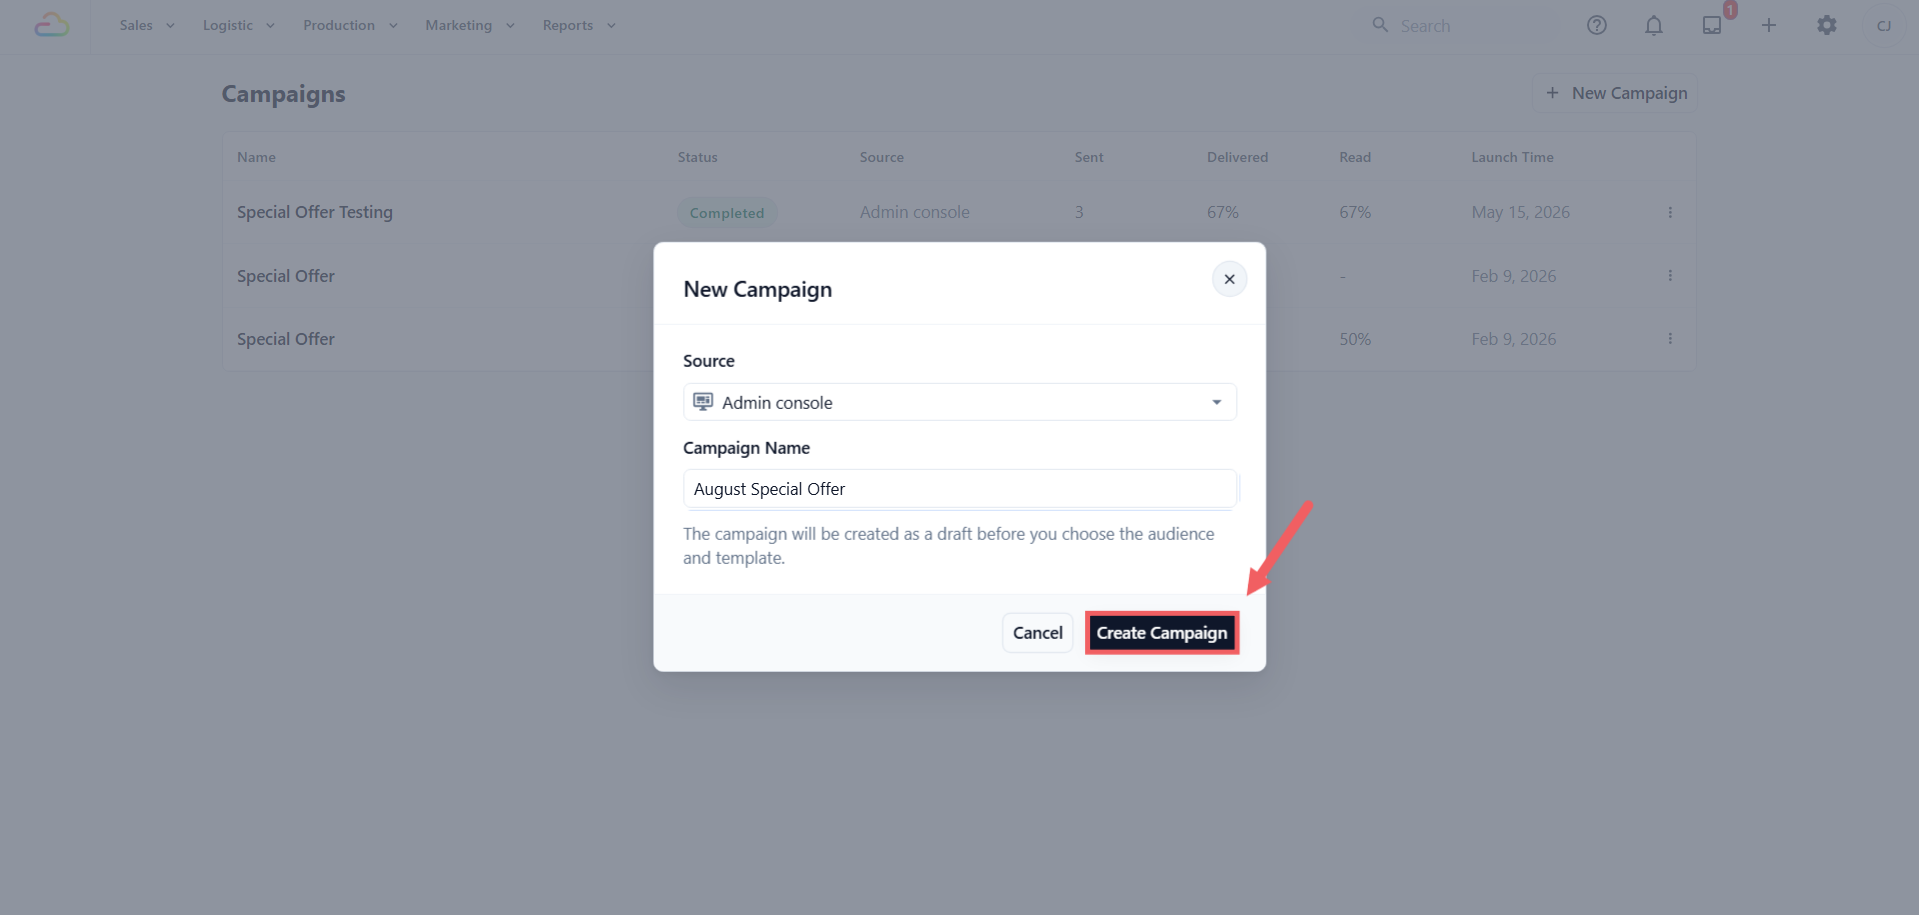
Choose a Source. Pick Admin console to reach customers from every outlet, or a POS shop to reach only customers who registered there.
Enter a Campaign Name you will recognize later, such as "August Special Offer".
Click Create Campaign.
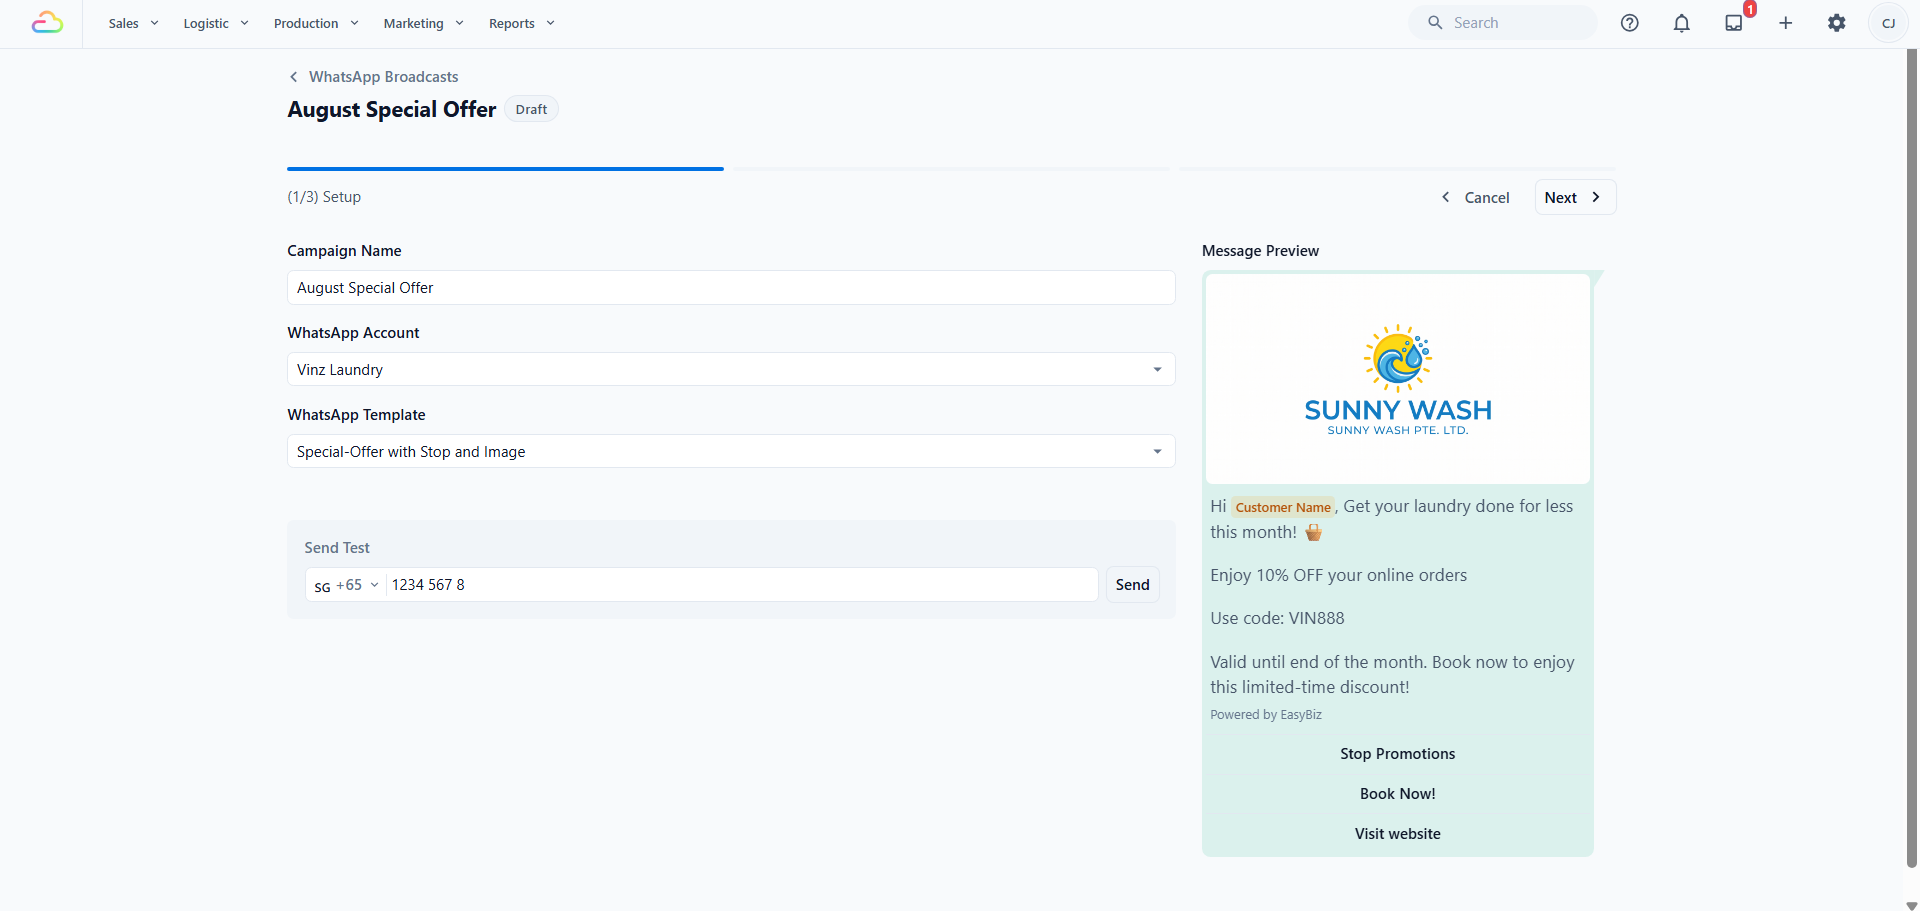
The campaign is saved as a Draft. Nothing is sent yet, and you can reopen it from the campaign list at any time.
Step 2: Setup
The editor runs through three steps, shown at the top as (1/3) Setup, (2/3) Audience, and (3/3) Review. Your work saves as you go, so you will see Saving... then Saved beside the step bar.
Check the Campaign Name. You can still change it here.
Select the WhatsApp Account to send from. If you only have one, it is picked for you.
Select the WhatsApp Template. Only approved Marketing templates on that account appear, and changing the account clears your template choice.
Check the Message Preview on the right. It shows the message as your customer will see it.
Under Send Test, enter your own number and click Send. You should see Test sent successfully.
Read the test on your own phone, then click Next.
Step 3: Audience
This step decides who receives the message. Set your filters, watch the live count, and untick anyone you do not want.
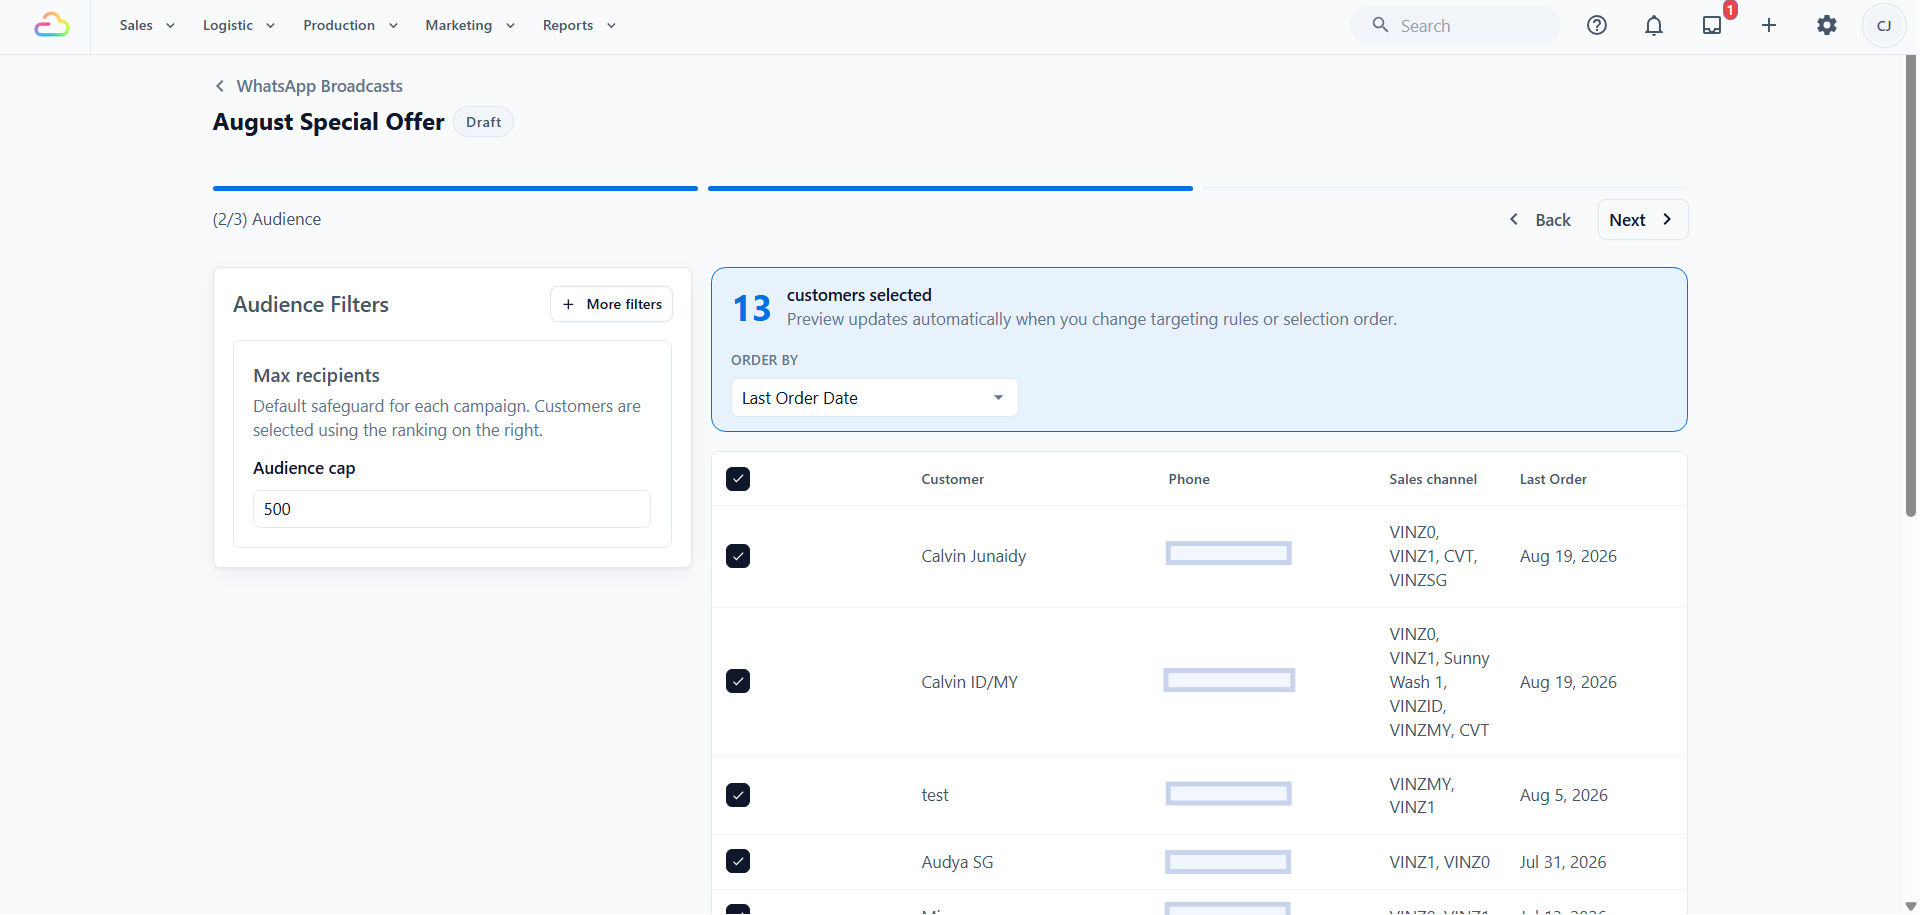
Every filter, how they combine, and why the count drops are covered in Choosing Your Campaign Audience. Come back when the list looks right, then click Next.
Step 4: Review and Launch
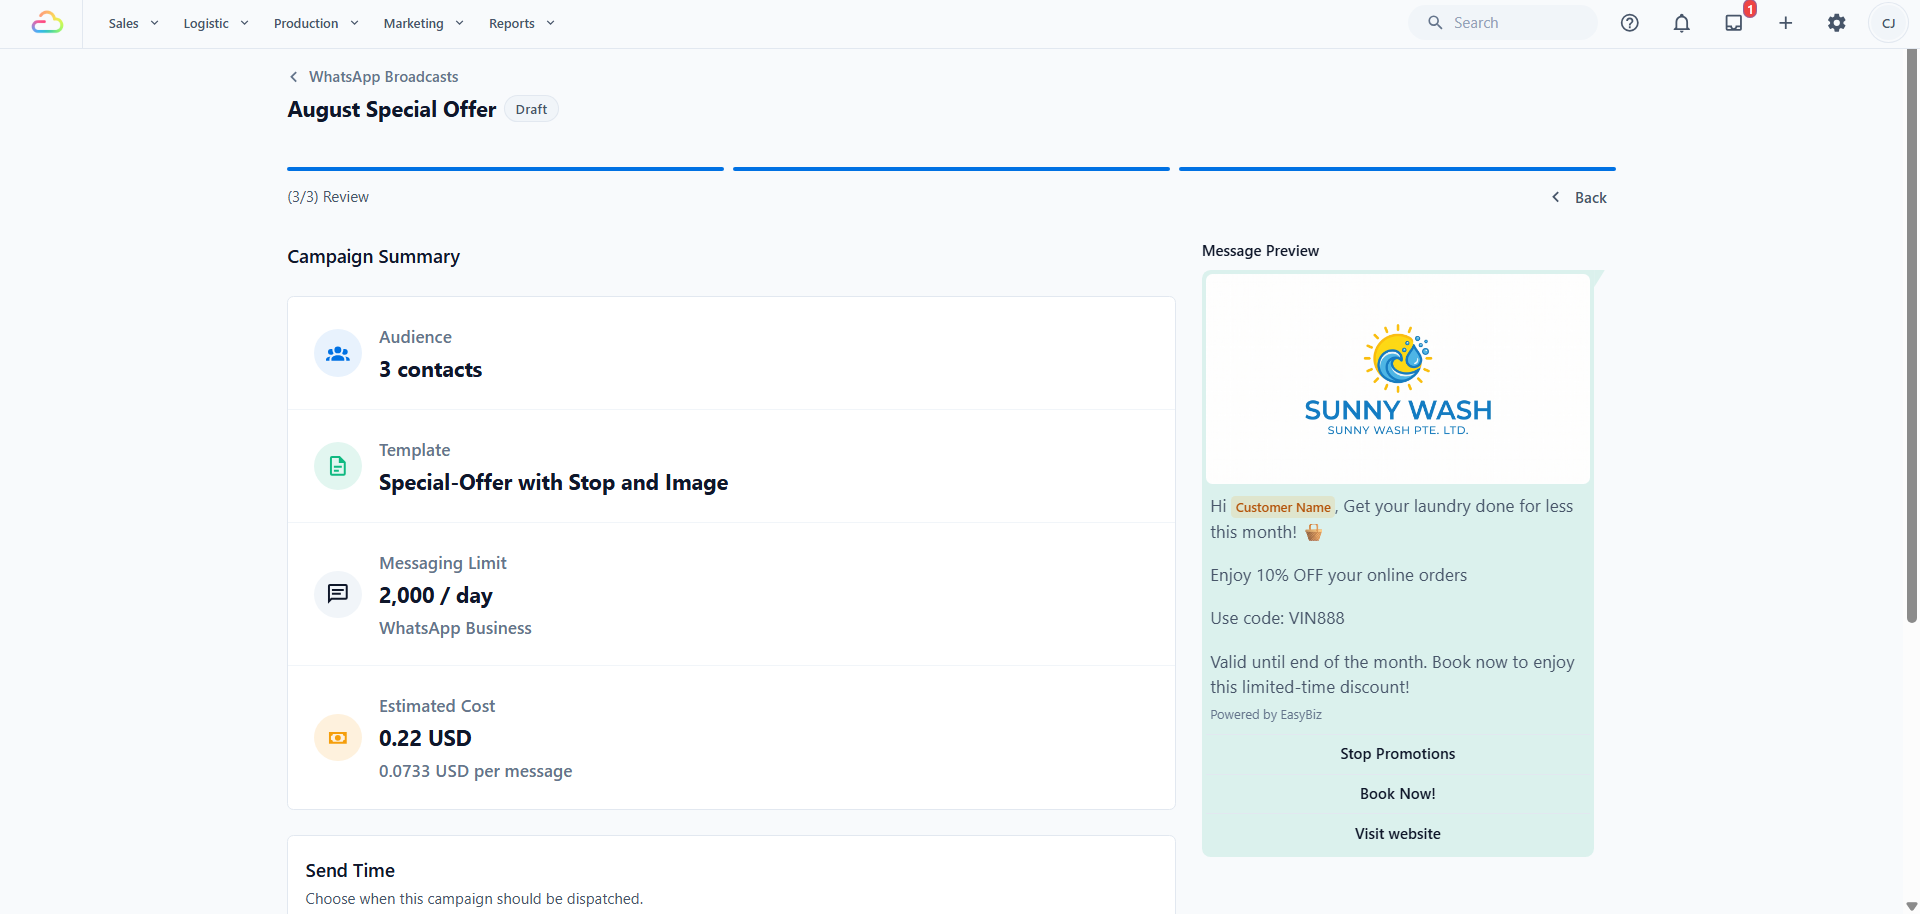
The Campaign Summary shows your Audience count, the Template, your Messaging Limit from Meta, and the Estimated Cost.
In the Send Time card, choose one:
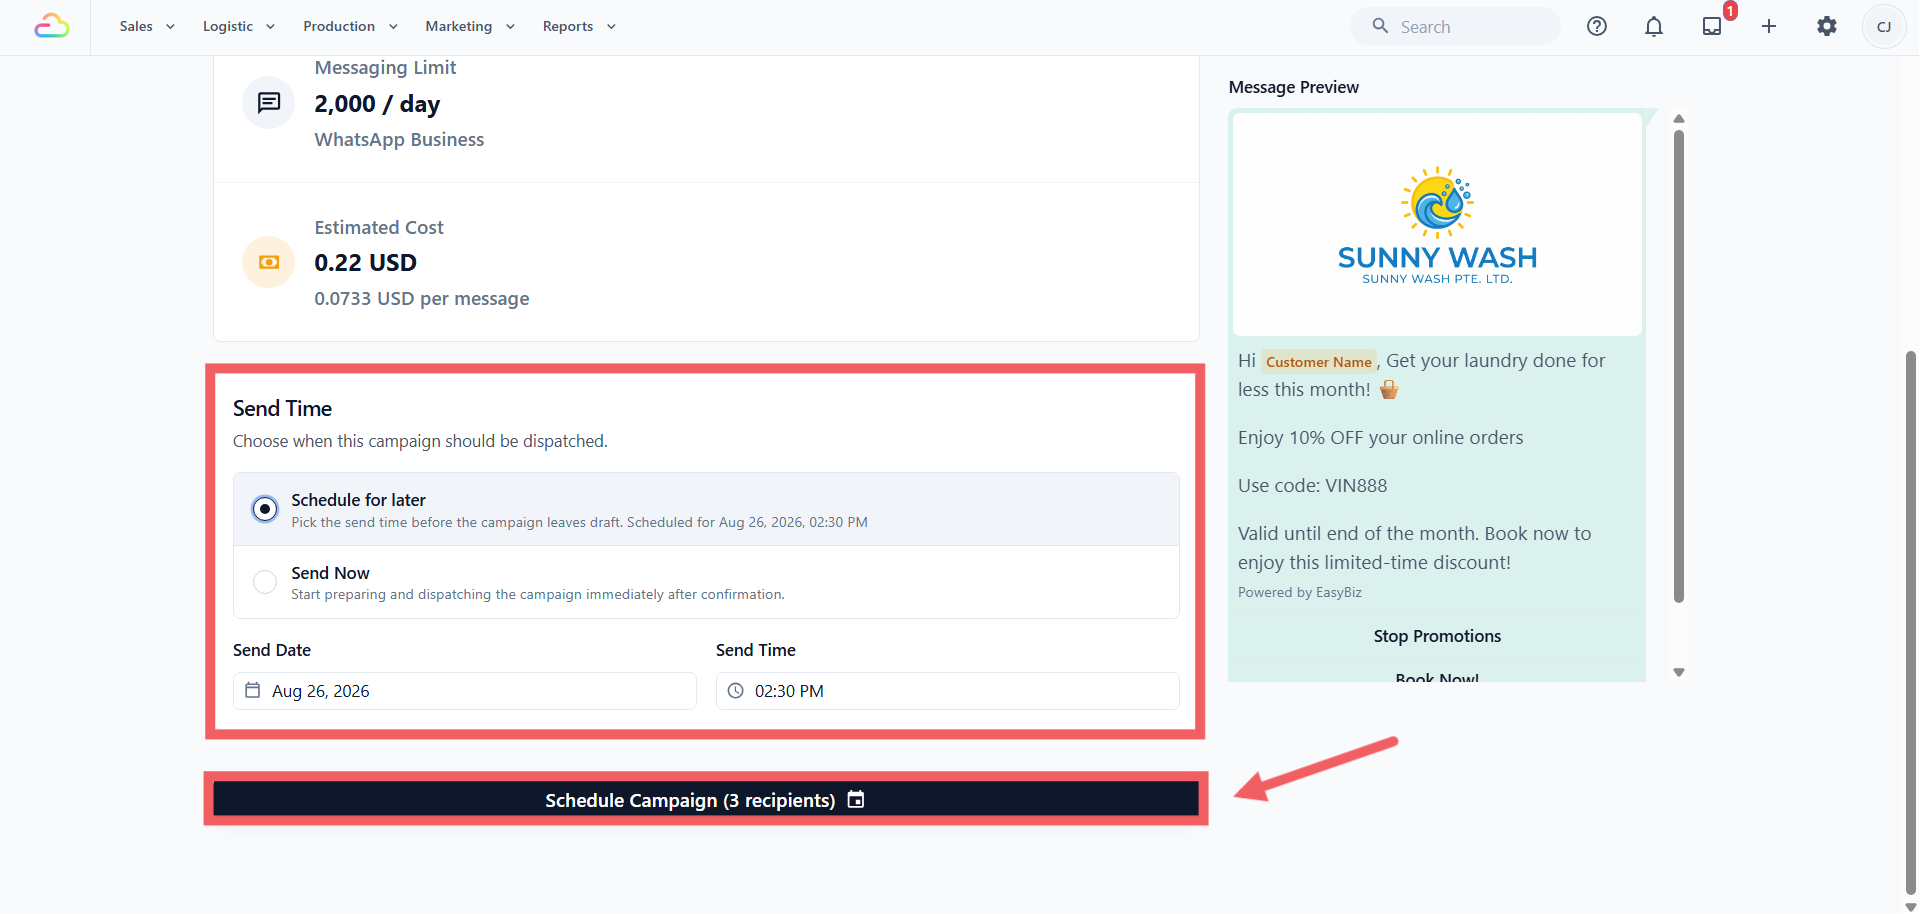
Schedule for later asks for a Send Date and Send Time, which must be at least 1 minute ahead.
Send Now starts preparing and dispatching right after you confirm.
Click Send Campaign Now or Schedule Campaign. The button shows the recipient count, and a confirmation dialog repeats how many messages you are sending, with which template, and the cost.
What the Statuses Mean
Draft, still being built, nothing sent.
Preparing or Snapshotting, the recipient list is being frozen.
Scheduled, audience locked, waiting for the send time.
Queued or Sending, messages are going out now.
Paused, nothing goes out until you resume.
Stopping or Stopped, remaining messages were cancelled.
Retrying, failed recipients are being tried again.
Completed, Failed, and Archived are the finished states.
Reading the Results
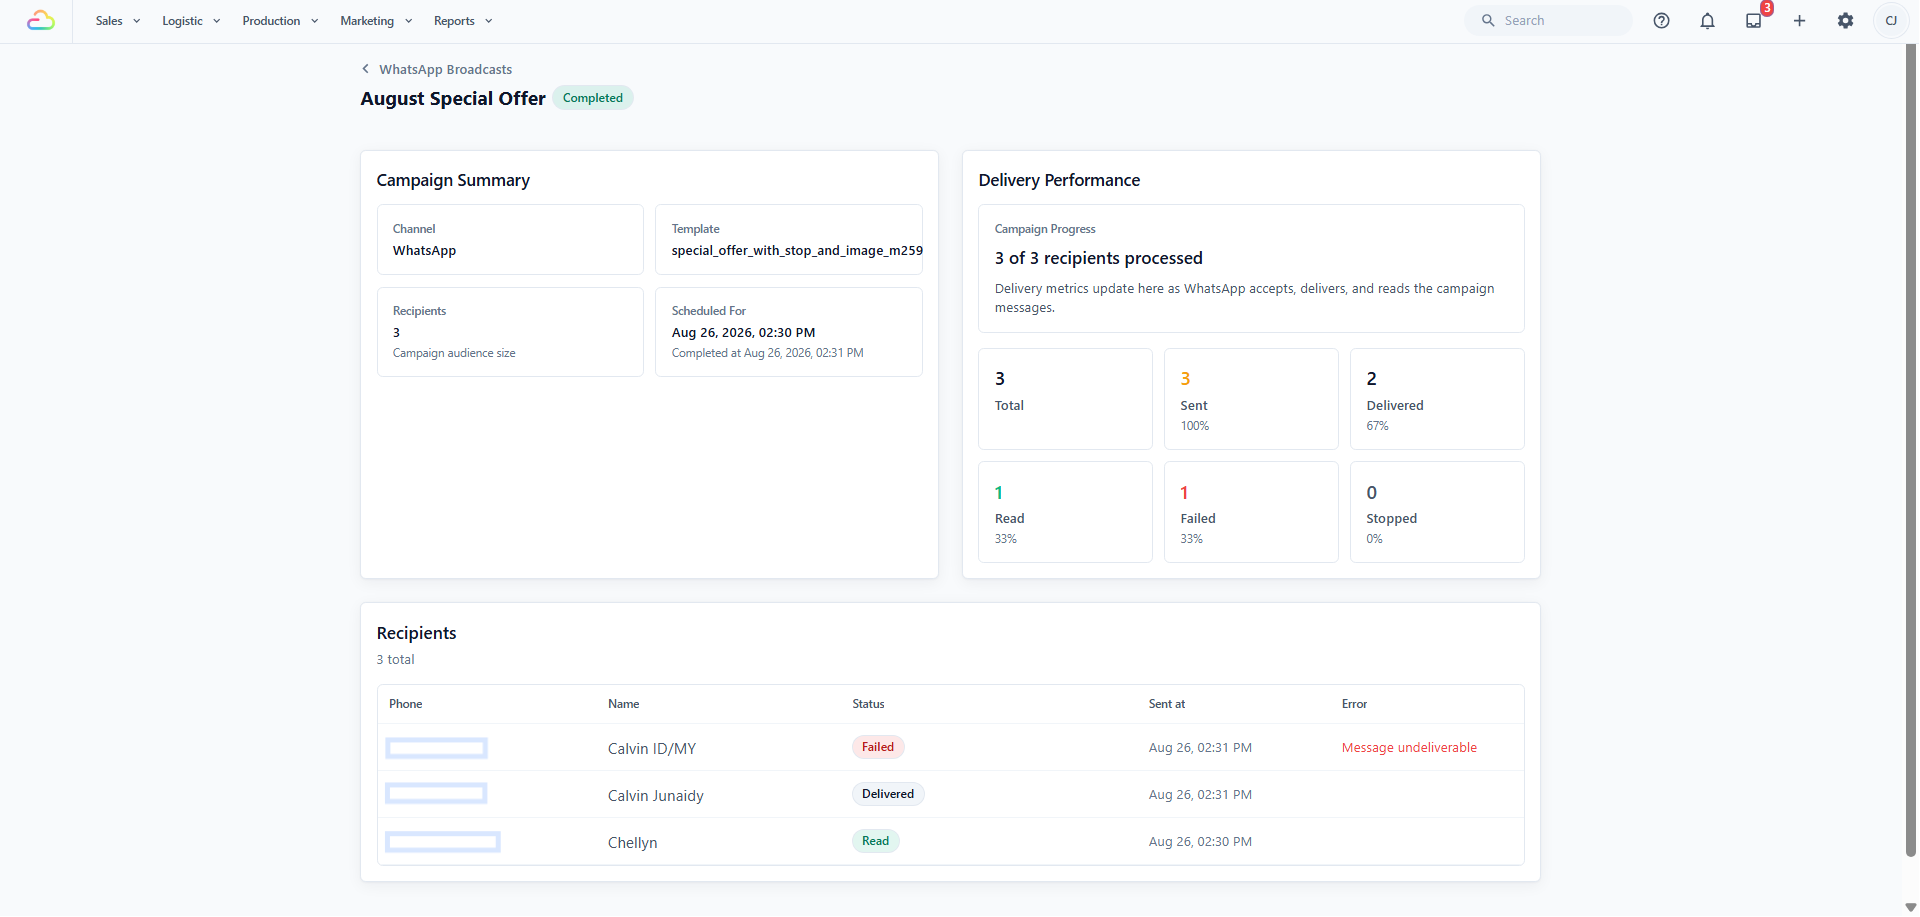
Delivery Performance breaks the send into Total, Sent, Delivered, Read, Failed, and Stopped. Below it, Recipients lists everyone locked in at launch with their Phone, Name, Status, Sent at, and any Error, failed rows first.
These counts keep updating for a day or two.
FAQs
Can I still edit a campaign after I schedule it?
Not directly. Use Cancel Schedule to return it to Draft, edit it, then schedule it again.
What is the difference between Pause and Stop?
Pause is temporary and you can resume where you left off. Stop is final and the campaign cannot be restarted.
Why can I not delete a campaign that already sent?
Delete is only offered on Draft and Archived campaigns. Archive it first, then delete it.
Can I change the audience after launch?
No. The list is frozen when the campaign leaves Draft, so anyone who opts out afterwards still receives that message.
Does Retry failed charge me again?
Each retry is a new message, so Meta bills it like any other send.
Does the test send cost money?
Yes. It is a real marketing message through Meta, billed like any other, and it also appears as a conversation in your WhatsApp Inbox.
Why is my approved template not in the list?
Only Marketing templates approved on the selected WhatsApp Account appear. Switching the account clears your template choice, so pick the account first.
Where do replies to a campaign go?
Into your WhatsApp Inbox as normal conversations, so your usual auto reply rules apply to them.
What's Next
Fine tune who receives the message in Choosing Your Campaign Audience.