
When you finish, a phone in your staff's hands takes photos of items and sends out or receives orders for your shop, while the main POS keeps serving customers at the counter.
Before You Start
- Set up your POS app and sign in your main POS first. The phone pairs with that main POS and works for the same shop. See Building Your POS App and Signing In, Switching and Signing Out a POS Device.
- Get a phone with a working camera. It can be an Android phone or an iPhone.
- Install the EasyBiz POS app on that phone: EasyBiz POS on Google Play for Android, or EasyBiz POS on the App Store for iPhone.
- Both the phone and the main POS need an internet connection. They don't need to be on the same Wi-Fi.
- You need someone at the main POS to enter the pairing code. Nothing needs to be set up in the Console for the phone.
- If you set this up before: a staff phone now pairs with the main POS using a 6-digit code, the same way as the customer-facing display.
Choose your setup
| Level | Fits shops like | What you set up | Read these sections |
|---|---|---|---|
| Easy | One shop that photographs items at drop-off to record stains and tears, like CleanFast's Tampines shop | Pair the phone and use Photo | Pairing the phone, Getting around the phone, Taking photos of items |
| Intermediate | Shops that send work to a factory or workshop and scan bags in the back room or at the van | Everything in Easy, plus Send out and Receive on the phone | Everything in Easy, plus Sending out and receiving |
With Easy alone, staff can photograph any item from the moment the phone is paired. Send out and Receive are already in the phone's menu, so you can start using them later without pairing again.
Overview
A paired phone is a staff phone that works with your main POS. You connect it once with a 6-digit code, and after that it works for the shop of the main POS it is paired with. Staff carry it to the workroom, the back door or the van to photograph items and to send out or receive orders, while the counter keeps serving customers. Every photo is saved with the item or order straight away, so anyone who opens the order later can see its condition. The phone uses the pages and rules you already set up for your POS, so there are no extra settings to manage.
Where it works
- Main POS: staff enter the phone's pairing code from the Customer screen icon.
- Paired phone: staff use Photo, Send out and Receive from its menu.
- Orders: photos taken on the phone are saved with the item or order, and batches sent out or received move the orders the same way as on the POS.
Why set it up
- Proof of an item's condition. A photo of a stain, a tear or a missing button is saved with the item at drop-off, so you can show the customer what it looked like when it came in.
- A free counter. Staff photograph and scan items where the items are, so the main POS stays free for the next customer.
- No carrying bags to the counter. Staff scan each bag at the van or in the workroom when sending work to the factory or receiving it back.
- Fewer mistakes. Each photo goes to the item whose tag was scanned, so nobody has to match pictures to orders later.
If you skip it, nothing else changes. Staff send out and receive on the main POS as before, and items have no photos.
Pairing the phone
You pair each phone once, the same way as a customer-facing display. It stays paired until someone signs it out. The pairing steps, with a picture of each screen, are in Connecting a Customer-Facing Display to Your POS.
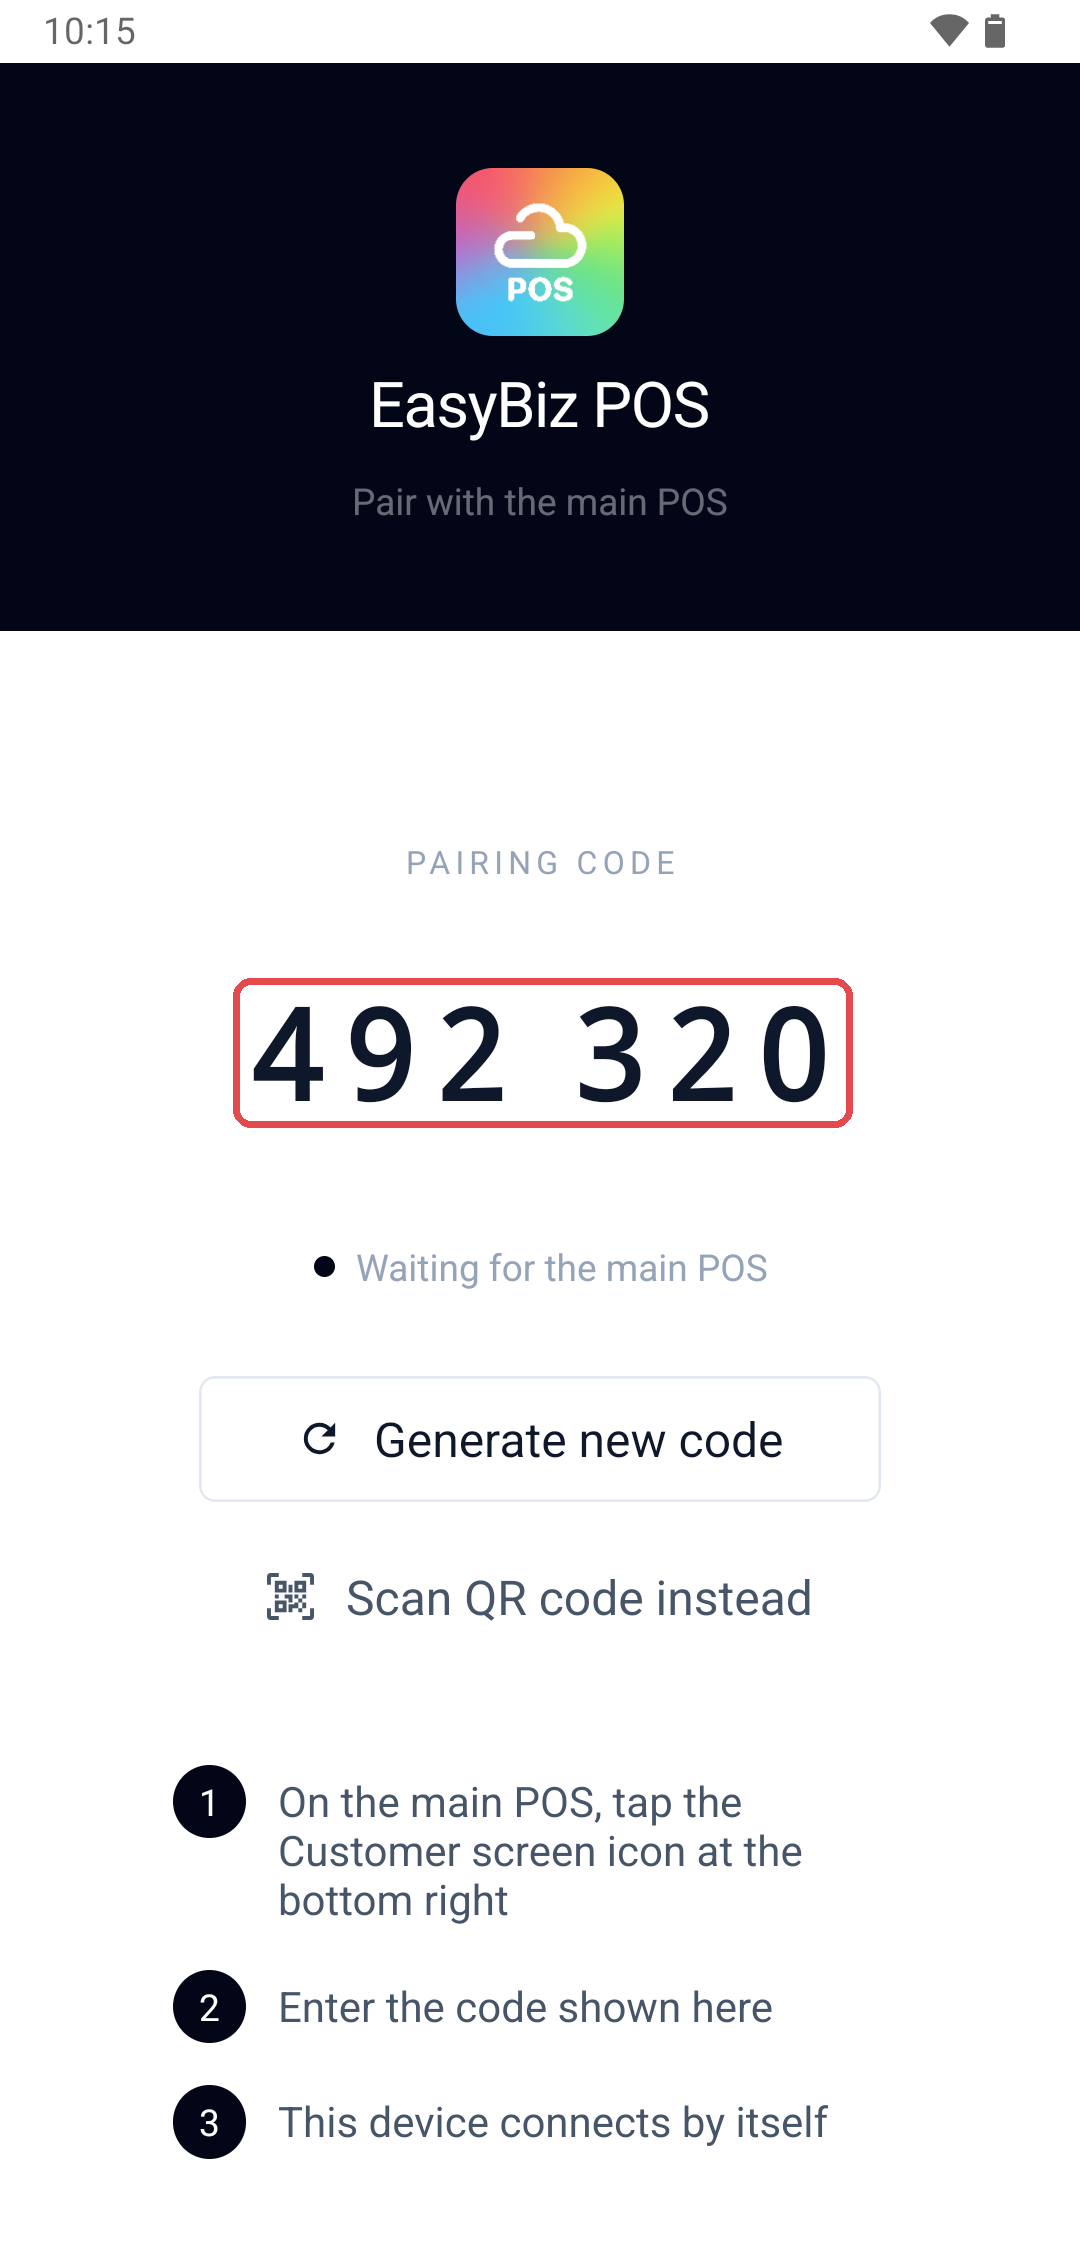
- Open the EasyBiz POS app on the phone. A phone goes straight to its 6-digit Pairing Code, because only a bigger screen can be the main POS.
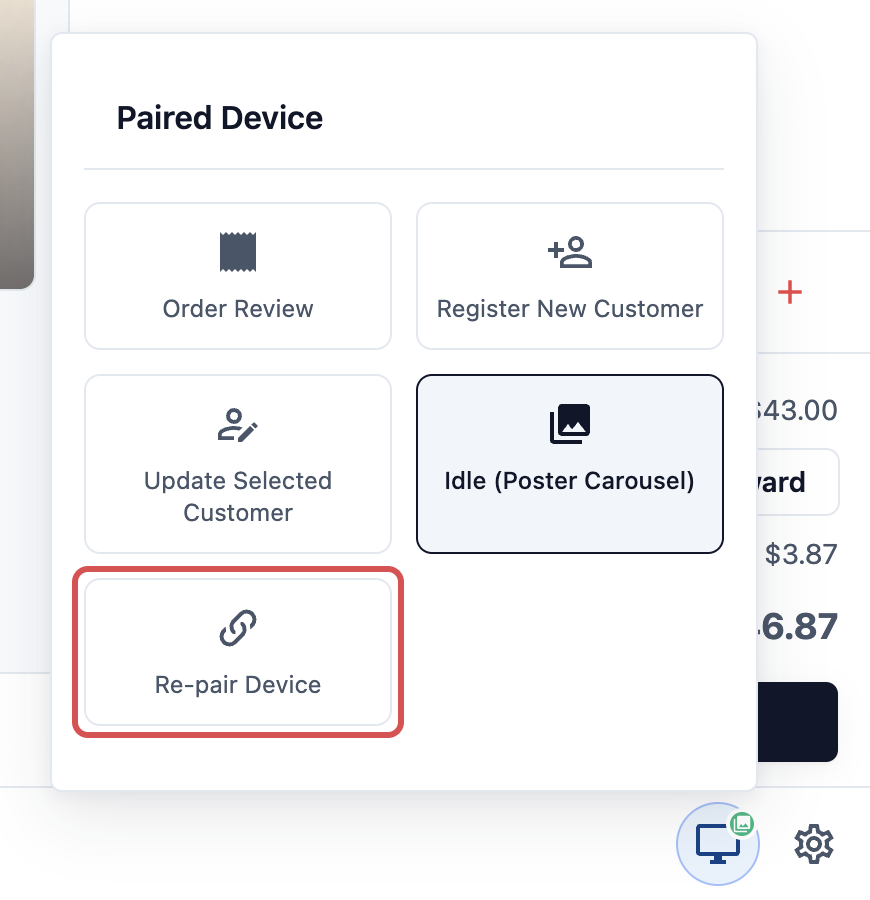
- On the main POS, tap the Customer screen icon (a small monitor) at the bottom right. If a customer-facing display is already paired, tap Re-pair Device in the panel that opens. Your display stays paired.
- Enter the 6-digit code shown on the phone. Both devices show Device Paired.
If the code no longer works, tap Generate new code on the phone for a fresh one.
Getting around the phone
After pairing, the phone opens on a screen named after your shop, for example CleanFast Tampines. Staff move between pages from the menu.
- Tap the menu icon (☰) at the top left, or swipe in from the left edge of the screen.
- Tap the page you want.
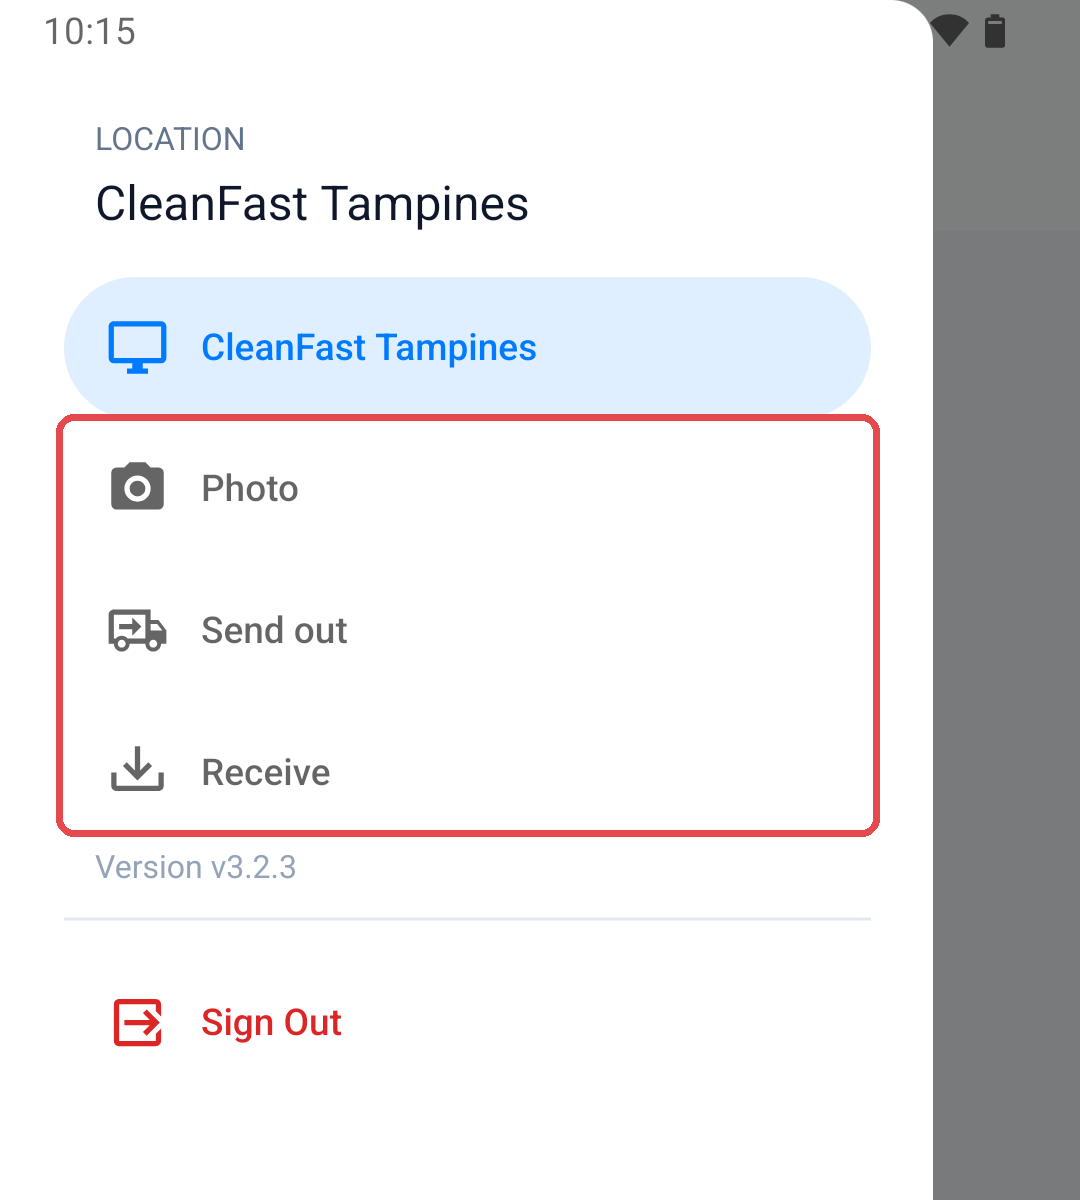
- CleanFast Tampines (your shop name): the customer screen, used by a customer-facing display. Staff don't need it.
- Photo: take and save photos of items and orders.
- Send out: scan orders leaving your shop for the factory or workshop.
- Receive: scan orders coming back.
- Sign Out: unpairs the phone.
The phone stays on the page staff last opened, so a phone kept in the workroom can stay on Photo all day.
If your POS asks staff to clock in, the phone's pages show Clock in on the POS first until someone clocks in on the main POS, and work on the phone is saved under that person's name. See Set Up Time Clock on Your POS.
Taking photos of items
Staff photograph an item by scanning its tag first, so each photo goes to the right item.
- Open the menu and tap Photo.
- The first time, the phone shows "We need your permission to show the camera". Tap Continue, then allow the camera.
- Point the camera at the QR code on the item's tag, or on the order's receipt.
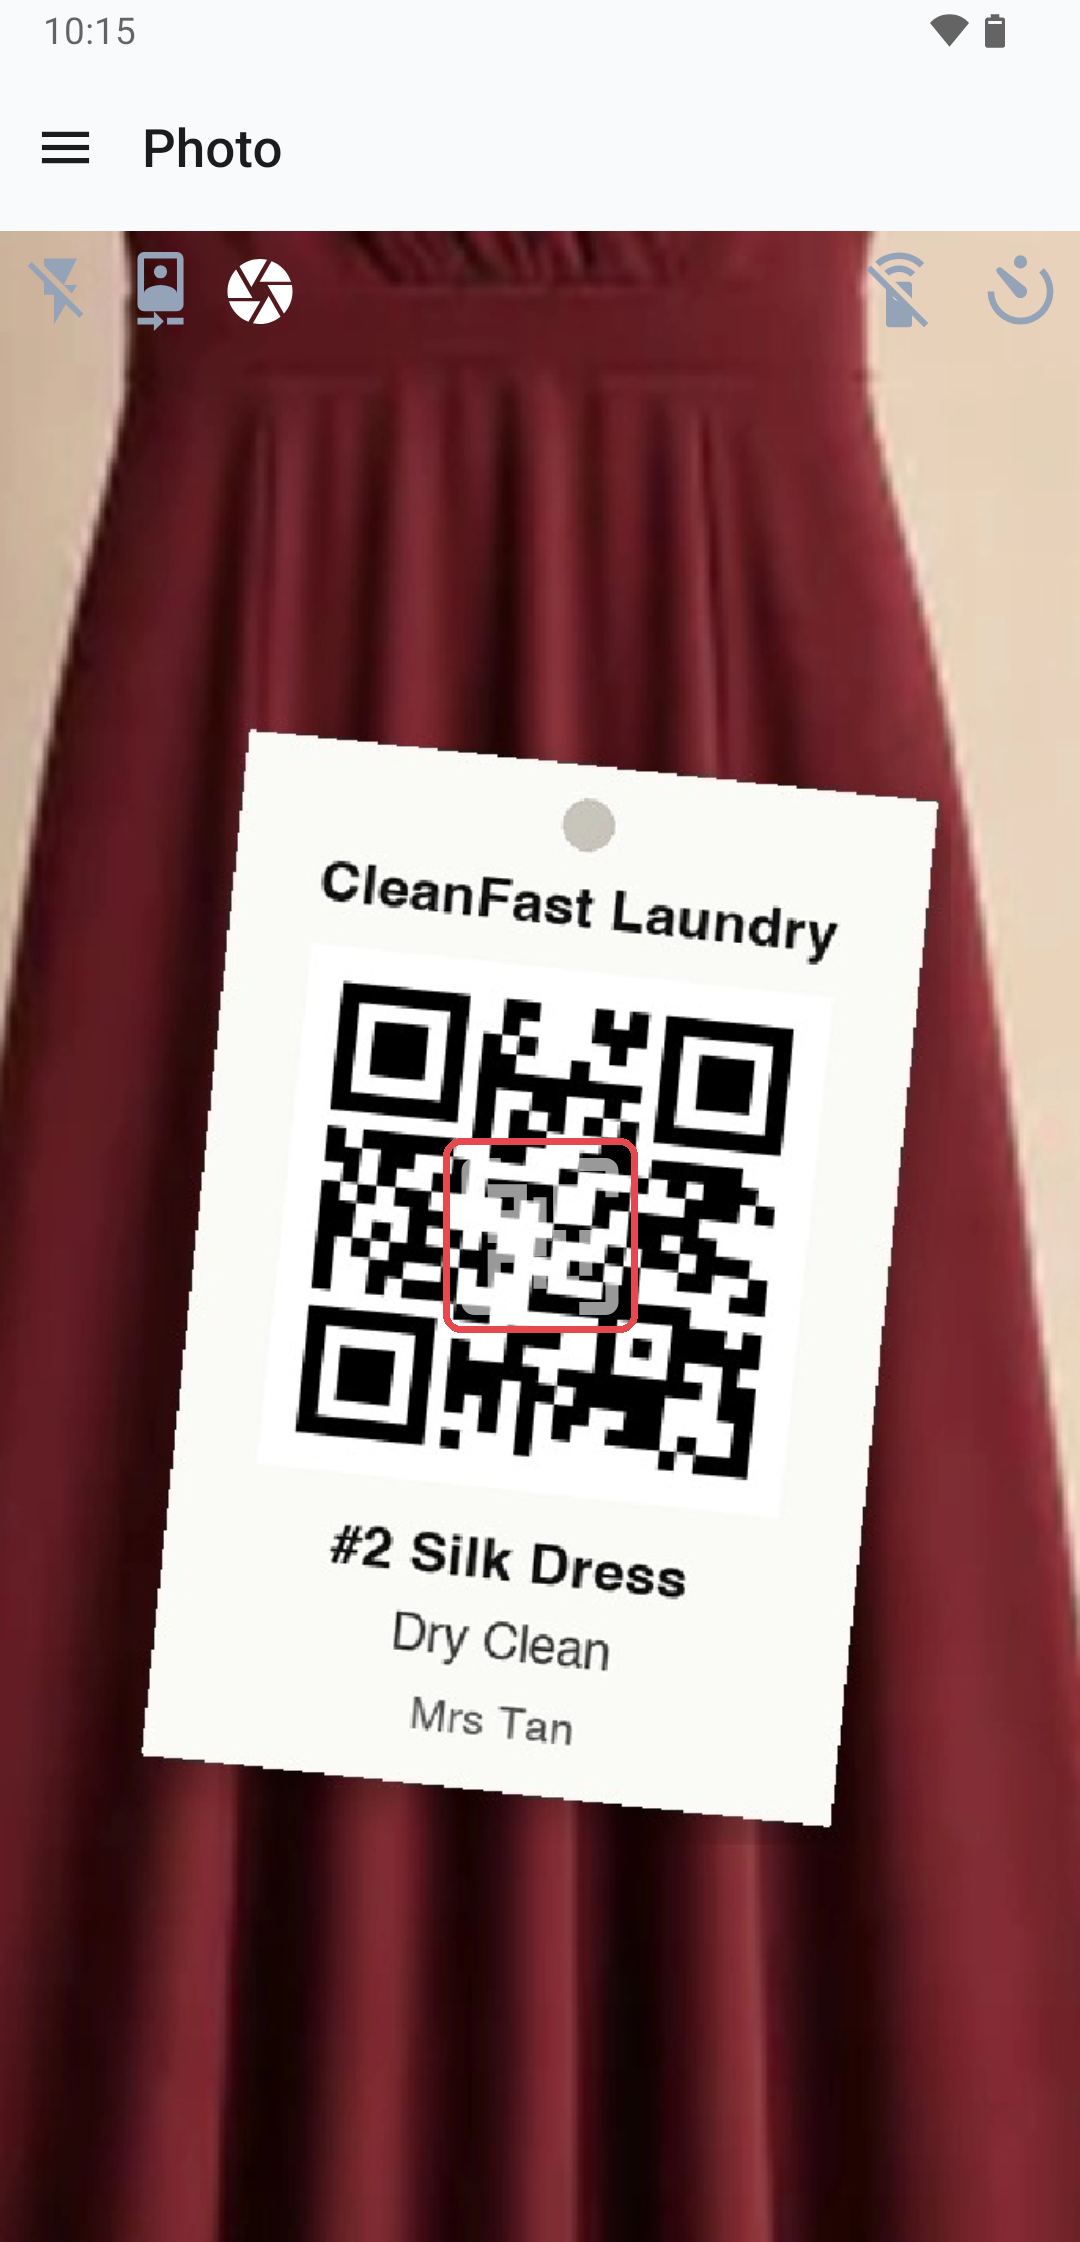
- A bar at the bottom shows what the phone found: the order number and the item name, for example "CFB-00029" and "Silk Dress".
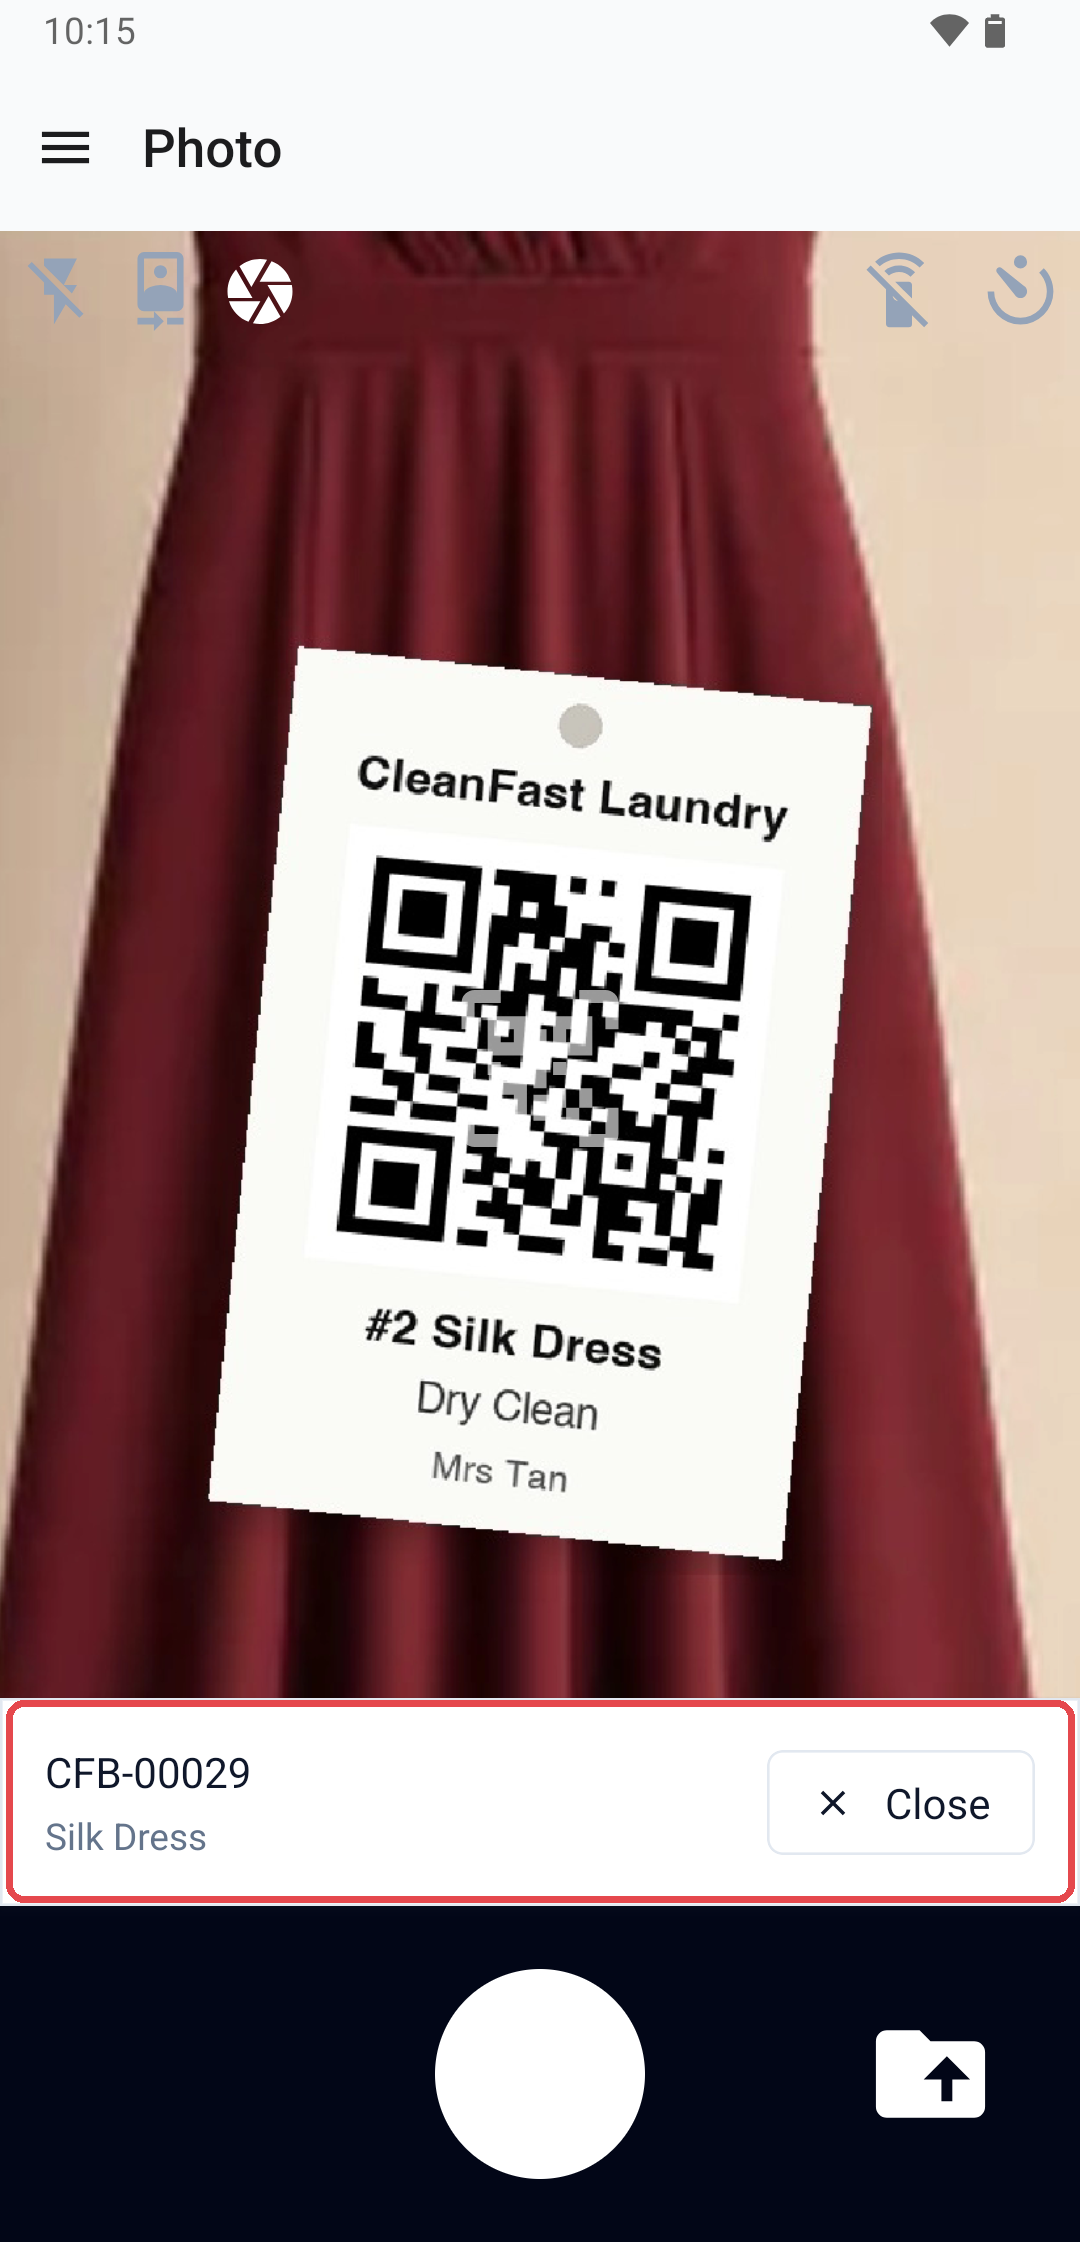
- Tap the round shutter button to take a photo. Take as many as you need. The number of photos saved shows on the small preview beside the shutter.
- To add a picture already on the phone, tap the folder icon to the right of the shutter and choose it.
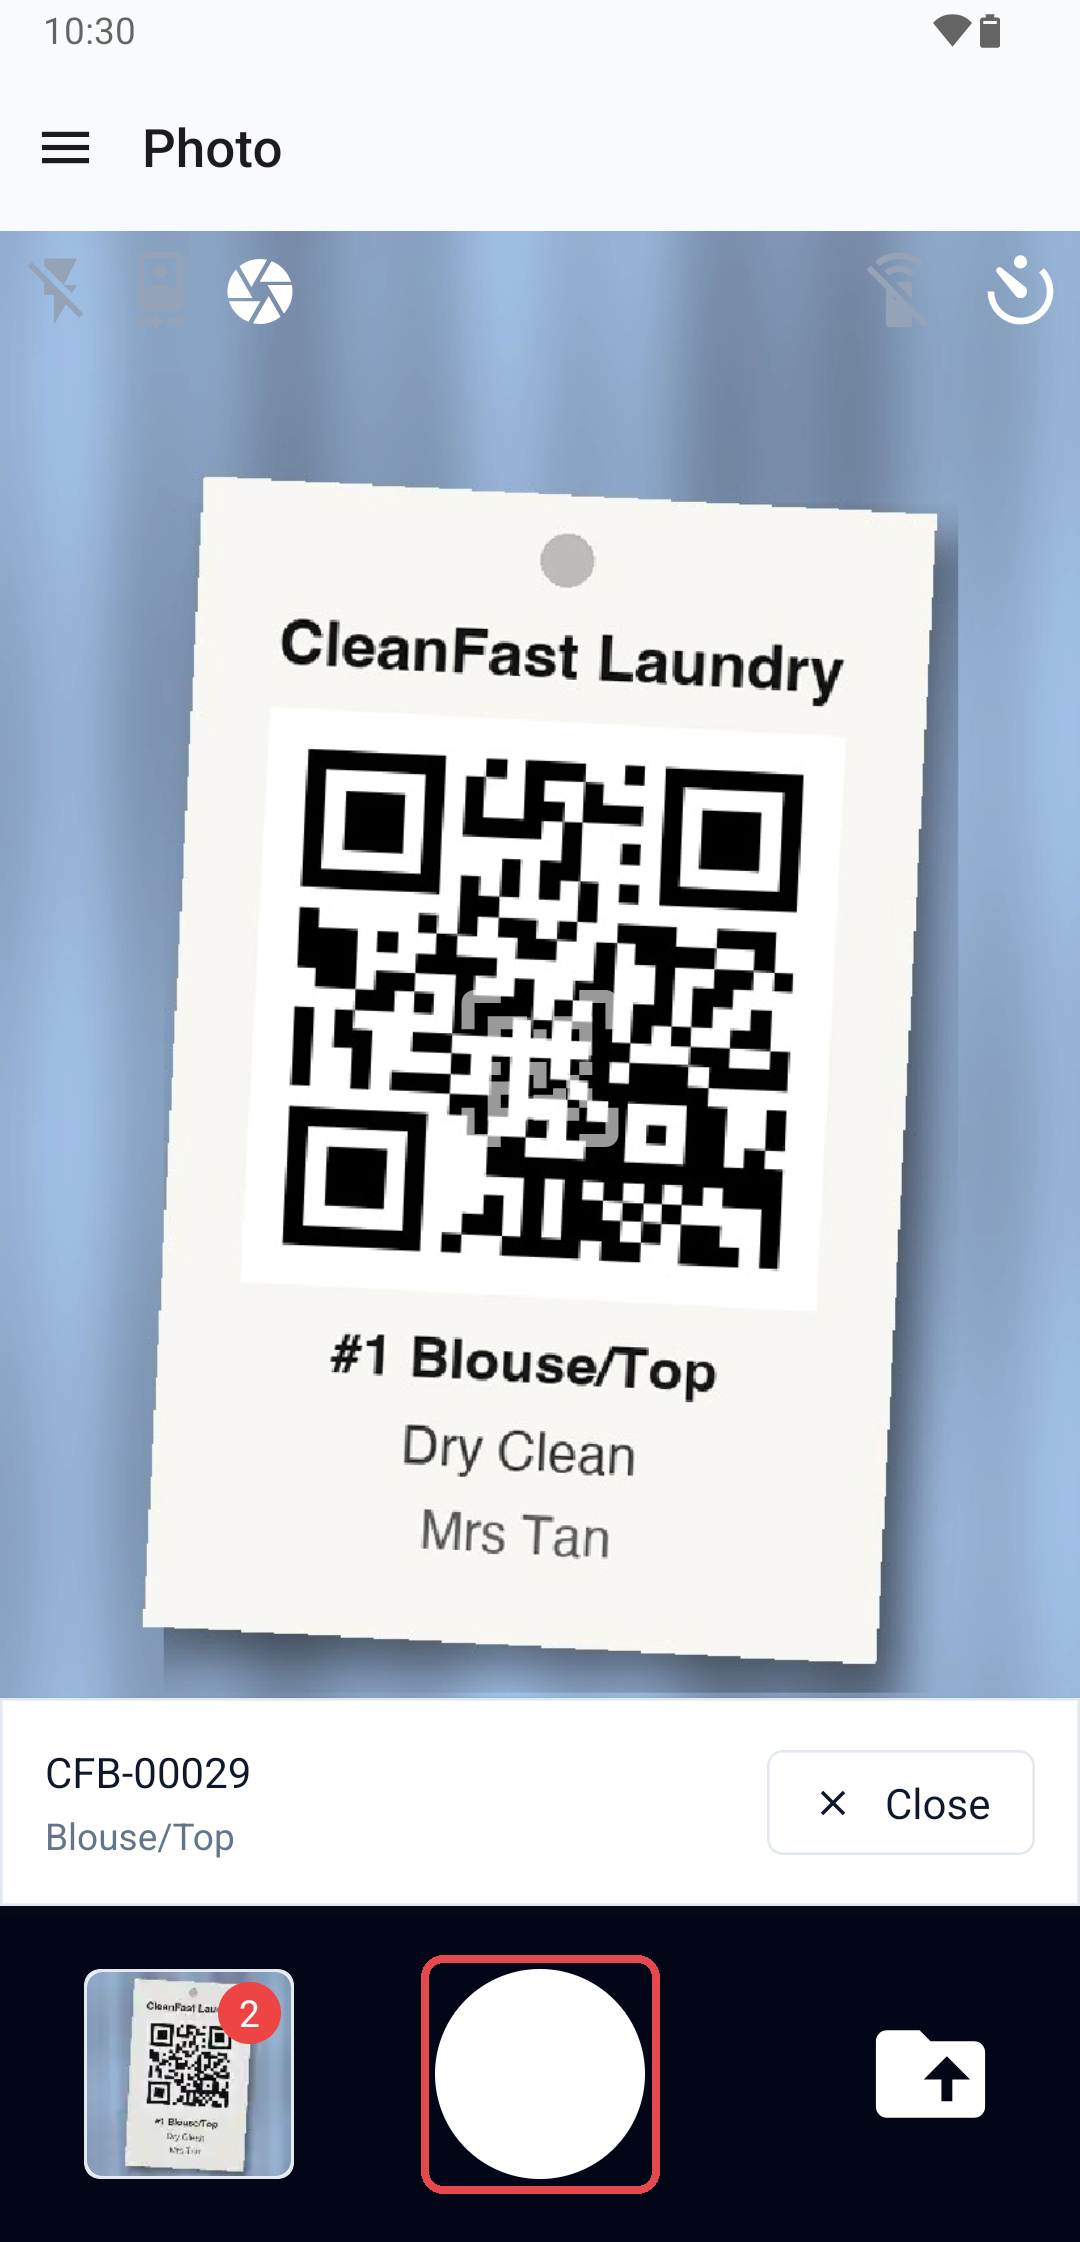
- Tap Close on the bar, then scan the next item.
When staff scan an item's tag, the photos are saved with that item. When they scan the receipt, the photos are saved with the whole order. If the code isn't an order or item from your shop, the bar shows "No order or item matches this code." The phone has no search box, so staff always scan a tag or receipt.
Camera buttons
The buttons at the top of the Photo page change how the camera works. Each choice stays on that phone until staff change it.
- Camera flash: tap to switch the flash between its settings, for items in a dim workroom.
- Front camera: switches to the camera on the screen side of the phone.
- Shutter sound: turns the camera sound on or off. The phone shows "Camera shutter on" or "Camera shutter off".
Auto Capture on Scan
If you turn this on, the phone takes the photos by itself a few seconds after it scans a tag, so staff can hold the item with both hands. A countdown shows on the screen before each photo.
- Tap the Auto Capture on Scan button at the top right.
- Choose the Number of Photos, from 1 to 3.
- Choose the Photo Capture Delay, the number of seconds to wait after the scan, from 1 to 60. It starts at 1 photo after 3 seconds.
- Tap Enable.
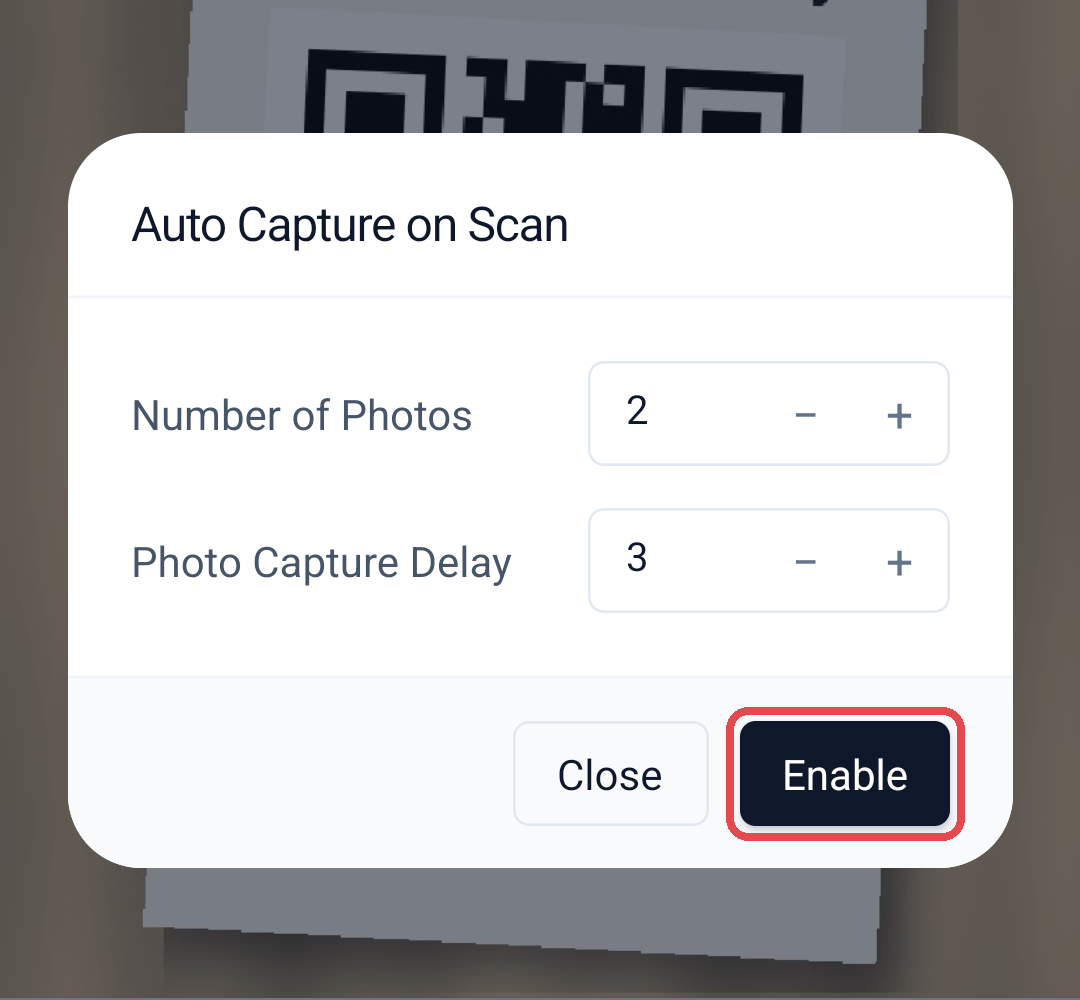
To change it later, open it again and tap Update, or tap Disable to turn it off. Staff can still tap the shutter for extra photos while it is on.
Remote Control
Use this only if you have a Bluetooth camera remote. If you turn this on, pressing the remote's button takes a photo, so staff can photograph a large item such as a duvet from a distance. Connect the remote to the phone's Bluetooth first, then tap the Remote Control button at the top right, choose the button press under Remote Controller Event, and tap Enable. It can be on together with Auto Capture on Scan: the phone takes its automatic photos after each scan, and the remote takes any extra ones.
Sending out and receiving
For Intermediate setups:
A paired phone has Send out and Receive in its menu, each as its own page, so staff use one direction at a time. They work like the Send Out / Receive page on the POS, and the phone beeps each time it adds an order. How the batch works and how orders move to their next step is explained in Sending Orders to Your Factory and Back (Send Out / Receive).
- Open the menu and tap Send out or Receive.
- Scan each receipt or bag tag. Each order is added to the batch.
- Tap the button at the bottom of the page to confirm the batch, for example Send out 3 orders.
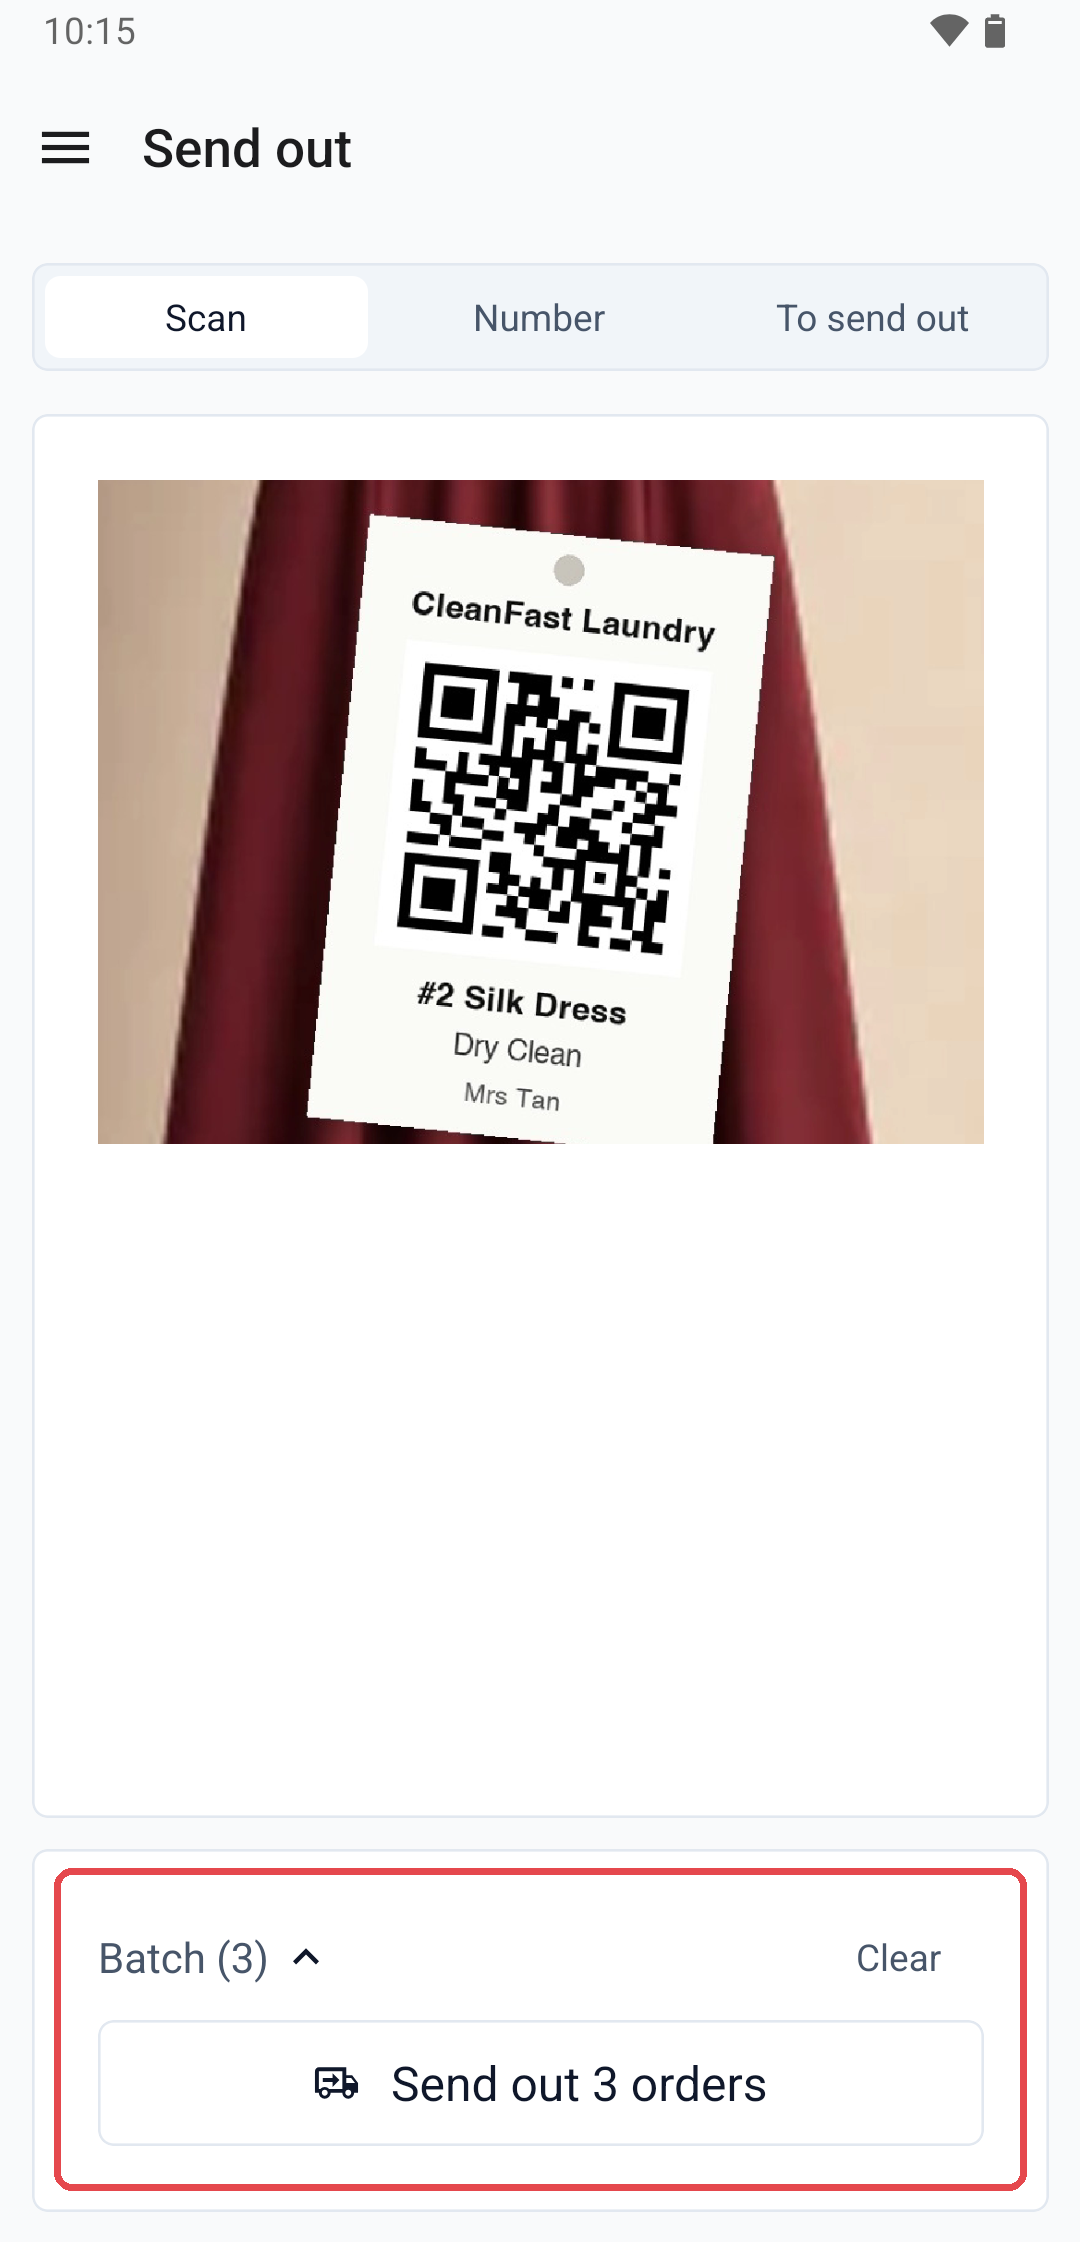
There is no switch for this in the POS app editor. Every paired phone has both pages, and each batch is recorded for the shop of the main POS the phone is paired with.
Example setup
CleanFast Laundry's Tampines shop pairs an Android phone with its main POS for the workroom, with Auto Capture on Scan on at 2 photos after 3 seconds, and leaves the phone on Photo during the day.
Mrs Tan drops off a silk dress with a small tear, and staff create order CFB-00029 at the counter. In the workroom, Aisha scans the dress's tag on the phone. The bar shows "CFB-00029" and "Silk Dress", and 3 seconds later the phone takes 2 photos of the tear, saved with the dress.
At 6pm, the factory van arrives at the back door. Aisha opens Send out on the phone, scans the 12 bags as they go into the van and confirms the batch, while the counter keeps serving customers.
Managing it later
- Unpairing: on the phone, open the menu and tap Sign Out. The phone stops working for your shop until you pair it again.
- Replacing a phone: sign out the old phone, then pair the new one with a fresh code from the main POS.
- Moving a phone to another shop: sign it out, then pair it with that shop's main POS. From then on, its photos and batches belong to the new shop.
- Camera buttons: flash, shutter sound, Auto Capture on Scan and Remote Control stay as staff set them on that phone, and don't change other phones.
Keeping the app on the phone up to date is covered in Updating the POS App and Getting Help.
FAQs
Do I need a paired phone to send out and receive orders?
No. Staff can send out and receive on the main POS's Send Out / Receive page. A phone only lets them do it where the bags are, without taking up the counter.
Why does the phone say "No order or item matches this code."?
The phone scanned a code that isn't one of your shop's order receipts or item tags, such as a brand's barcode on a product. Scan the EasyBiz tag or receipt instead. If an item has lost its tag, find its order on the main POS.
What happens to the photos if I sign out or replace the phone?
They stay with the items and orders. Photos are saved with the order as soon as they are taken, not on the phone, so anyone who opens the order later still sees them.
What's Next
You have now set up both devices that work next to your main POS: a display for your customers and a phone for your staff. Next, learn the main POS screen staff use every day, from the menu to the icons at the bottom, in How to Get Around Your POS Screen.