
Before You Start
- Set up at least one business unit first, because staff fill in custom fields as steps in your business units and flows. See Introduction to Business Units.
- You need to be the account owner, or have Library & templates access in Users & Access. See Inviting Your Team and Managing Access.
- No customer details are needed. Custom fields are set up once for your whole shop.
What a custom field is
A custom field is a question your shop asks that EasyBiz doesn't ask by default. You give it a name, such as Fabric Type, and choose what kind of answer it takes, such as a list of choices or a photo.
Some examples:
- Fabric Type for a laundry: Cotton, Silk or Wool.
- Bag Brand for a bag repair shop.
- Stain Notes for a dry cleaner, where staff describe each stain in a few words.
- Condition Photo for any shop that wants a photo of damage before work starts.
If you skip custom fields, orders still work. Staff take orders as usual, but any extra detail ends up in free notes, written differently by each person, or not written at all.
What changed from Console 2.0
Console 2.0 called these Data Fields. Console 3.0 calls the page Custom Fields, but the buttons and windows inside it still say "Data Field", such as Add Data Field. Both names mean the same thing. Your existing fields are already on the page, so you don't need to create them again.
Where custom fields appear
Creating a custom field does not show it to anyone yet. A field appears only where you add it. You can use a custom field in these places:
- When staff take an order: as a step in a business unit's staff checkout, at the POS or in the Console. See Adding Extra Steps When Staff Take an Order.
- For each item: as a line item step, so staff answer it for every item they add, such as the fabric of each garment. See Asking for Details on Each Item.
- In flows: as a step in a flow from ⚙️ Settings › Flows, such as a packing check. In the step list it is shown under Your custom fields. See Introduction to Flows.
- At pickup and delivery: as a step drivers complete on a pickup or delivery job.
- In online booking: as a step in your Online Store's customer checkout, so customers answer it when they book. See Setting Up Customer Checkout.
- On printouts: the answer can be added to your receipt, label and PDF templates, so it prints on the receipt, the item tag or the invoice.
- In Price Rules: an Options field can set or change a price, for example a higher price for Silk. See Setting Up Price Rules.
Open Custom Fields
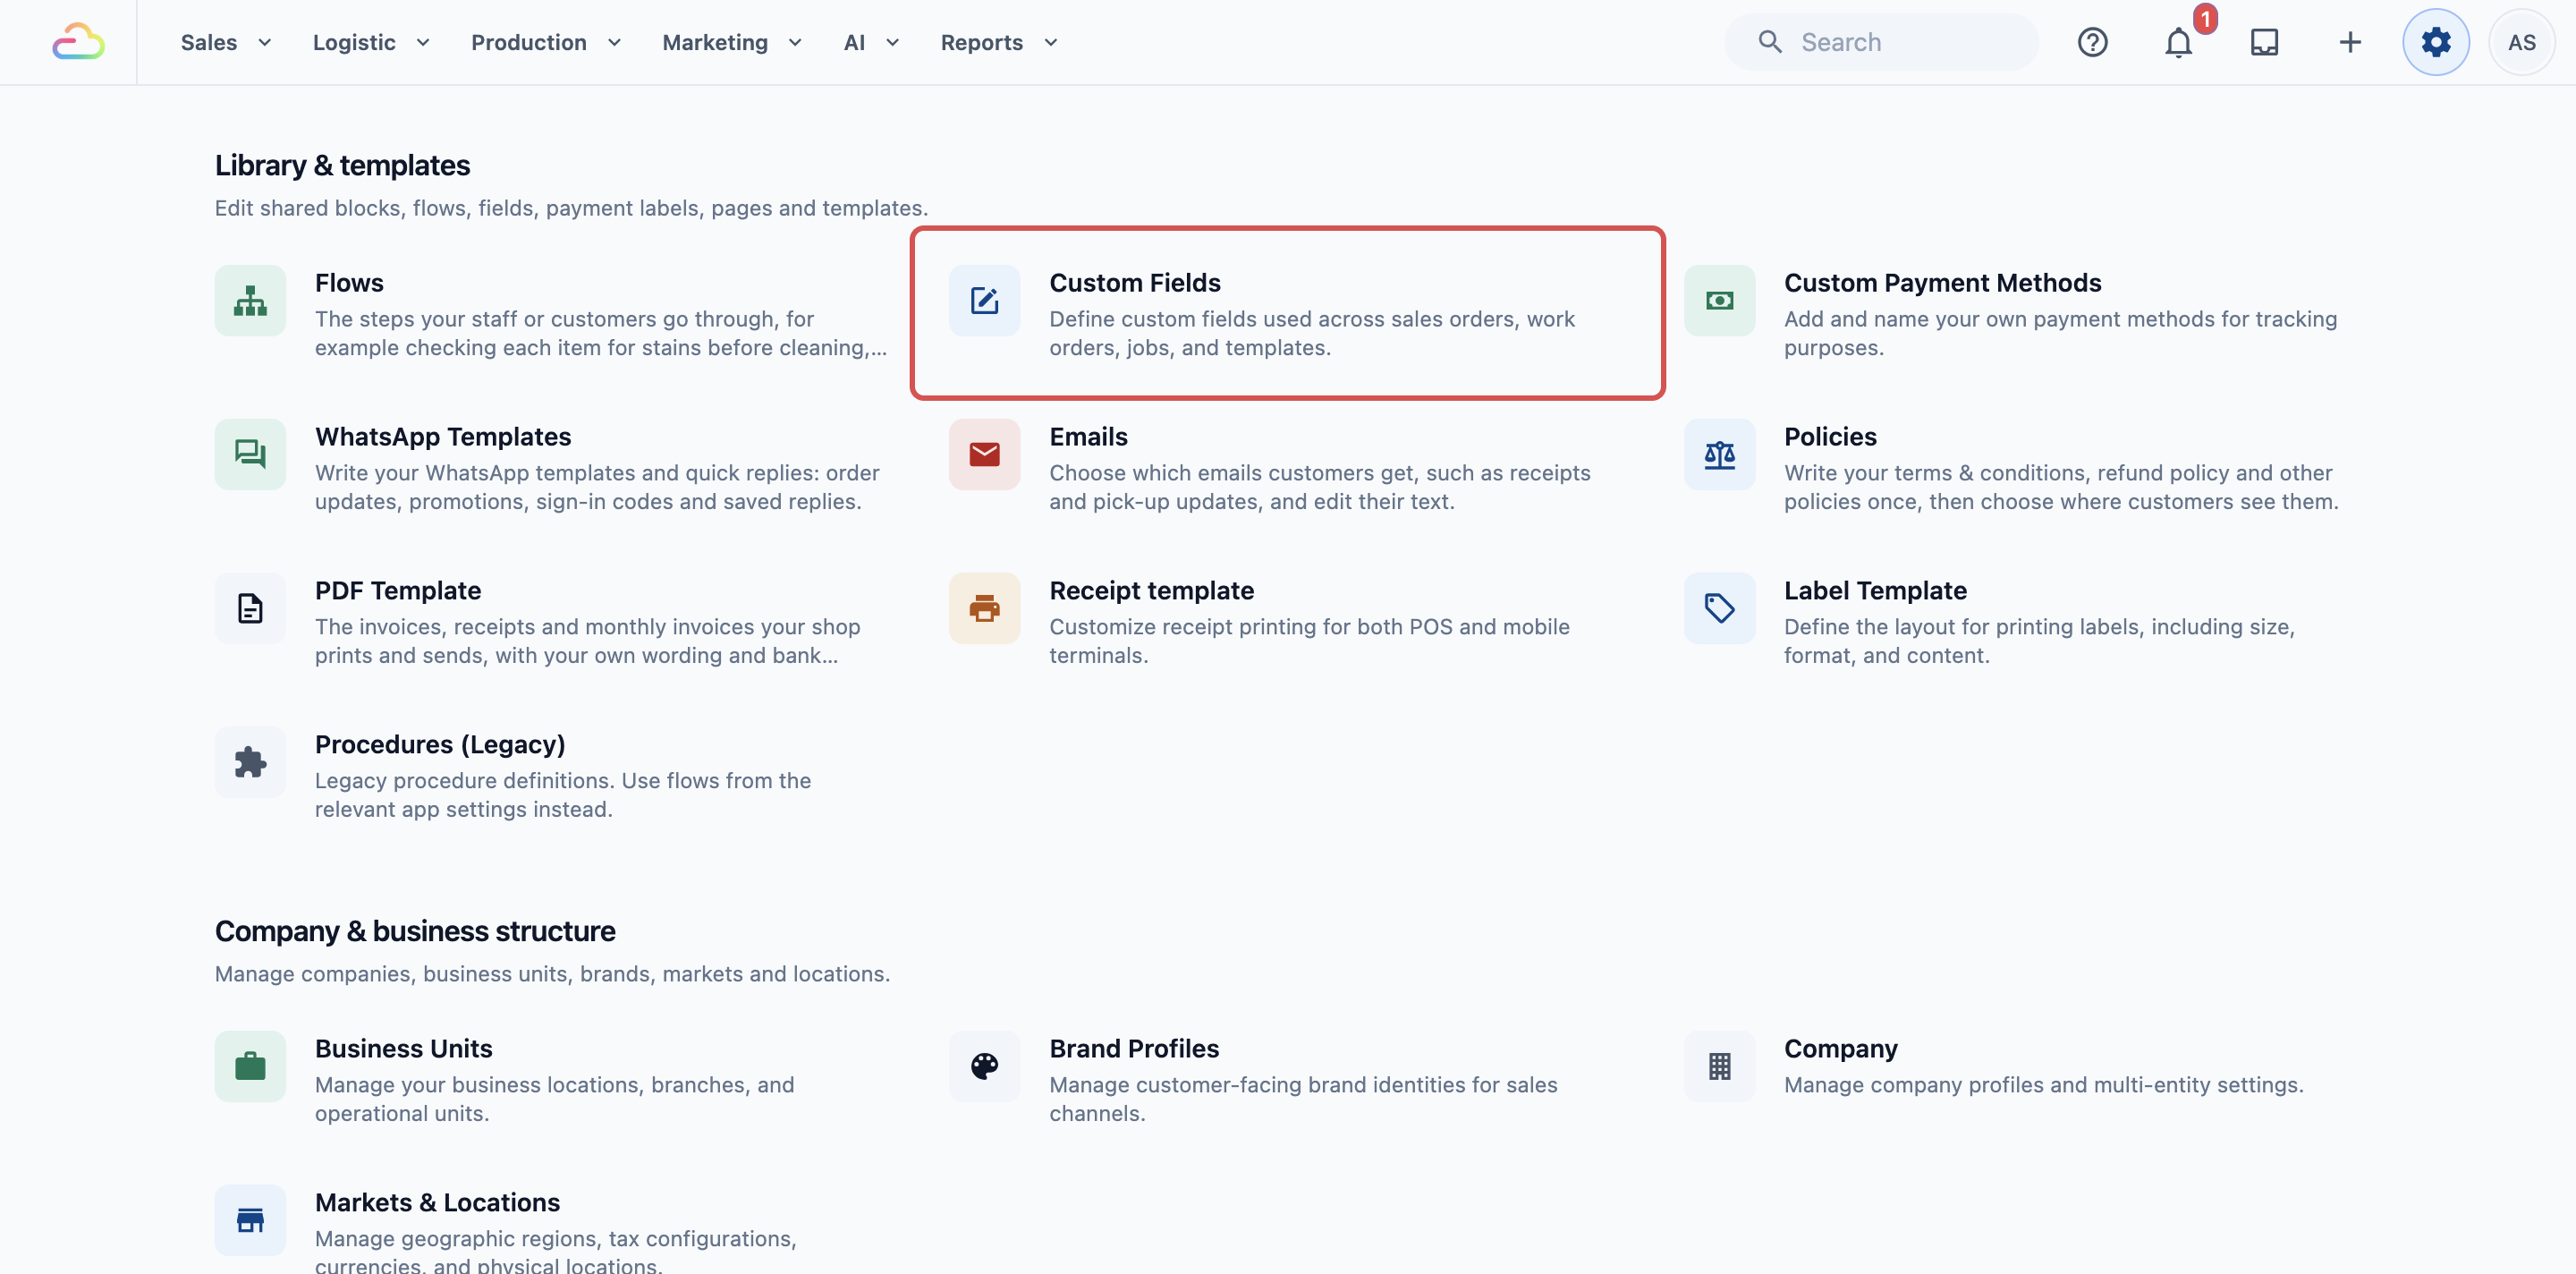
- Click the ⚙️ Settings icon in the top-right corner.
- Under the Library section, click Custom Fields.
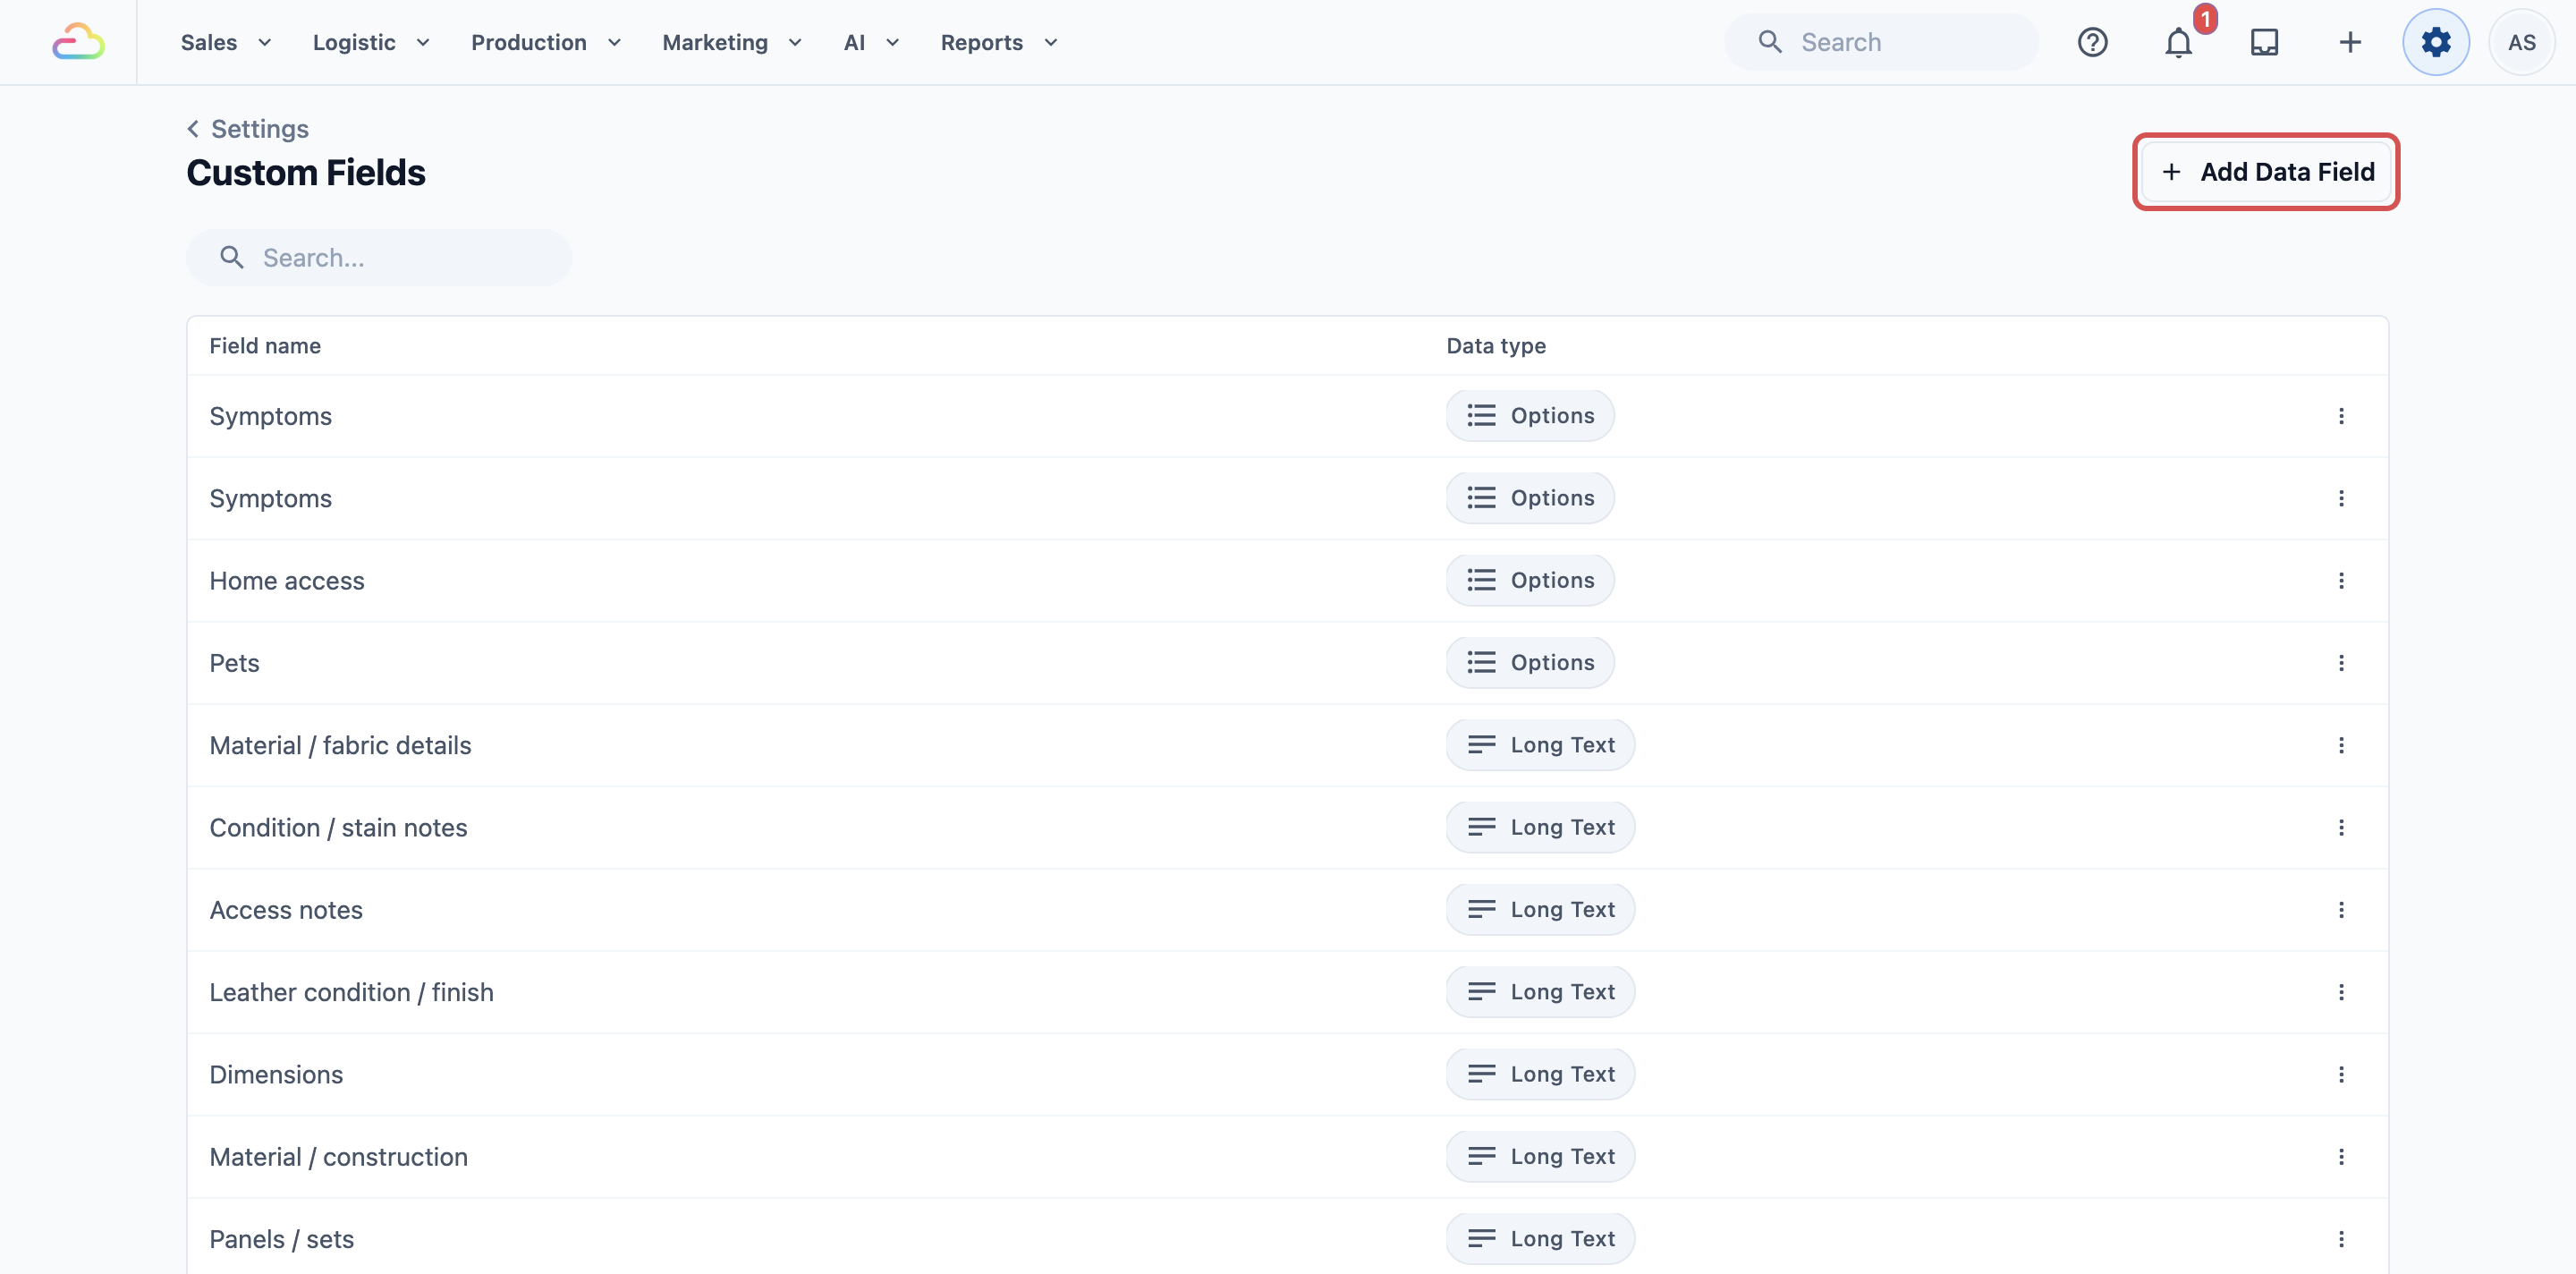
The Custom Fields page lists every field your shop has, with its Field name and Data type. Use the search box above the list to find a field by name. If you have none yet, the list says "No custom fields yet".
Add a custom field
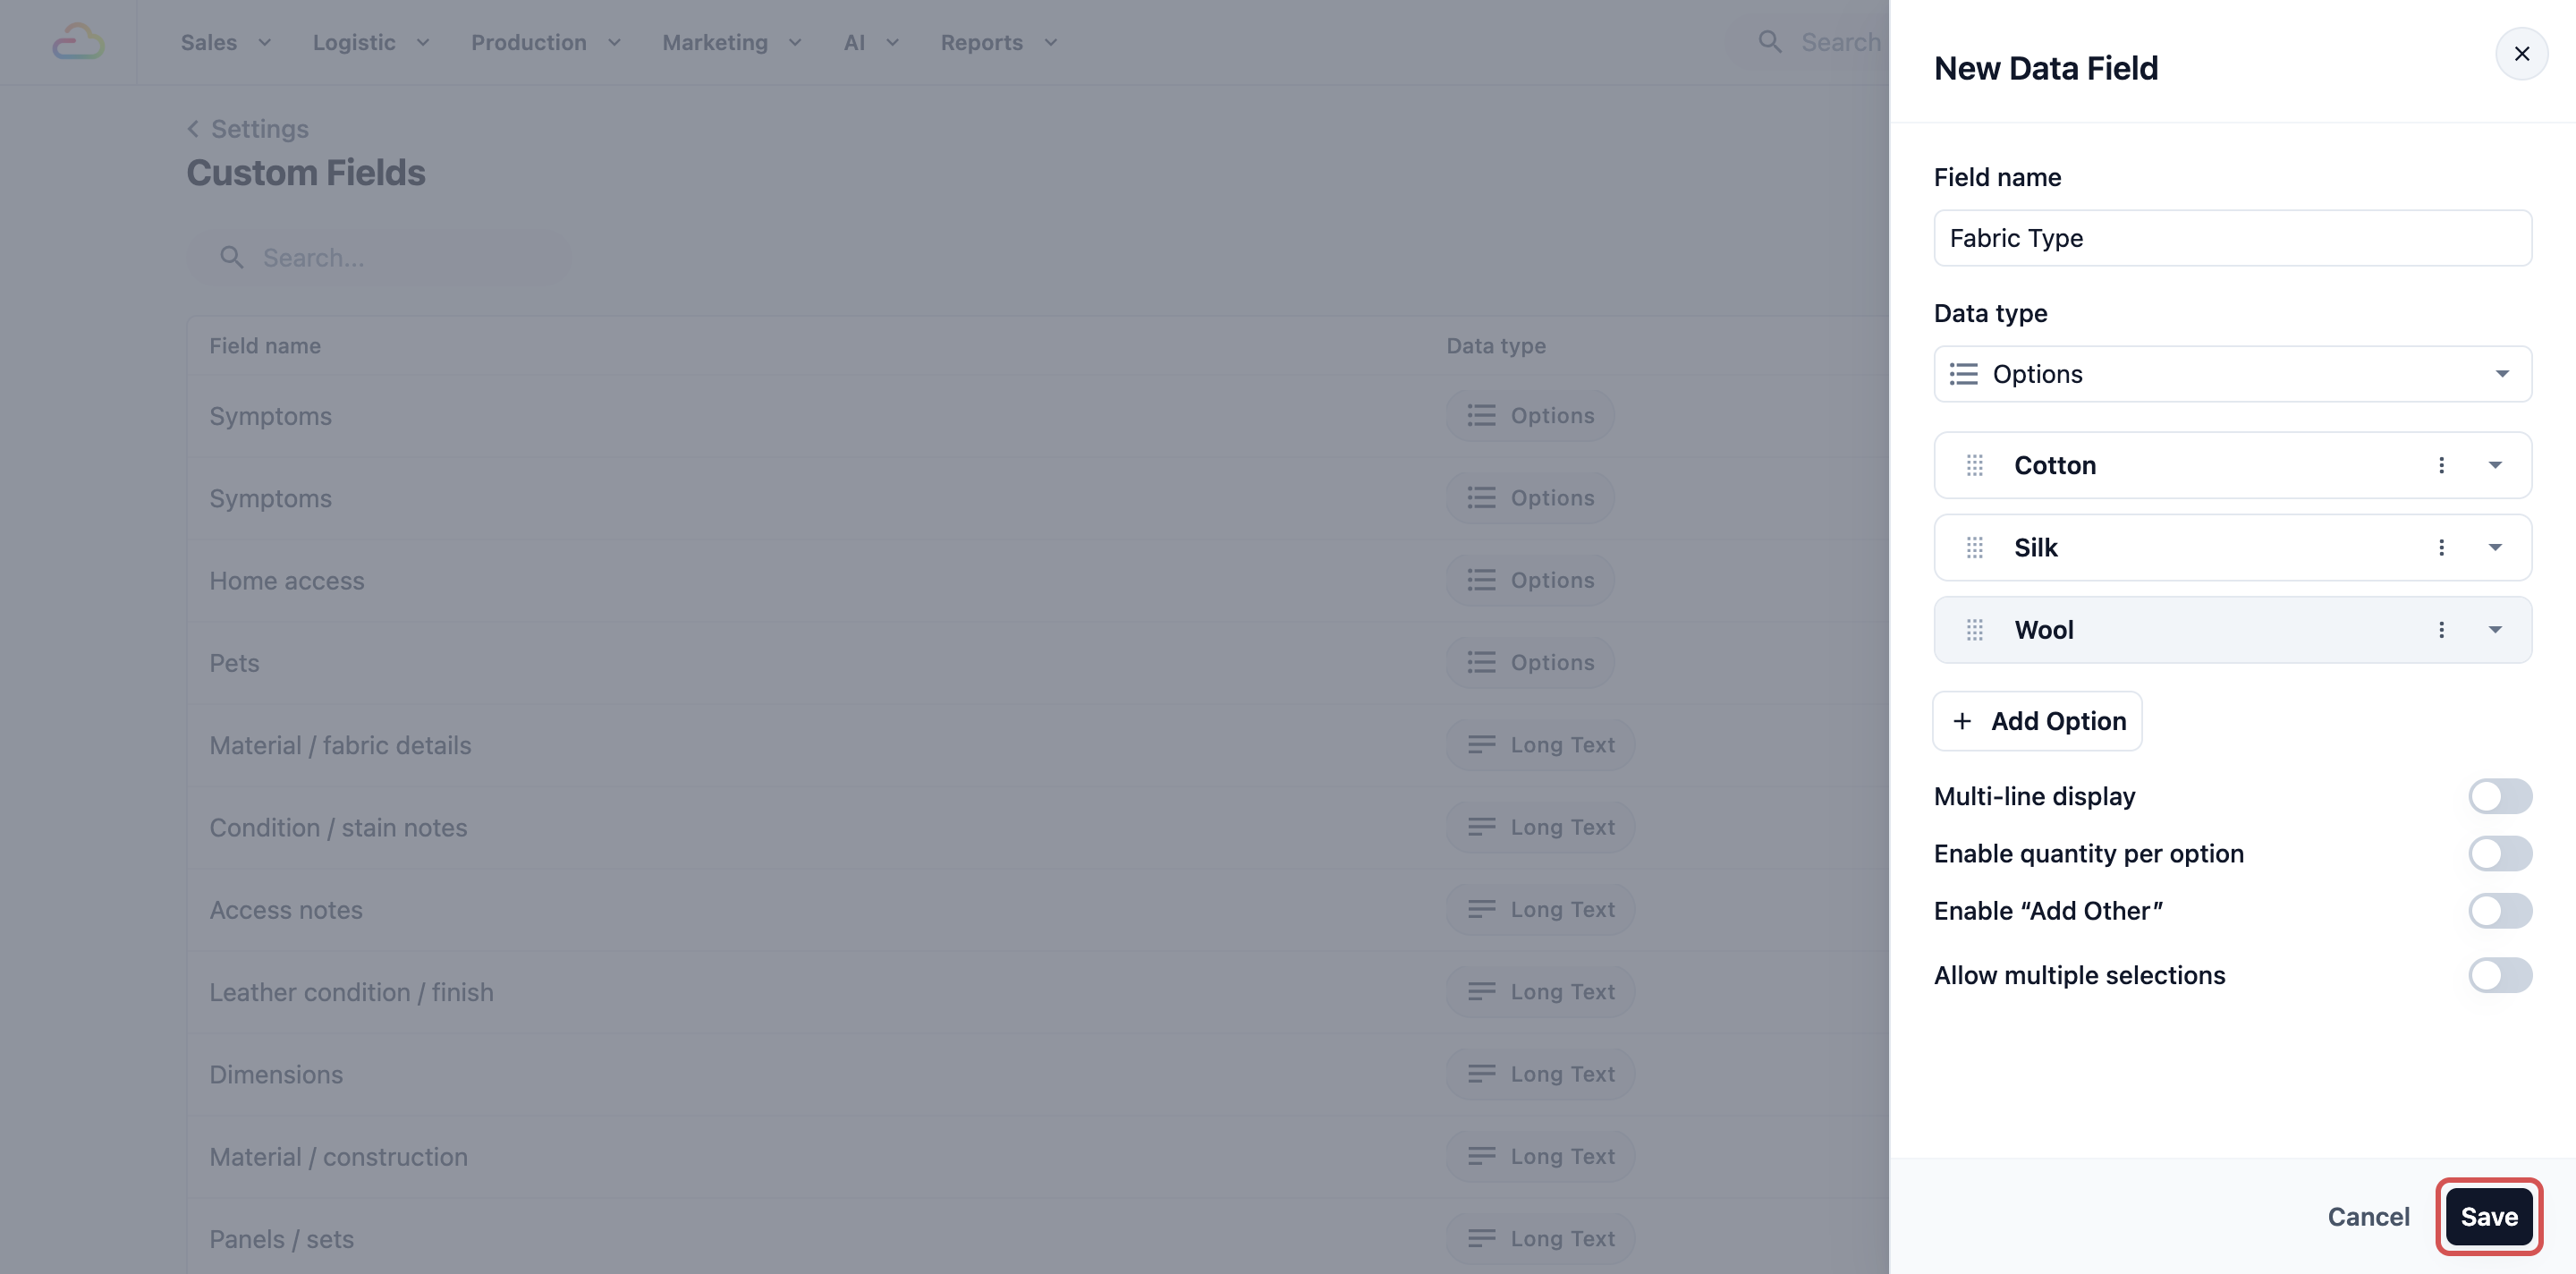
- On the Custom Fields page, click Add Data Field. The New Data Field window opens on the right.
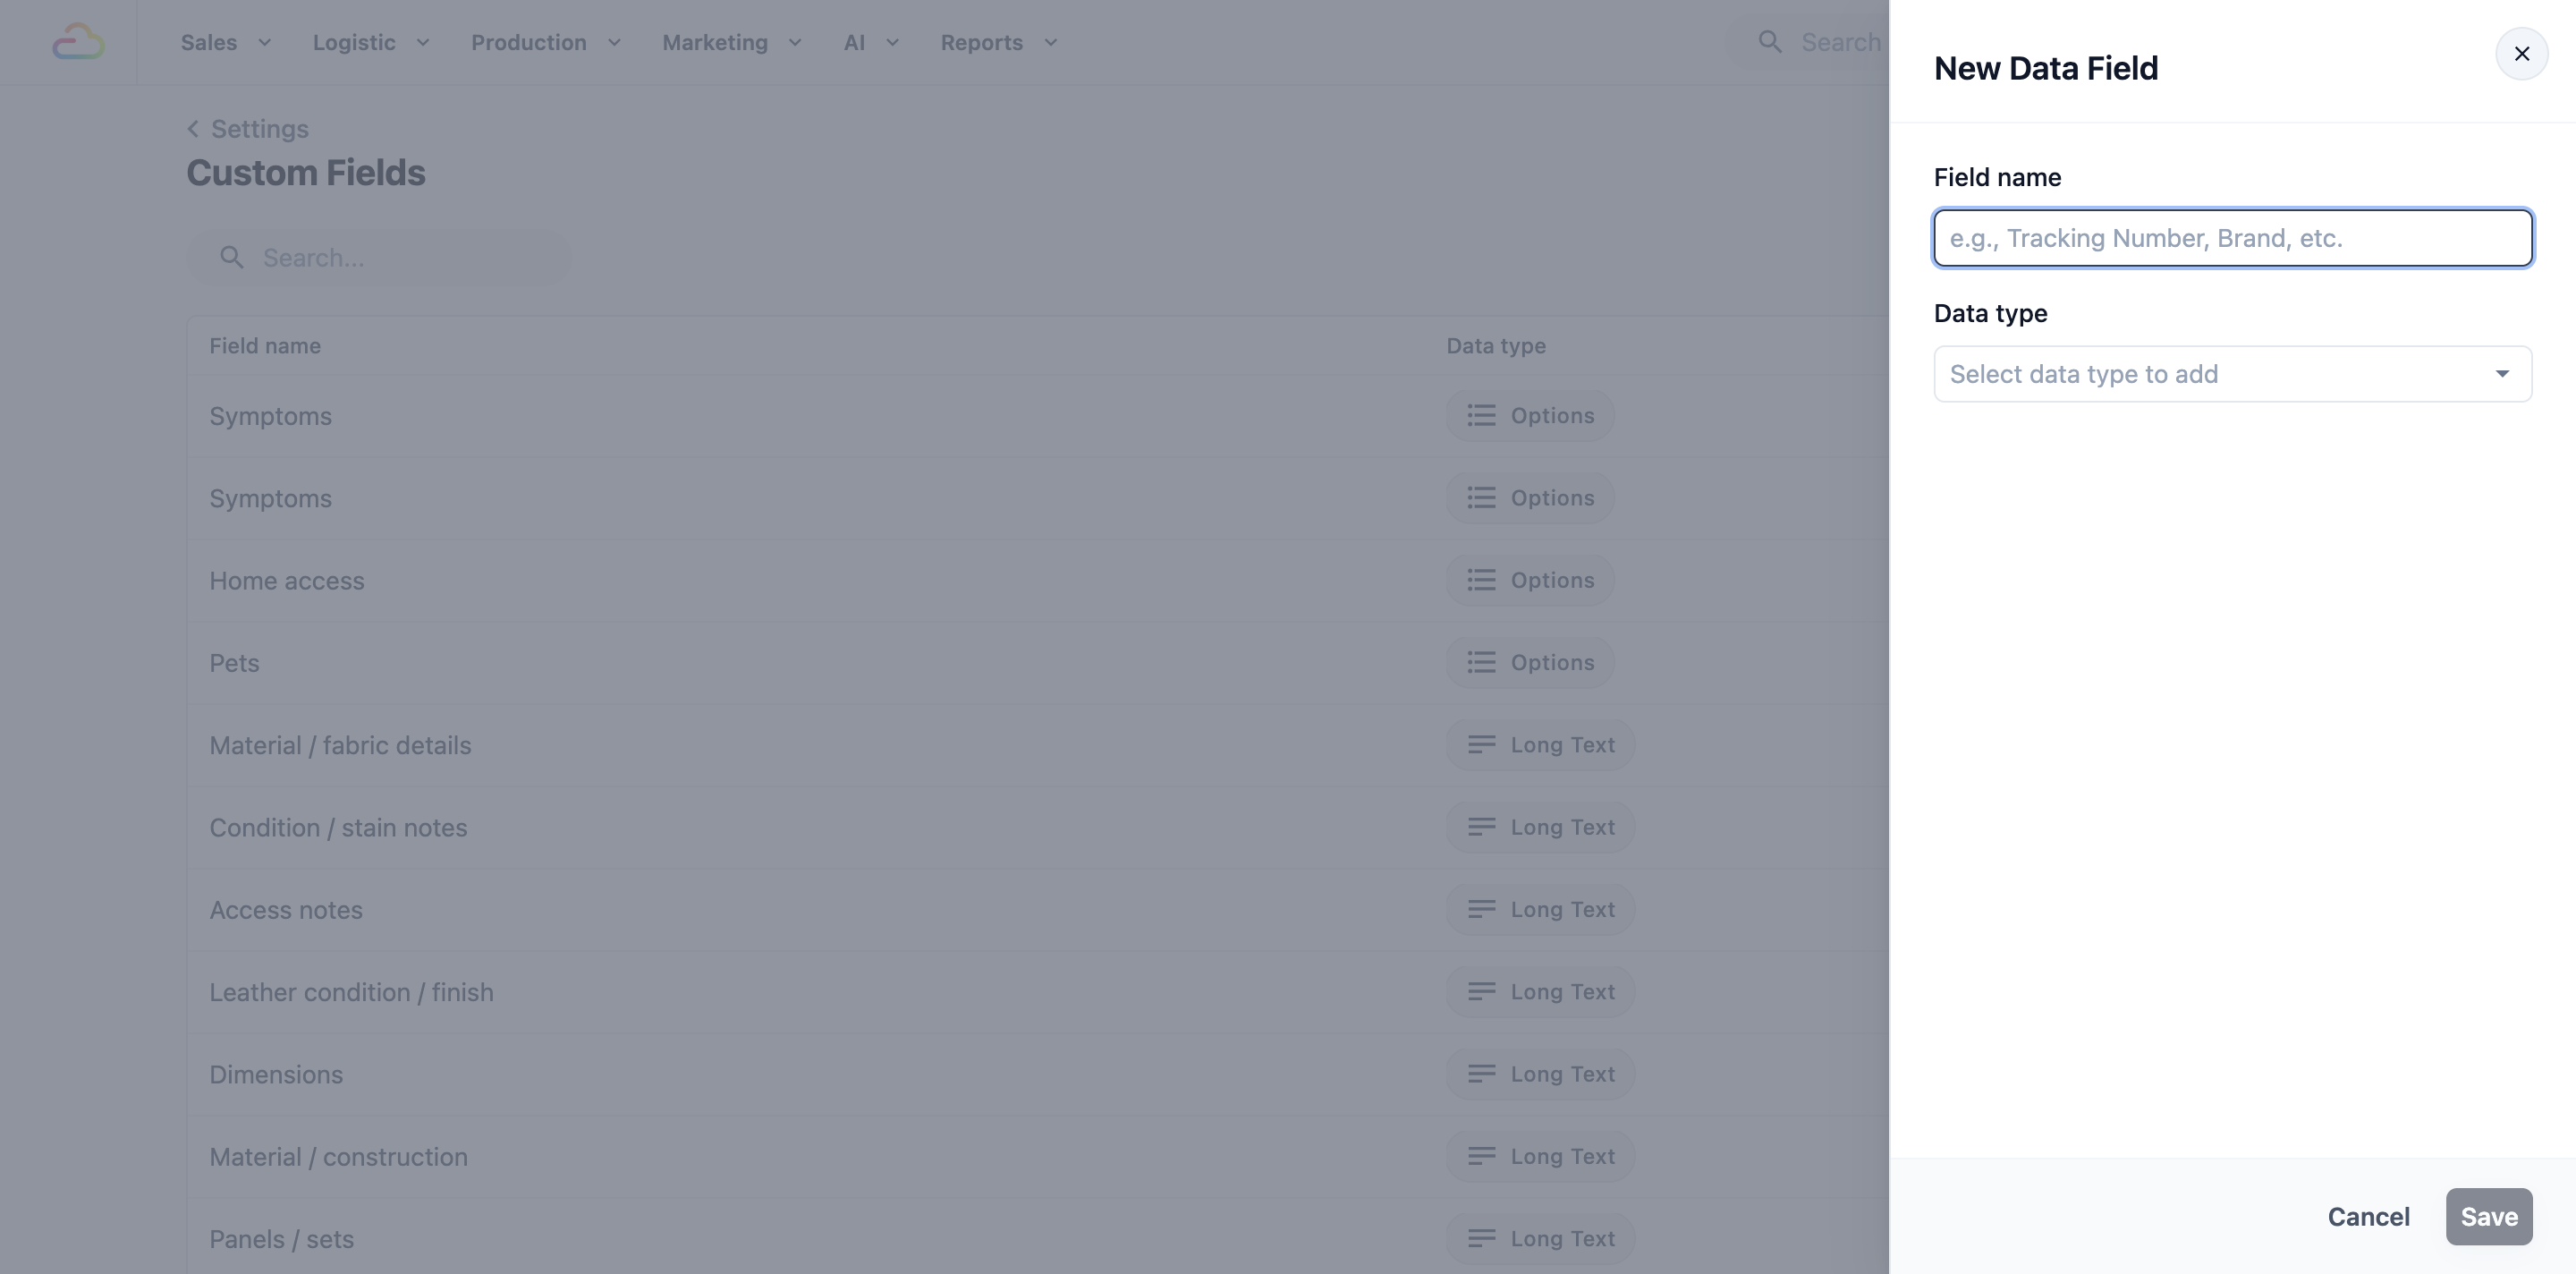
- In Field Name, type the name staff will see, for example "Fabric Type".
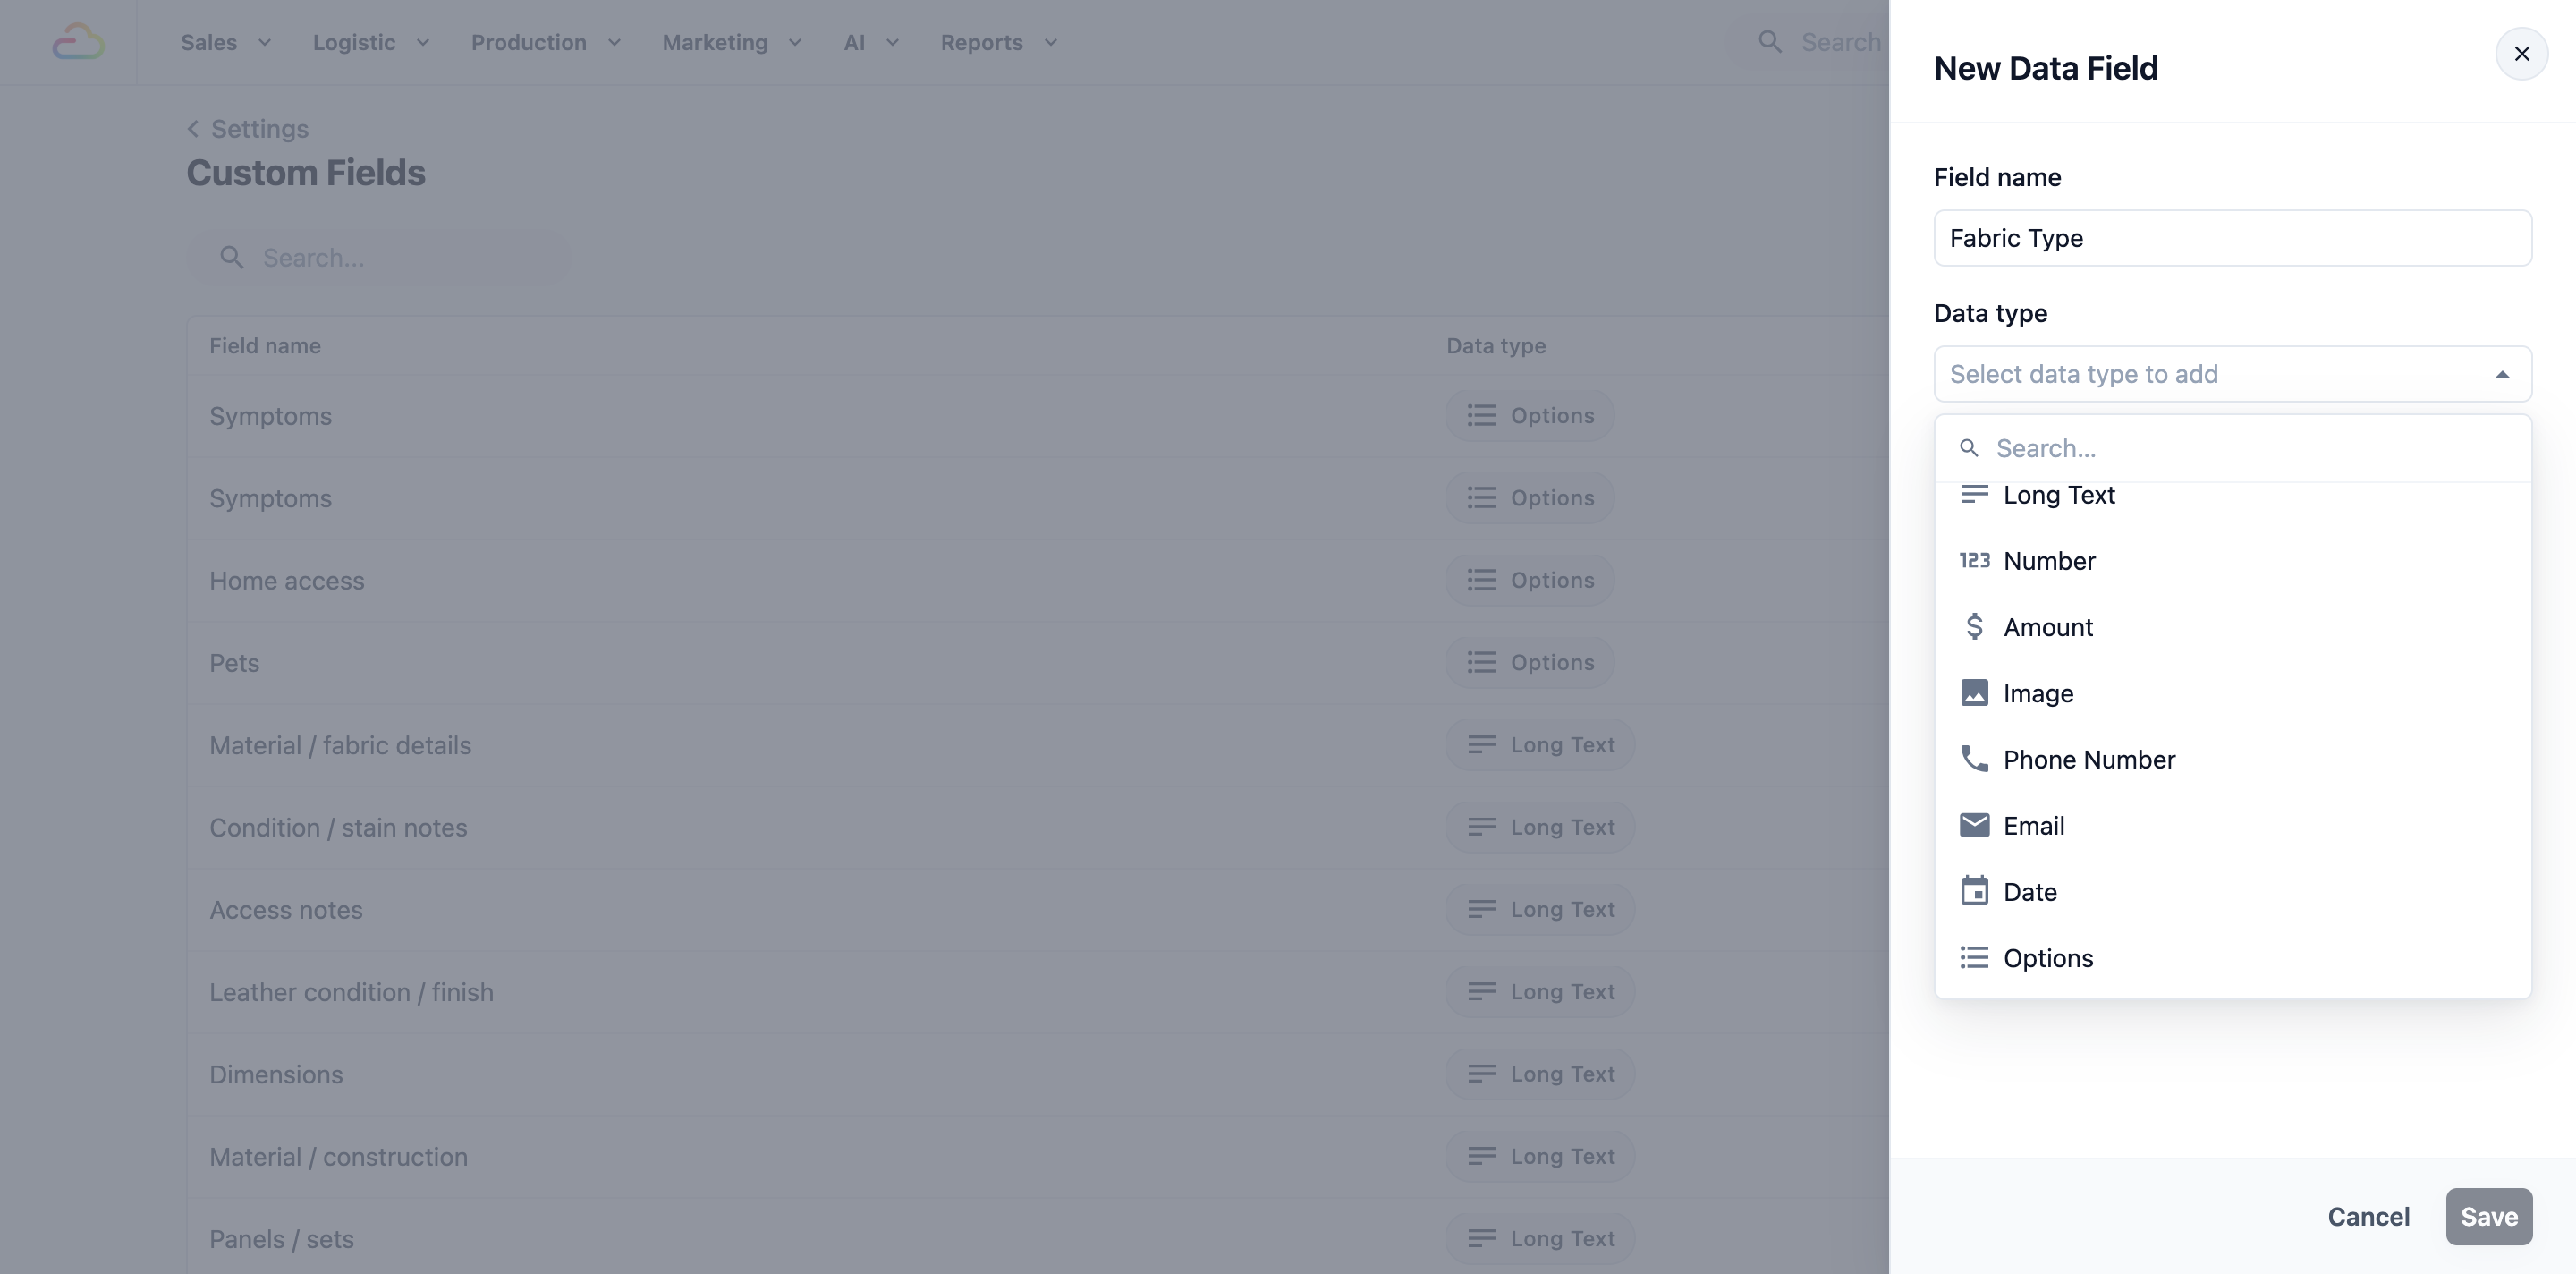
- Click the Data Type box and choose the kind of answer the field takes.
- Fill in any extra settings that appear for the type you picked (see below).
- Click Save. You see "Data field created", and the field appears in the list.
Field Name
Type a short, clear name, such as "Bag Brand" rather than "Brand". This name is what staff see when they are asked for the answer, and what you pick from when you add the field to a step.
Data Type
| Option | What staff enter | Example |
|---|---|---|
| Text | A short line of text | Bag Brand: "Coach" |
| Long Text | Several lines of text | Stain Notes: "Coffee stain on left sleeve, faint ink on collar" |
| Number | A number. Tick Allow Decimal if it can have decimals | Number of Buttons: 6 |
| Amount | A money amount | Customer's Declared Value: $350 |
| Image | A photo | Condition Photo before cleaning |
| Phone Number | A phone number | Alternative Contact Number |
| An email address | Billing Email | |
| Date | A date picked from a calendar | Date Purchased |
| Options | One or more choices from a list you set | Fabric Type: Cotton, Silk, Wool |
When you pick Options, more settings appear below the type, where you add your choices and decide how staff pick them, including whether staff can pick more than one. Each of these is explained in Configure Data Fields.
Example: Fresh Fold Laundry adds Fabric Type
Fresh Fold Laundry prices silk and wool differently from cotton, and staff kept forgetting to note the fabric. The owner adds one custom field:
- Field Name: Fabric Type
- Data Type: Options
- Options: Cotton, Silk, Wool
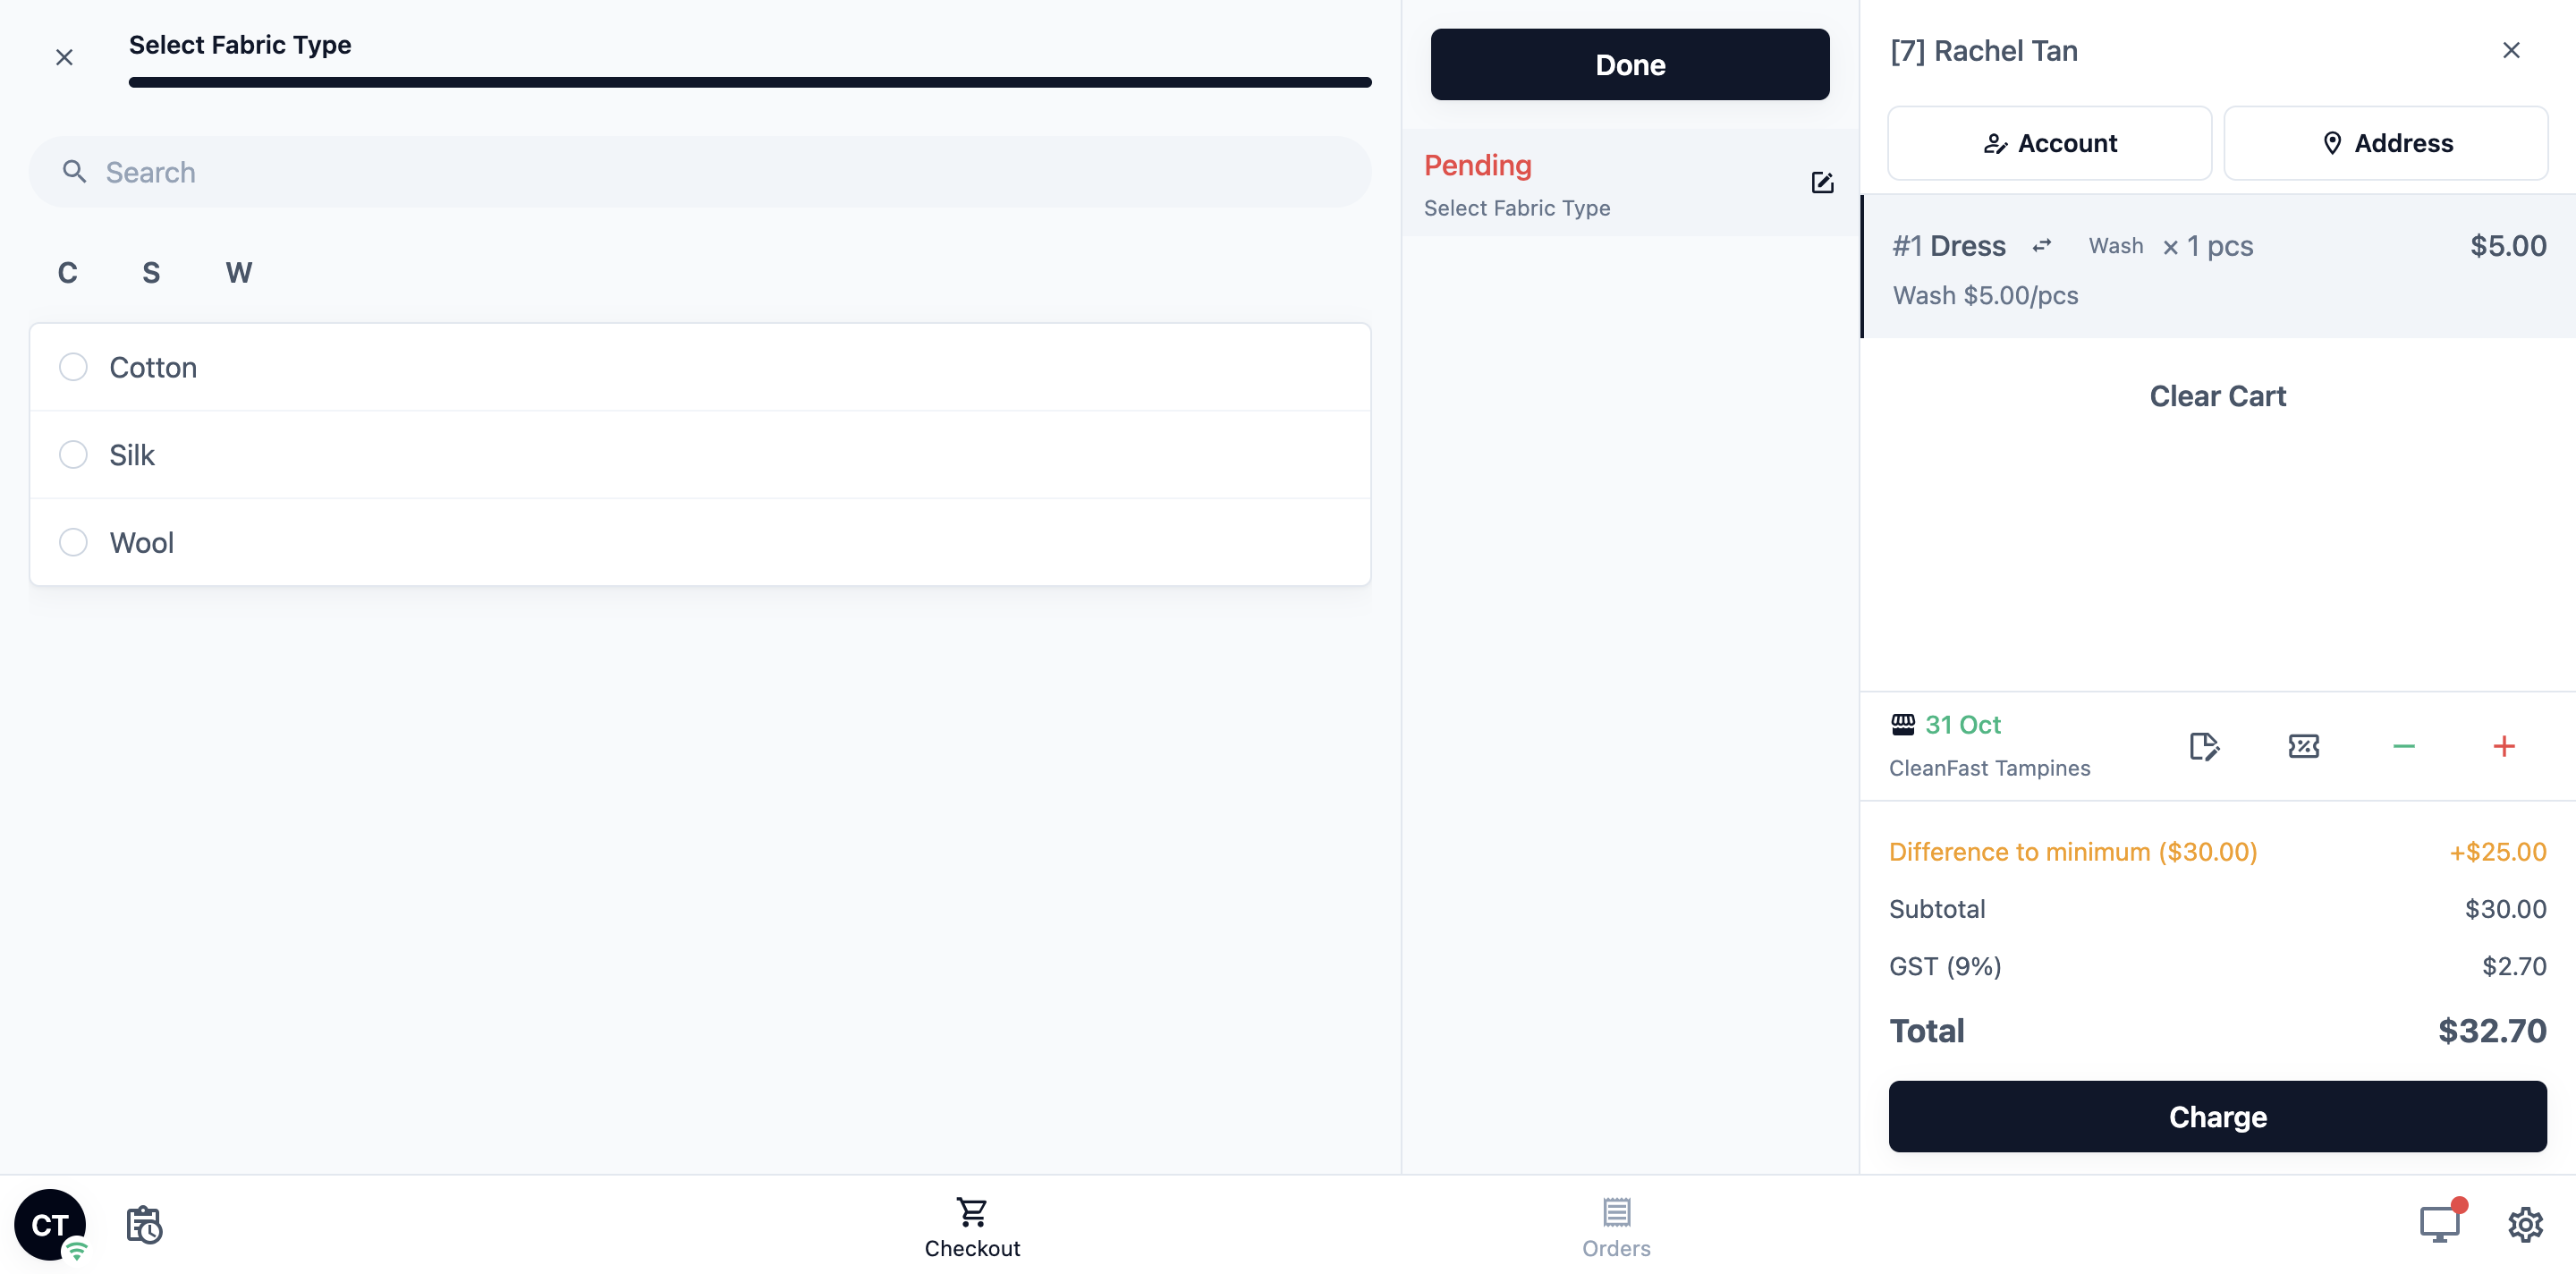
After saving, the owner adds Fabric Type as a line item step for the Laundry business unit, following Asking for Details on Each Item. Now each time staff add a garment at the POS, they are asked to pick Cotton, Silk or Wool. The answer is saved with that item on the order.
Edit a custom field
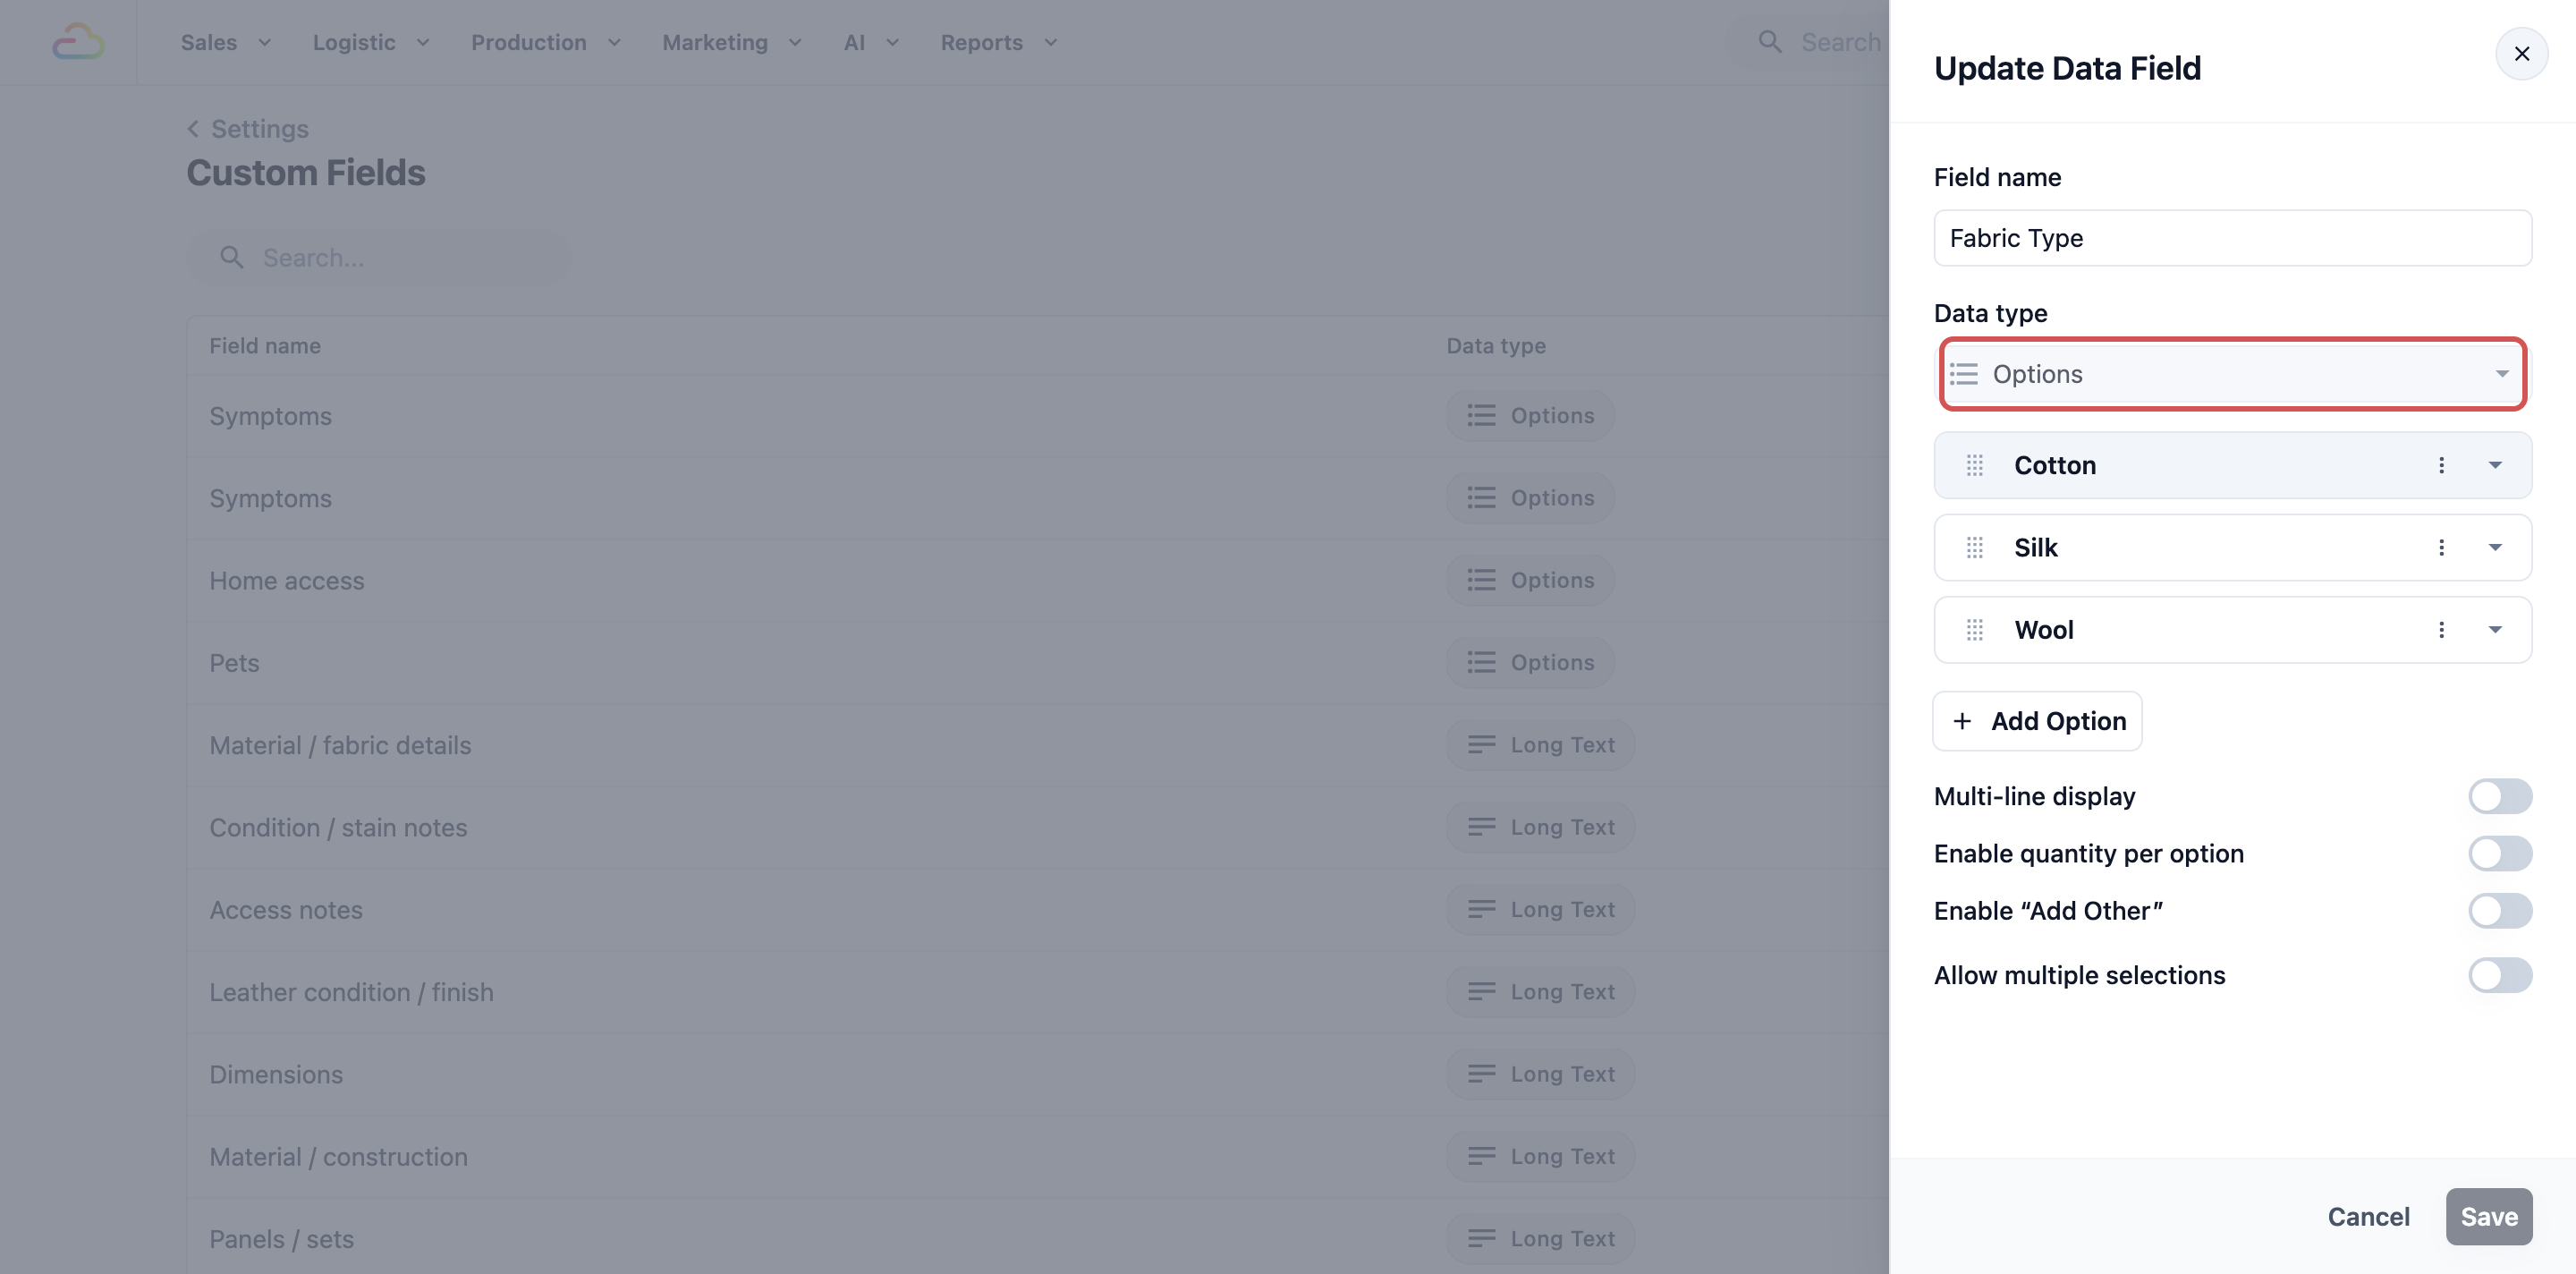
- On the Custom Fields page, click the field in the list. The Update Data Field window opens on the right.
- Change the Field Name, or the extra settings for an Options or Number field.
- Click Save. You see "Data field updated".
The Data Type box is greyed out, because the type can't be changed. A new name shows everywhere the field is used, and answers already saved on orders stay as they are.
Delete a custom field
- On the Custom Fields page, click the ⋯ menu at the end of the field's row.
- Click Delete. The Delete Data Field window opens.
- Read the message in the window. If it names flows that still use the field, remove the field from those flows first. Delete can't be clicked until you do.
- Click Delete. You see "Data field deleted".
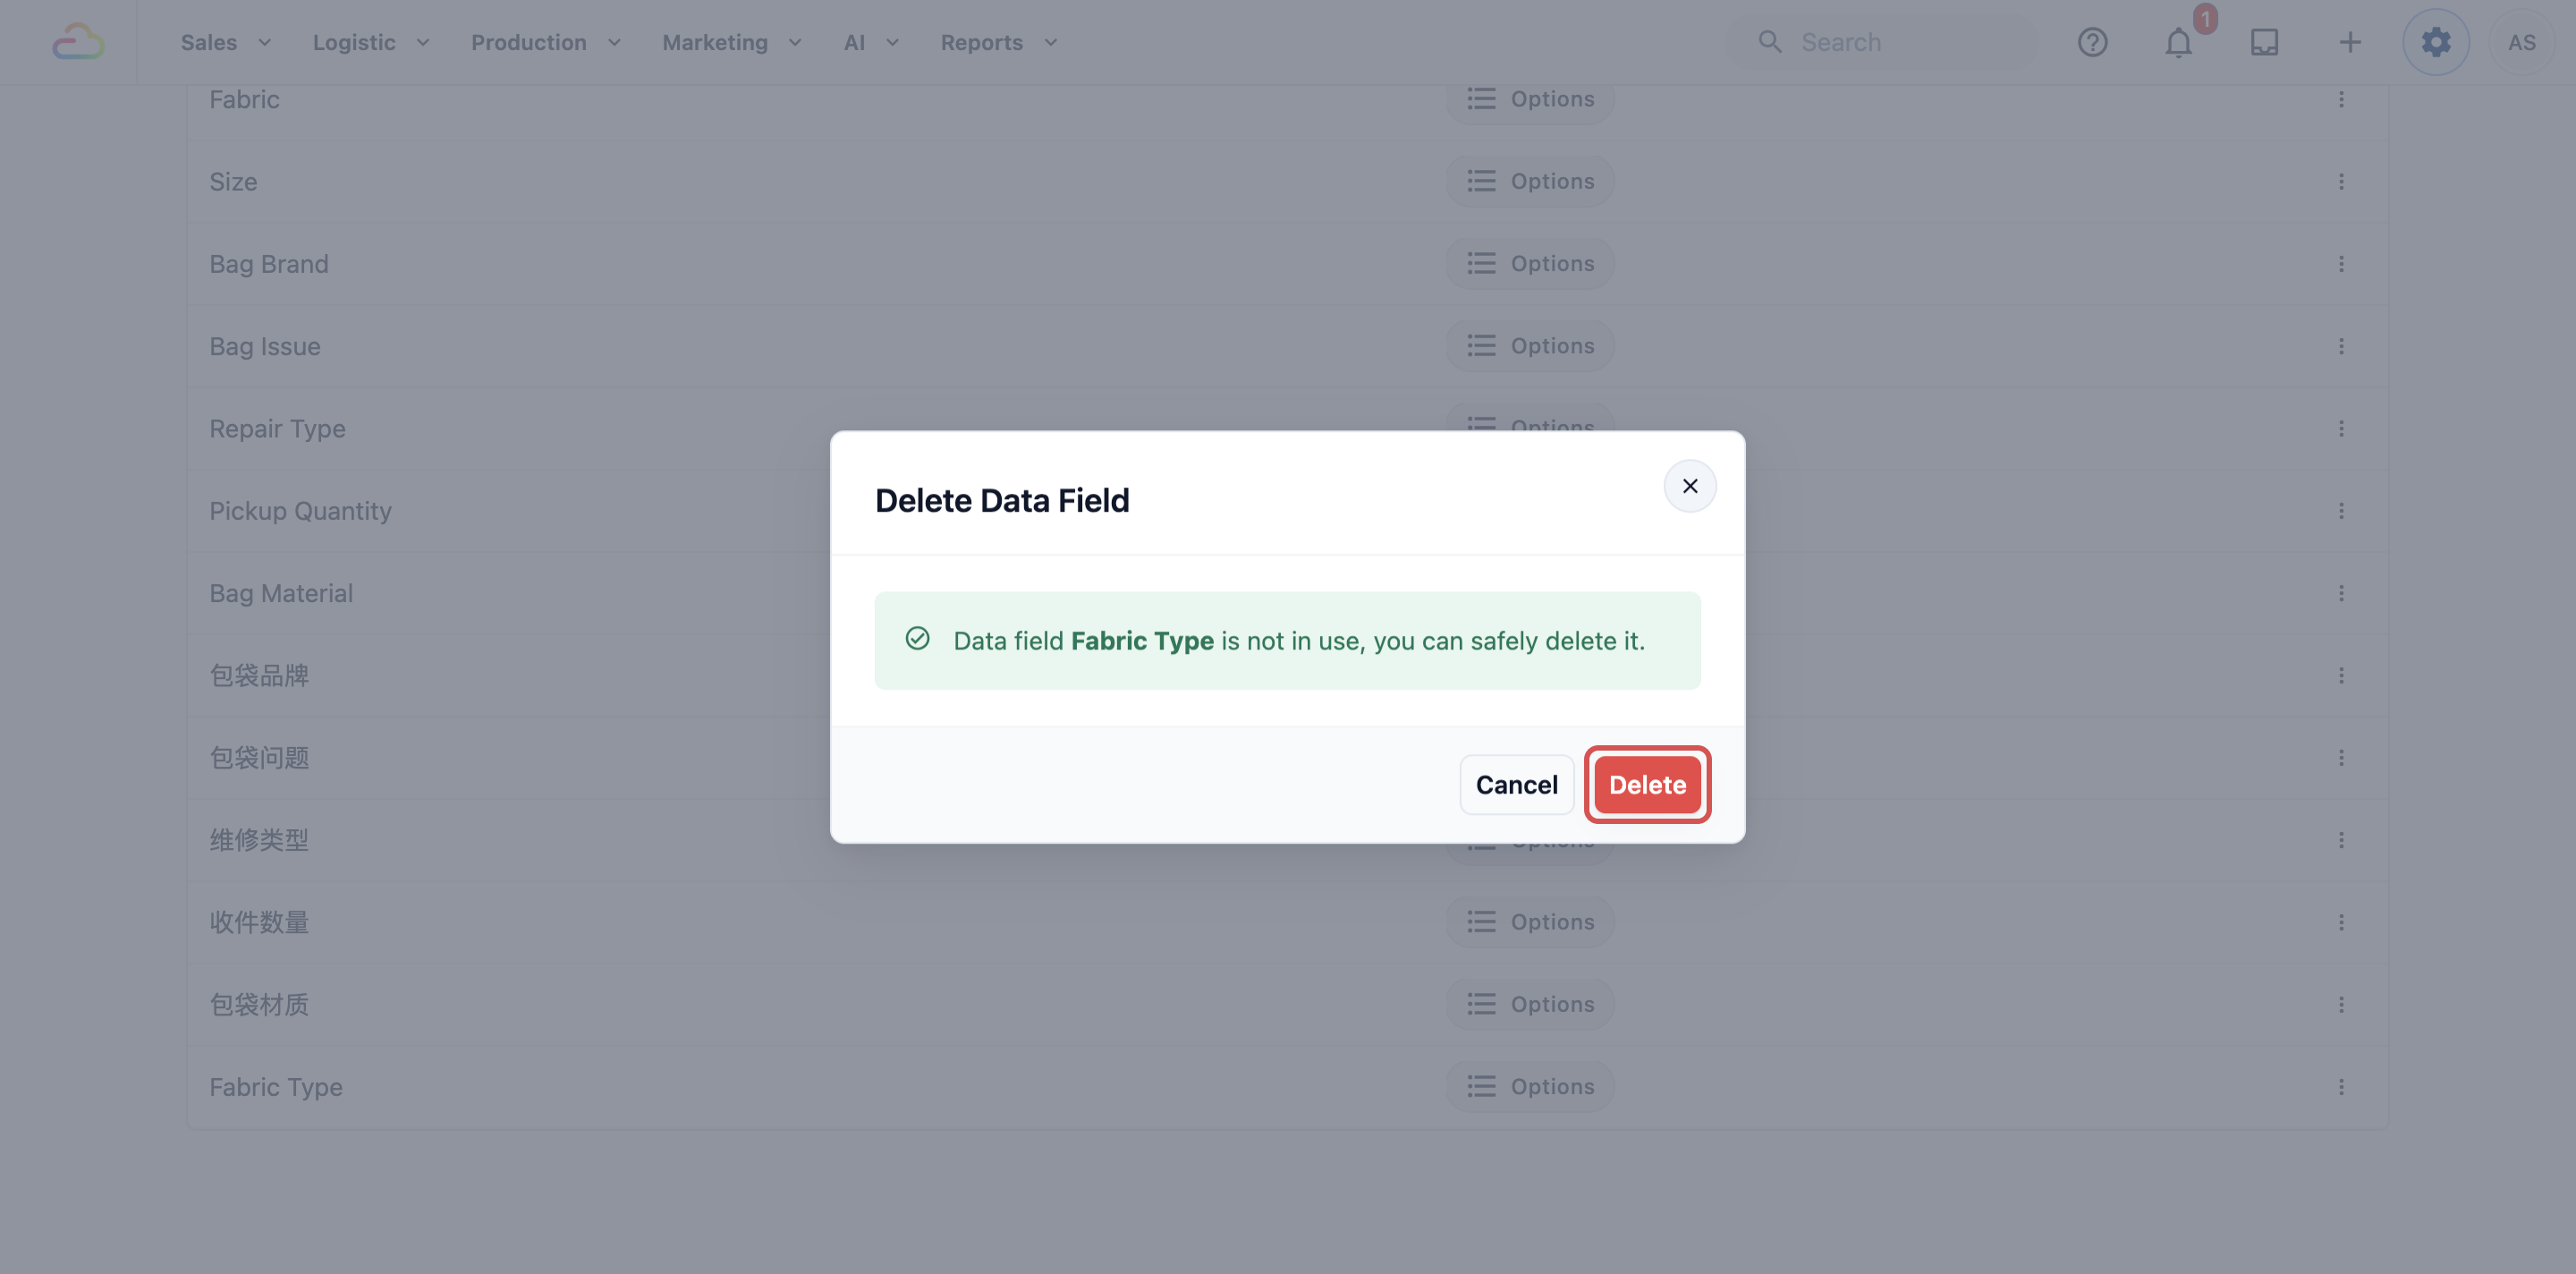
Deleting a field does not erase answers already saved on past orders. It removes the field from the list, so it can't be added to new steps.
FAQs
I set up Data Fields in Console 2.0. Do I need to create them again?
No. Your Data Fields are already on the Custom Fields page with the same names, types and options. What may have moved is where staff answer them: checkout and line item steps are now set on each business unit. See Introduction to Flows to check yours.
Do I need custom fields at all?
No. They are optional. Use them only if there is a detail you want every staff member to record the same way, such as fabric, brand or condition. If the standard order details cover your shop, you can skip this page.
I created a field, but staff are never asked for it. Why?
A custom field only appears where you add it. Add it as a step in a business unit's staff checkout, as a line item step, or in a flow, and staff are asked for it from their next order.
Will my customers see my custom fields?
Only if you add a field to your Online Store's customer checkout, or print its answer on a receipt, label or invoice template. Otherwise custom fields are for your staff only.
Can a custom field change the price of an item?
Yes, through Price Rules. A base price rule can use up to two Options fields as Price Factors, so Silk can cost more than Cotton, and surcharge and discount rules can depend on a field's answer. See Setting Up Price Rules.
If I rename a field, what happens to orders that already have an answer?
The answers stay on those orders. The new name is shown wherever the field is used from then on, so you don't need to fix old orders.
What's Next
You now know what custom fields are, where they appear, and how to add, edit and delete them. Next, set up the extra choices for Options fields, such as multiple selections, quantities per option and linked options, in Configure Data Fields.