
What the Job Table is for
The Job Table is the master list of your pickup, delivery, and on-site service jobs. Each job represents one visit by a field worker, such as collecting items from a customer, delivering a completed order, or performing work at the customer’s location.
Most jobs are created automatically from customer orders. You can also add a standalone job for one-off work. From the Job Table, office staff can see what is scheduled, identify unassigned work, assign field workers, update job details, and track completion.
For multi-market businesses, each job belongs to a Market and Location:
- A Market is the country or region that provides the job’s business context.
- A Location is the physical operating area responsible for planning and dispatching the job.
Jobs created from orders keep the Market and Location stored on the order. The job address does not independently move the job into another Market or Location.
The table automatically respects your account’s Market and Location access. You only see jobs within the areas you are permitted to manage.
Open the Job Table
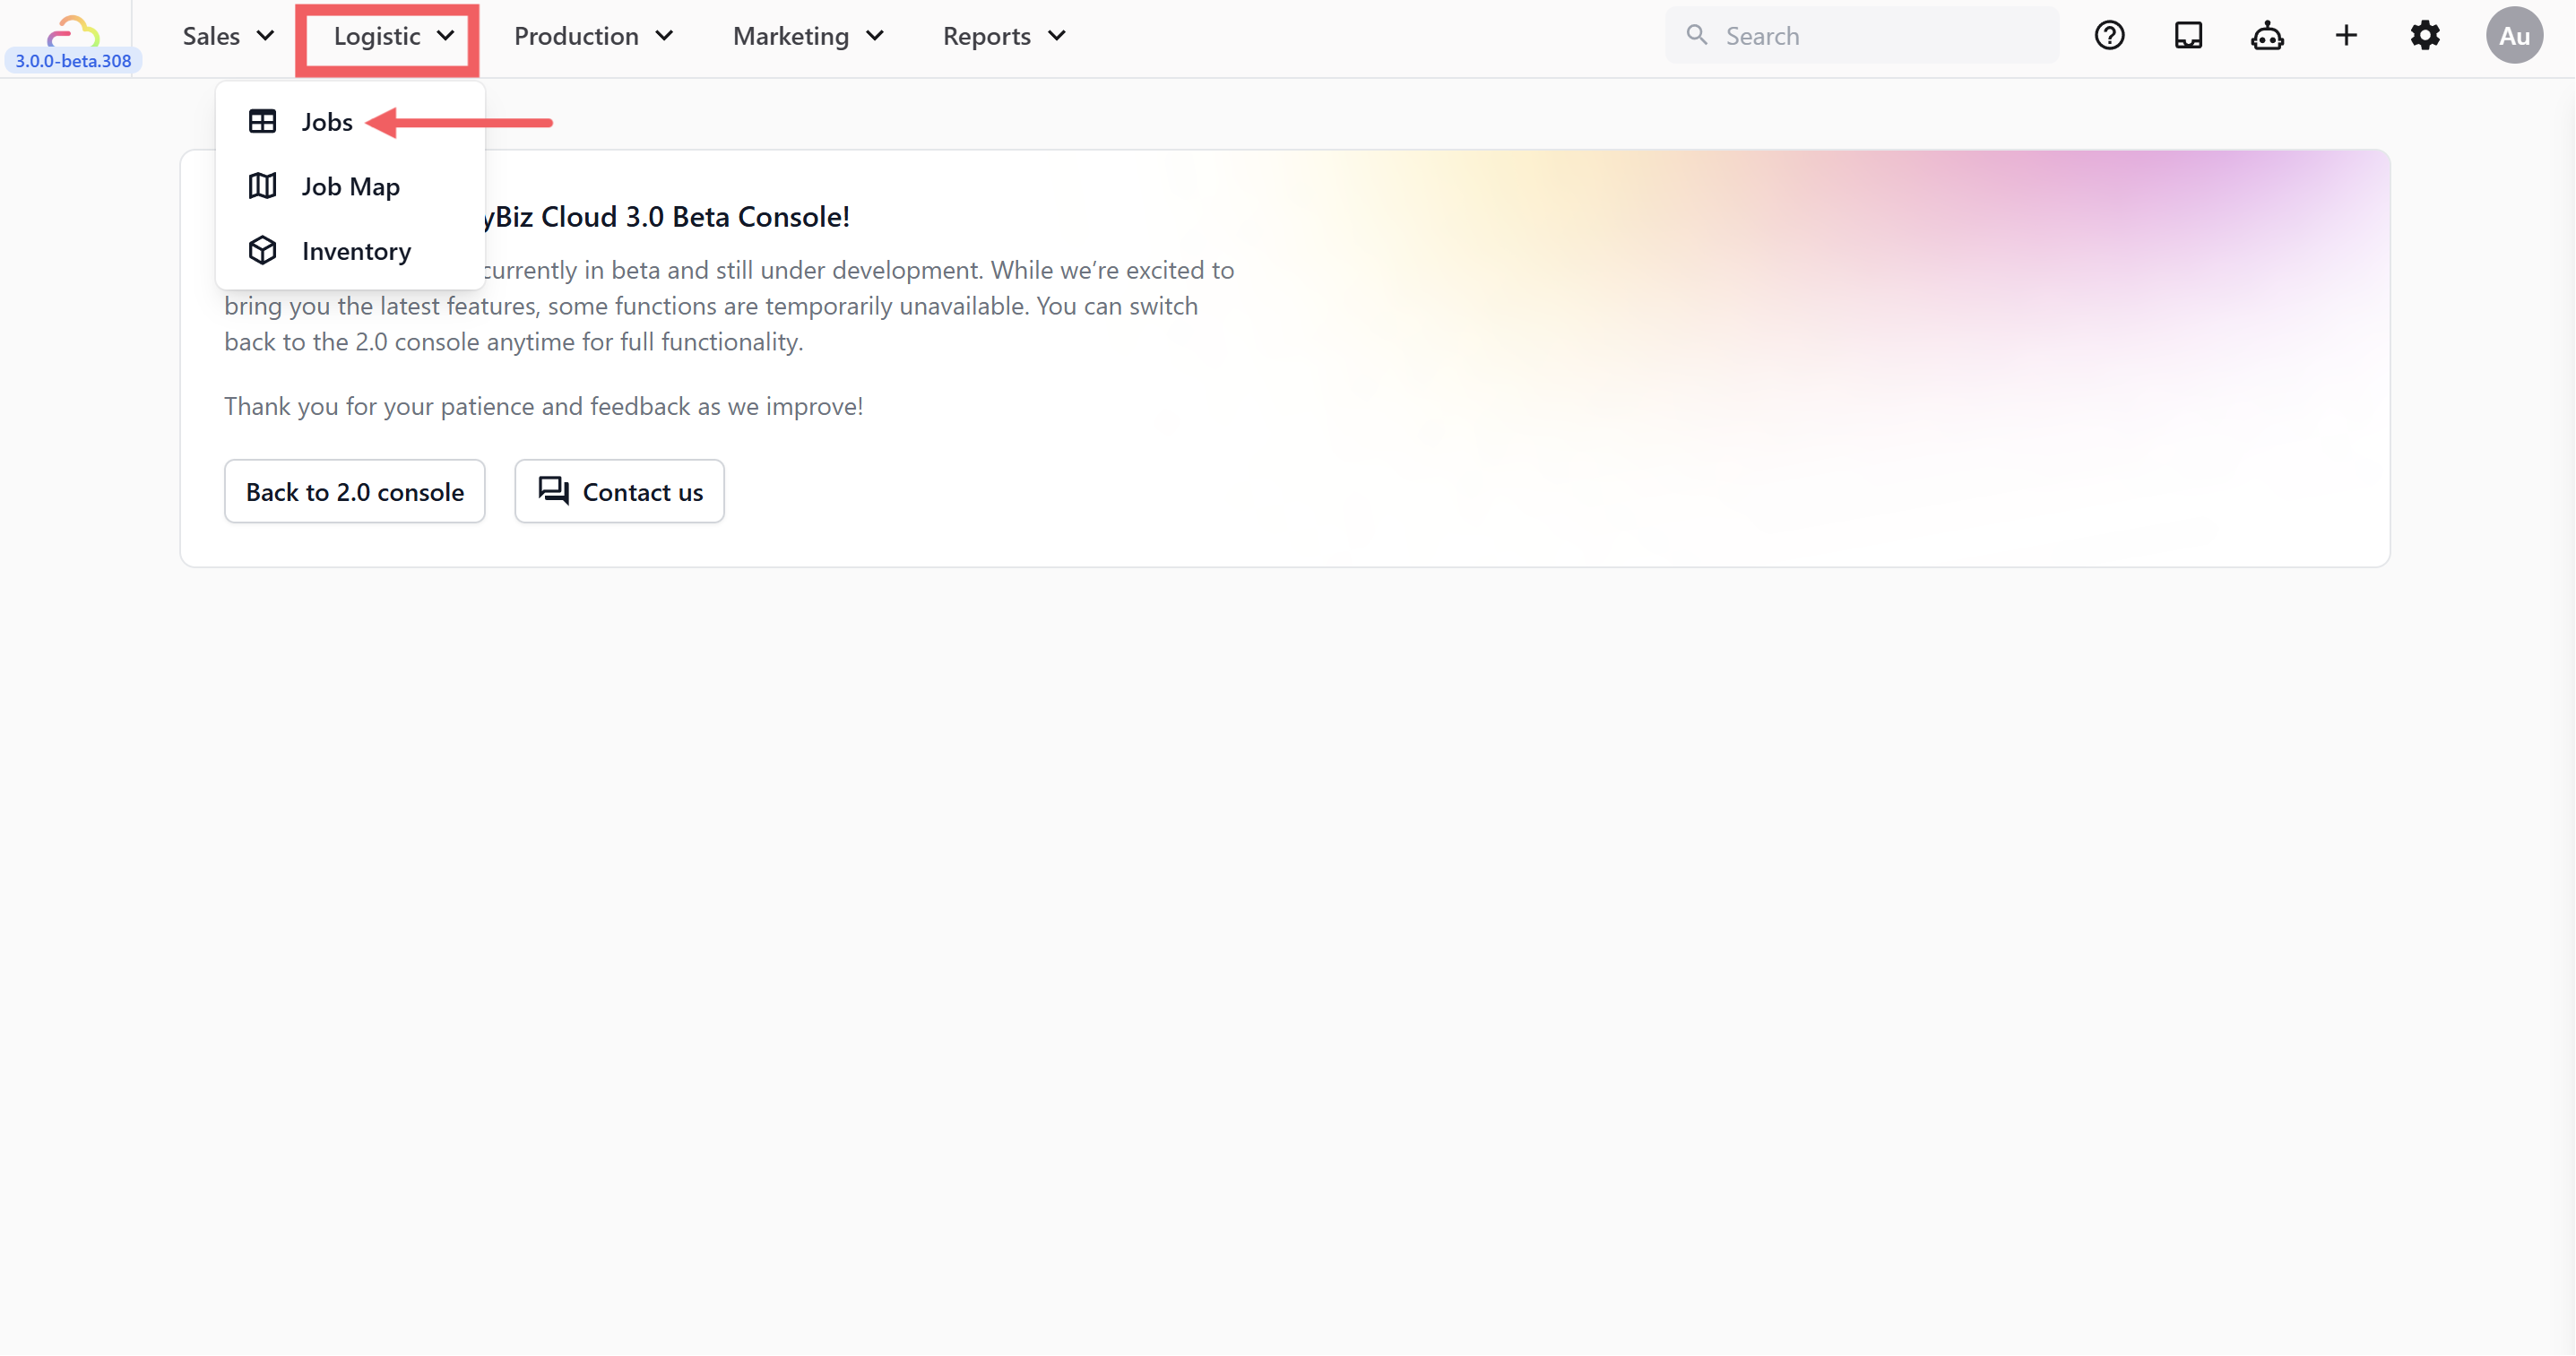
In the top navigation bar, click the Logistic dropdown.
Click Jobs.
What each column shows
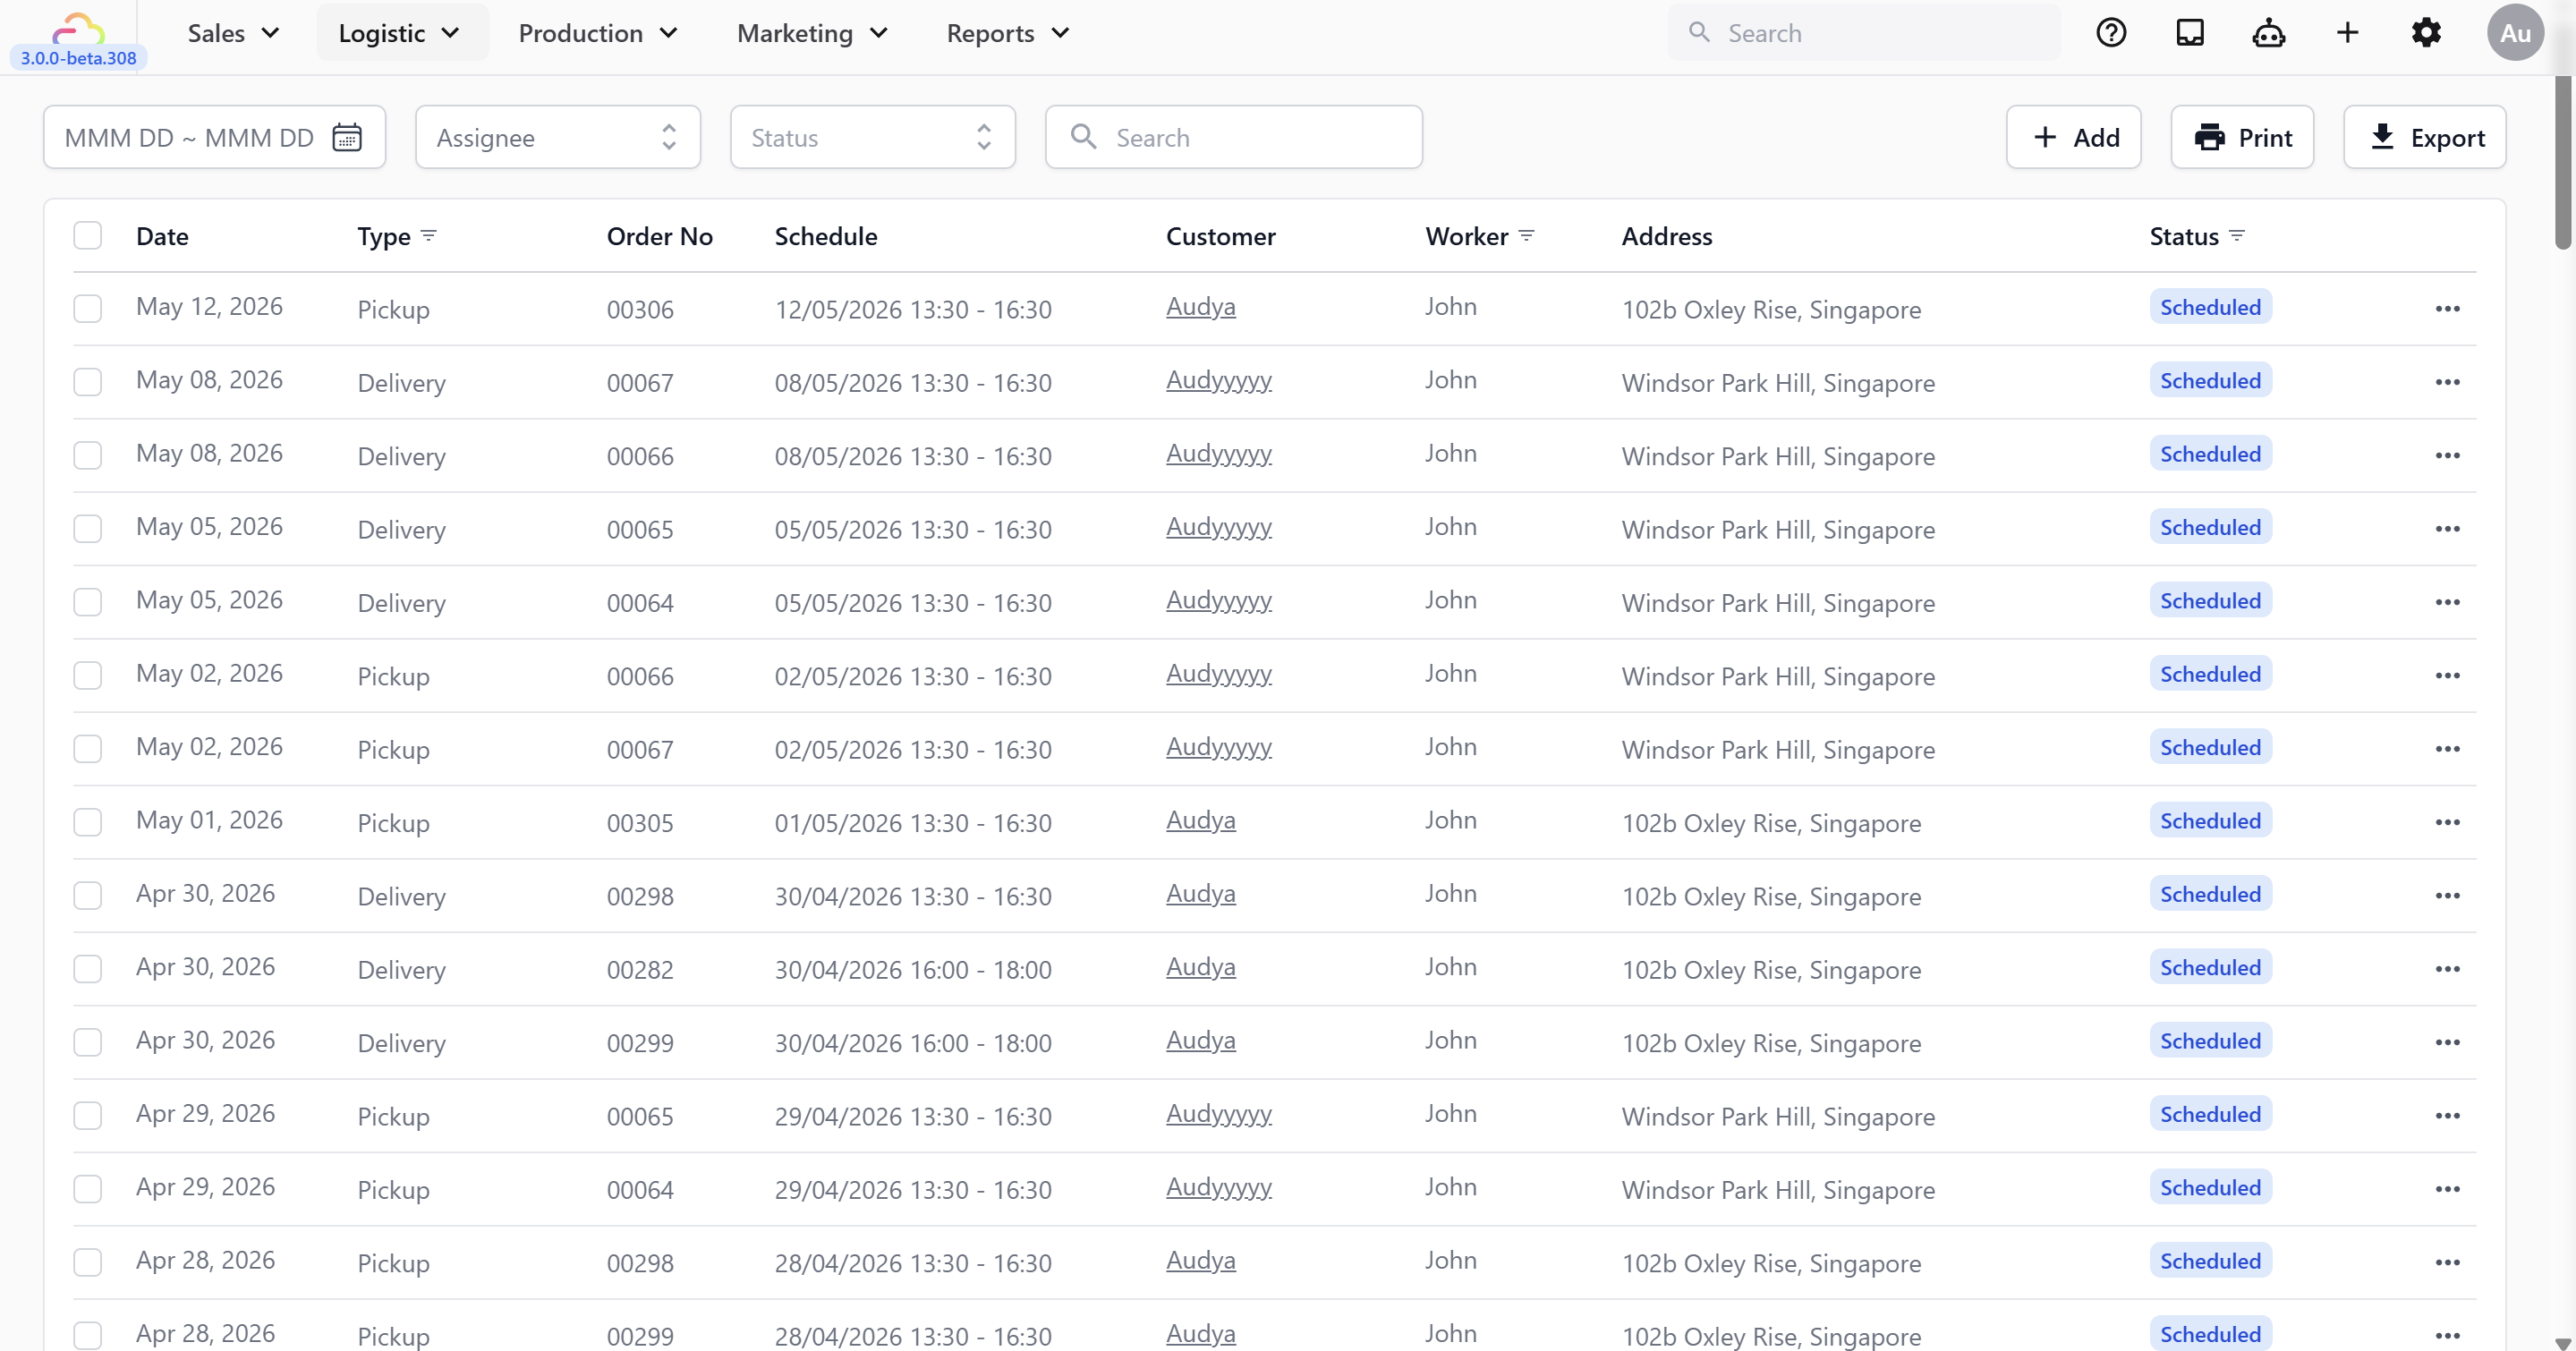
Each row represents one job. The default columns are:
| Column | What it shows |
|---|---|
| Date | The date the job is scheduled for. When viewing one specific day, this column may be hidden automatically. |
| Type | Pickup, Delivery, or On-site service. |
| Order No | The customer order linked to the job. Empty for a standalone job. |
| Schedule | The scheduled date and time window. |
| Customer | The customer linked to the job. |
| Worker | The Field Worker assigned to the job. Empty when unassigned. |
| Address | The pickup, delivery, or service address. |
| Status | Pending, Scheduled, Completed, or Failed. |
The default table does not add a separate Market or Location column. Use the Location filter above the table to separate dispatch work. Each Location option shows its Market name, helping multi-market teams choose the correct operating area.
Open Job Page Settings
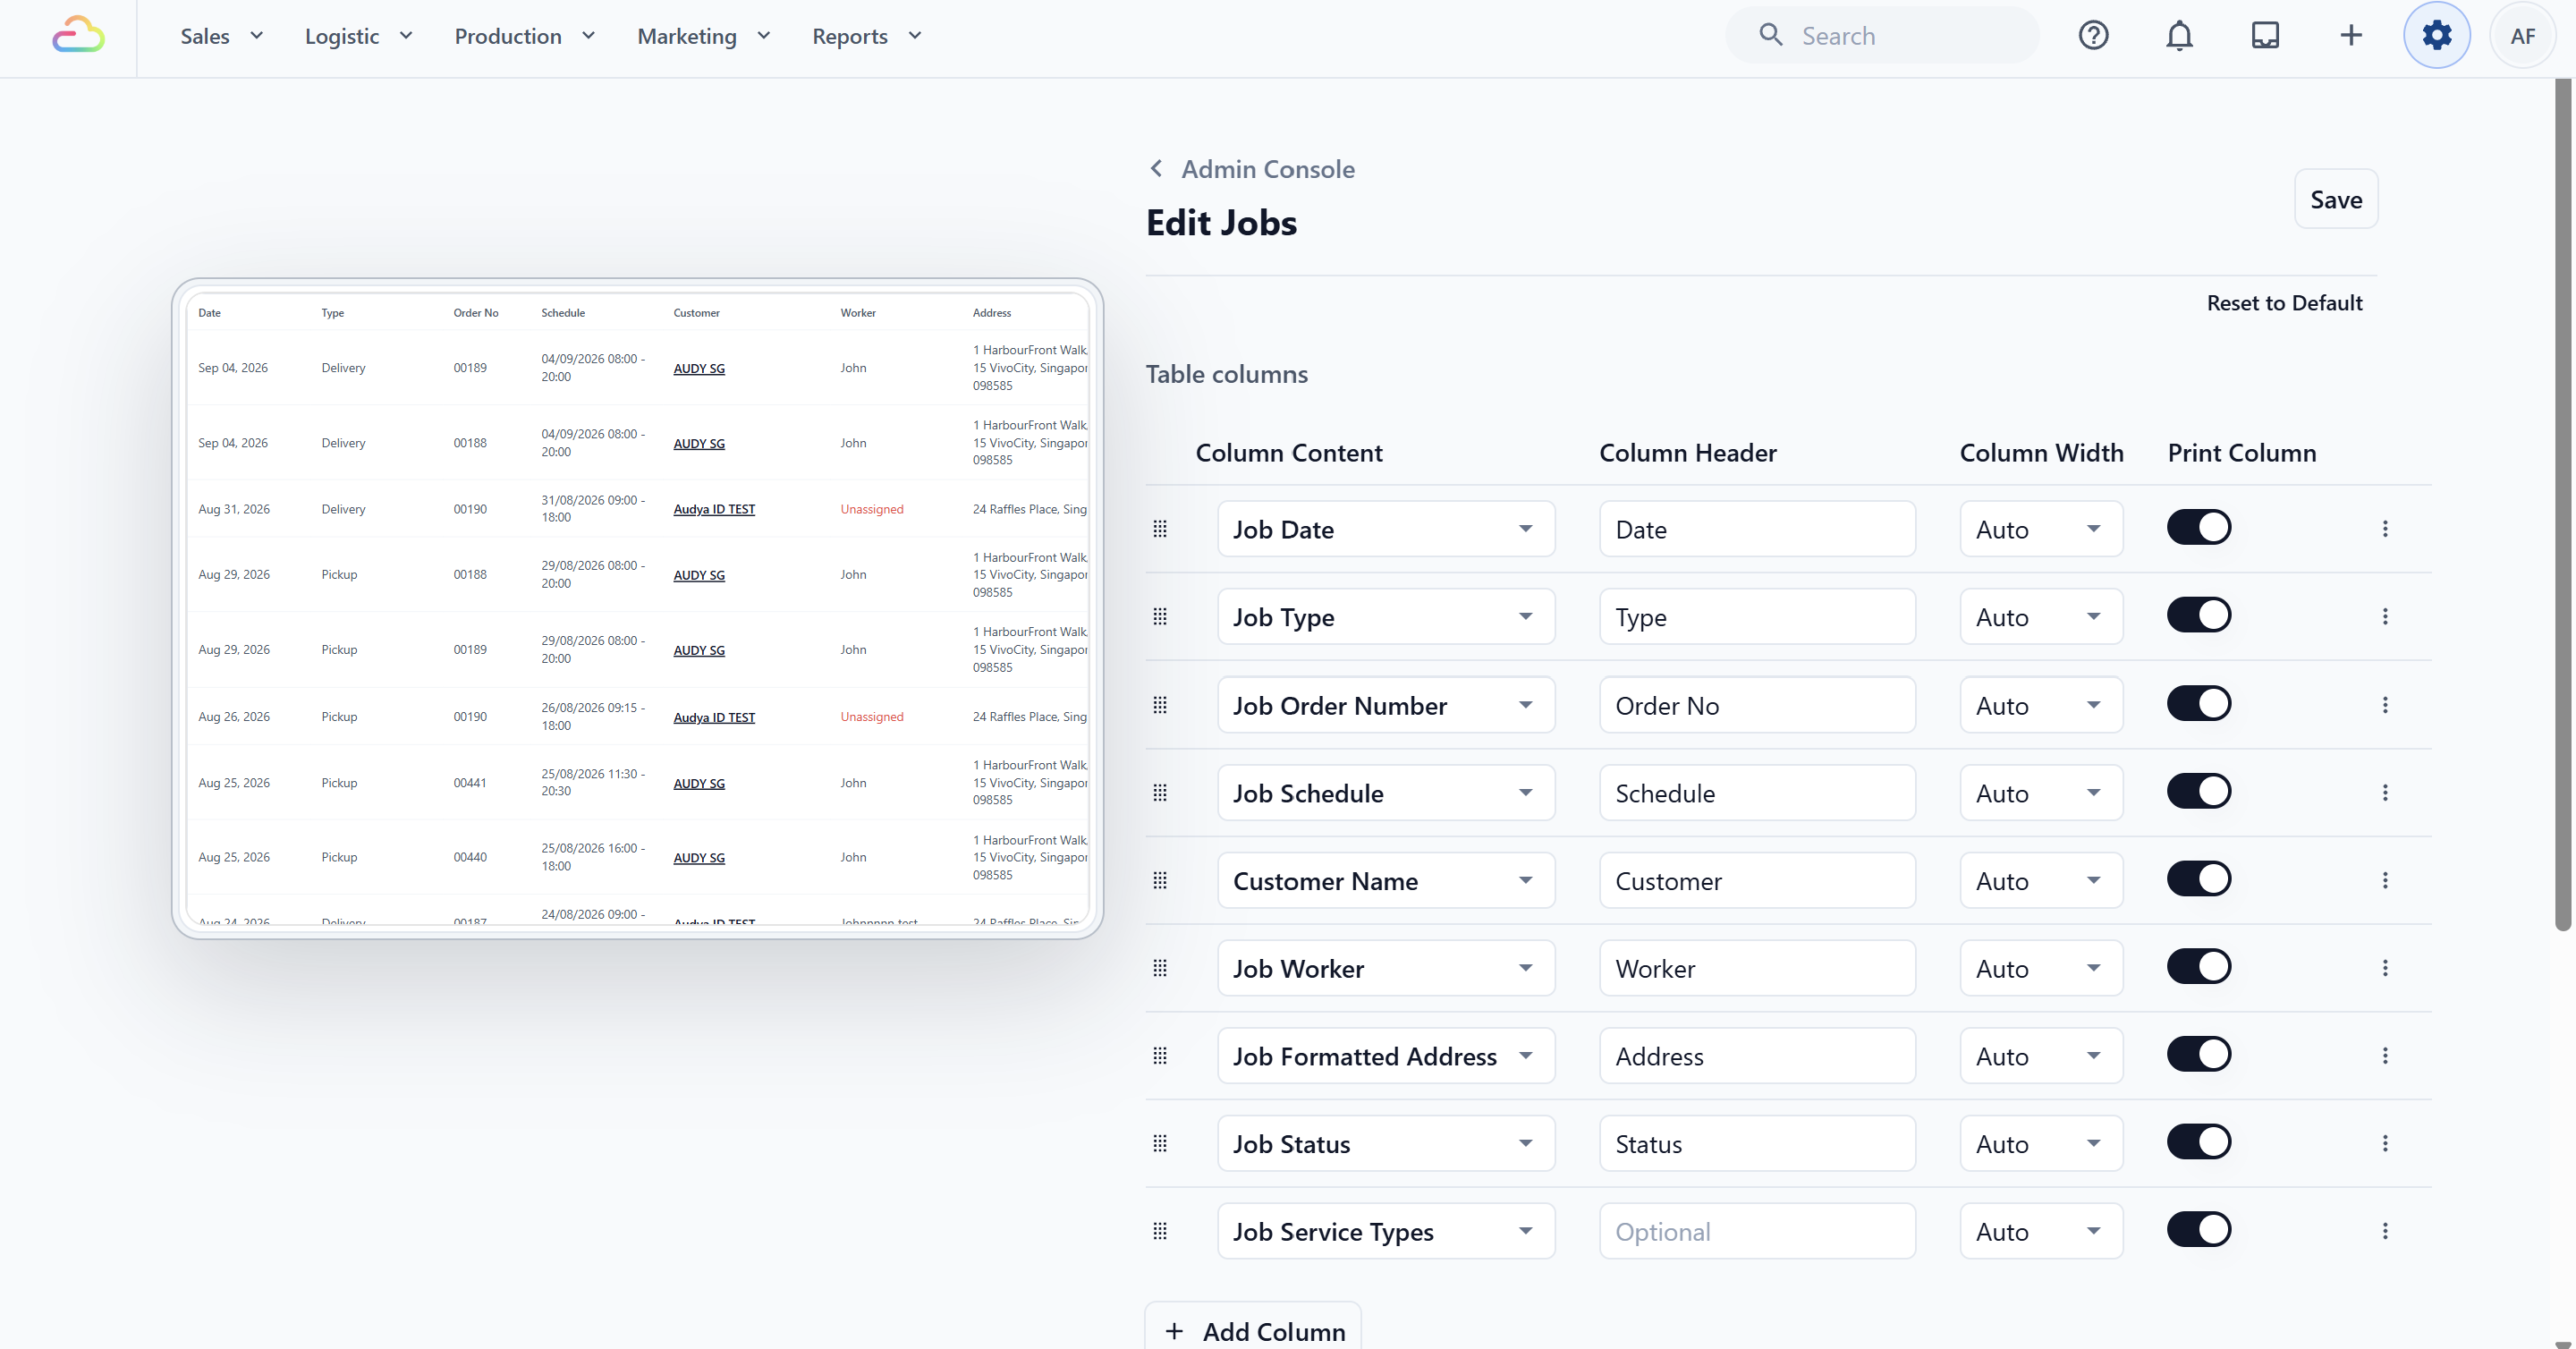
Page Settings controls which columns appear in the Job Table and how jobs on the same date are sorted.
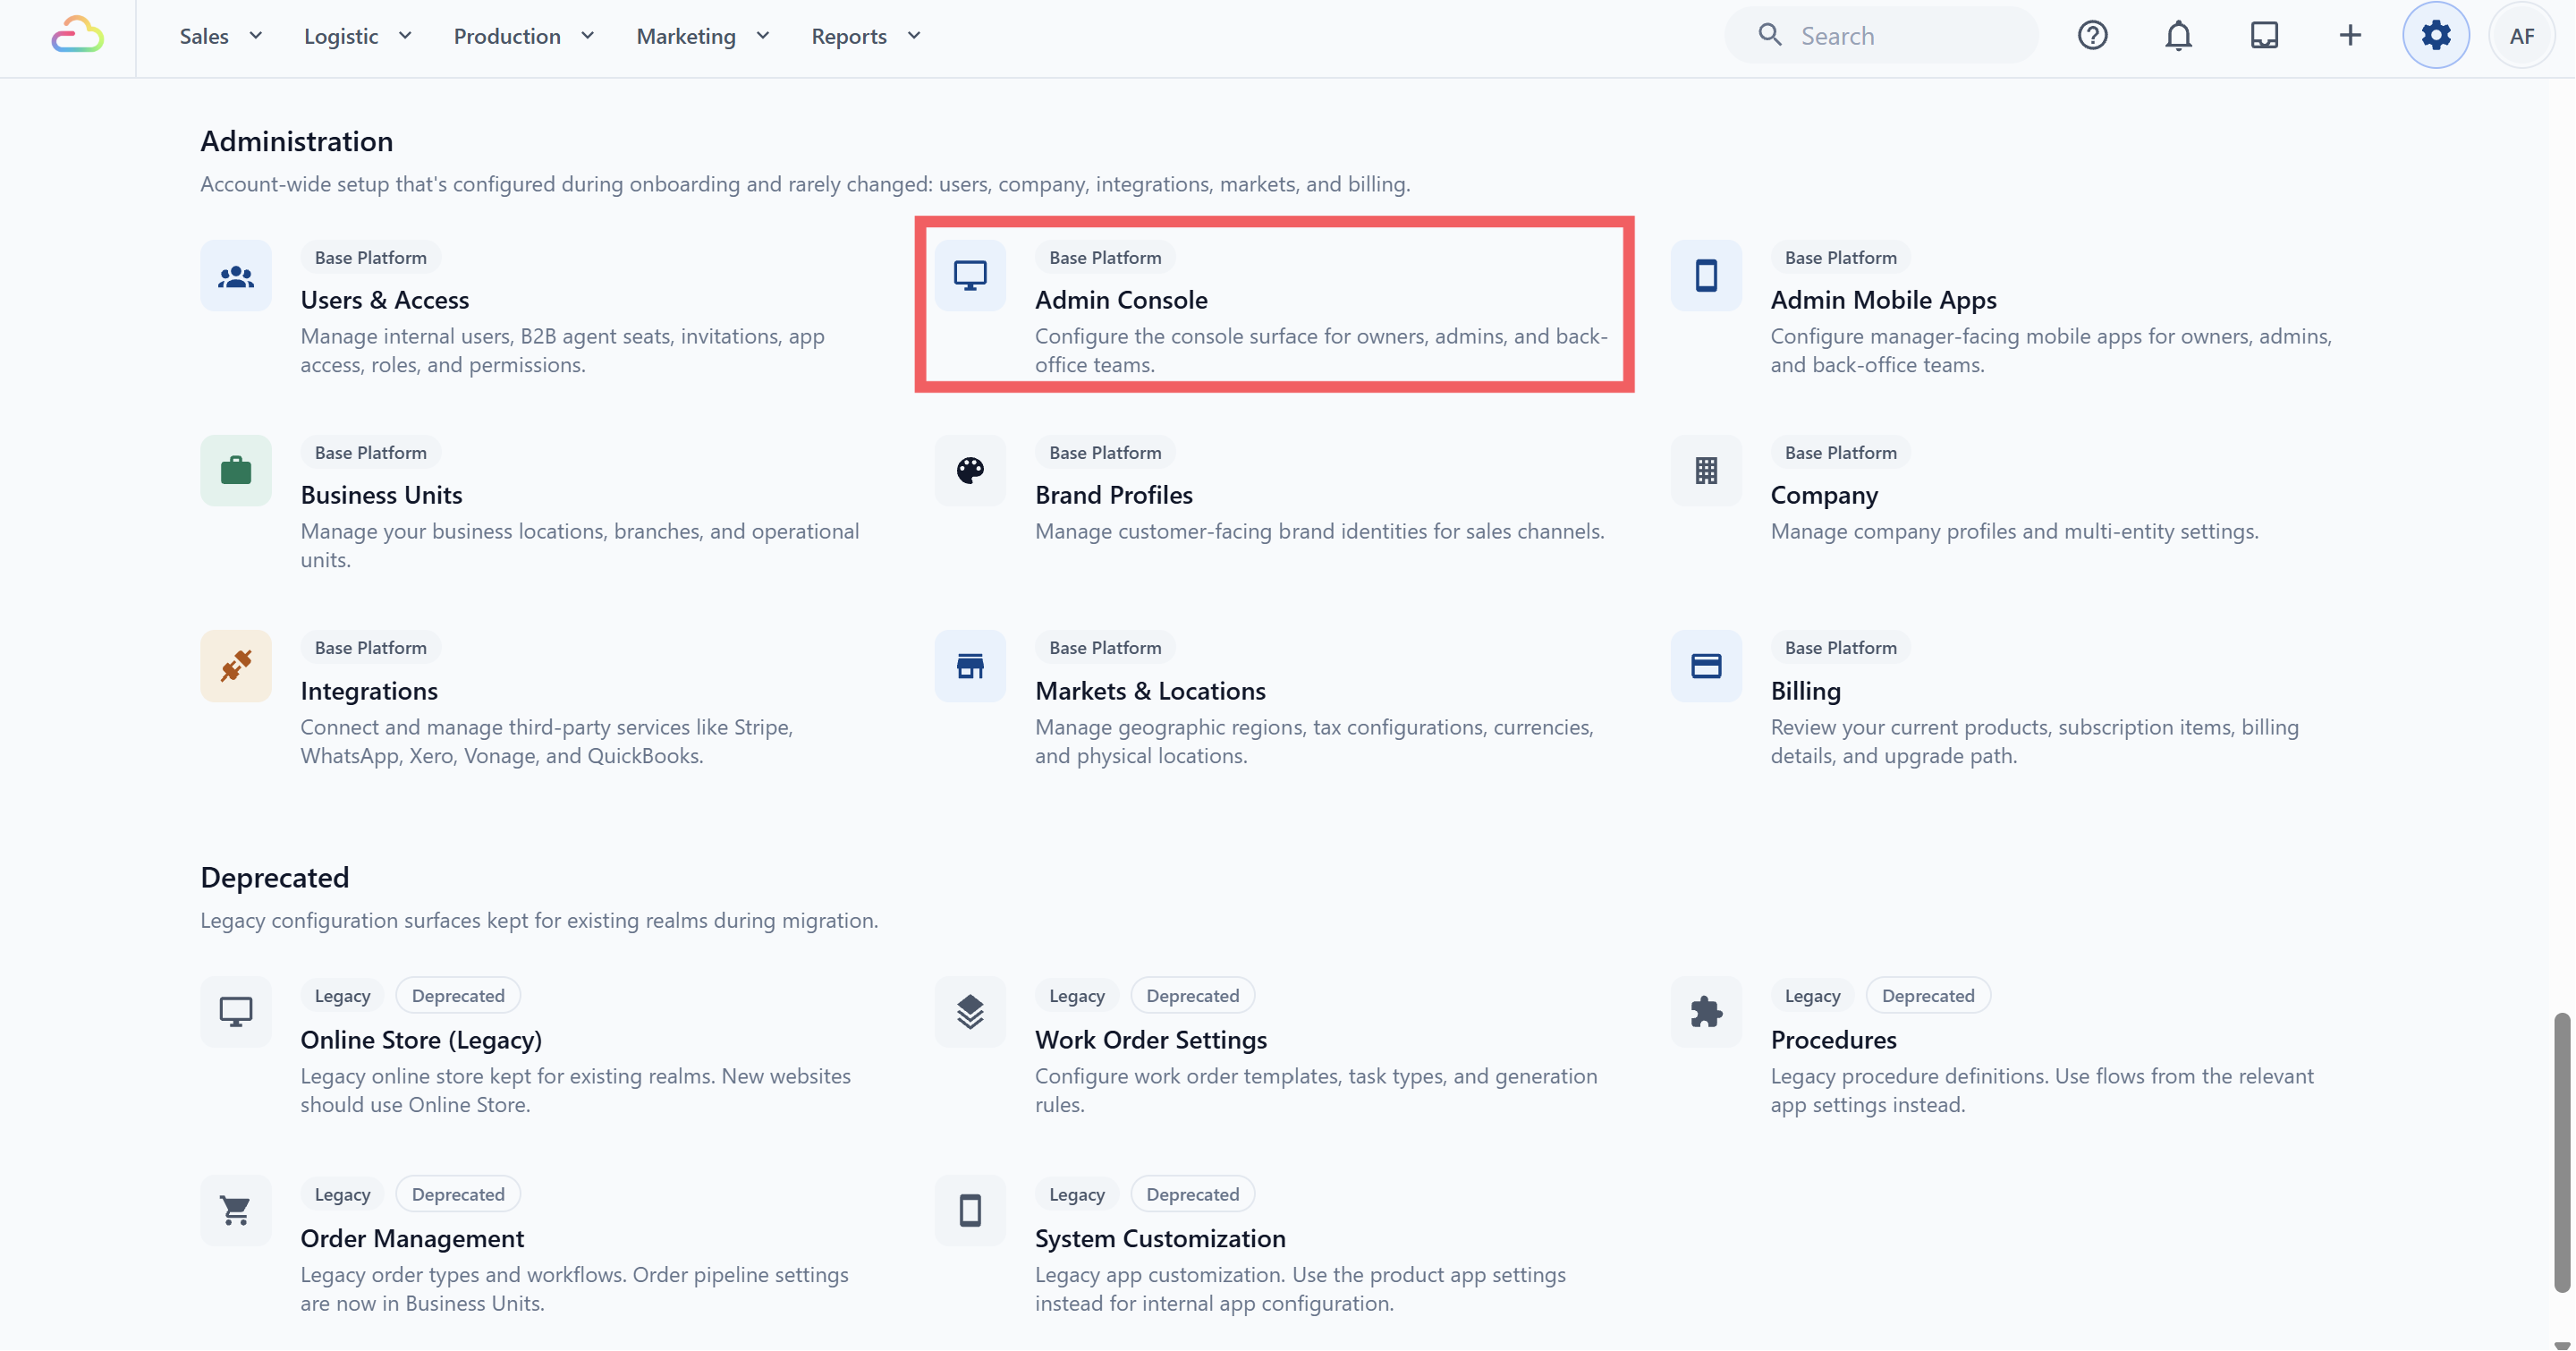
Click the ⚙️ Settings icon.
Under Administration, click Admin Console.
- In the Console Pages section, find and click Jobs.
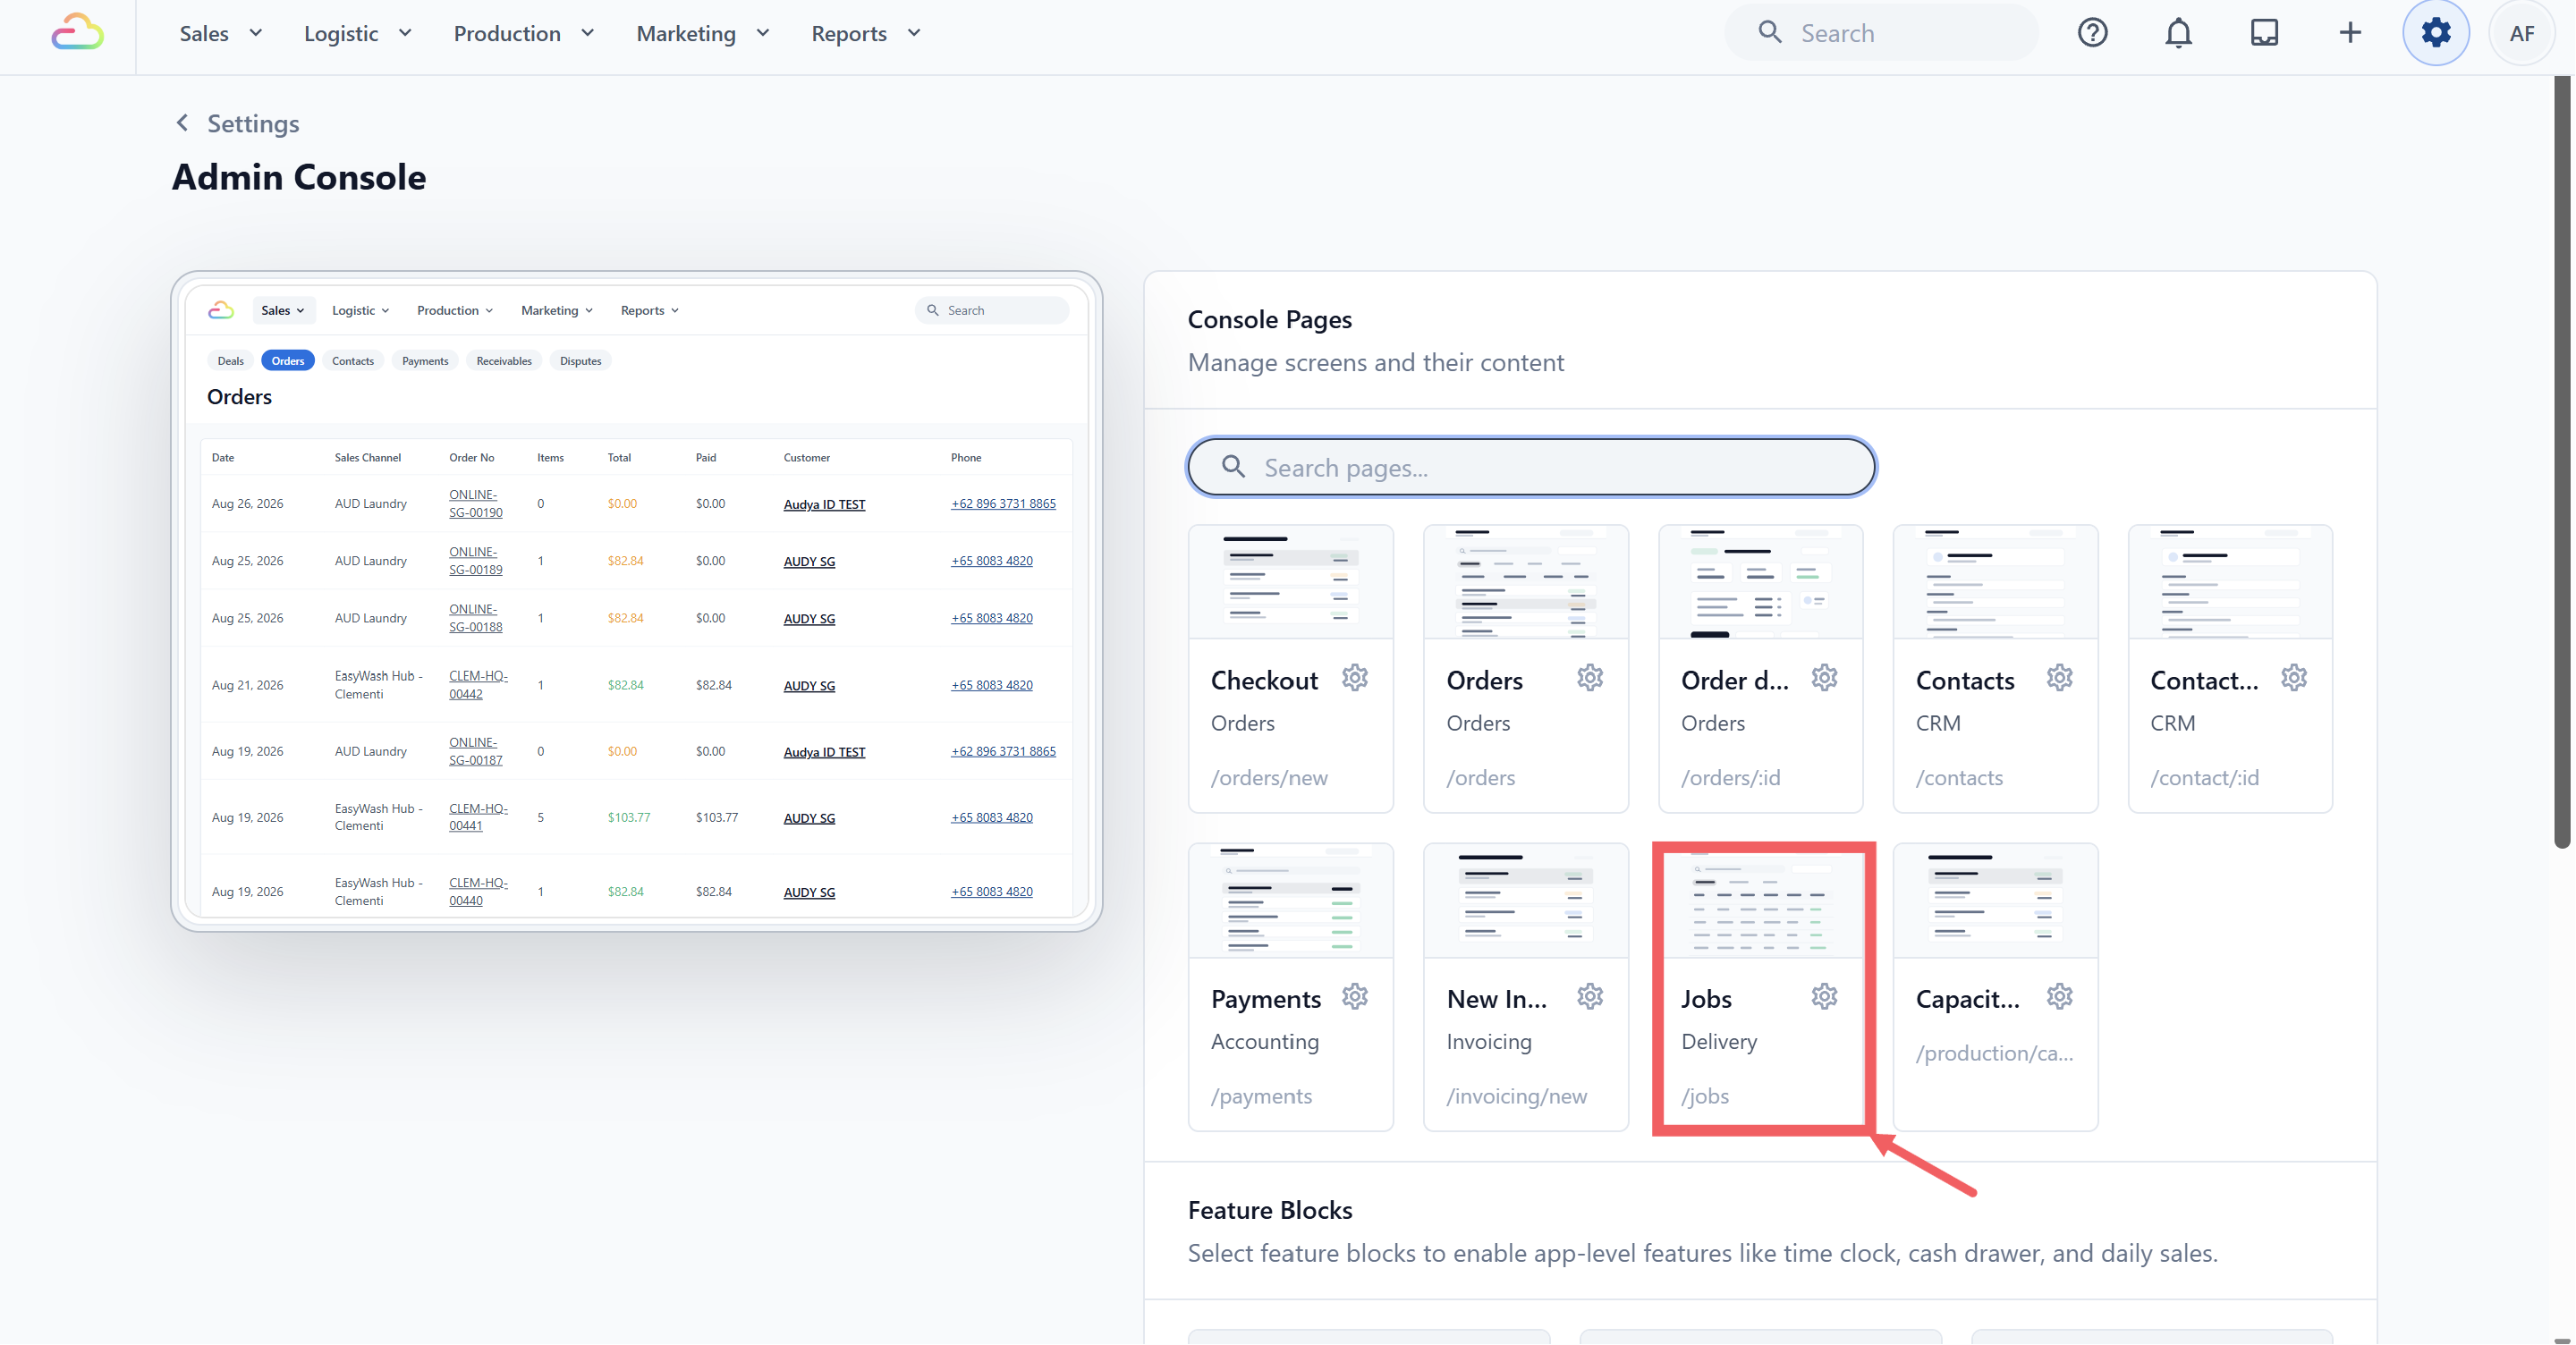
- The Edit Jobs screen opens with the Job Table settings and a live preview.
- After making changes, click Save in the top-right corner.
What the Table Columns settings mean
Each row under Table Columns controls one column in the Job Table.
Column Content chooses the information displayed, such as customer name, job time, worker, order amount due, or job notes.
Column Header changes the label at the top of the column. Leave it blank to use the default label.
Column Width controls how much table width the column uses.
Print Column controls whether the column is included when printing the Job Table.
- ⠿ Drag a row up or down to change the column order.
Open a row’s action menu and select Remove to remove that column.
Click Reset to Default to restore the standard Job Table columns and sorting.
Customize the Job Table columns
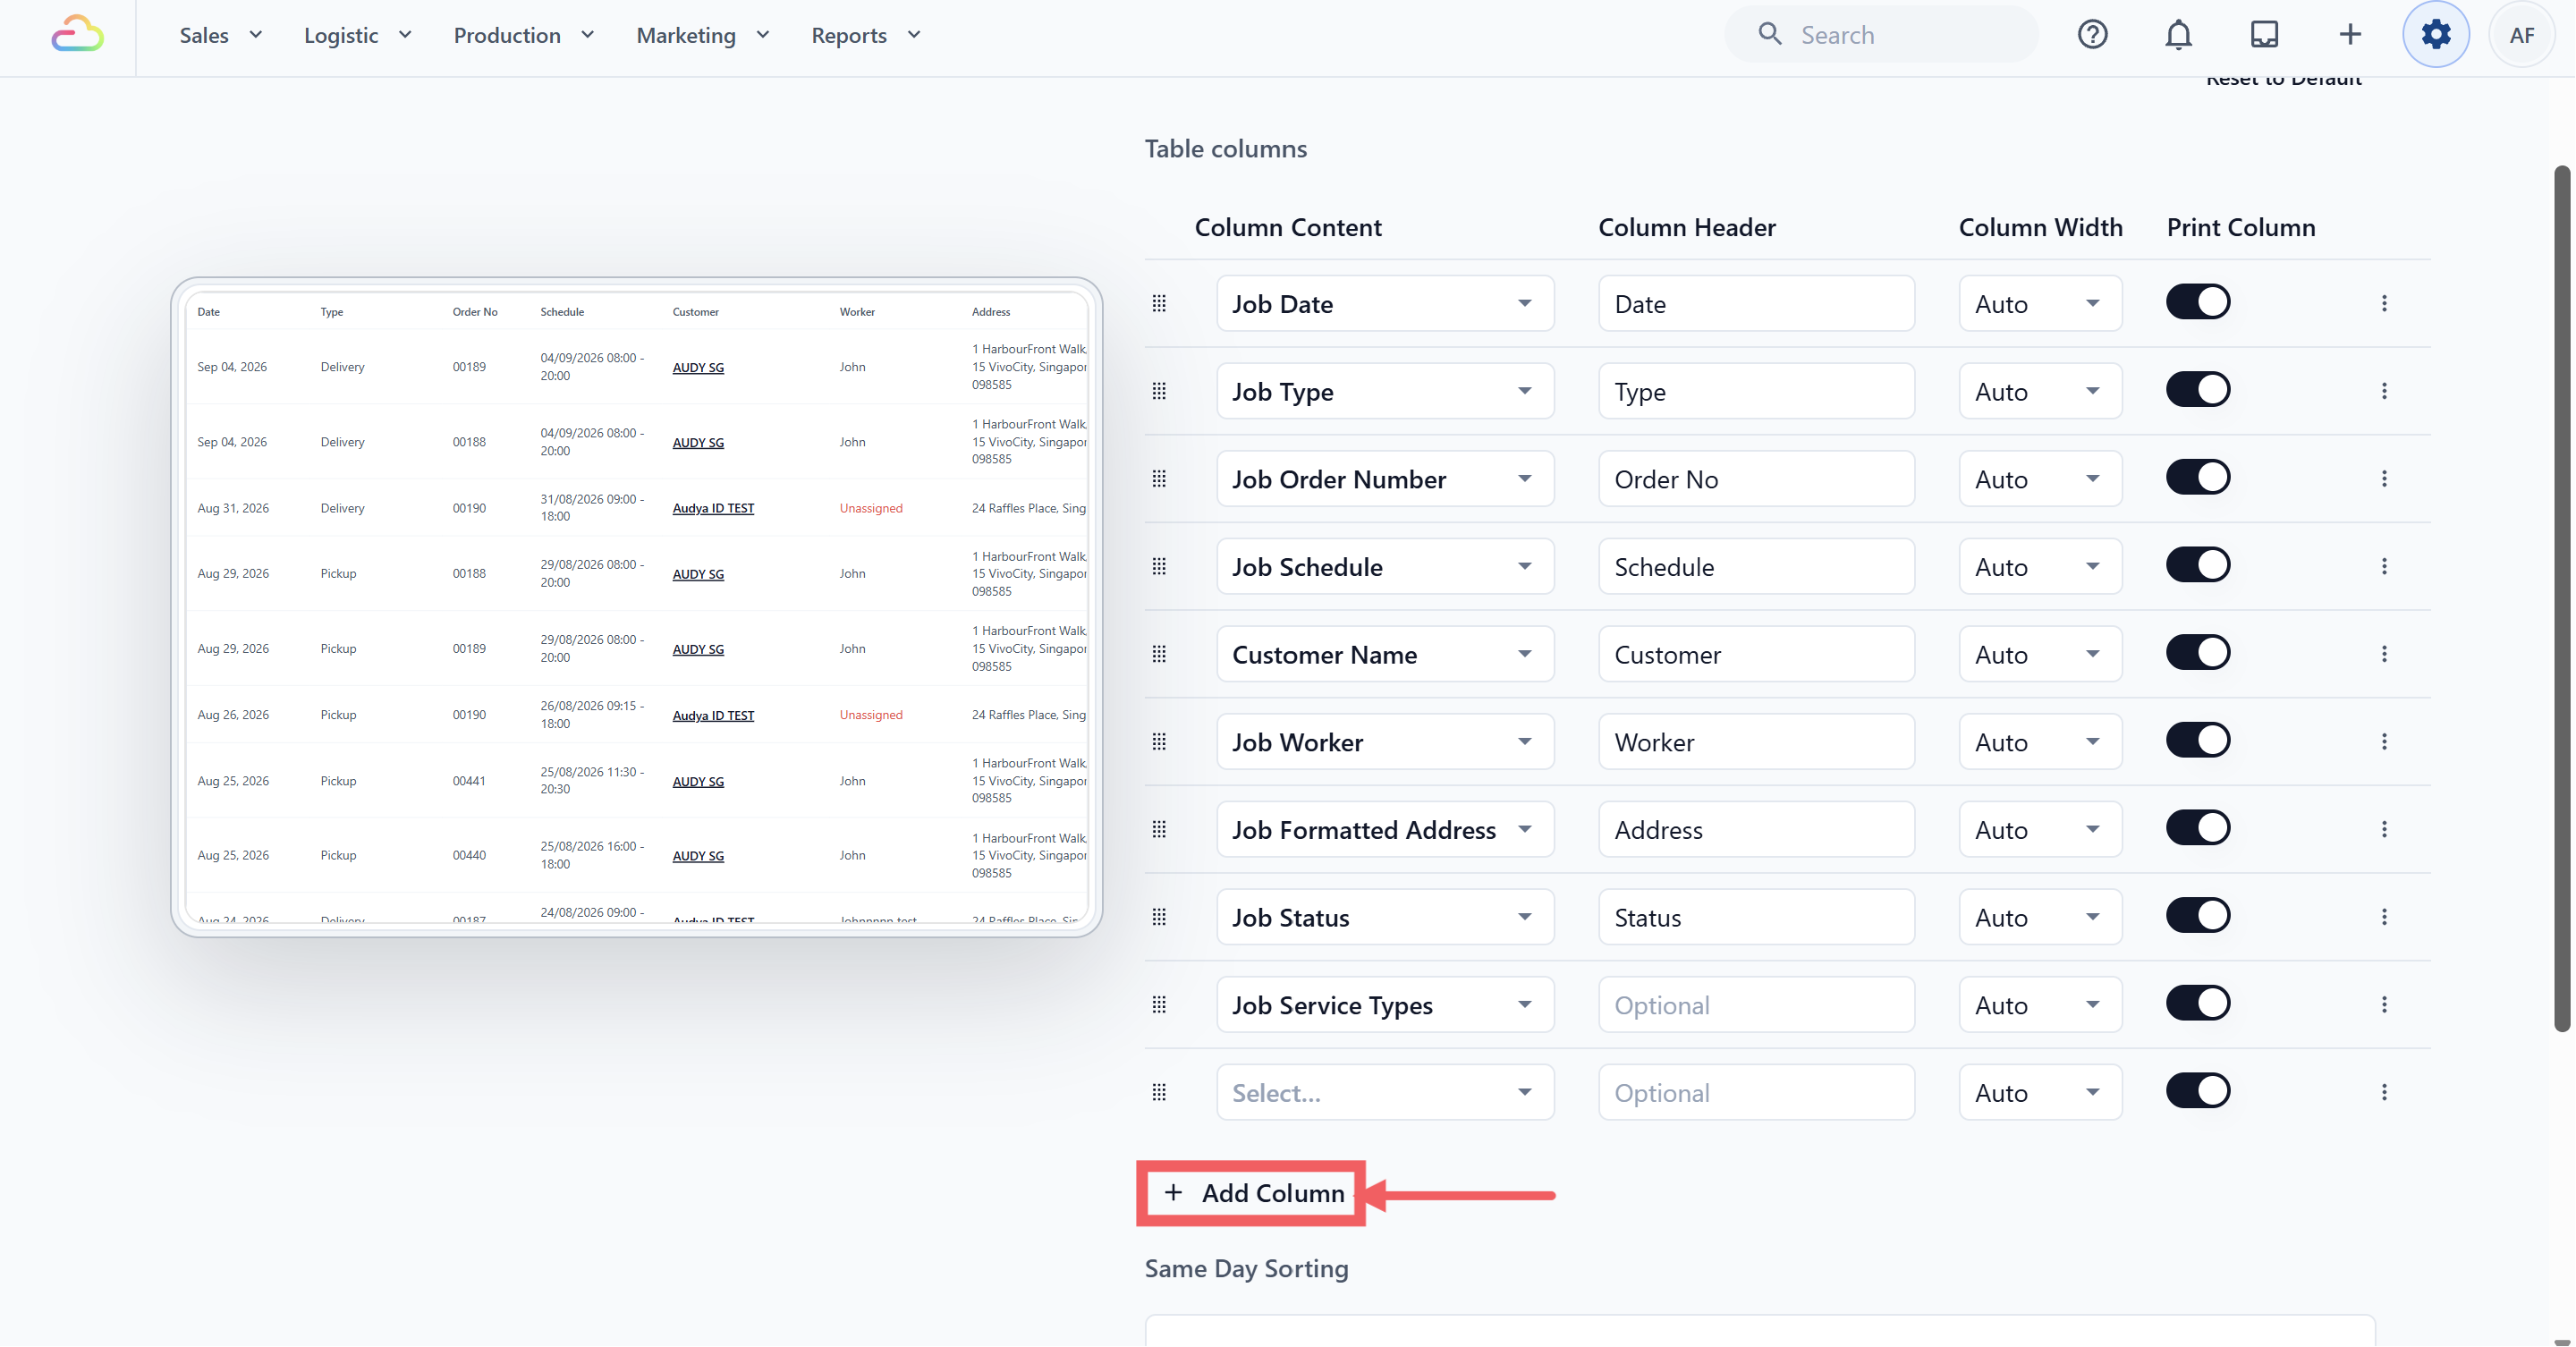
The default columns cover the information most dispatch teams need. You can remove unused columns or click + Add Column to add another field.
| Column | Add it when |
|---|---|
| Customer Phone | Dispatchers or field workers often need to call customers. |
| Customer Private Note | Staff need customer-specific reminders, such as access instructions or preferences. |
| Job Time | The table is usually filtered to one day and the team needs a compact time-only column. |
| Job Schedule Option | Customers choose named pickup or delivery windows. |
| Order Amount Due | Field workers may need to collect payment. |
| Job Note | Job-specific instructions should be visible without opening the job. |
| Job Service Types | Field workers need to know the service involved before arriving. |
| Job Photos | Proof or reference photos should be visible in the table. |
| Sales Channel Code or Name | Your team manages jobs created through several stores, POS locations, or online channels. |
Same Day Sorting
Same Day Sorting controls the order of jobs scheduled on the same date. It is useful when you want a practical route sequence instead of only grouping jobs by date.
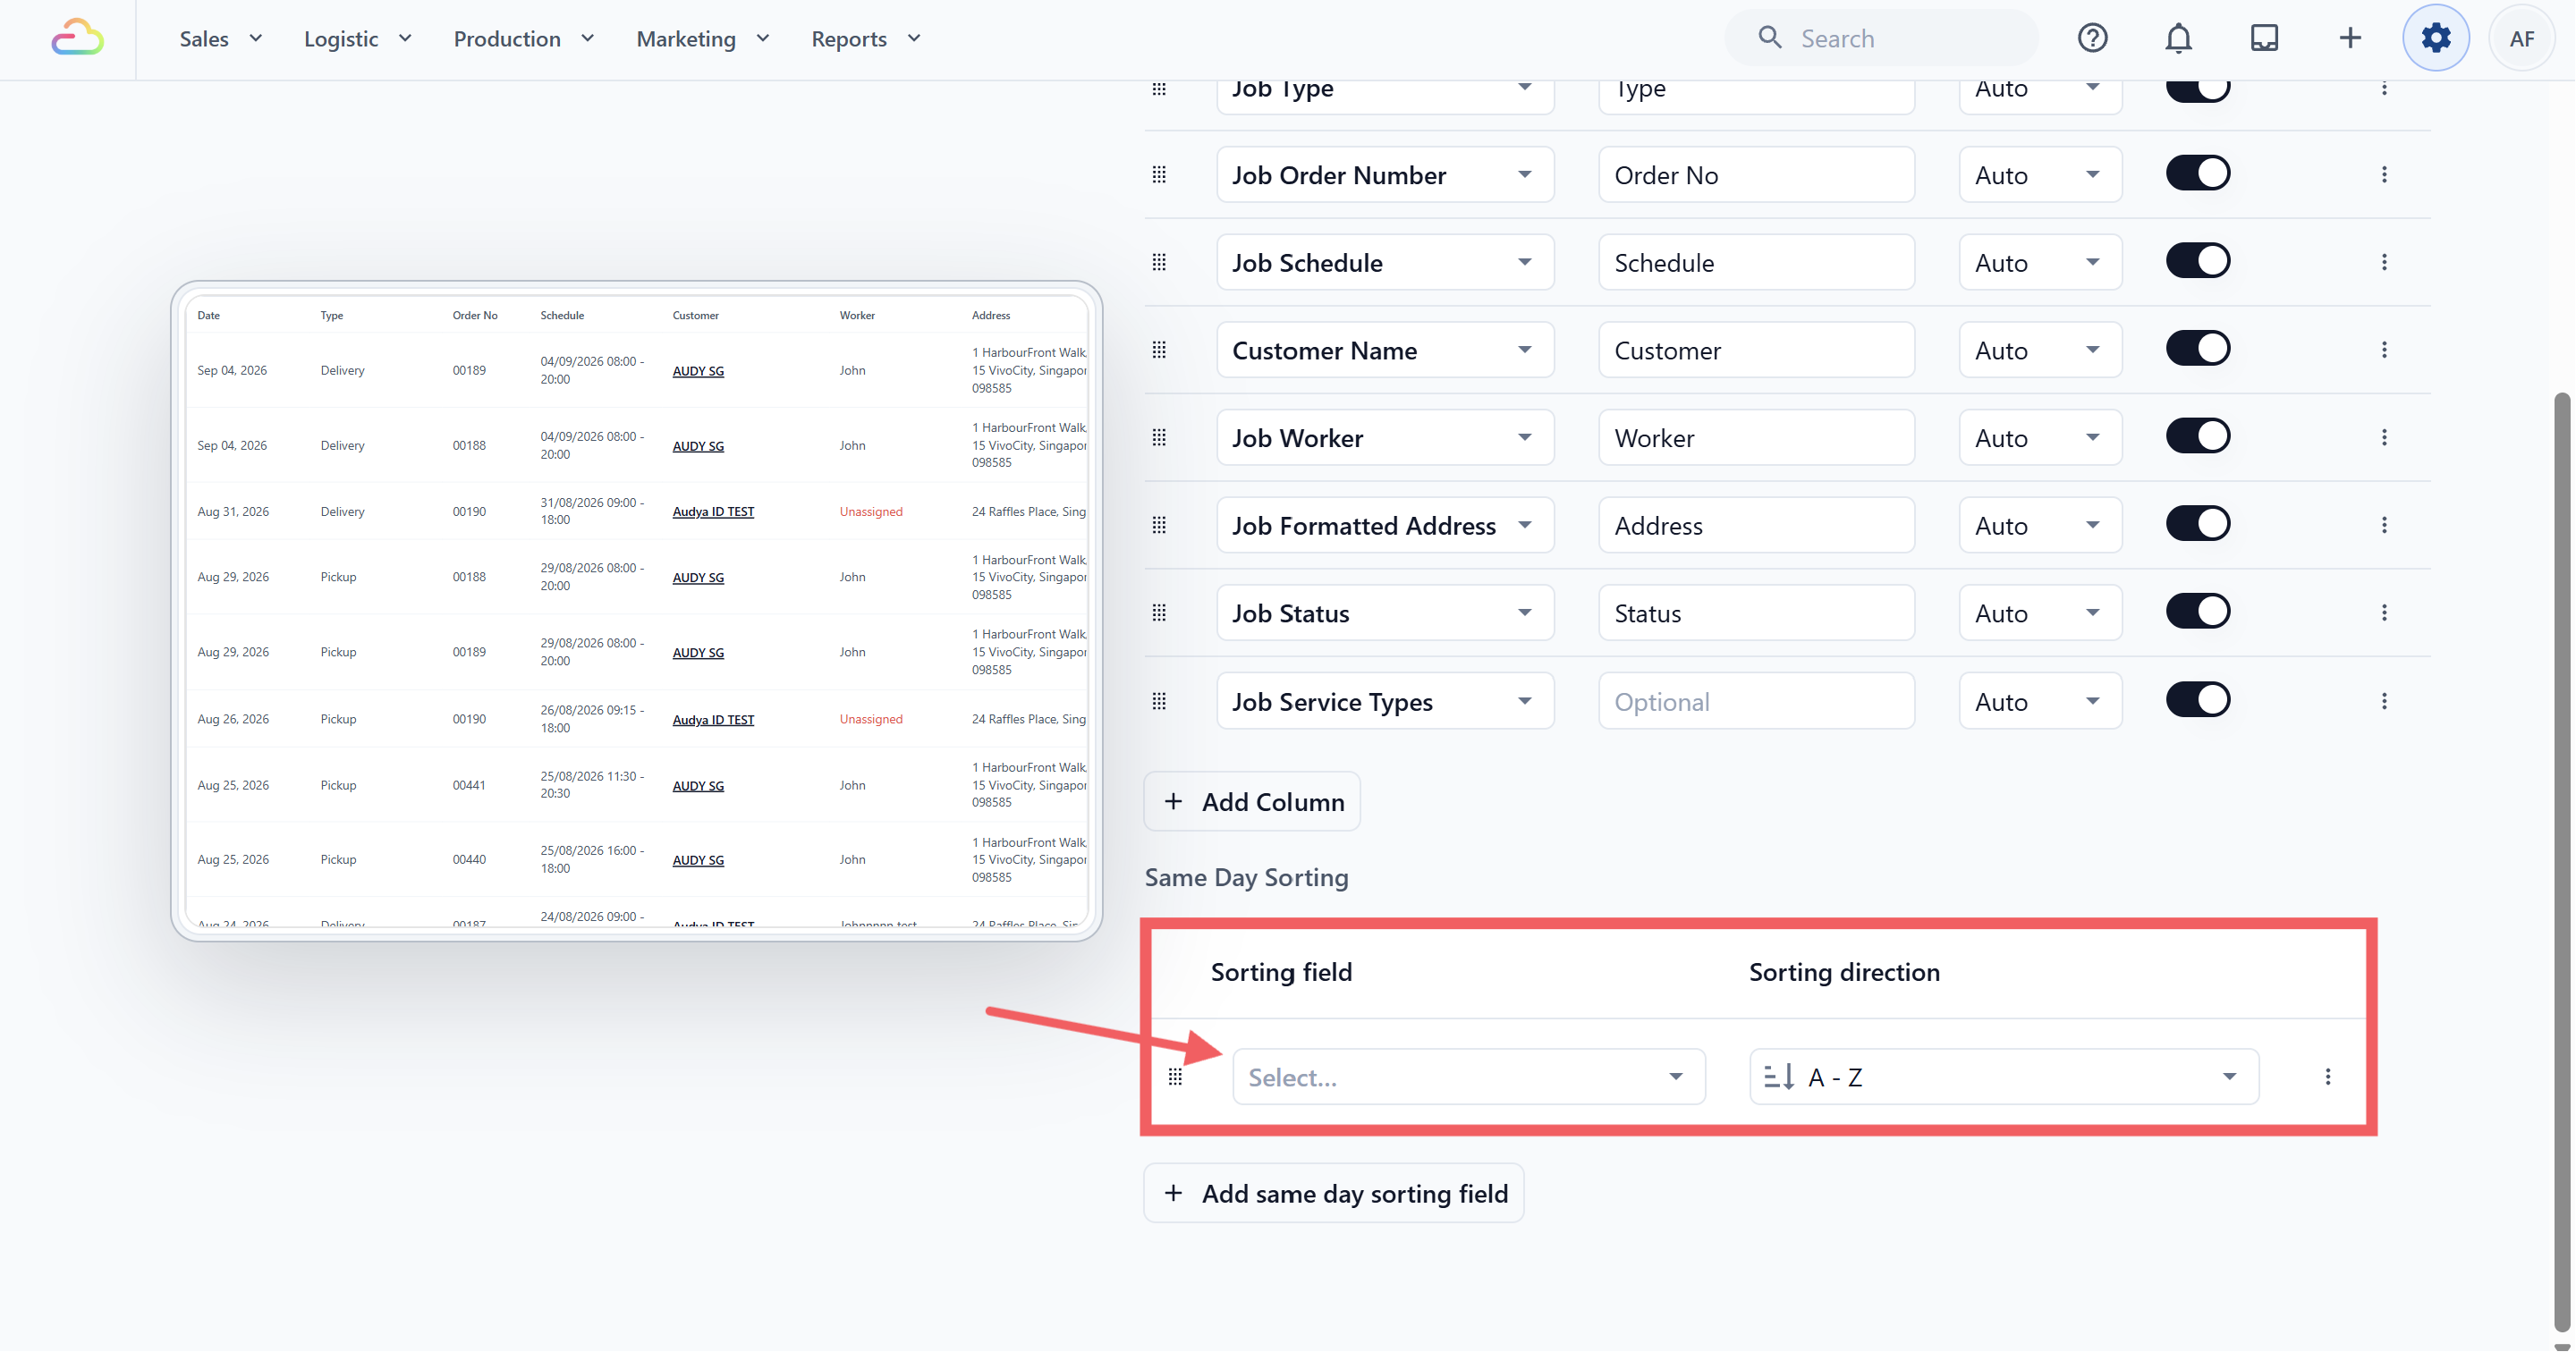
Common sorting fields are:
Job Time → shows earlier jobs first.
Job Worker → groups jobs by assigned Field Worker.
Job Schedule Option → groups jobs by named pickup or delivery window. You can add more than one sorting field and drag them into priority order. Choose ascending or descending direction for each field, then click Save.
Job statuses
| Status | Meaning |
|---|---|
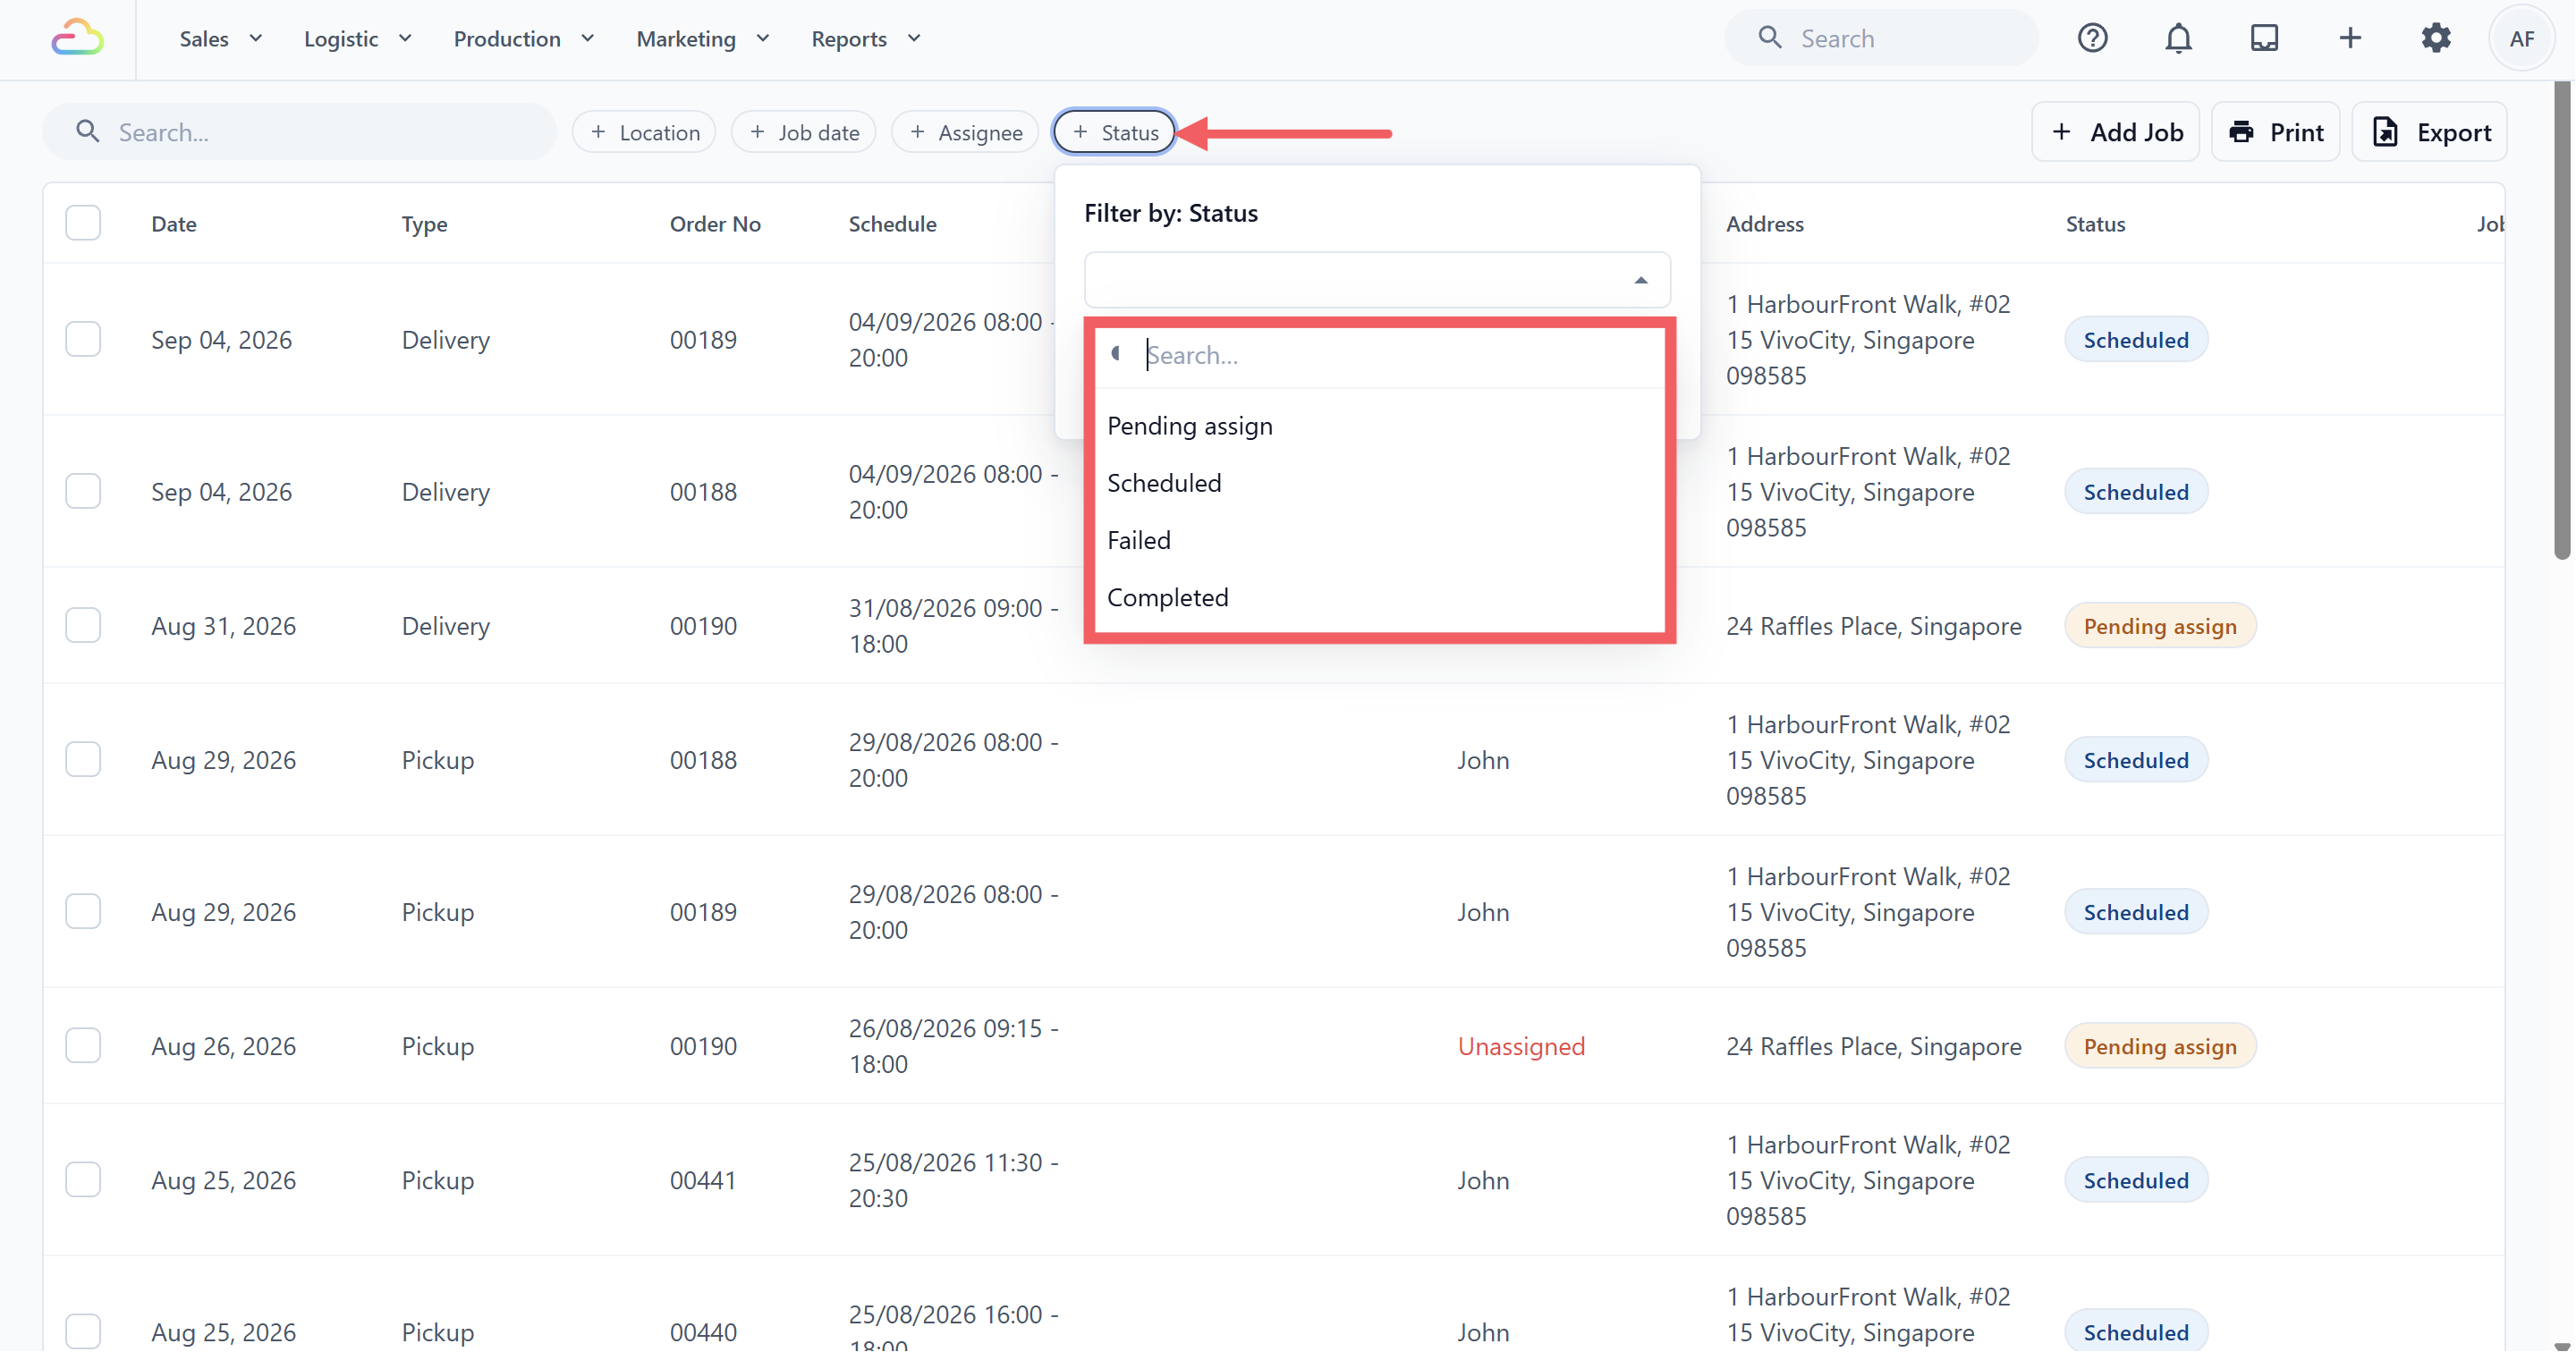
| Pending | The job exists but no Field Worker is assigned. |
| Scheduled | A Field Worker is assigned and the job appears in their work list. |
| Completed | The Field Worker or office team completed the job. |
| Failed | The job could not be completed, for example because the customer was unavailable. |
Assigning a Field Worker moves an active job to Scheduled. Removing the assignment returns it to Pending. Assignment rules may also assign a worker automatically when a new job is created.
Filter and search
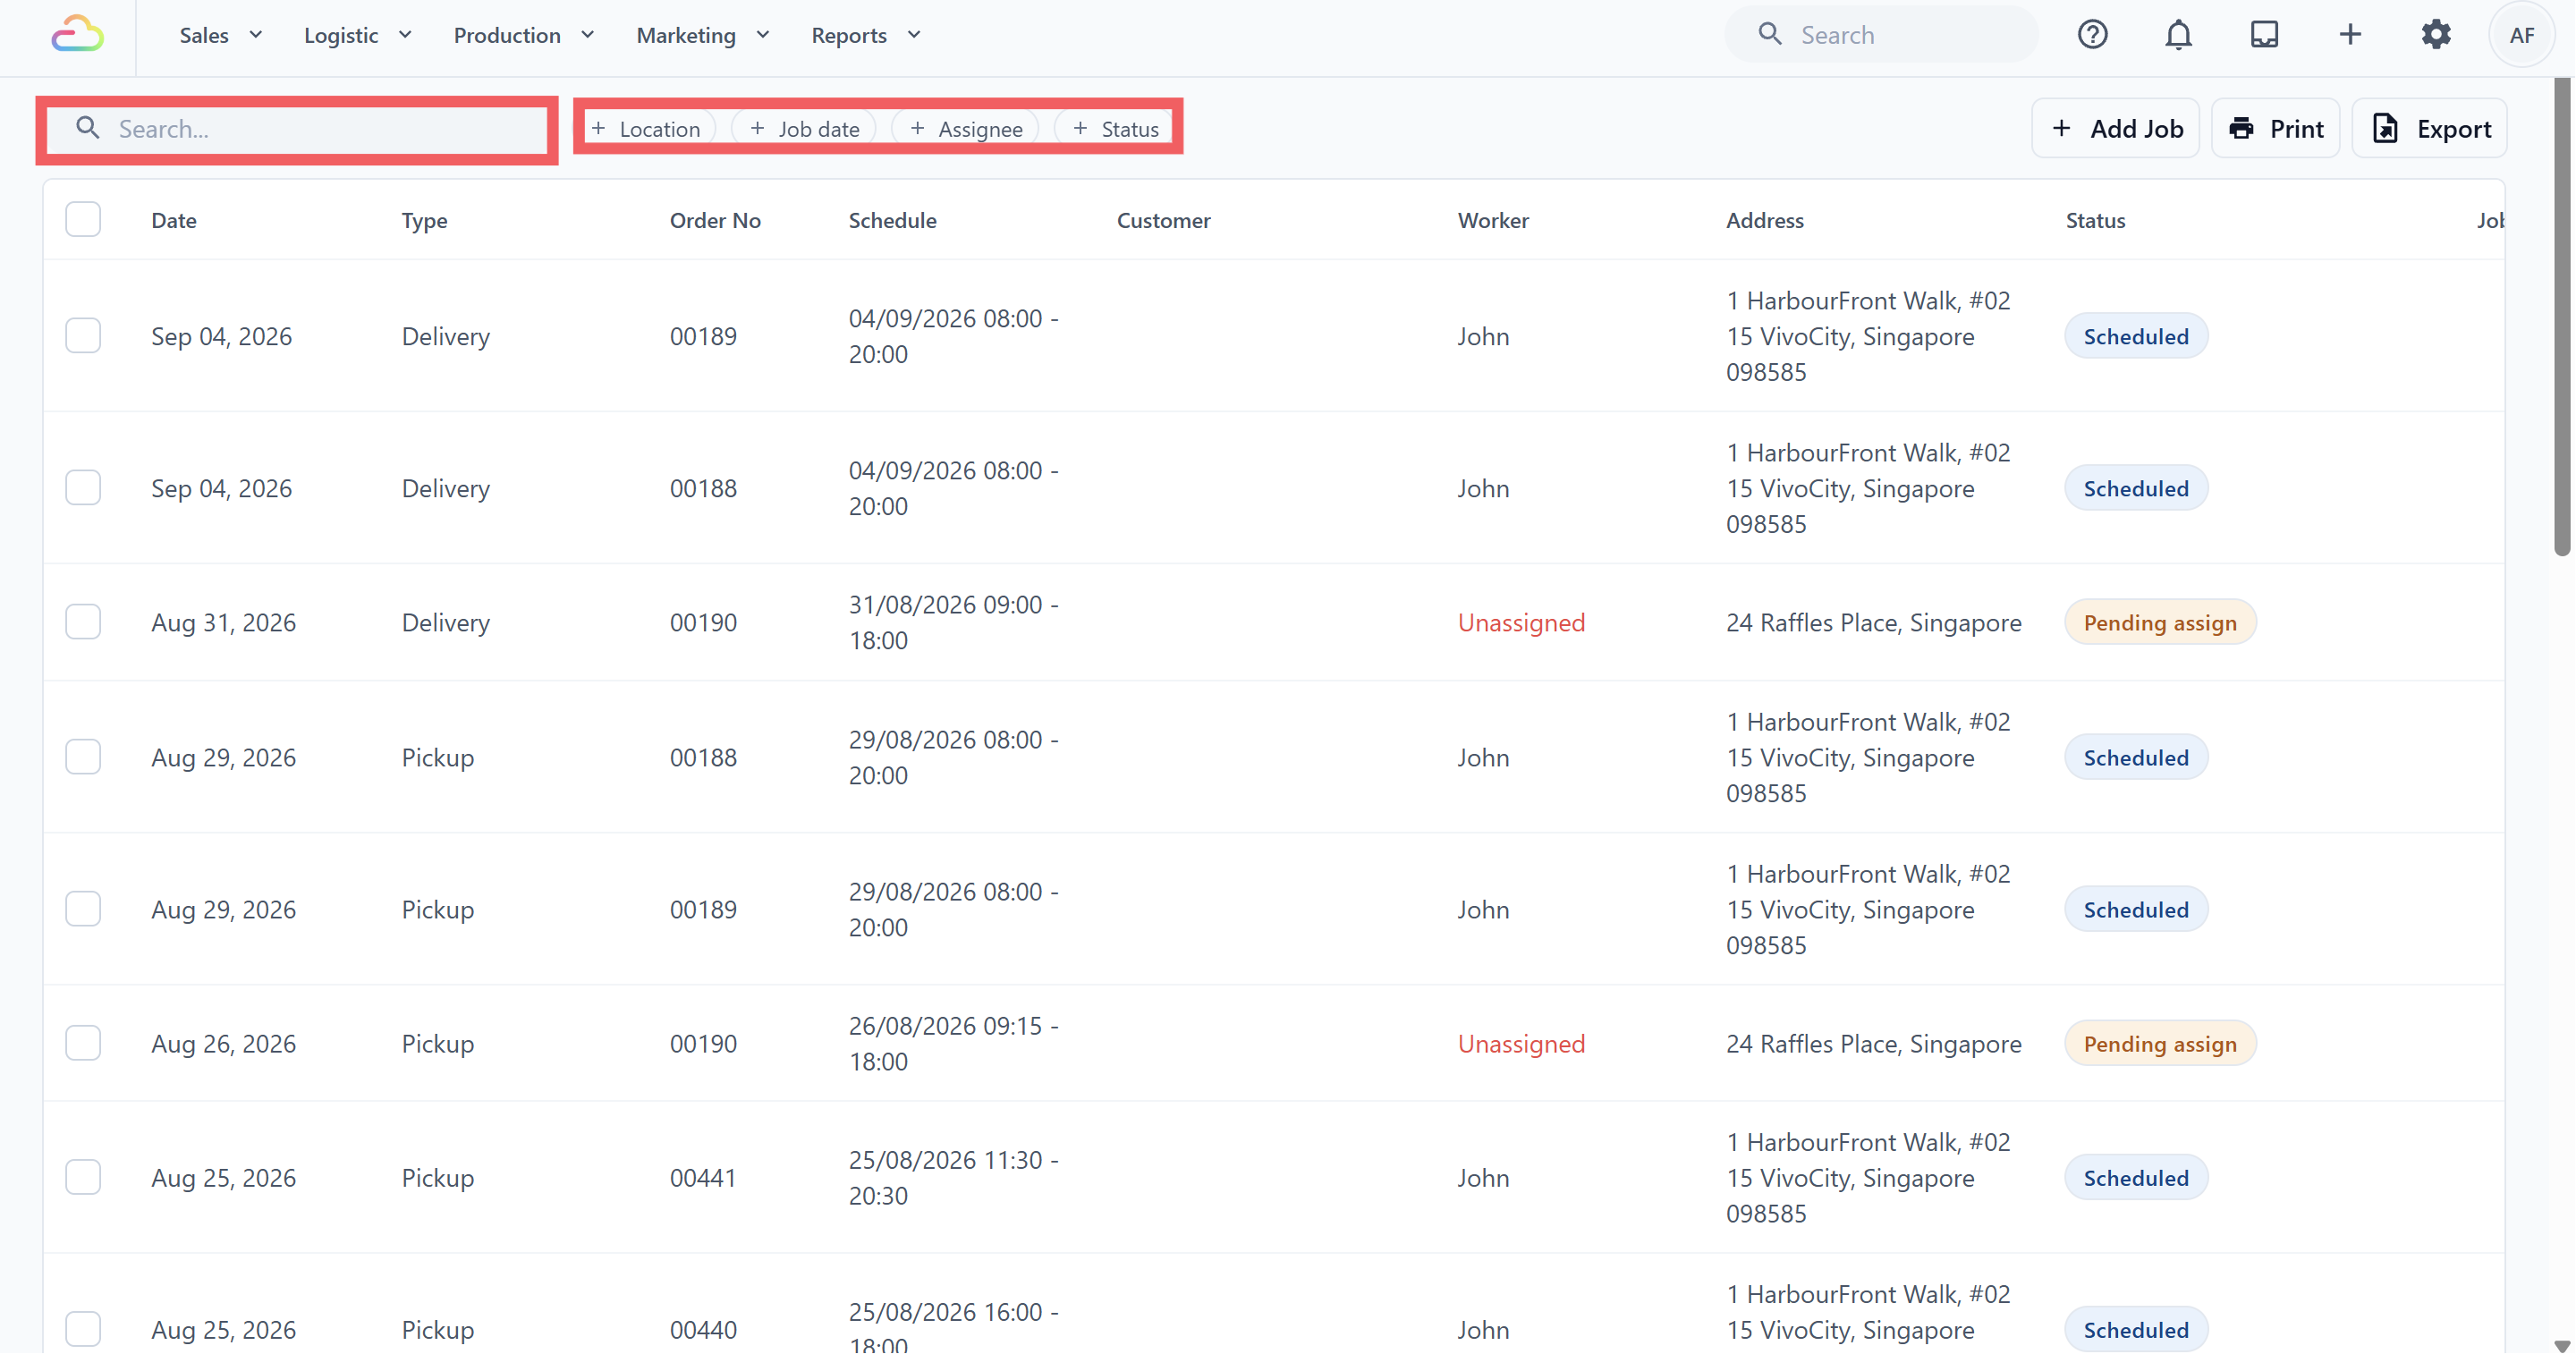
Use the controls above the table to narrow the job list:
Location: select the operating Location. The Location’s Market appears beneath its name. Clear this filter to view every accessible Location.
Job date: select a date or date range, up to 366 days. When the Status filter is Completed, the date range uses the completion date; otherwise it uses the scheduled date.
Assignee: show jobs assigned to one Field Worker.
Status: show only Pending, Scheduled, Completed, or Failed jobs.
Search: search by customer, customer phone, address, or order number.
Clear filters: remove all applied filters.
The table initially loads 20 jobs. The count above the table shows loaded jobs compared with the matching total when a date range is selected. Click Load More below the table to fetch the next batch.
Edit jobs in the table
Jobs are now edited in a drawer rather than directly inside table cells.
Click the job row you want to update.
The Update Job drawer opens.
Update the relevant fields:
- Contact - Job Address - Assign To - Status: Completed or Failed - Schedule Date and Schedule Time - Job Note - Job Photos
- Click Update Job to save.
The linked sales order and job type cannot be changed after the job is created.
To cancel the job, close the drawer, open the row’s action menu, select Cancel Job, and confirm.
Update multiple jobs
Use the checkboxes in the first table column to select jobs.
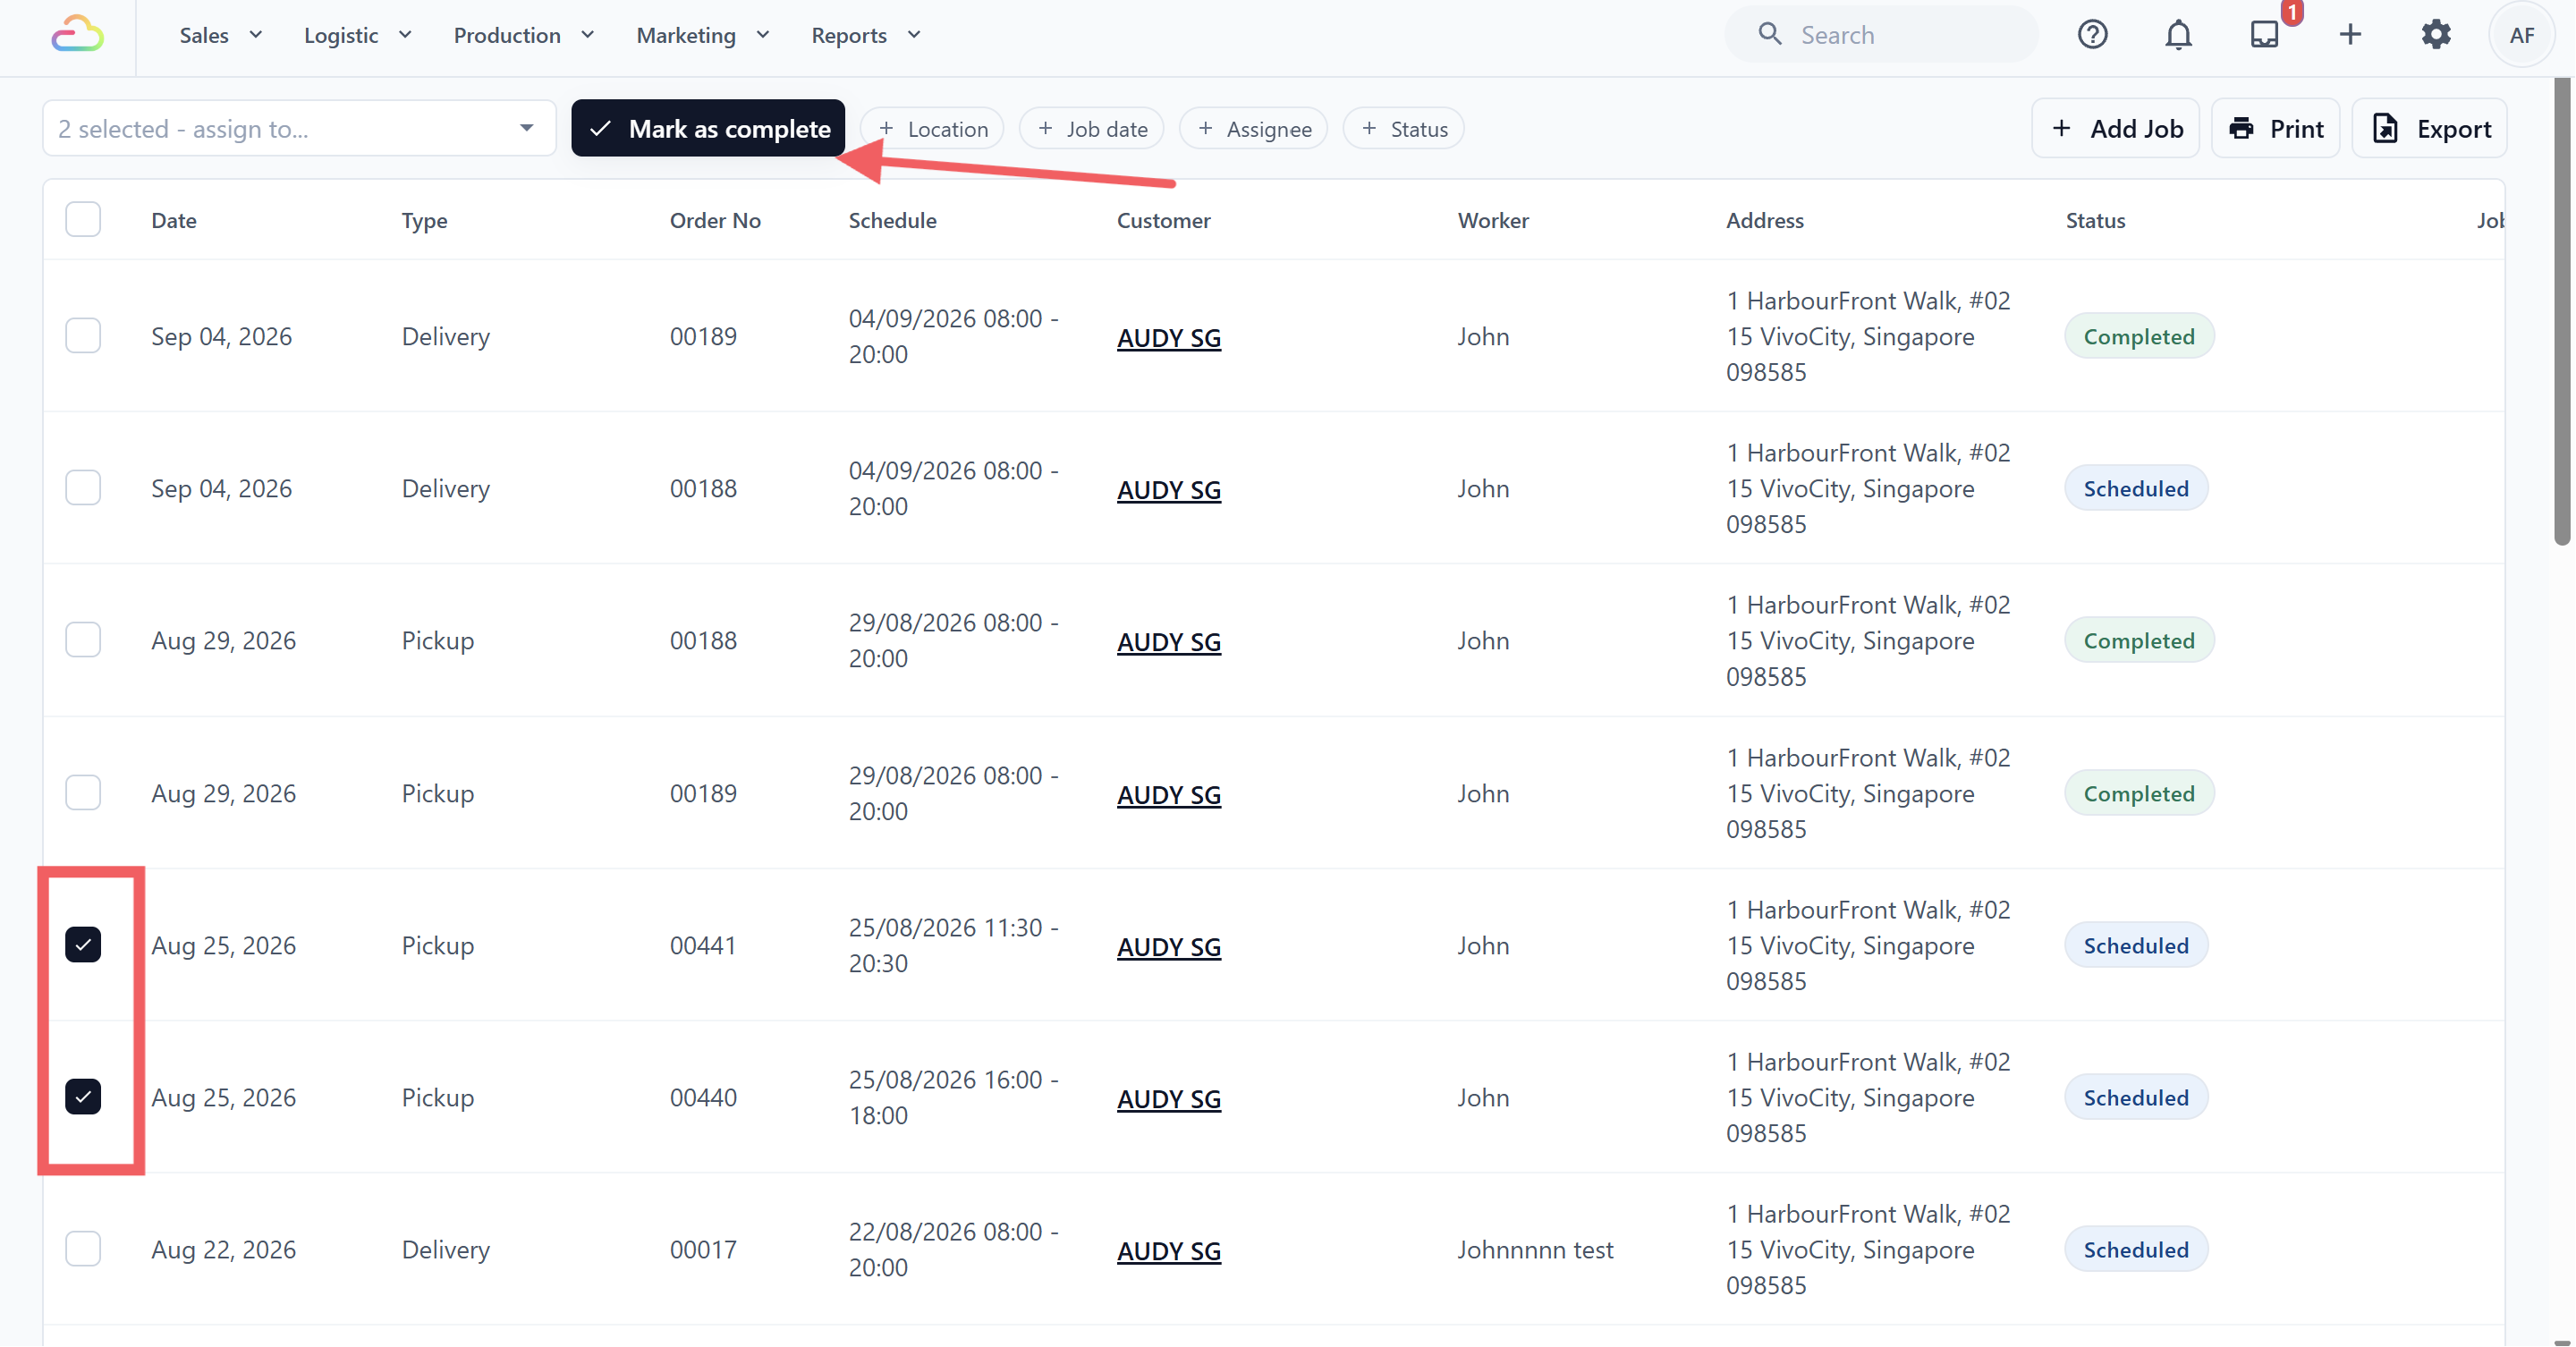
After selecting one or more jobs, you can:
Assign the selected jobs to one Field Worker and optionally add a note.
Mark the selected jobs as complete and optionally add a completion reason.
Each bulk action opens a confirmation dialog before saving.
Add a new job manually
Most jobs are created automatically from orders. Add a job manually for standalone or one-off work that did not originate from the normal order flow.
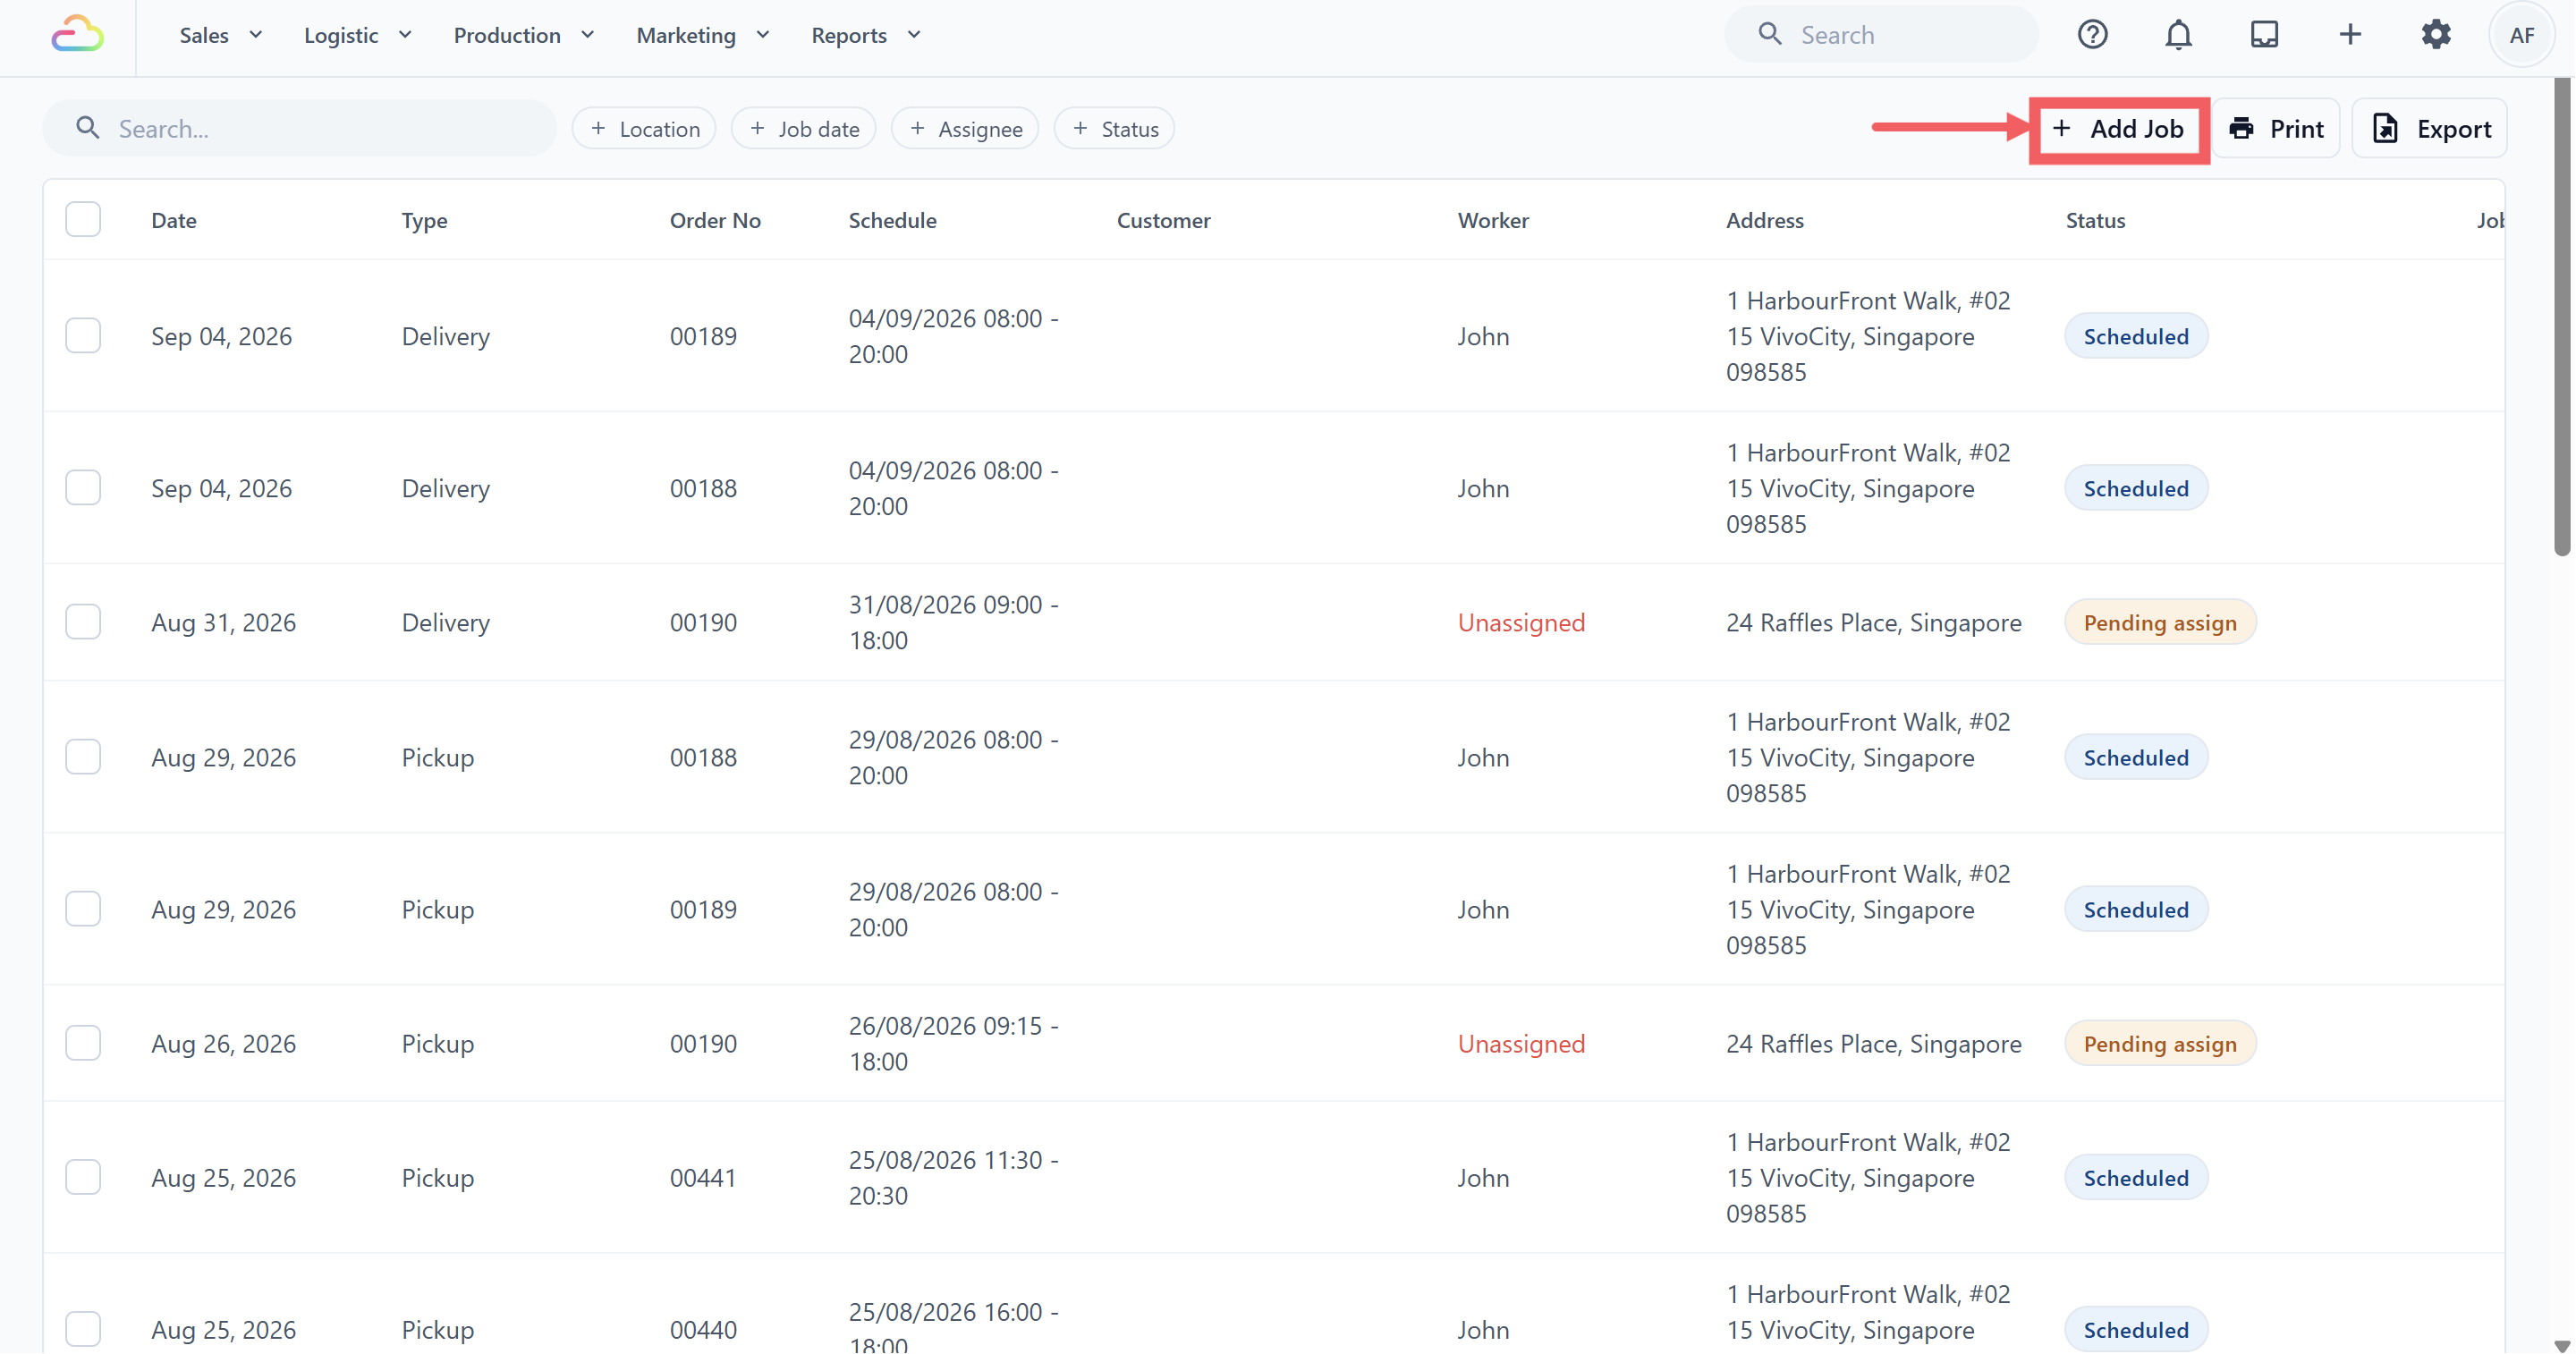
- Click + Add Job above the table.
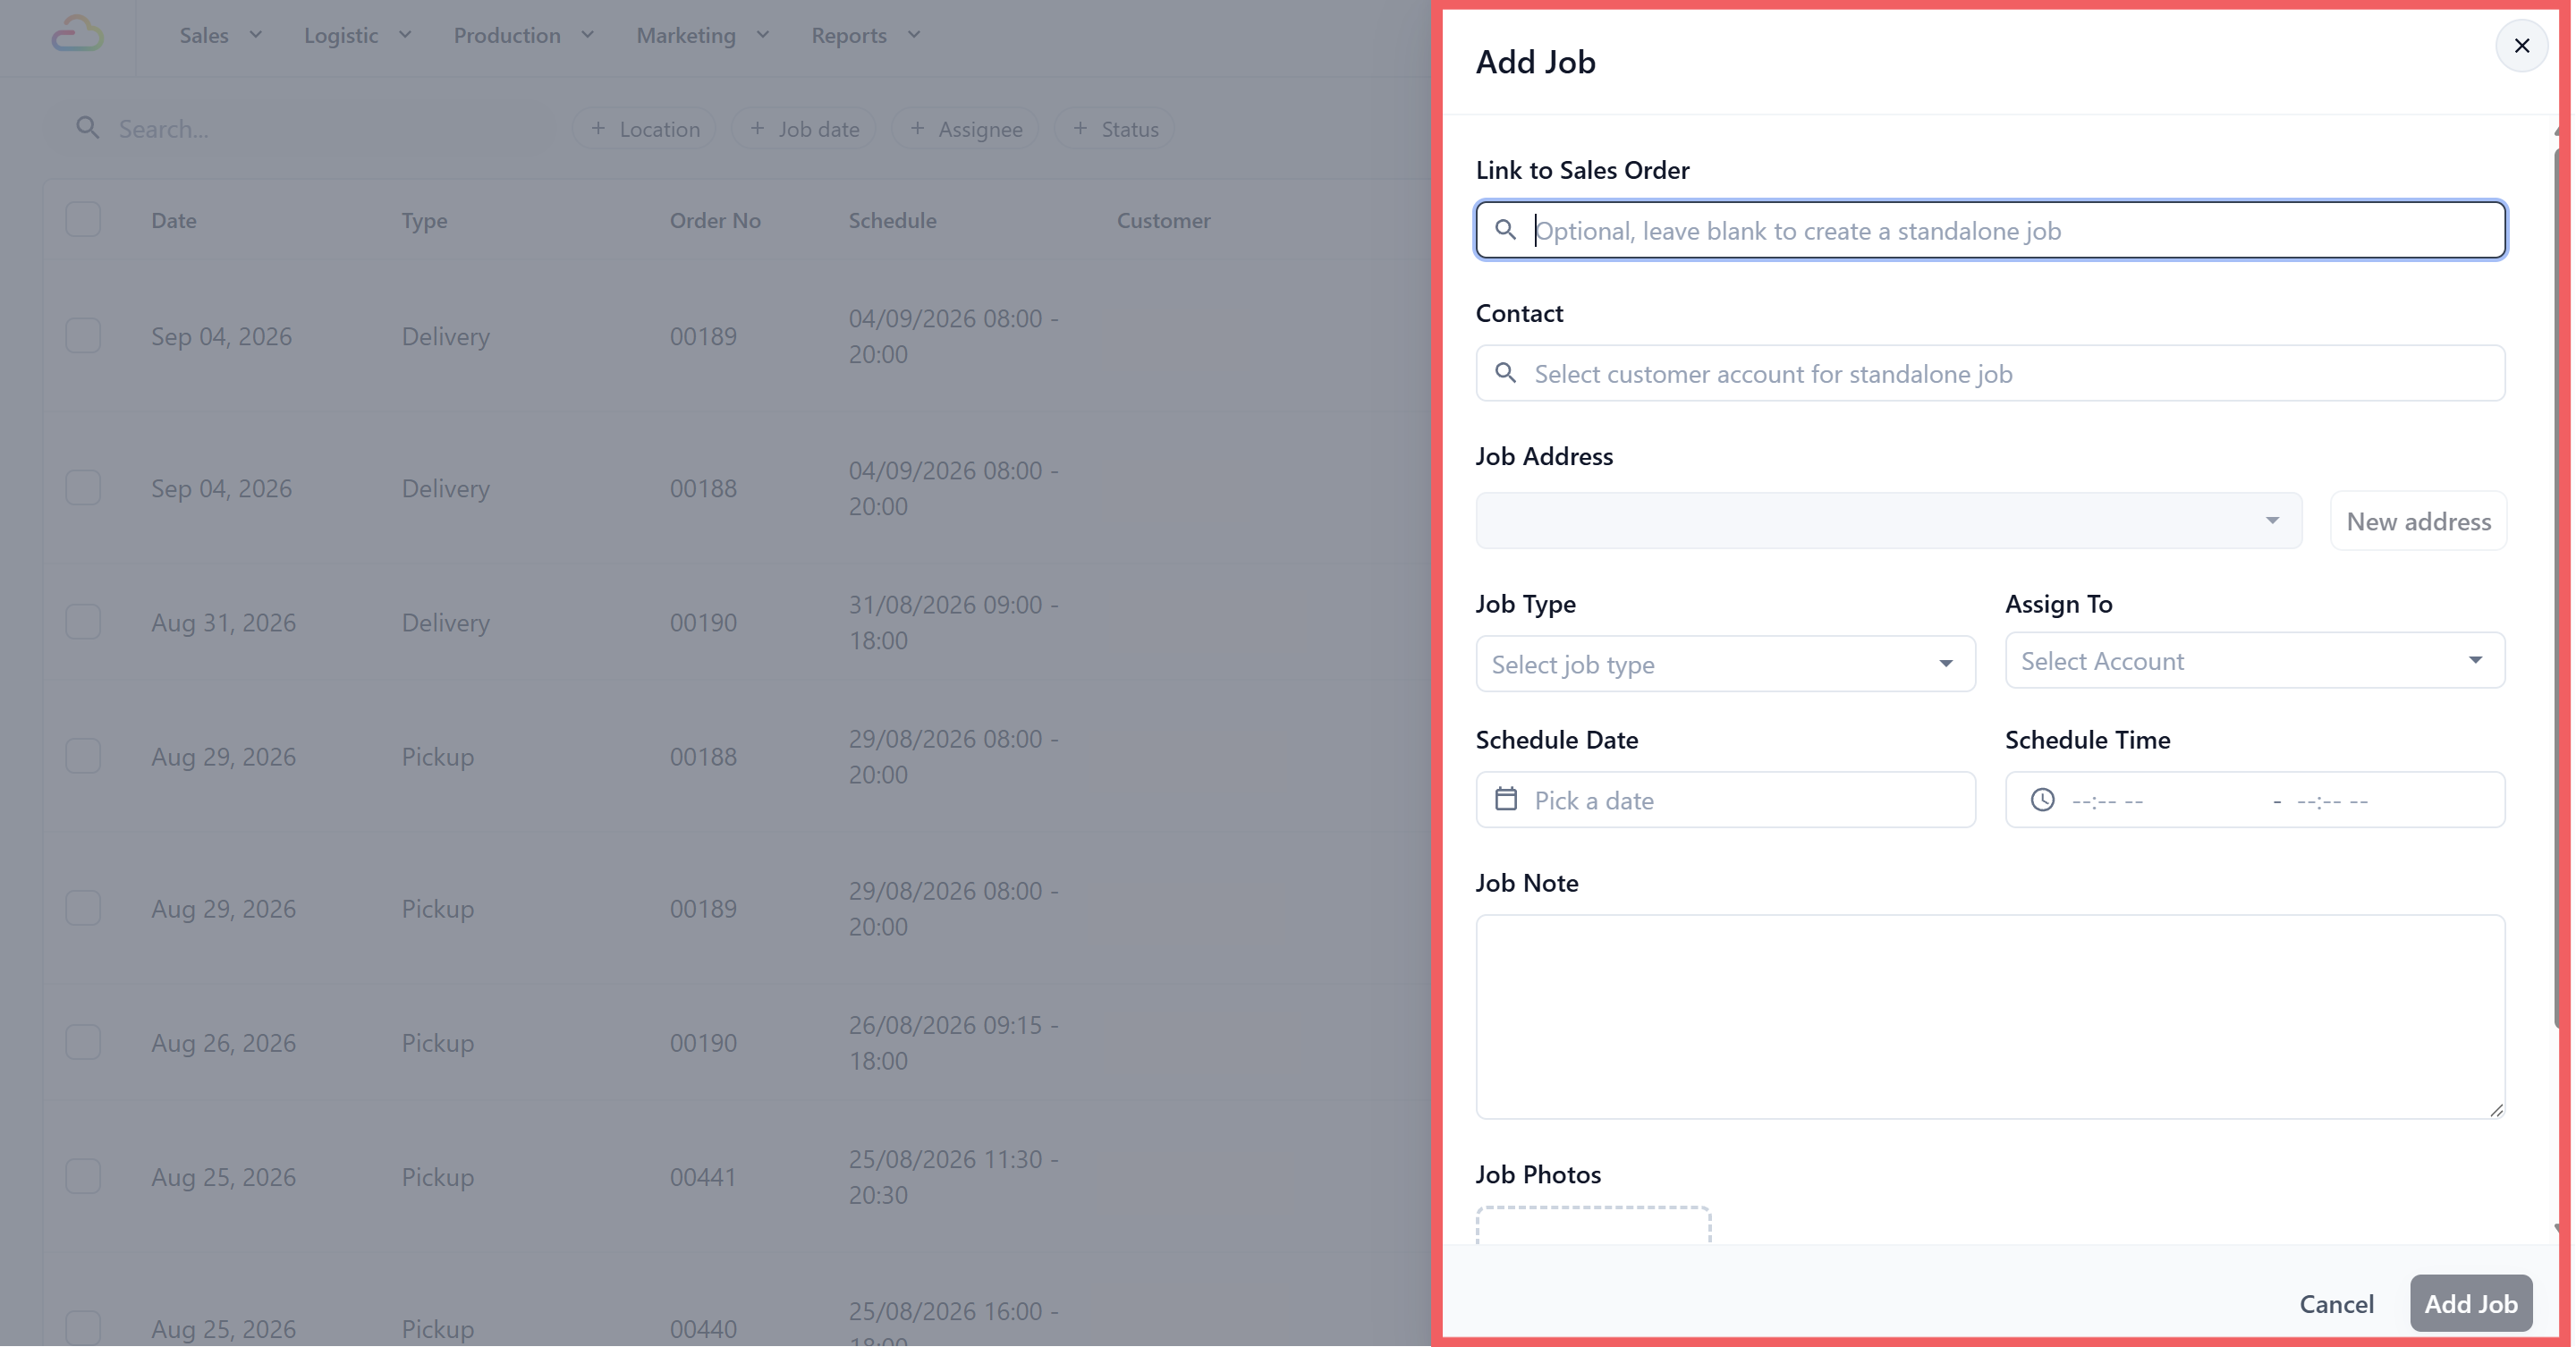
- Complete the job drawer:
Field Requirement Details Link to Sales Order Optional Search for an existing order if this job should be linked. Contact Required for a standalone job Select the customer contact for the job. Job Address Required Select an address with a pinned map location. Job Type Required Select Pickup, Delivery, or On-site service. Assign To Optional Select a Field Worker, or leave blank to keep the job Pending. Schedule Date Required Select the date of the job. Schedule Time Optional Select the scheduled time or time window. Location Required when shown This field appears when your account is assigned to more than one Location. Select the operating Location responsible for the job. Job Note Optional Add any instructions or information needed for the job. Job Photos Optional Attach reference photos or other images related to the job.
- Click Add Job.
Print and export
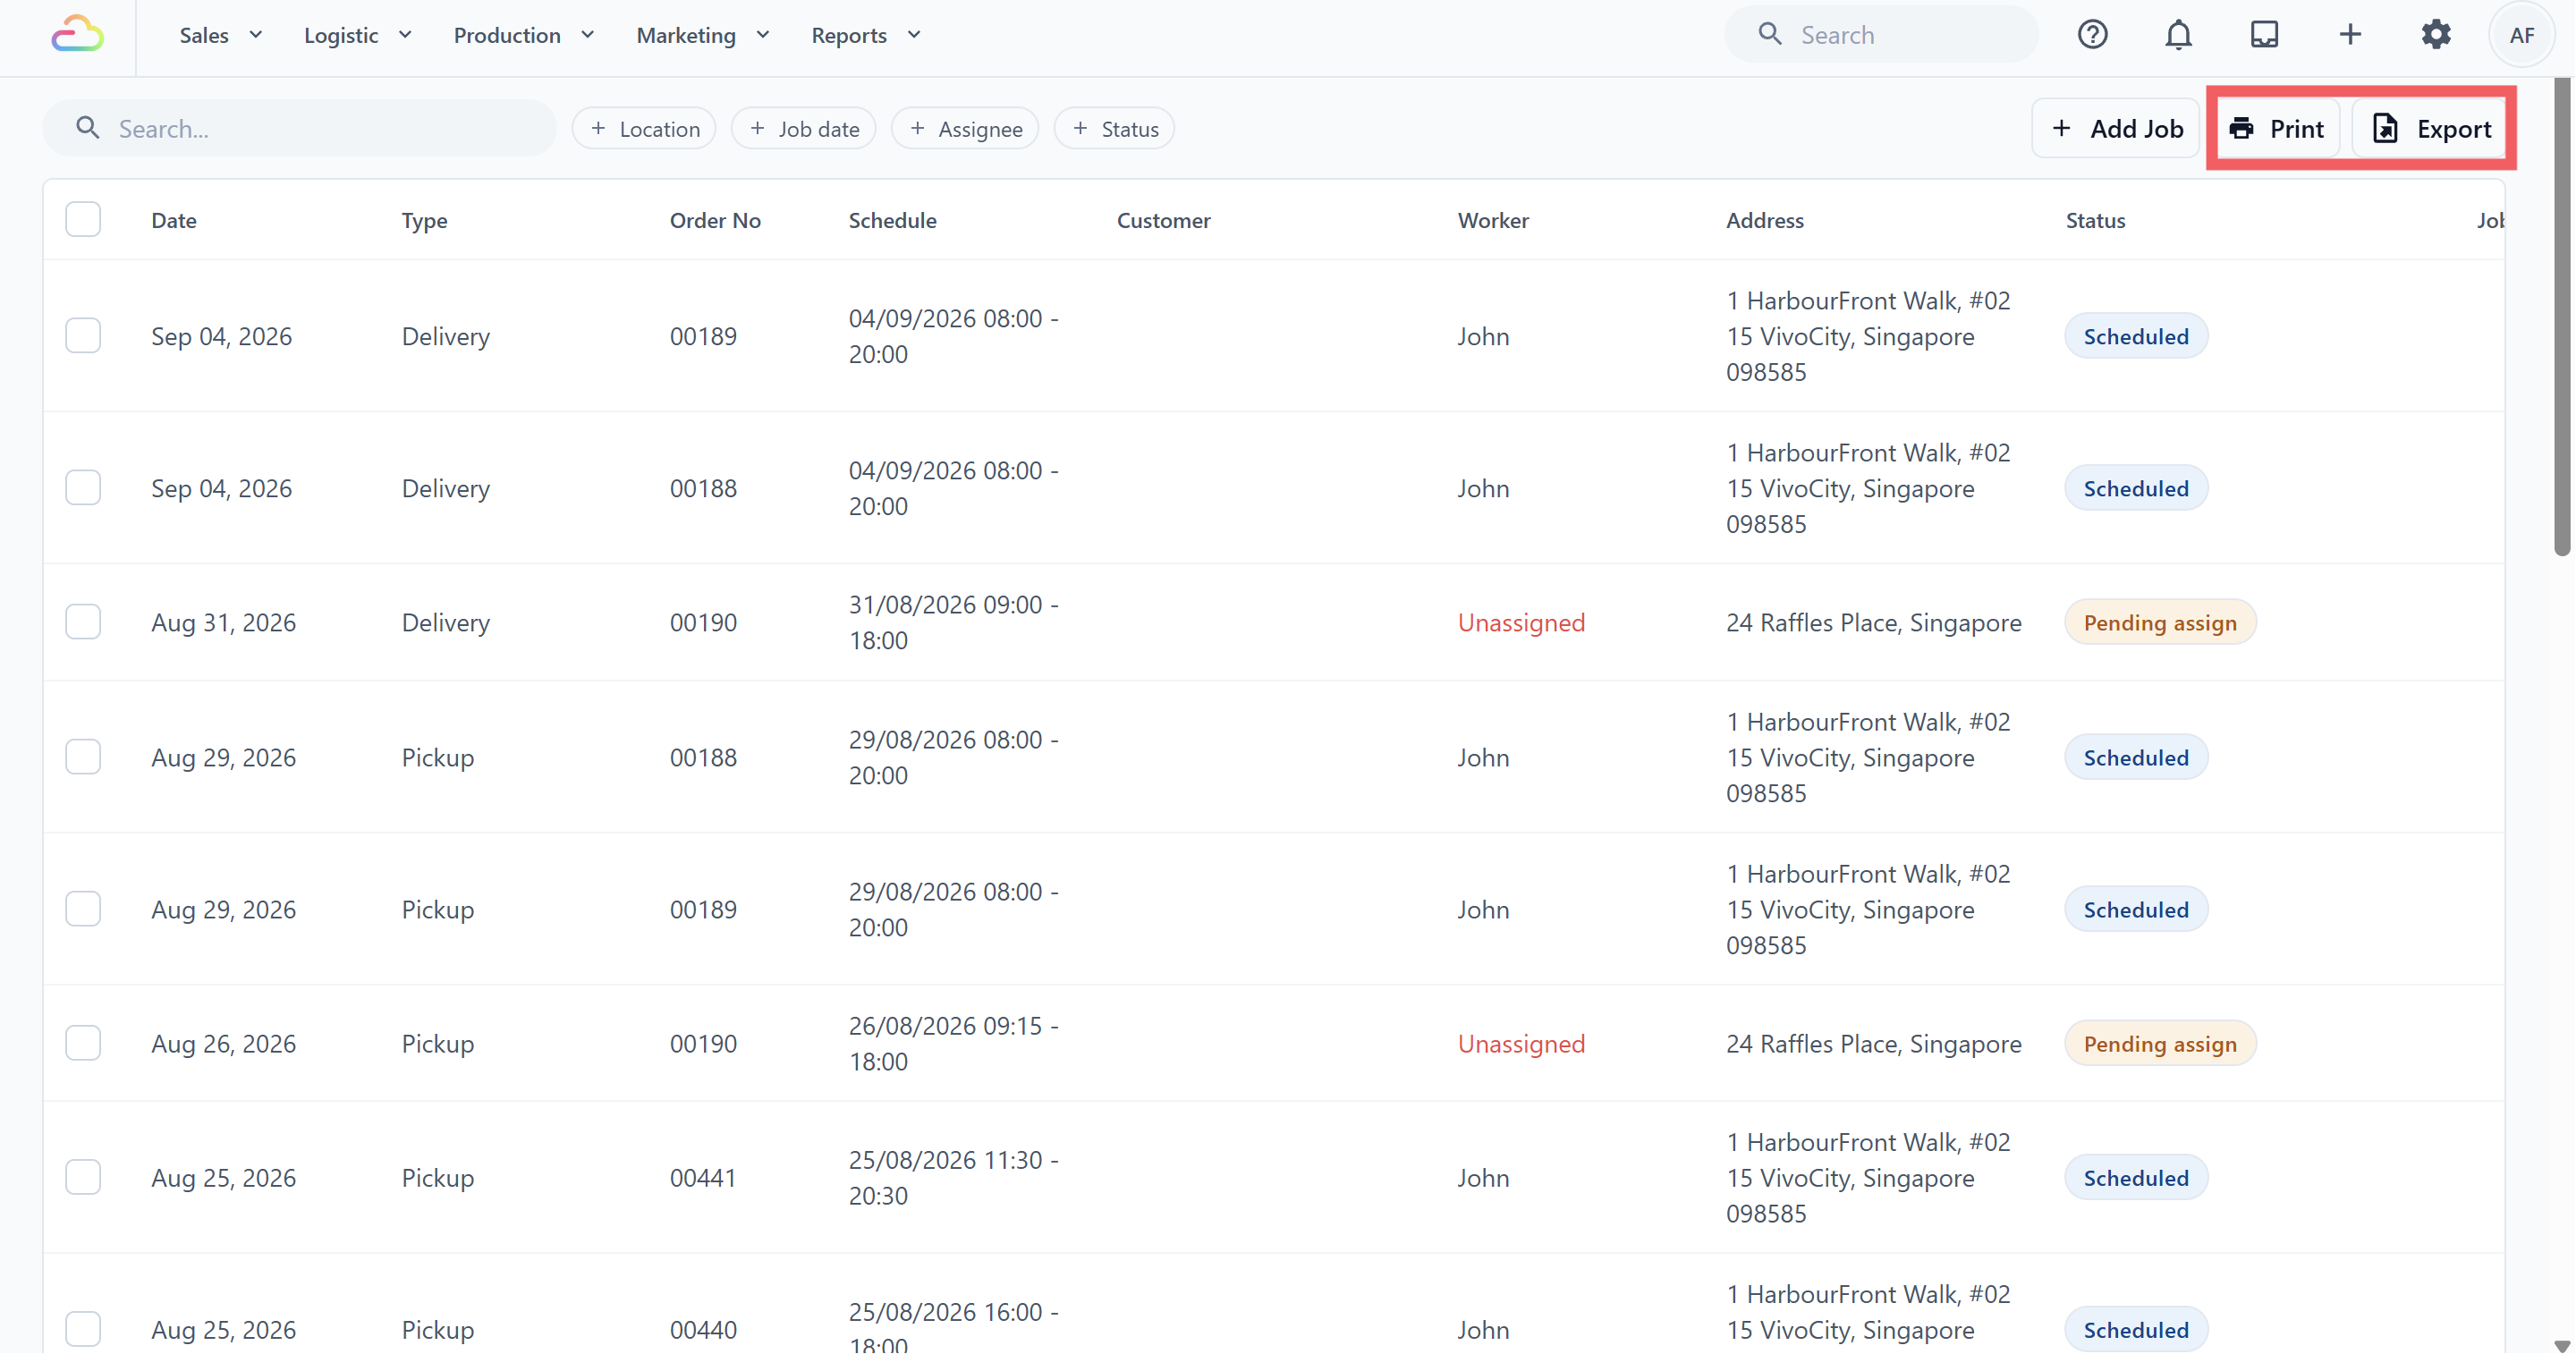
Print opens a printer-friendly version of the rows currently loaded in the table. It uses the current search and filters and includes only columns with Print Column enabled in Job Page Settings.
Before printing a run sheet:
- Select the correct Location.
- Choose the date and any other filters.
- Load any additional jobs needed.
- Click Print.
Export
Export opens the Export jobs dialog.
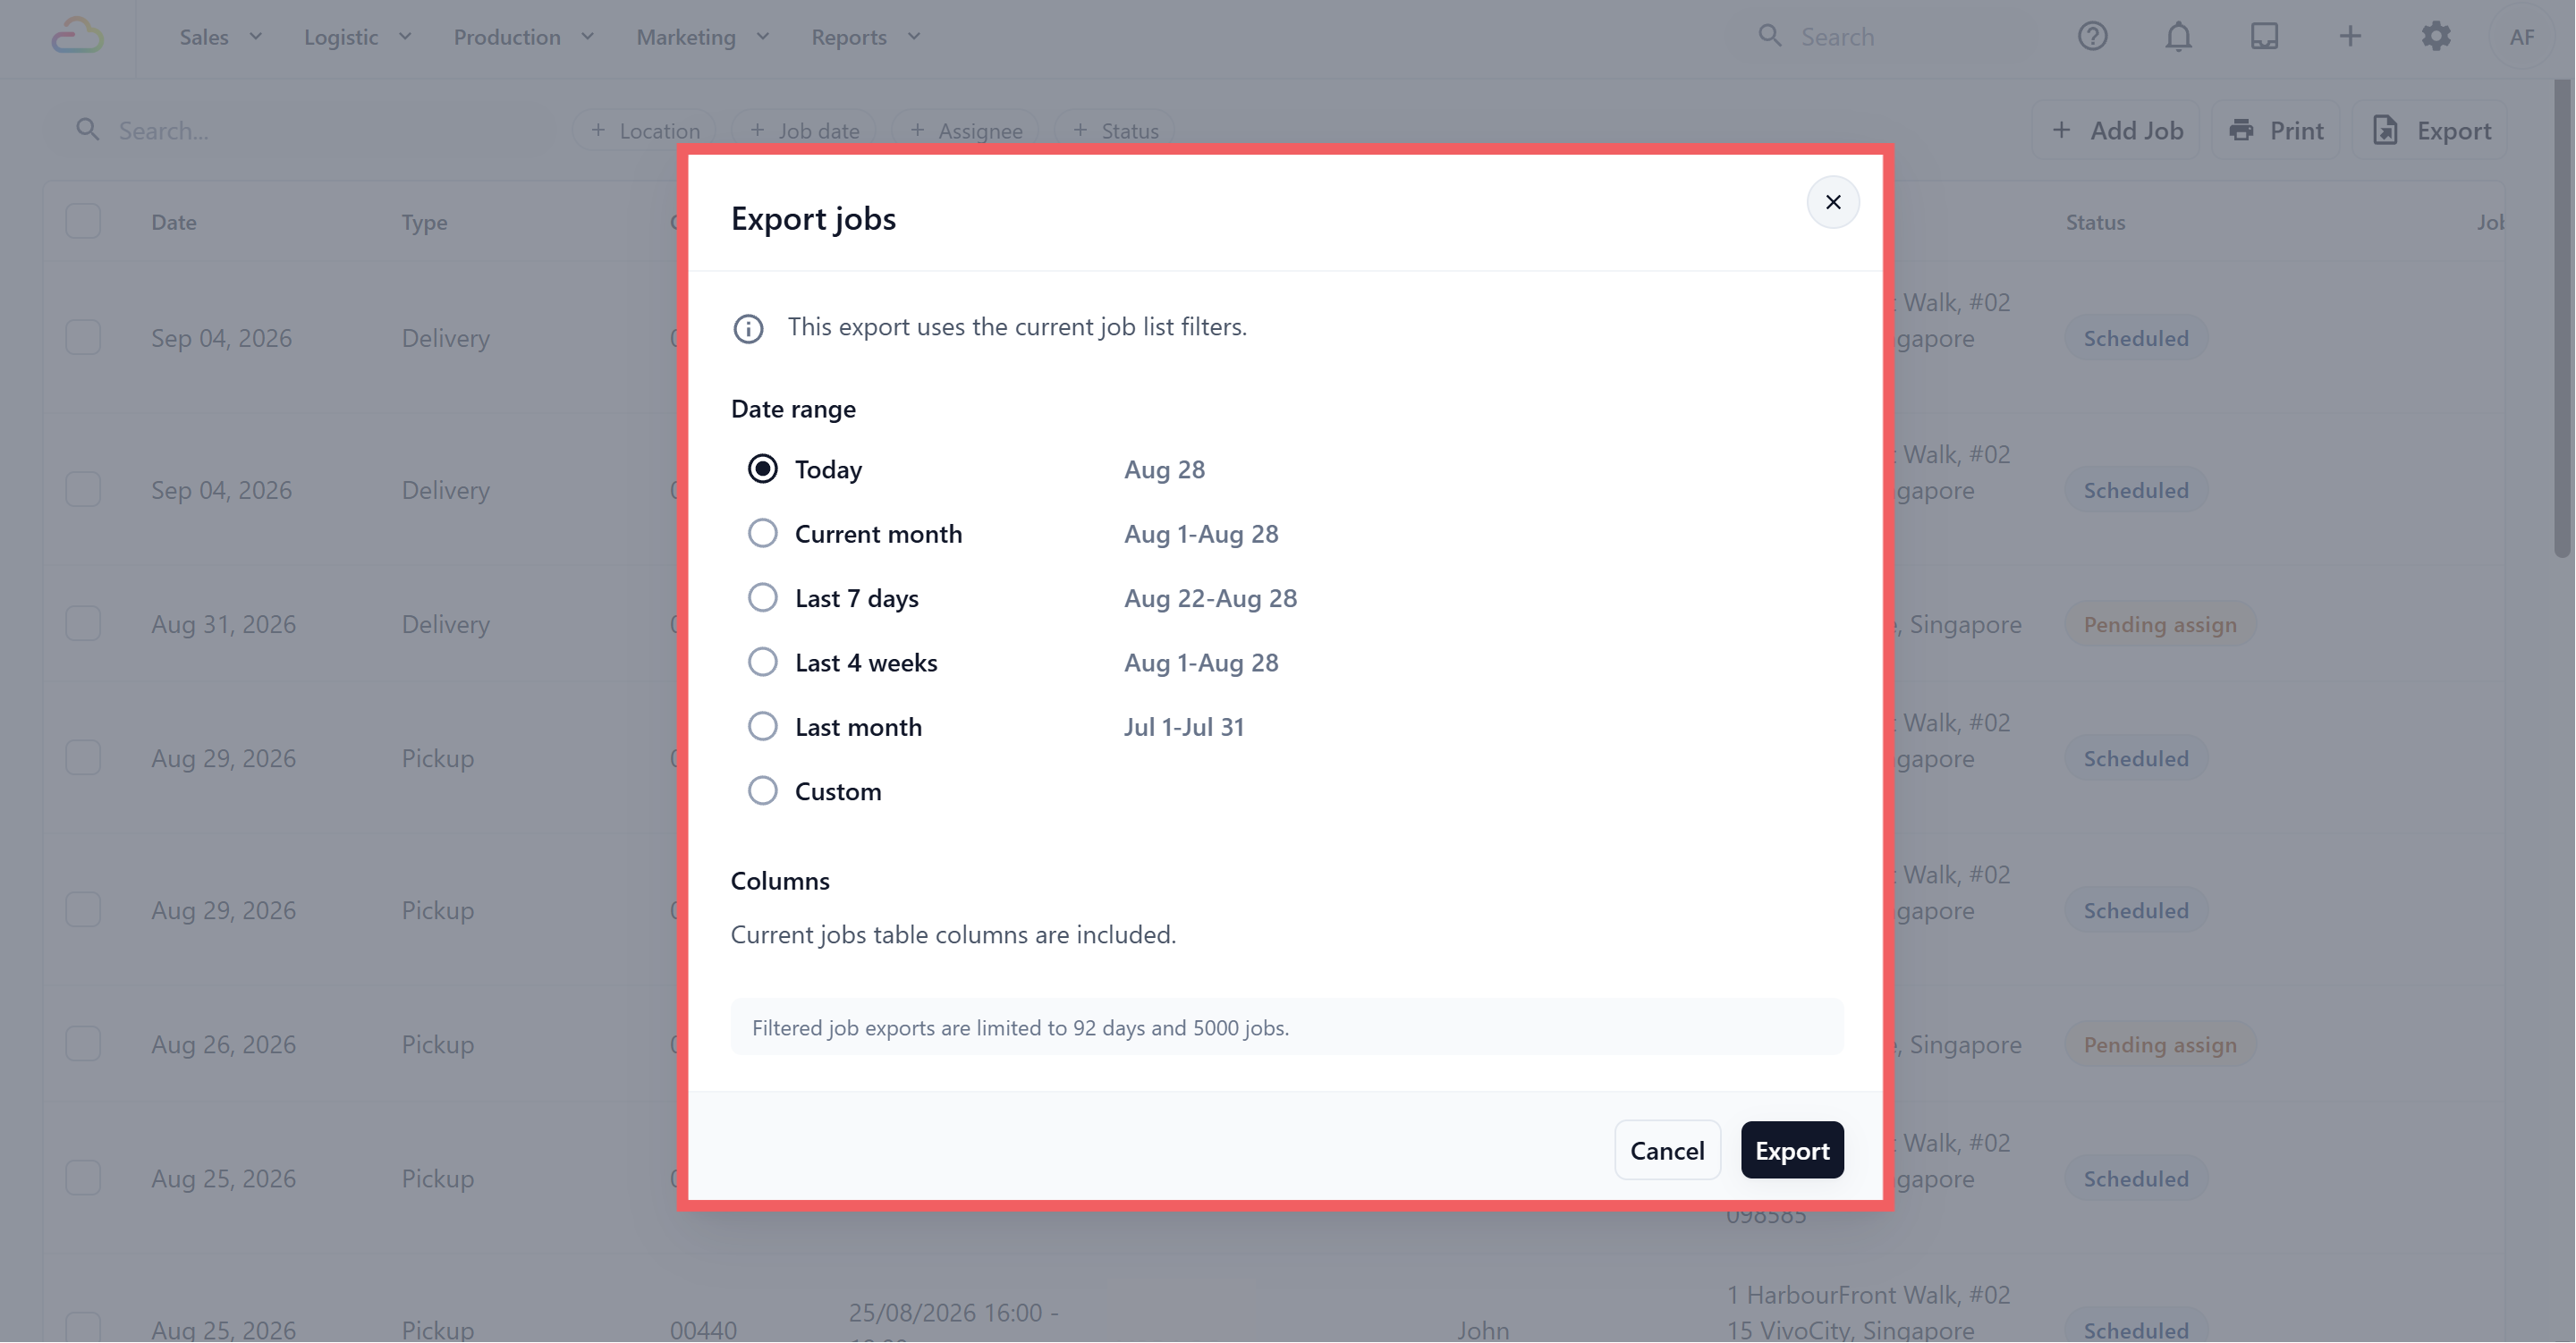
- Current Search, Location, Assignee, and Status filters are carried into the export.
- Choose Today, Current month, Last 7 days, Last 4 weeks, Last month, or a Custom date range.
- The current Job Table columns are included.
- Filtered job exports are limited to 92 days and 5,000 jobs.
- The export remains limited to the Markets and Locations your account can access.
FAQs
Why can I only see 200 jobs when there are more?
The table loads in batches to stay fast. Look at the loaded total at the top. Narrow your date range or use a filter to see more.
My driver's name is missing from the Worker dropdown. Why?
The driver needs a teammate account with app access turned on. The Worker dropdown is built from this list, so a teammate without app access will not appear here. See Inviting Your Team and Managing Access.
Can I change a job's status to Failed from the table?
No. The table only lets you mark jobs as Completed. To set a job to Failed or Cancelled, open the job and use the action menu inside it.
I made edits but lost them. What happened?
Edits are only saved when you click Batch Save. If you refreshed or moved away first, the edits were dropped.
If I edit a job here, does it change the linked customer order?
The link goes one way. The job knows which order it came from, but editing the job's schedule, address, or worker does not change the original order. If the customer's order details change, edit the order itself.
Do I need the Job Table if my drivers use the mobile app?
Yes. The mobile app is for the drivers themselves. The Job Table is for you and your office staff to plan, reassign, and check on the work. They stay in sync automatically.
What's next
Now that you can read and update the Job Table, see Setting Up the Job Map to view the same jobs on a calendar or map, drag them around to reschedule, and track where your drivers are.