
Before You Start
- Read Introduction to Cards first, so you know what a card is and where staff see it.
- Make sure your shop has at least one order. The preview draws order cards and cart item cards with a real order, so a brand-new shop sees "The preview draws the card with an order. It shows once the shop has one." until the first order comes in. Contact cards don't need an order.
- You need access to the POS settings in ⚙️ Settings. The Cards page sits next to them.
- If you set this up before: details your POS pages already showed under an order, item or contact were moved into cards for you, named after their page, for example "Cart item card (Checkout)". You can open and edit those cards here.
Choose your setup
| Level | Fits shops like | What you set up | Read these sections |
|---|---|---|---|
| Easy | One counter where staff mostly need to recognise the customer, such as CleanFast Laundry's Tampines shop | One contact card with the customer's phone number and the note your staff keep | Where to find it, Setting it up, What staff see |
| Intermediate | A shop that takes different kinds of items at the counter, such as laundry and bag repairs, and checks item photos on the order | Everything in Easy, plus an order card for the Orders list and a cart item card with its photo and status switches | Everything in Easy, plus Cart item card switches and Example setup |
With the Easy setup, your staff see the customer's details as soon as they pick the customer at checkout. Every other page keeps showing the ready-made System Default card, and you can add more cards later.
Overview
A card decides which extra details staff see under a record's name, such as an order in the Orders list, a customer at checkout, or an item in the cart. You make each card once in the Console and then choose it on the pages that should show it. This article covers the three cards most shops start with: order cards, contact cards and cart item cards. You write what the card shows, check it straight away in a live preview with one of your own orders, and save it. Every page that uses the card then shows the same details.
Where it works
- Console: you make and edit cards in Settings, and the Console's Checkout can use your contact and cart item cards.
- POS: order cards show in the Orders list, contact cards under the customer's name in the Checkout cart, and cart item cards under each item's name in the cart.
- Staff apps: order cards show in a staff app's Order List, and contact cards in its Contact List.
Cards are for your staff only. Customers never see them.
Why set it up
Without your own cards, staff see only the basics, such as the customer's name or the item's name. They then open the customer or order to check a phone number, a note or a bag count, one tap away from every sale. A card puts those details on the row itself, so staff spot a returning customer's preferences or a missing bag at a glance.
If you skip it, nothing breaks. Every page keeps showing the System Default card until you make a card and choose it on that page.
Where to find it
- Click the ⚙️ Settings icon in the top-right corner.
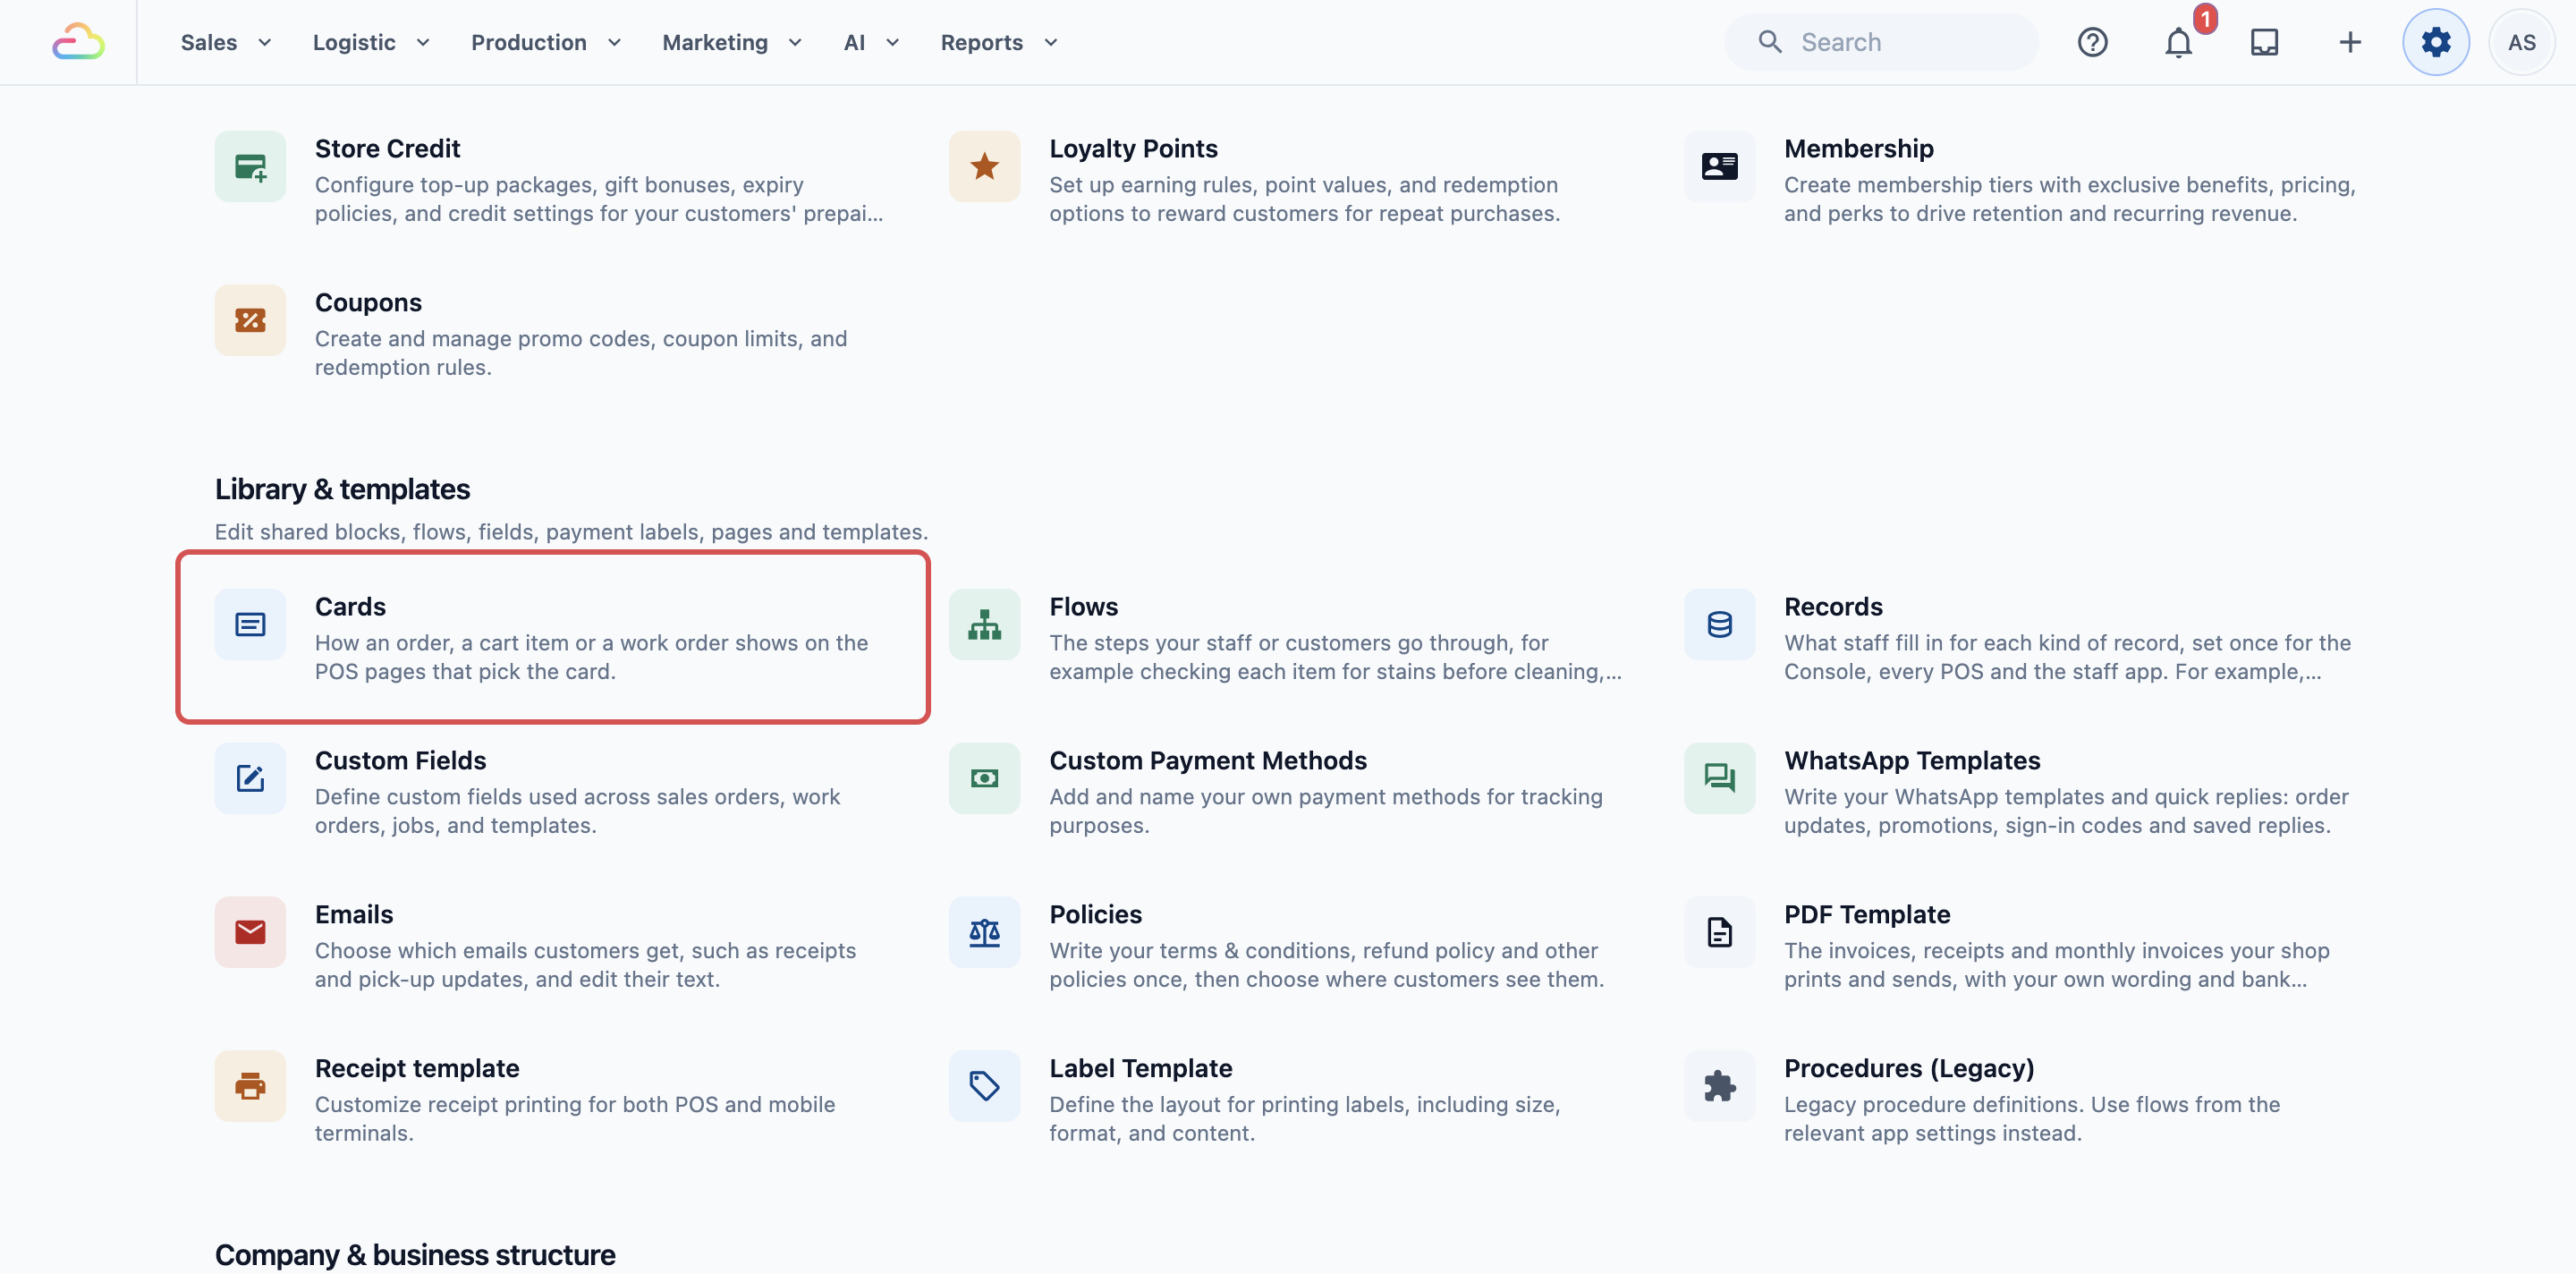
- Under the Library section, click Cards.
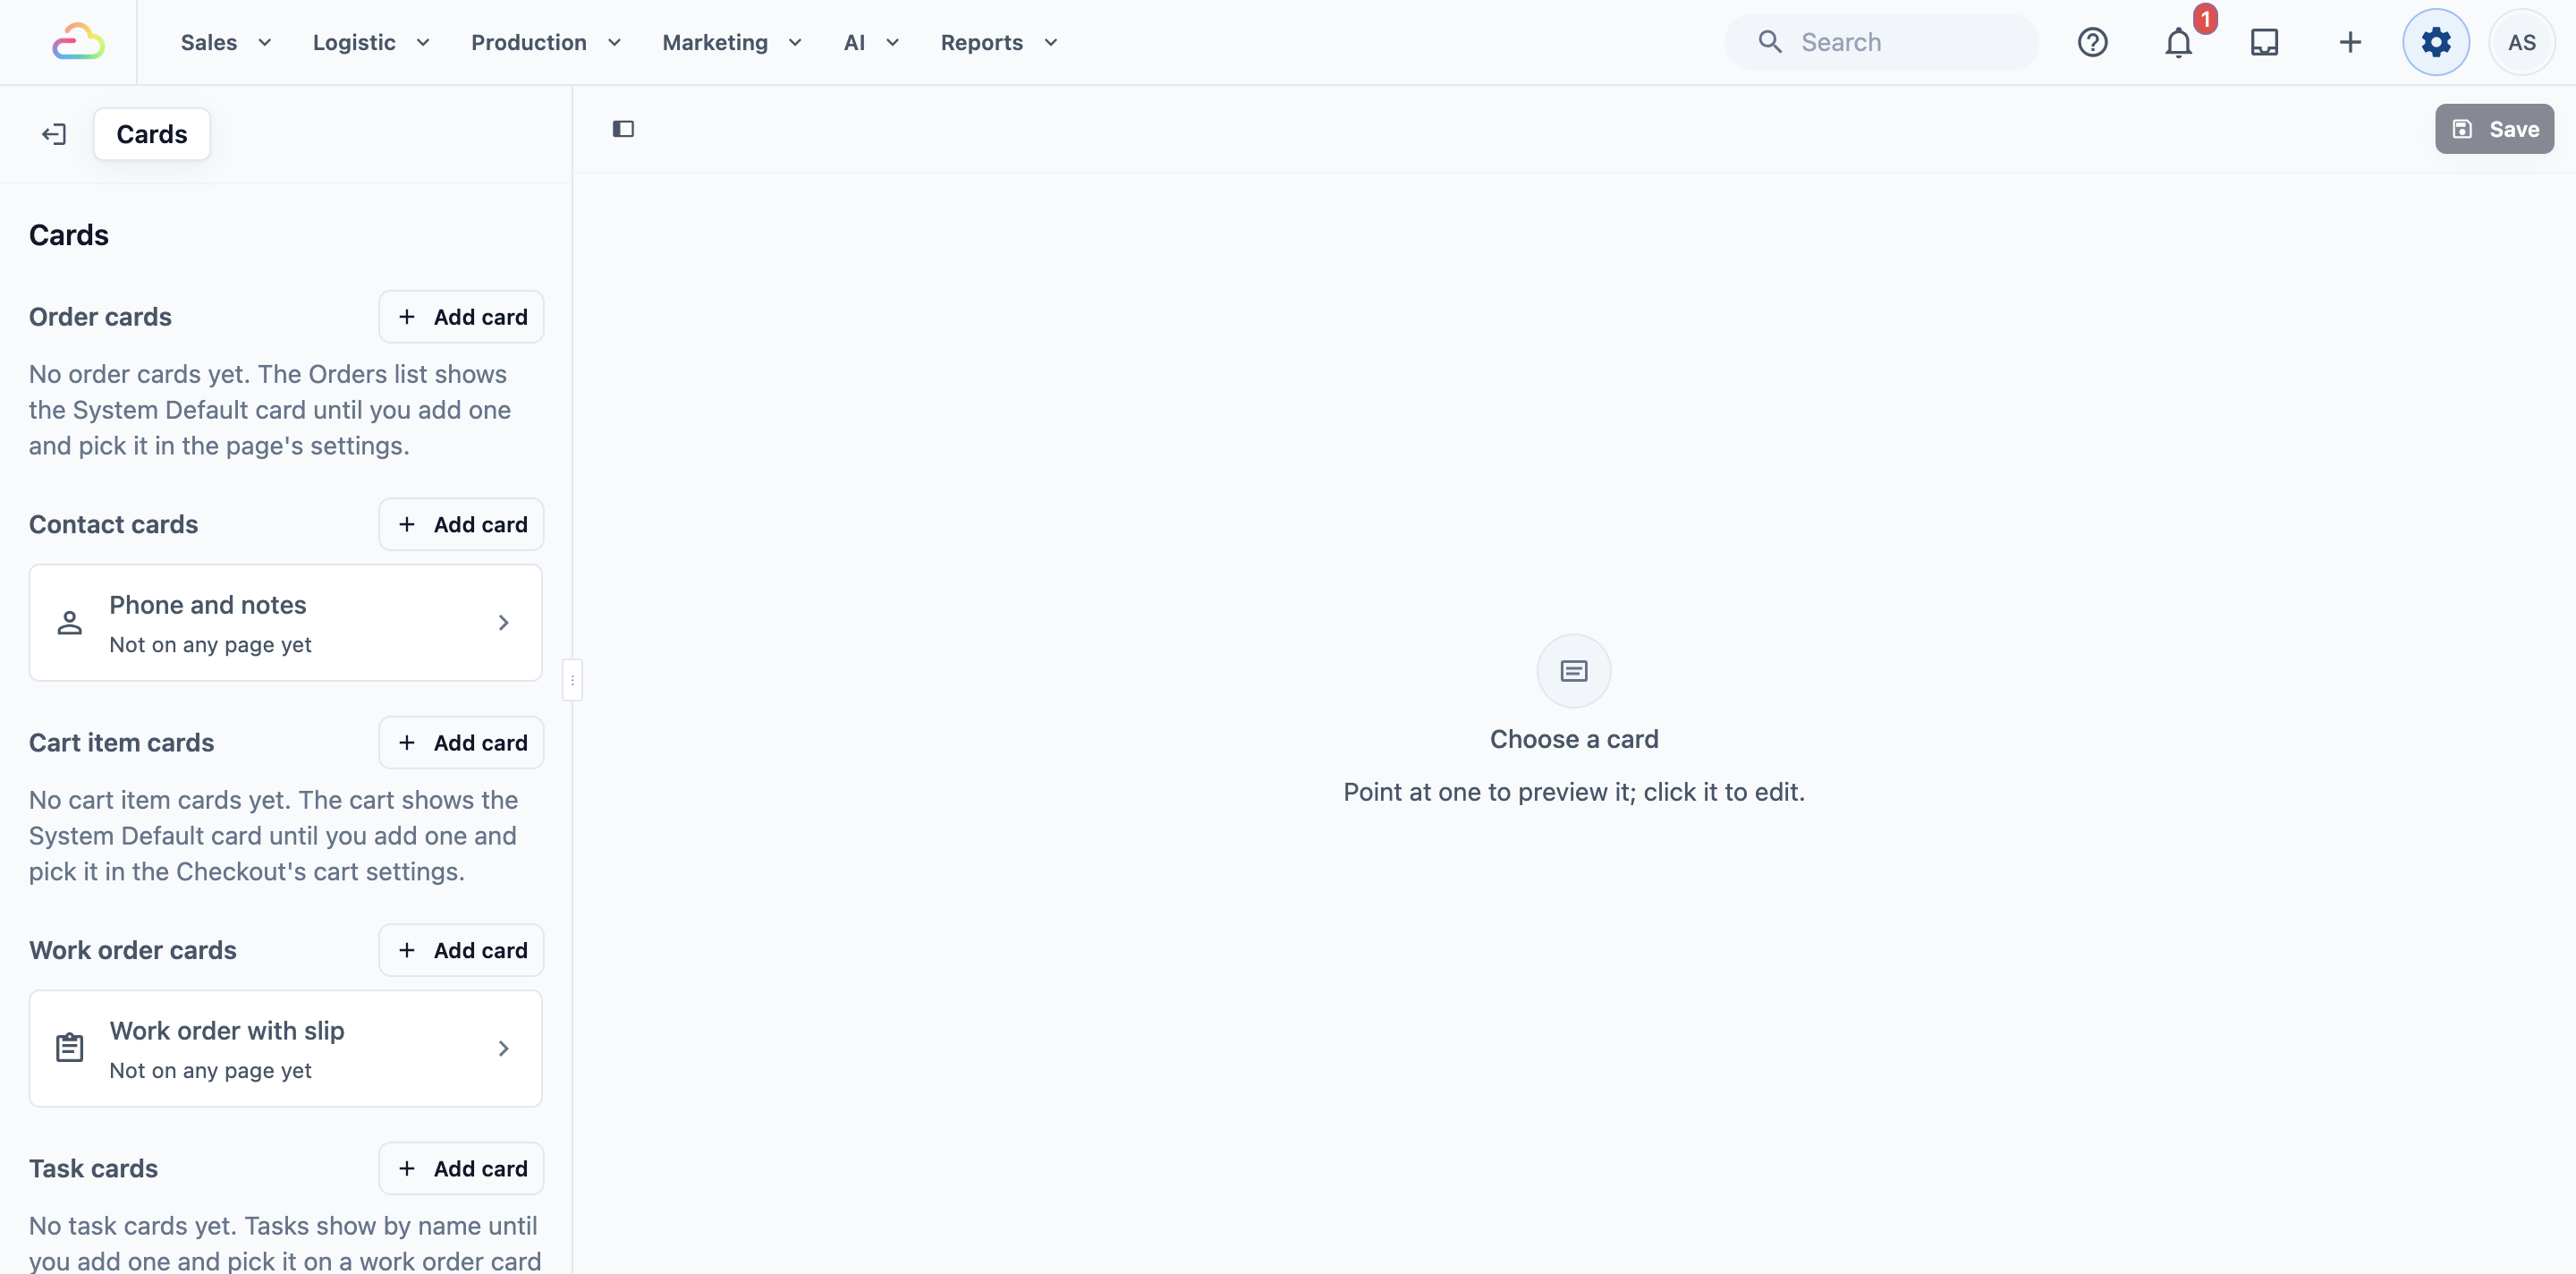
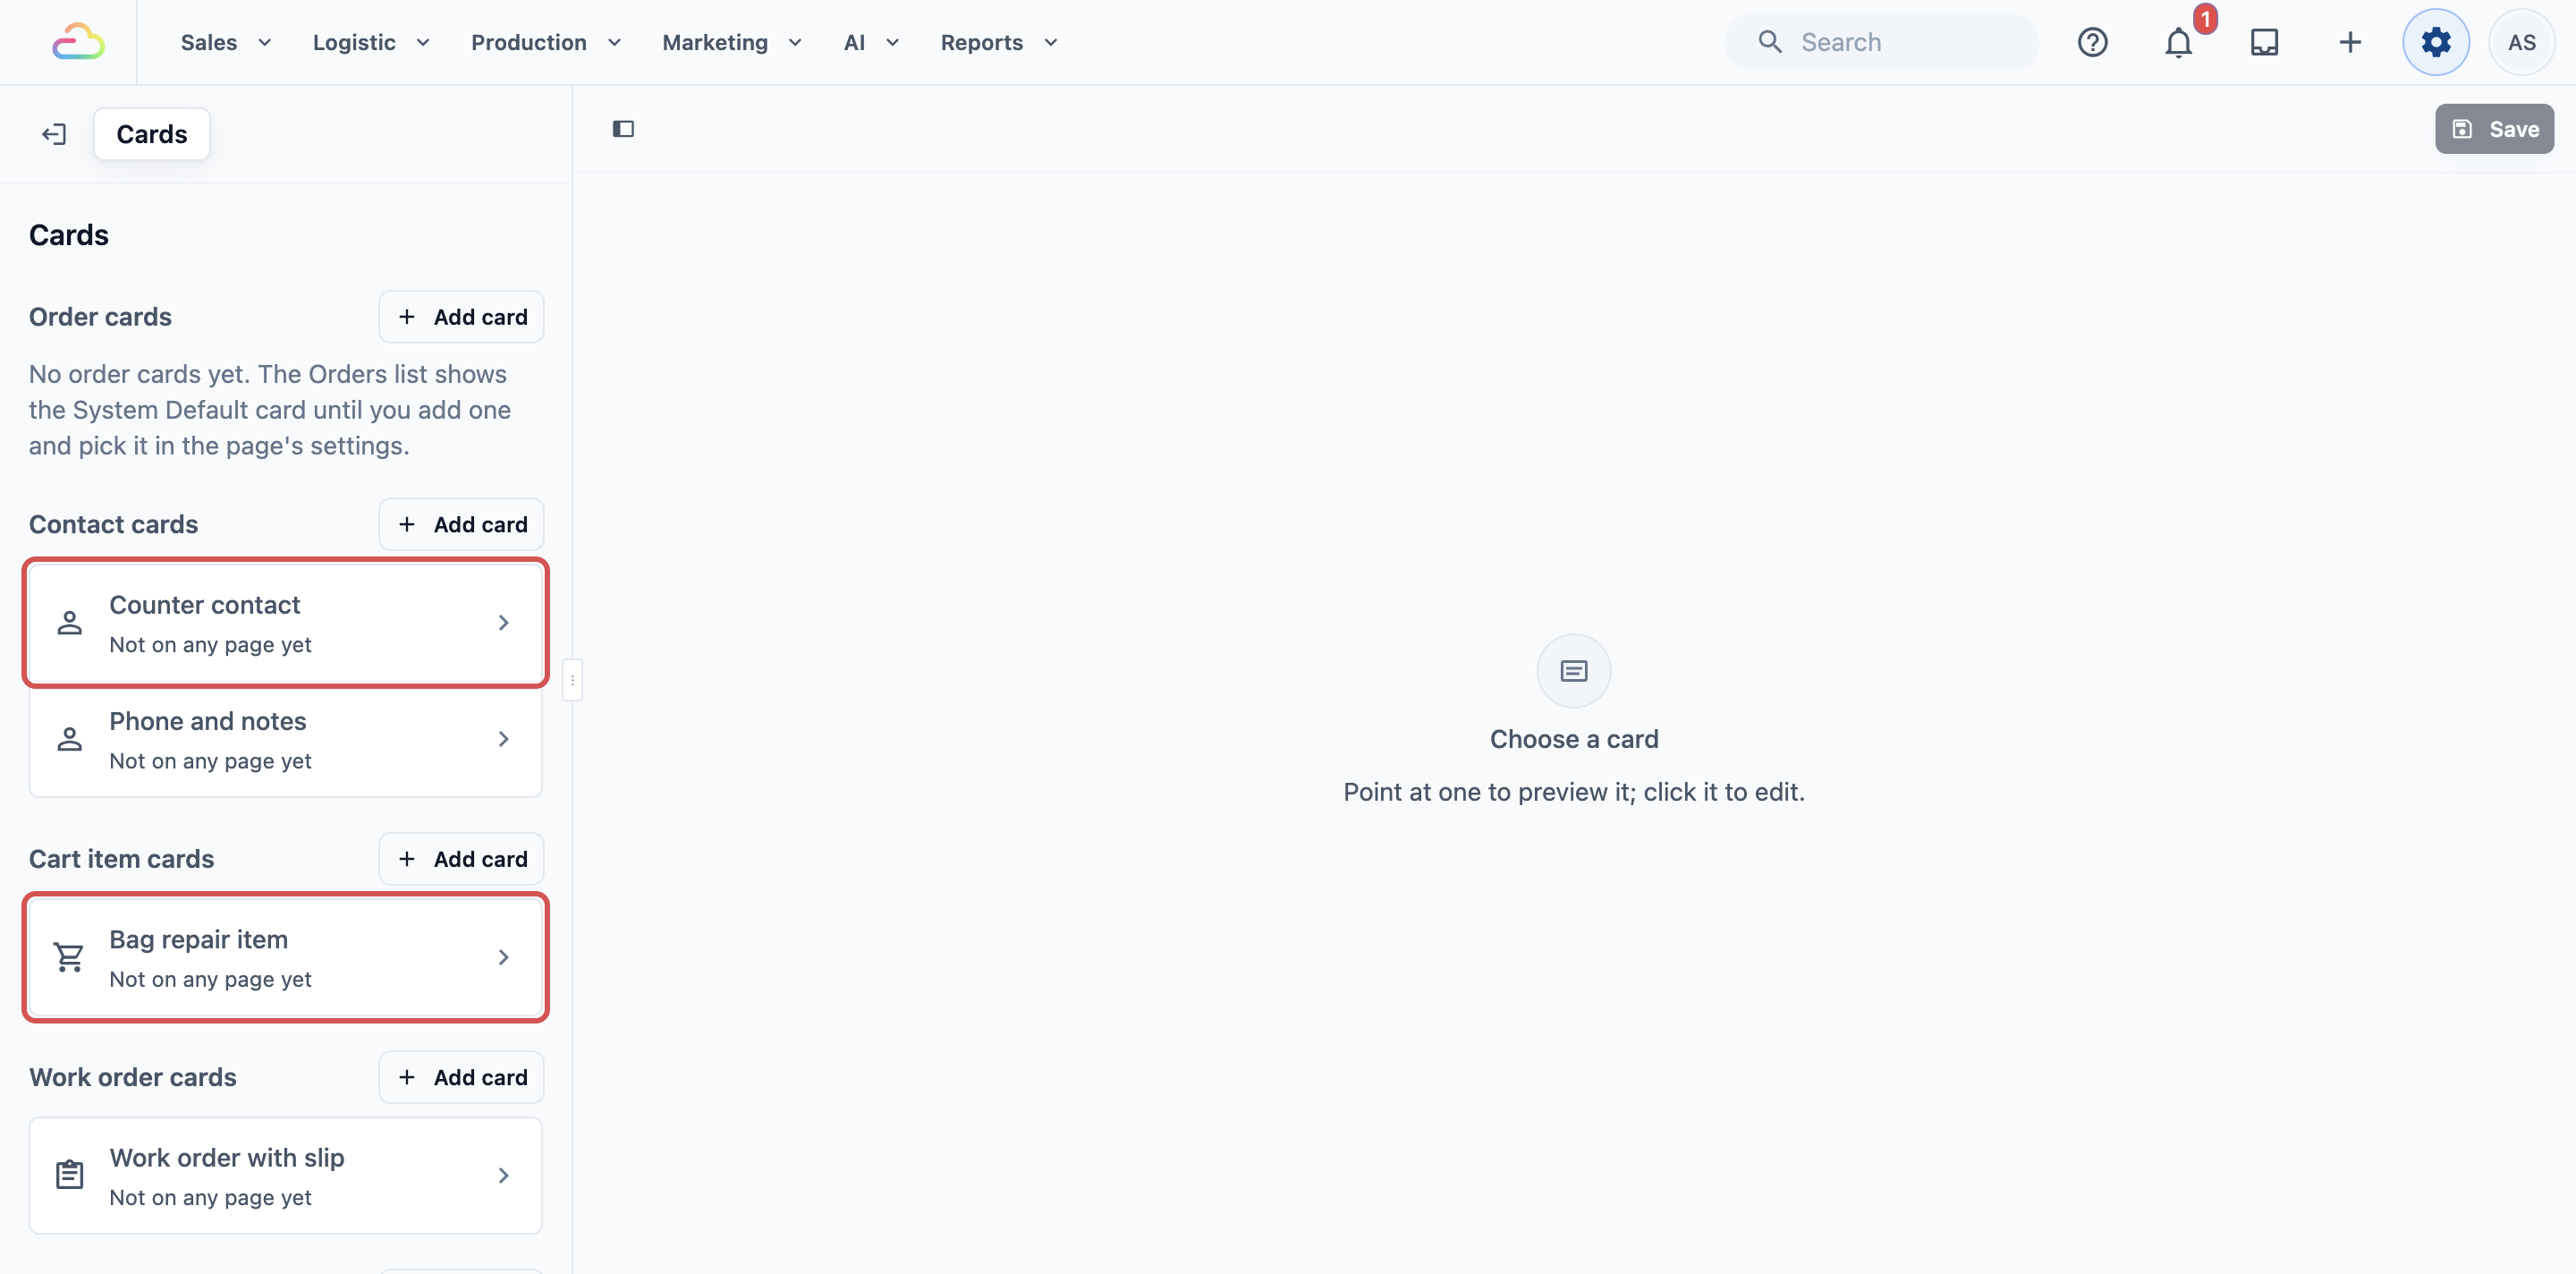
The Cards page opens. On the left, your cards are listed by type: Order cards, Contact cards, Cart item cards, Work order cards, Task cards and Job cards. Each card shows where it is used, and the right side is the preview.
Until you point at a card, the preview says "Choose a card" with "Point at one to preview it; click it to edit." Hover over any card in the list to preview it, and click it to open it.
This article covers order, contact and cart item cards. Work order and task cards are in Setting Up Work Order and Task Cards.
Setting it up
Add a card
- Find the card type you want, for example Contact cards.
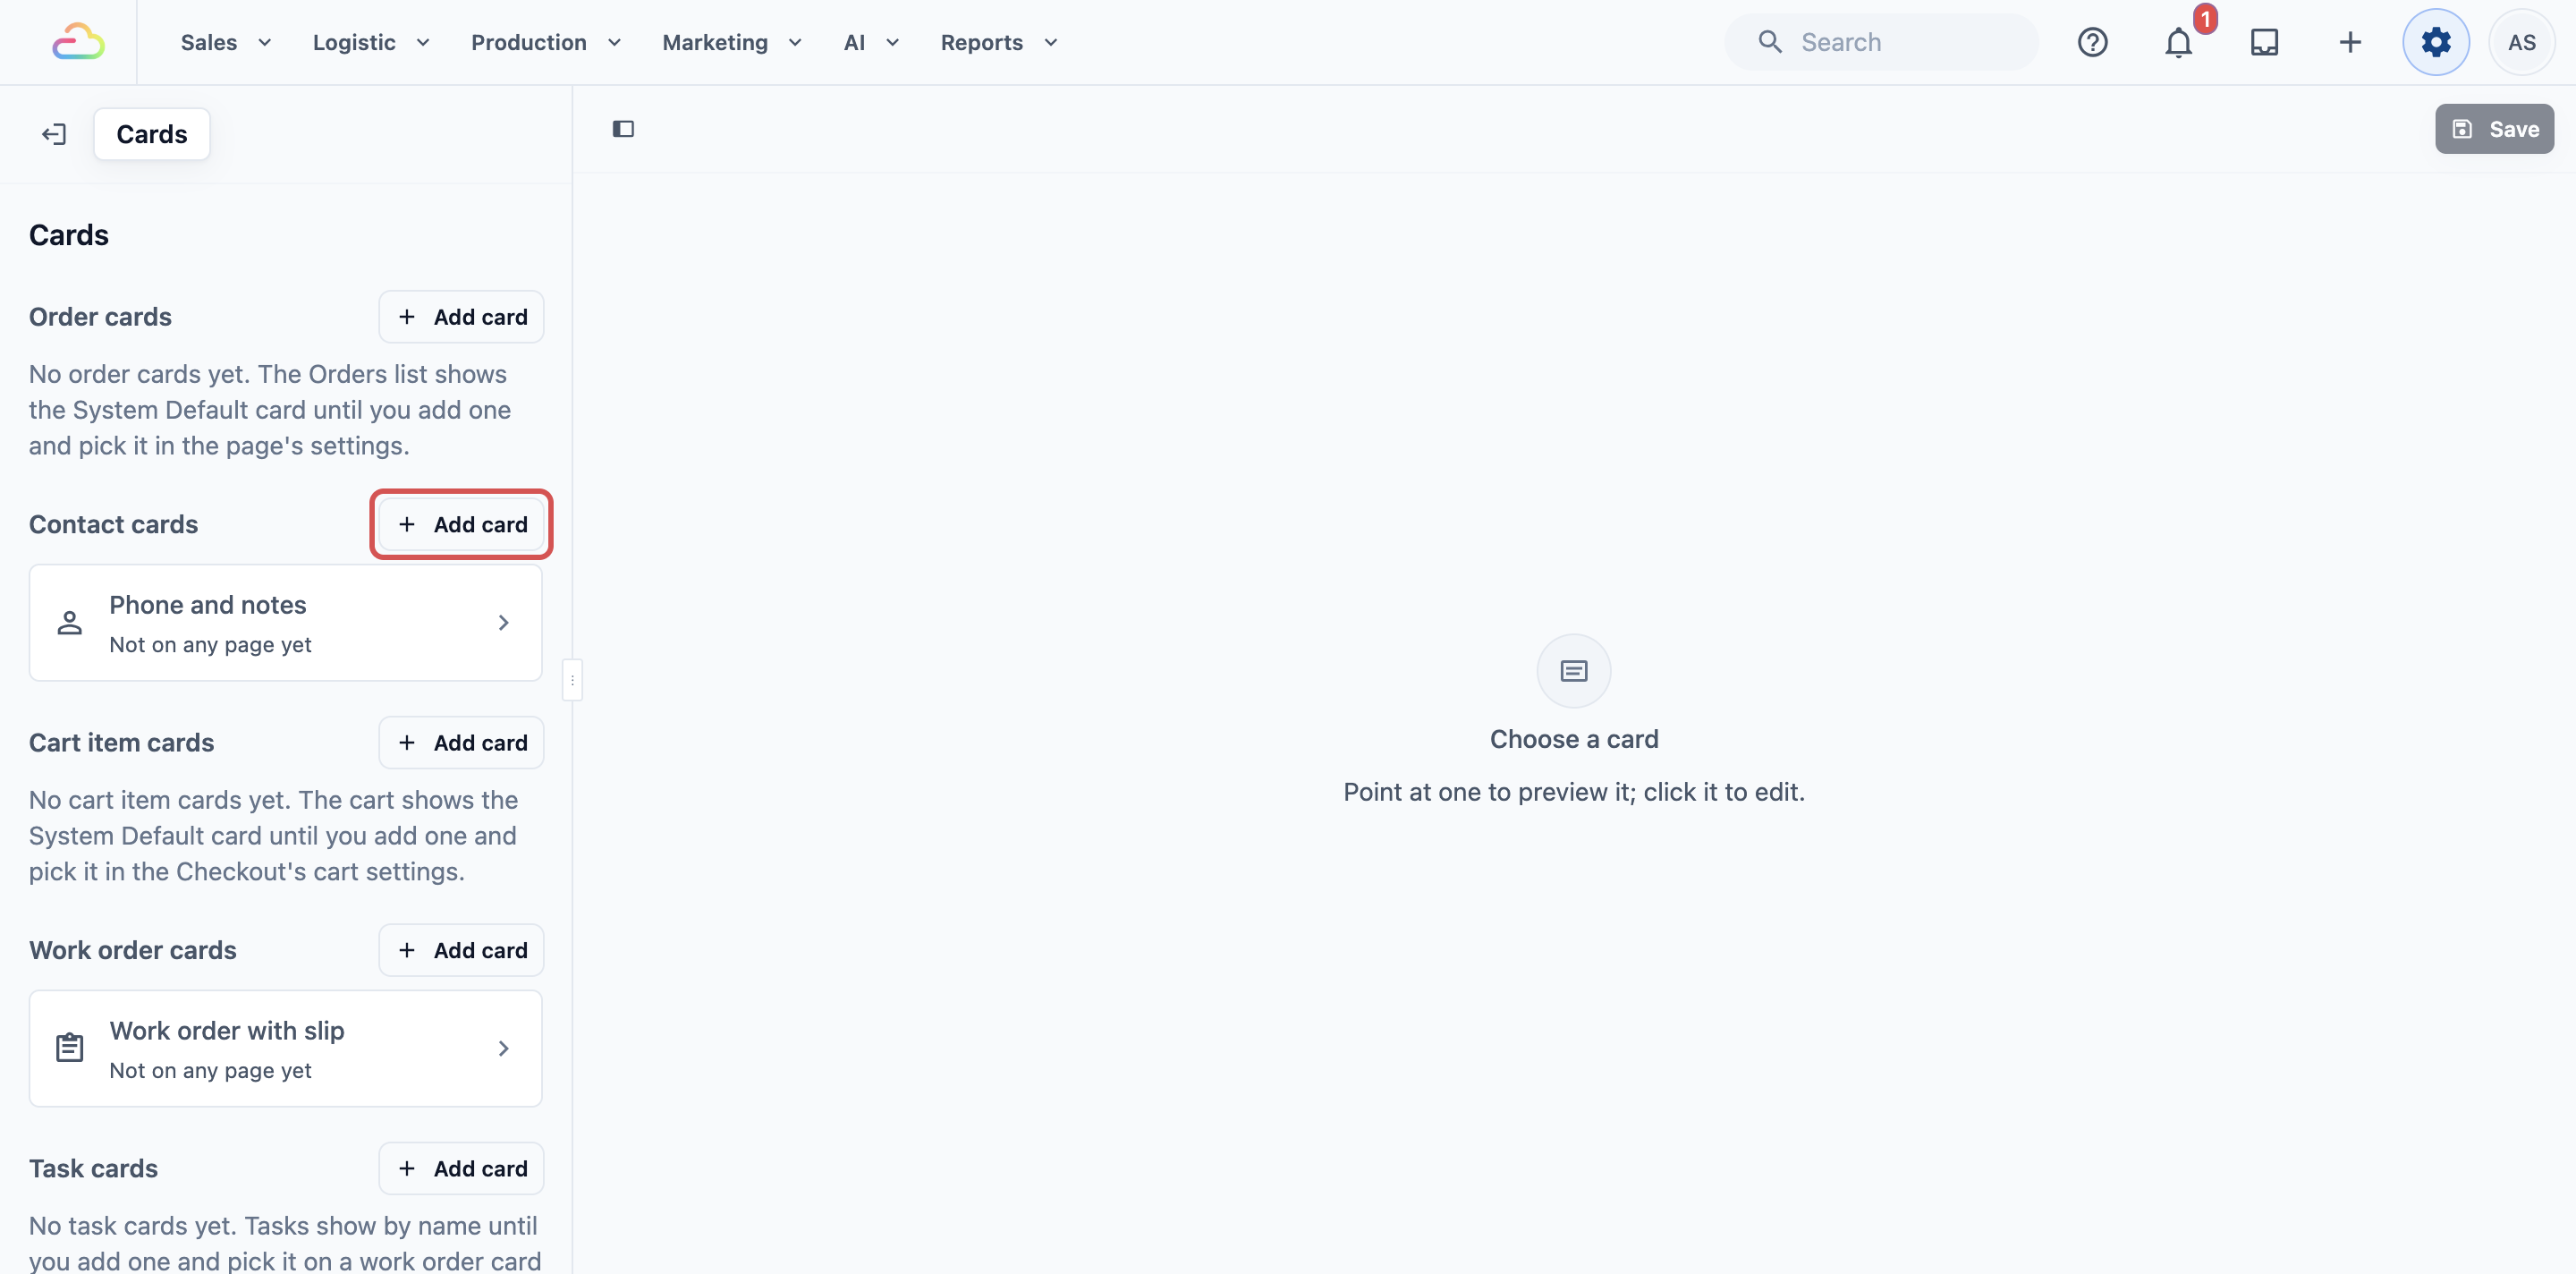
- Click Add card next to its heading.
The new card opens straight away with a numbered name, for example "Contact card 1". The next contact card you add is "Contact card 2", and so on.
| Card type | What it changes |
|---|---|
| Order card | How each order shows in the Orders list |
| Contact card | How a contact shows under their name, in the Checkout cart and in a staff app's Contact List |
| Cart item card | How each item shows in the Checkout cart, under its name |
Name the card and choose its details
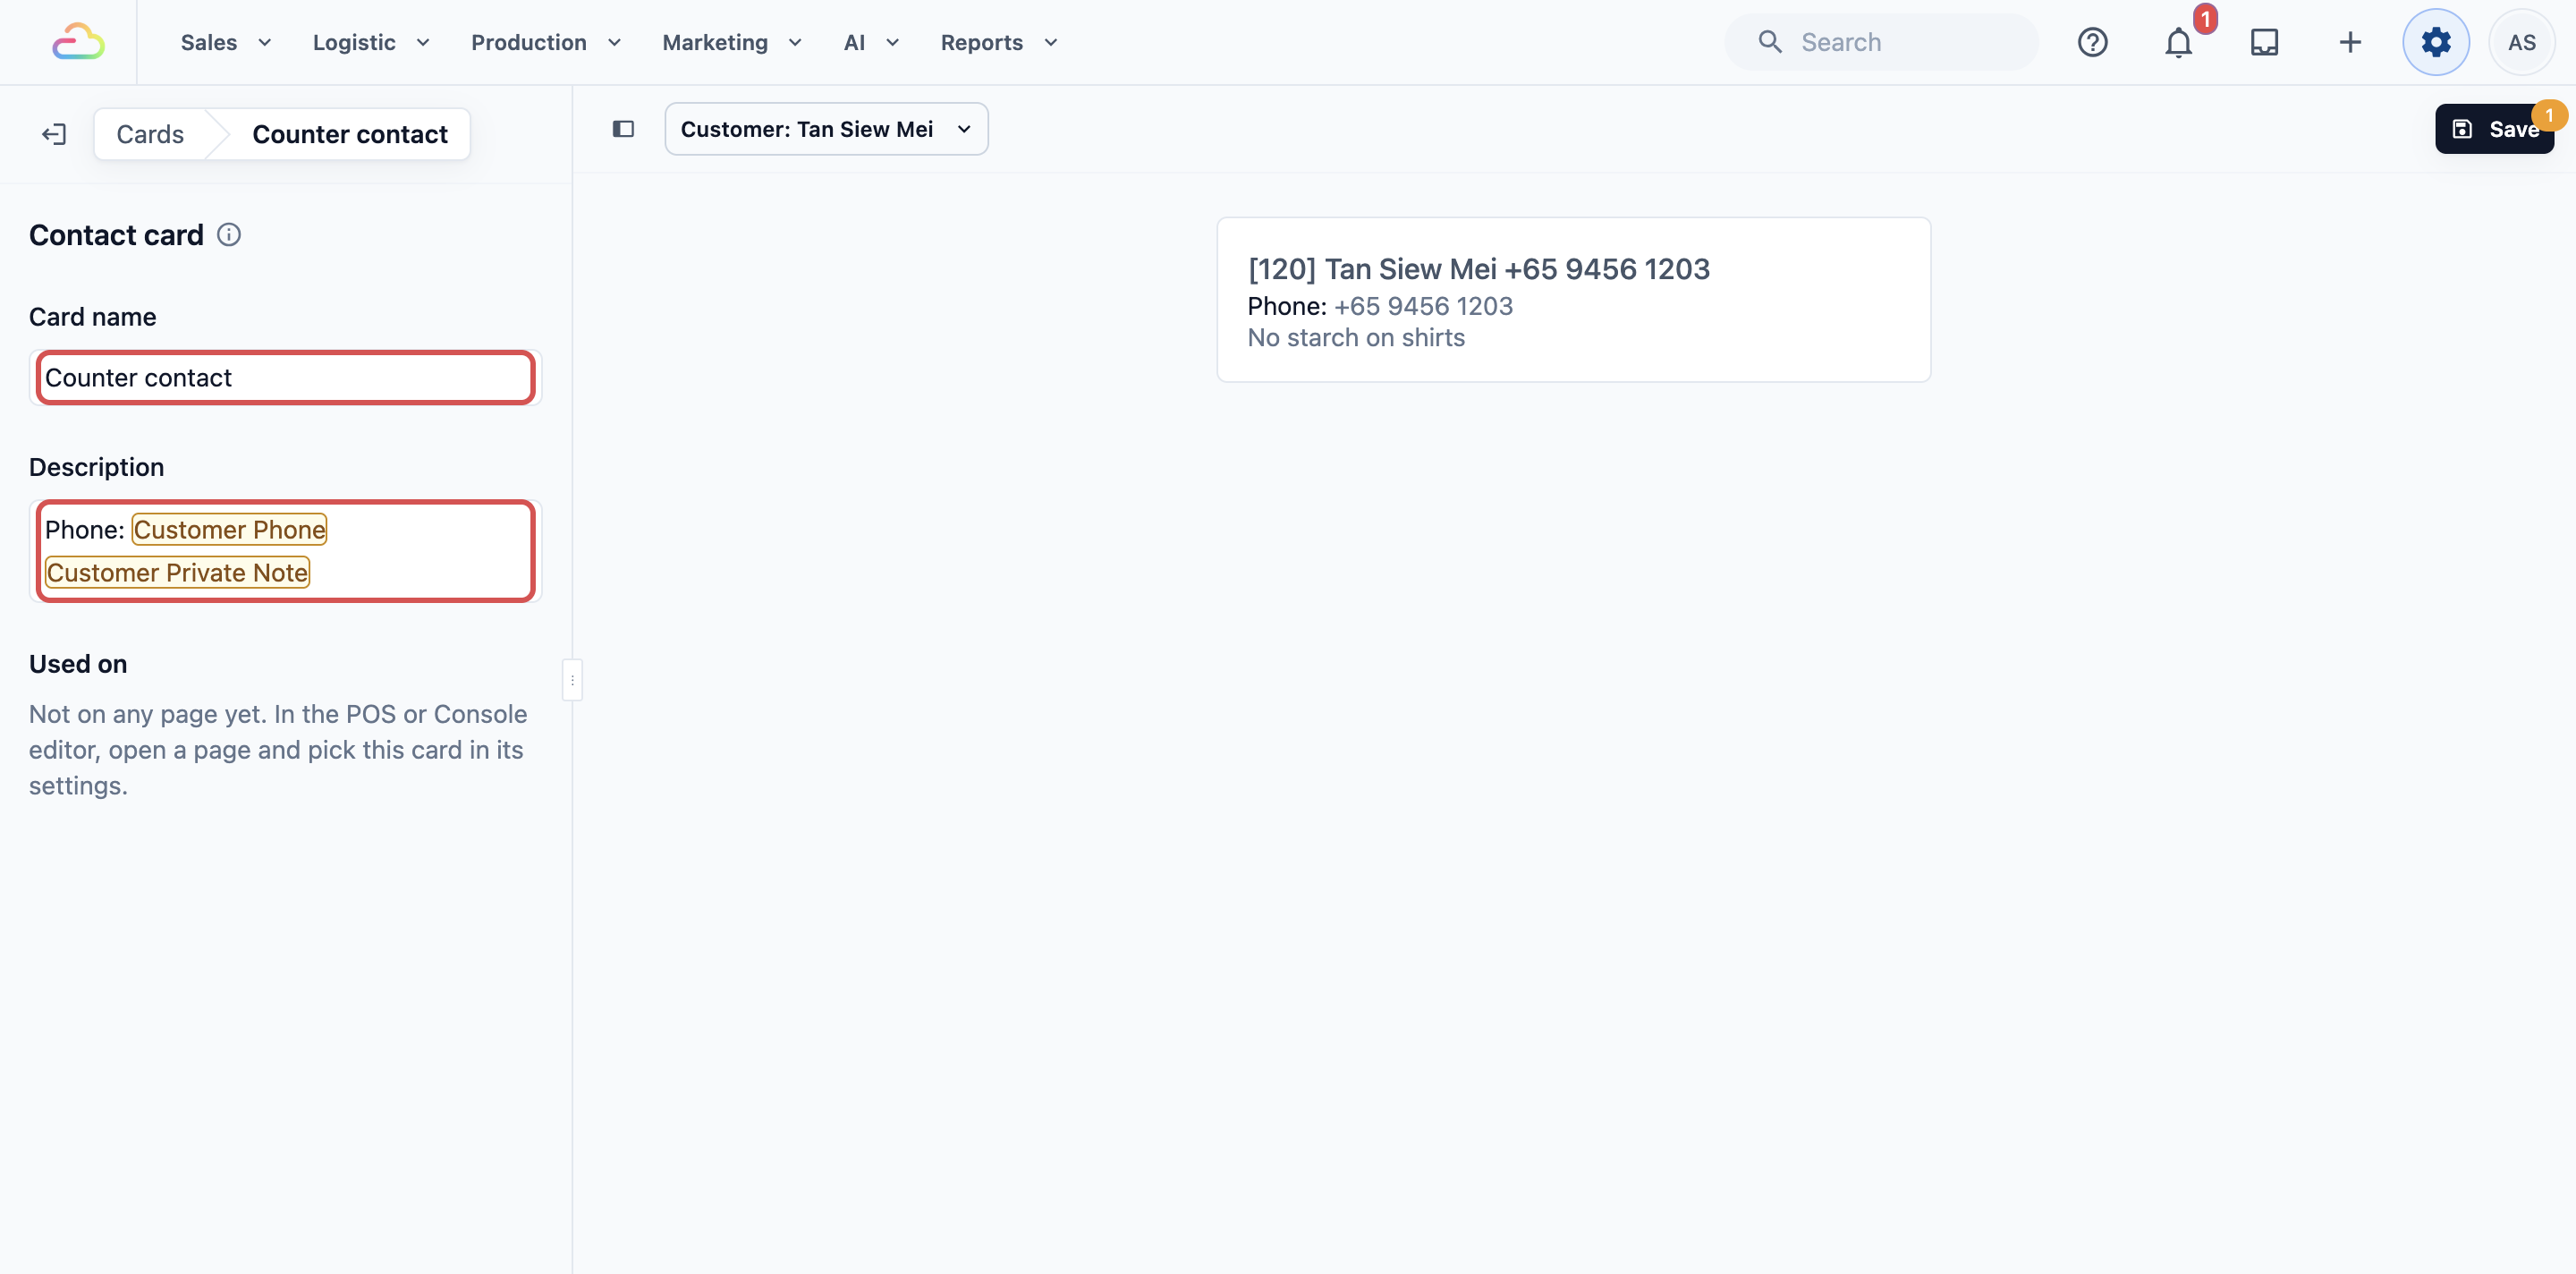
- In Card name, type a name your team will recognise, for example "Counter contact". This name appears when you choose a card for a page, so name it after what it's for.
- Click into Description. This is what the card shows under the name. The empty box says "type '@' for placeholders".
- Type @ and pick a detail from the list. A detail fills in on its own for each order, customer or item, so one card works for every record. You can also type your own words around them, for example "Phone:" before the phone number.
- Press Enter to start a new line, and add the next detail the same way.
The details you can pick depend on the card type:
| Card type | Details you can pick | For example |
|---|---|---|
| Contact card | The customer's details | Customer Phone, Customer Private Note (the note your staff keep about the customer), Customer Address, Customer Order Count, Customer Last Order Date |
| Order card | The order's details and its customer's details | Order Total Packages (the number of bags), Order Total Pieces, Order Note, Order Pickup Date, Order Amount Due, Customer Phone |
| Cart item card | The item's details | Line Item Note, Line Item Service Option, Line Item Add-on Names, Line Item Accessories, Line Item Total Pieces |
Custom fields your shop created, such as bag brand or item condition, also appear in the list with a * in front of their name. See Introduction to Custom Fields to create them.
Check it in the preview
The preview on the right draws your card as staff will see it, with your unsaved changes, as soon as you type.
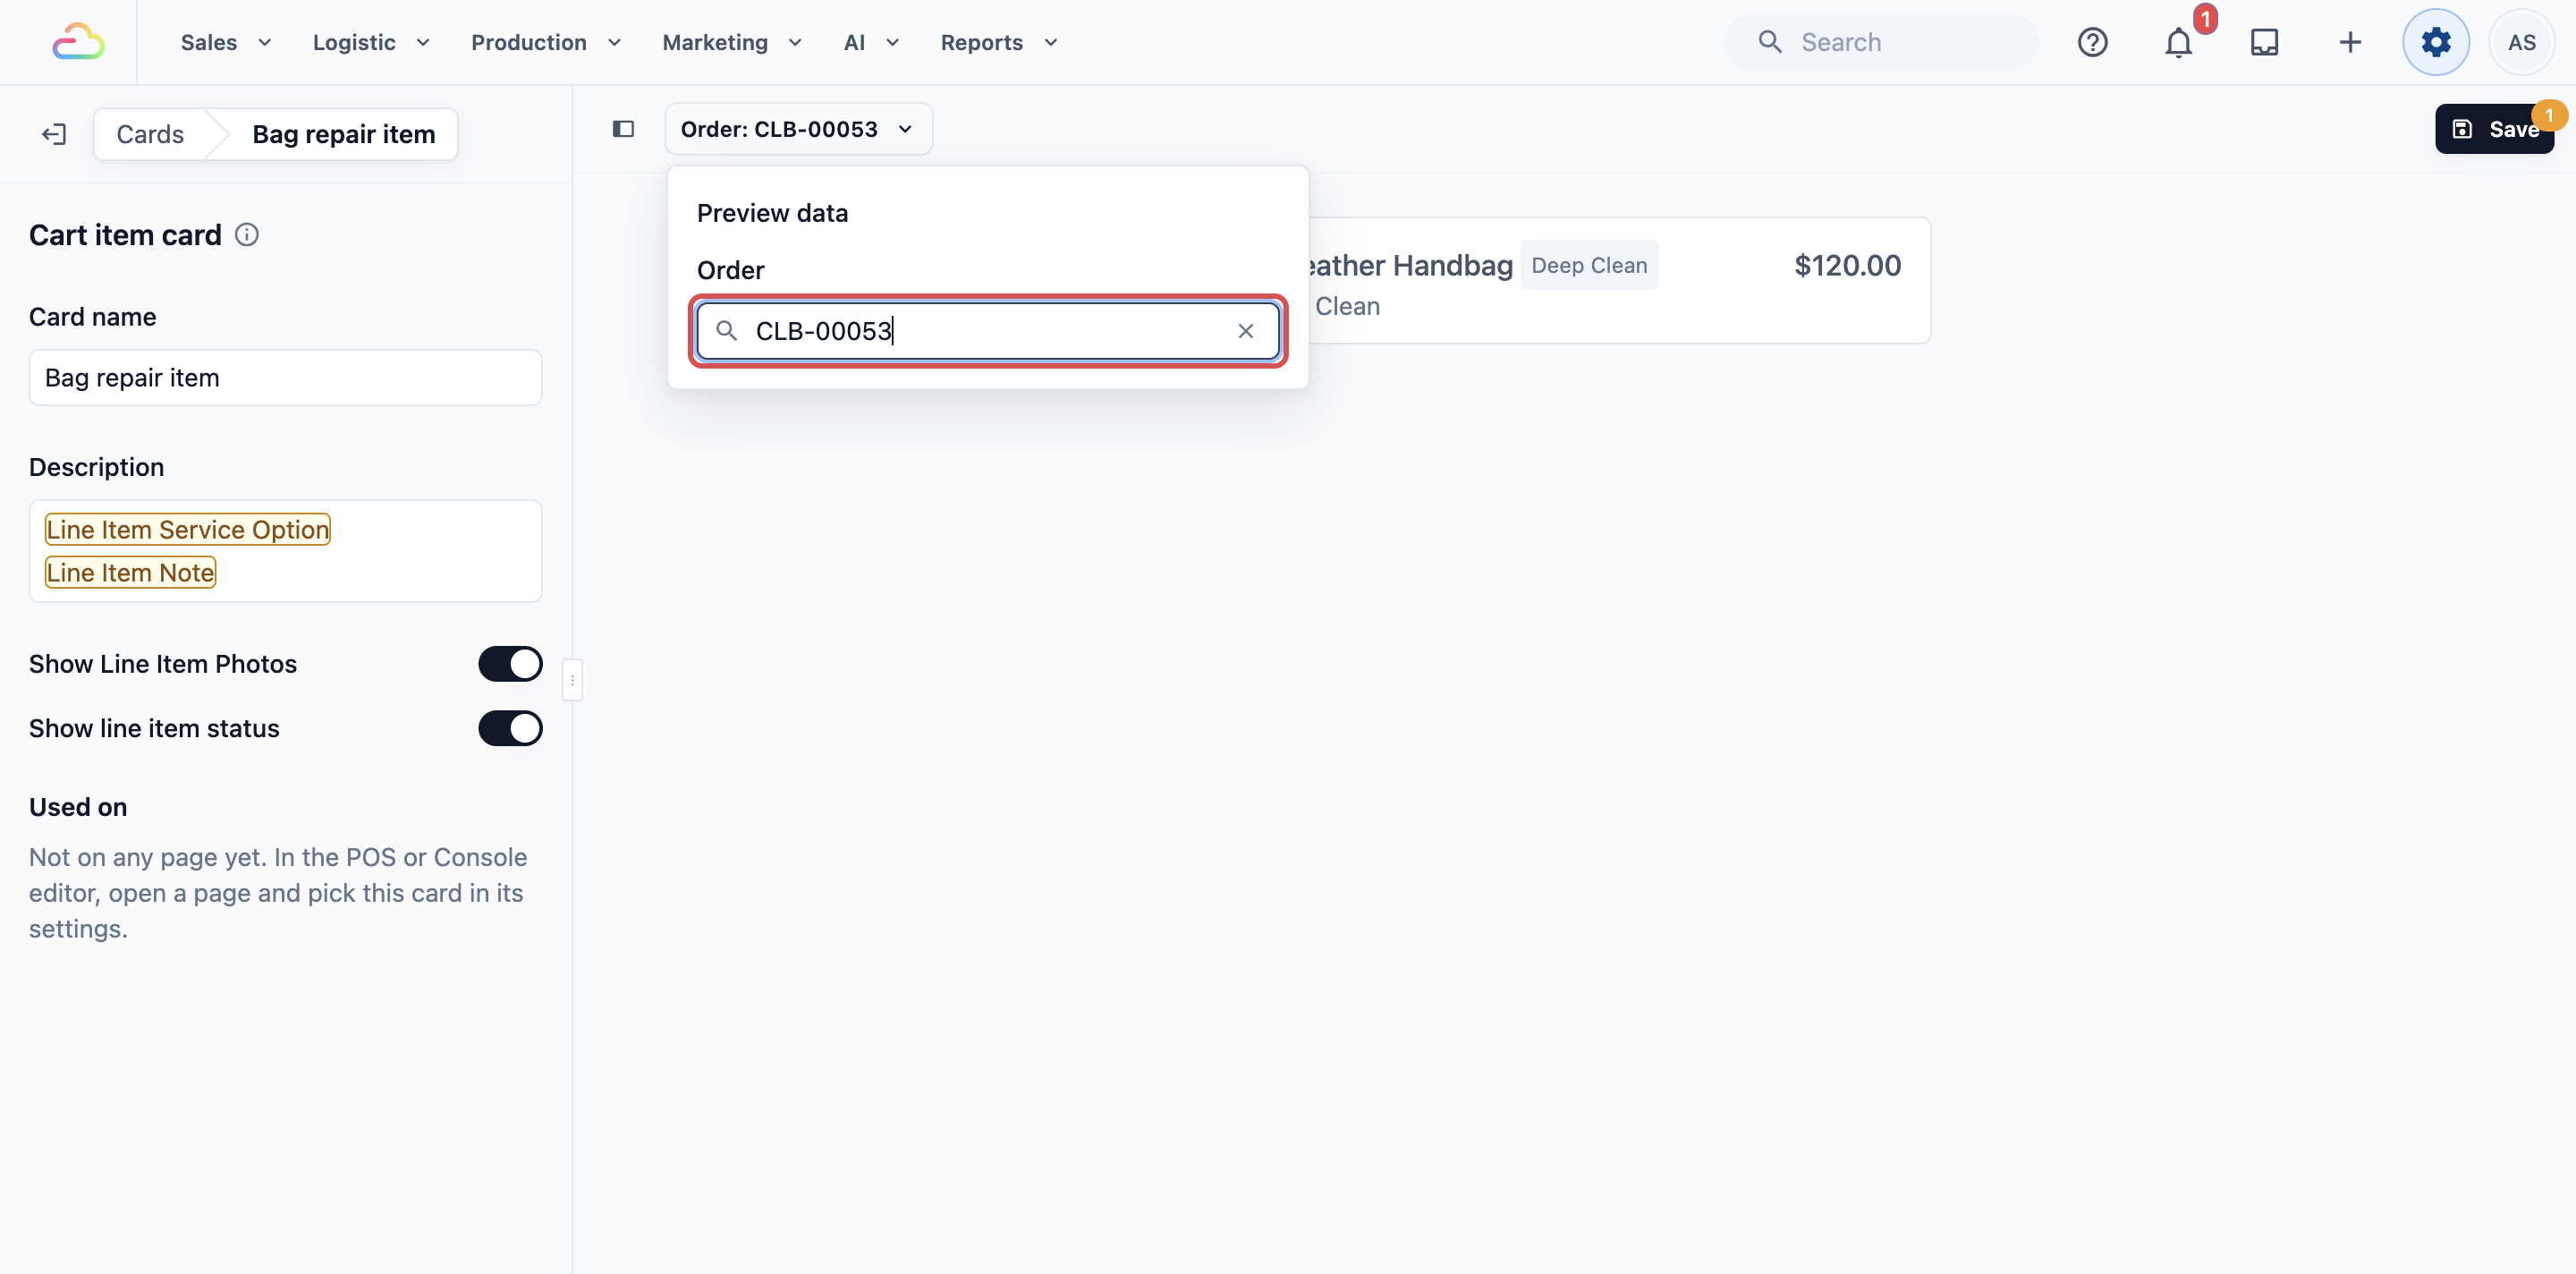
- Look at the button above the preview. For order cards and cart item cards it shows the order being used, for example "Order: #00113". The preview picks your latest order on its own.
- To try a different order, click that button. In Preview data, search for an order in Order and pick it.
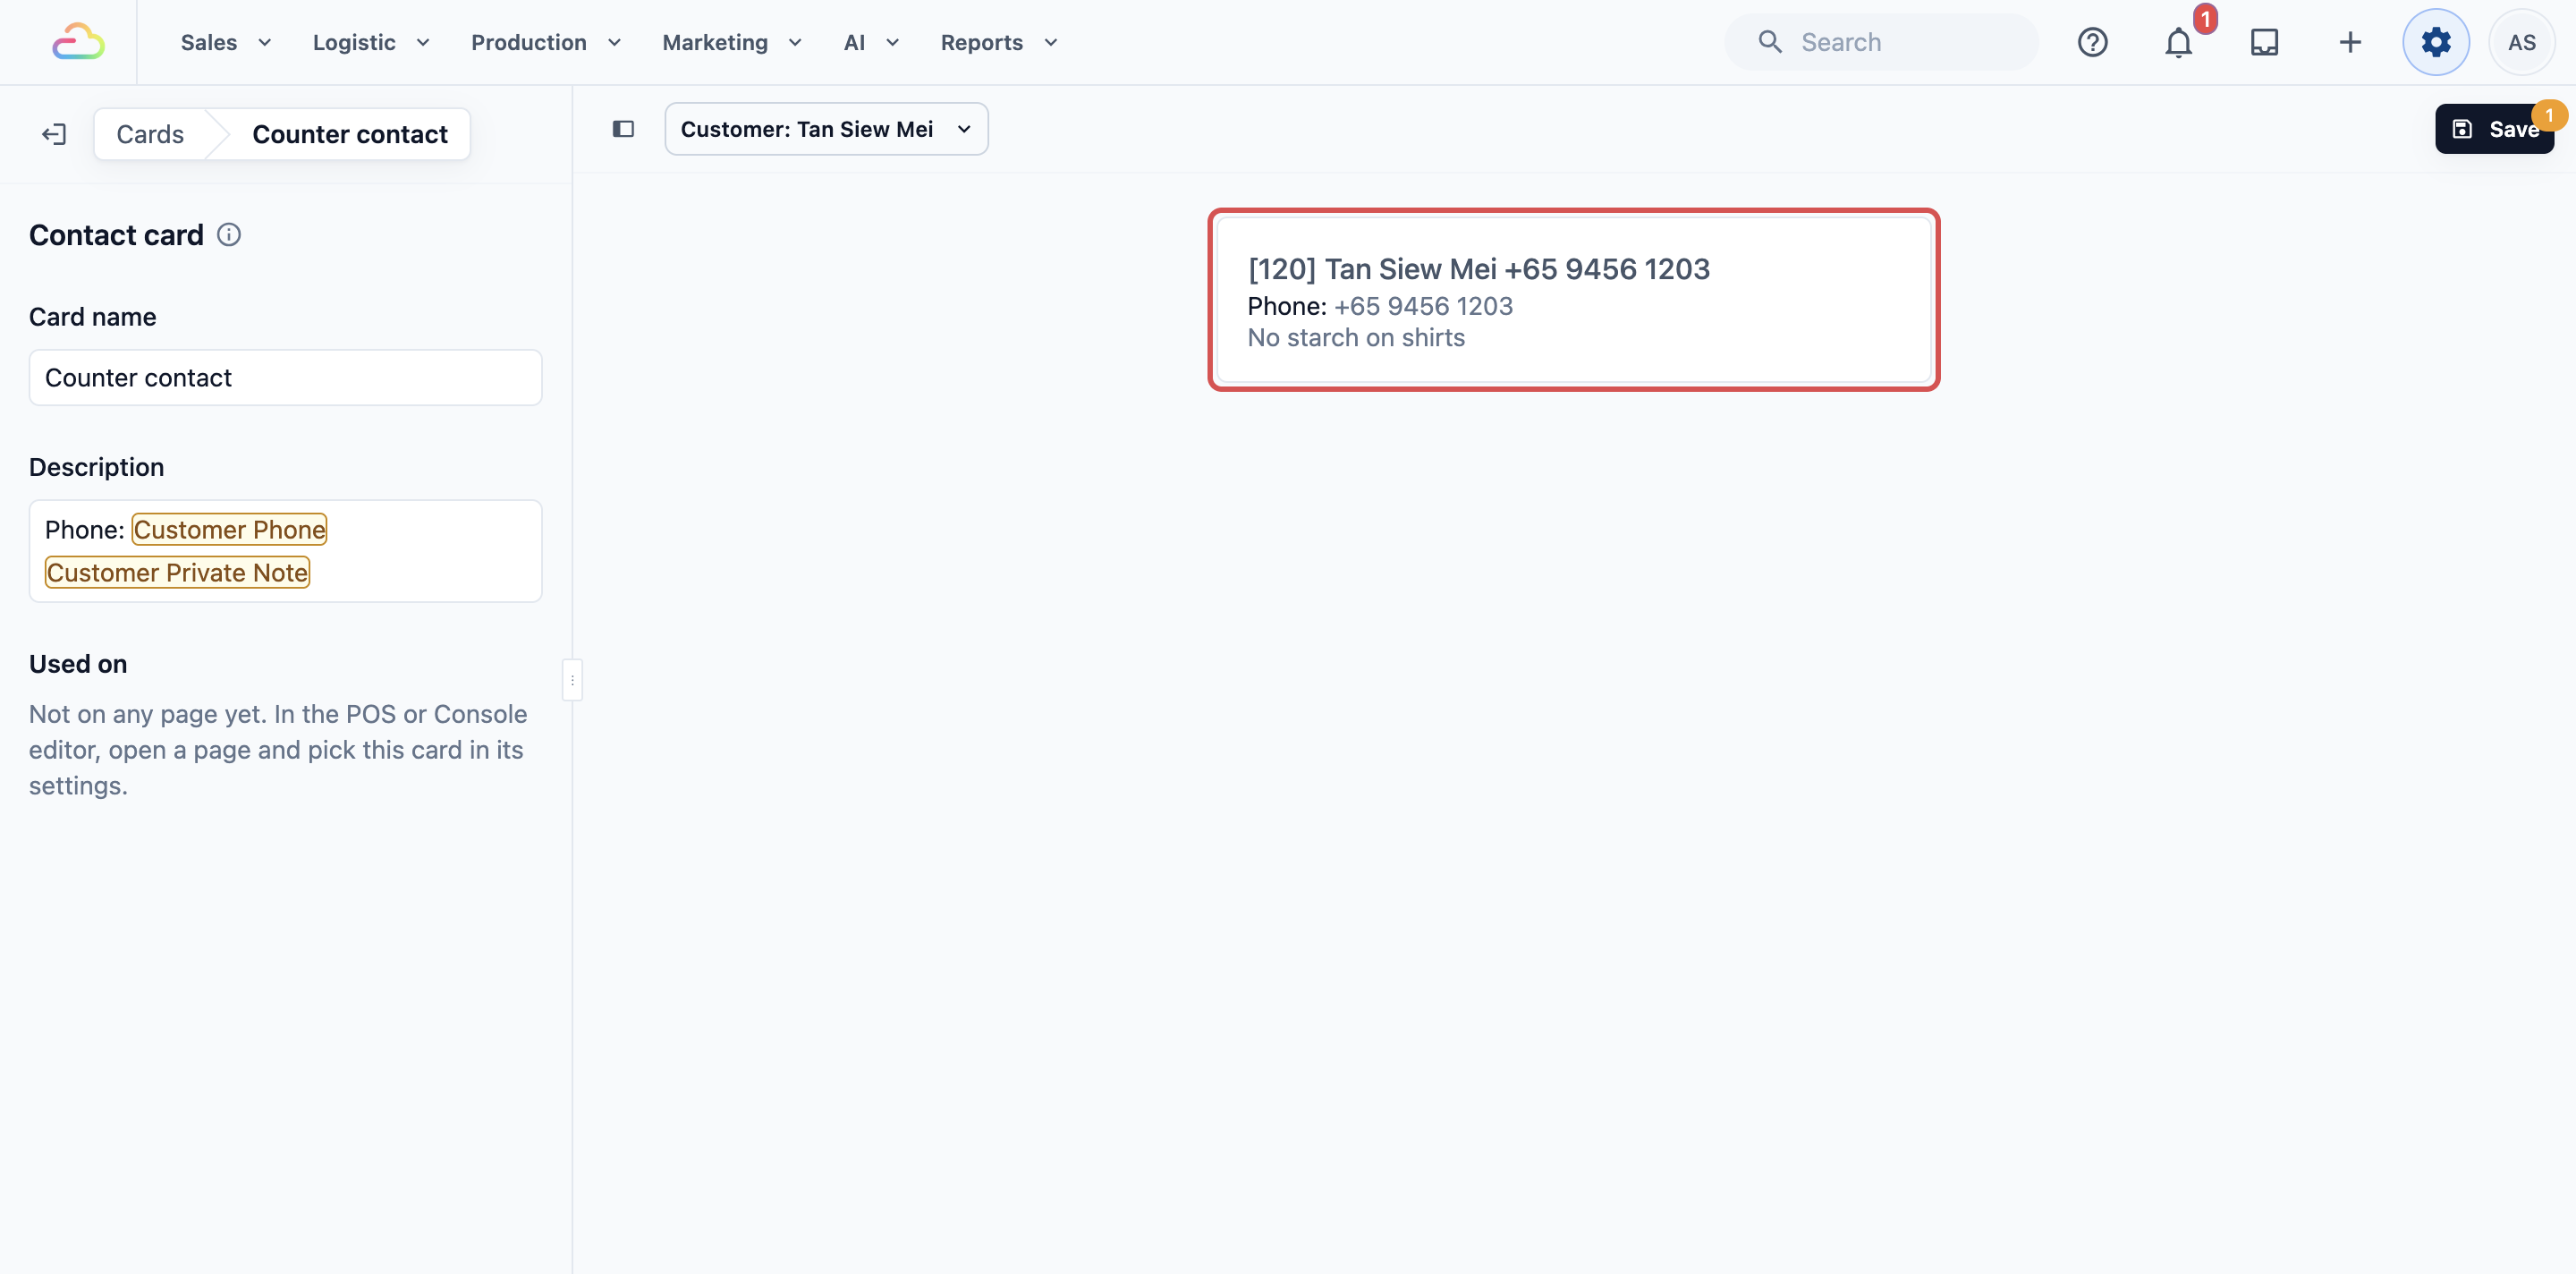
- For contact cards, the button says "Choose a customer". Click it and pick a customer in Customer account. Until you do, the preview uses a sample customer called "Preview Customer".
| Card type | What the preview shows |
|---|---|
| Order card | The order's row as it looks in the Orders list |
| Contact card | The customer's name with your card's details underneath, as the cart shows them |
| Cart item card | The order's items as cart rows, each with your card's details under its name |
Save the card
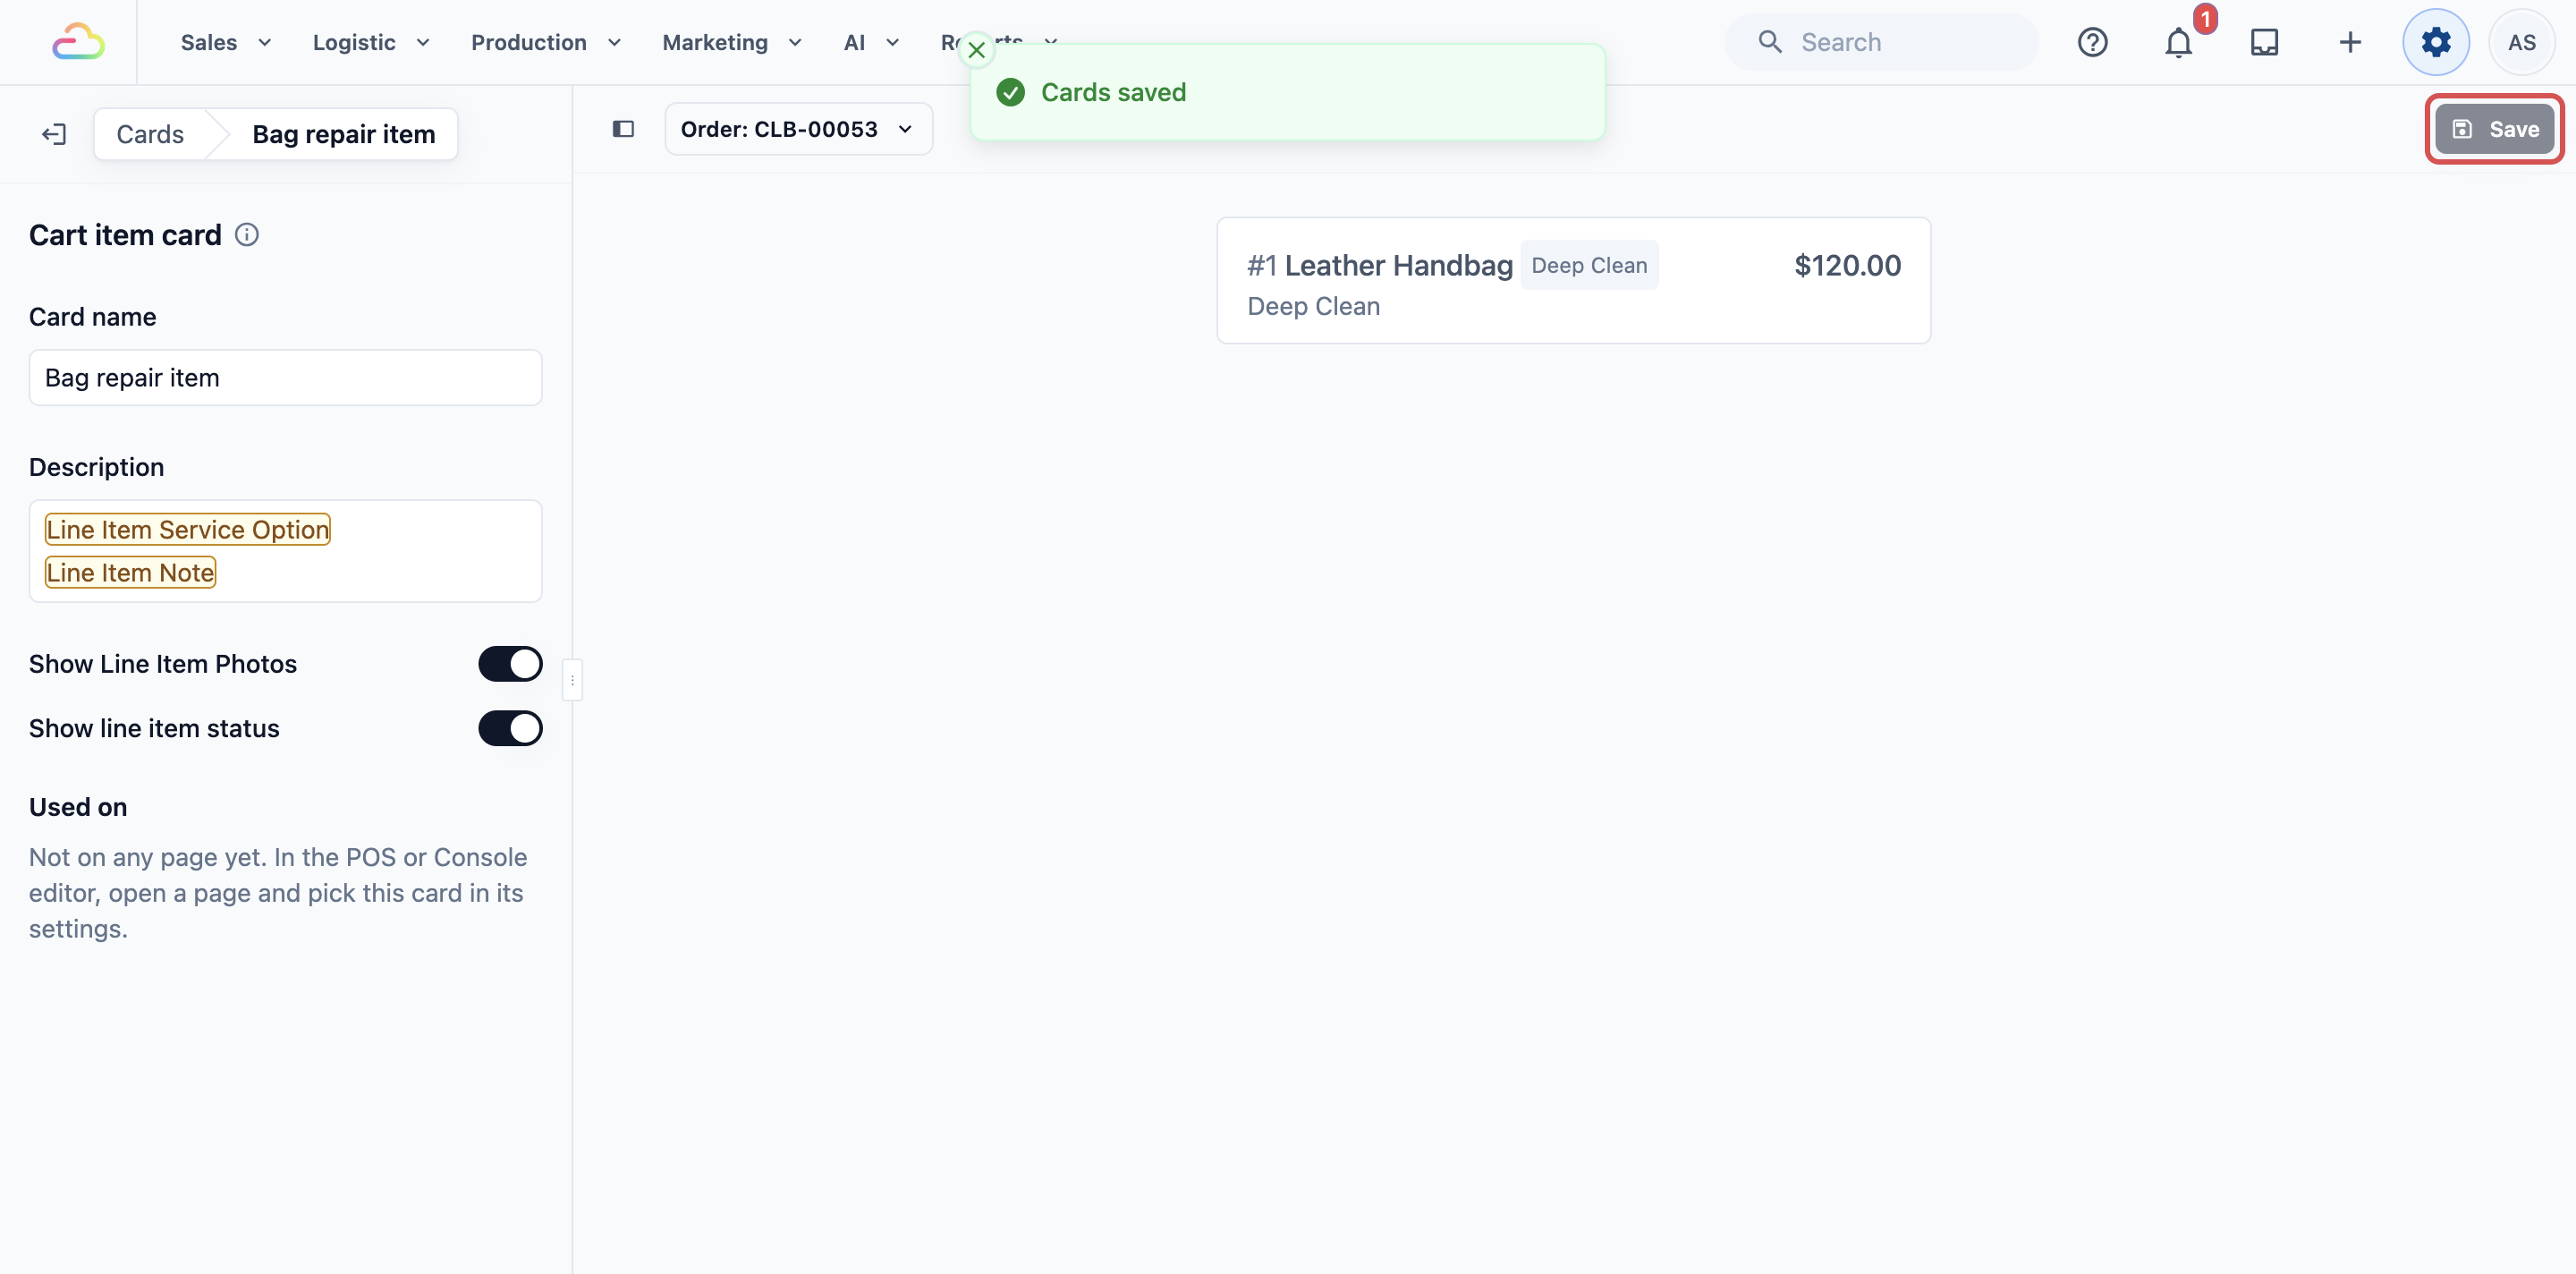
- Click Save in the top-right corner.
When it's done, the message "Cards saved" appears.
Until you save, a new card says "Not saved yet" in the card list, and the Save button shows a small number for how many cards have unsaved changes. Your changes only show on the preview until then. If you change several cards, one click on Save saves them all. Each card saves on its own, so if one can't be saved, it keeps its changes for your next Save and the others still save.
After saving, a card that no page uses yet says "Not on any page yet". The card is ready, but staff won't see it until you choose it on a page. That is covered in Choosing Which Card Each Page Shows.
Cart item card switches
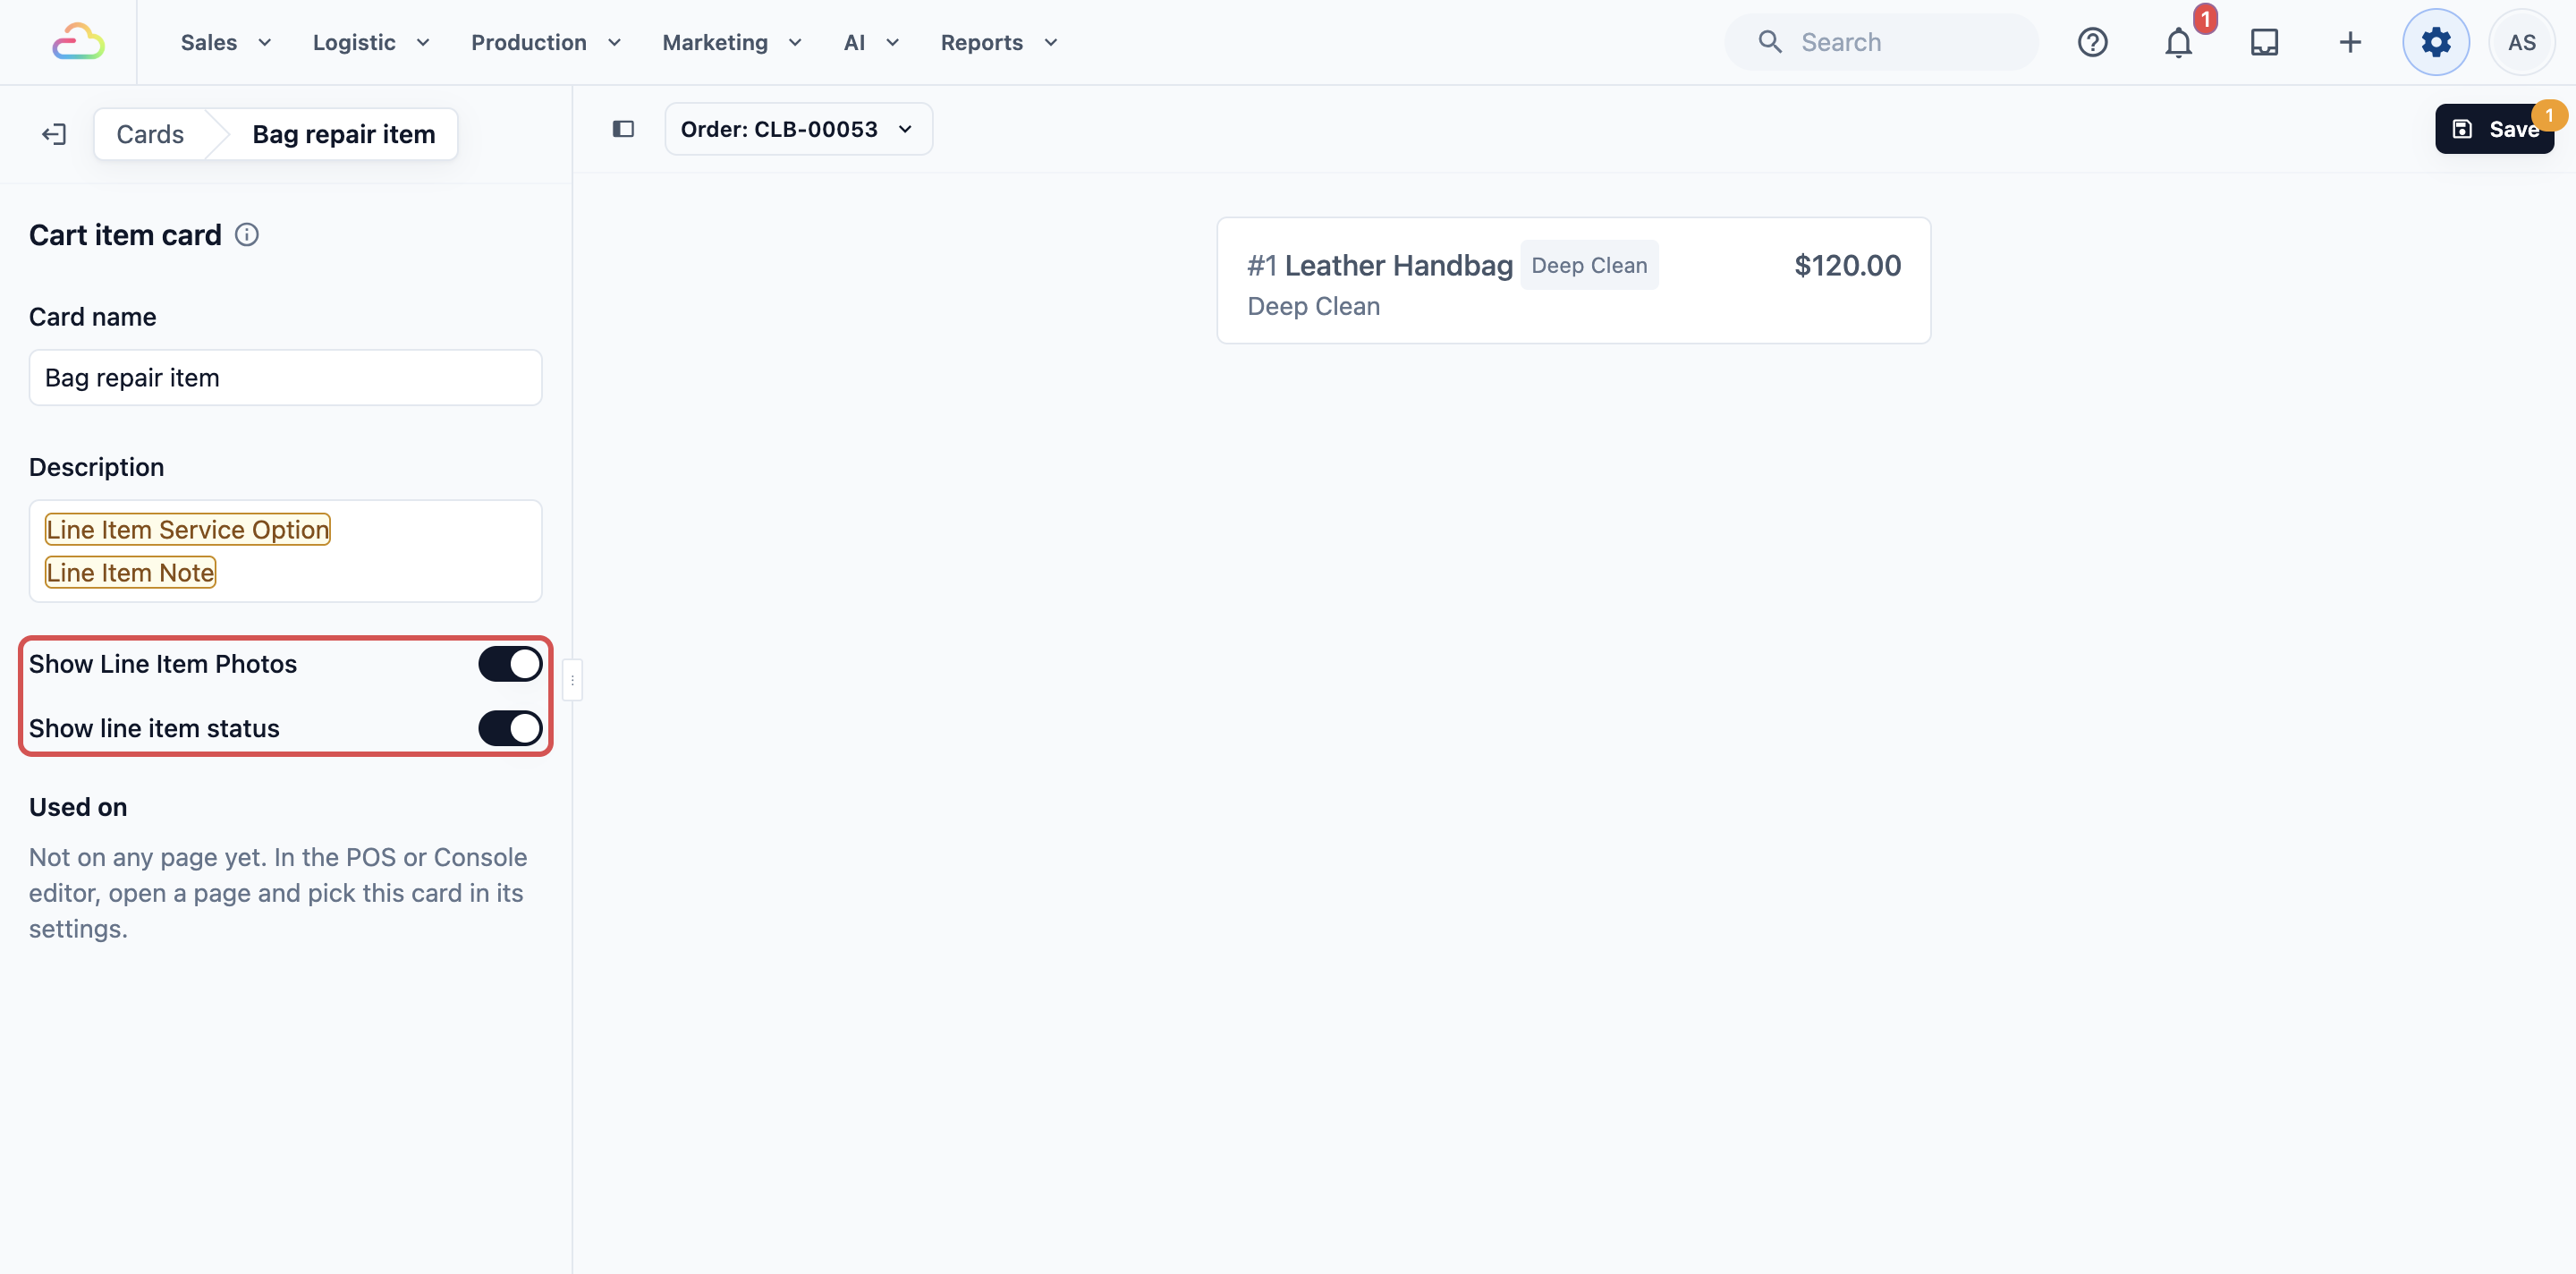
For Intermediate setups: a cart item card has 2 switches under Description. Both are on unless you turn them off. They don't change the cart: they change the Line Items list on an order's details, for orders on pages that use this card.
Show Line Item Photos
If you turn this on, the photos staff took of each item show under it in the order's details, so staff can check a bag's condition without opening the photos. If you turn this off, the photos are hidden there. They stay saved on the order.
Show line item status
If you turn this on, each item in the order's details shows its status tag, so staff see which items are done. If you turn this off, the items show without their status.
Both switches can be on together. Each one controls its own part of the item row, so they never clash.
Example setup
CleanFast Laundry runs Laundry and Bag Repair from its Tampines and Jurong POS shops. The owner makes 2 cards.
Counter contact (contact card)
- Card name: Counter contact
- Description: "Phone:" then Customer Phone on line 1, and Customer Private Note on line 2
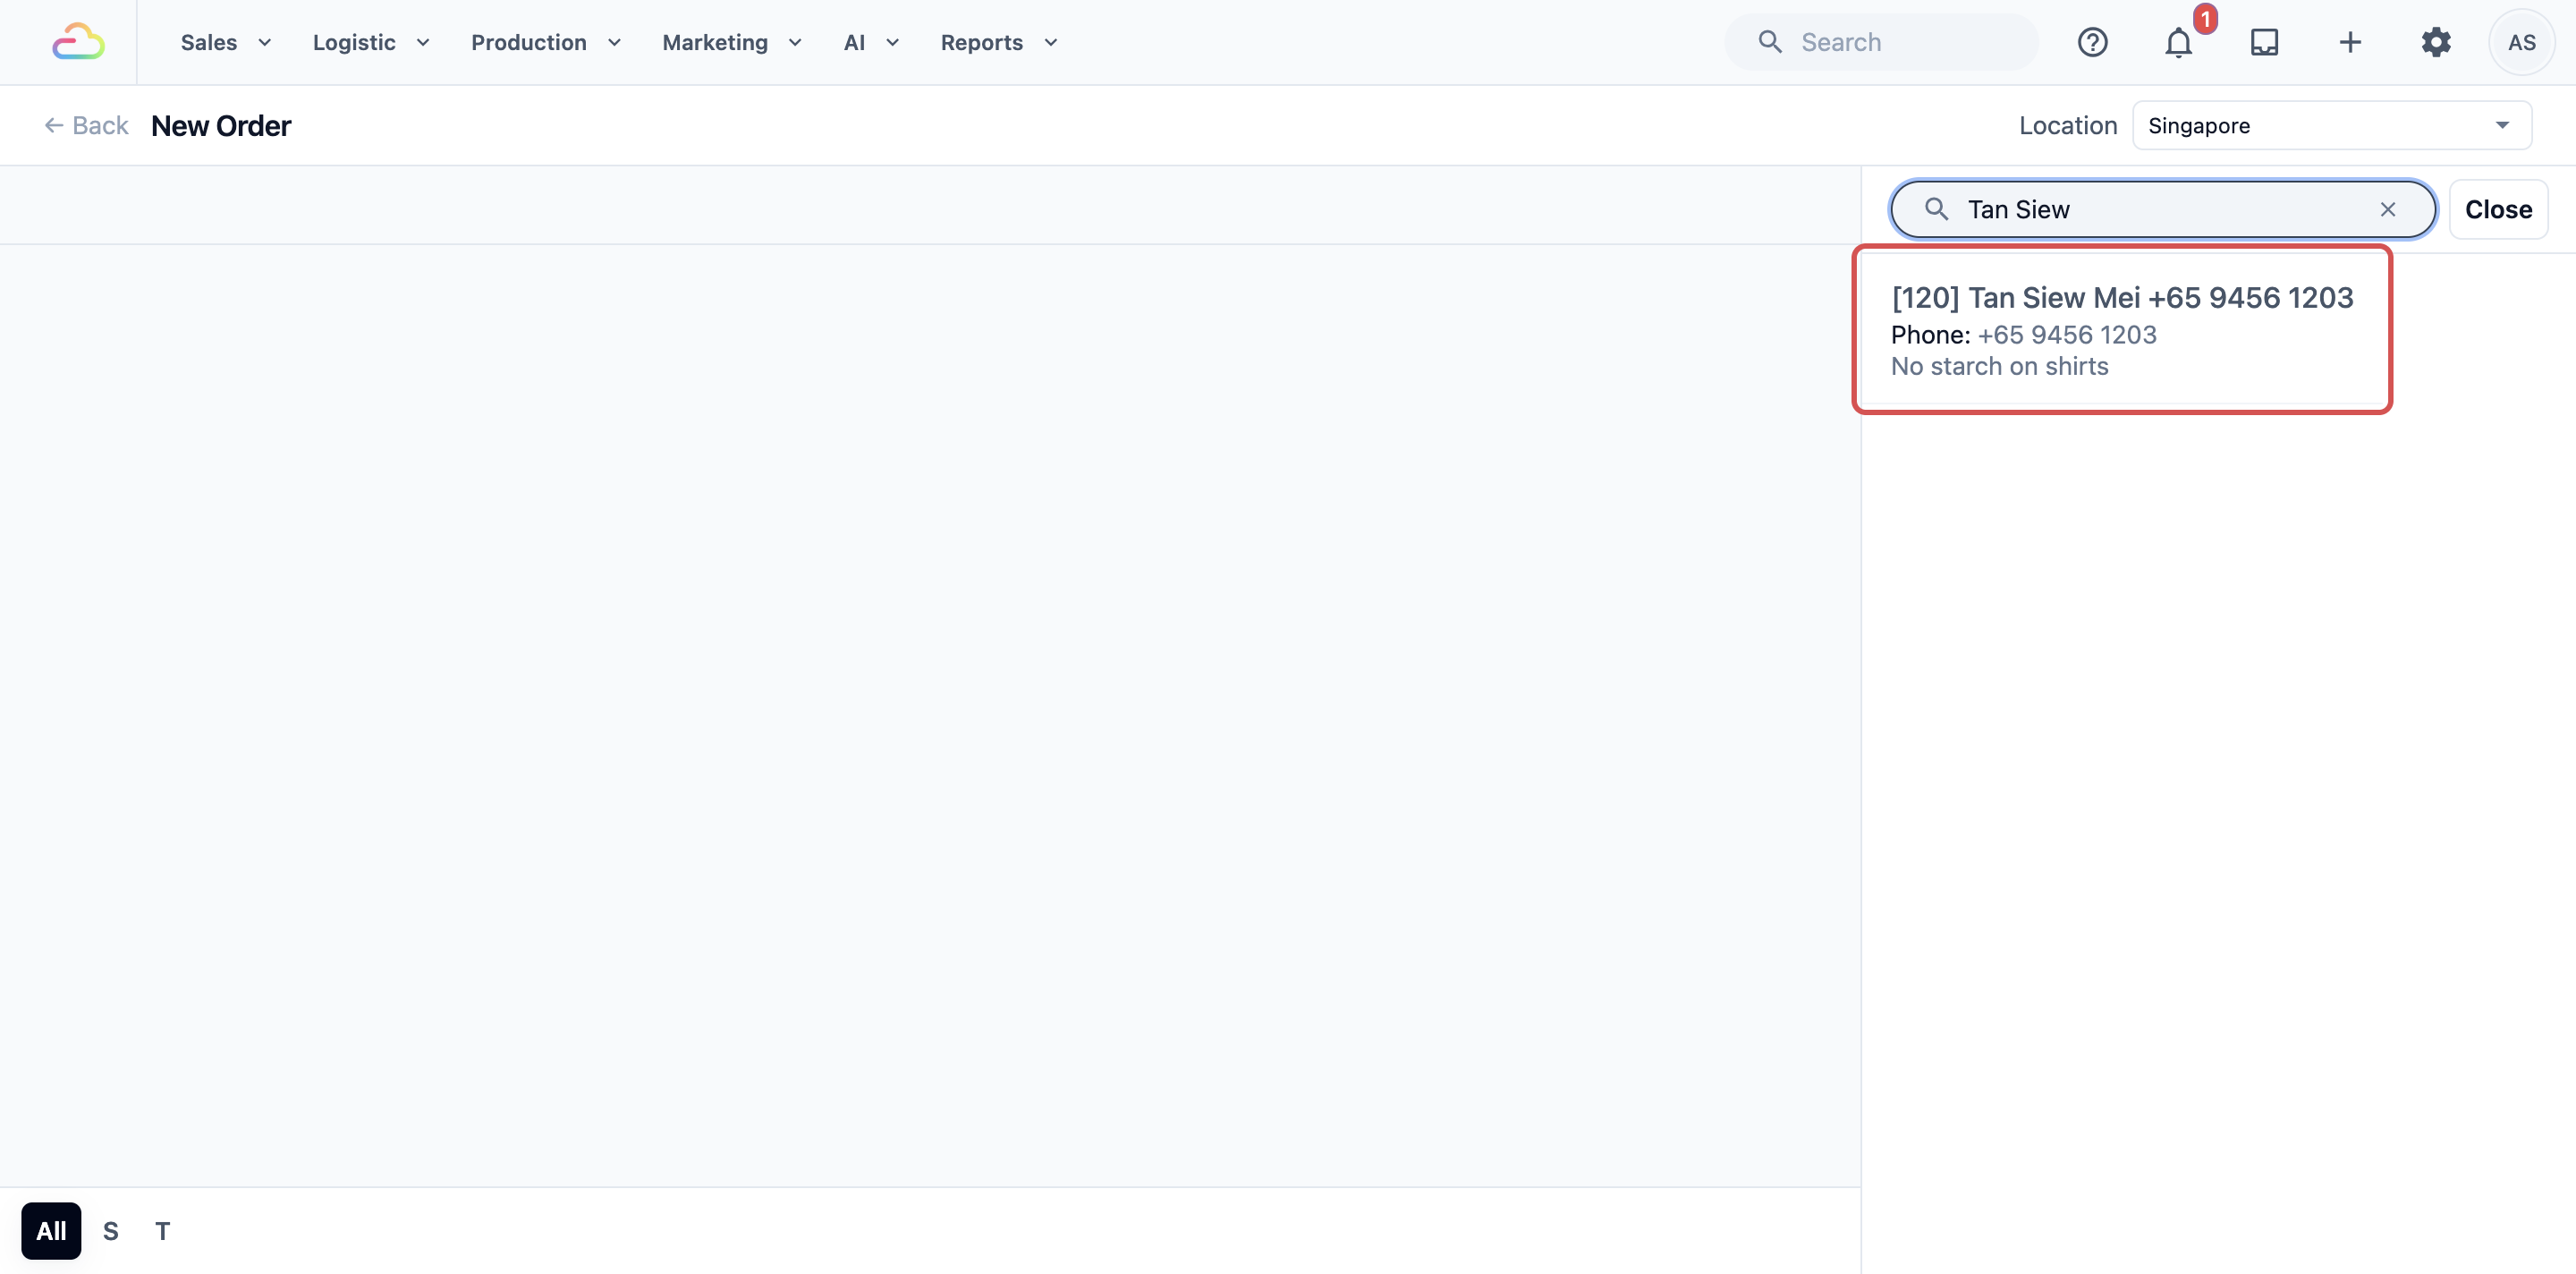
At the counter, a customer's note such as "No starch on shirts" shows under their name the moment staff pick them.
Bag repair item (cart item card)
- Card name: Bag repair item
- Description: Line Item Service Option on line 1, and Line Item Note on line 2
- Show Line Item Photos: on
- Show line item status: on
A bag in the cart shows "Leather recolour" and the note "Scuff on the front flap" under its name. On the order's details, staff see the photos of the bag taken at drop-off.
After saving both, the owner chooses them on the Tampines and Jurong Checkout pages, as shown in Choosing Which Card Each Page Shows.
What staff see
Once a page uses the card, staff see your details on that page:
- Contact card: in the Checkout cart, under the customer's name after they pick the customer, and in a staff app's Contact List.
- Order card: under each order in the Orders list, and in a staff app's Order List.
- Cart item card: under each item's name in the Checkout cart. The switches show on the order's details.
Managing it later
Changing a saved card
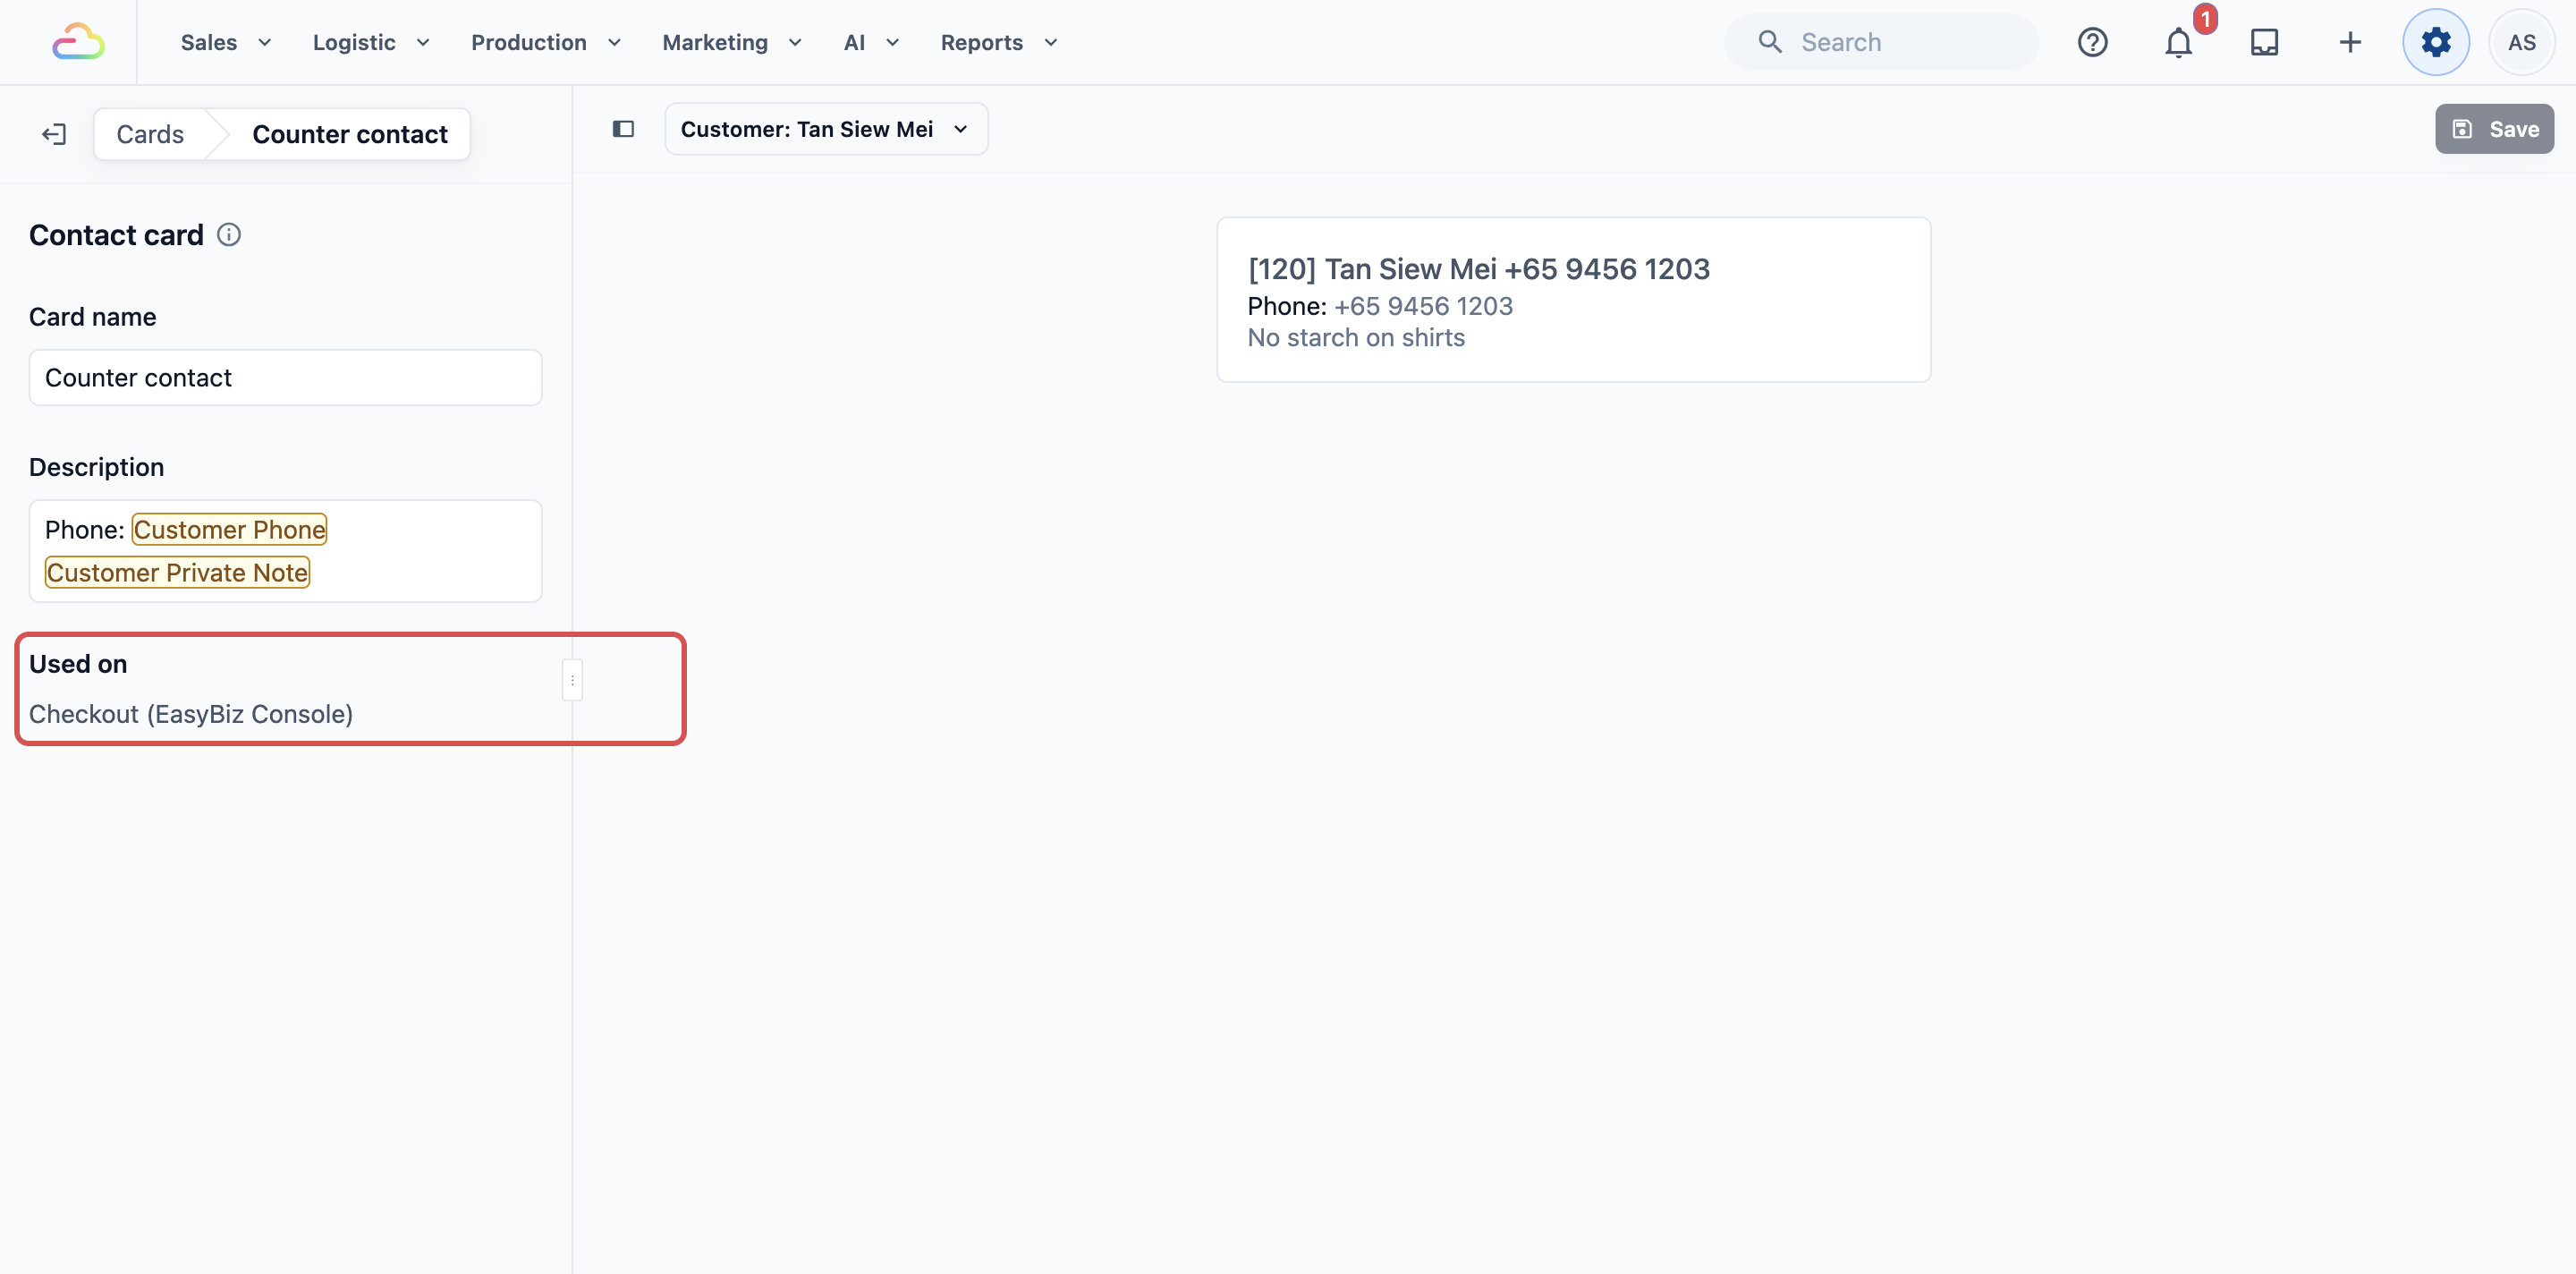
Open the card from the list, change it and click Save. Every page in its Used on list shows the change, so check that list before you save. In the card list, each card's second line says where it's used, for example "Used on Checkout (Tampines POS)".
Renaming a card
Change its Card name and click Save. Pages that use it keep using it under the new name.
FAQs
If I change a card my staff are using, what happens to their pages?
Every page in the card's Used on list shows your change once you save it. If a page should keep the old look, make a new card for your change and choose it on only the pages that need it.
Can two pages use different cards of the same type?
Yes. Each page chooses its own card. For example, your Checkout can use "Counter contact" while a staff app's Contact List uses a shorter contact card with the phone number only.
Why is the preview empty in my new shop?
Order cards and cart item cards are previewed with a real order, so the preview stays empty until your shop has its first order. Contact cards preview with a sample customer, so you can make those right away.
Does a card show on every POS shop, such as Tampines and Jurong, or only one?
Your cards are shared across your whole account, but each shop's POS chooses which card its pages show. Tampines and Jurong can use the same card, or a different one each. A card only shows on the pages you choose it on.
Do I need to make cards at all?
No. Every page shows the System Default card until you choose your own. Make a card when staff keep opening an order or customer to check the same detail.
If I turn off Show Line Item Photos, are the photos deleted?
No. The photos are only hidden on the order's details for pages that use this card. They stay saved on the order, and turning the switch back on shows them again.
What's Next
You have made your first card, checked it in the preview and saved it. Next, set up the cards for your workshop in Setting Up Work Order and Task Cards, so each work order and its tasks show the details your team needs.