
Before You Start
Set up your Store Credit program first. Your expiry rules and top-up packages decide what the receipt has to show, and the setting that connects this template lives on the same page.
See Setting Up Your Store Credit Program before you continue.
Where to Find Receipt Templates
Your top-up receipt is built in the same list as every other slip your shop prints.
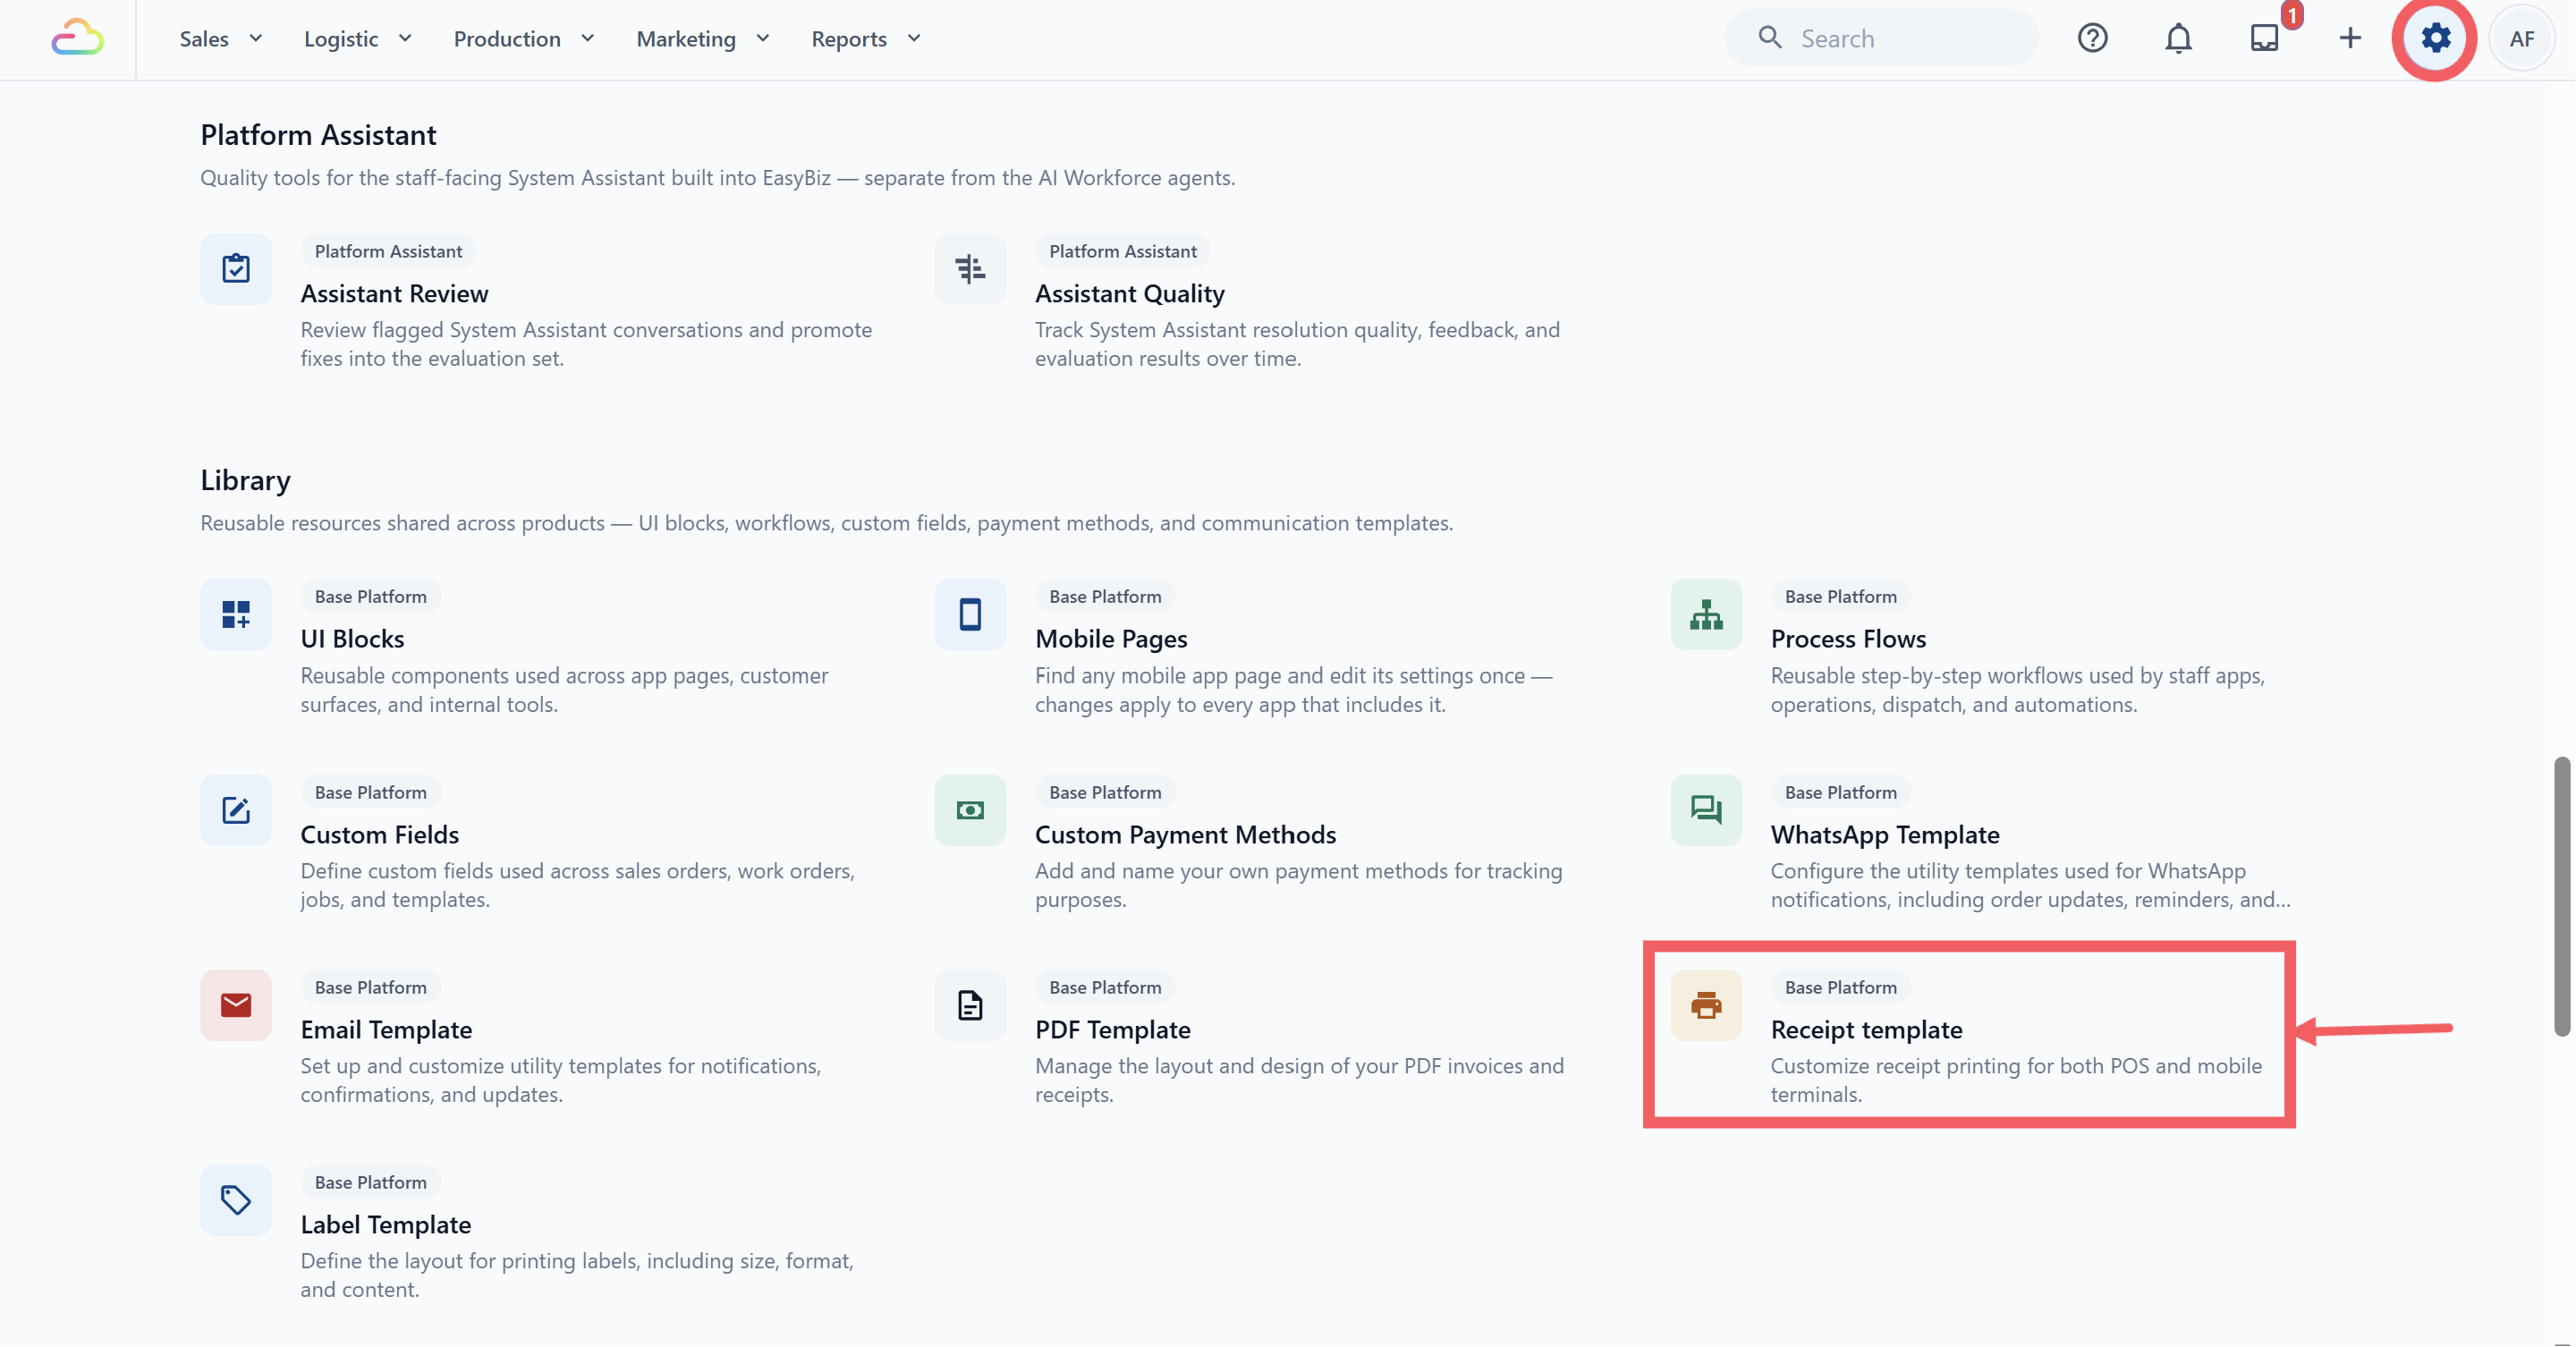
Click the ⚙️ Settings icon in the top-right corner.
Under the Library section, click Receipt template.
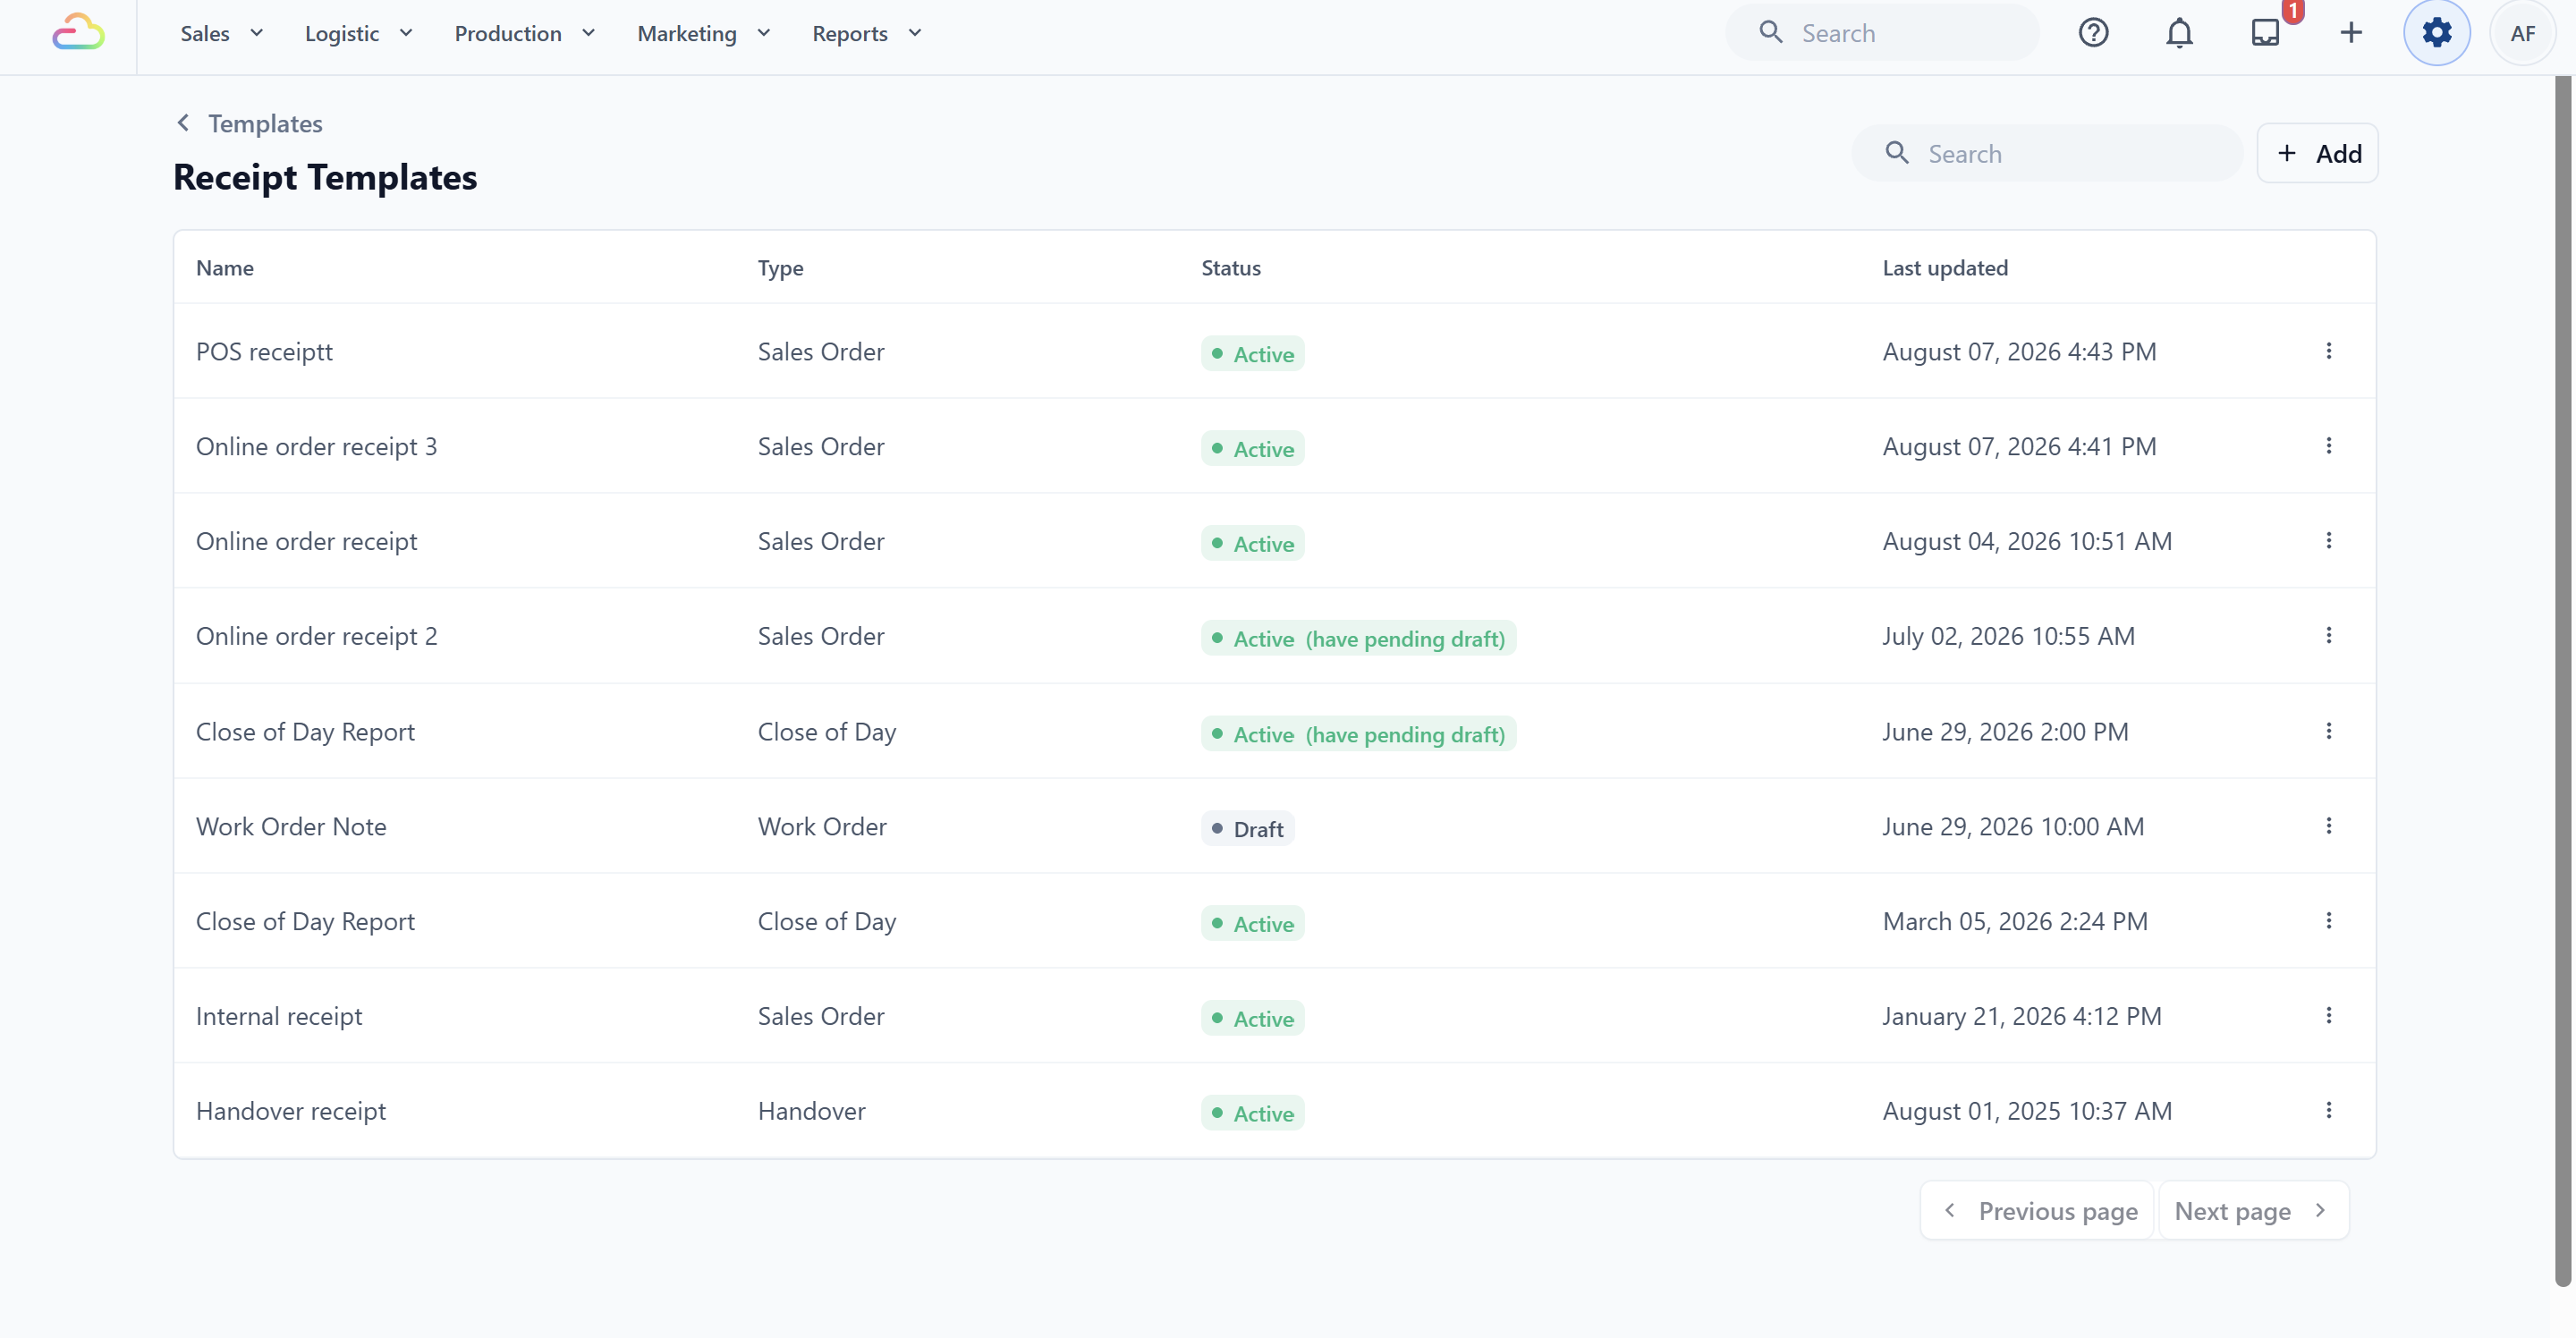
- The page that opens is titled Receipt Templates. Slips you already use, such as your POS order receipt, are listed here.
Create the Top-Up Receipt Template
Click + Add in the top right. A pop-up titled New Receipt Template opens.
Enter a Template name, for example Store Credit Top-Up Receipt. This is the name you will pick later in Store Credit settings, so keep it plain.
Under Template content, scroll to the bottom of the card list. Top up receipt is the last card.
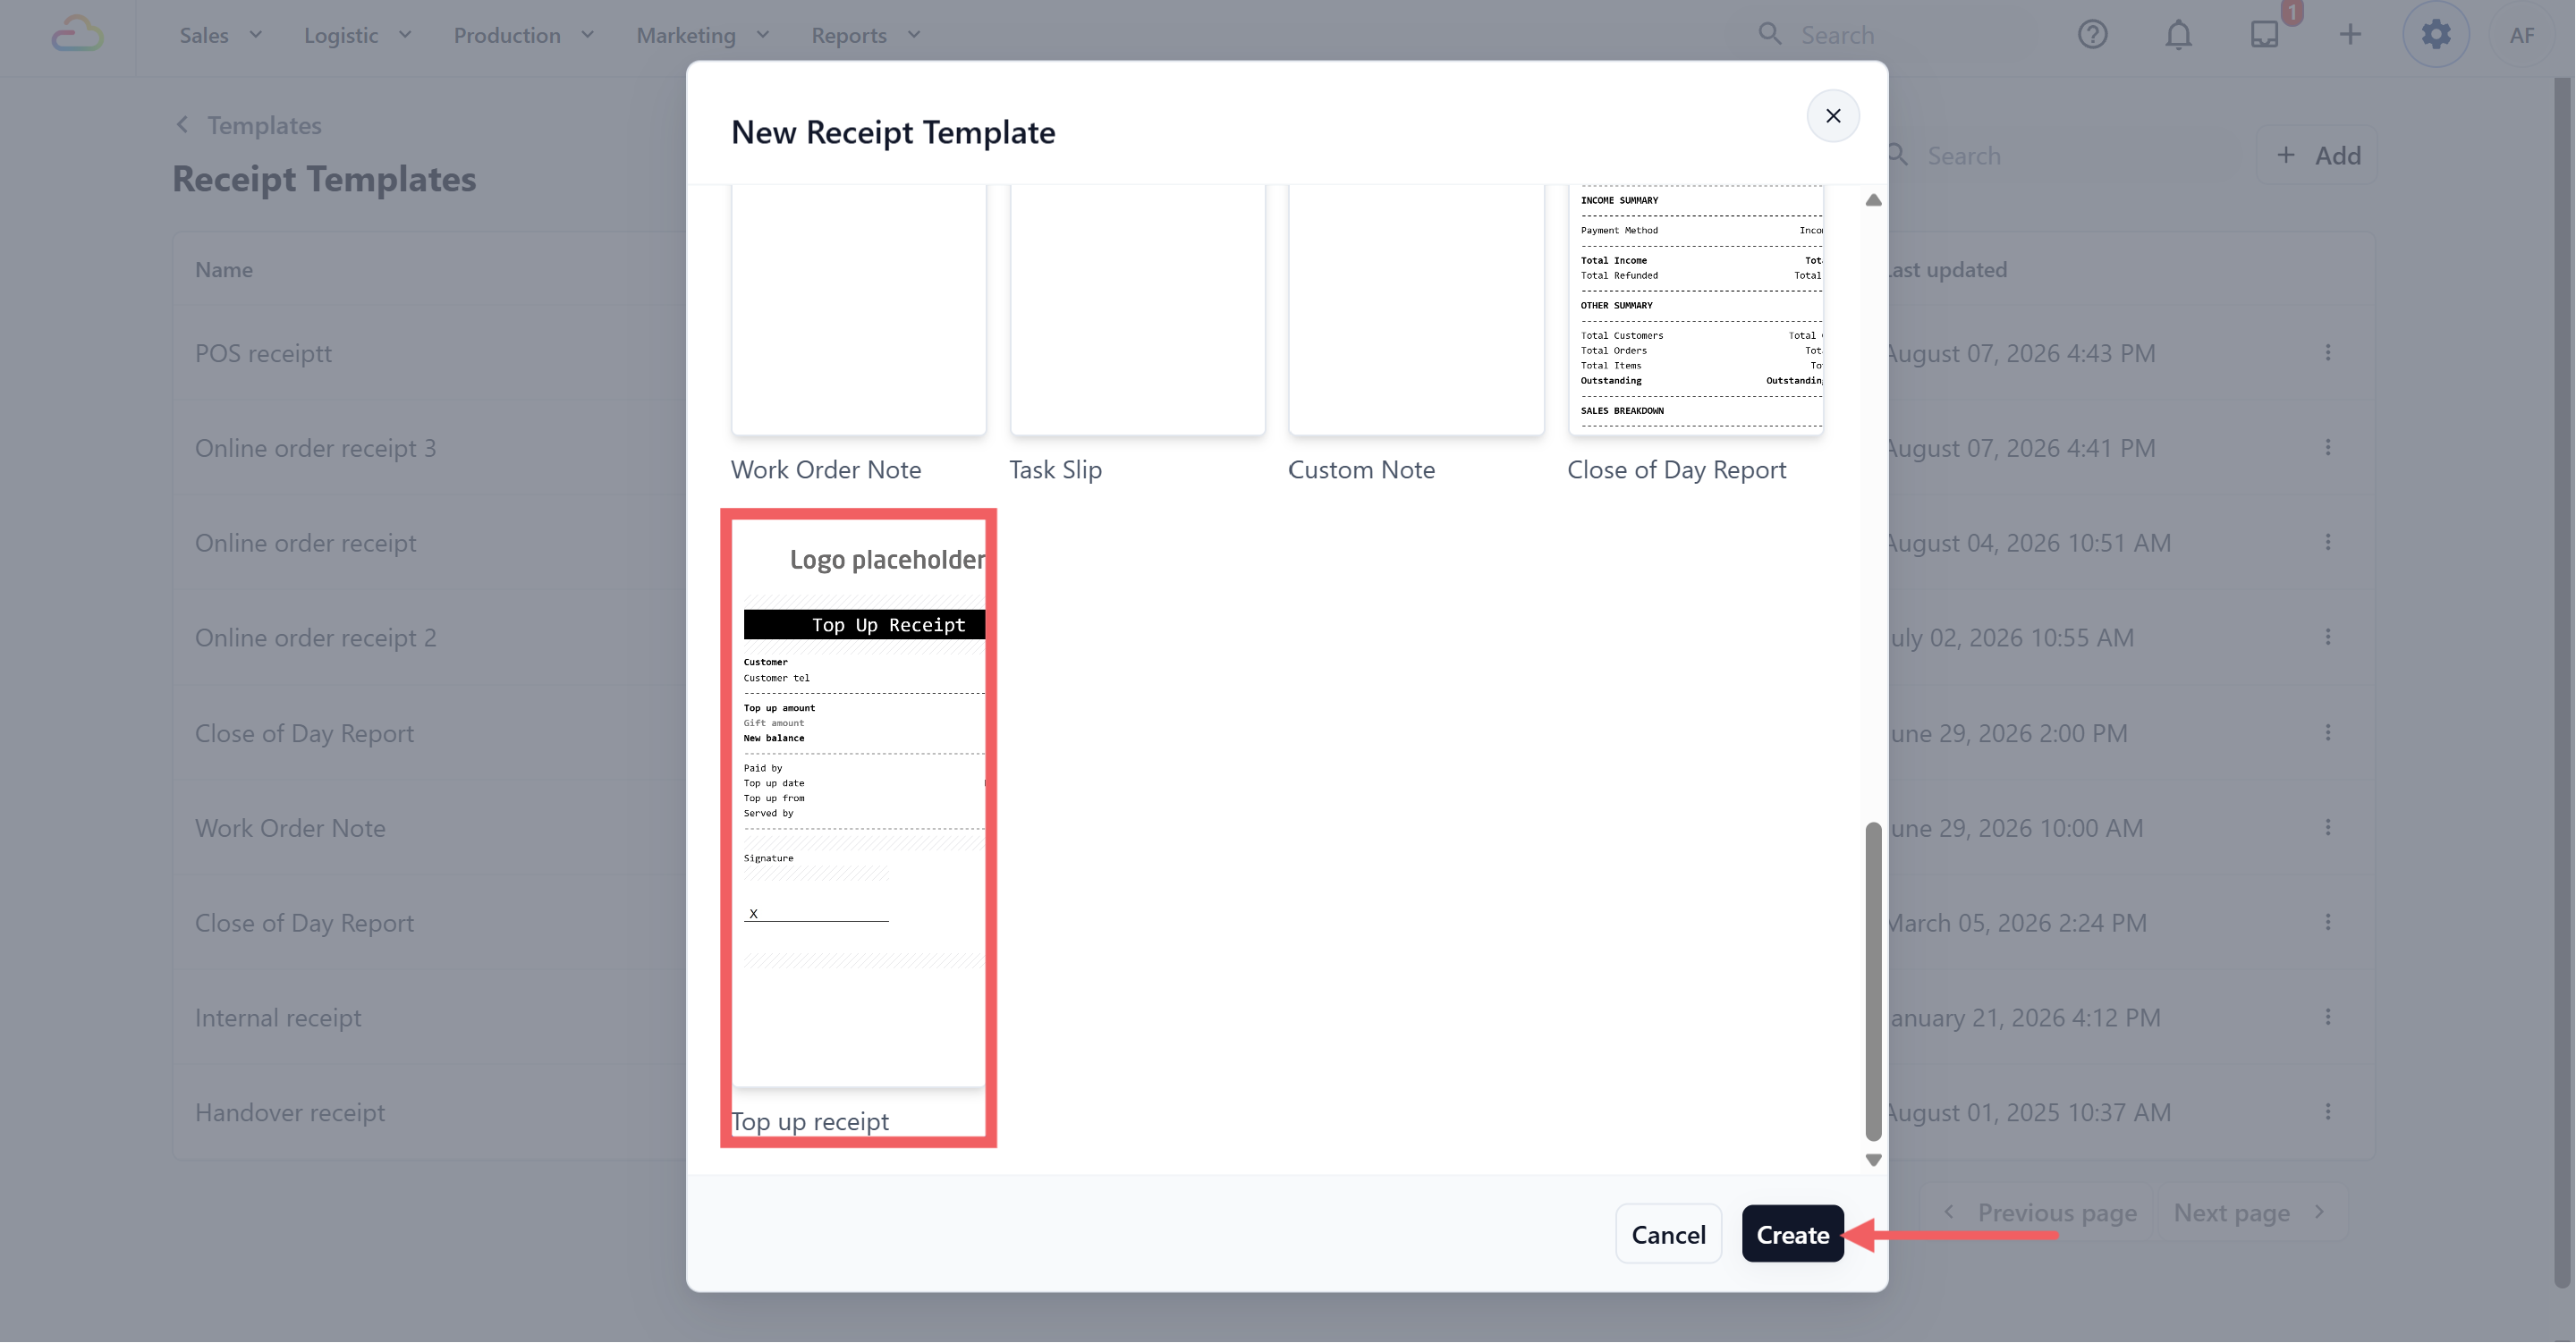
- Click the Top up receipt card, then click Create.
What the Ready-Made Layout Already Prints
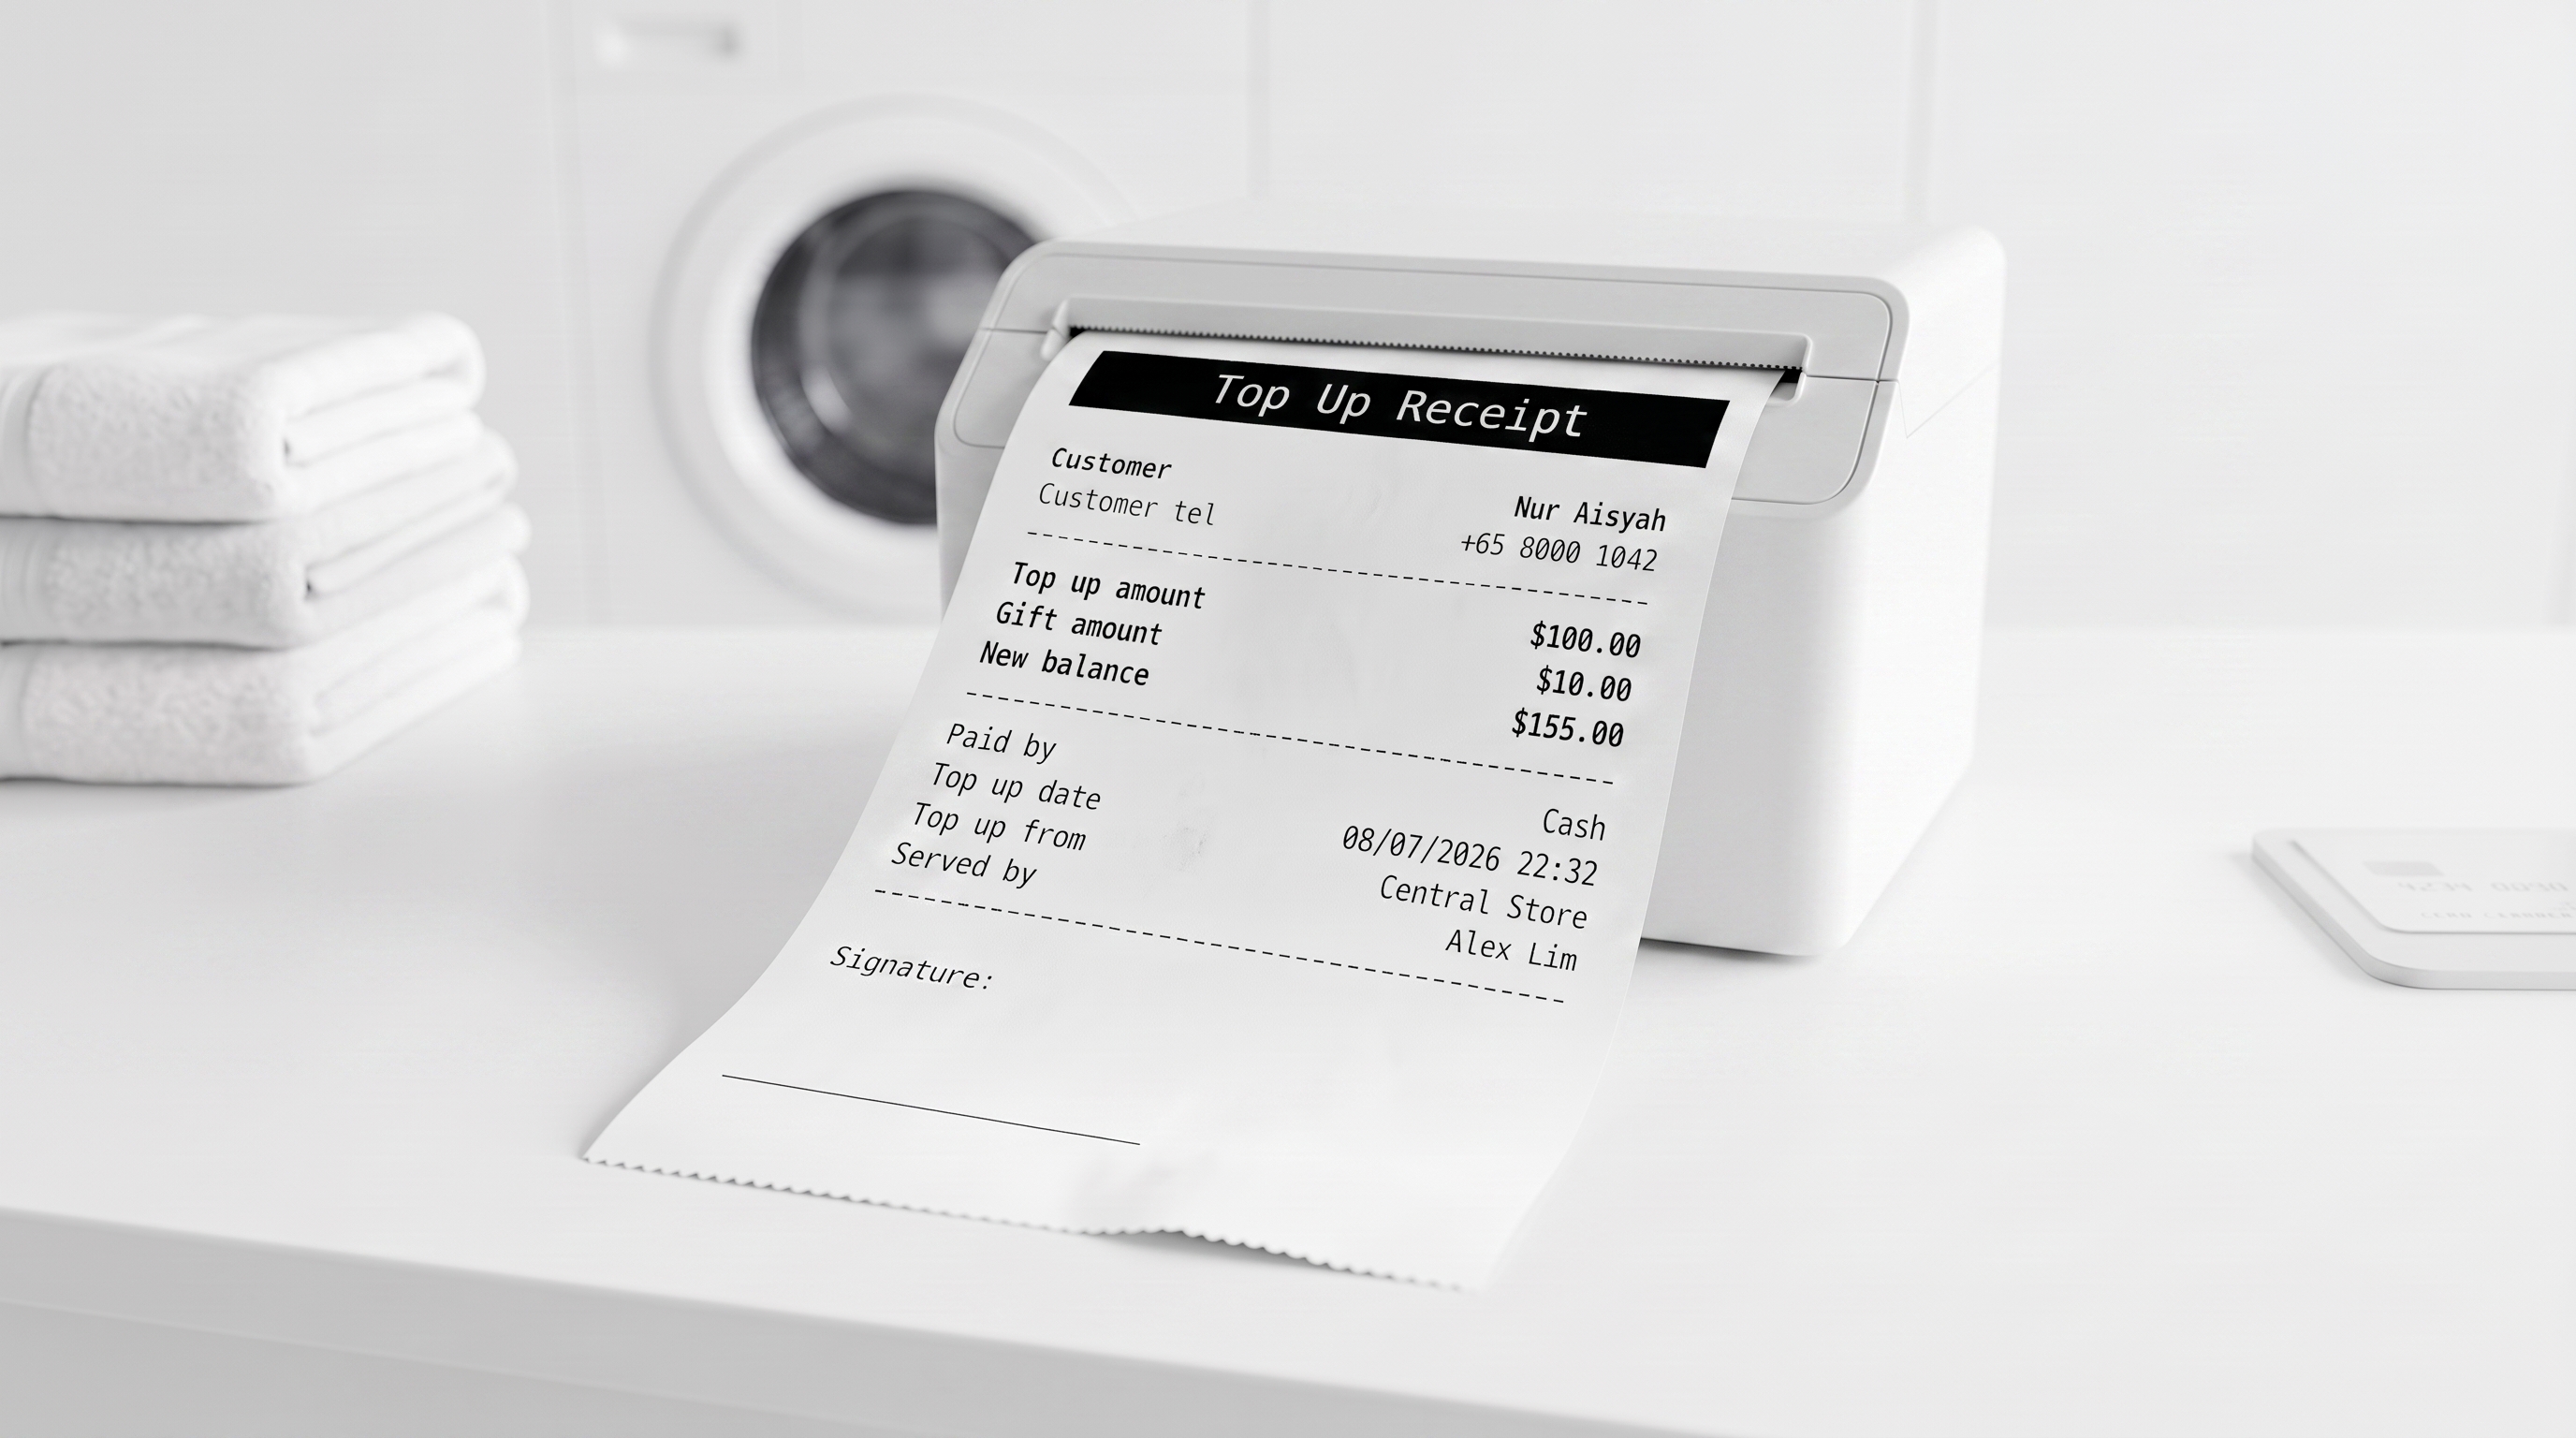
The editor opens with a working slip.
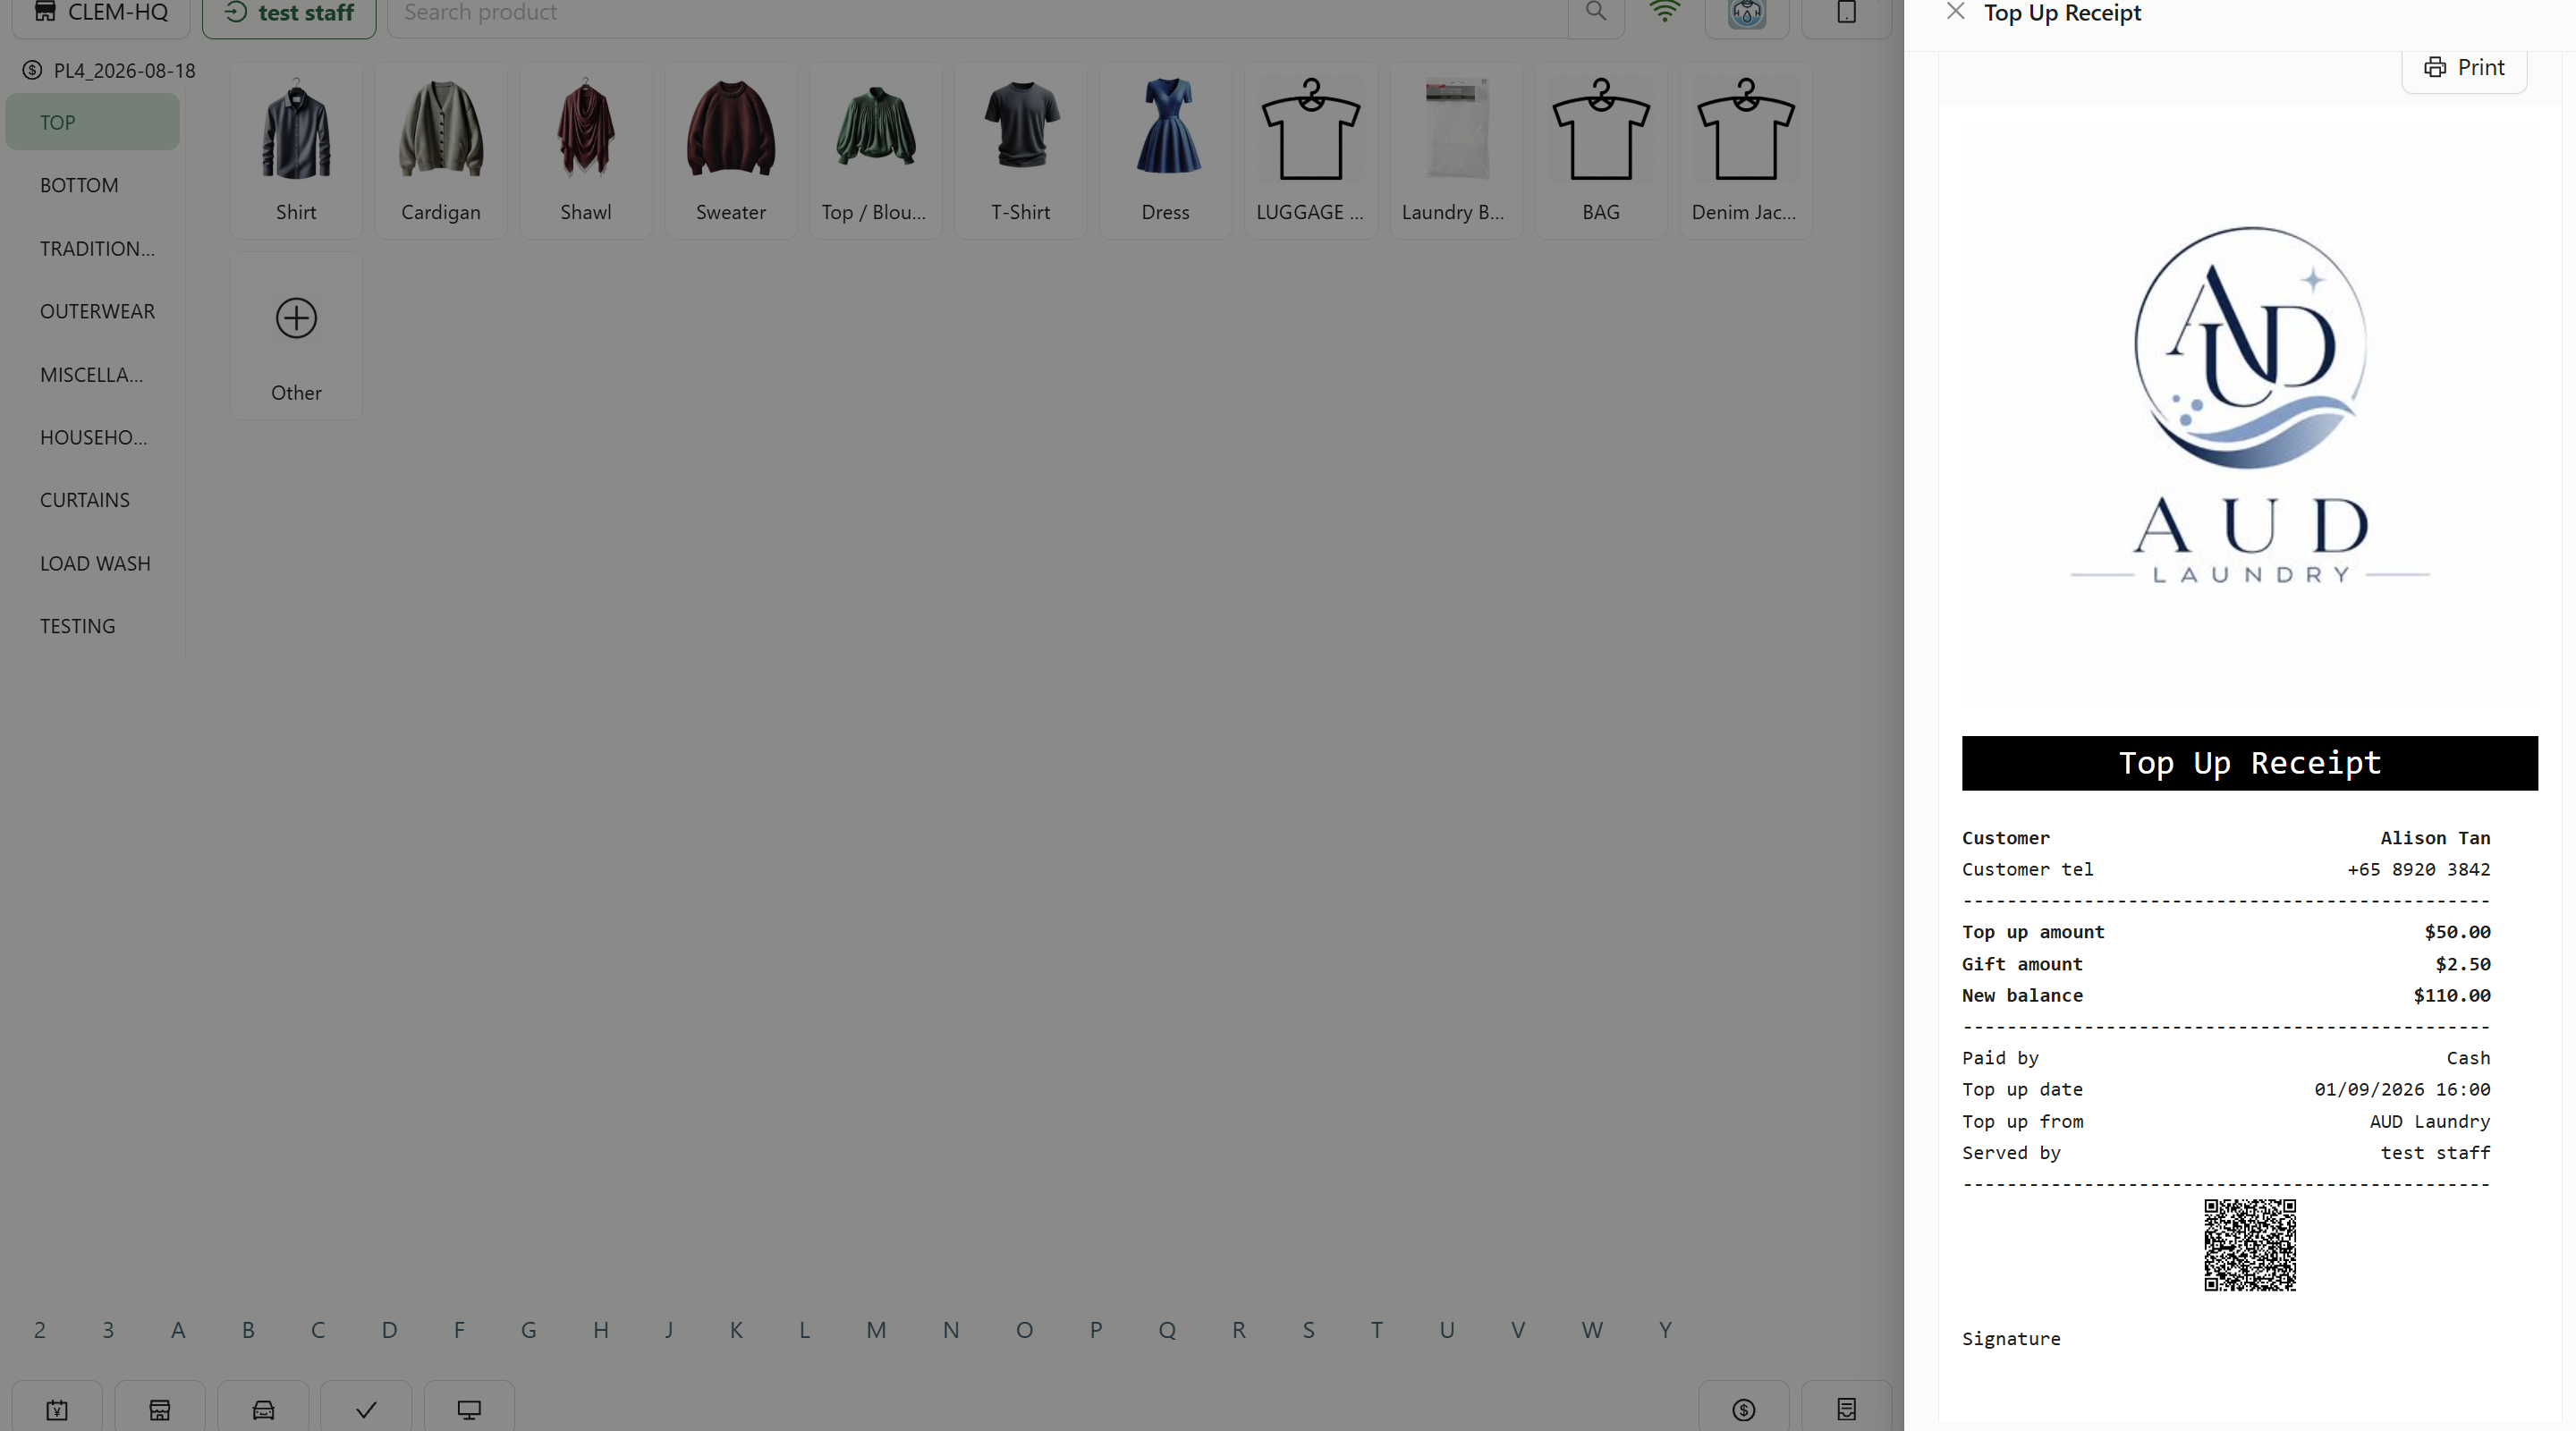
- Brand Logo centered
- A large Top Up Receipt heading in white-on-black
- Customer and Customer tel
- Top up amount, Gift amount, New balance
- Paid by, Top up date, Top up from, Served by
- A Signature line
Set the Paper Width and Formats
Click the outer edge of the slip to select the receipt itself. The Block tab then shows Normal character per line.
| Pick this | Result |
|---|---|
| 48 Characters (80mm) | For a normal counter printer |
| 32 Characters (58mm) | For a small handheld printer |
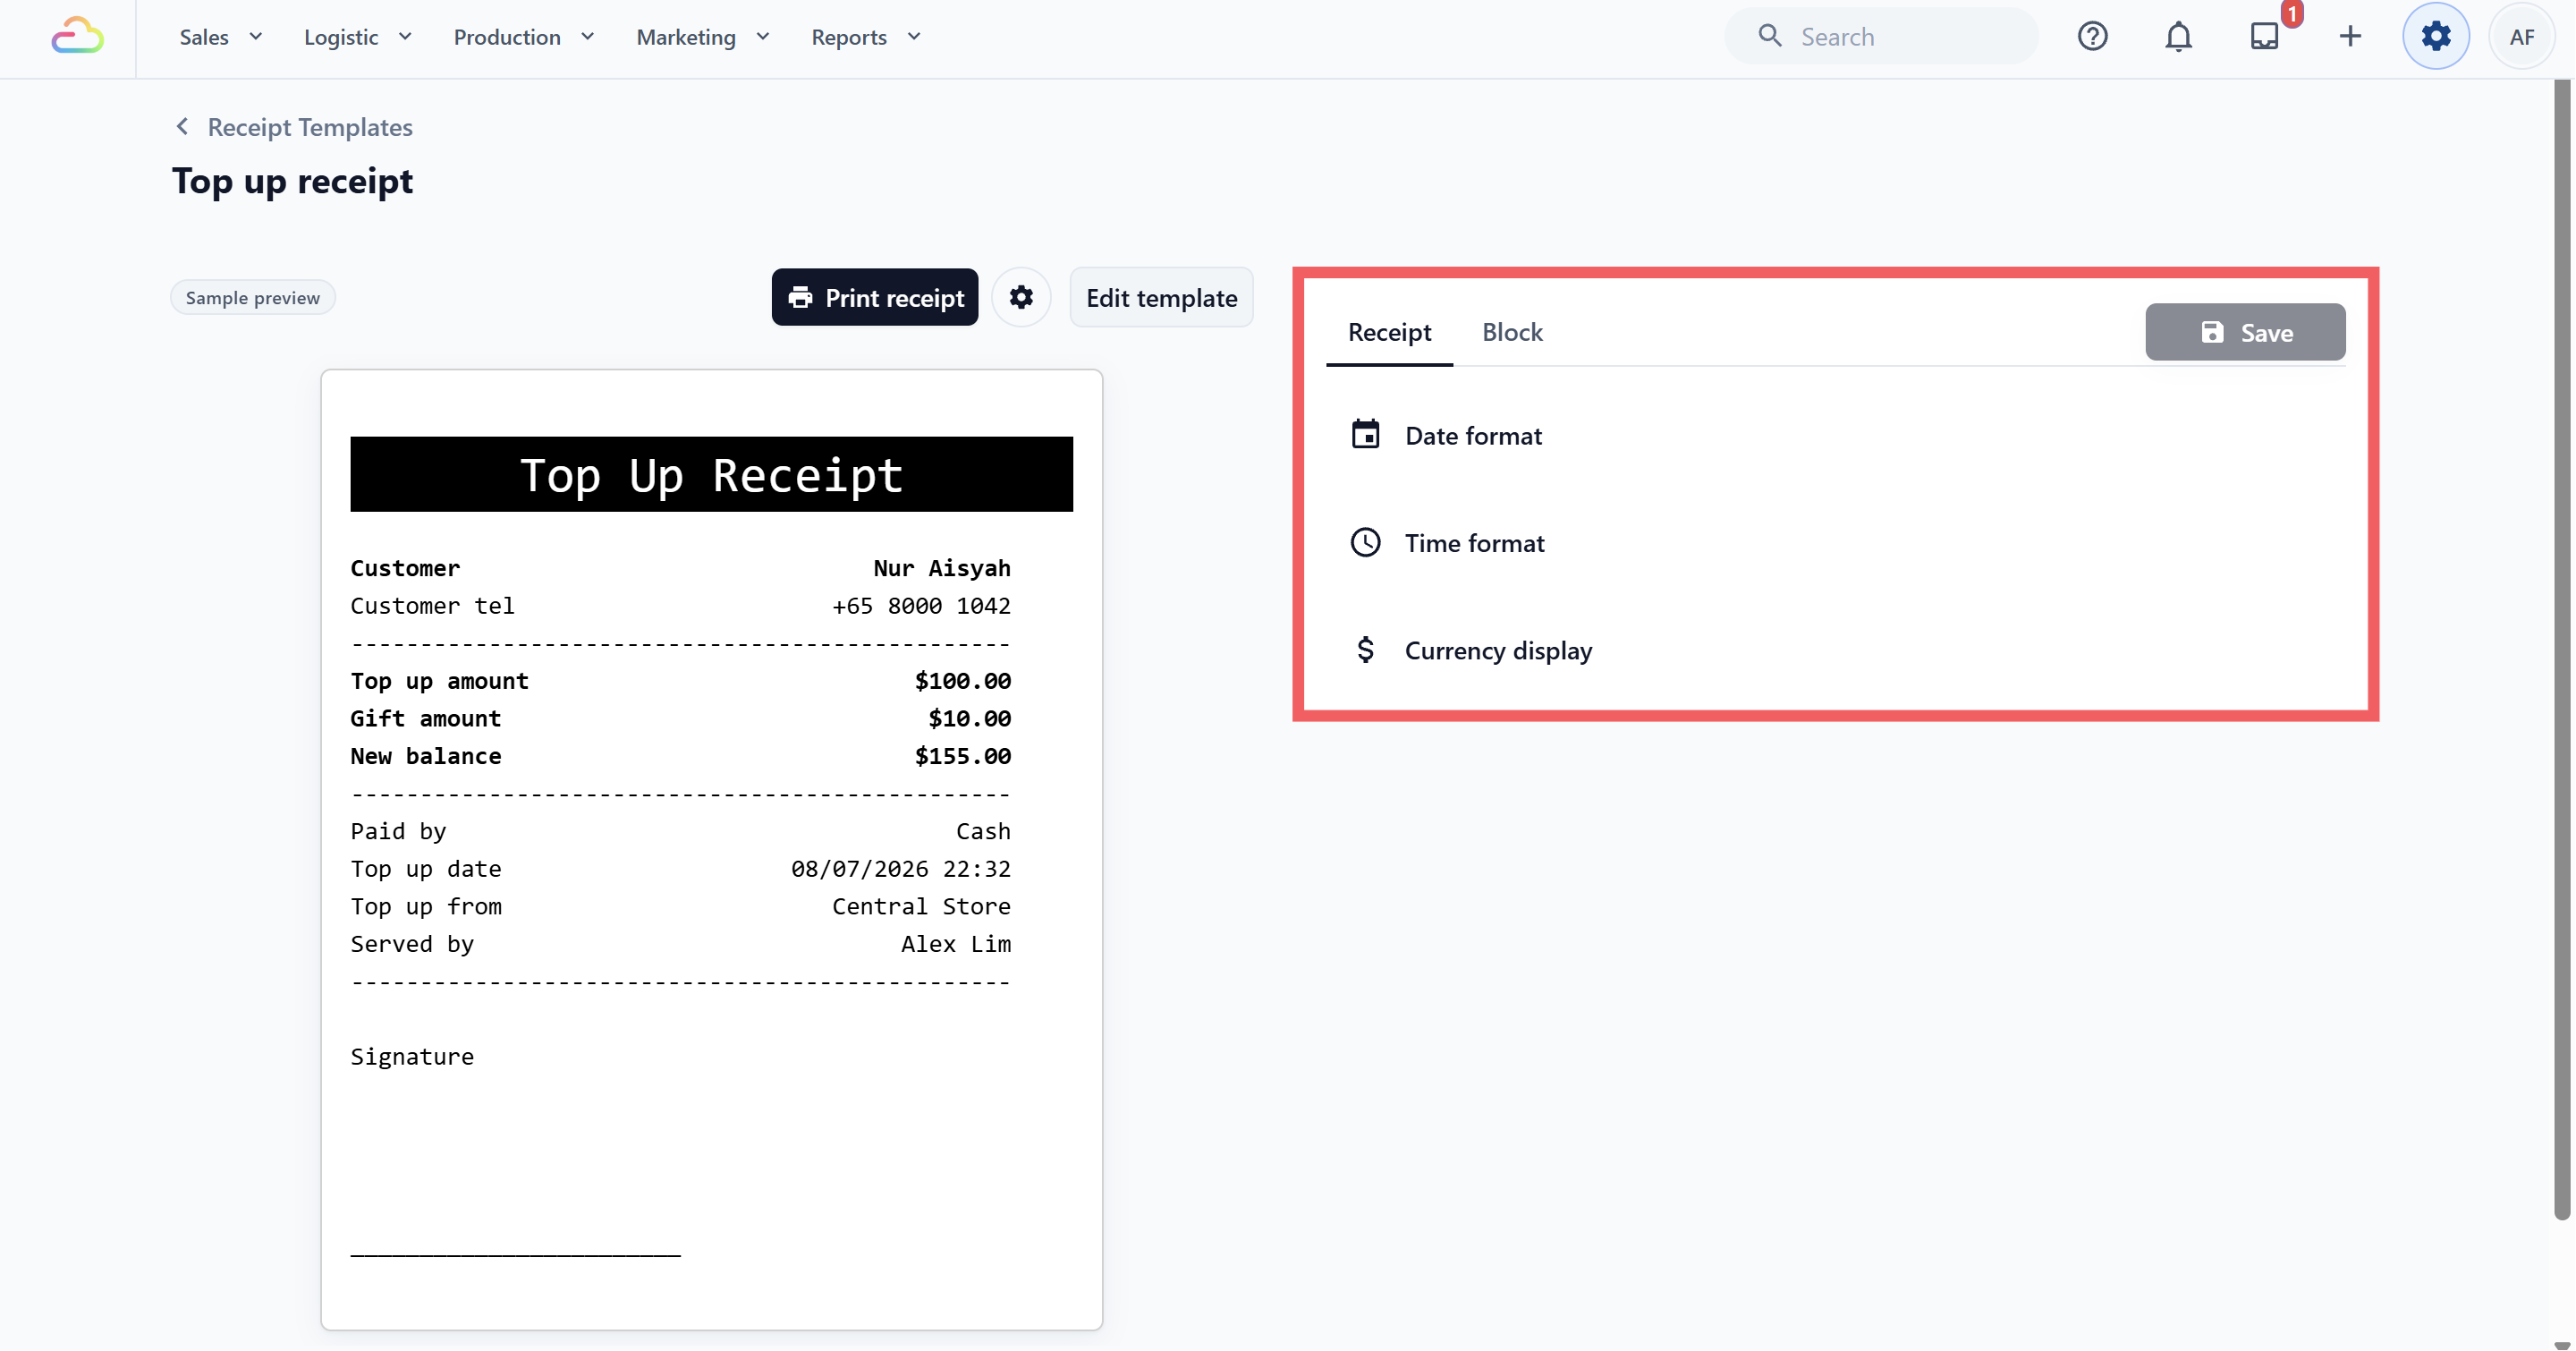
The Receipt tab holds three settings that apply to the whole slip: Date format, Time format, and Currency display. Each can be left on Default to preferences, which follows your Console setting.
Customise the Layout
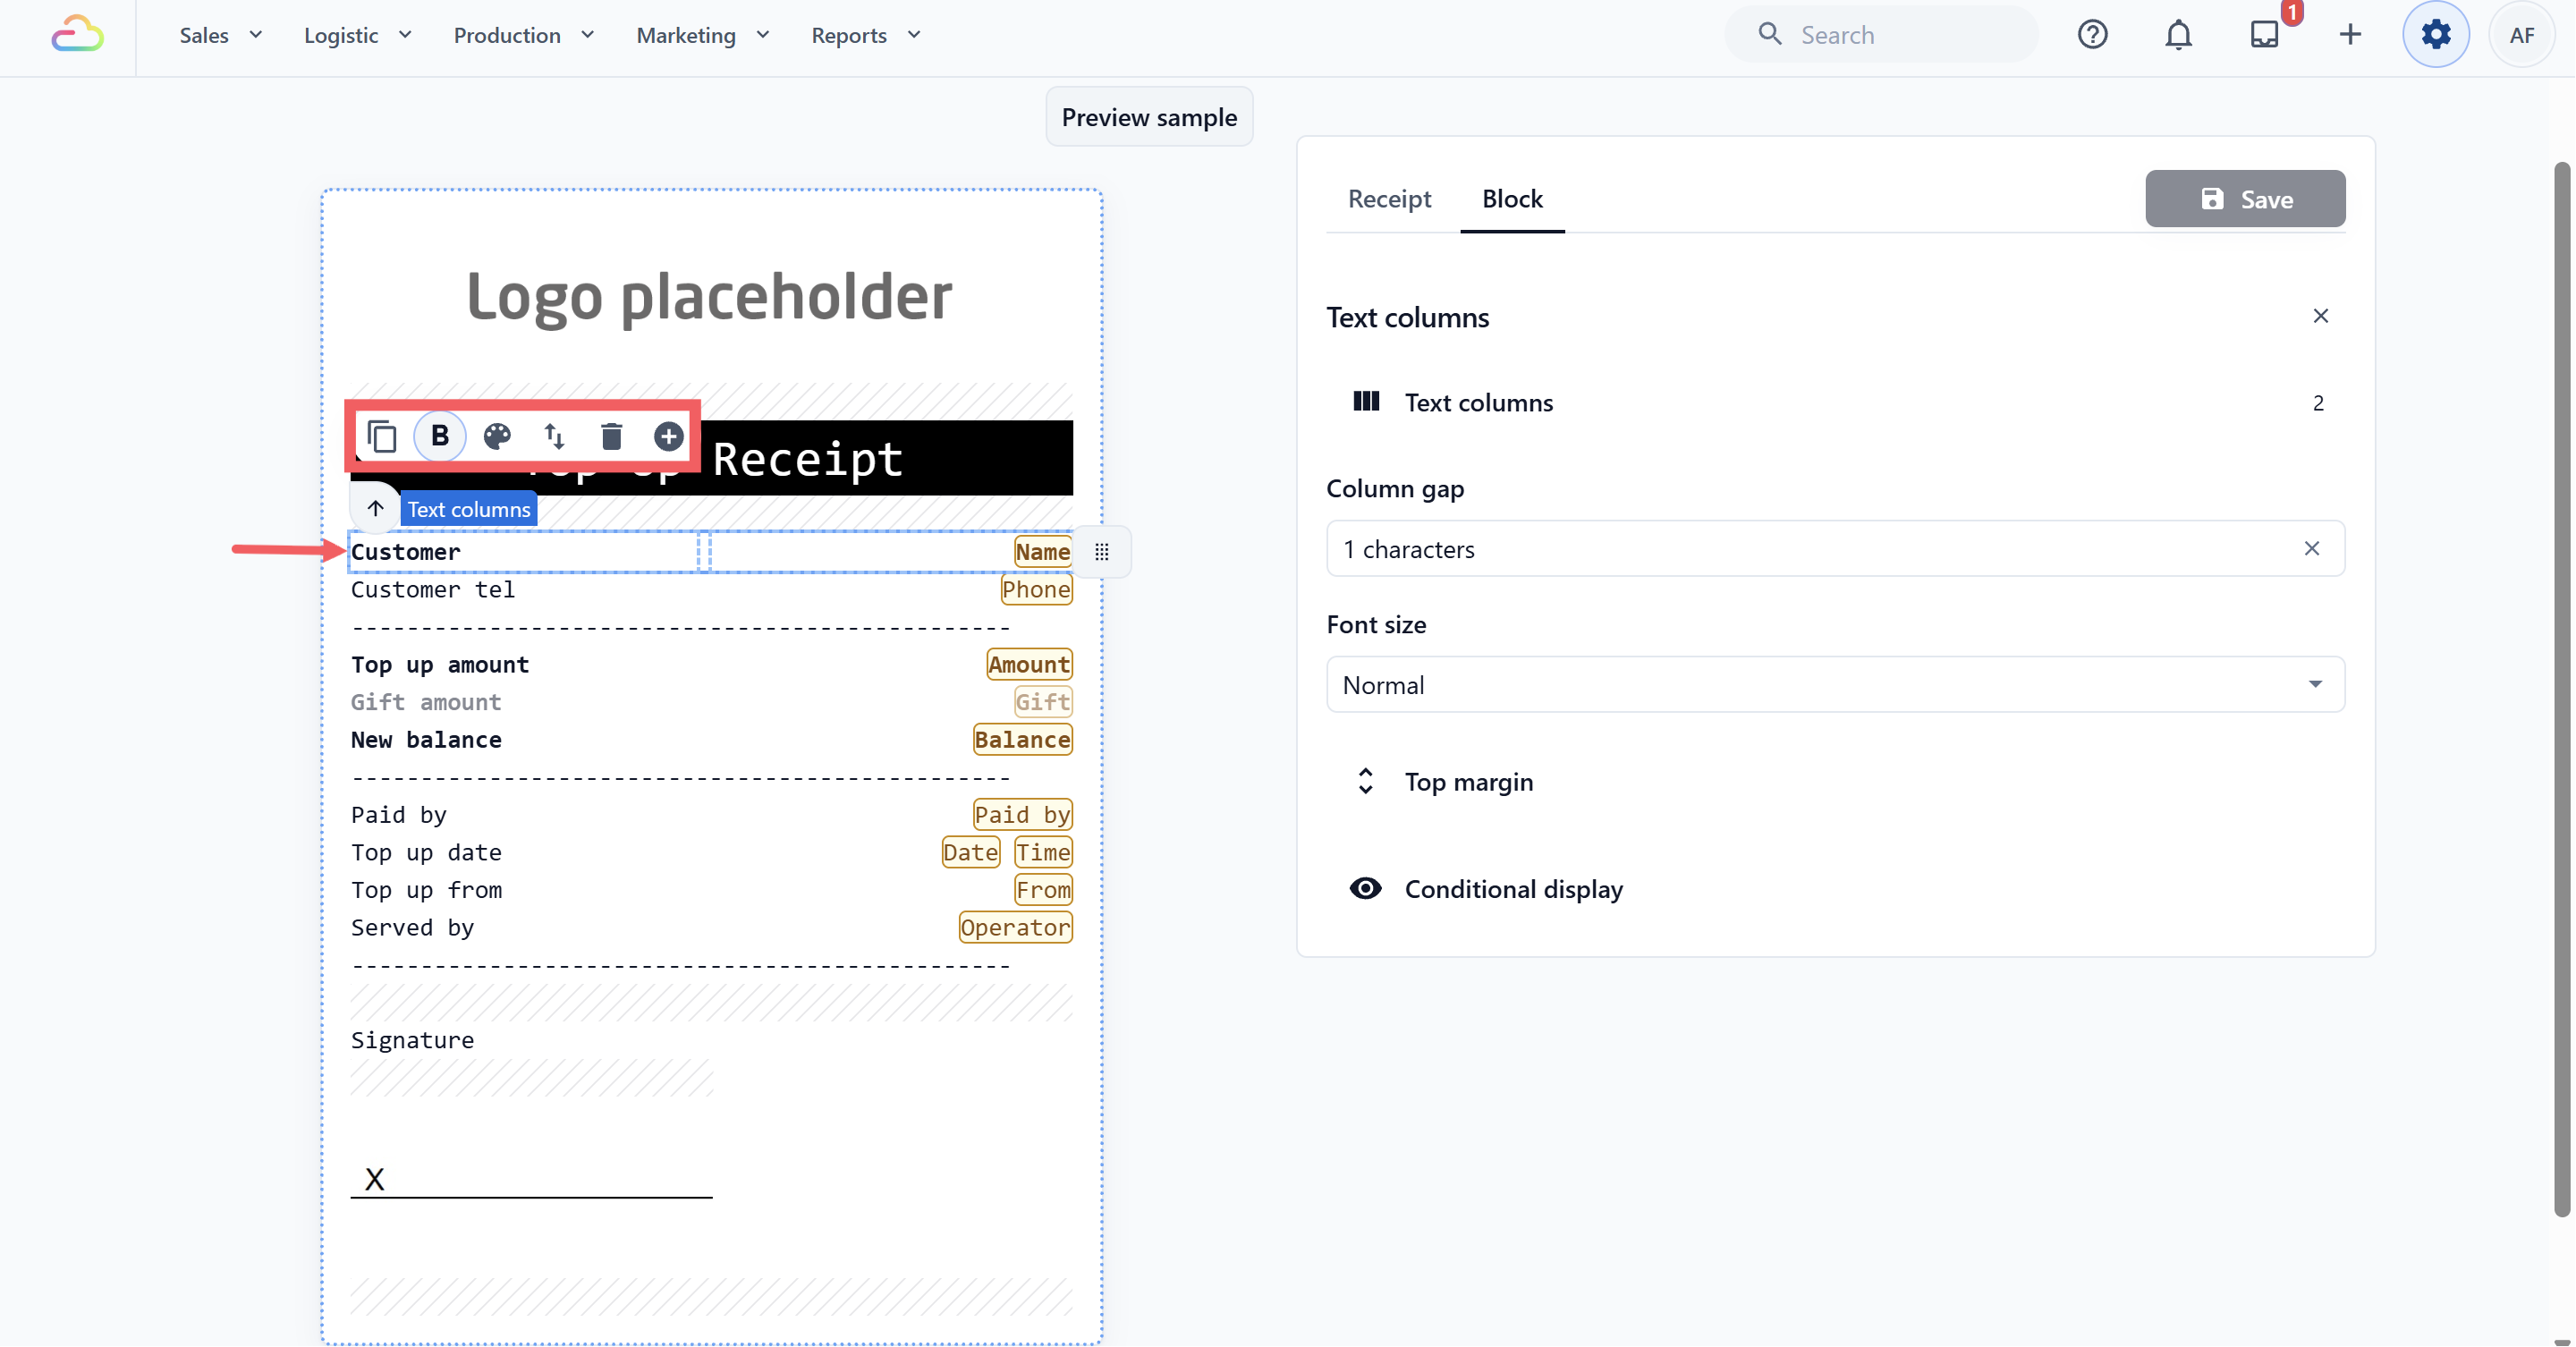
Click any part of the slip to select that block. A small toolbar appears on the block, and the Block tab fills with its settings.
- Rewrite the wording, for example change Top Up Receipt to Thank You For Topping Up.
- Font size: Small, Normal, Large, Huge, or Giant.
- Alignment: click to cycle Left, Center, Right.
- Bold and Invert mode, which prints white letters on a black bar for a heading.
- Top margin: add 1 to 5 blank lines above the block.
- Move block to shift it up or down, or Delete block to remove it.
- Conditional display to print a block only in certain situations.
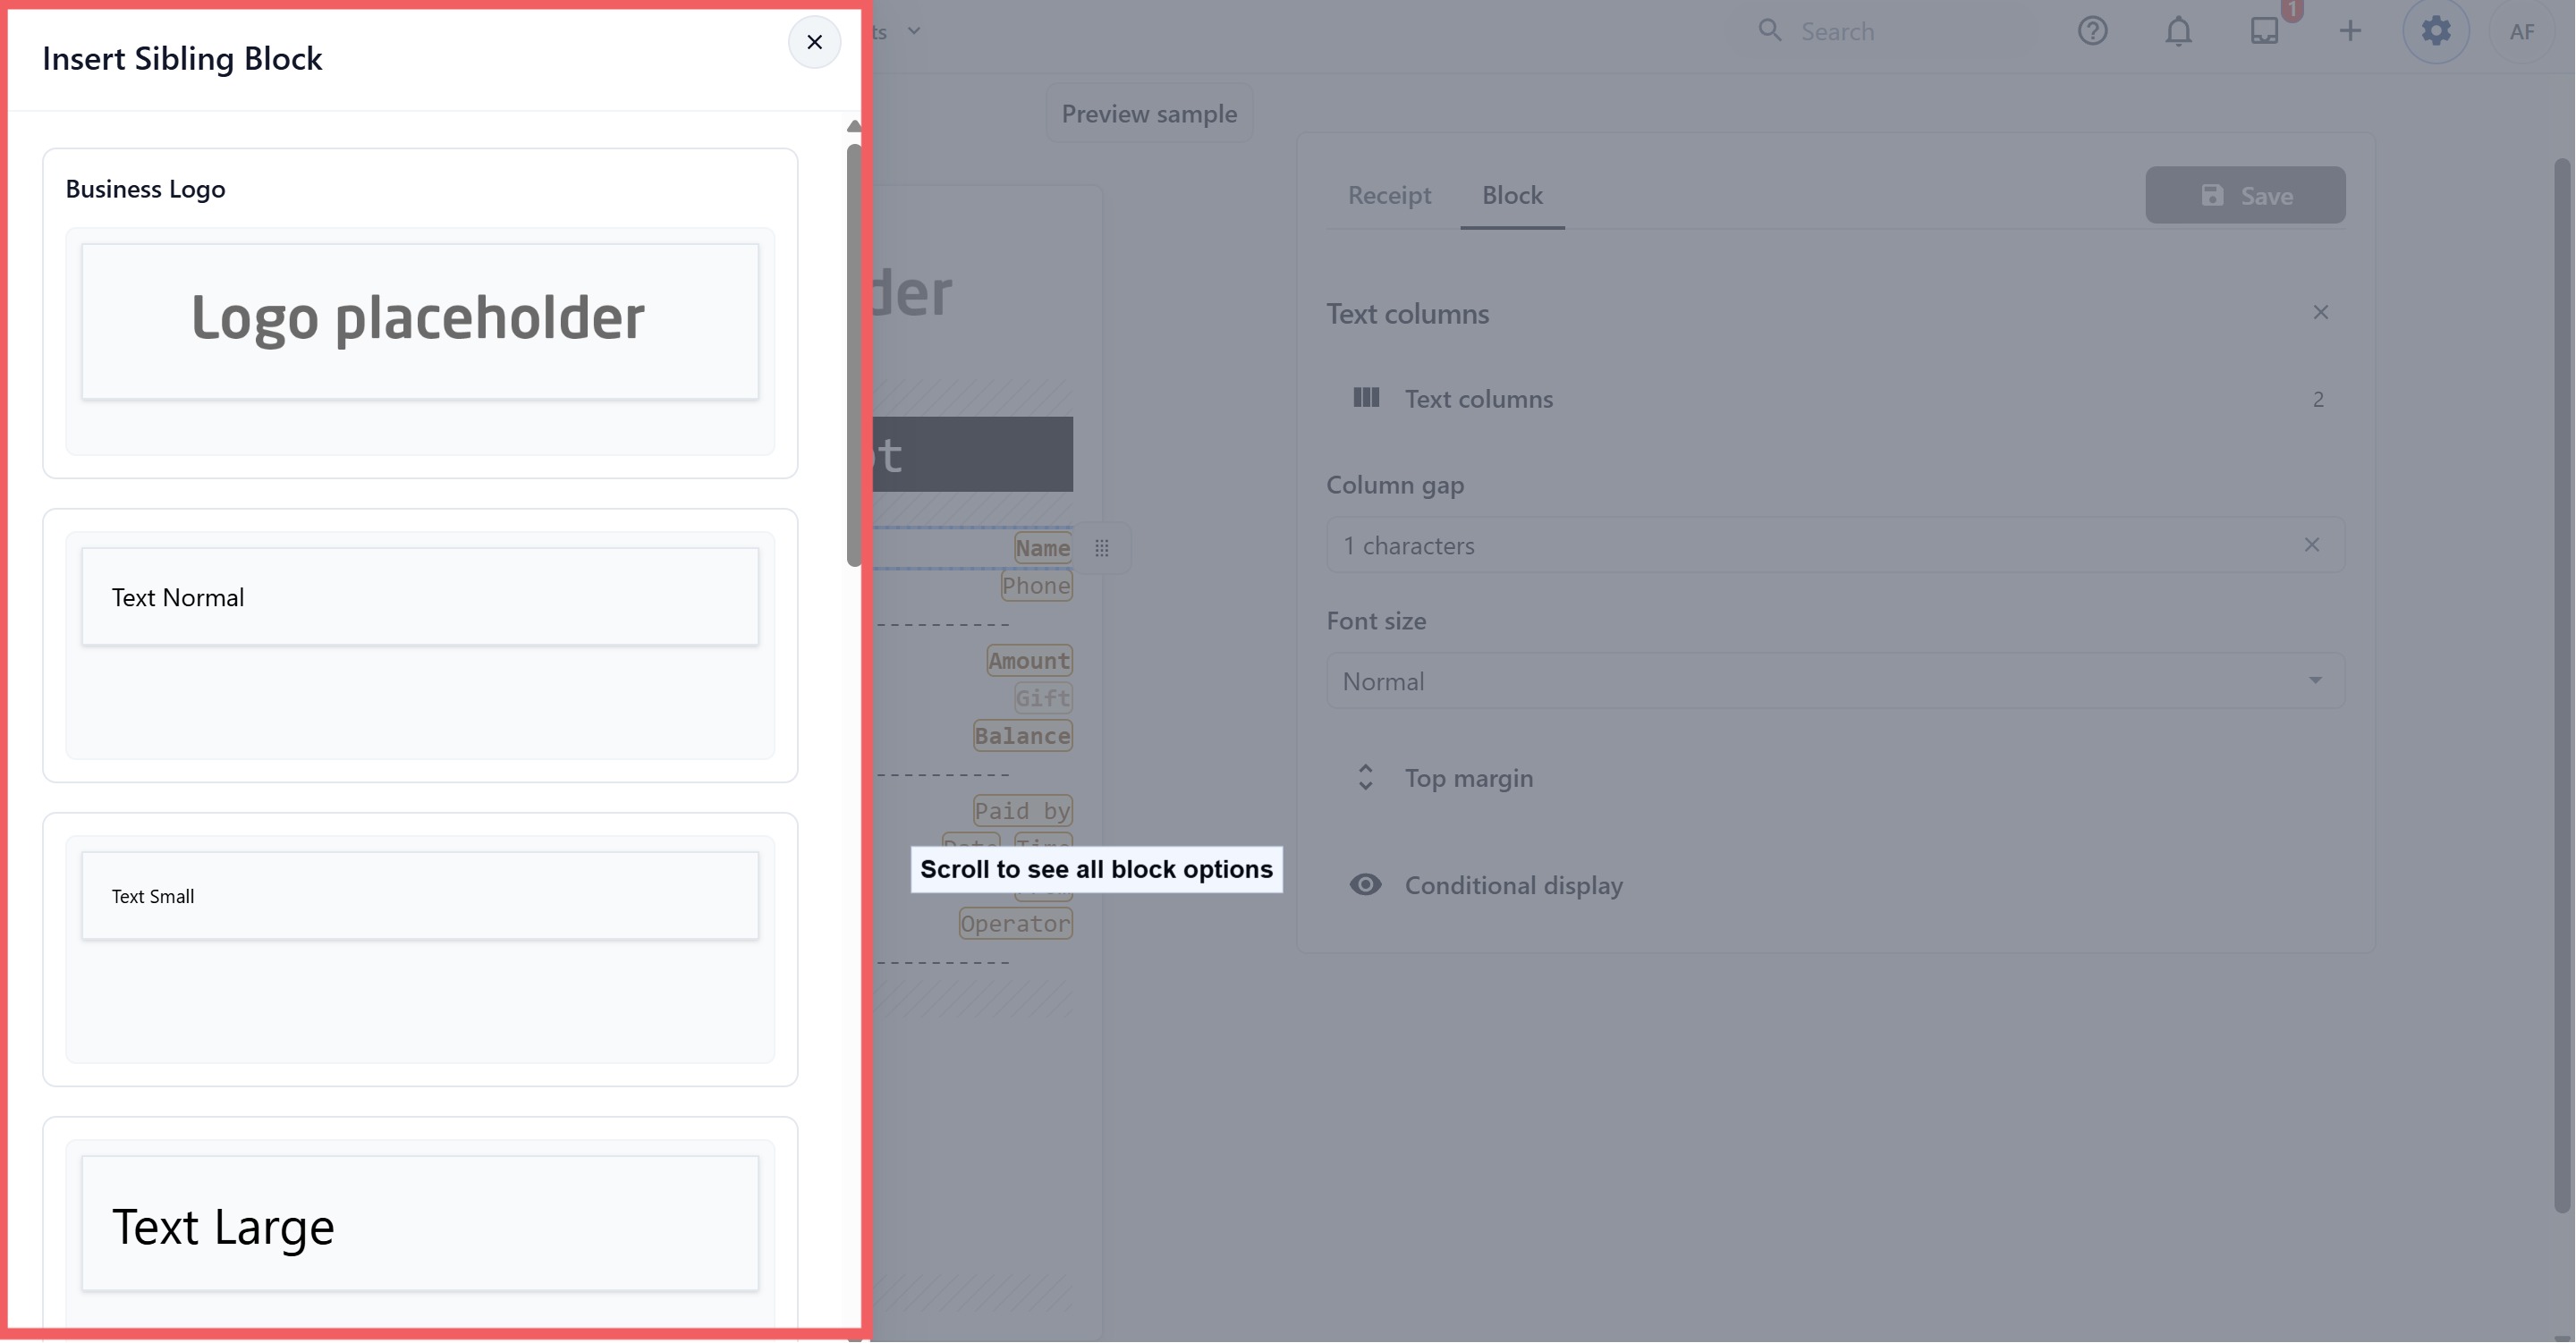
To add something new, select the block you want to add below and click the ⊕ Insert sibling block below button. A drawer opens with the blocks a top-up receipt can use: Business Logo, three text sizes, Text side by side, Text 3 columns, Line Feed, Dash line, Signature, and PAYNOW QR Code (Manual).
Add a Manual PayNow QR
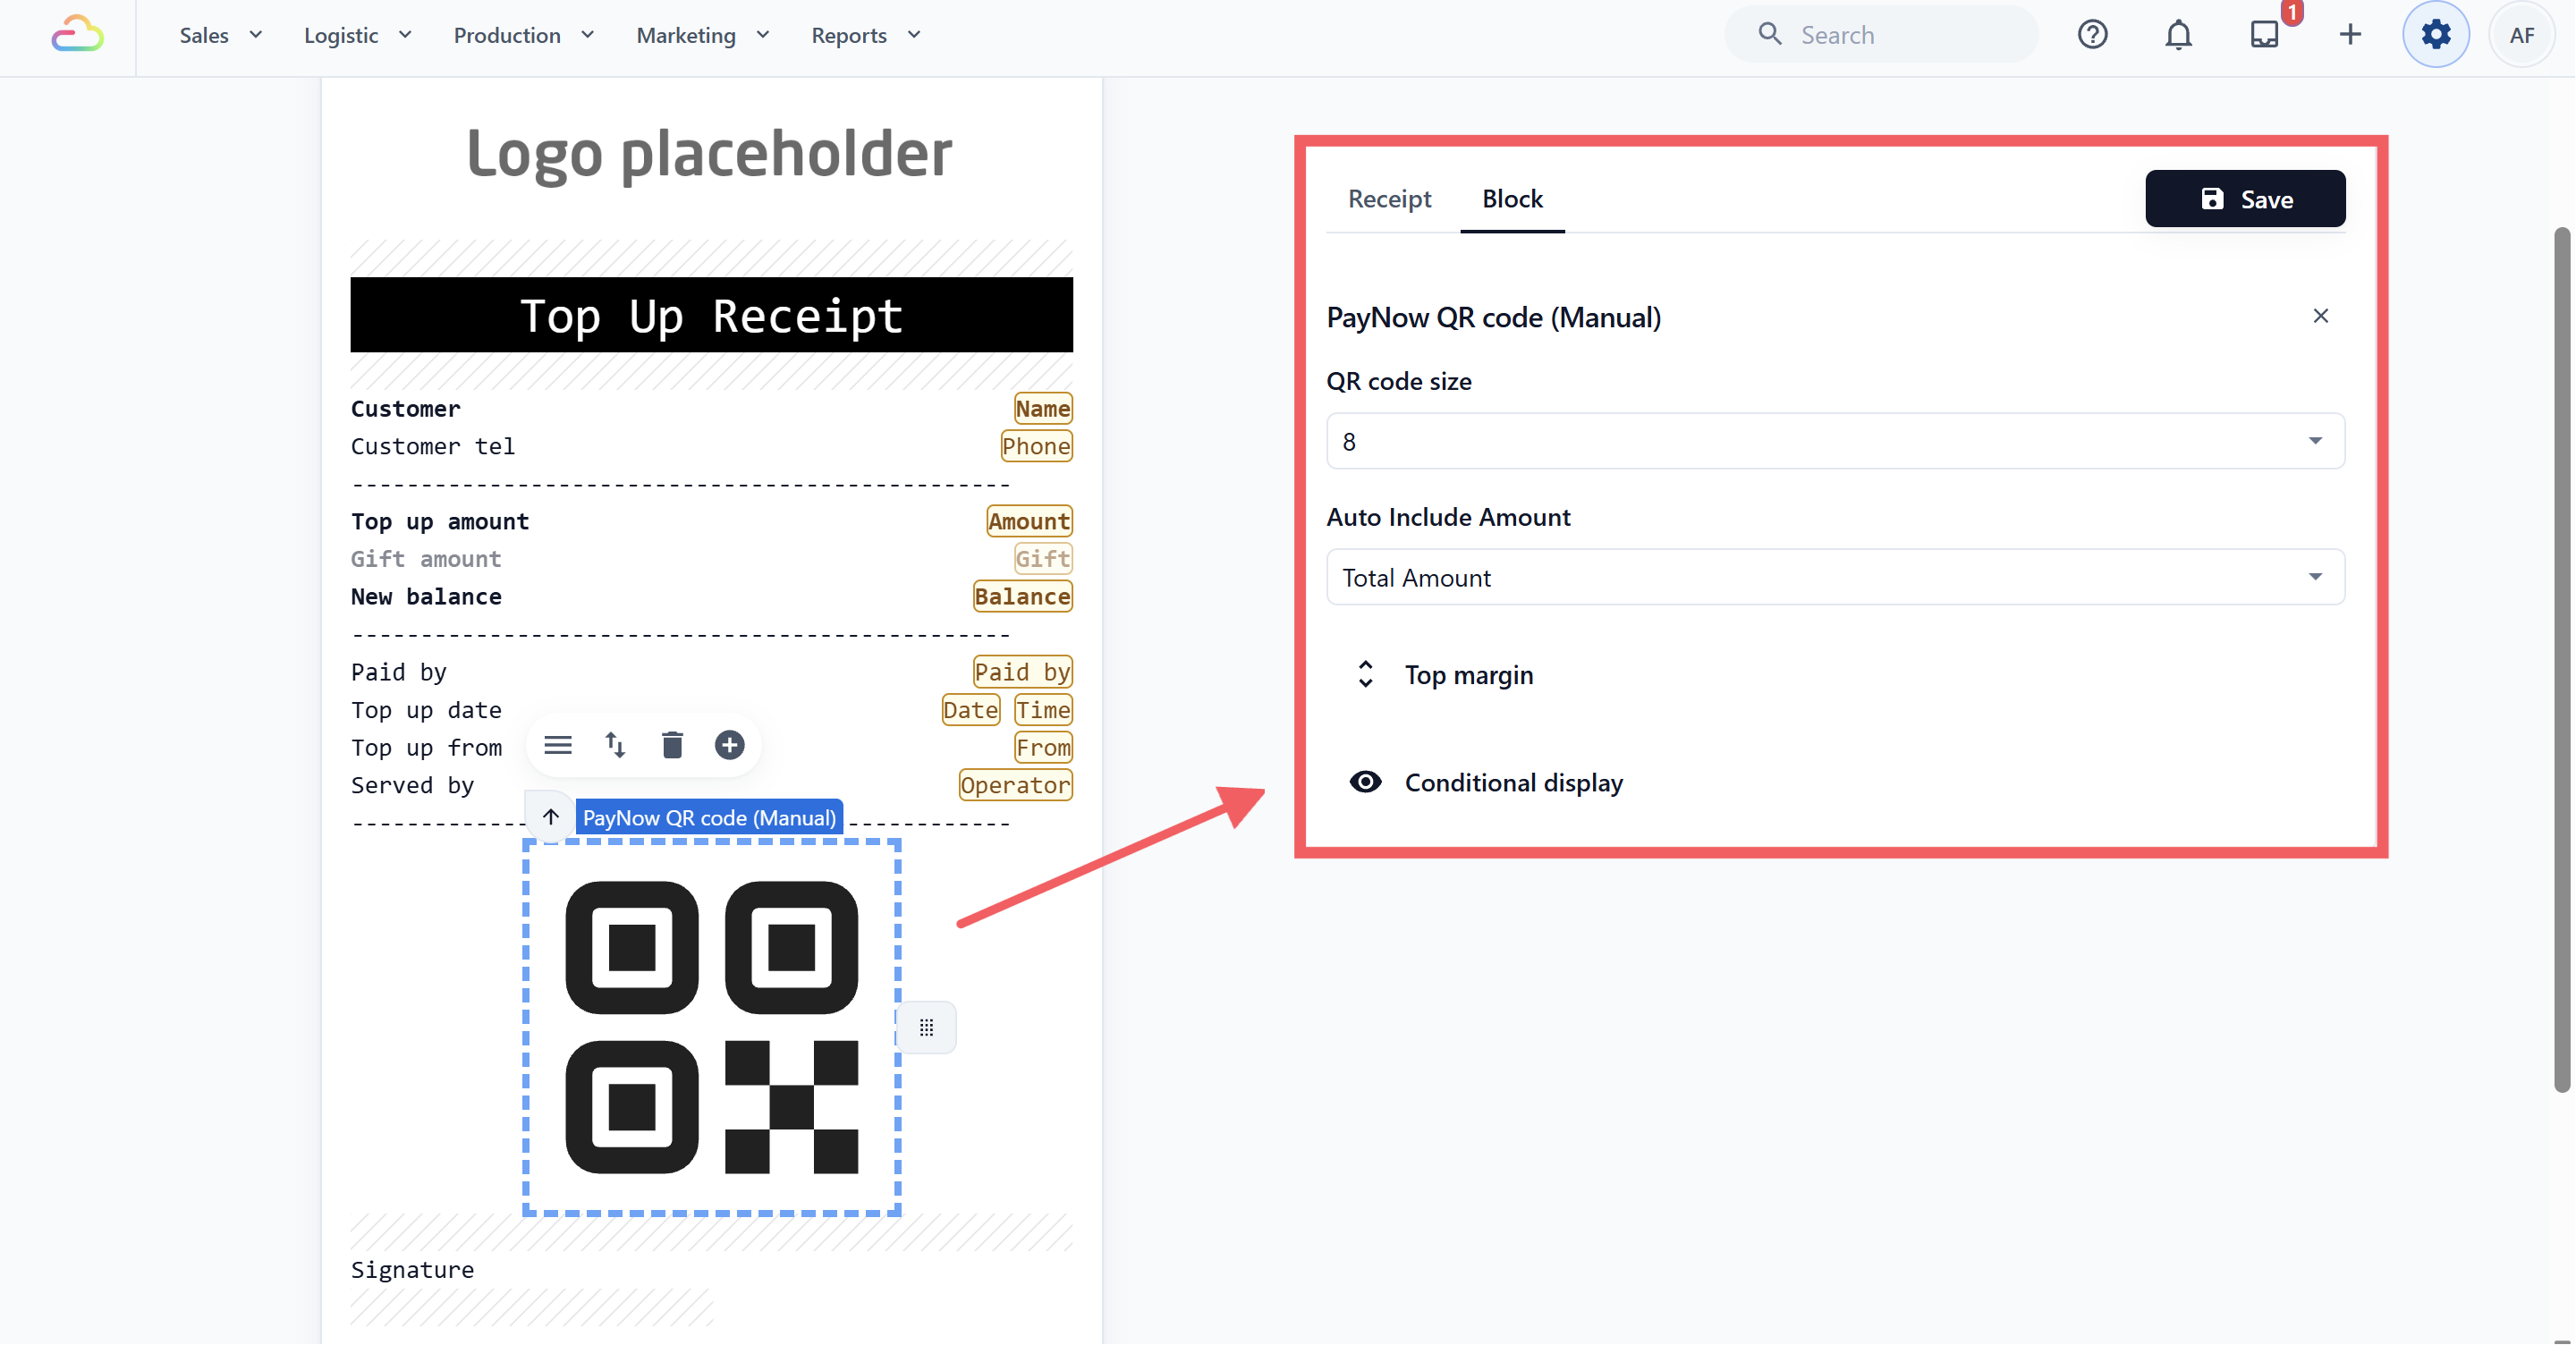
Add the PAYNOW QR Code (Manual) block, then set two options.
| Setting | What it does |
|---|---|
| QR code size | 1 to 8. Larger is easier to scan off a narrow slip. |
| Auto Include Amount | Total Amount and Outstanding Amount both print a QR for what the customer paid. No Amount prints a QR with no value, so the customer keys the amount into their banking app. |
Save the Template
Click Save in the top right. Saving also publishes: the Status in the Receipt Templates list changes from Draft to Active.
Connect It to Store Credit
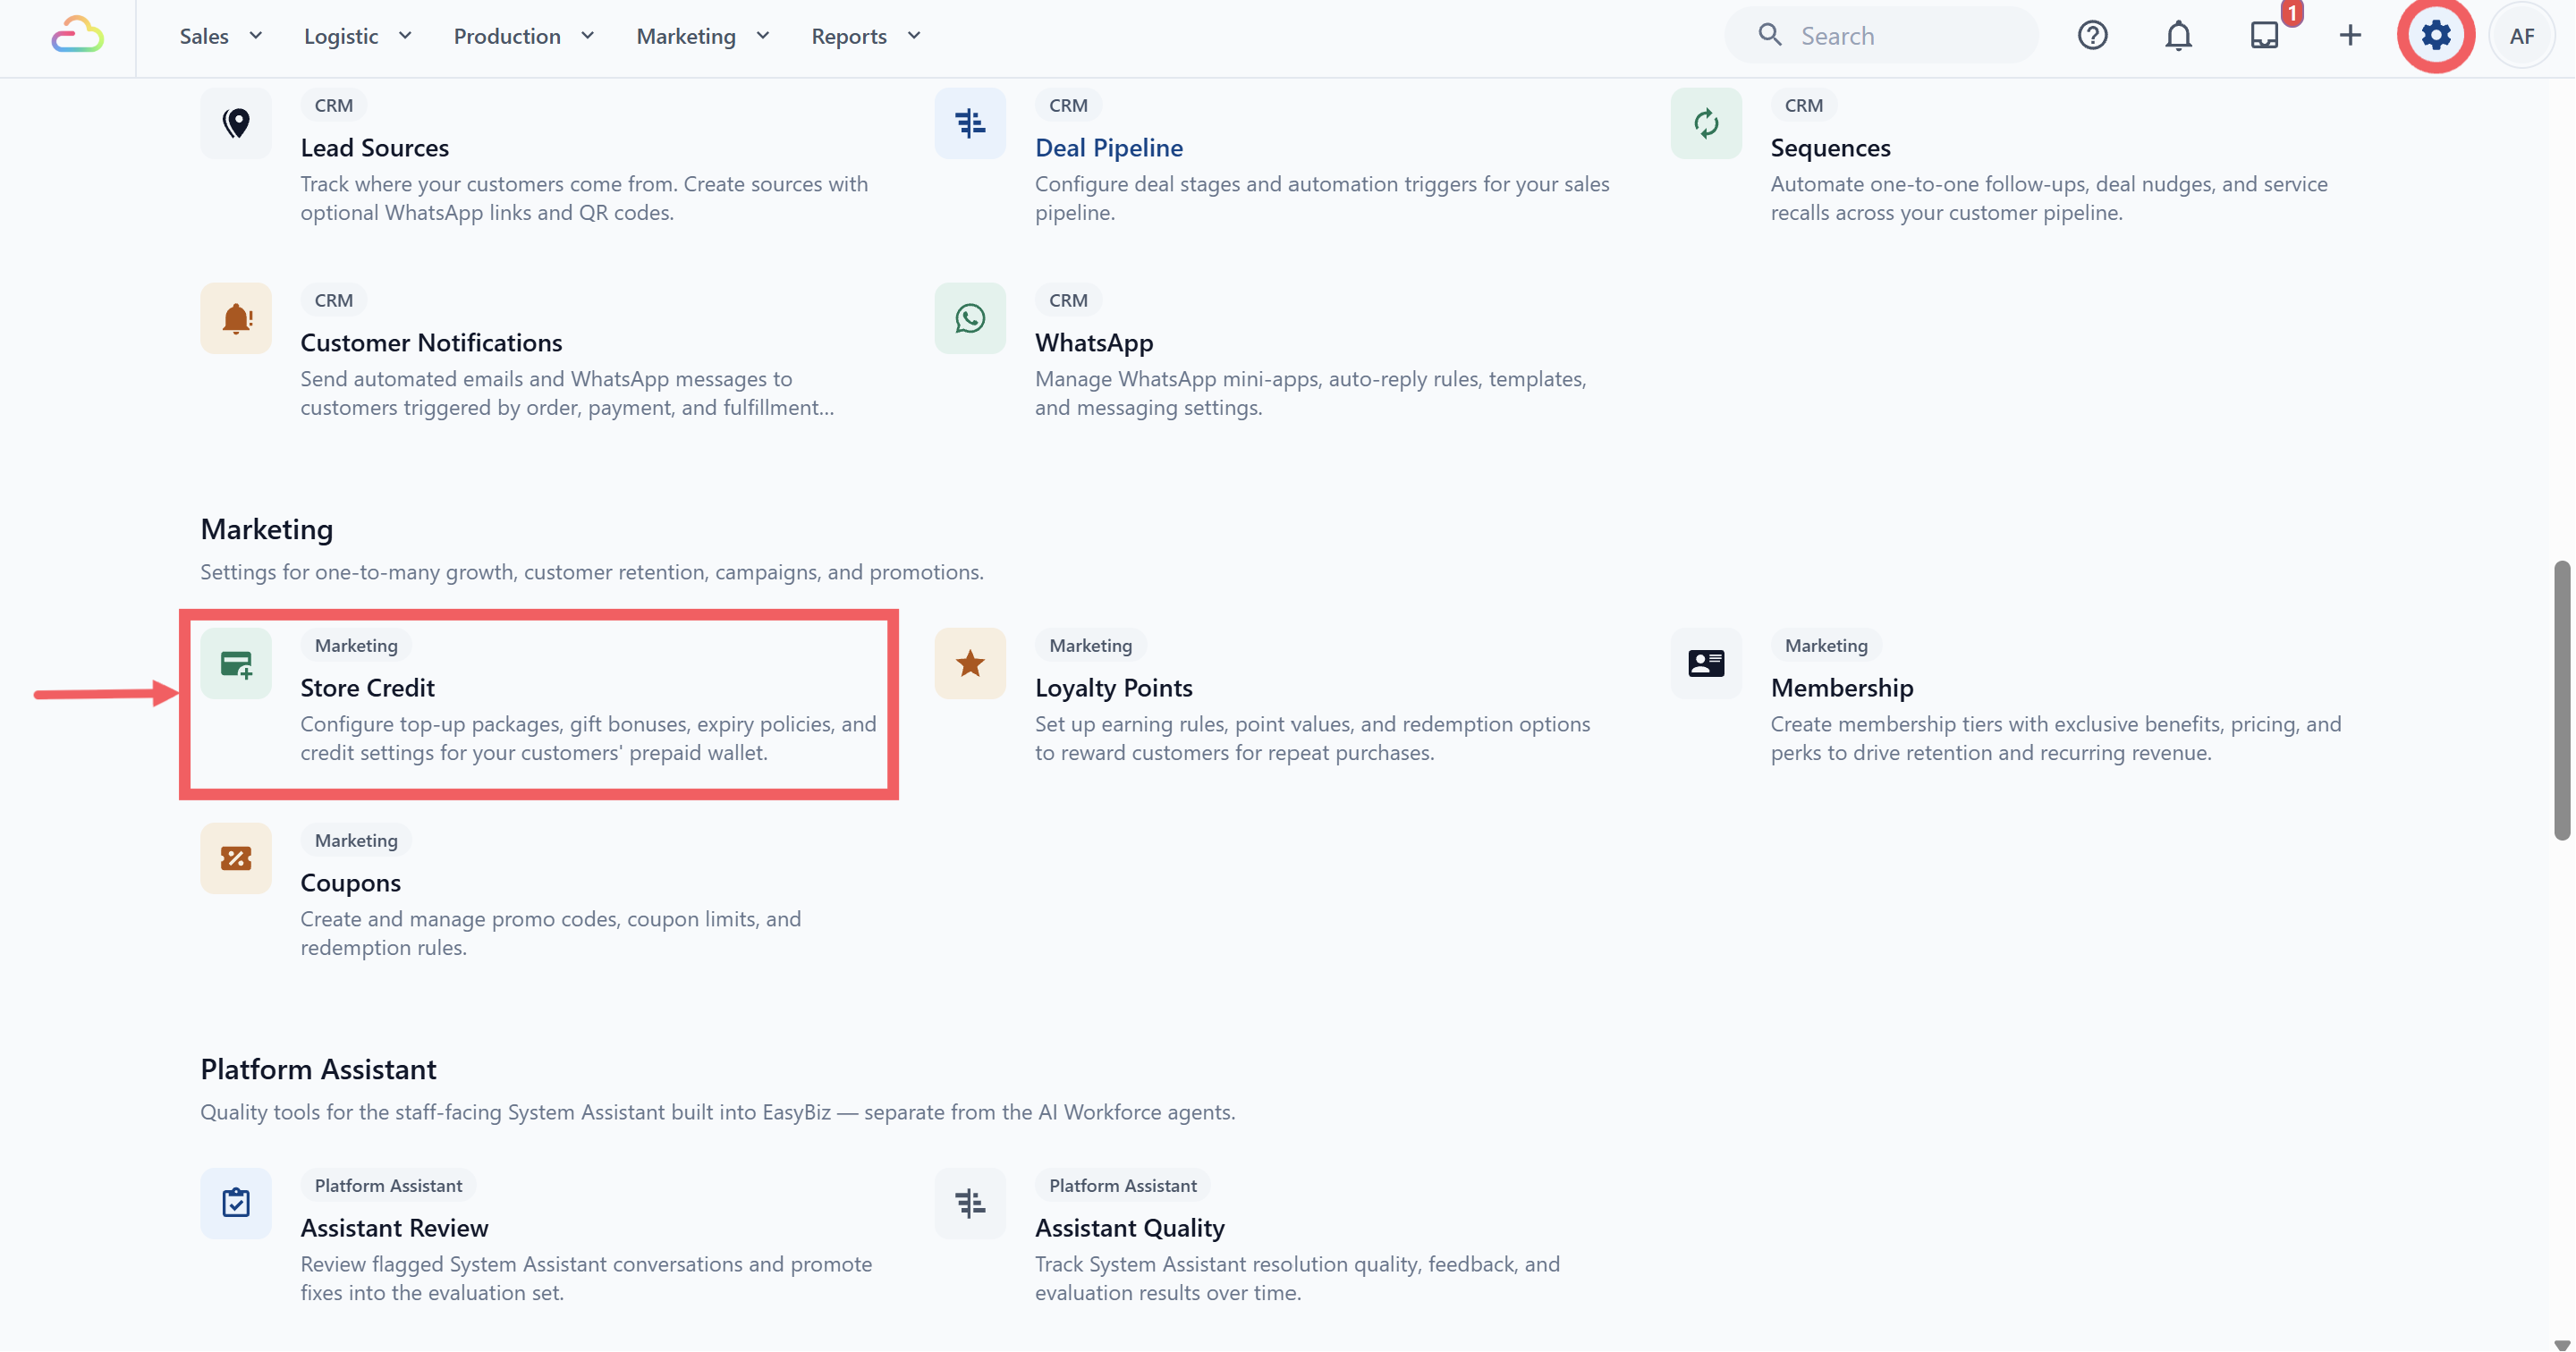
Click the ⚙️ Settings icon in the top-right corner.
Under the Marketing section, click Store Credit.
- Under General Settings, open Top-up receipt template and choose the template you saved.
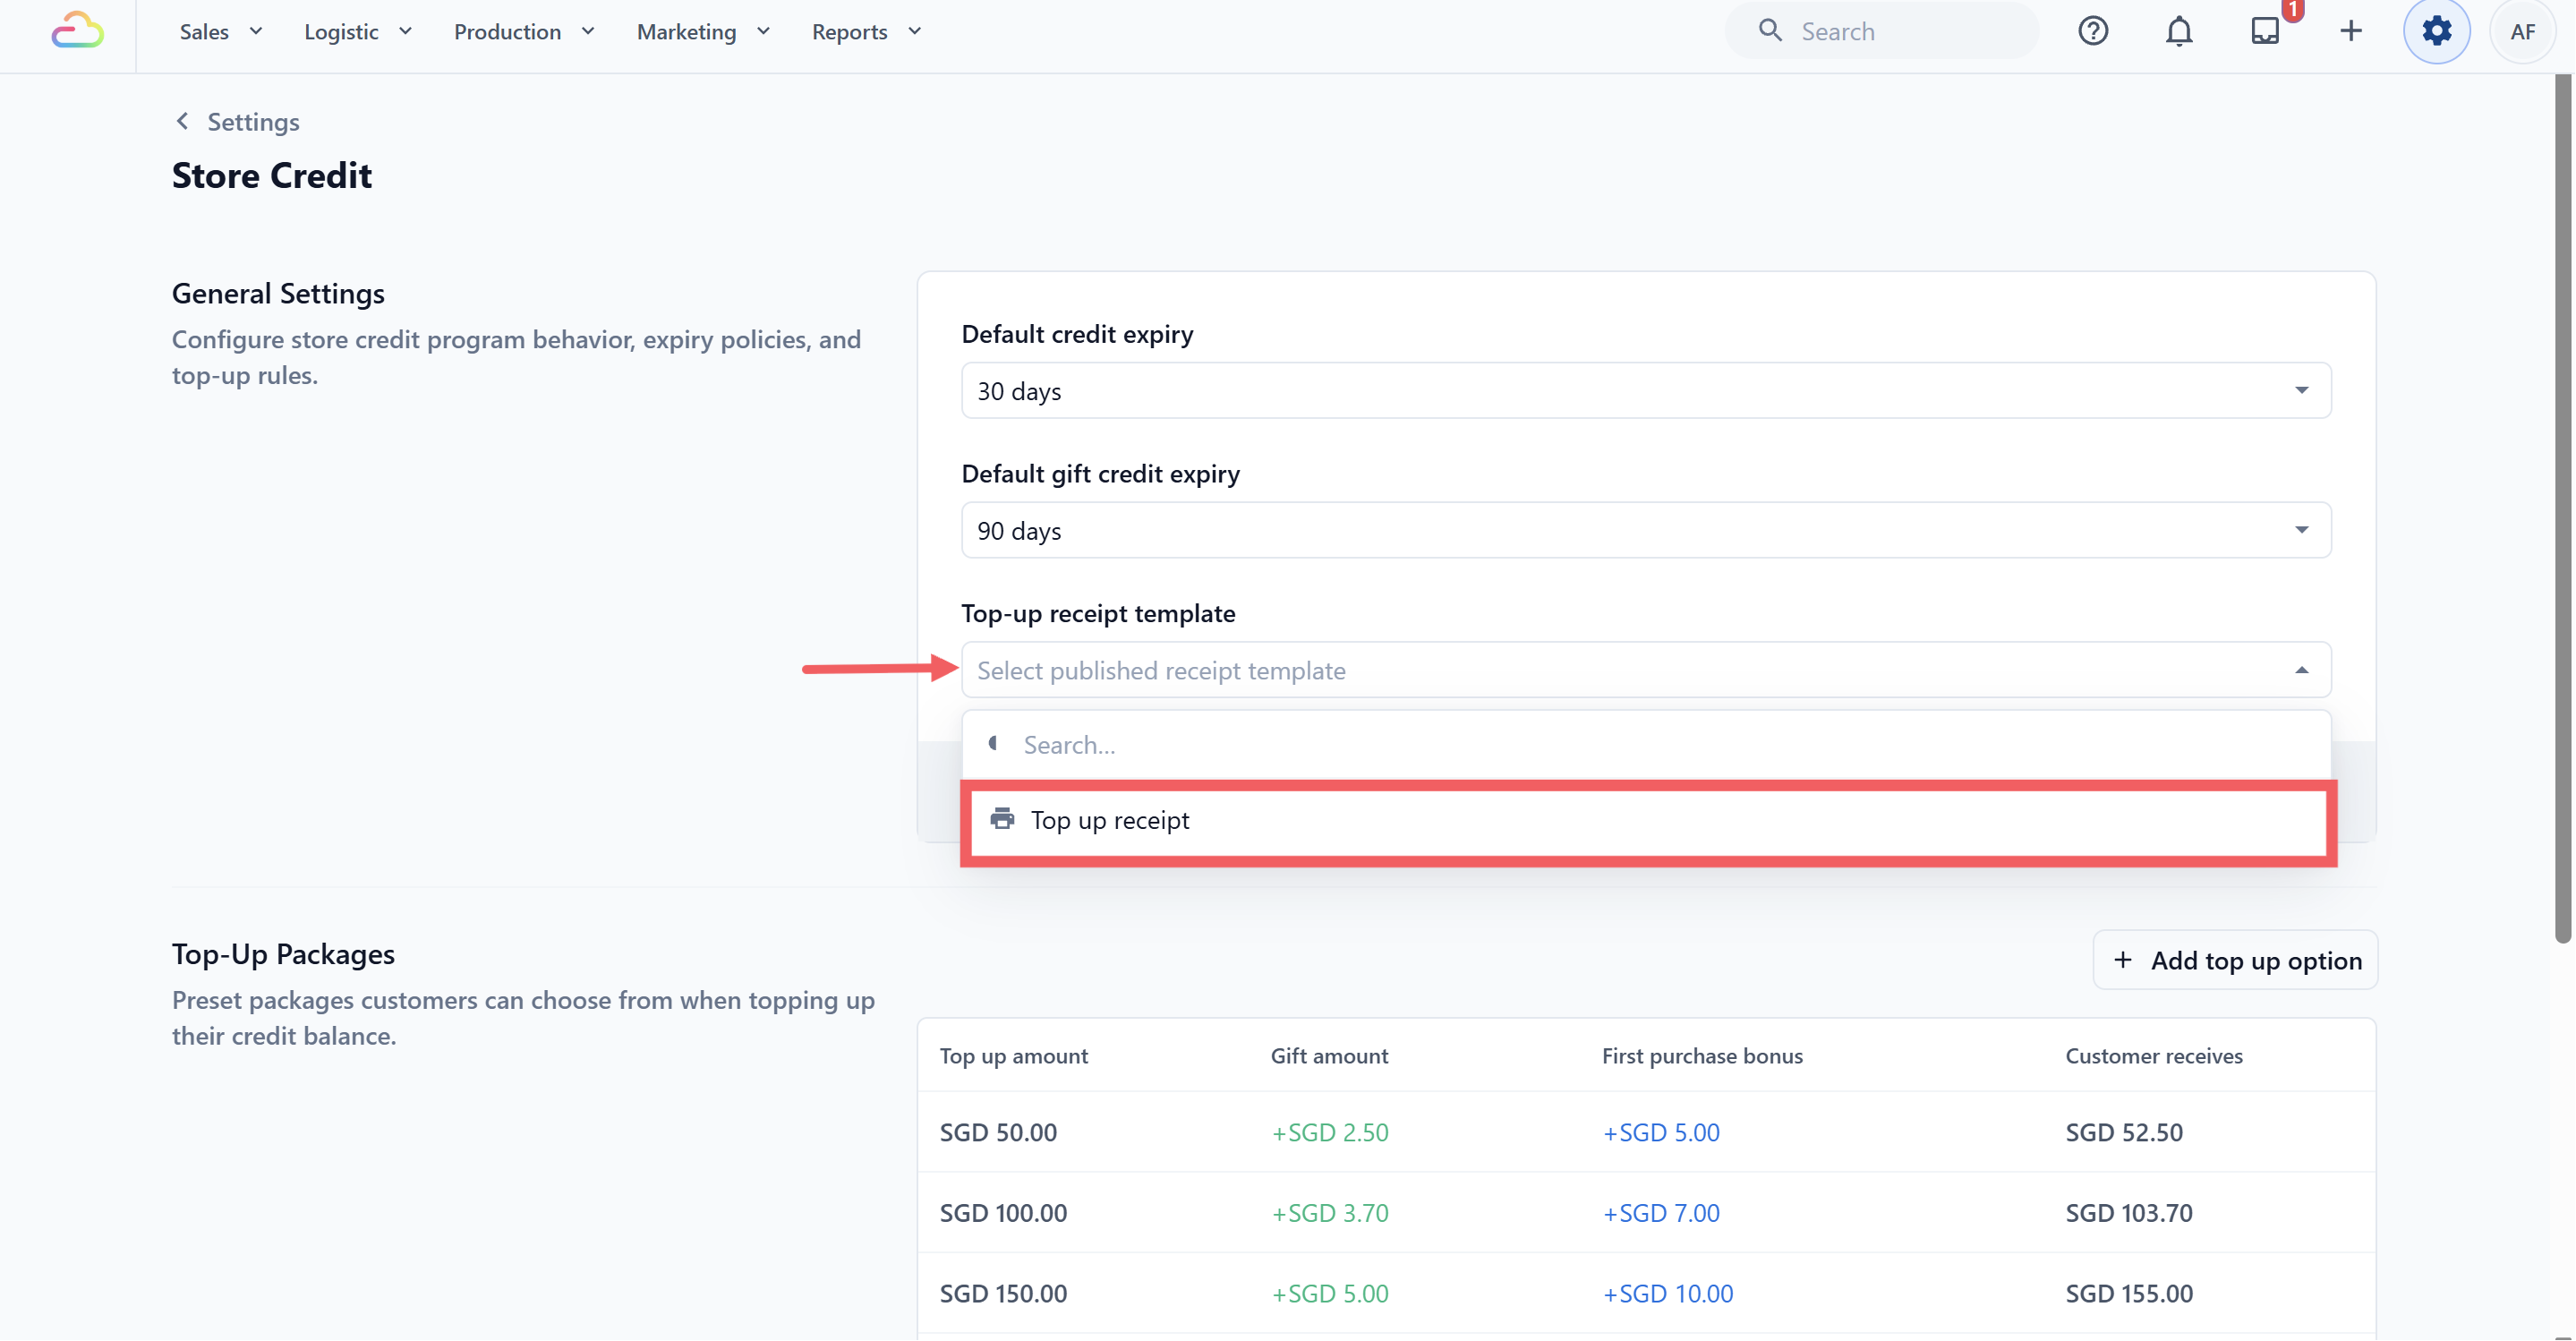
- Click Save.
What Your Staff Sees at the Counter
| POS version | What your staff sees | What prints |
|---|---|---|
| Older POS app | The existing top-up completion flow | Your template once it is connected, otherwise EasyBiz's fixed standard slip |
| Newer POS app | A Payment Succeeded screen showing the slip, a Print receipt button, and a printer settings button | Your template |
Test It
Do one small top-up on the POS with a test customer.
Open the Credit tab, choose a package or a custom amount, and take the payment.
When the payment succeeds, the slip appears on the success screen with a Print receipt button below it.
FAQs
Is the template required before staff can top up credit?
No. Top-ups work either way. What changes is what staff can hand the customer: the newer POS app shows no slip and no print button until a template is connected, while the older app falls back to a fixed slip you cannot edit.
Why does my template not appear in the selector?
Either it has never been saved, so it is still Draft and only Active templates are offered, or it was created from the wrong card. The selector only offers templates created from the Top up receipt card, and that card cannot be changed after creation.
Is one selected template shared across all outlets and POS devices?
Yes. There is one setting for the whole business. You cannot give a different top-up receipt to different outlets, sales channels, or devices. Changing it changes every counter at once.
Does changing it update receipts from earlier top-ups?
No. Each top-up keeps the slip produced at that moment. A new template applies from the next top-up onward.
Is the receipt printed automatically, or sent by email or WhatsApp?
Neither. It is a manual print from the success screen, on the device that took the payment. Once staff close that screen the print option is gone. There is no email or WhatsApp version of the top-up receipt.
What happens to the top-up if receipt printing fails?
The credit is added to the wallet first and the slip is produced afterwards. A printer that is off, out of paper, or a template that fails to build never takes the money back or removes the credit. Check the customer's balance on their profile to confirm.
Why is the PayNow QR missing or blank?
Almost always a missing company registration number under Settings, Administration, Company. Without it the block quietly prints nothing while the rest of the slip prints normally. Also check you added the block to the same template you connected in Store Credit settings.
Does the QR include bonus gift credit?
No. It carries only what the customer pays. A $100 package with a $10 bonus produces a $100 QR, because the $10 is credit you grant, not money the customer transfers.
Why can I not find the top-up fields when I type @ in a text block?
The @ list on a top-up receipt currently offers customer and company fields, not the top-up amounts. Keep the ready-made amount, gift, and balance rows and edit their labels instead of rebuilding them. If you need one twice, duplicate the existing row.
What's Next?
Make the Credit tab visible to counter staff with Set Up Store Credit on Your POS.