## Before You Start
- Sign up and sign in to the Console, the EasyBiz website you use on a computer. If you haven't, see [Making the Most of Your Free Trial](/docs/making-the-most-of-your-free-trial).
- You need owner or administrator access to Settings. Staff without it can't open Business Units, Price Lists or Integrations, and the price list step asks them to contact an administrator.
- Publishing the Online Store adds it to your subscription, so the person who publishes it needs billing access.
- No customer details are needed. You are setting up your shop, not serving a customer yet.
---
## Setting Up With the AI Assistant
When you first sign in, the Console home opens on the AI Assistant's chat. Your setup happens in a chat called **Set up your workspace**, pinned on the left. Click Get started and the Assistant leads you through it.
The Assistant asks what you sell and how your customers order, for example at your counter with **Point of sale (POS)** or online with the **Online Store**. It then suggests one setup plan for you to approve. For each step it opens a card that is already filled in, so you only check it and save. Optional steps, such as connecting an online payment provider, can be skipped and done later.
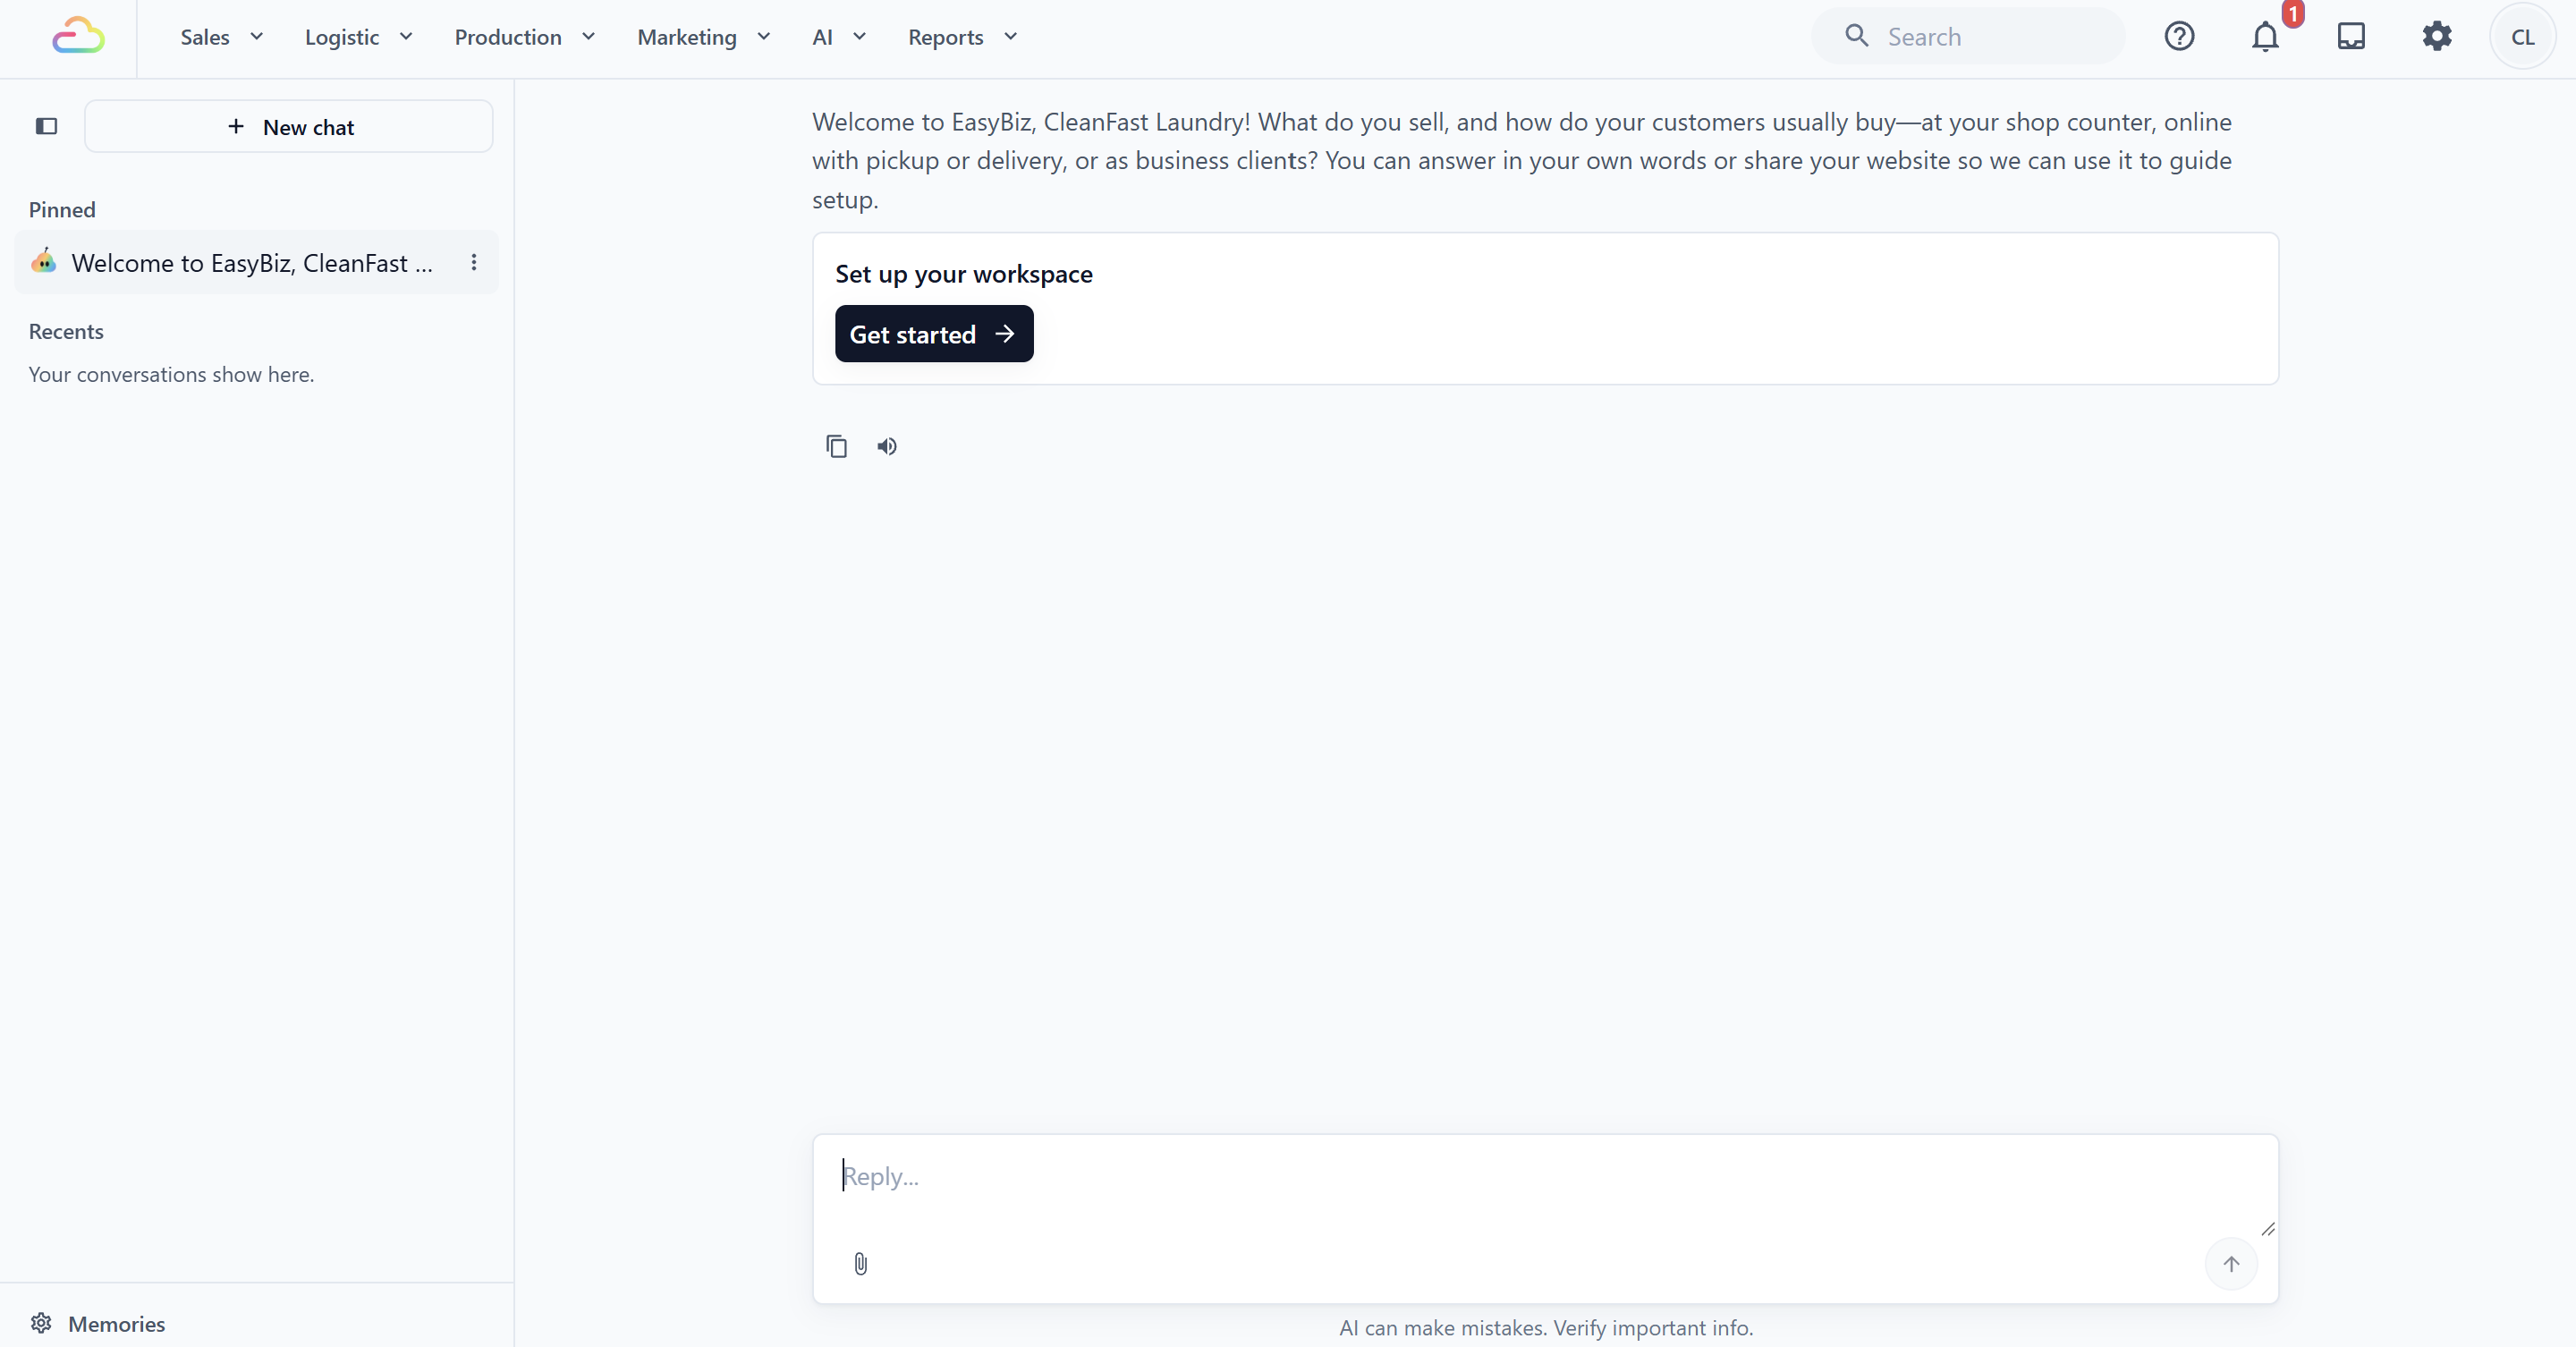
The steps below cover what you need before your first order. Each one also tells you where to find it in Settings, so you can set it up yourself or come back to it any time.
Stopped halfway? Open the **Set up your workspace** chat under **Pinned** and carry on where you left off. See [Using the AI Assistant for Setup](/docs/using-the-ai-assistant-for-setup).
---
## Step 1: Create Your Business Unit
A business unit is one line of business in your shop, with its own services, prices and order steps. For example, a shop that does laundry and bag repair can run them as two business units. Everything else on this list, from prices to booking times, belongs to a business unit, so it comes first.
If you skip it, your POS and Online Store have nothing to sell.
1. Click the ⚙️ Settings icon in the top-right corner.
2. Under the **Administration** section, click Business Units.
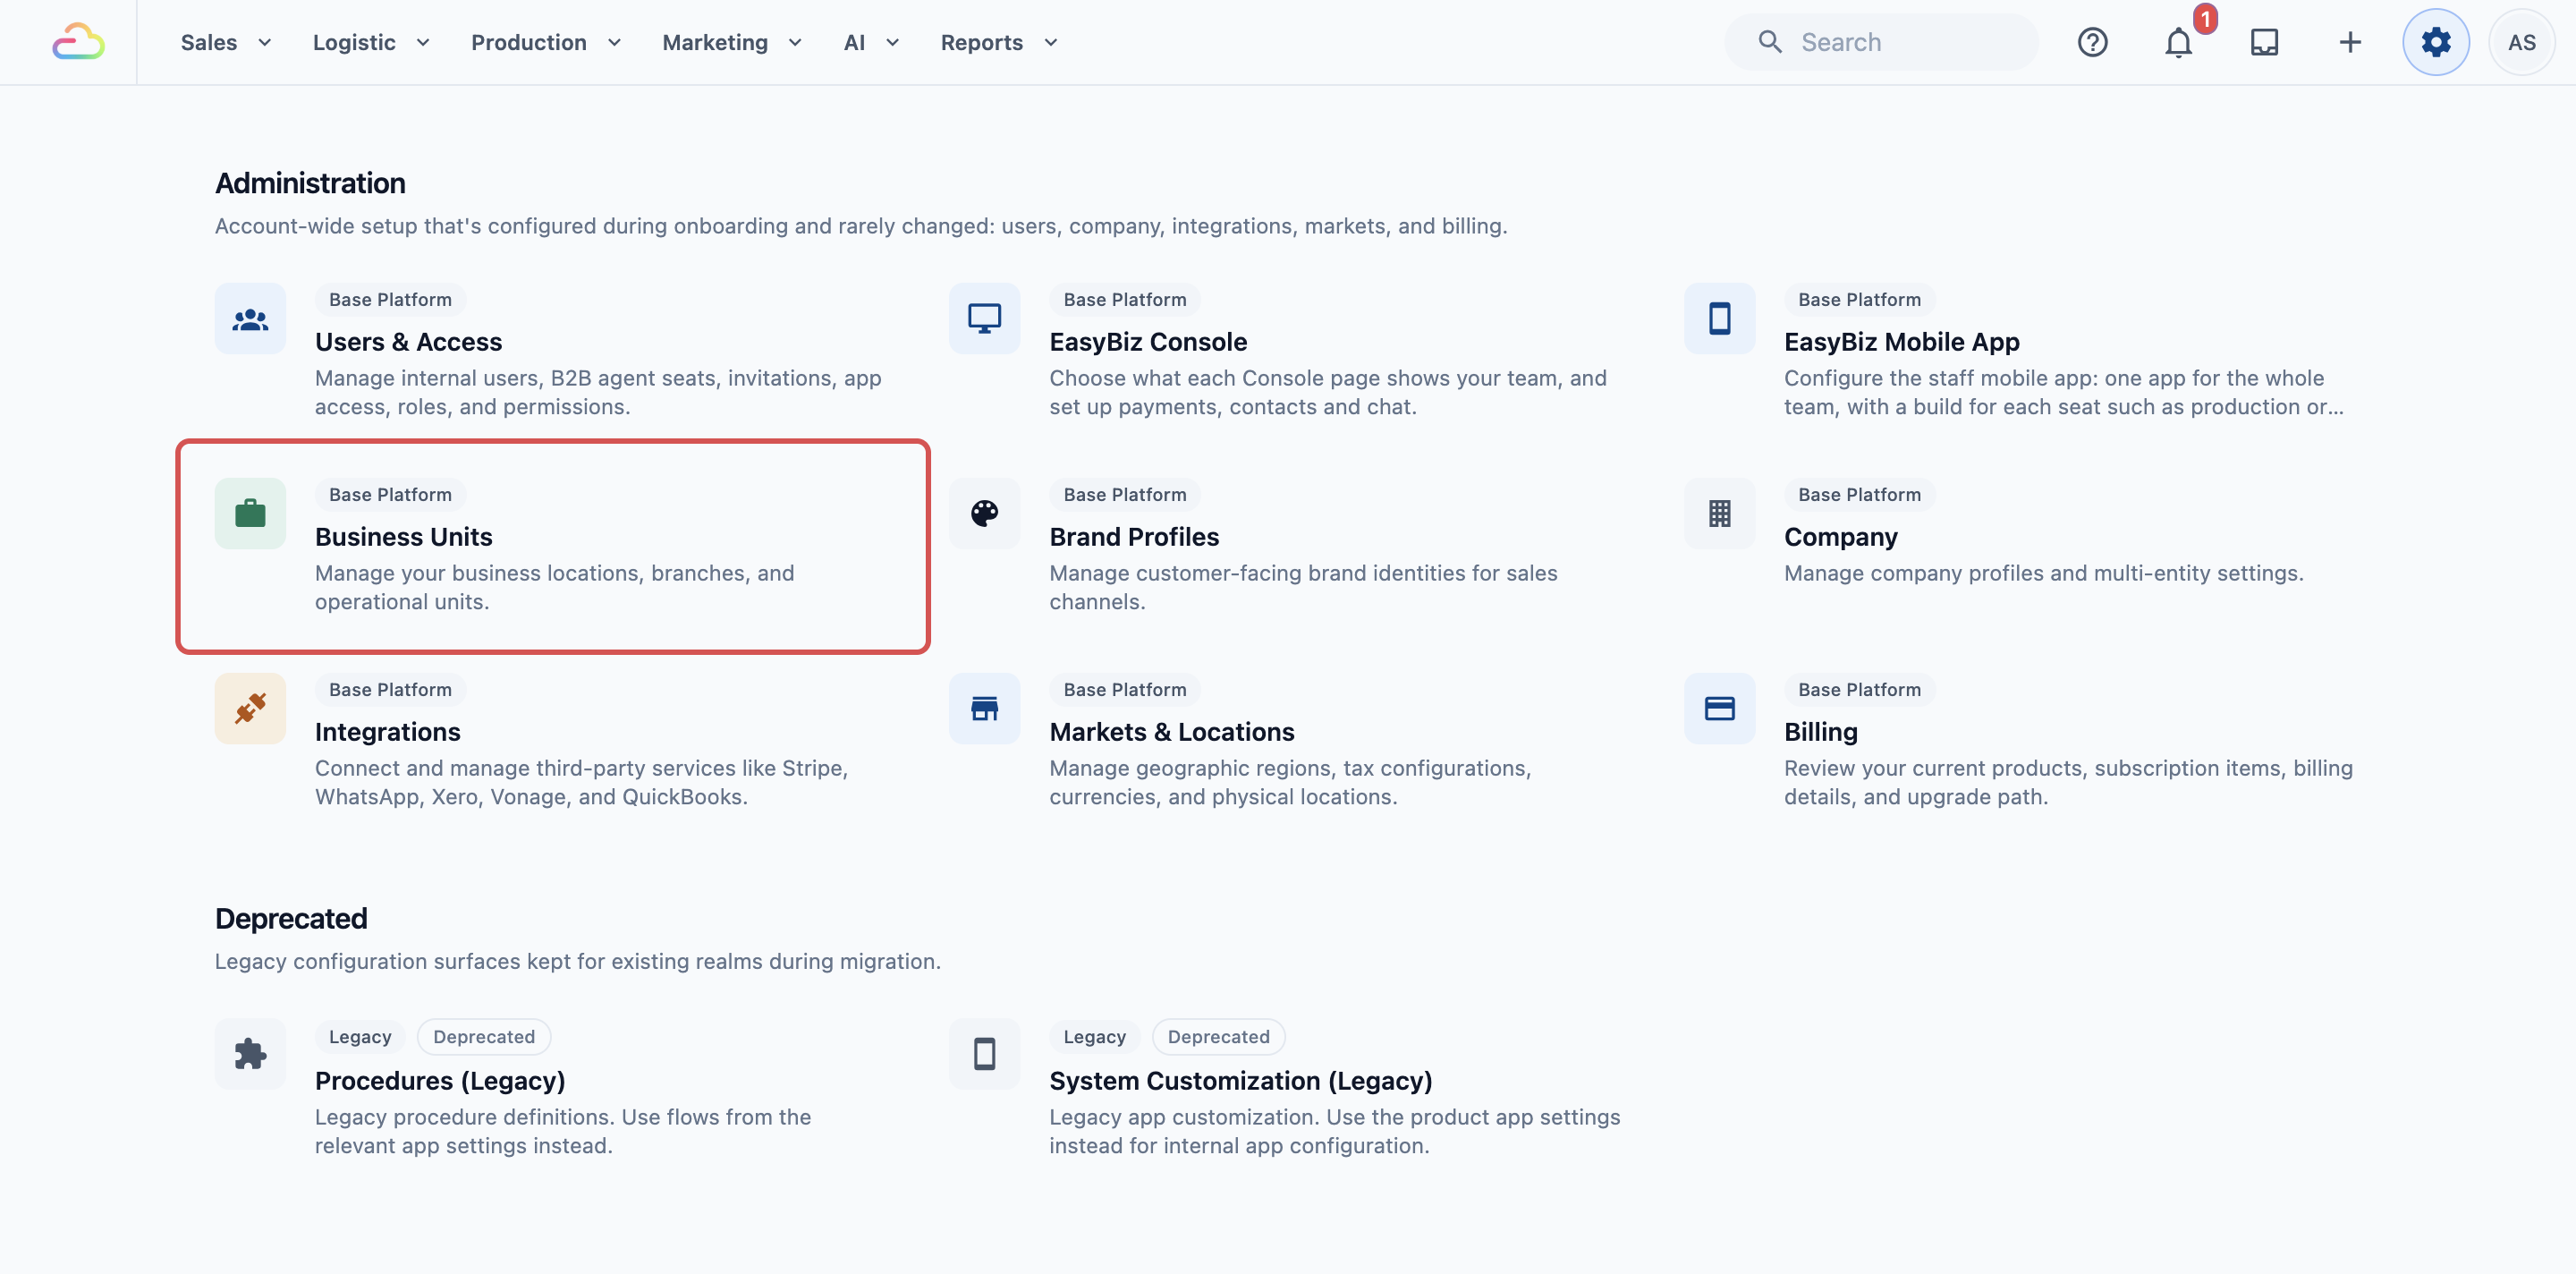
3. Click New Business Unit.
4. Type a **Display name**, for example "Laundry & Dry Cleaning". Use 120 characters or fewer.
5. Choose a **Business type**.
6. Click Create.
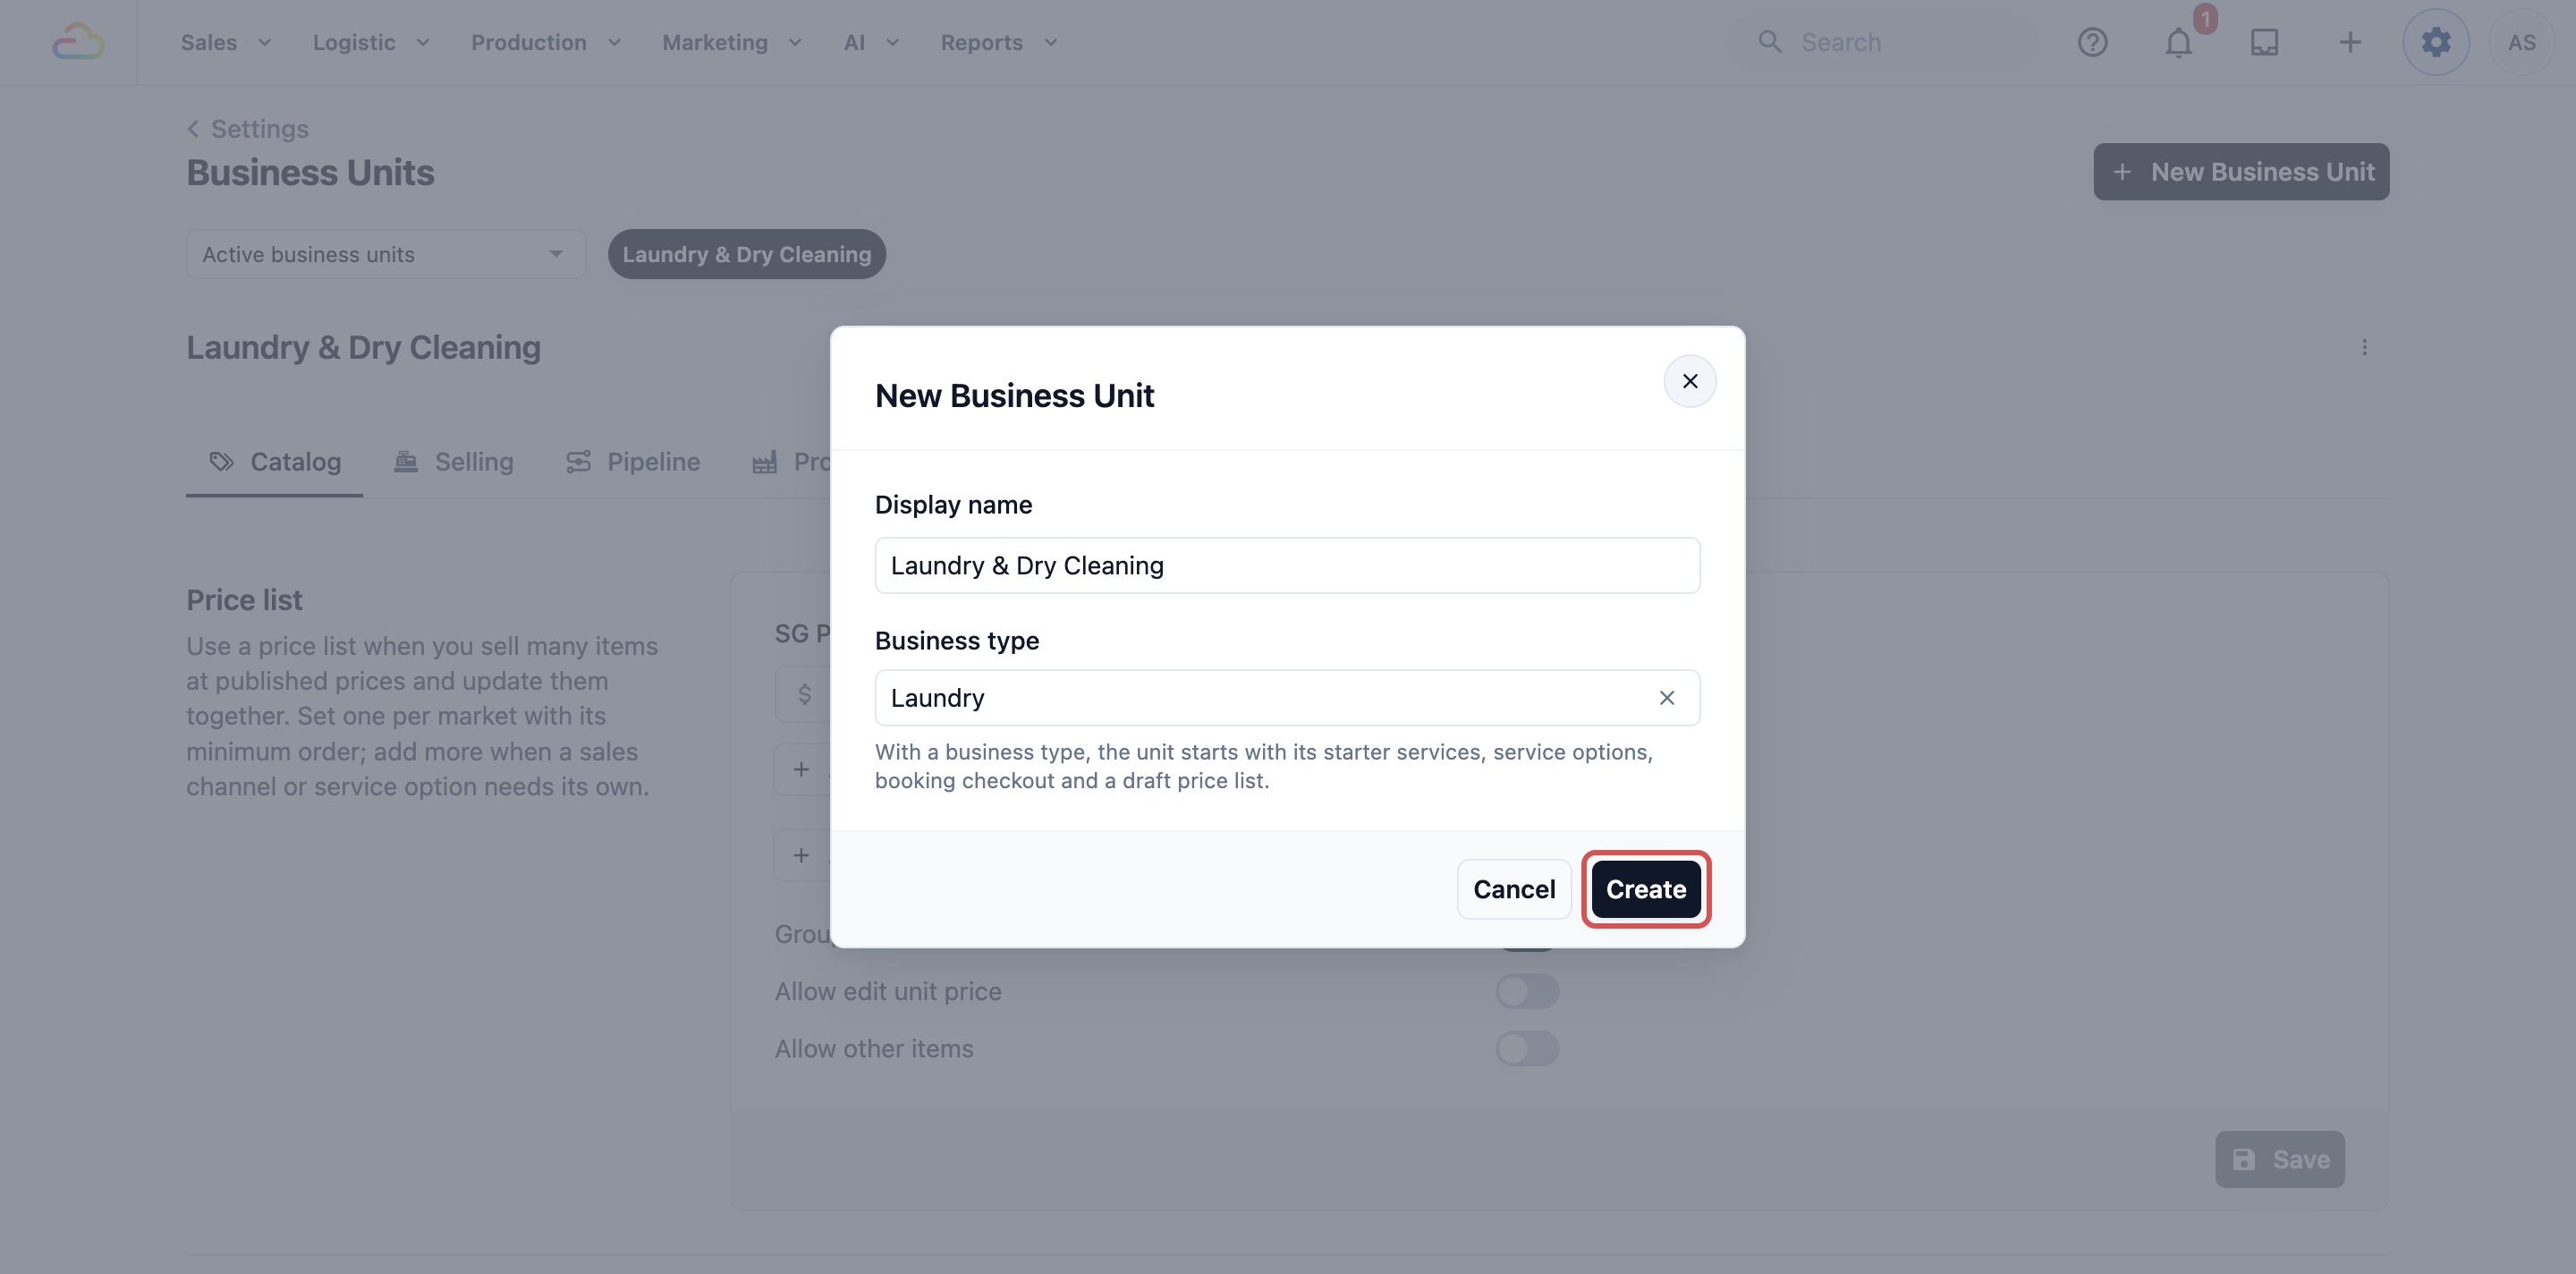
**Business type**
| Option | What you get |
| --- | --- |
| Laundry | Starter services such as Wash, Dry Clean and Ironing, with service options and a draft price list |
| Bag Service | Starter bag services such as Cleaning and Coloring, with a draft price list |
| Home Cleaning | Starter cleanings sold by the hour or by home size |
| Aircon Service | Starter visits such as General Servicing and Chemical Wash, plus a servicing contract |
| Upholstery Cleaning | Starter upholstery cleaning services, with a draft price list |
| Other service | A simple starter you shape yourself |
| None: I'll set it up myself | An empty business unit with no services or prices |
With a business type, EasyBiz shows "Business unit created with its starter services. Review its prices in Price Lists and publish them." That message leads straight to Step 2.
For every tab inside a business unit, see [Creating and Editing a Business Unit](/docs/creating-and-editing-a-business-unit).
---
## Step 2: Check and Publish Your Price List
Your price list is what customers pay for each item, such as $4.00 to wash and press a shirt. A business type gives you a starter price list, but it is saved as a draft. A draft is only a working copy. Your counter and your Online Store use the published version only.
If you leave it as a draft:
- Your POS shows **No price list configured** when staff start an order.
- Your Online Store's Prices page says "There is no public price list right now. Get in touch and we'll quote you."
1. Click the ⚙️ Settings icon in the top-right corner.
2. Under the **Catalog & Pricing** section, click Price Lists.
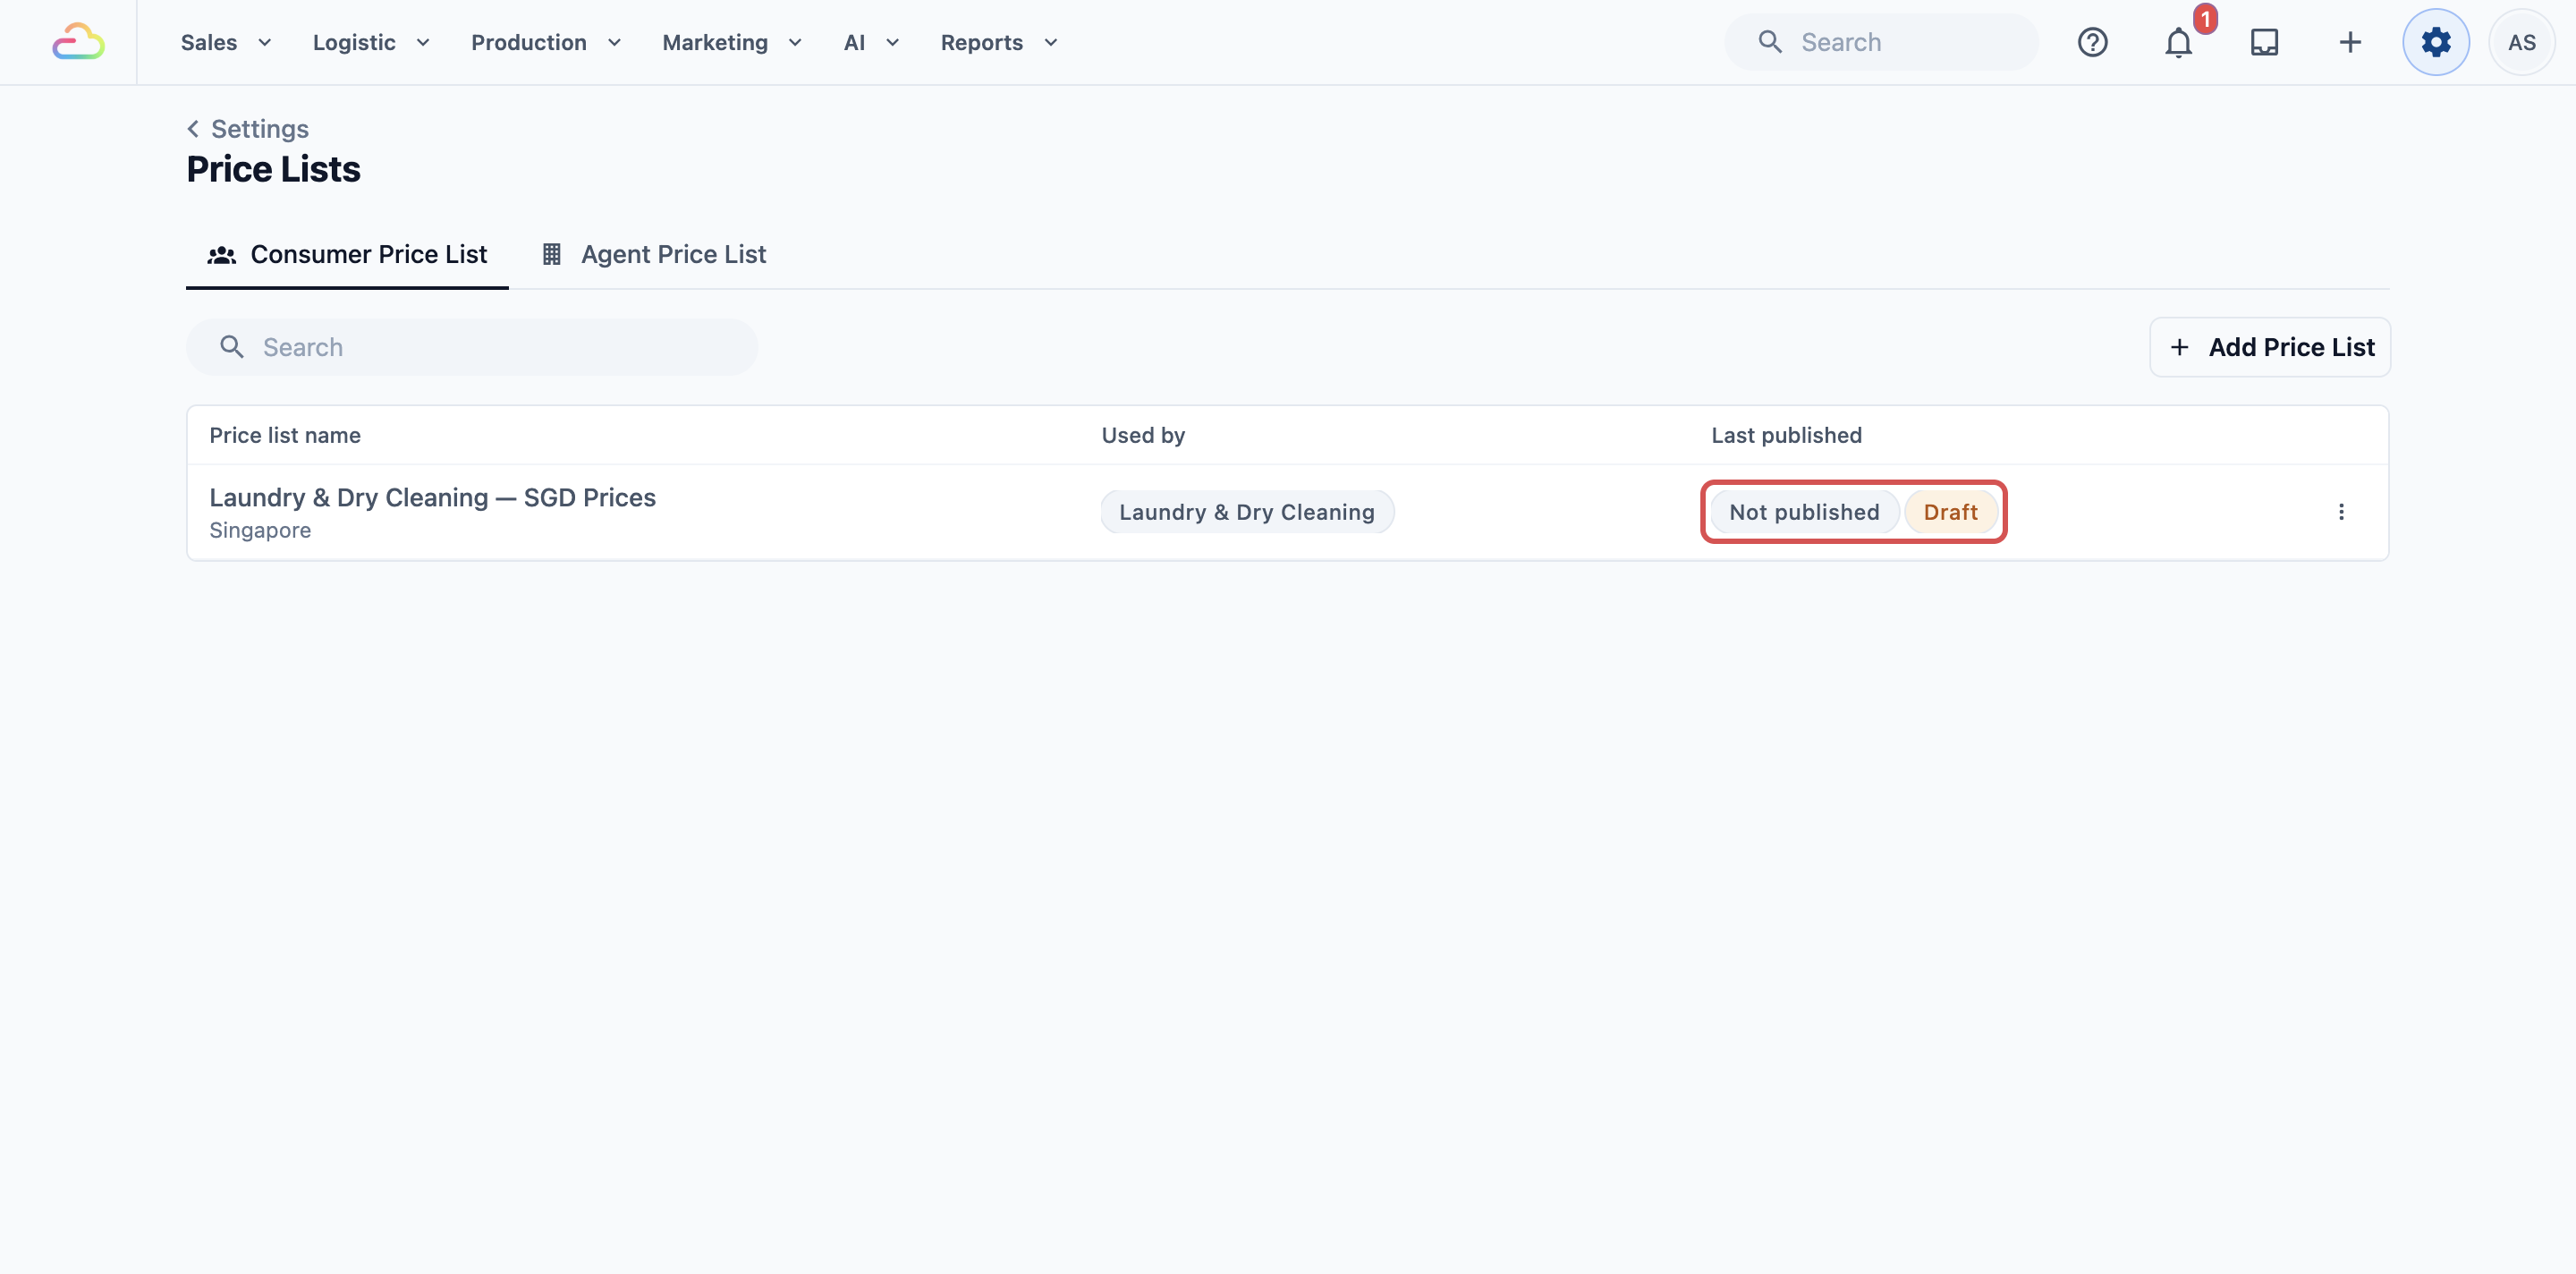
3. Click the ⋮ menu next to your price list, then click Edit draft version.
4. Change the starter prices to your own.
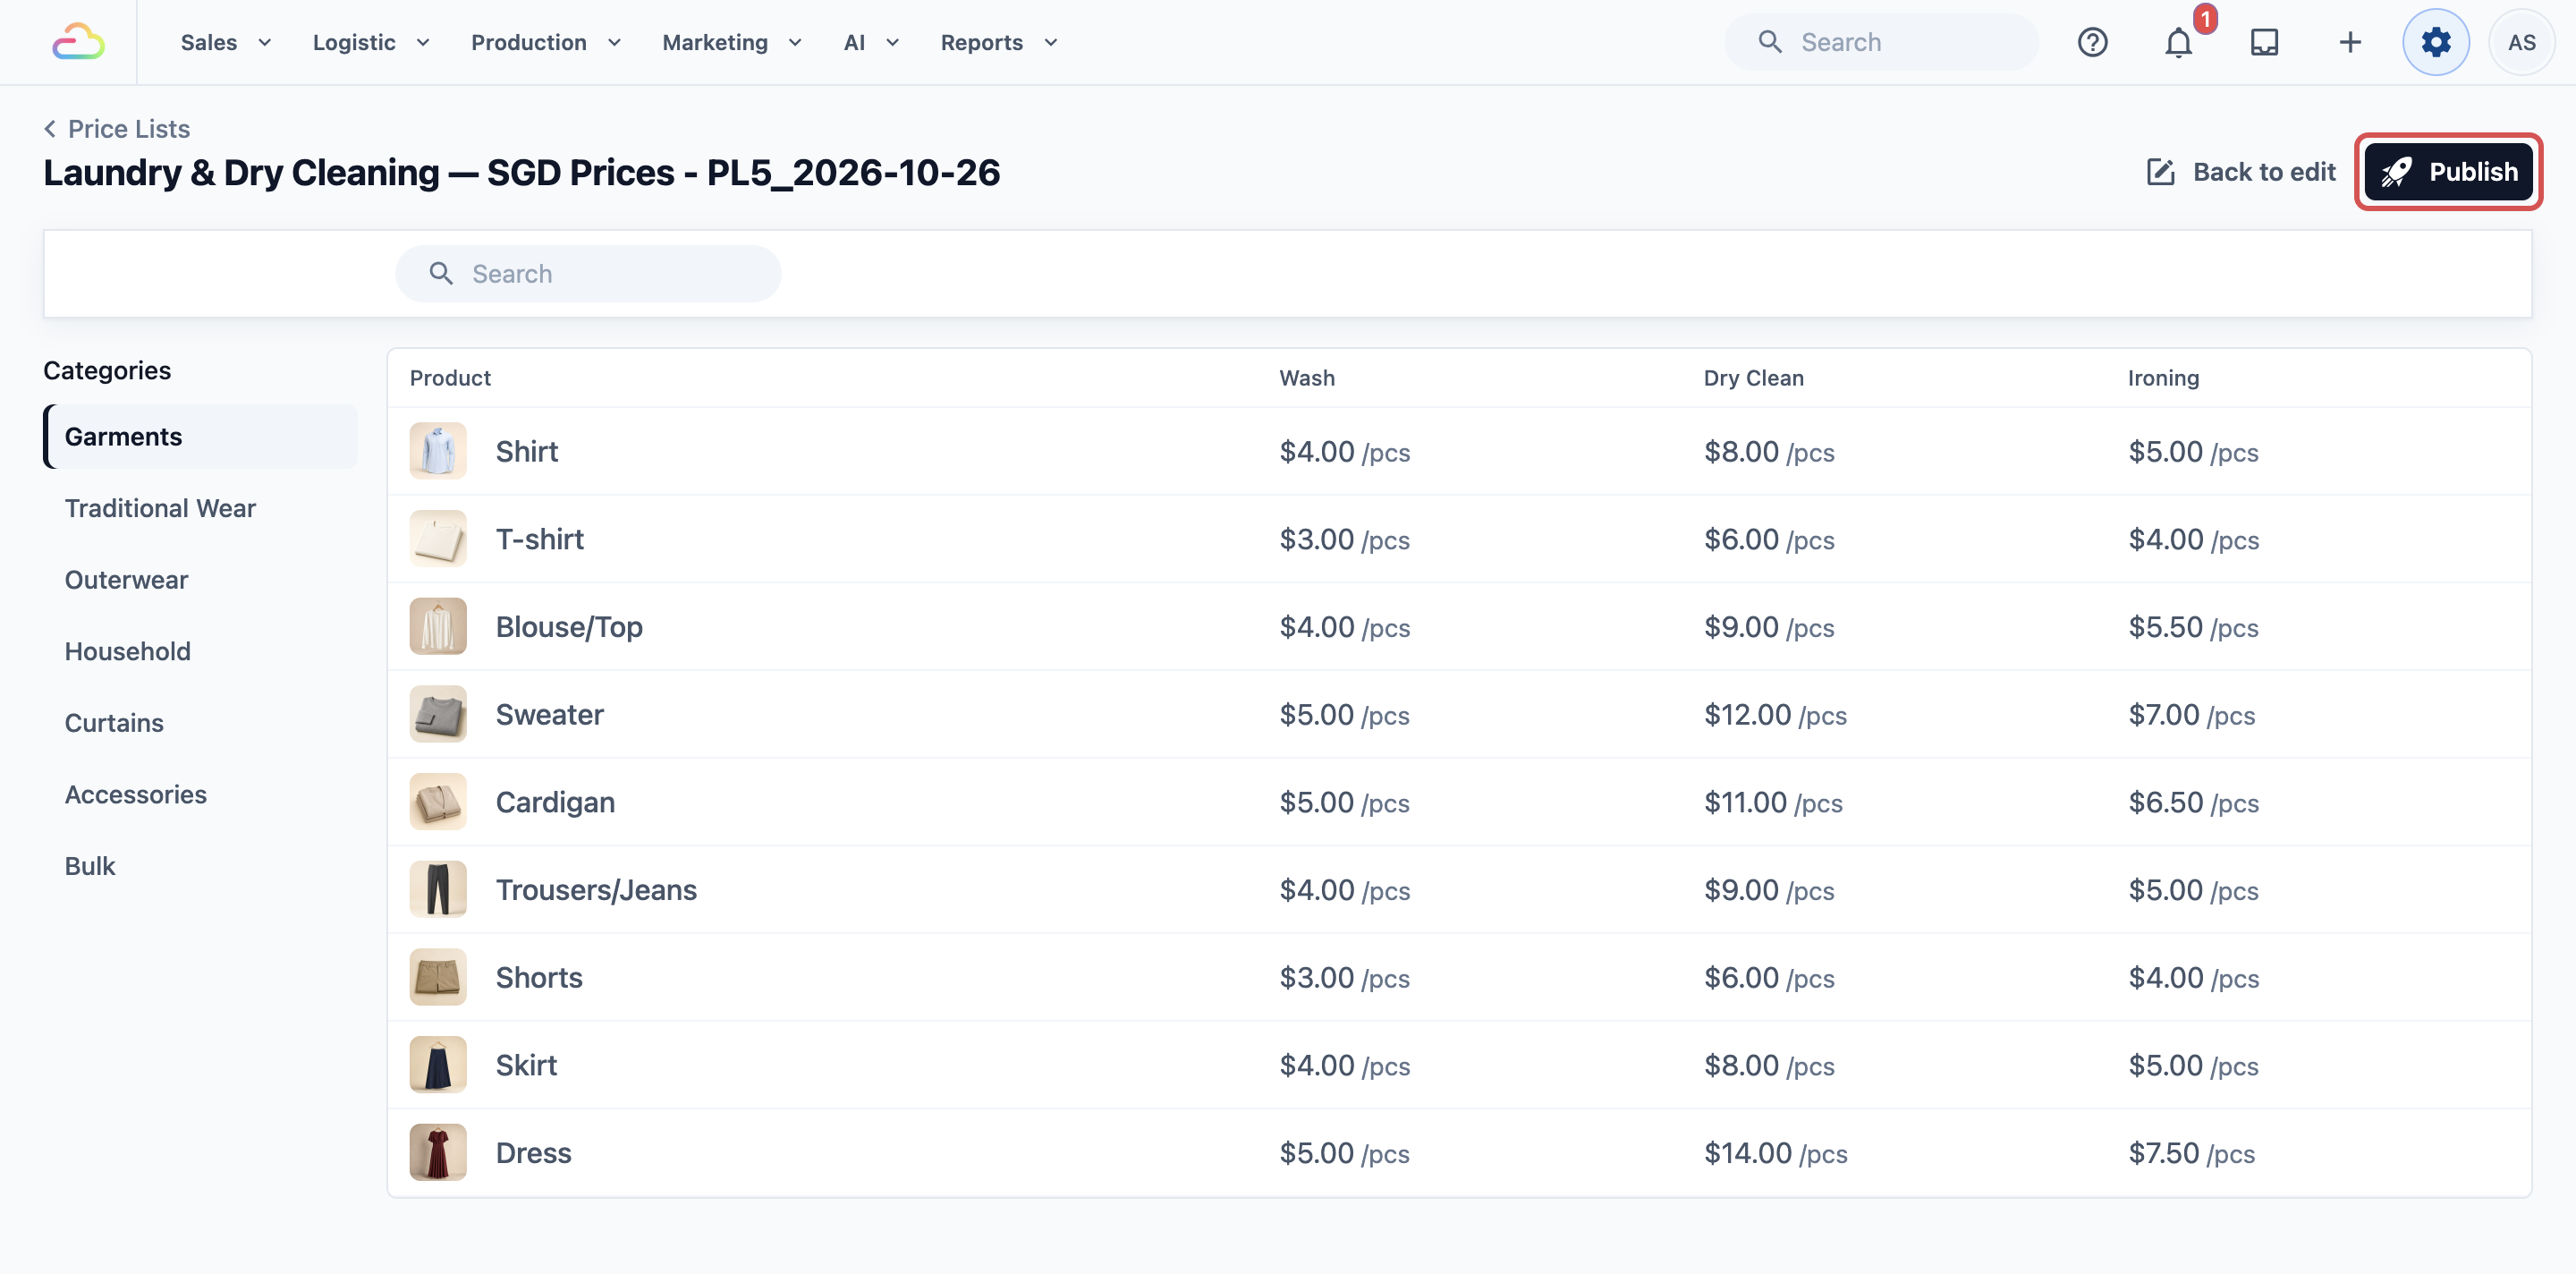
5. Click Preview to check the prices as staff and customers will see them, then click Publish.
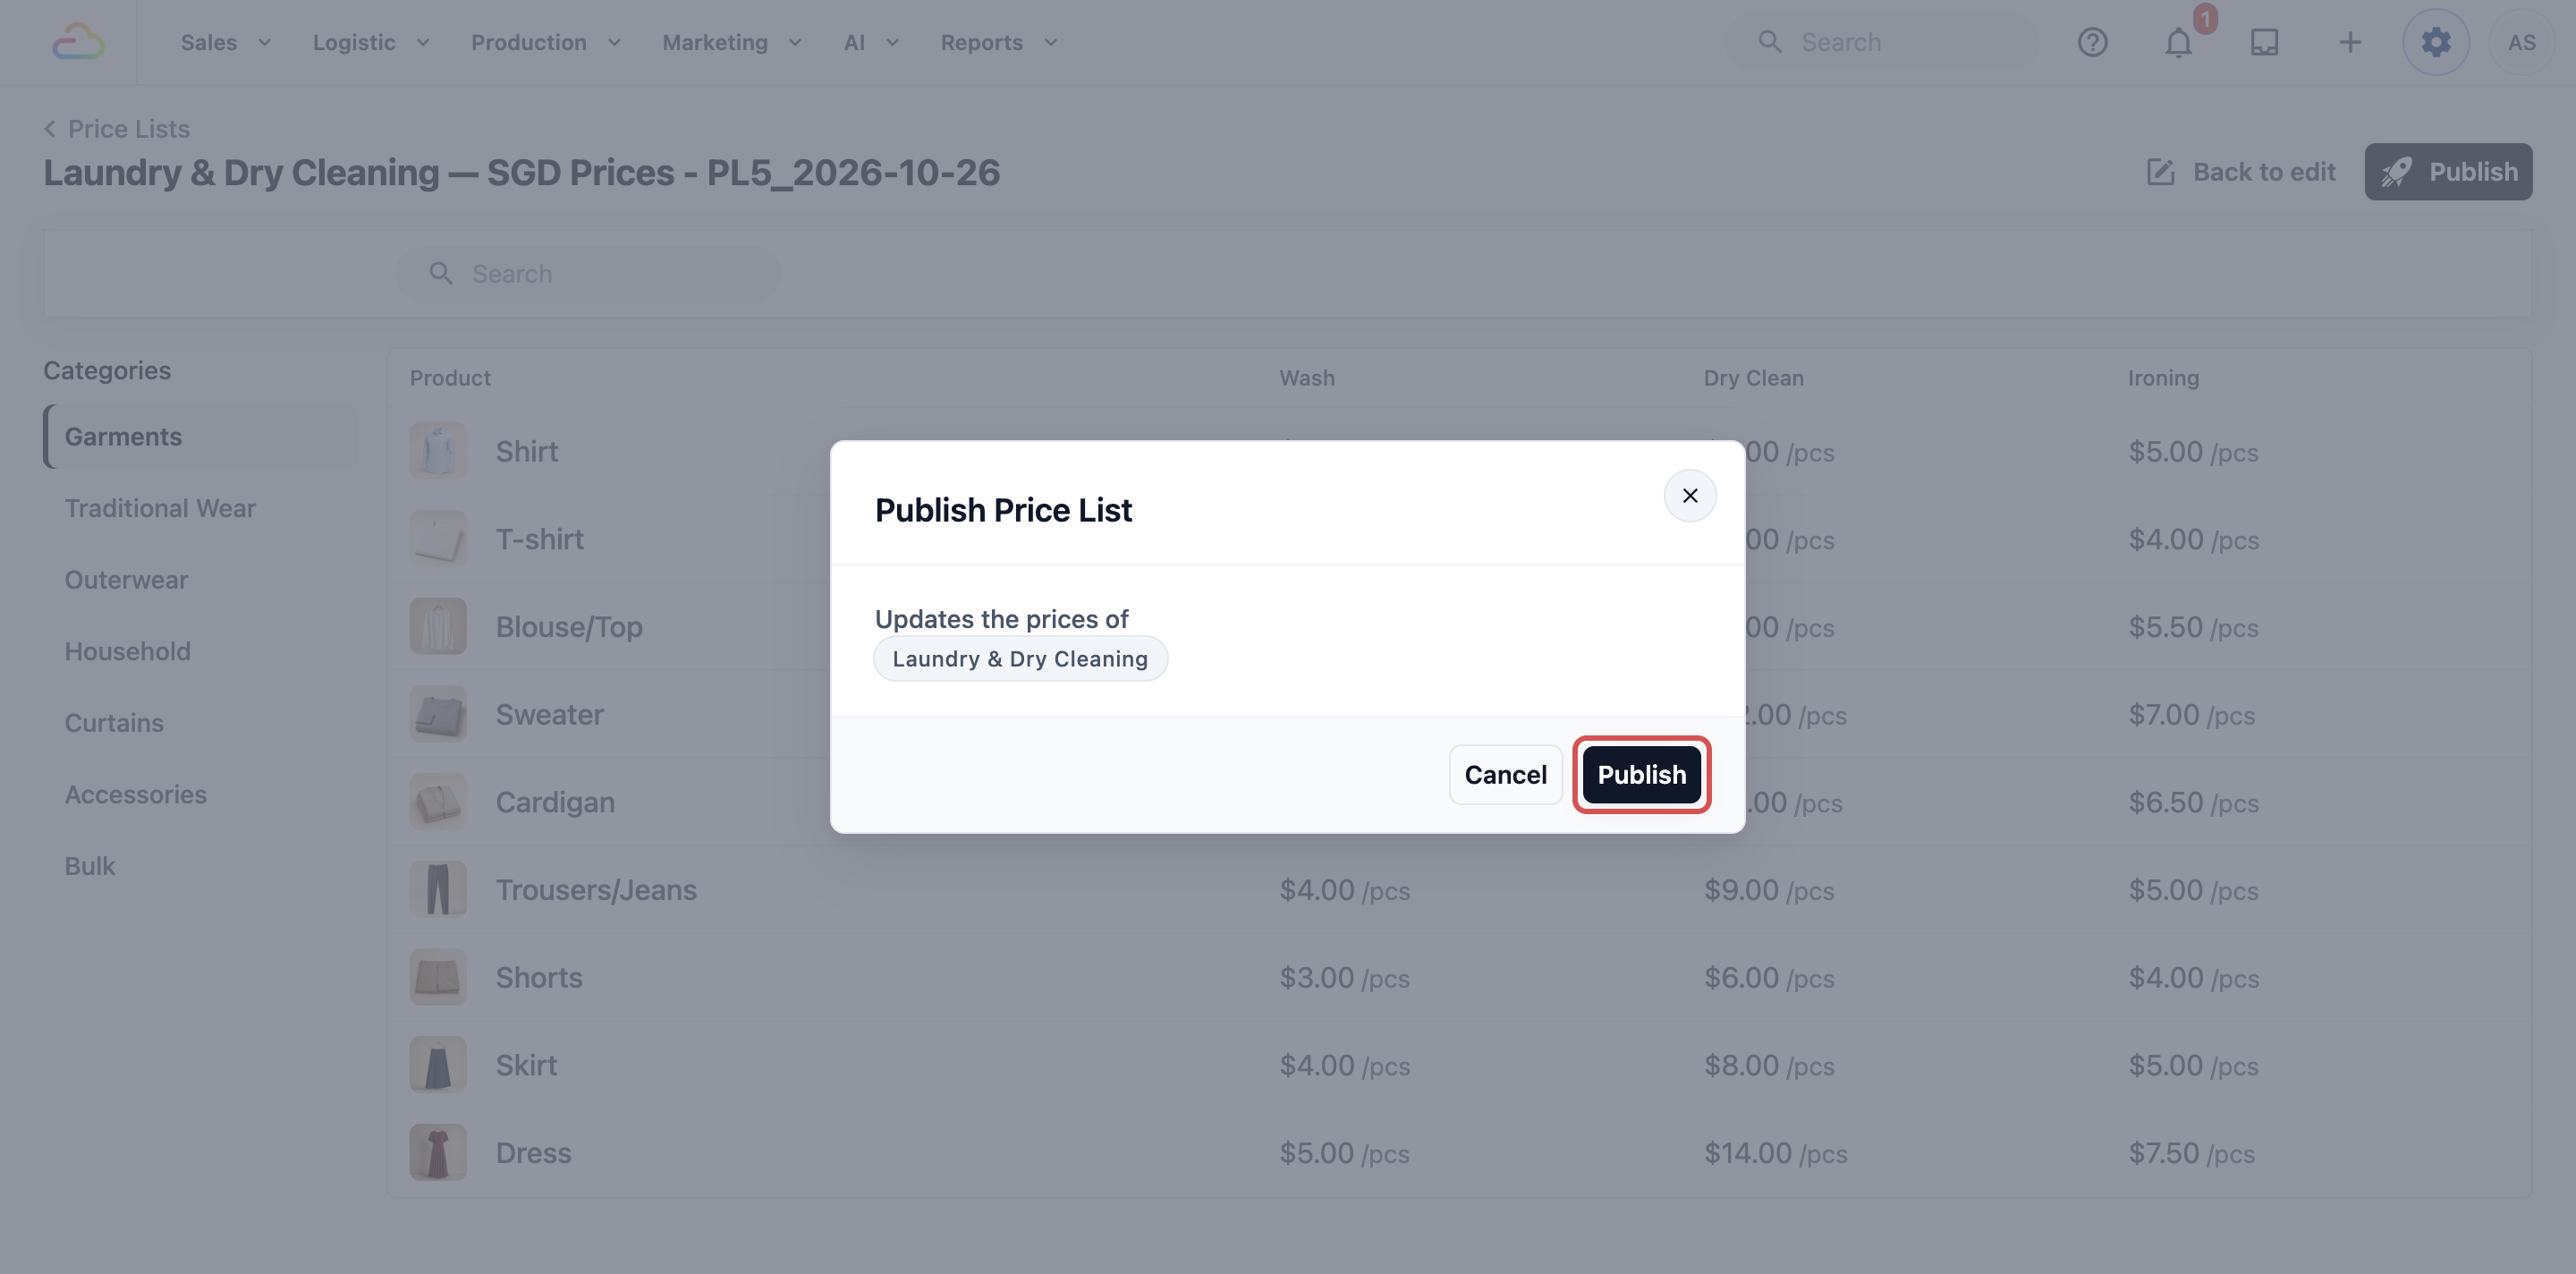
6. In the **Publish Price List** window, check **Publish to business unit** shows your business unit, for example Laundry & Dry Cleaning.
7. Under **Publish to sales channels**, choose your POS and Online Store. If you haven't added either yet, the window says so, and you can publish to them later.
8. Click Publish.
After publishing, the list shows the date under **Last published**. To change prices later, draft a new version and publish it again. For the full guide, see [Create Price Lists](/docs/create-price-lists).
---
## Step 3: Connect HitPay for Payments
HitPay is the payment service that lets customers pay you by PayNow or card, at your counter and on your Online Store. Payments go straight into your own HitPay account. Cash and other ways customers already pay at your counter are set up for you, so HitPay is optional.
Use this only if you want customers to pay online or by card. If you skip it, customers can still order, and you collect payment at the counter or on delivery.
1. Click the ⚙️ Settings icon in the top-right corner.
2. Under the **Administration** section, click Integrations.
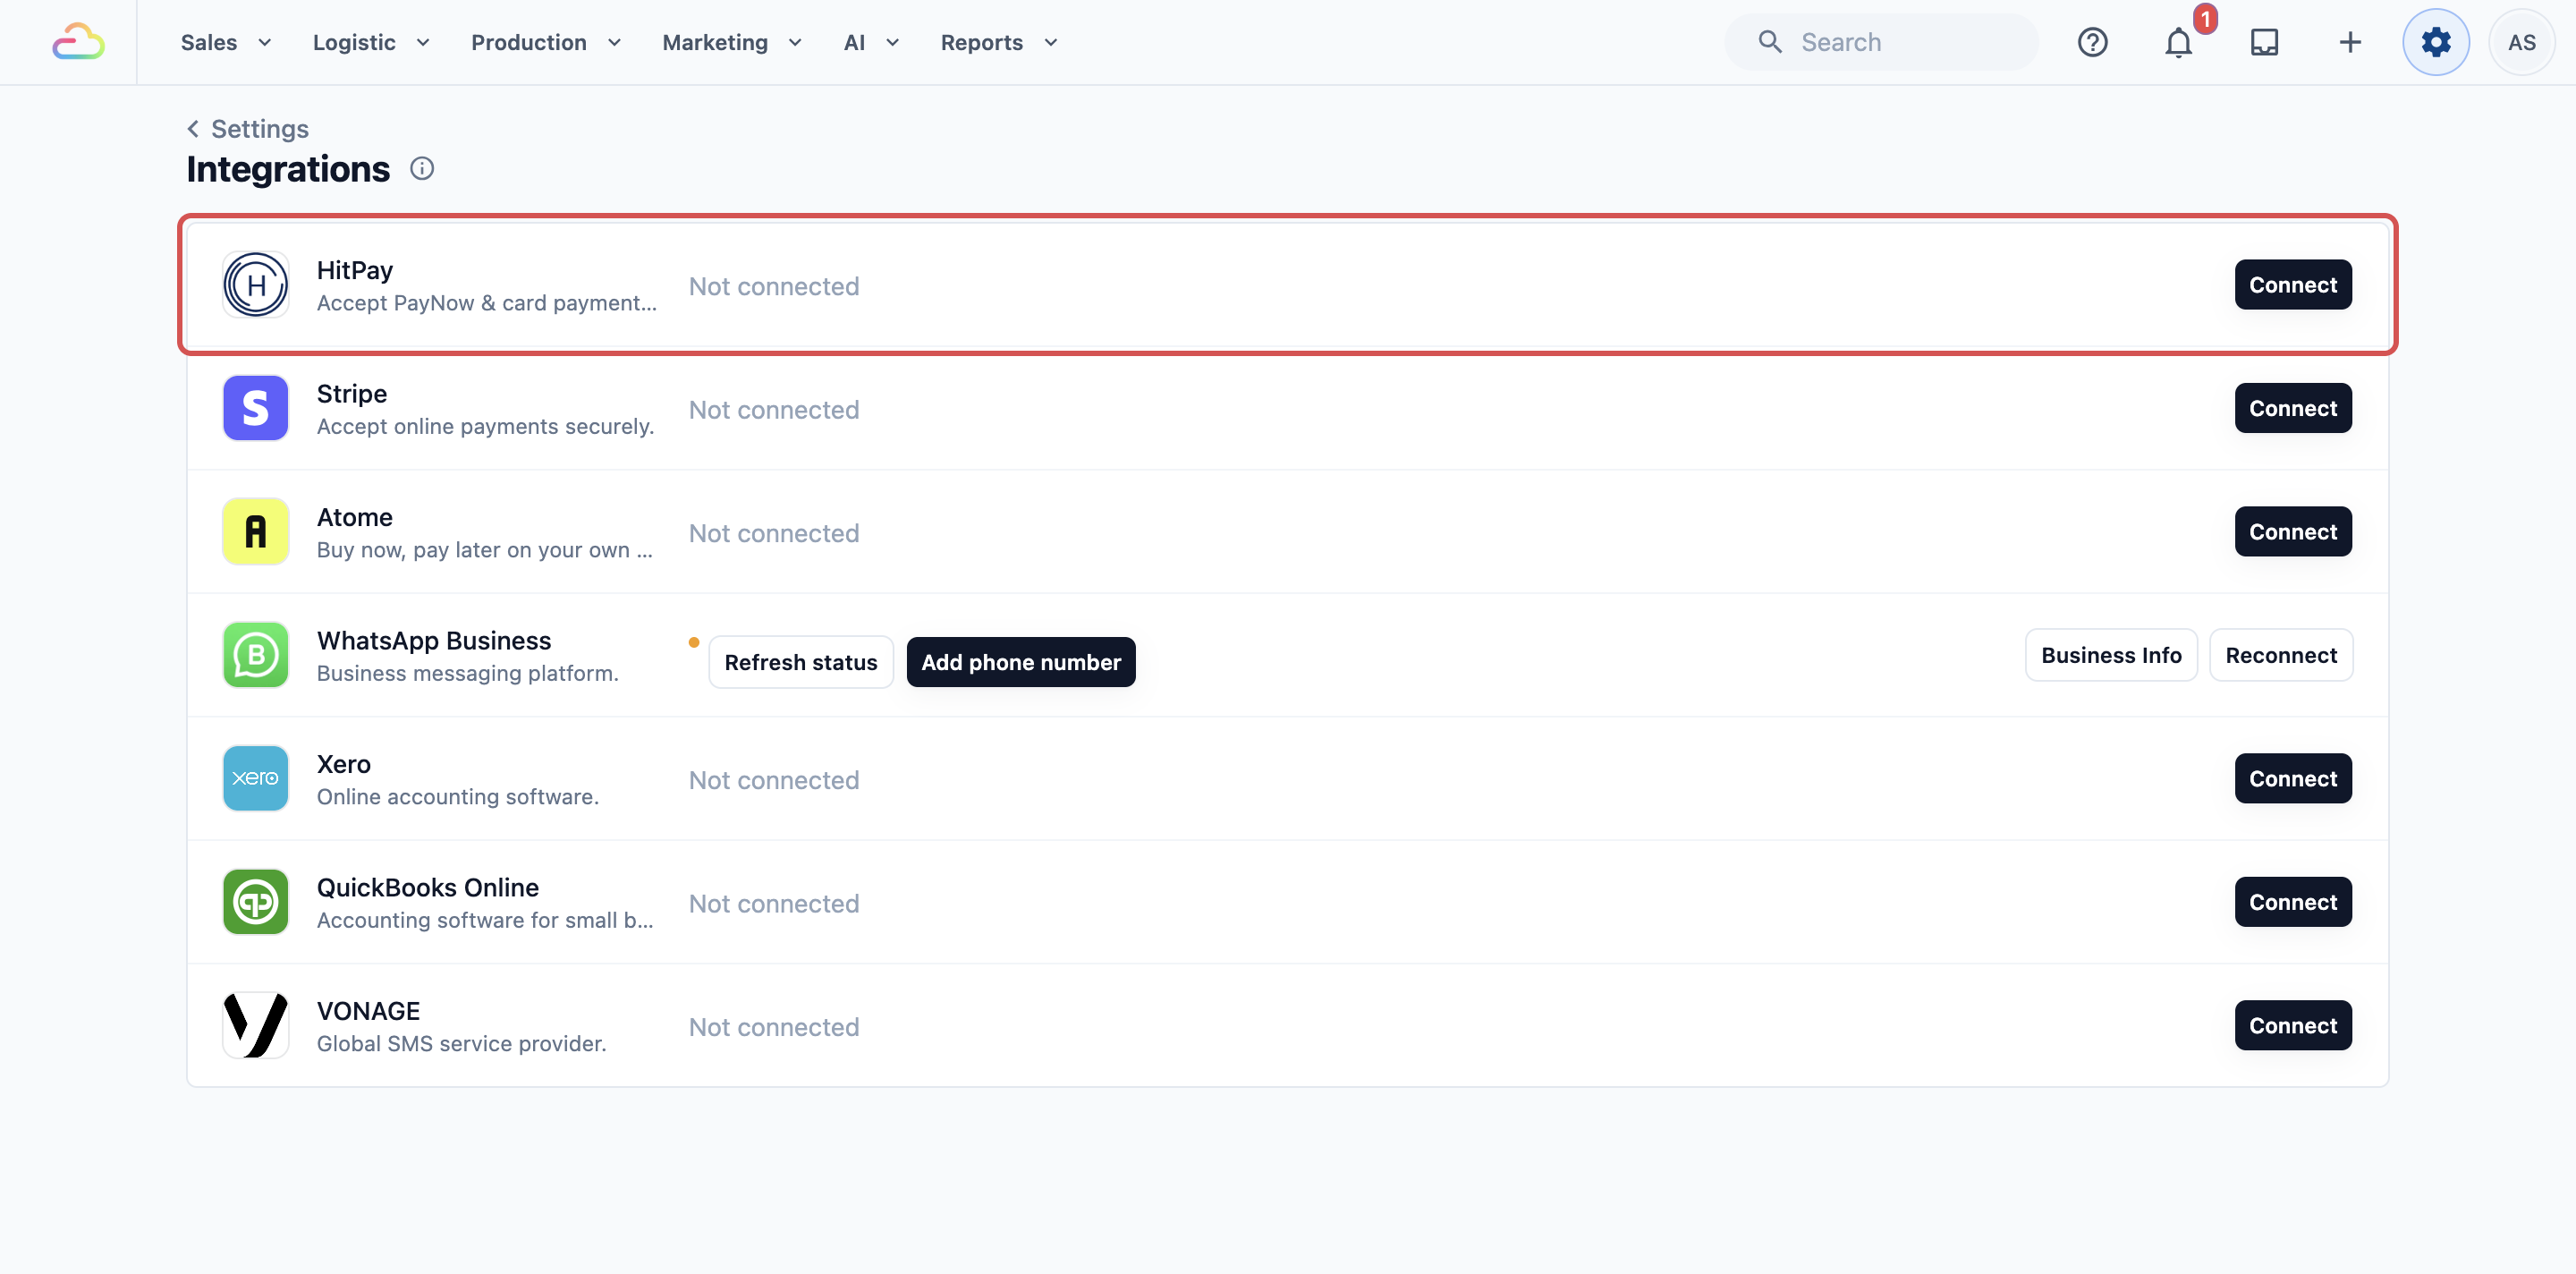
3. Find **HitPay** and click Connect.
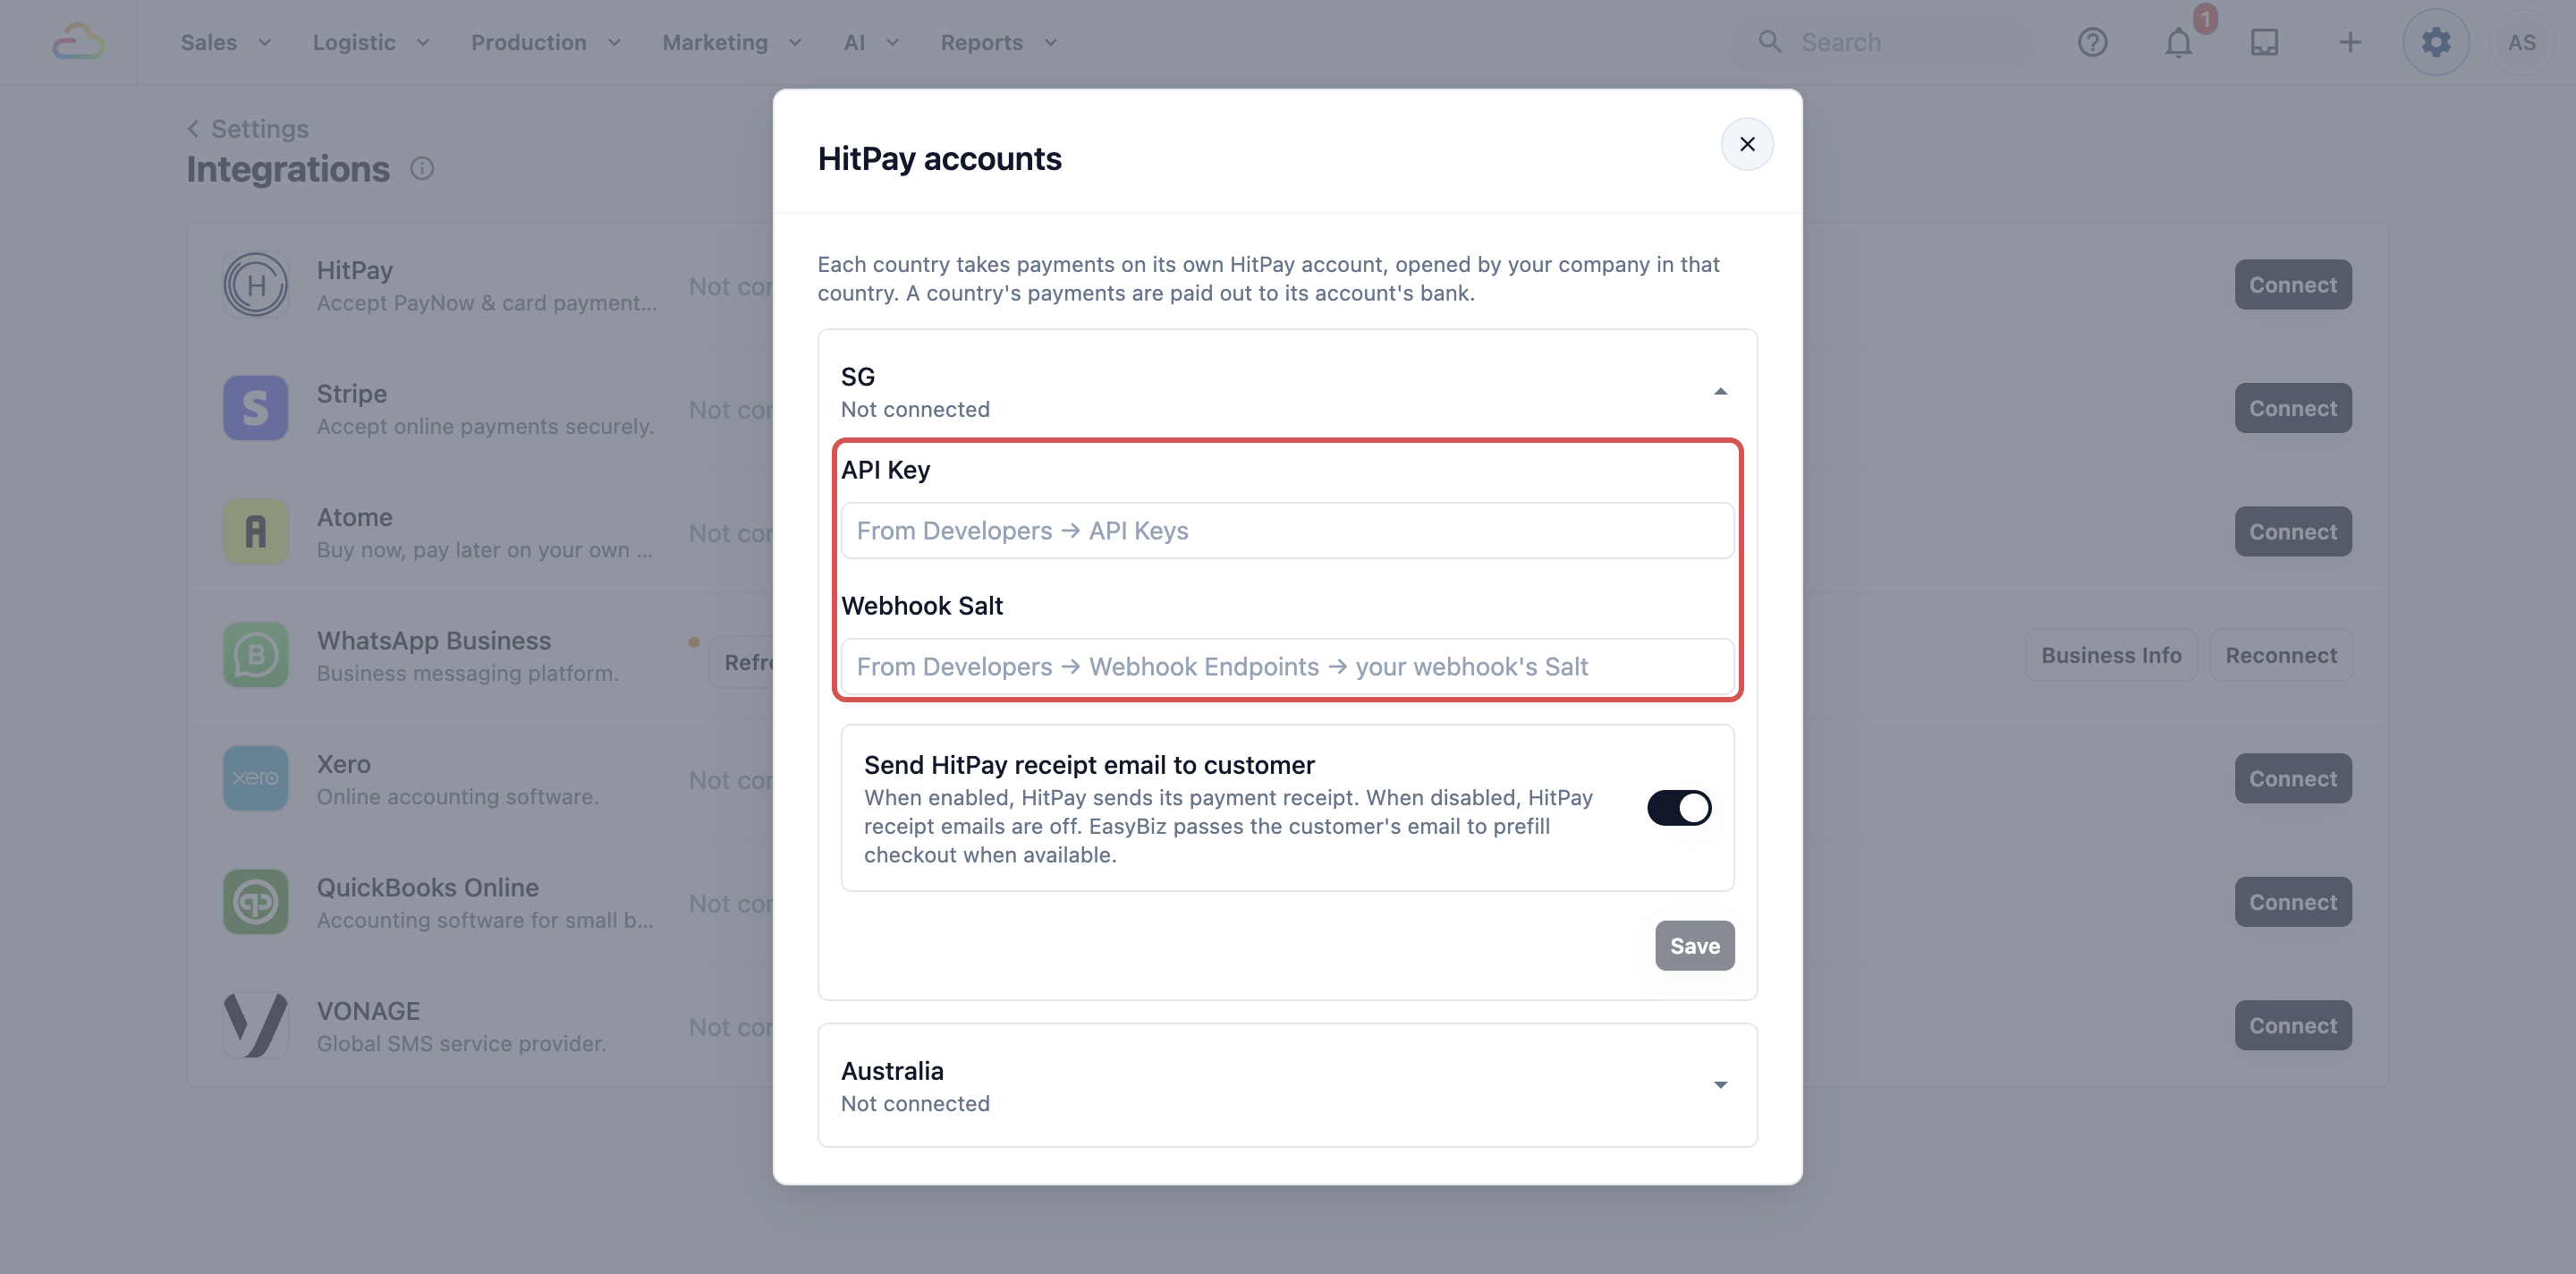
4. In the **HitPay accounts** window, paste your HitPay API key and webhook salt into your country's row.
Connecting is not the last step. You also switch HitPay on as a payment method for your counter and your Online Store. [Connecting HitPay to EasyBiz](/docs/connecting-hitpay-to-easybiz) covers each step, including where to find your API key in HitPay.
---
## Step 4: Set Up Pickup and Delivery Times
If you collect or deliver, customers need to choose when. You set this up with a booking option, such as Standard Pickup, and its time windows. A time window is the time range a customer picks, for example 9:00 AM to 12:00 PM.
If you leave it out, the Online Store has nothing for customers to book. If an option has no time windows, customers pick a day only.
1. Click the ⚙️ Settings icon in the top-right corner.
2. Under the **Scheduling & Dispatch** section, click Bookings.
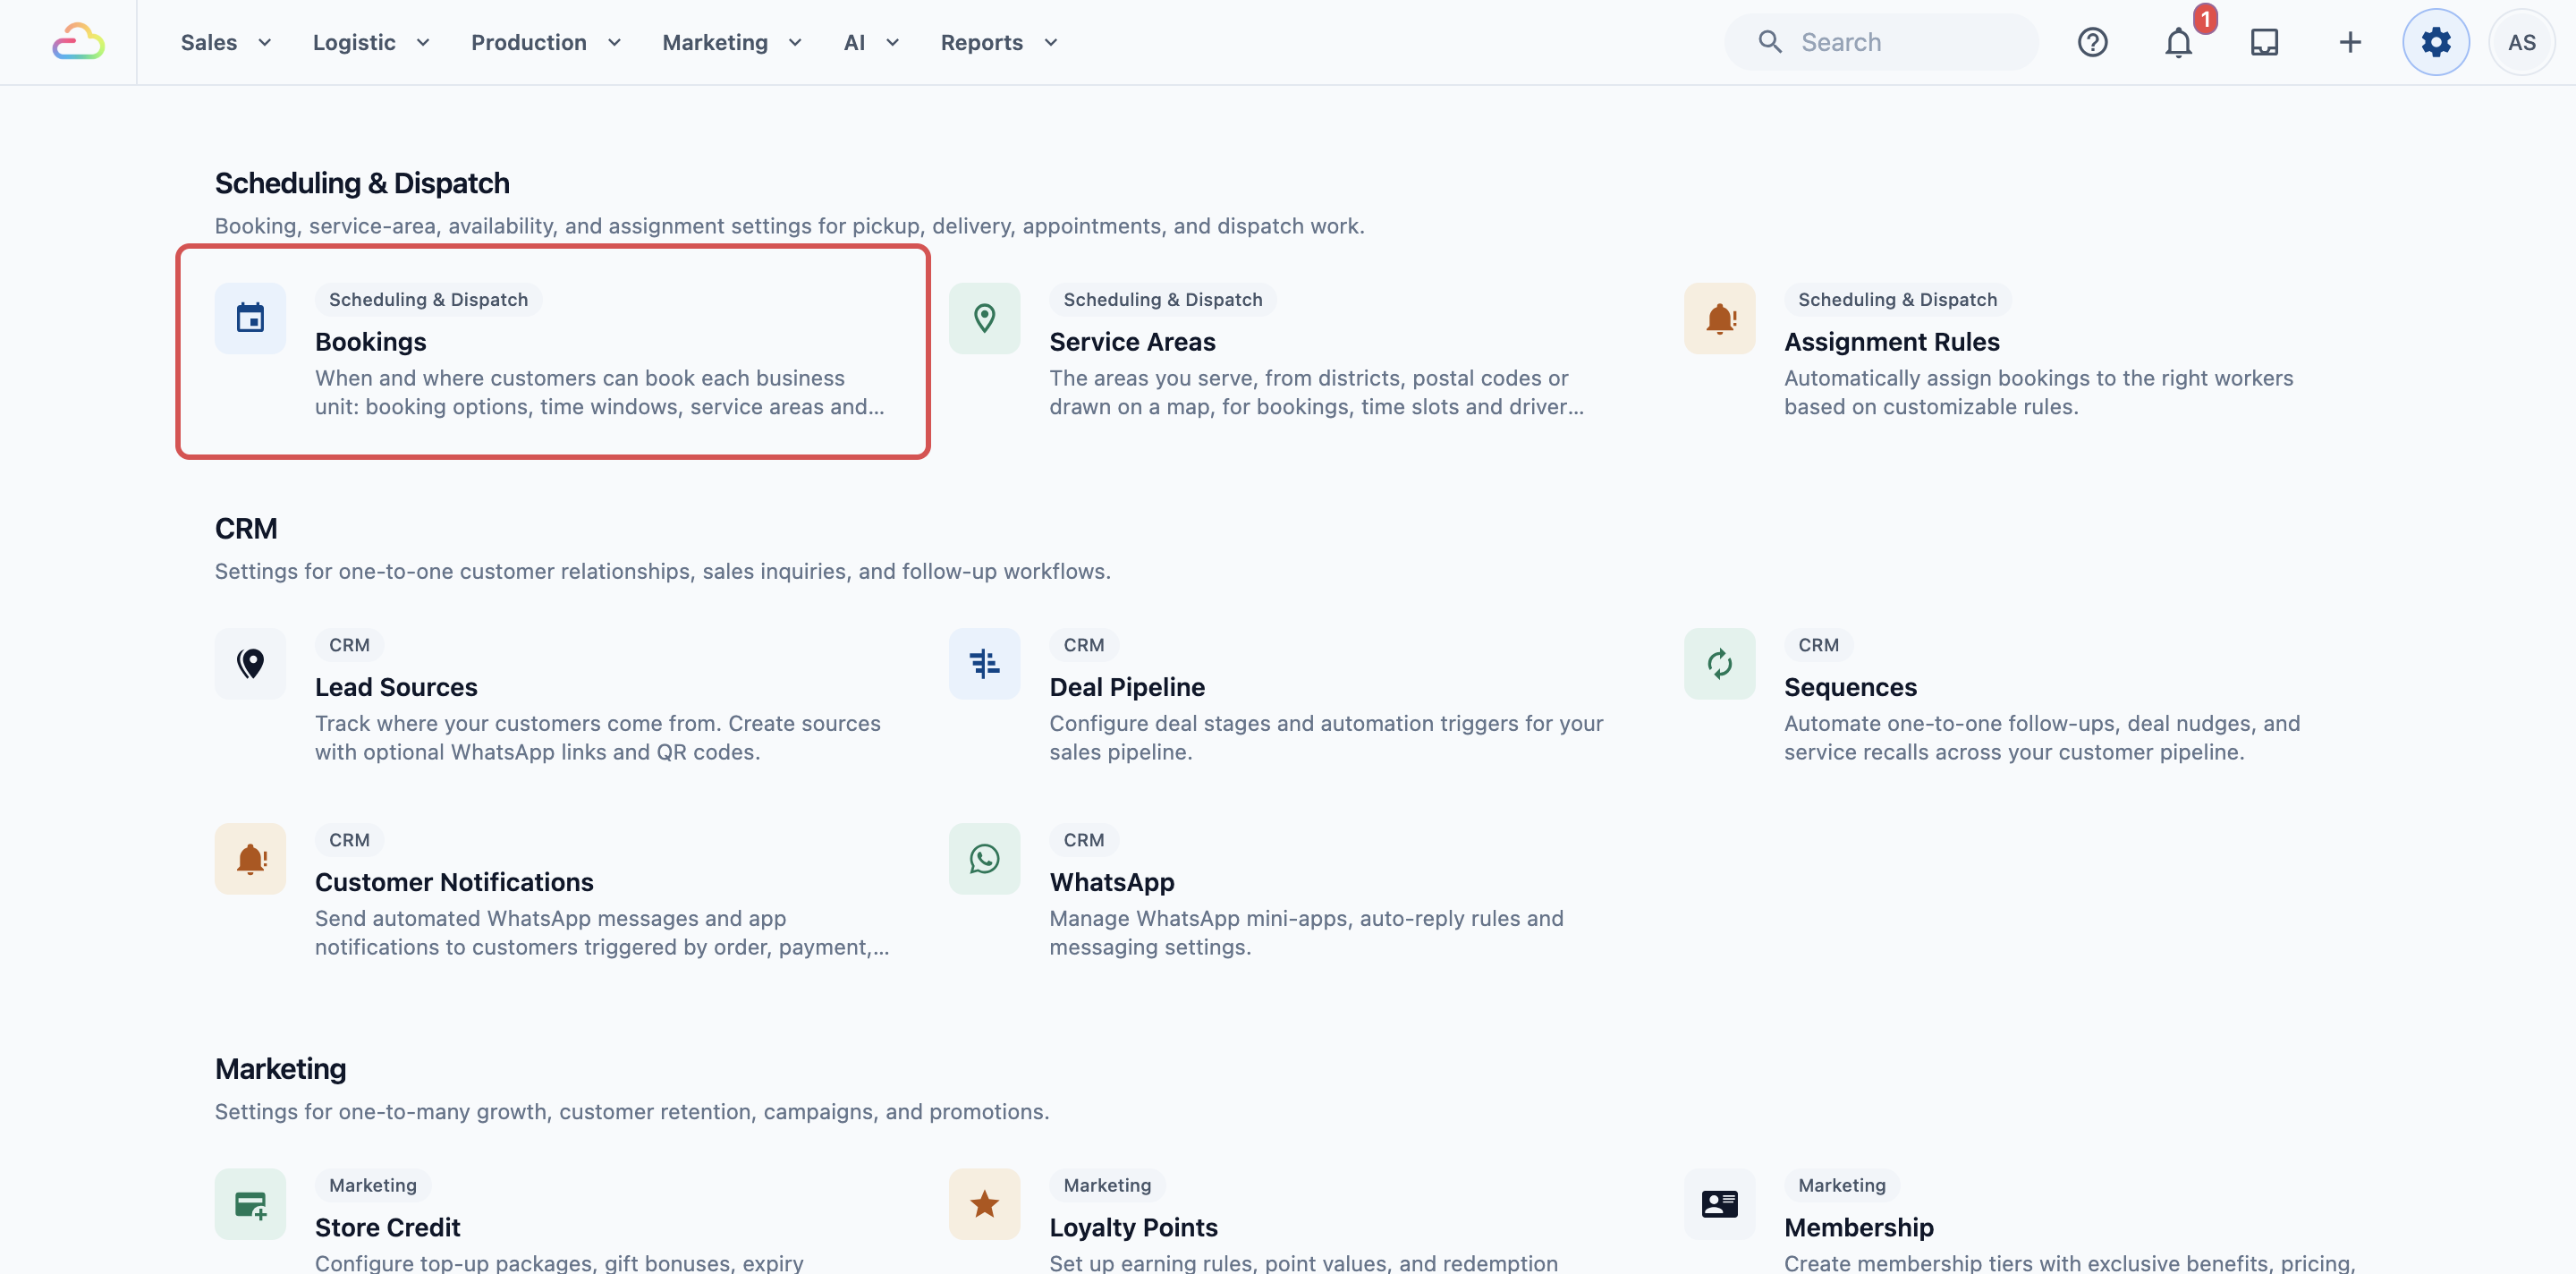
3. Click your business unit, for example Laundry & Dry Cleaning.
4. Under **Online booking options**, add an option or click one, for example Standard Pickup.
5. Under **Time windows**, click Add time window, then set the time range, the days and a daily booking limit, for example 10 bookings.
6. Click Save.
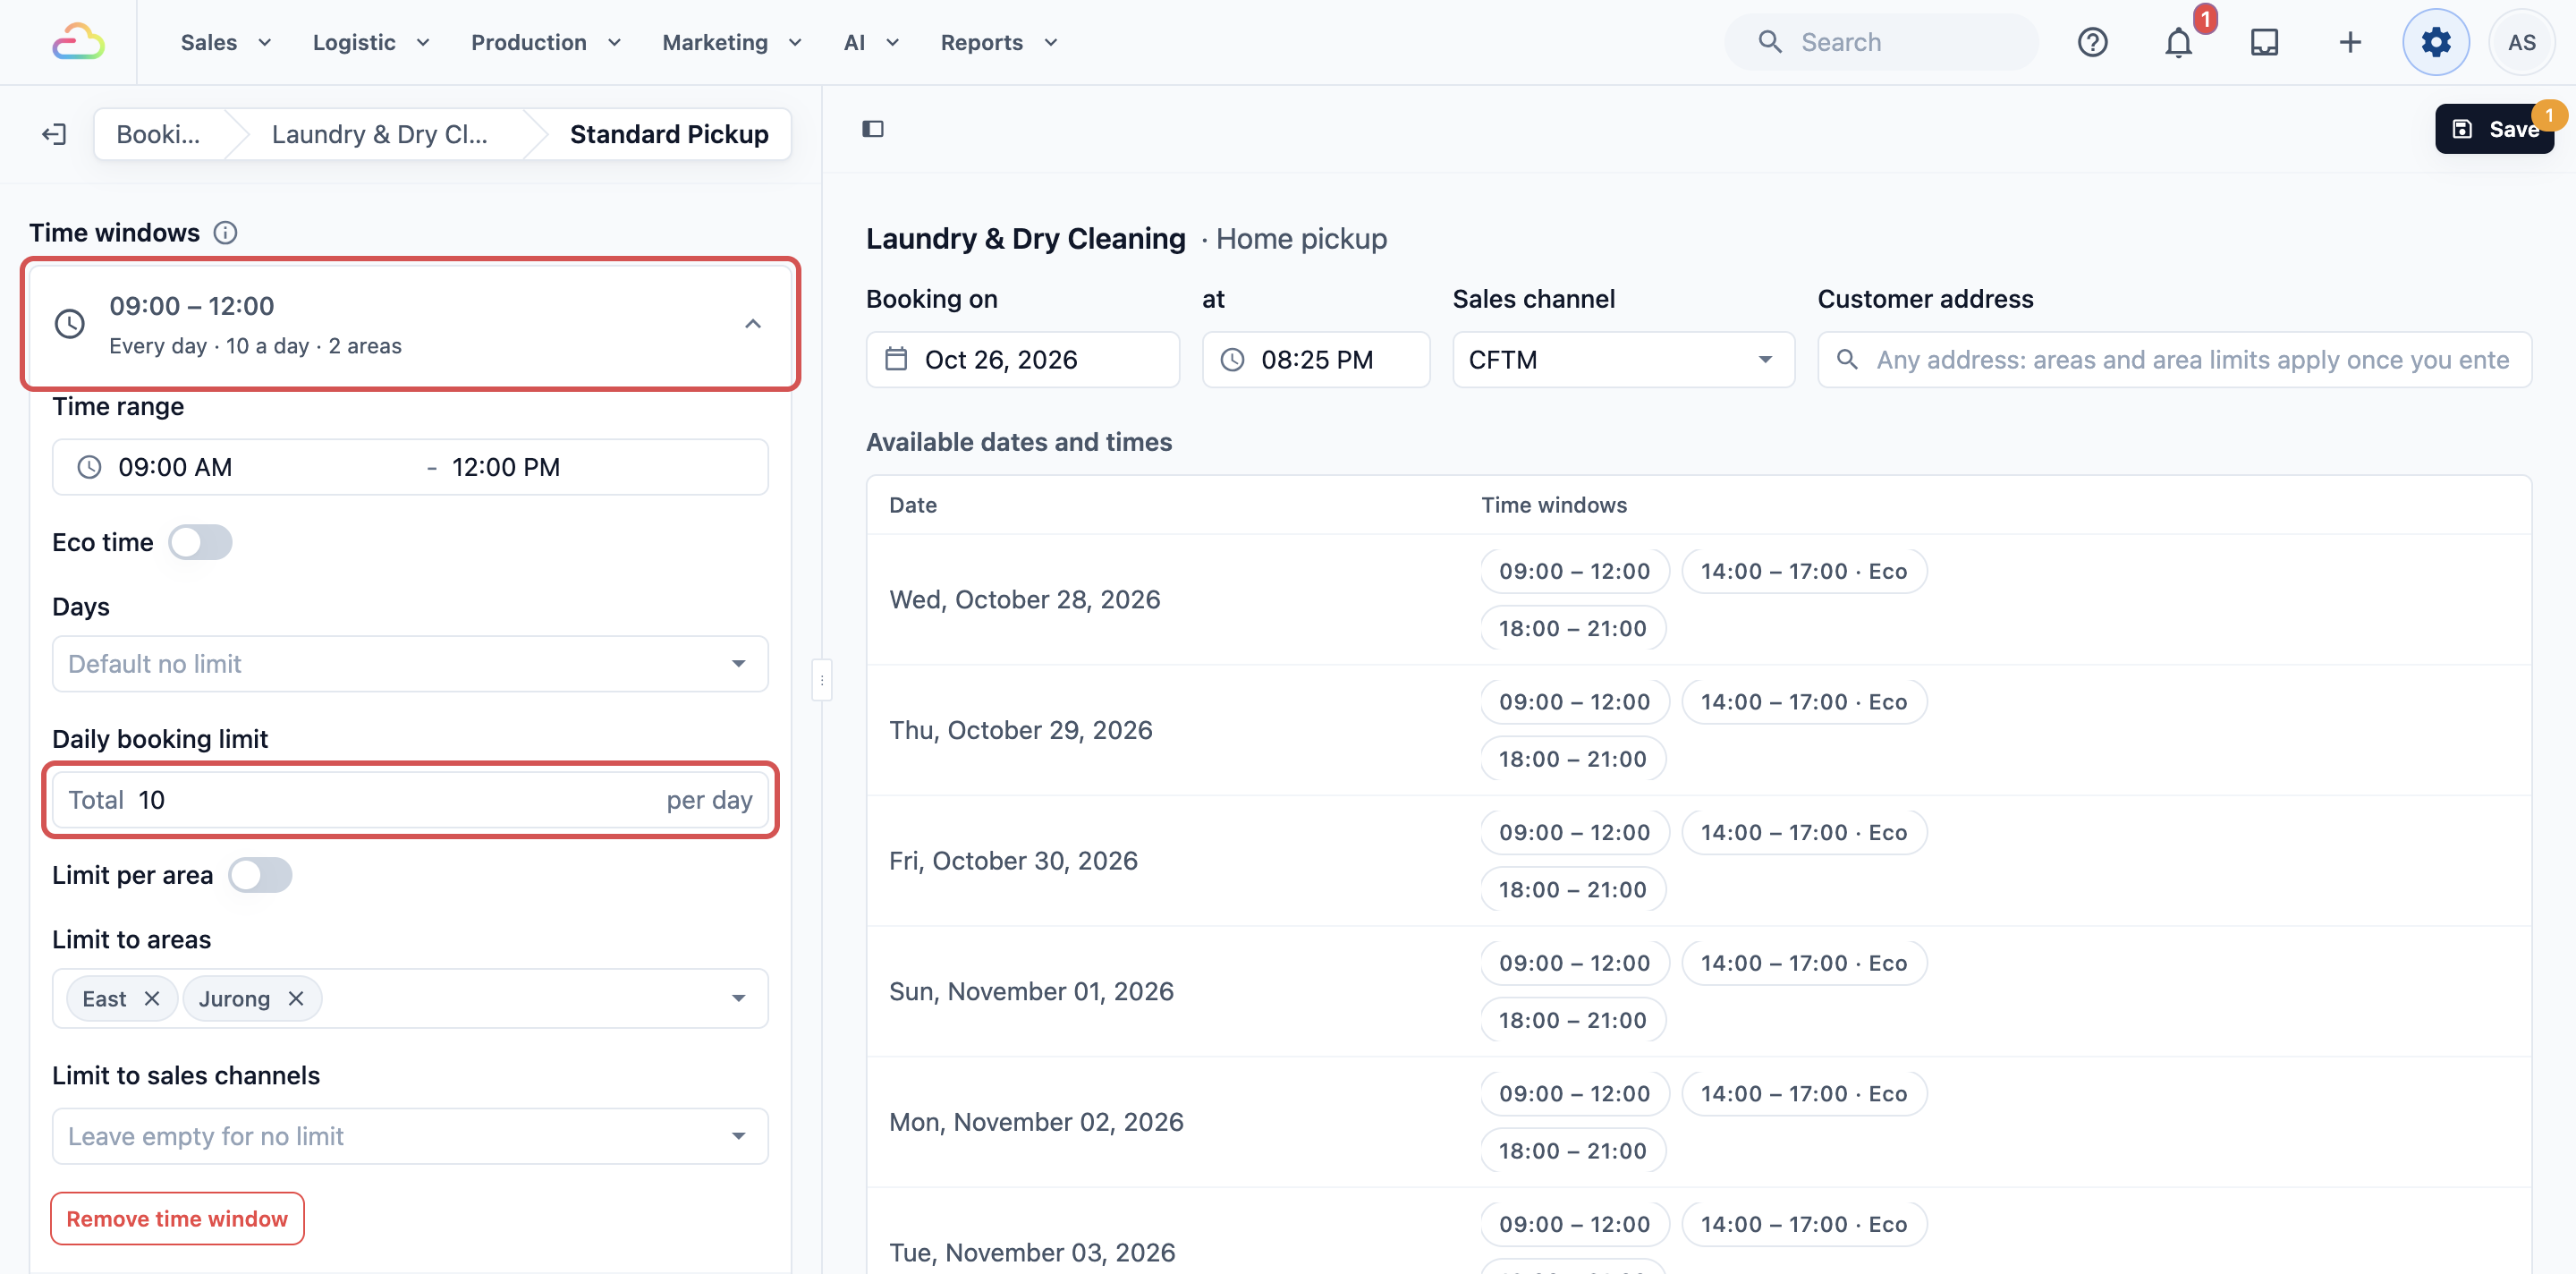
If you used the old system, time windows replace the Time Slots page, and you need to add your times again here. For every setting, see [Setting Up Time Windows and Daily Limits](/docs/setting-up-time-slots).
Time windows only show in areas you serve. Set your service areas on the same Bookings page, see [Setting Up Service Areas](/docs/setting-up-service-areas).
---
## Step 5: Turn On Online Ordering
Your Online Store is your own website where customers see your prices, book a pickup and pay. It uses everything above: your business unit, your published price list, your payment methods and your booking times.
1. Click the ⚙️ Settings icon in the top-right corner.
2. Under the **Sales Channels** section, click Online Store & Mobile App.
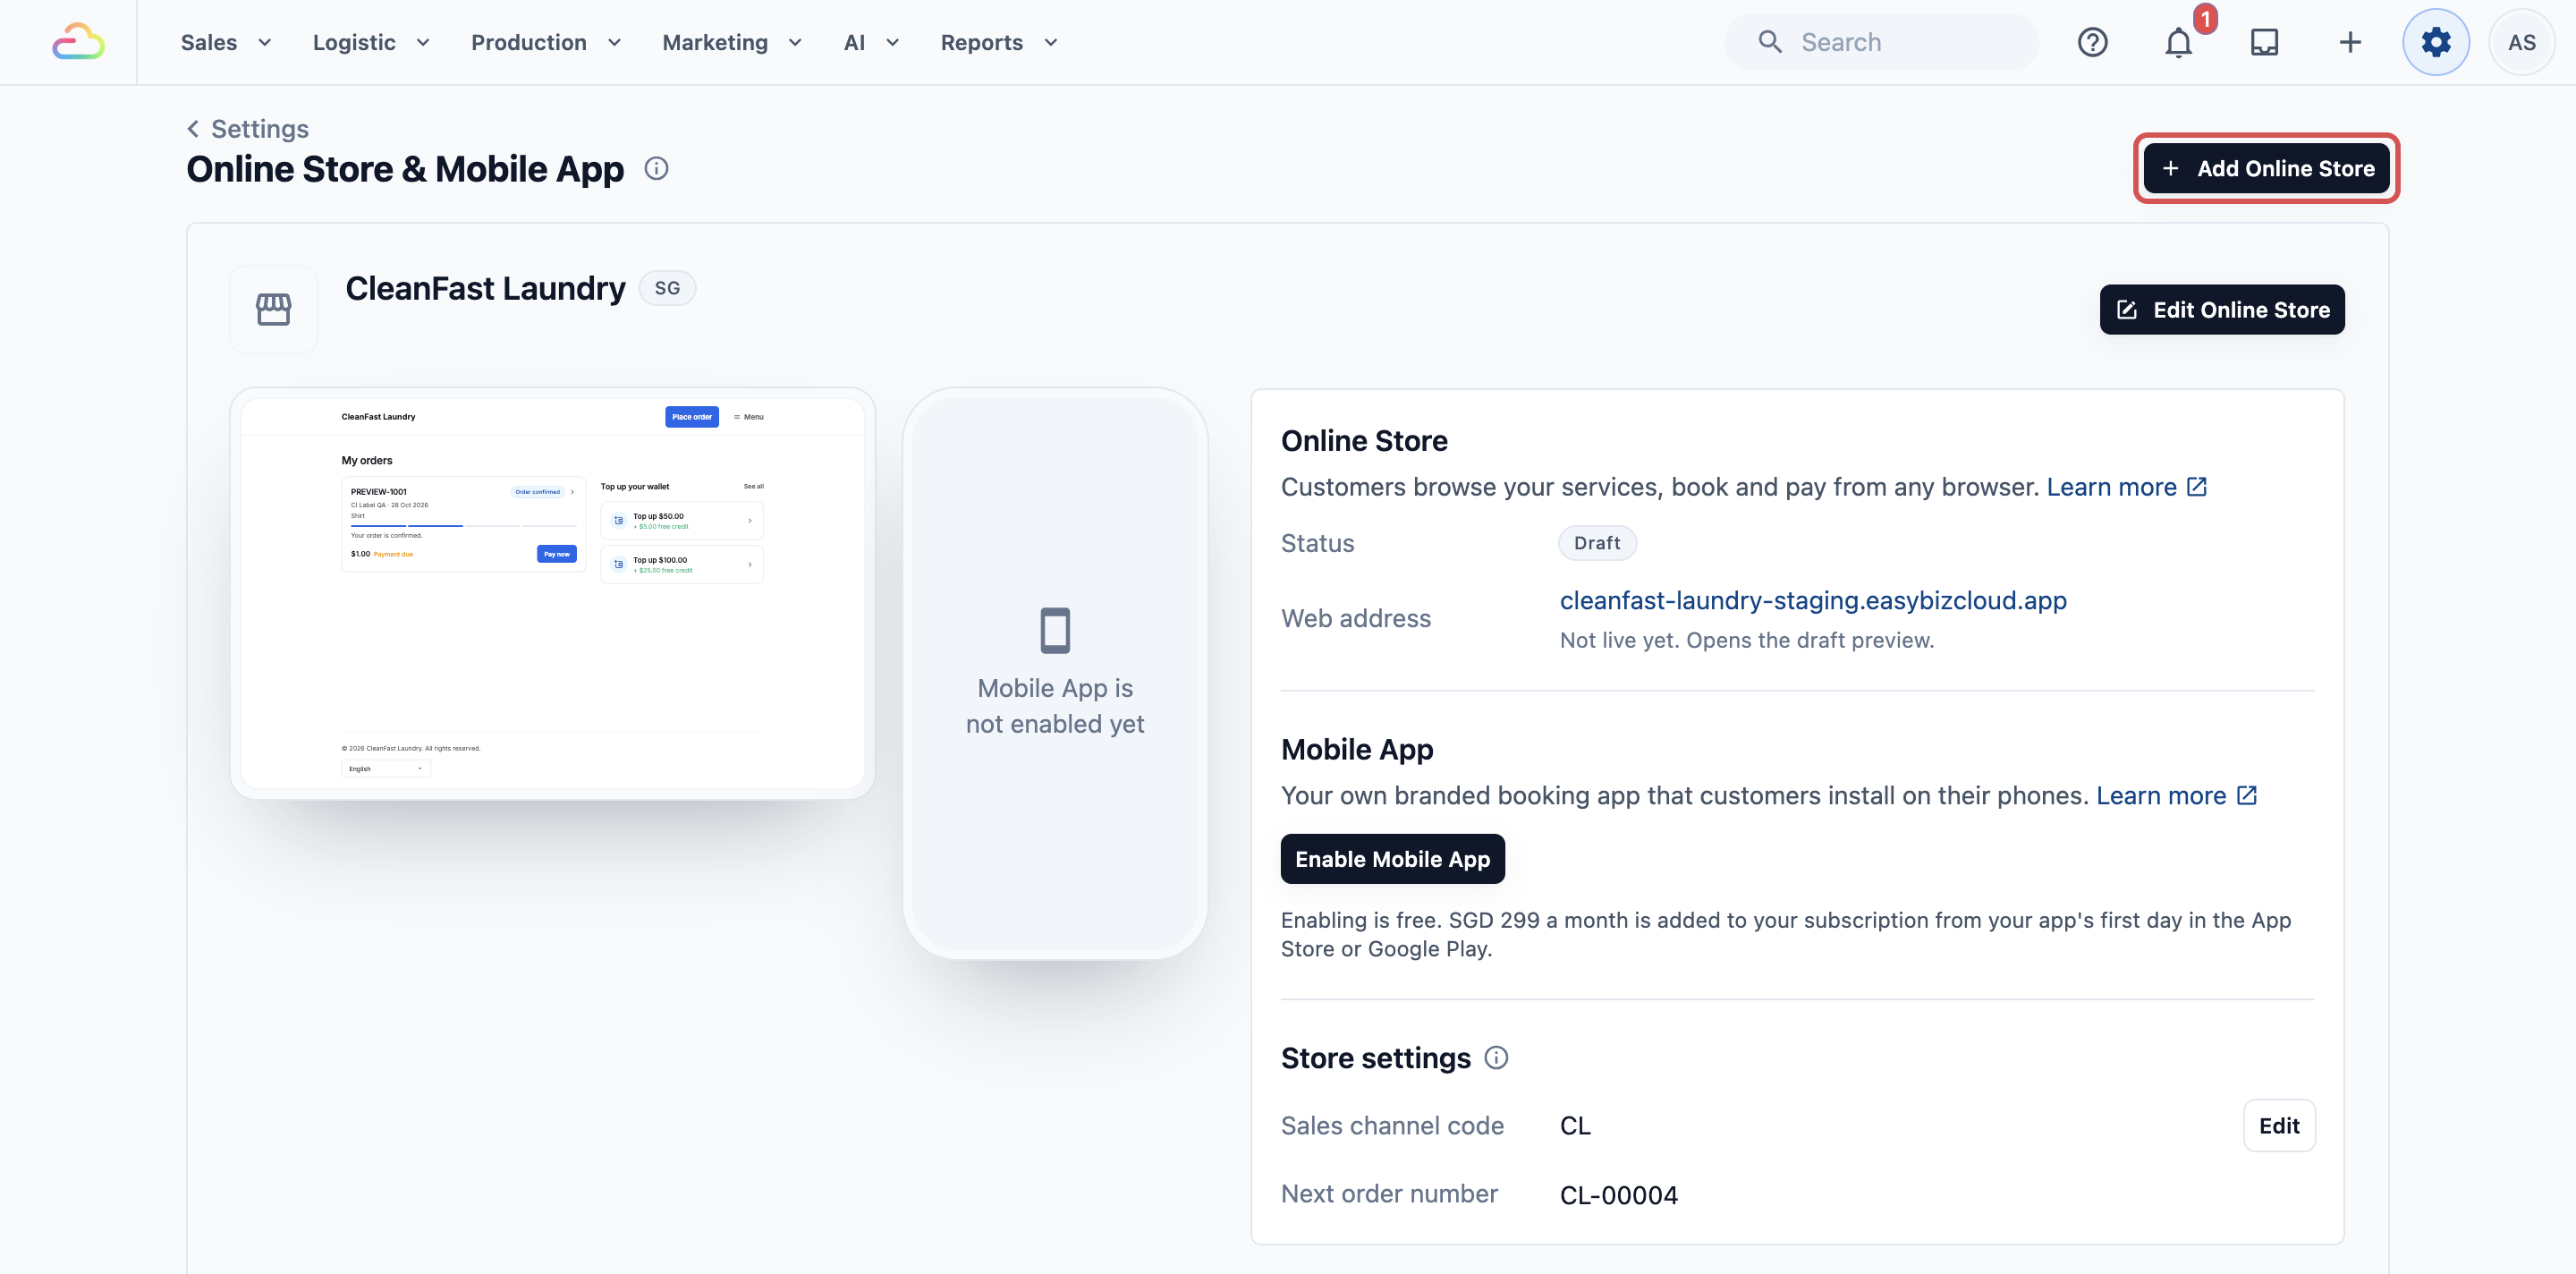
3. Click Add Online Store, choose your brand and market, then click Add Online Store.
4. On the store's card, click Enable Online Store, choose the billing company and the web address, then click Enable.
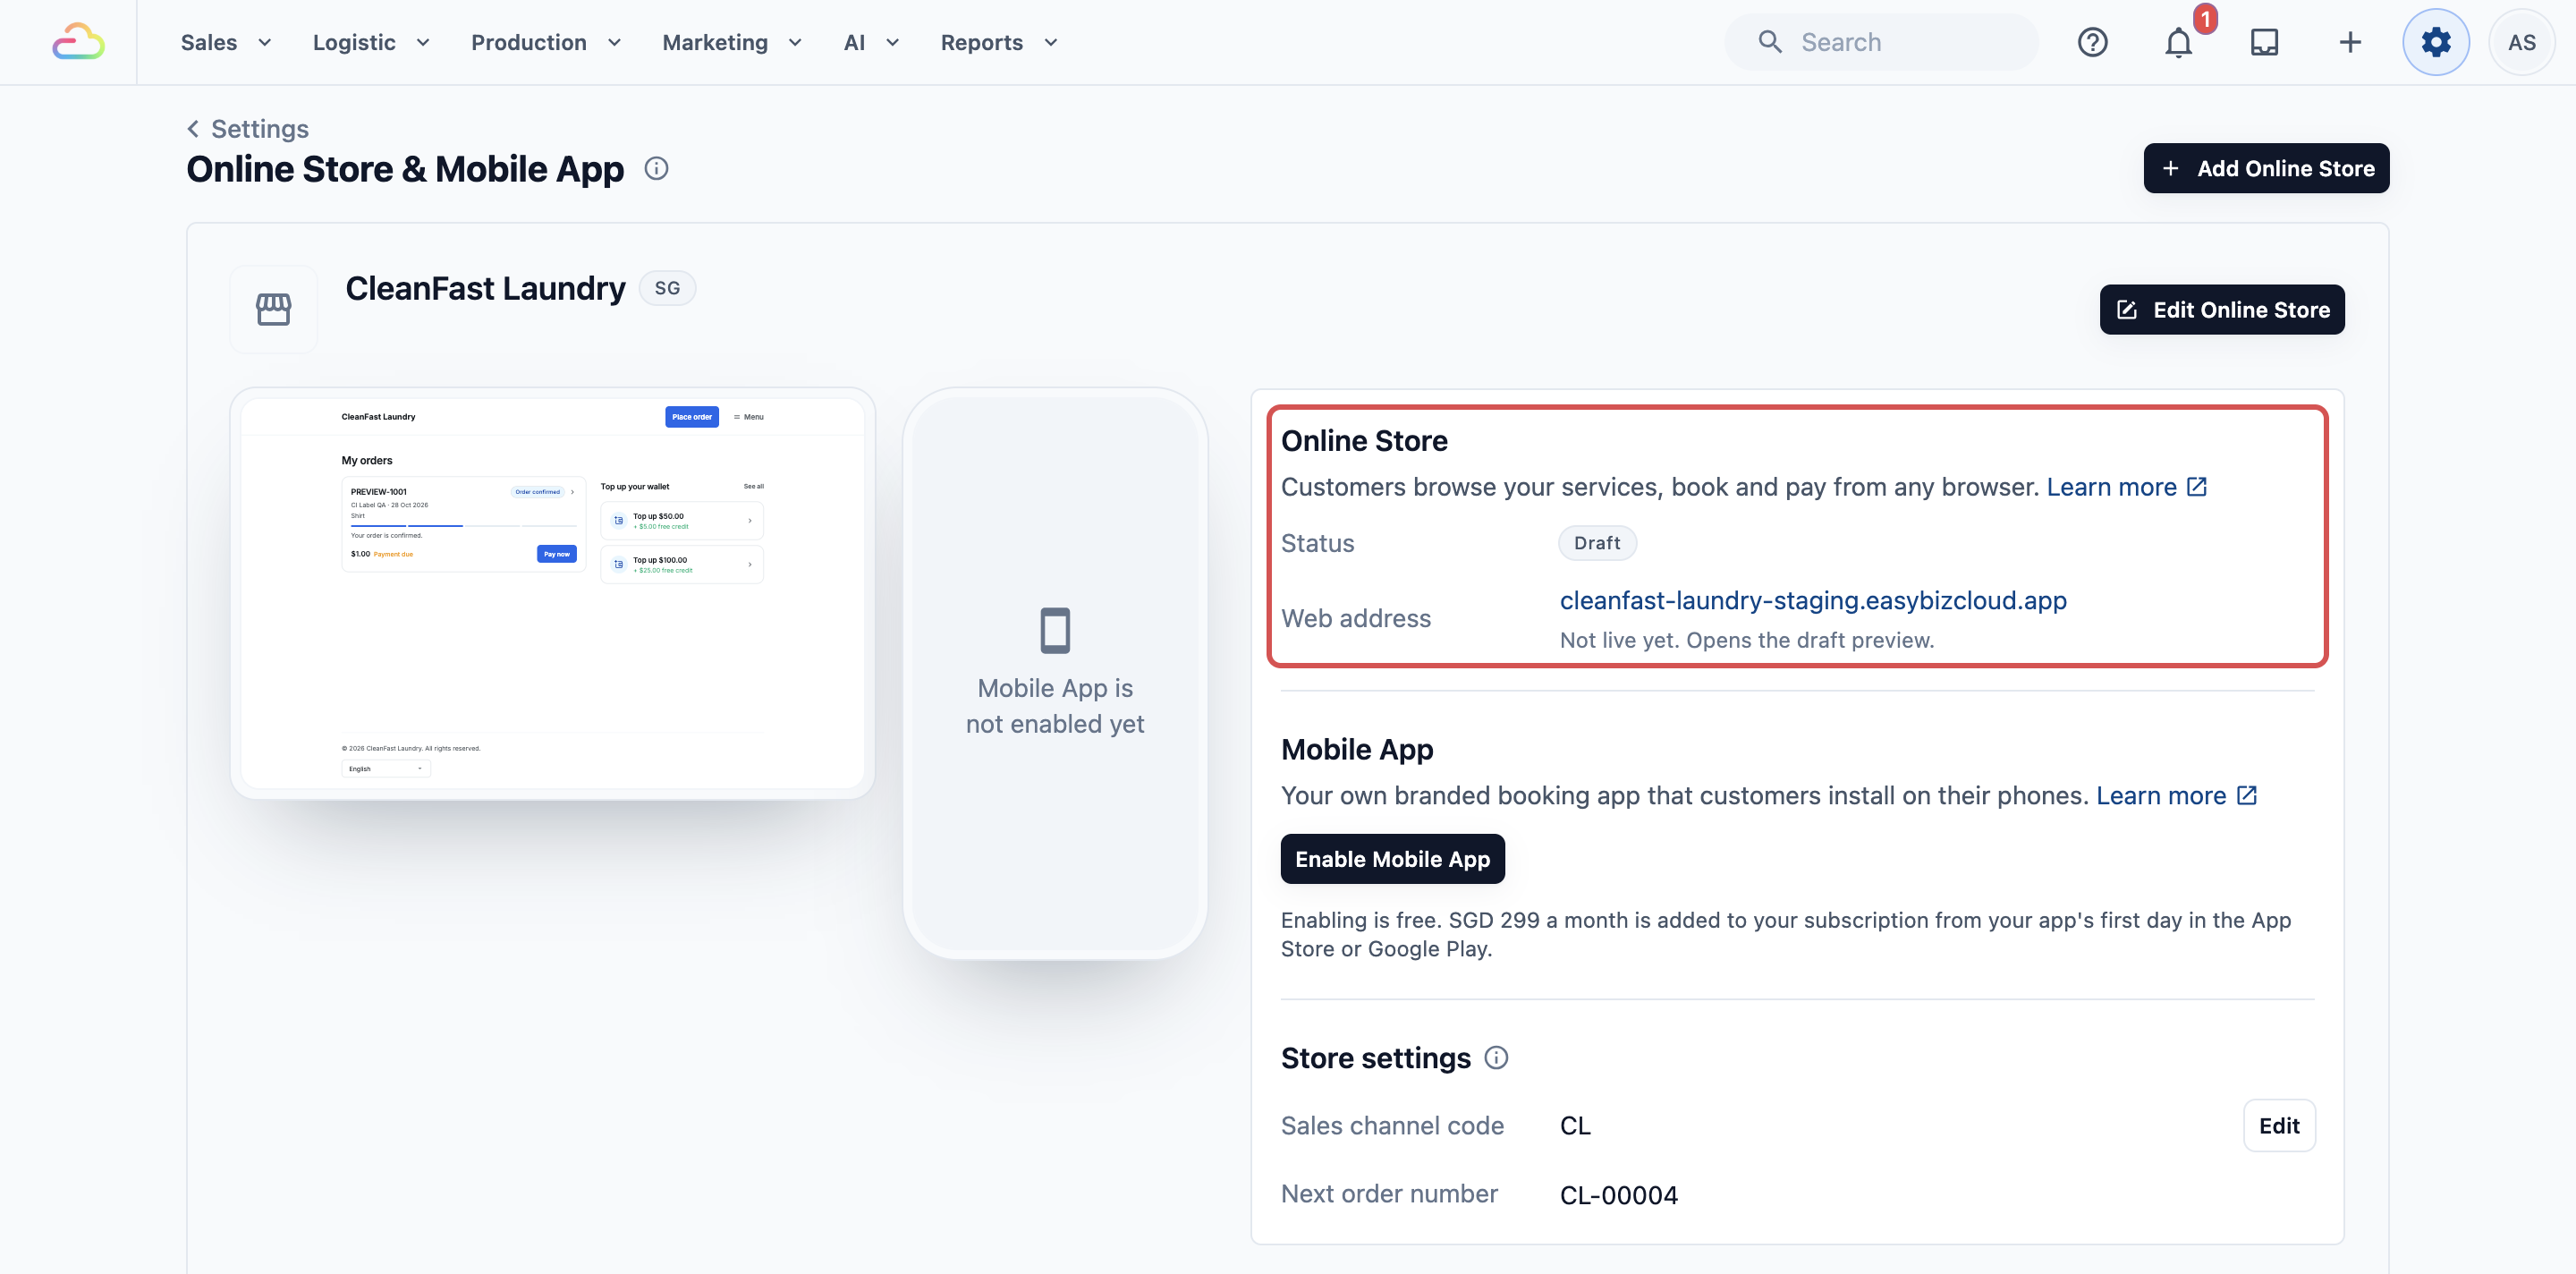
5. In the store editor, click Preview and place a test order. Nothing is charged.
6. When it looks right, click Publish, then Publish Online Store.
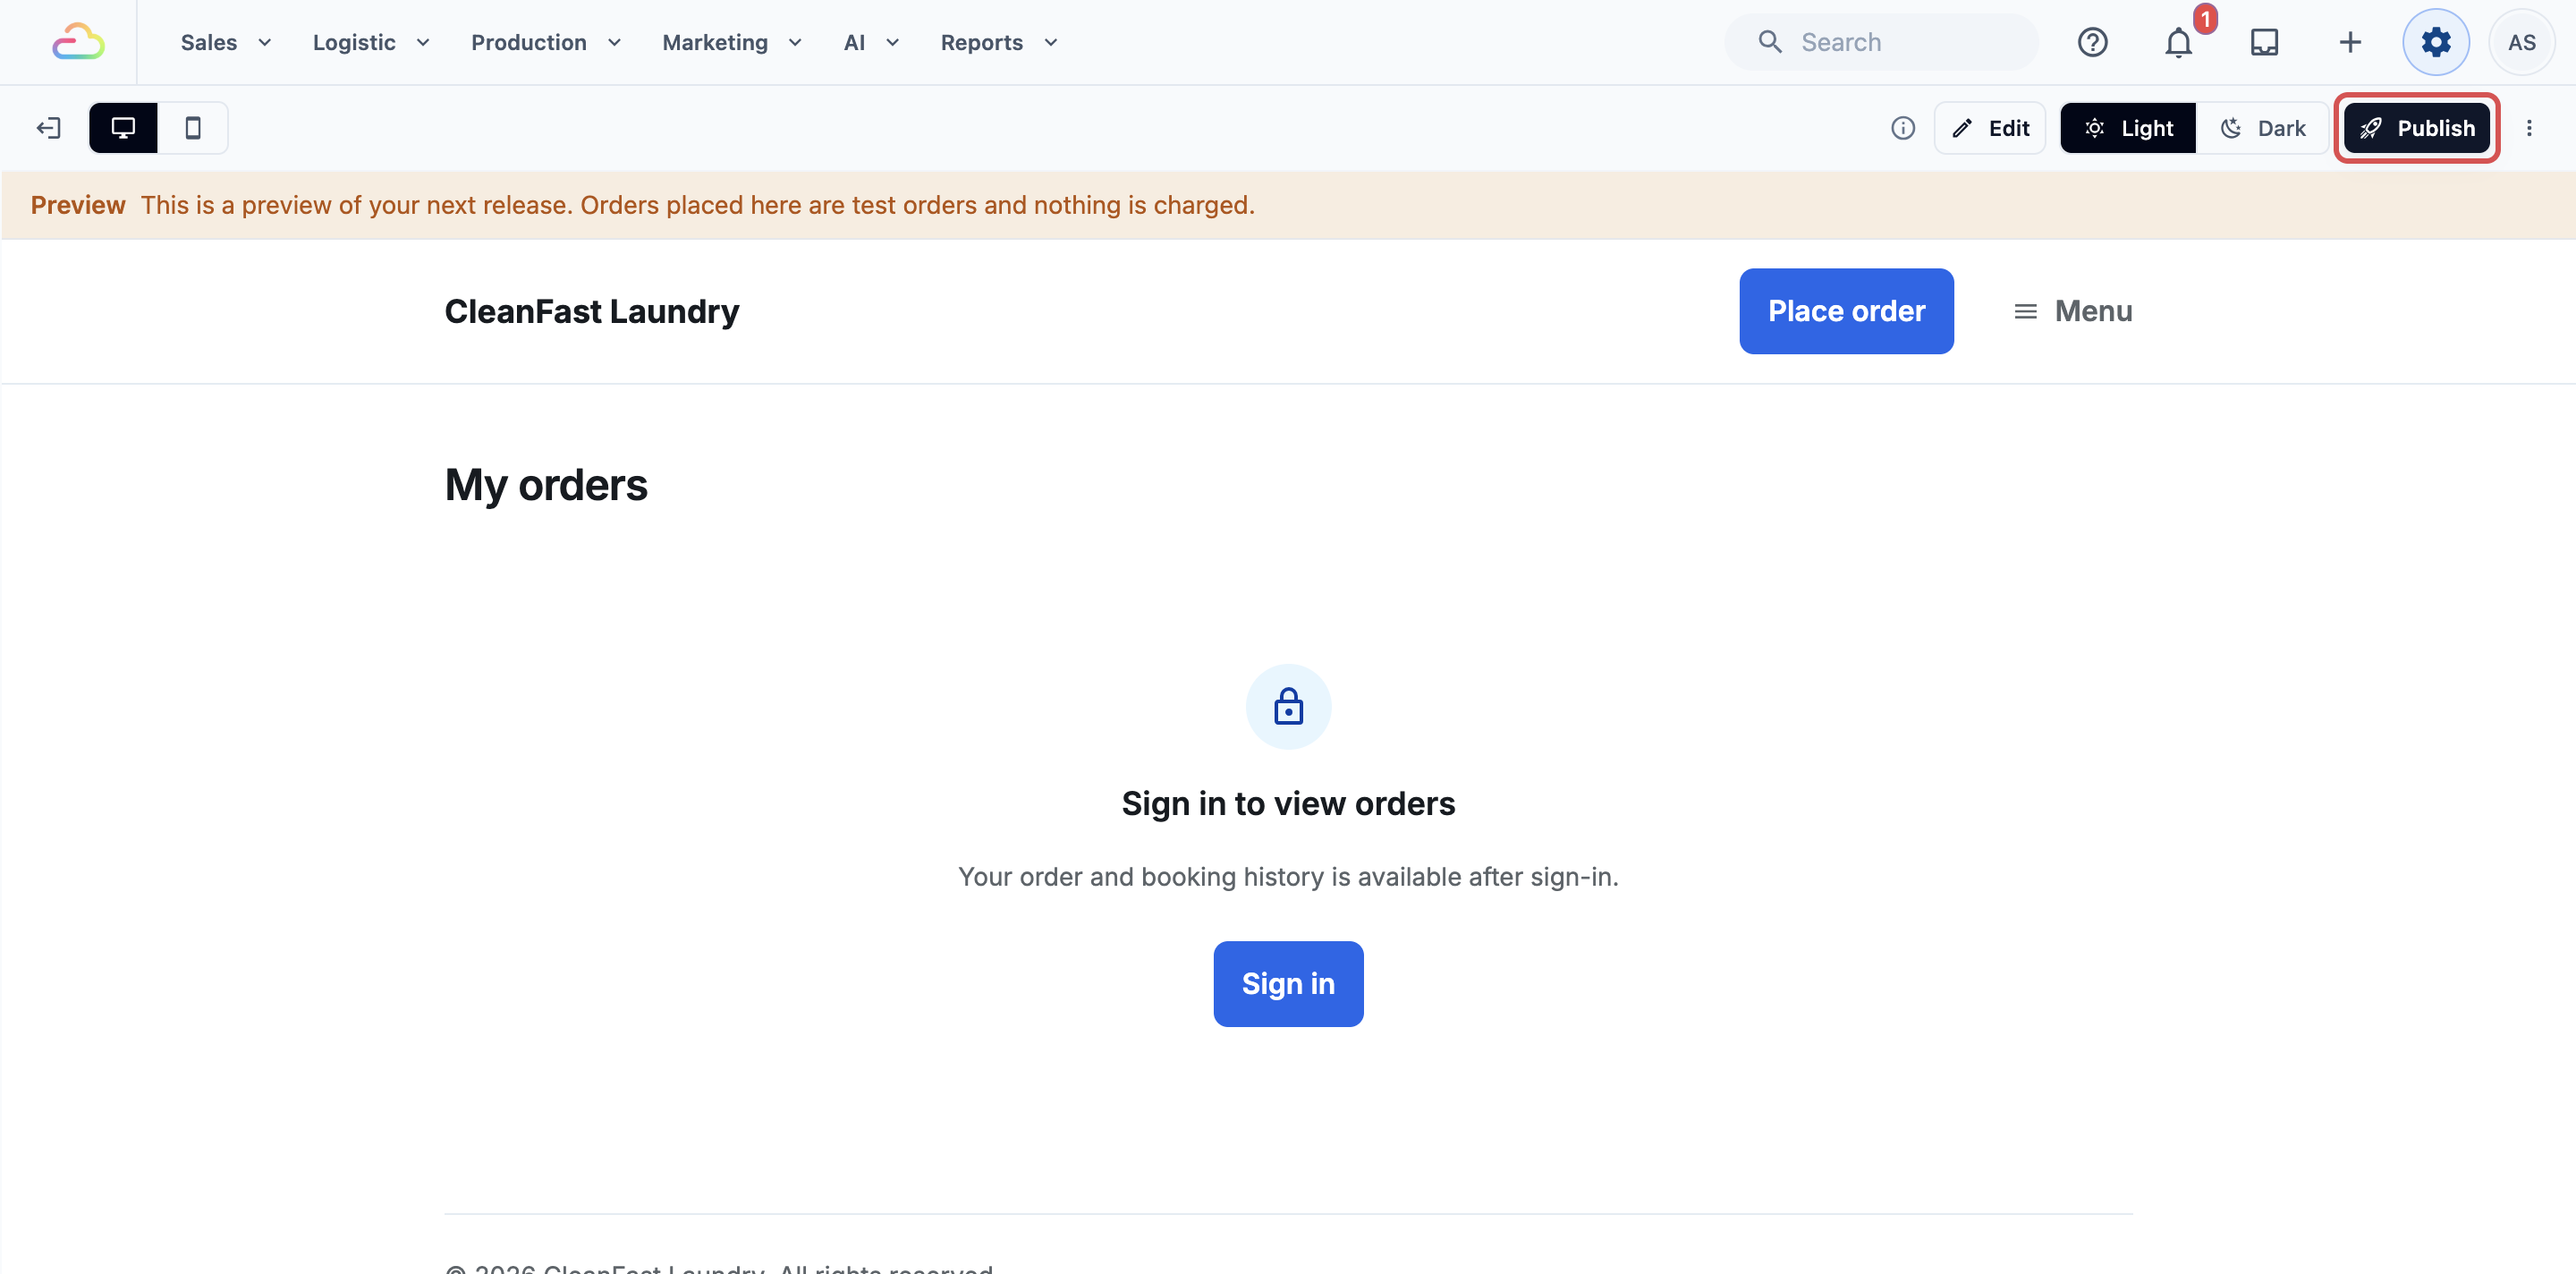
Nothing is live and nothing is billed until you publish. If you used the old Online Store, it now sits under **Online Store (Legacy)**, and new stores are set up here. For every step, see [Adding a Store and Turning On the Online Store or Mobile App](/docs/adding-a-store-and-turning-on-online-store-or-mobile-app).
---
## Example: CleanFast Laundry's First Day
CleanFast Laundry, a Singapore laundry and dry cleaner, follows these steps in one morning:
- **Business unit:** Laundry & Dry Cleaning, with the Laundry business type.
- **Price list:** changes Shirt with Wash to $4.00 and publishes it to the shop counter and the Online Store.
- **Payments:** connects HitPay so customers can pay by PayNow.
- **Booking times:** Standard Pickup, Monday to Saturday, 9:00 AM to 12:00 PM, 10 bookings a day.
- **Online Store:** cleanfast.easybizcloud.app, tested with a preview order, then published.
After saving, staff see the laundry items and prices when they start an order on the POS. Customers open the Online Store, see the same prices, pick a morning pickup and pay by PayNow.
---
## Adding a Second Business, Such as Home Cleaning
When you start a new line of business, add it as its own business unit. Home cleaning works differently from laundry: it is booked as a visit at the customer's home, priced by the hour or by home size, with no pickup or production.
1. Click the ⚙️ Settings icon in the top-right corner.
2. Under the **Administration** section, click Business Units.
3. Click New Business Unit, enter a **Display name** such as "Home Cleaning", choose **Home Cleaning** as the **Business type**, and click Create.
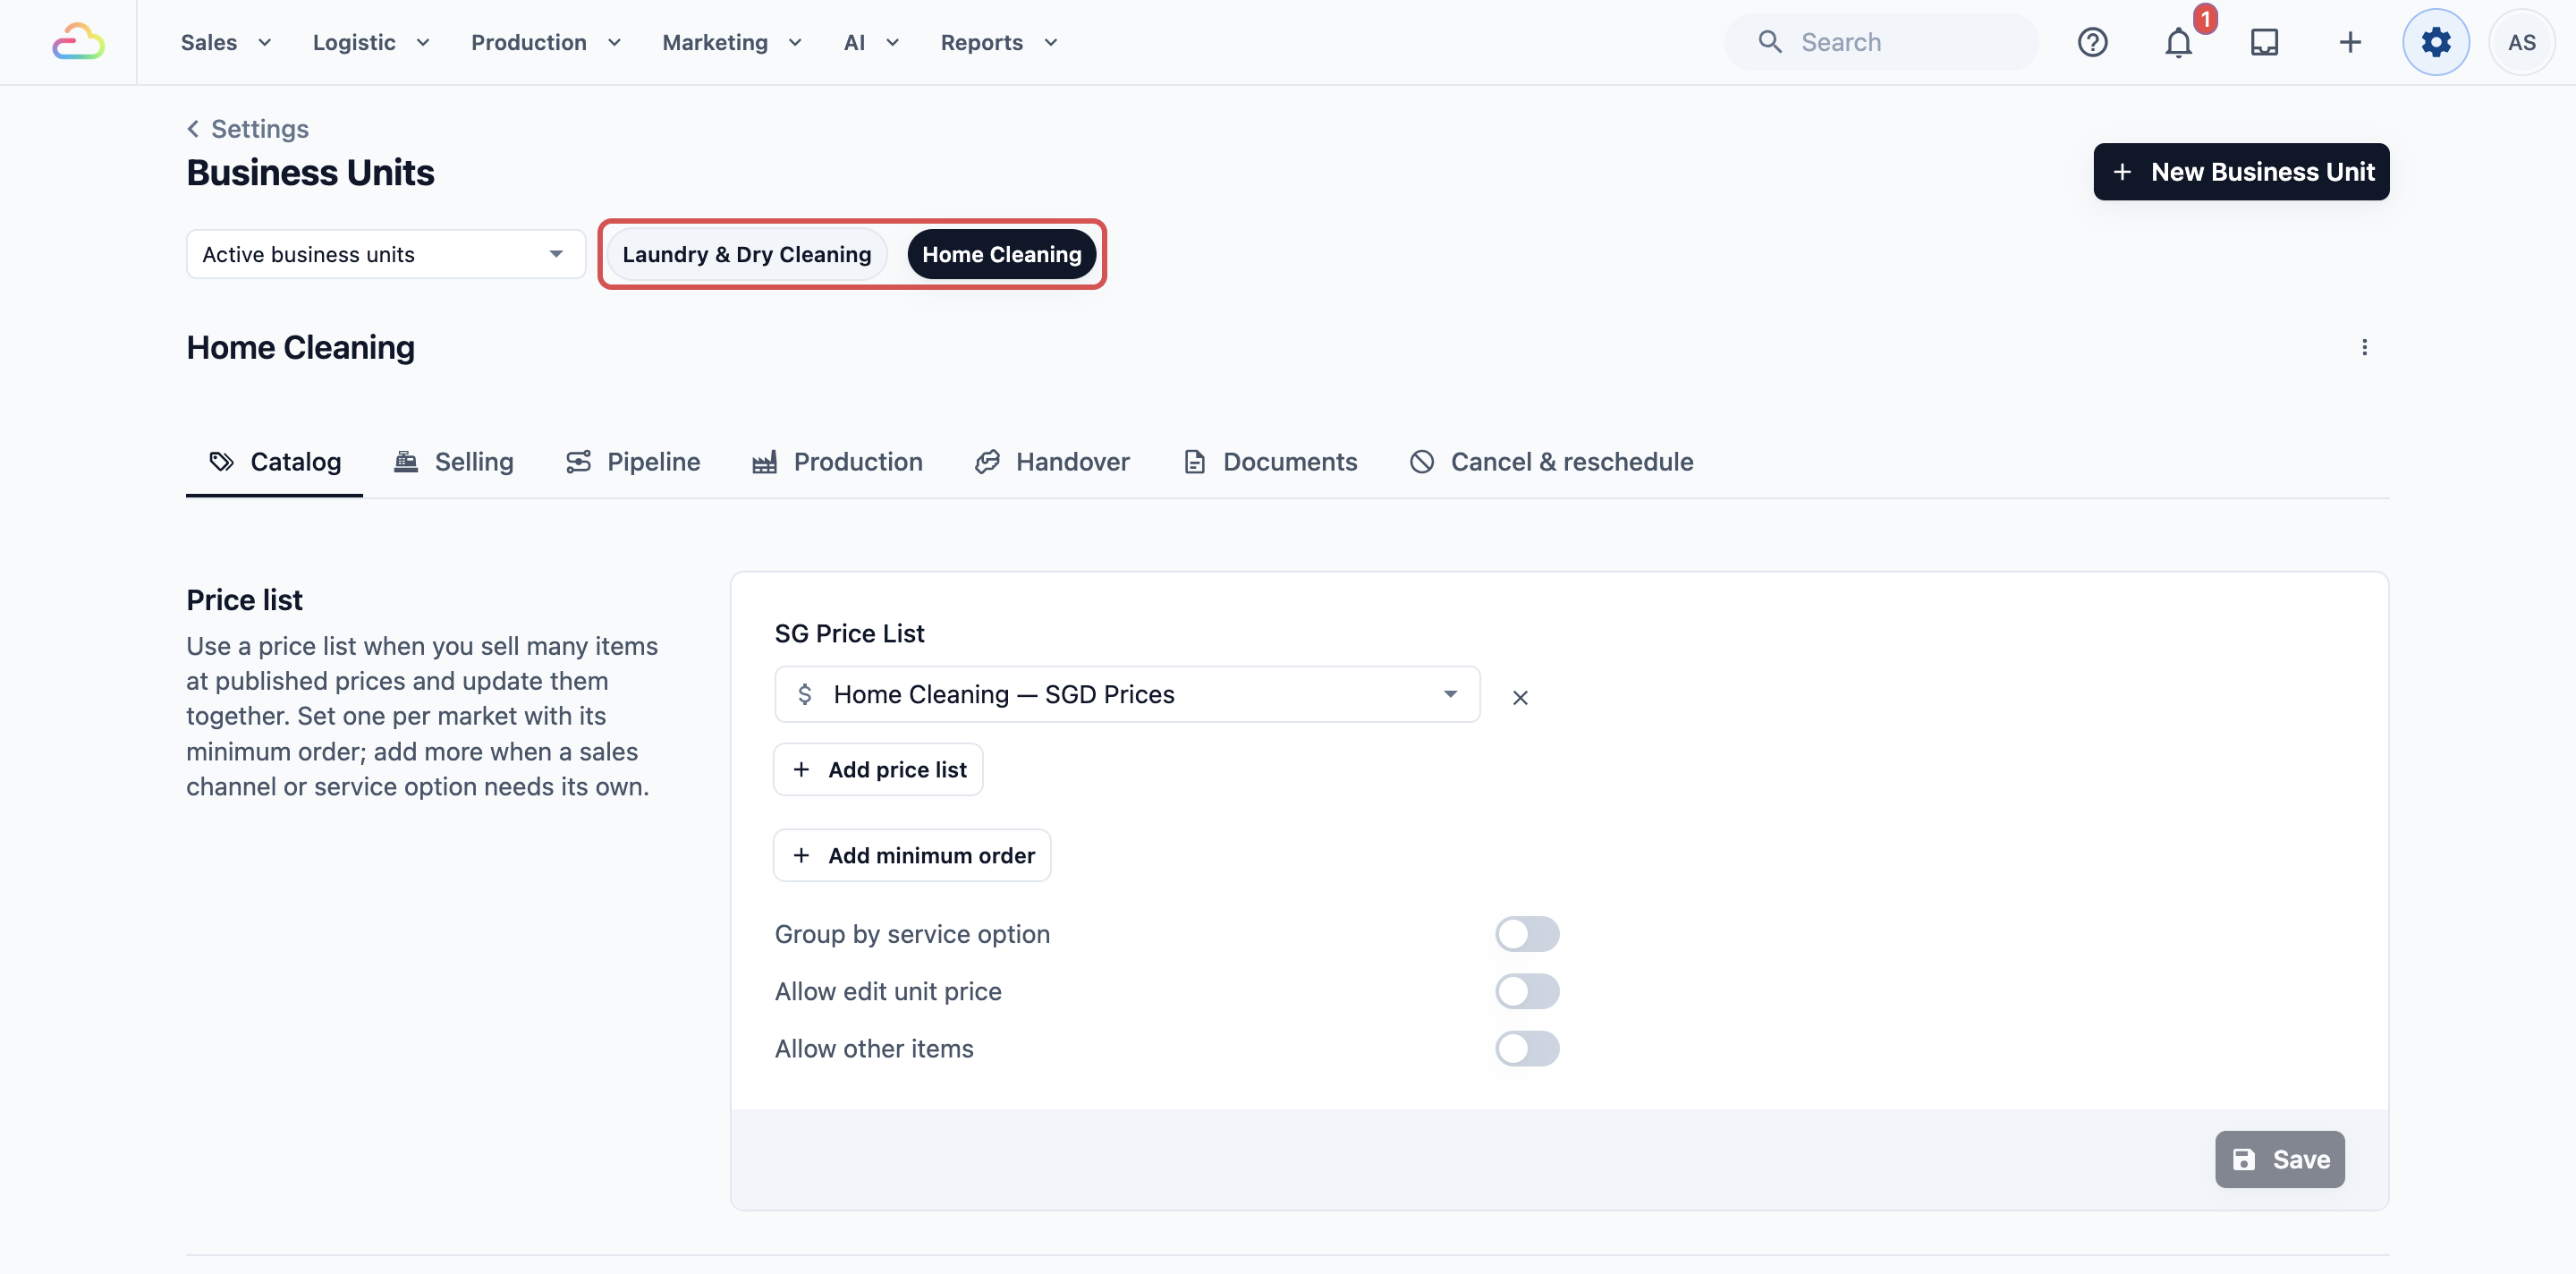
Then repeat Steps 2, 4 and 5 for it: publish its price list, add its booking option and time windows, and switch it on for your Online Store. Your HitPay connection is shared, so Step 3 is already done. For the starter services and prices, see [Running a Home Cleaning Business on EasyBiz](/docs/running-a-home-cleaning-business).
---
## FAQs
**I changed my prices, but the POS still shows the old ones. Why?**
> Your changes are saved in a draft until you publish them. Open the price list, click Preview, then Publish, and the POS and Online Store switch to the new prices.
**Do I need HitPay to start taking orders?**
> No. Customers can order and pay at your counter or on delivery without it. Connect HitPay when you want customers to pay online or by card.
**Will publishing my Online Store change my bill?**
> Yes. Adding and previewing a store is free, and the store joins your subscription when you publish it. The Mobile App is billed separately, only when you publish it.
**Can I set up the POS before the Online Store?**
> Yes. The POS needs your business unit and a published price list, so do Steps 1 and 2 first. Booking times and the Online Store can come later.
**I moved from the old EasyBiz. Do my time slots and online store carry over?**
> Time slots are now time windows inside each booking option on the Bookings page, so add them there. Your old store stays under Online Store (Legacy) until you set up a new one in Online Store & Mobile App.
**My second business unit doesn't appear on the Online Store. What did I miss?**
> Each business unit needs its own published price list and booking option, and you switch it on in the store editor. Until then, customers can't book it.