## What Is a Data Field?
Think of a data field as a single blank on a paper form. If your staff currently fill out a job sheet with fields like "Customer Name," "Service Type," and "Damage Description," each of those blanks is a data field. Data Fields in EasyBiz work the same way — except they're digital, reusable, and can be attached to any workflow.
A bag repair shop might create data fields for **Bag Brand**, **Bag Material**, **Repair Type**, and **Before Photos**. A laundry business might create fields for **Material**, **Service Type**, and **Pickup Quantity**. You decide what information matters for your business
Once you've created your data fields, they become available across EasyBiz. You can attach them to any procedure in your Business Process Management (BPM) setup — so your team sees exactly the right fields at each step of a job.
---
## Where to Find Data Fields:
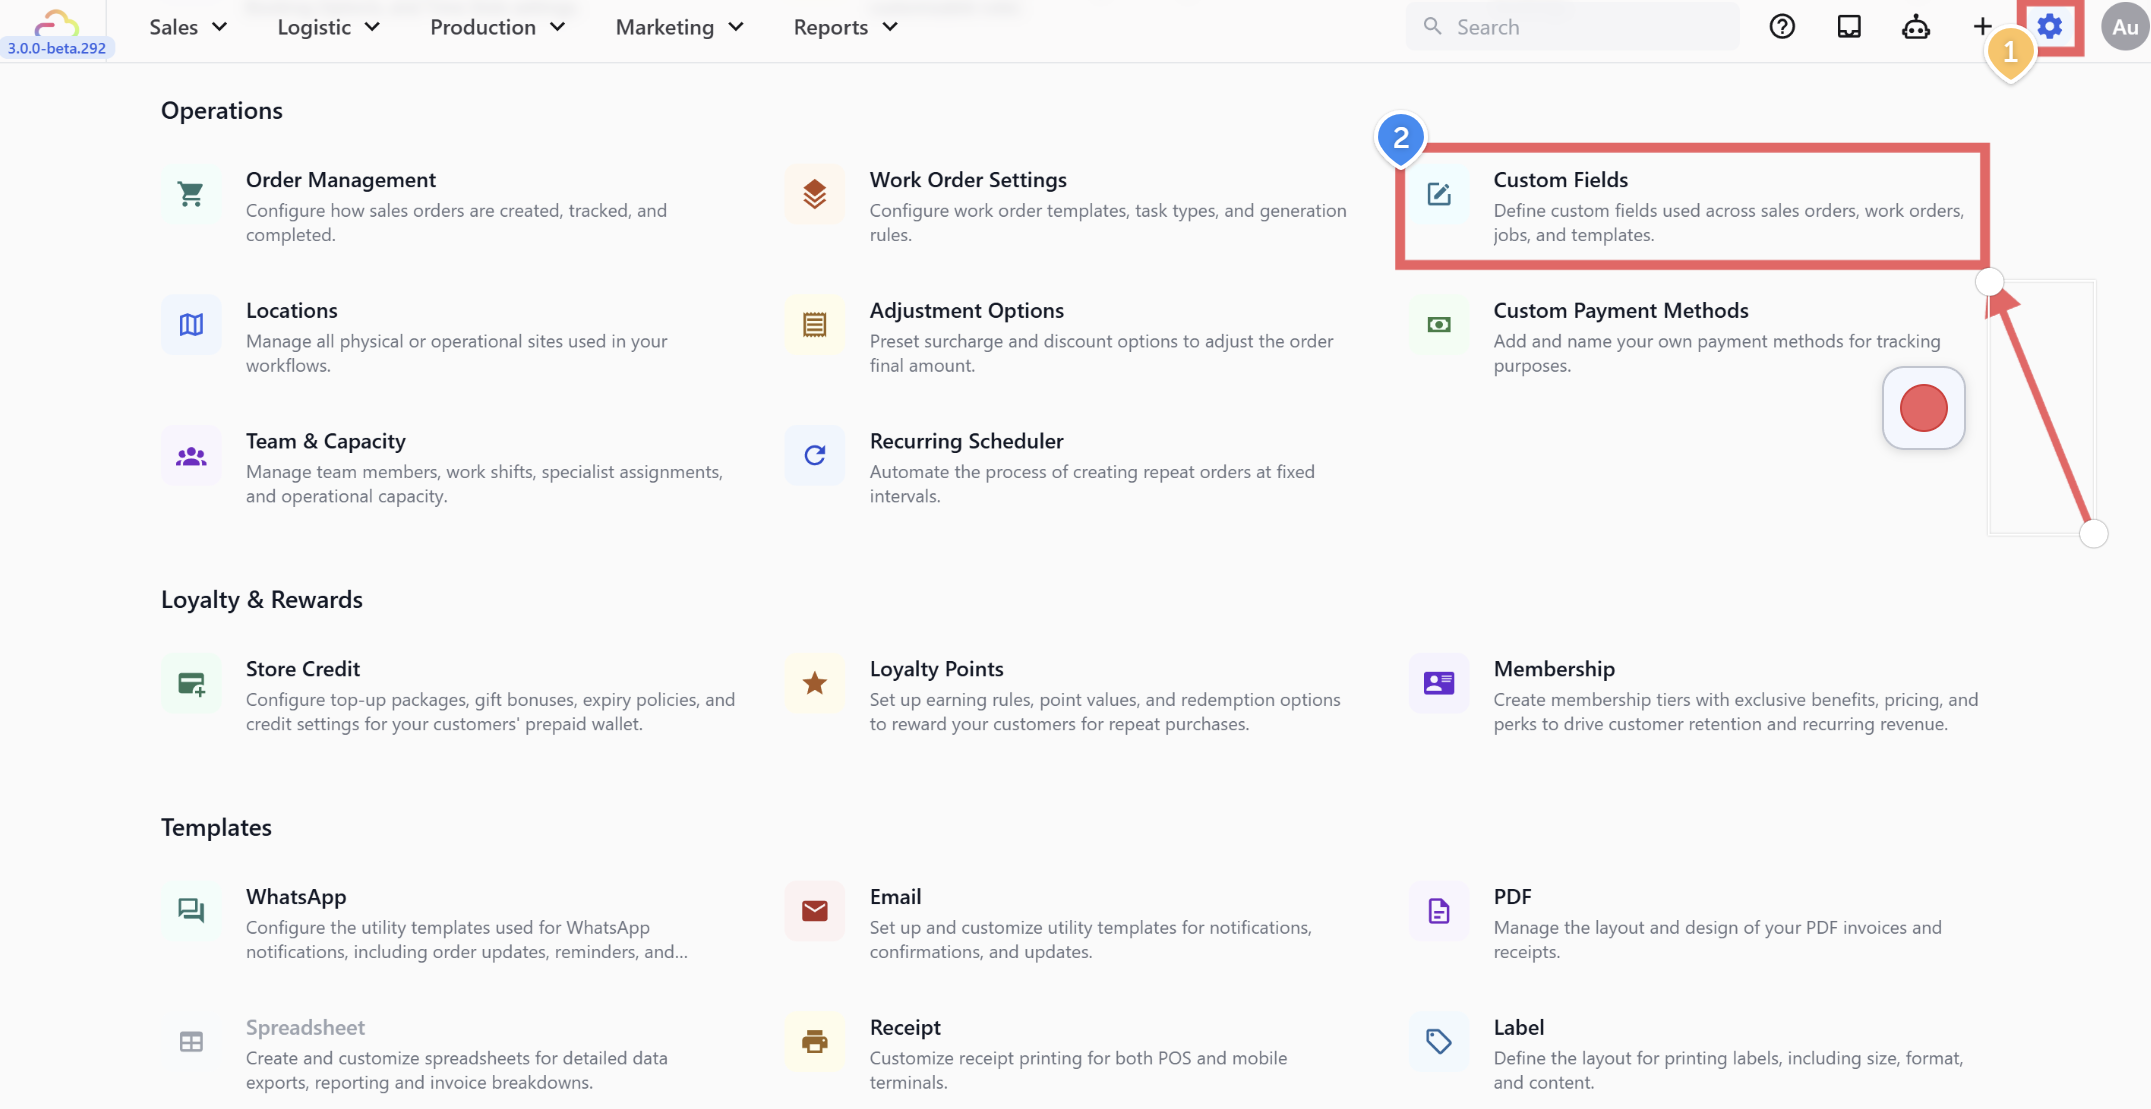
1. Click the Settingsicon in the top navigation bar
2. Scroll down and click Custom Fields
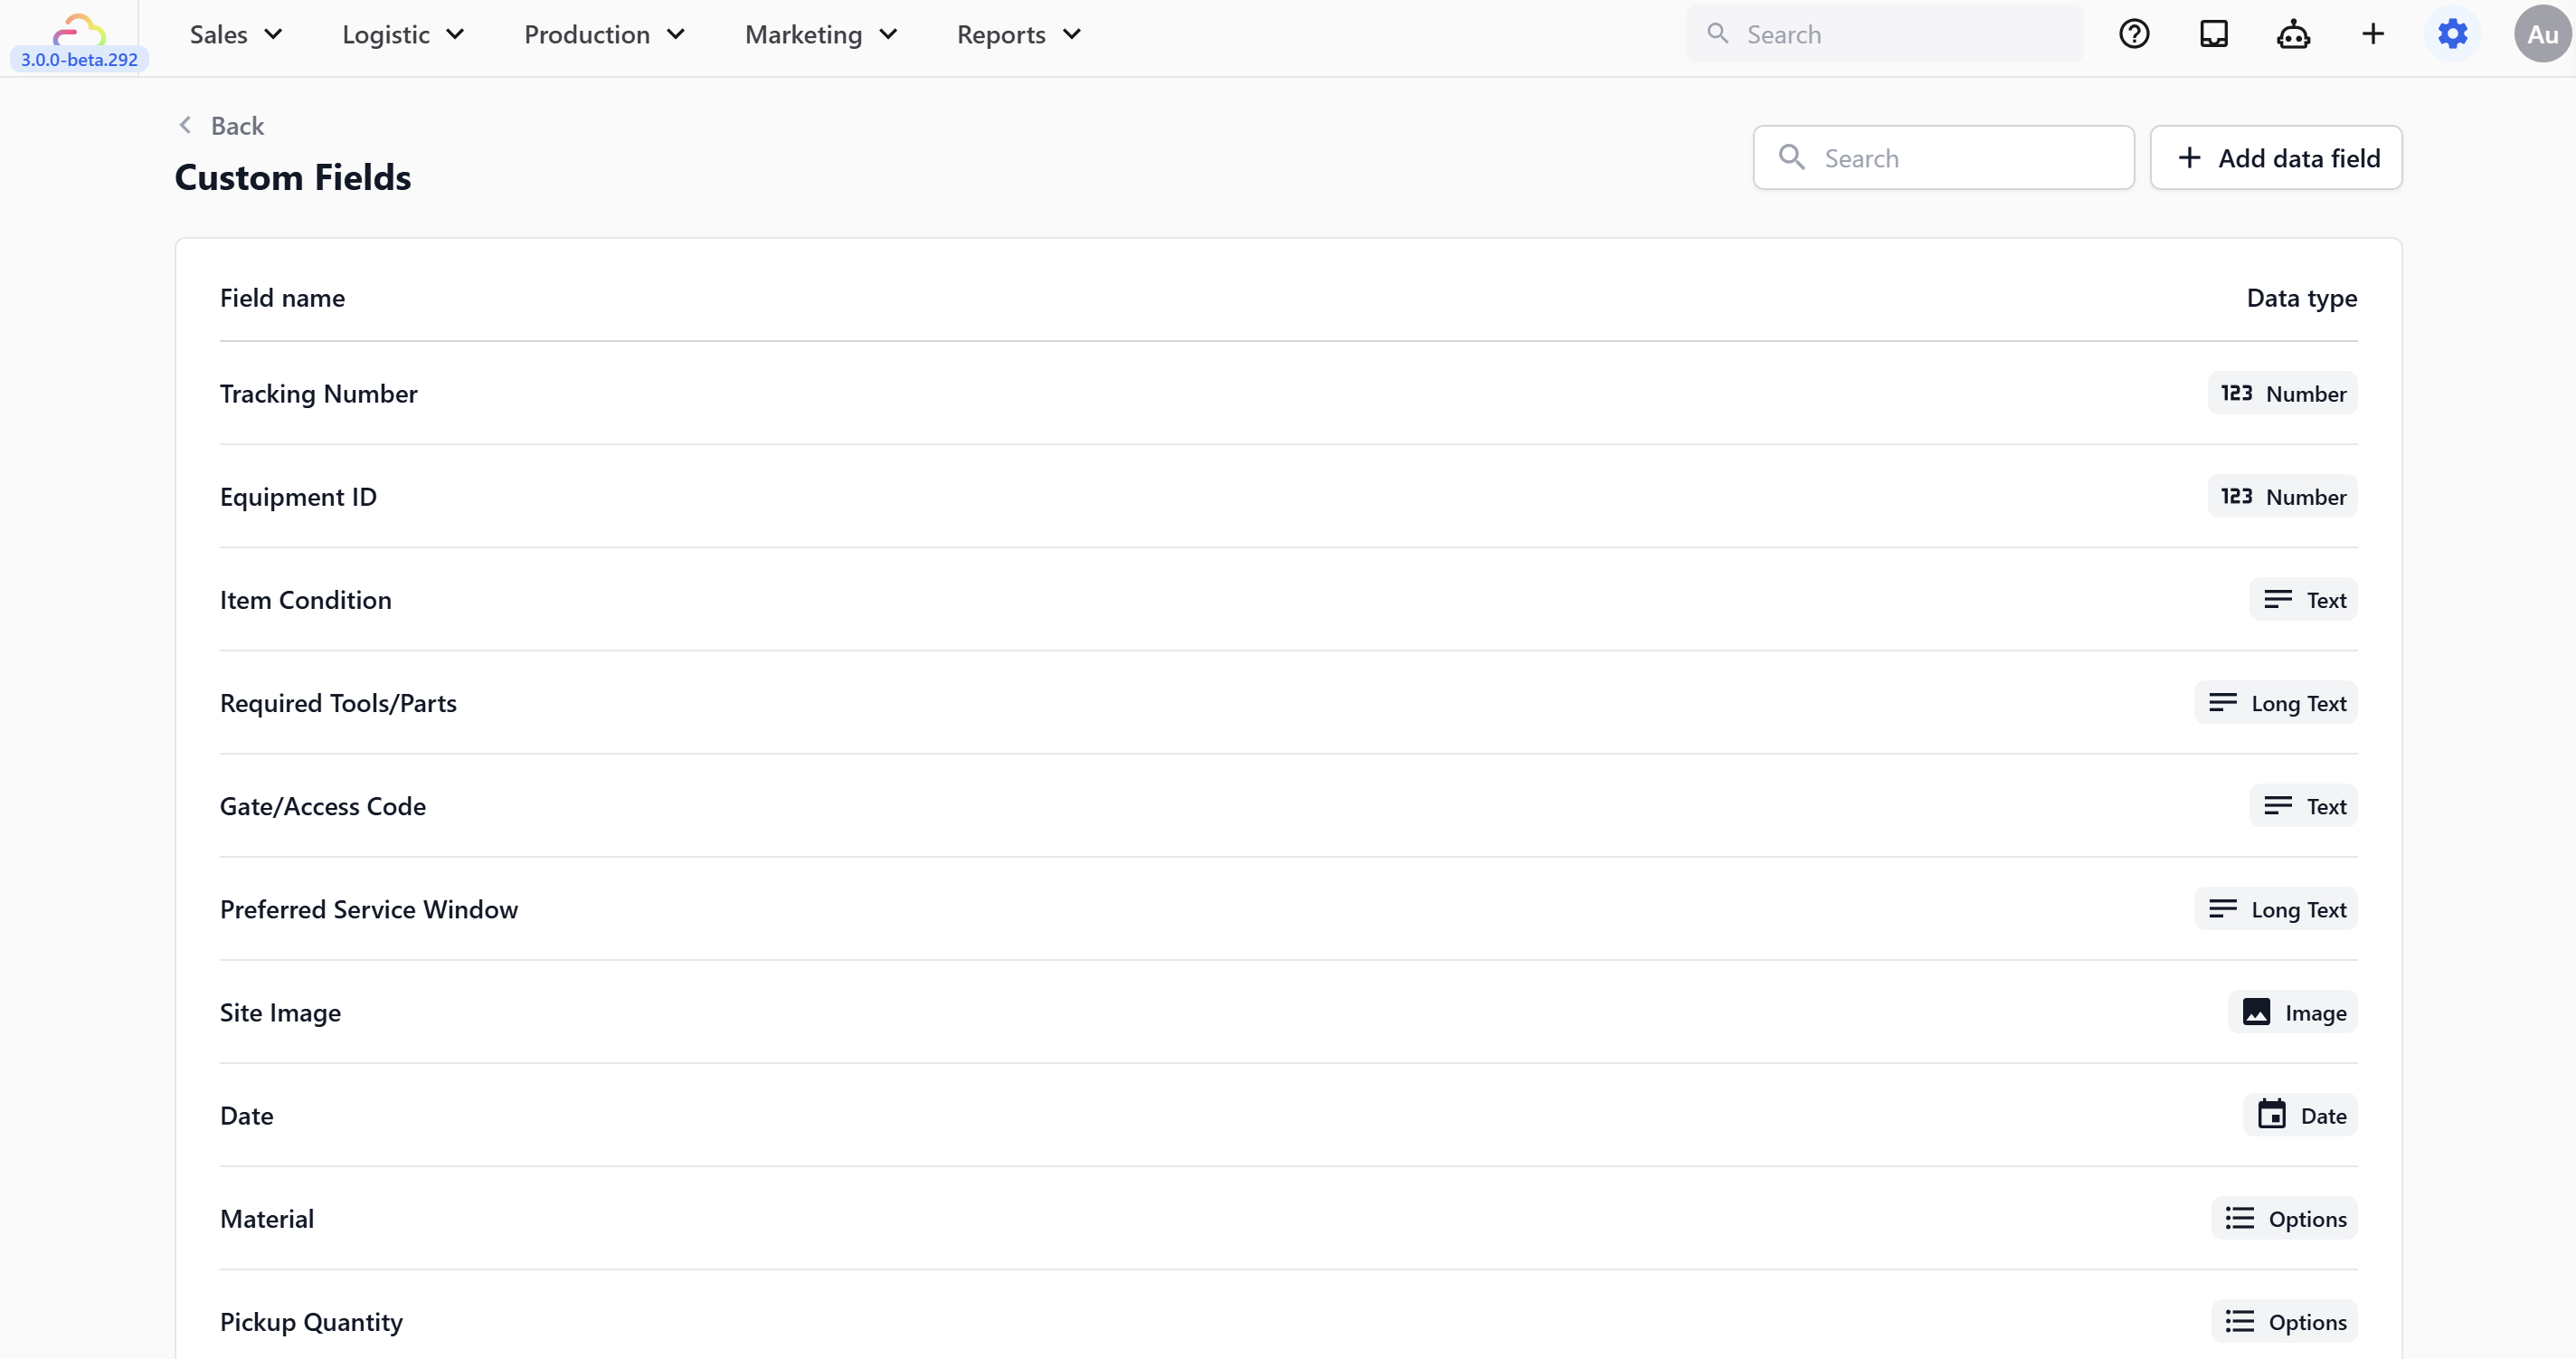
You'll see a table listing all your existing data fields, with two columns: **Field name** and **Data type**.
---
## Choosing the Right Data Type
Every data field has a type that controls what kind of information your team can enter. Picking the right type matters — it determines whether your staff type free text, choose from a list, upload a photo, or enter a number.
Here's what's available:
### Text & Numbers
- **Text** — A short, single-line text entry. Use this for things like a bag brand name, a craftsman's name, or a gate access code.
- **Long Text** — A larger text box for detailed descriptions. Use this for a damage description, special instructions, or notes about preferred service windows.
- **Number** — A numeric value. Use this for tracking numbers, equipment IDs, or any field where only digits make sense. There's an optional **Allow Decimal** setting if you need values like measurements (e.g. 2.5 metres of fabric).
- **Amount** — A currency value. Use this for costs, quoted prices, or any field that represents money (e.g. estimated repair cost, material surcharge).
### Photos & Files
- **Image** — Lets your team upload or capture photos directly. This is ideal for before-and-after photos of a repair job, a photo of a stain on a garment, or a picture of a site before work begins.
### Contact Details
- **Phone Number** — A phone number field. Use this to capture an alternative contact number, a building manager's phone number, or an on-site contact for delivery jobs.
- **Email Address** — An email address field. Use this to capture a billing contact email, a property manager's email, or any secondary email your team needs for a job.
### Dates & Choices
- **Date** — A date picker. Use this for a preferred collection date, an expected completion date, or any field where your team needs to record a specific day.
- **Options** — A list of predefined choices your team picks from. This is one of the most versatile types. Use it whenever there's a fixed set of answers — for example:
- **Service Type** — Laundry, Dry Clean, Ironing, Express
- **Bag Material** — Leather, Canvas, Nylon, Suede, Exotic Skin
- **Address Type** — Home, Office, Hotel, Other
Not sure which type to pick? Use **Options** for anything with a fixed set of answers (like service types, materials, or condition ratings). Use **Text** for everything else where the answer could be anything.
---
## What's Next — Configuring Your Data Fields
Now that you know what data fields are and which types are available, head over to the configuration guide to start creating them:
- [**Configuring Data Fields**](/docs/configure-data-fields) — Step-by-step instructions for adding, editing, and managing your data fields in the EasyBiz Console.