## Before You Start
Your WhatsApp Business account must be connected to EasyBiz, and your booking time slots must already be configured, otherwise the date screens will have nothing to offer the customer.
If you are not sure what a Mini App is or what your customer will see, read [What Is a Mini App?](/docs/what-is-a-mini-app) first. Then return to this guide when you are ready to create one.
- [Set up WhatsApp Integration](/docs/connect-and-configure-whatsapp)
- [How the Mini App Builder Works](/docs/how-the-mini-app-builder-works)
## Who Is This For
When a customer needs to change their pickup or delivery time, instead of handling it manually through chat, you send them a form directly inside WhatsApp. They pick their new slots themselves, and the reschedule is done — no phone calls, no back-and-forth.
---
## ⚠️Before You Use This Mini App
This Mini App must be sent to a customer who already has an **existing order** in your EasyBiz system with a pickup or delivery already scheduled. When you send it, the system will link the new times to that existing order.
If the customer does not have an existing booking yet, send them the [New Order: Pickup & Delivery Mini App](/docs/setting-up-a-new-order-pickup-and-delivery-mini-app) instead to create the order first.
**What happens if there is no order to reschedule?** If you accidentally send this Mini App to a customer who has no existing booking, the form will still open — but when they tap the final button, the system will not be able to find an order to update. The reschedule will not go through.
---
## Create Your Mini App
1. Click Settings in the top navigation bar.
2. Under the CRM settings section, click WhatsApp.
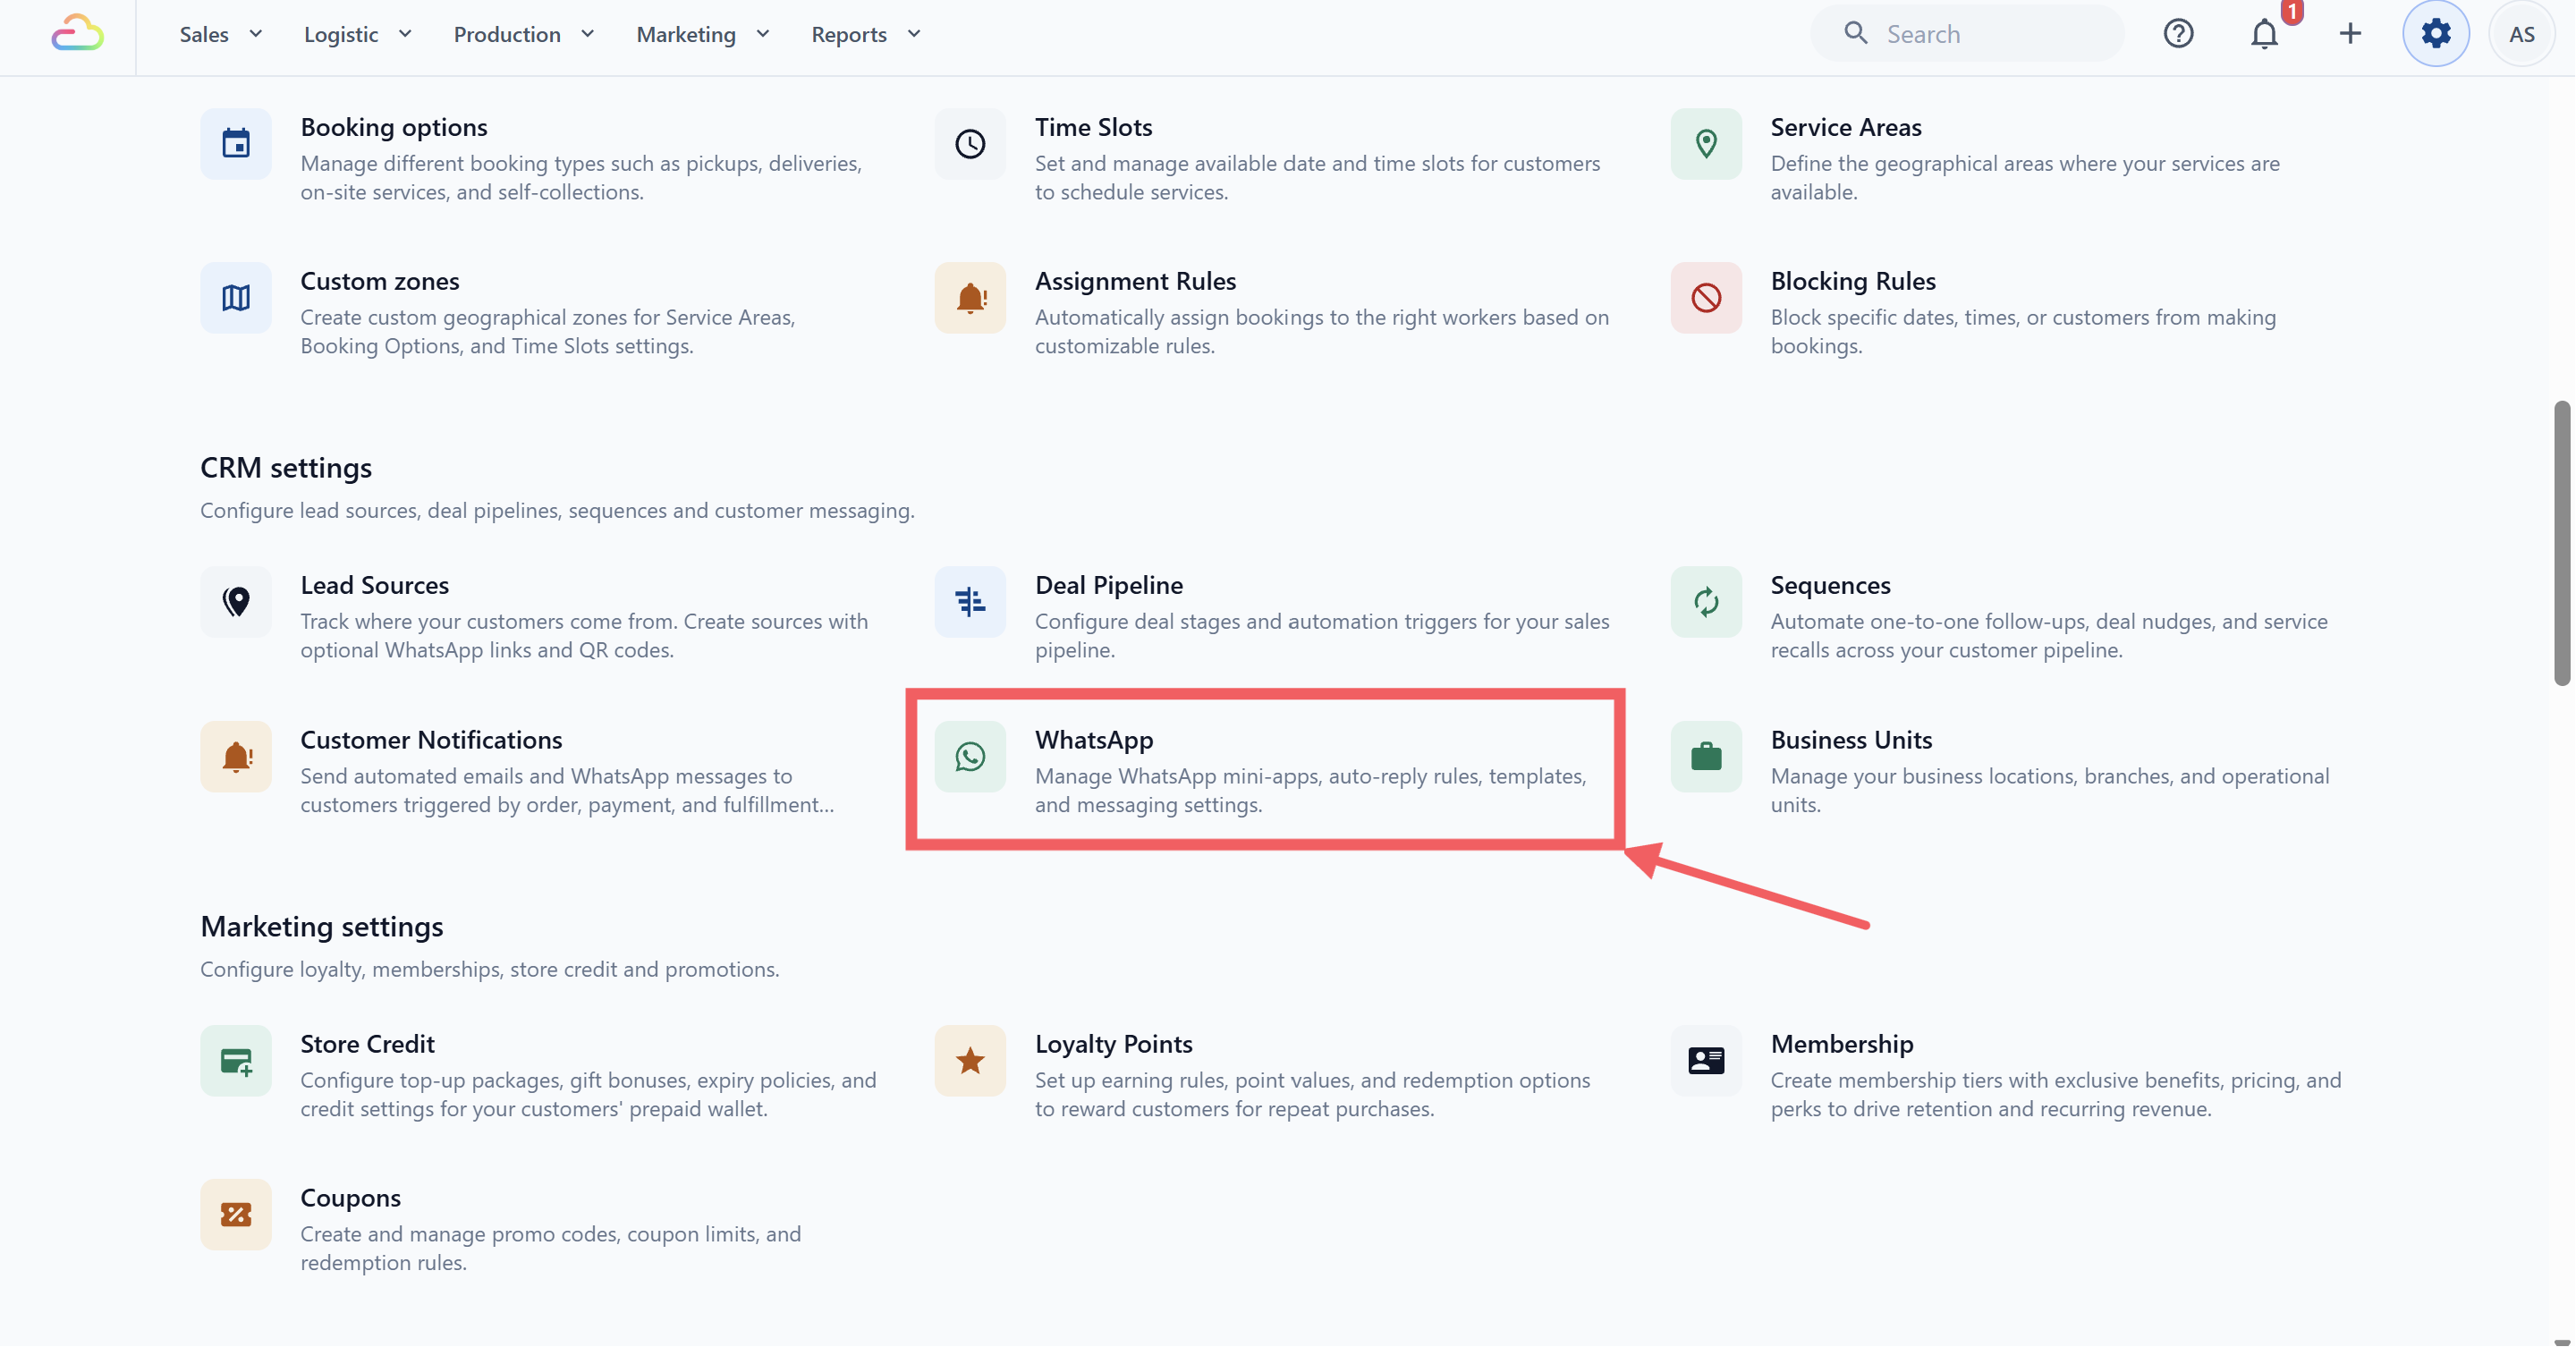
3. Click the Mini Apps tab.
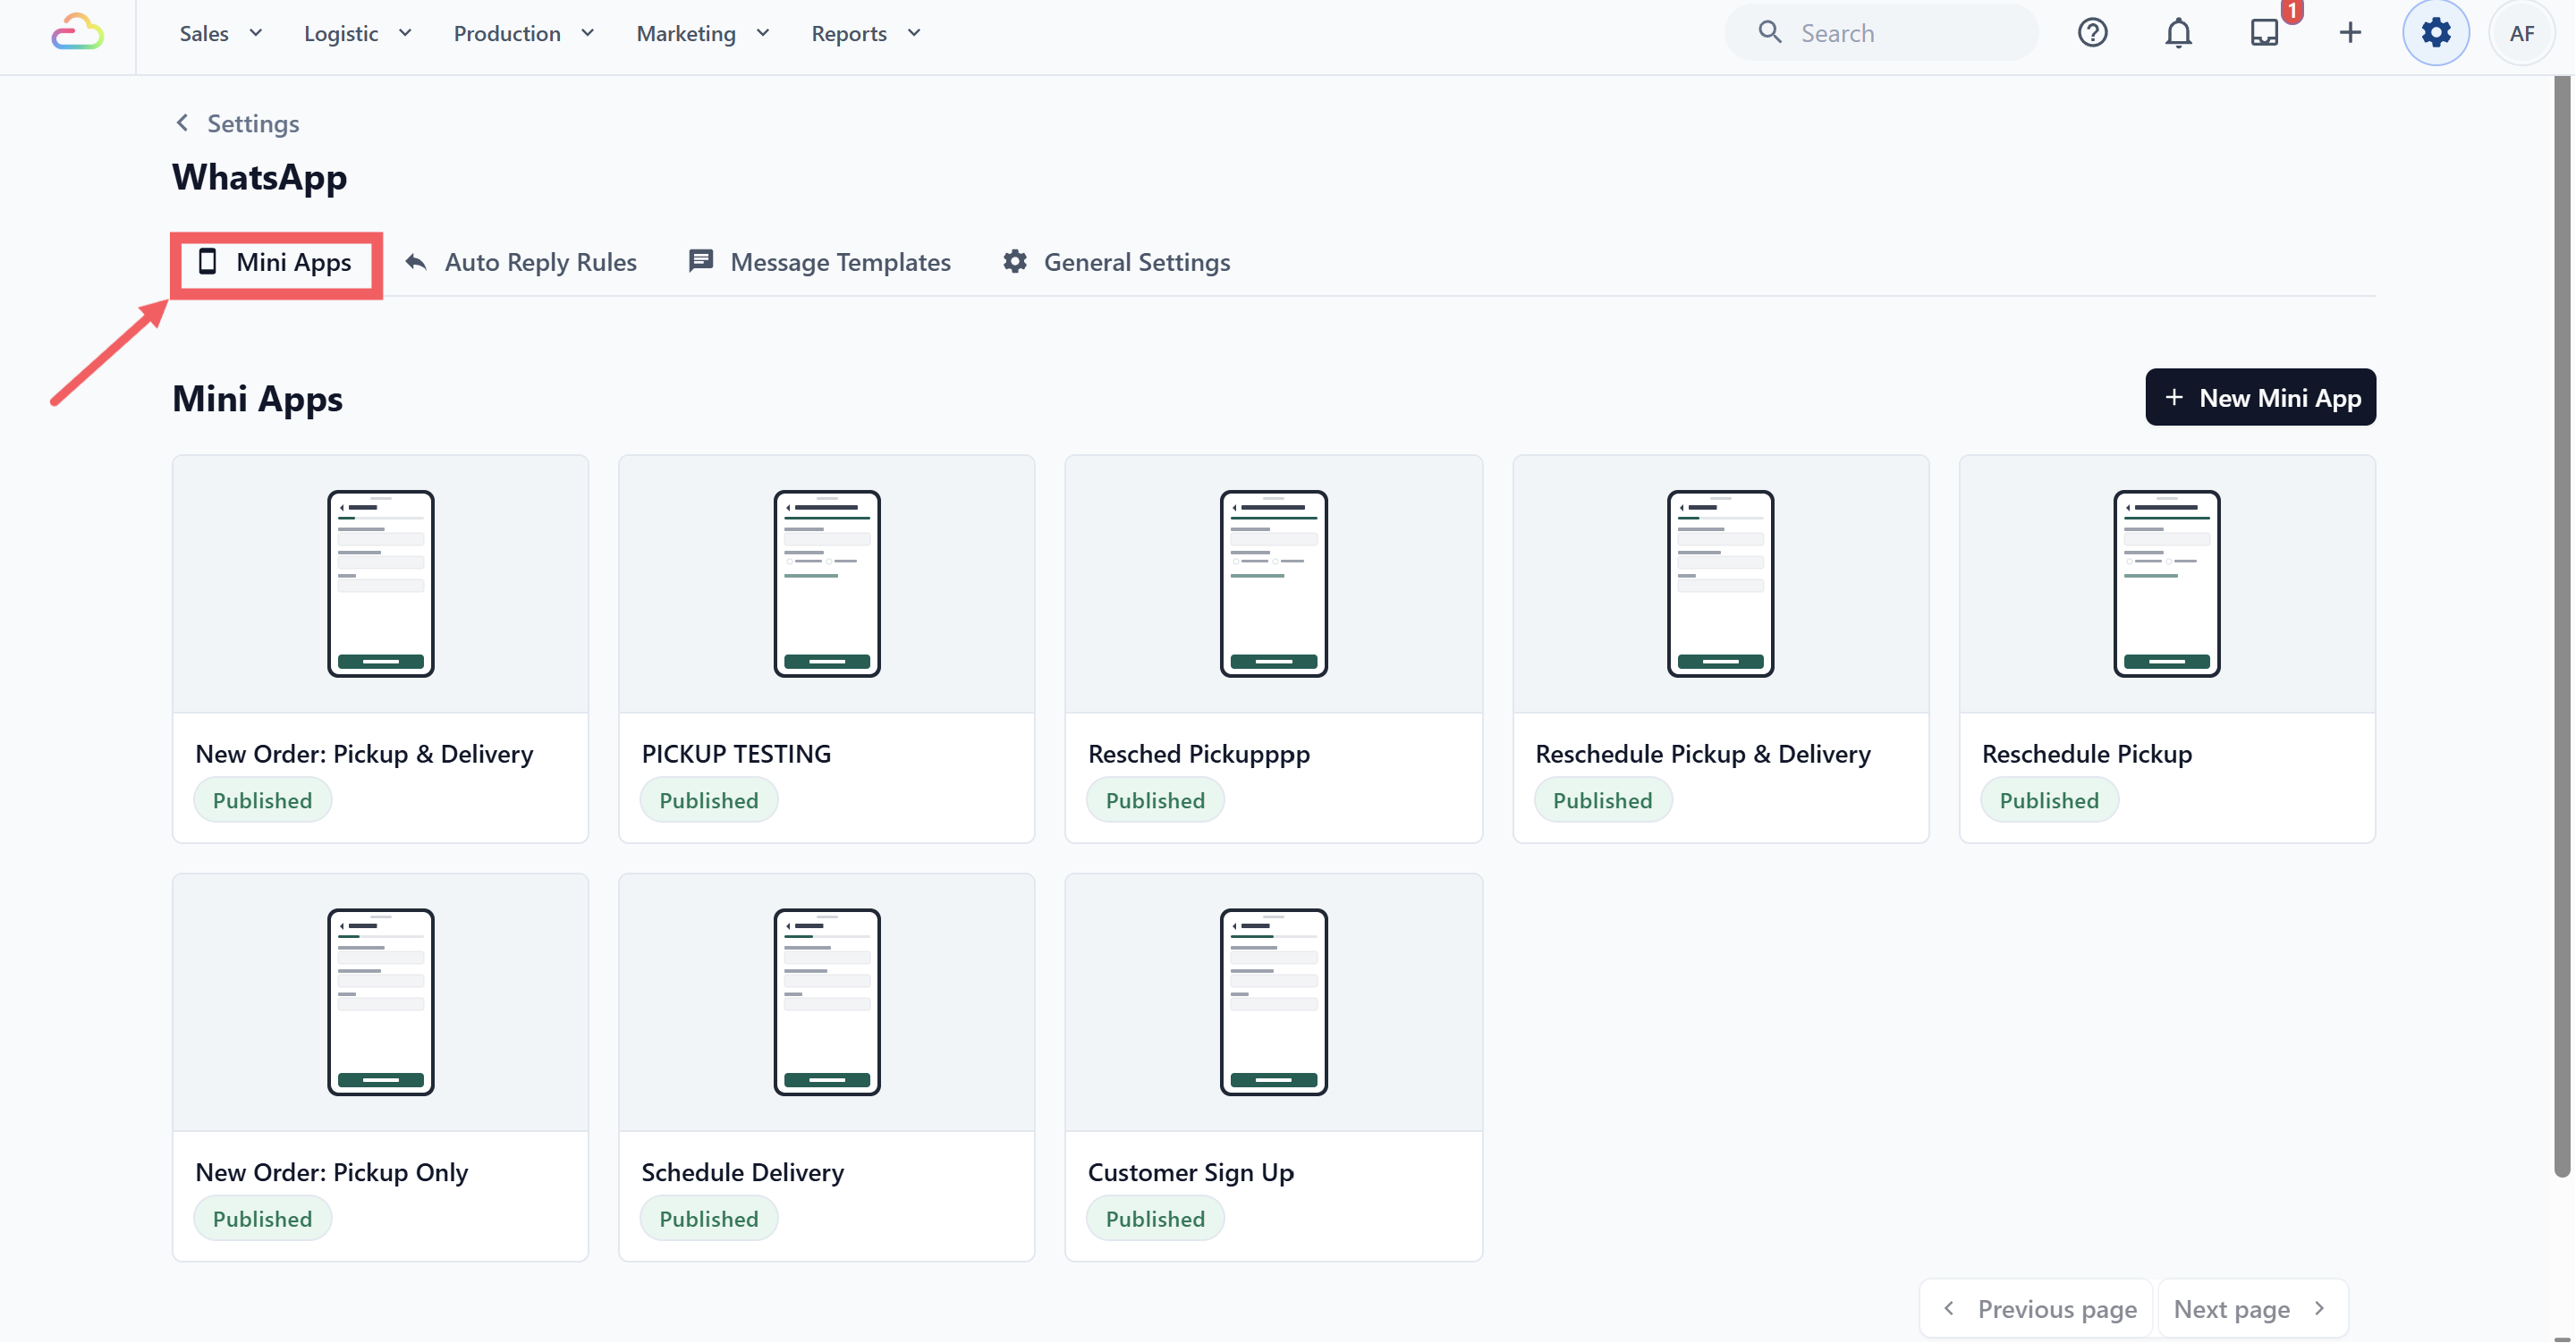
4. Click New Mini App.
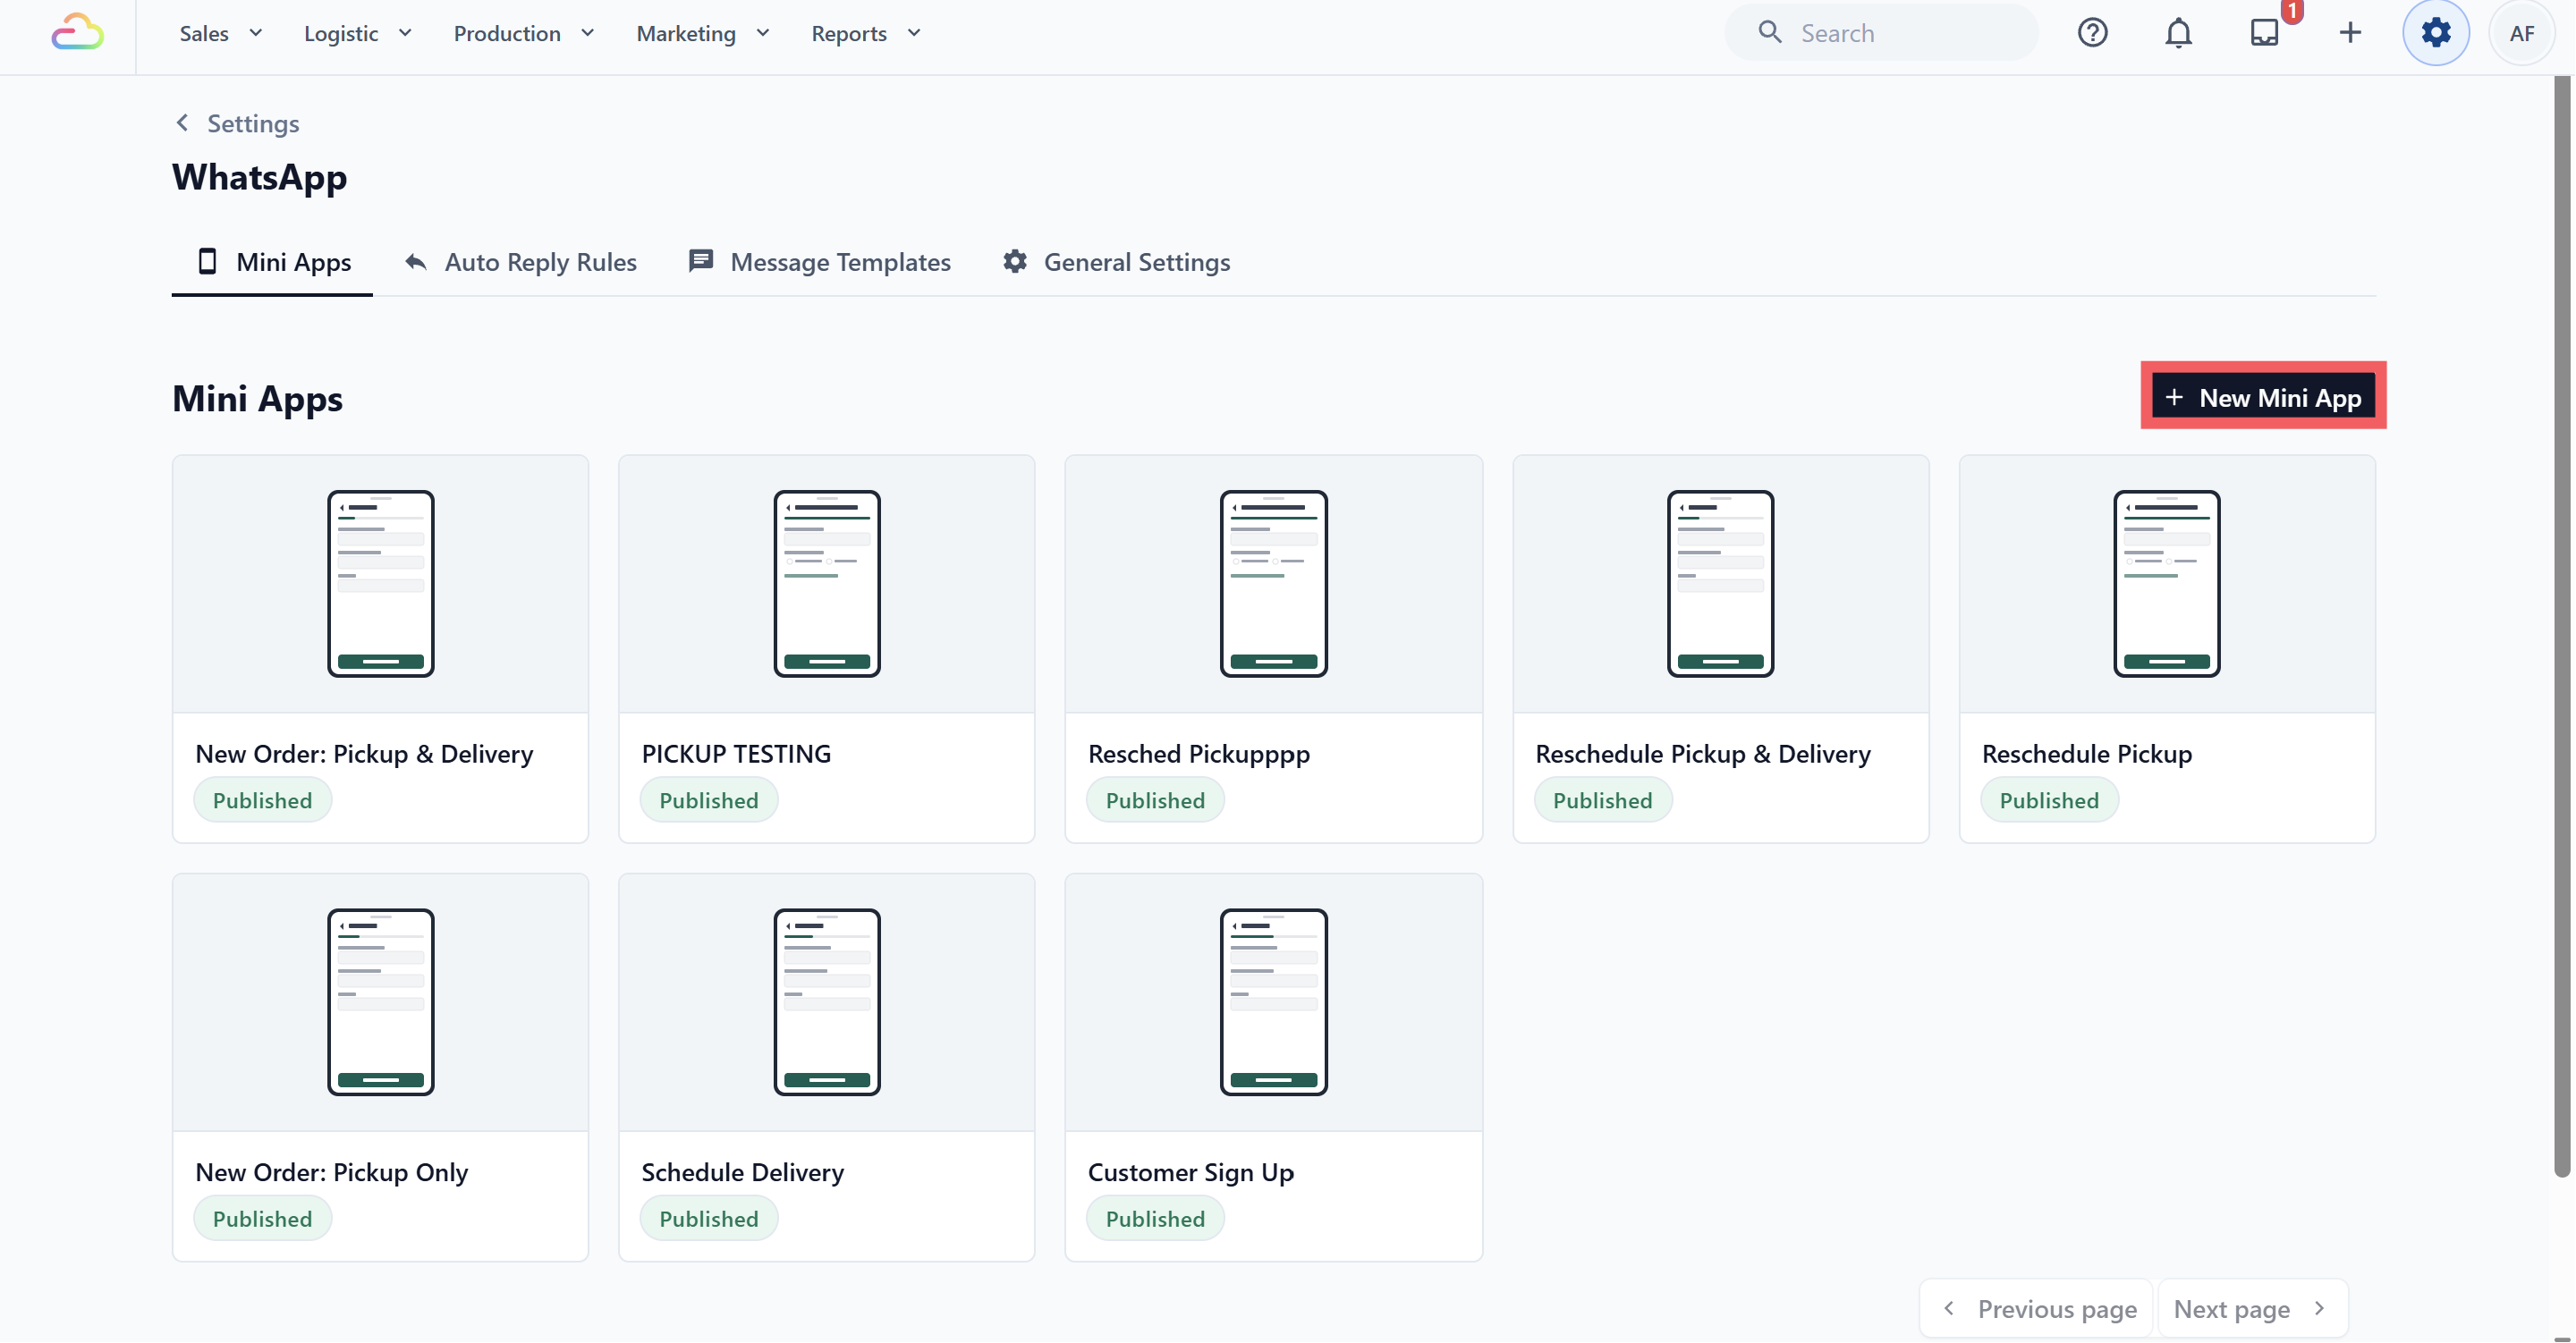
5. Under the Schedule group, select Reschedule Pickup & Delivery.
6. Enter a name, for example Change My Booking.
7. Click Create.
This form does not ask for a Business Unit or a Sales Channel. It never creates a new order, so it simply follows the order you attach it to when you send it.
---
## What Is Already Set Up
The template arrives with four screens in this order. You can publish it as it is.
Before changing the screens, read [How the Mini App Builder Works](/docs/how-the-mini-app-builder-works). It explains what screens and blocks are, how to move them, and what the button at the bottom of each screen does.
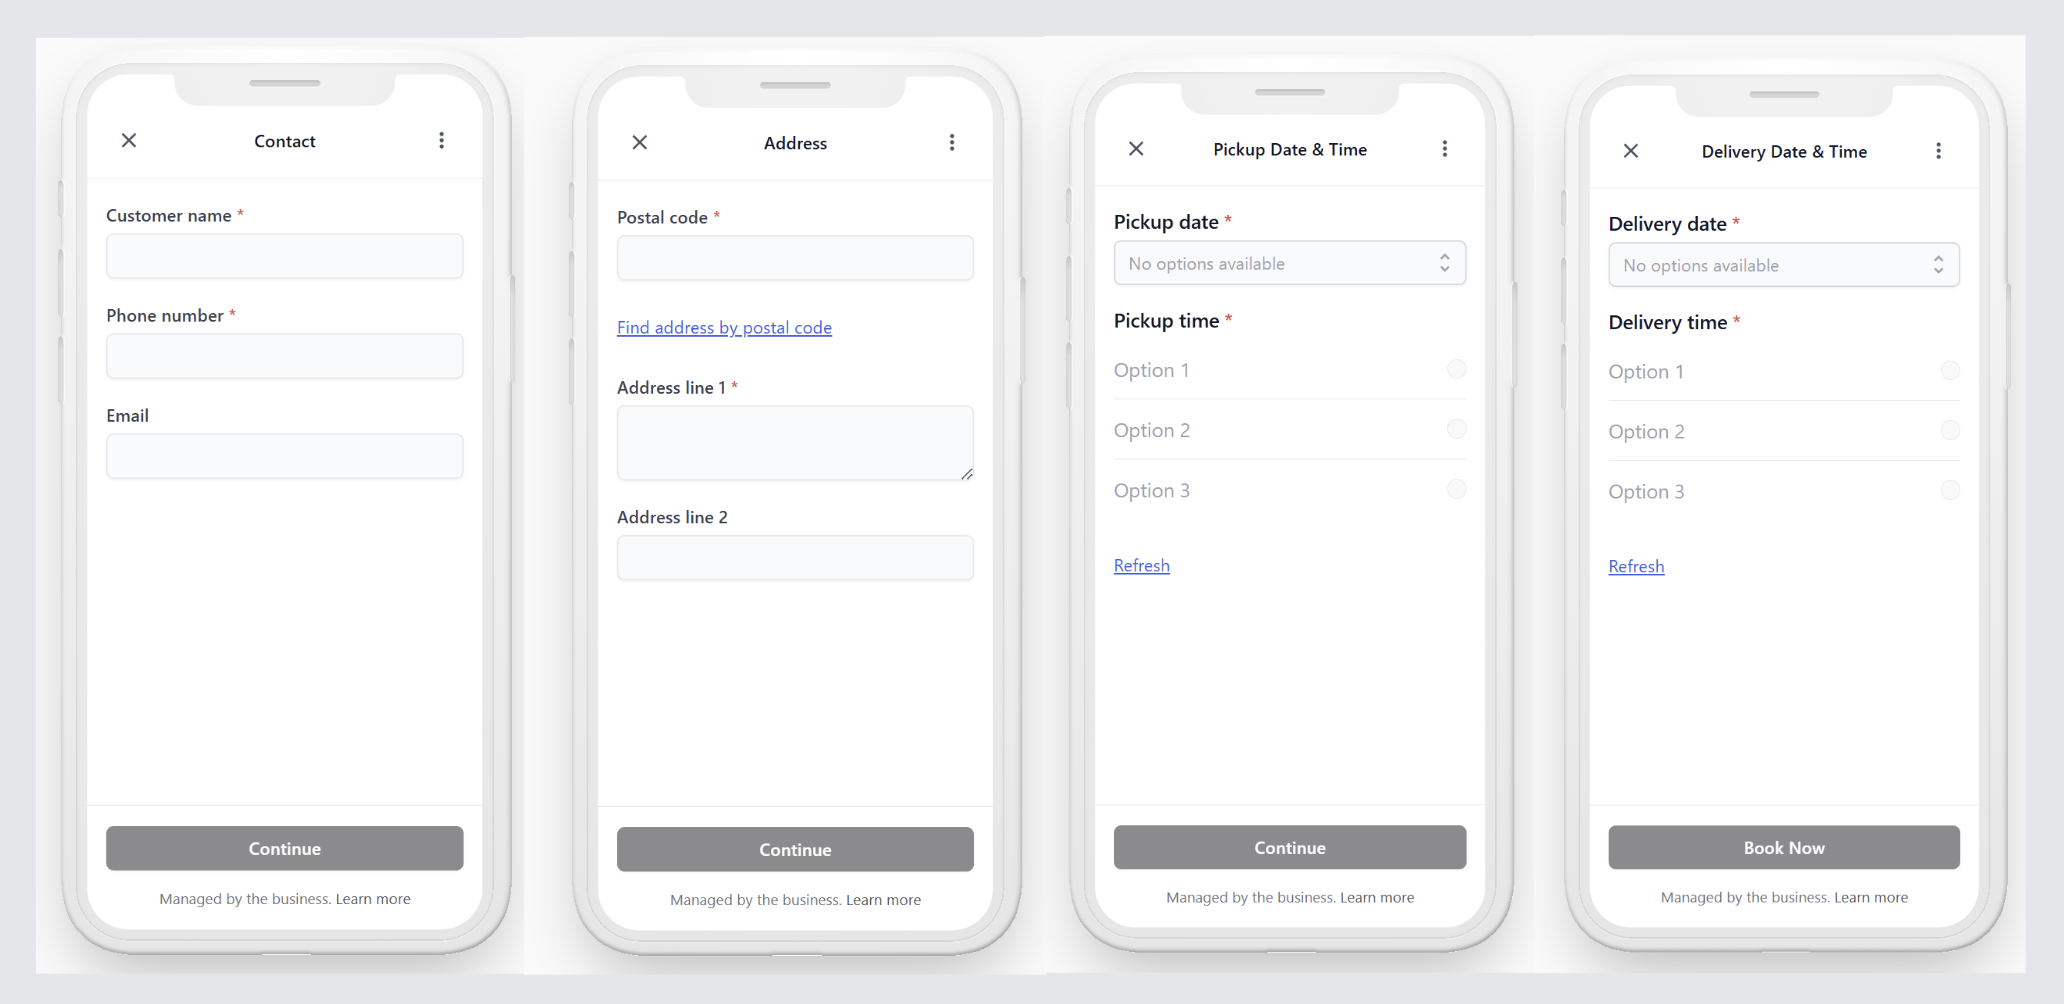
**Contact**
Confirms the customer's name, phone number and email before anything is changed. The footer action is Save Customer.
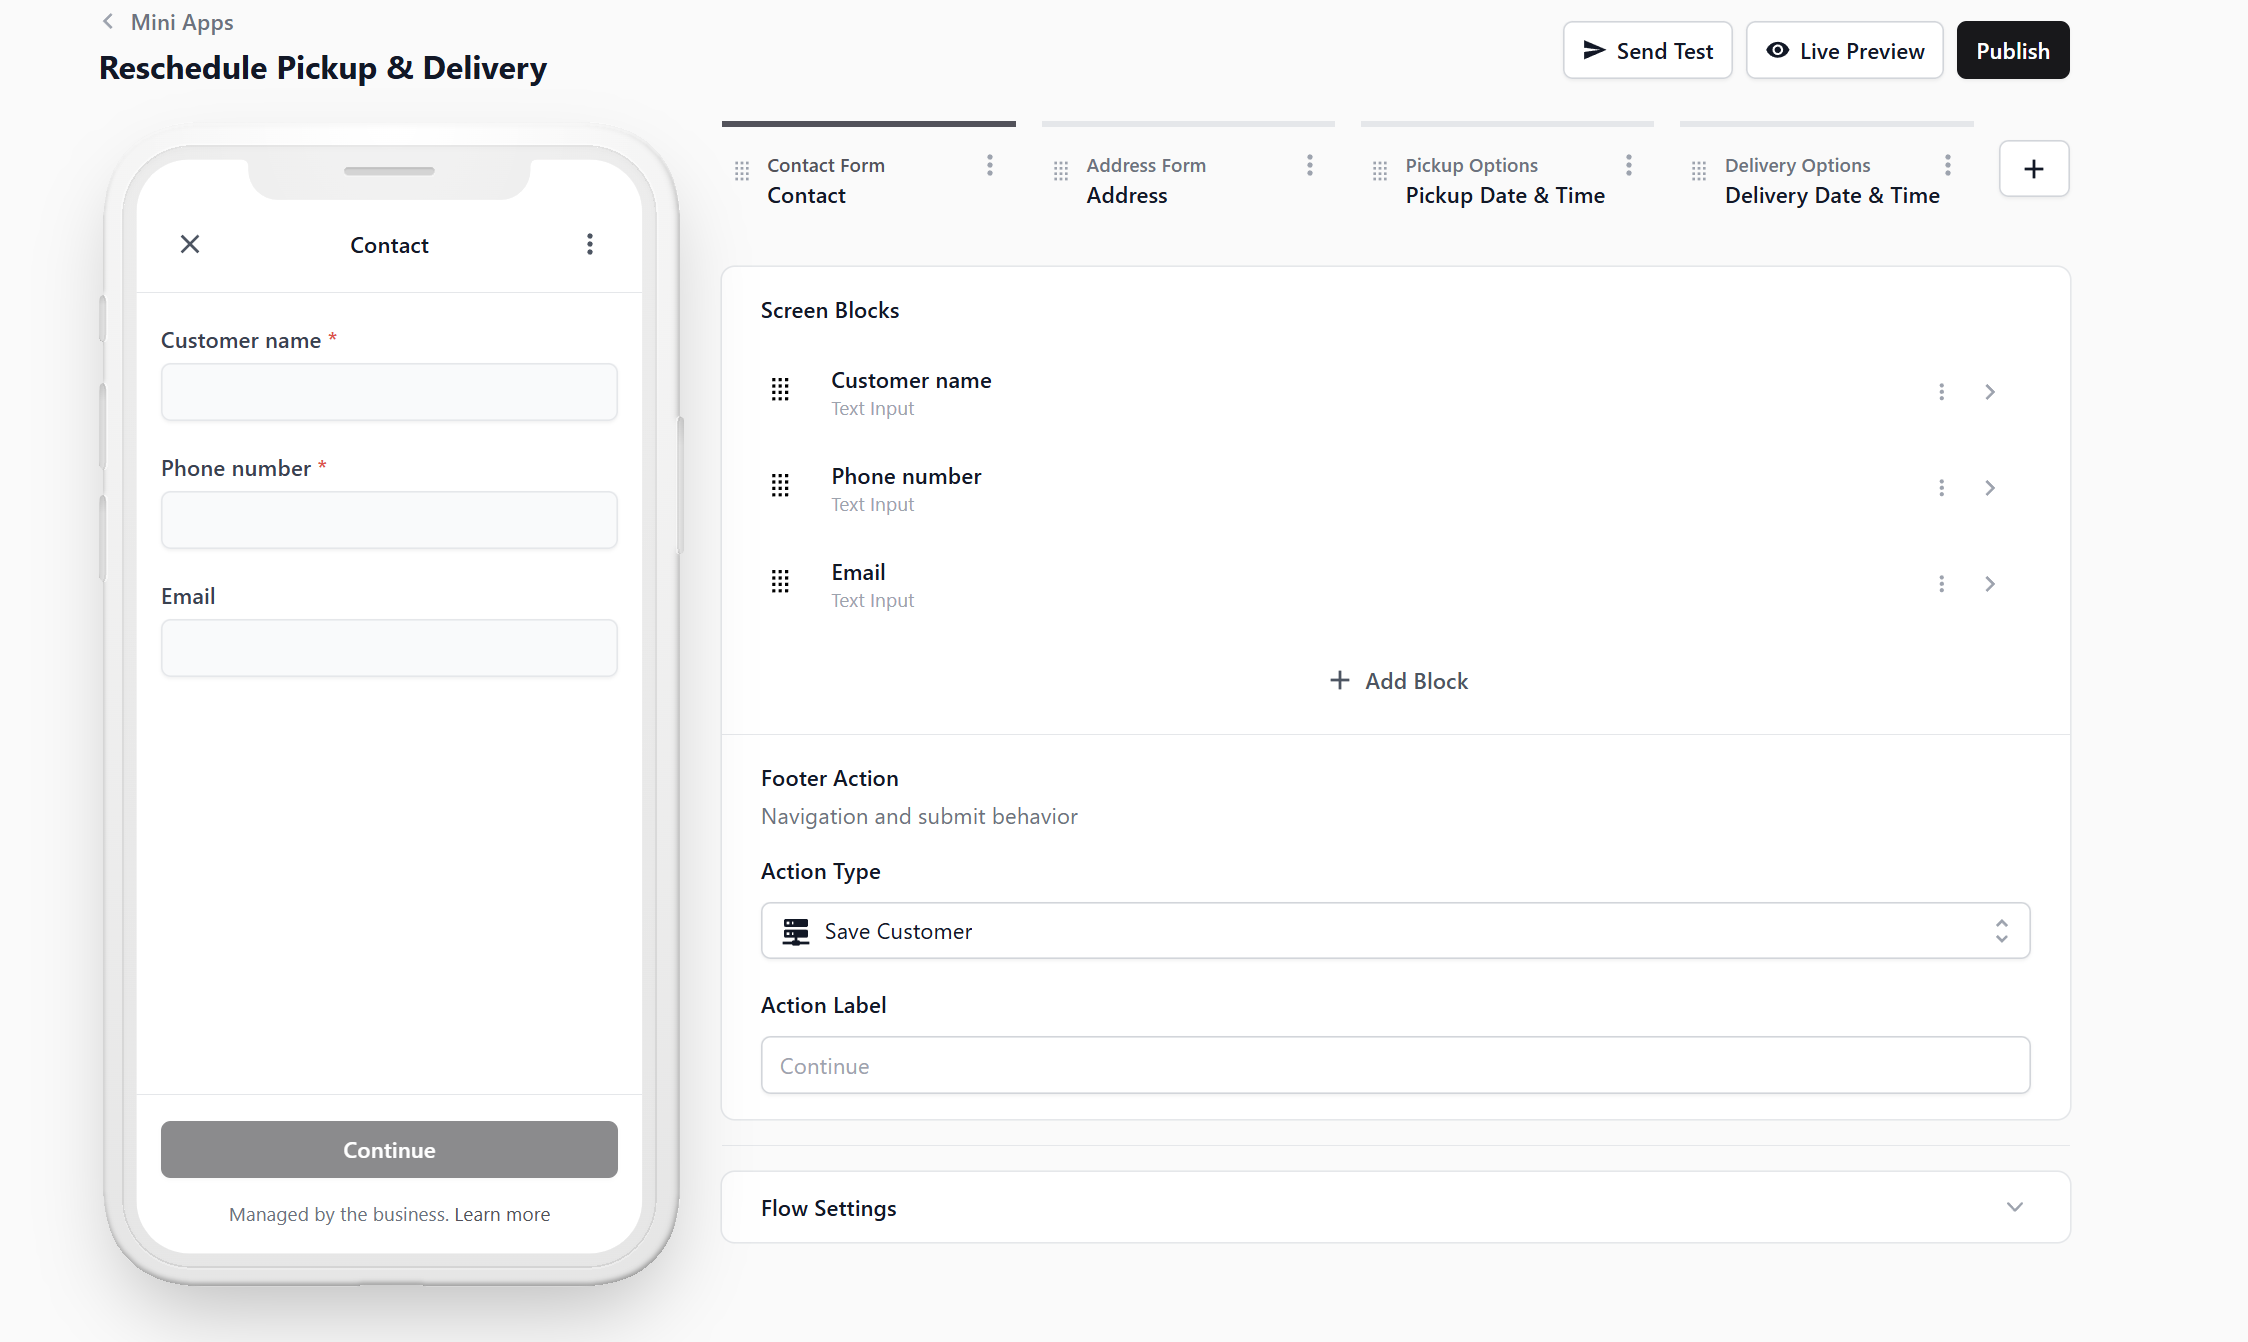
**Address**
Confirms the address for the new pickup and delivery, so a customer who has moved can update it here. The footer action is Save Address.
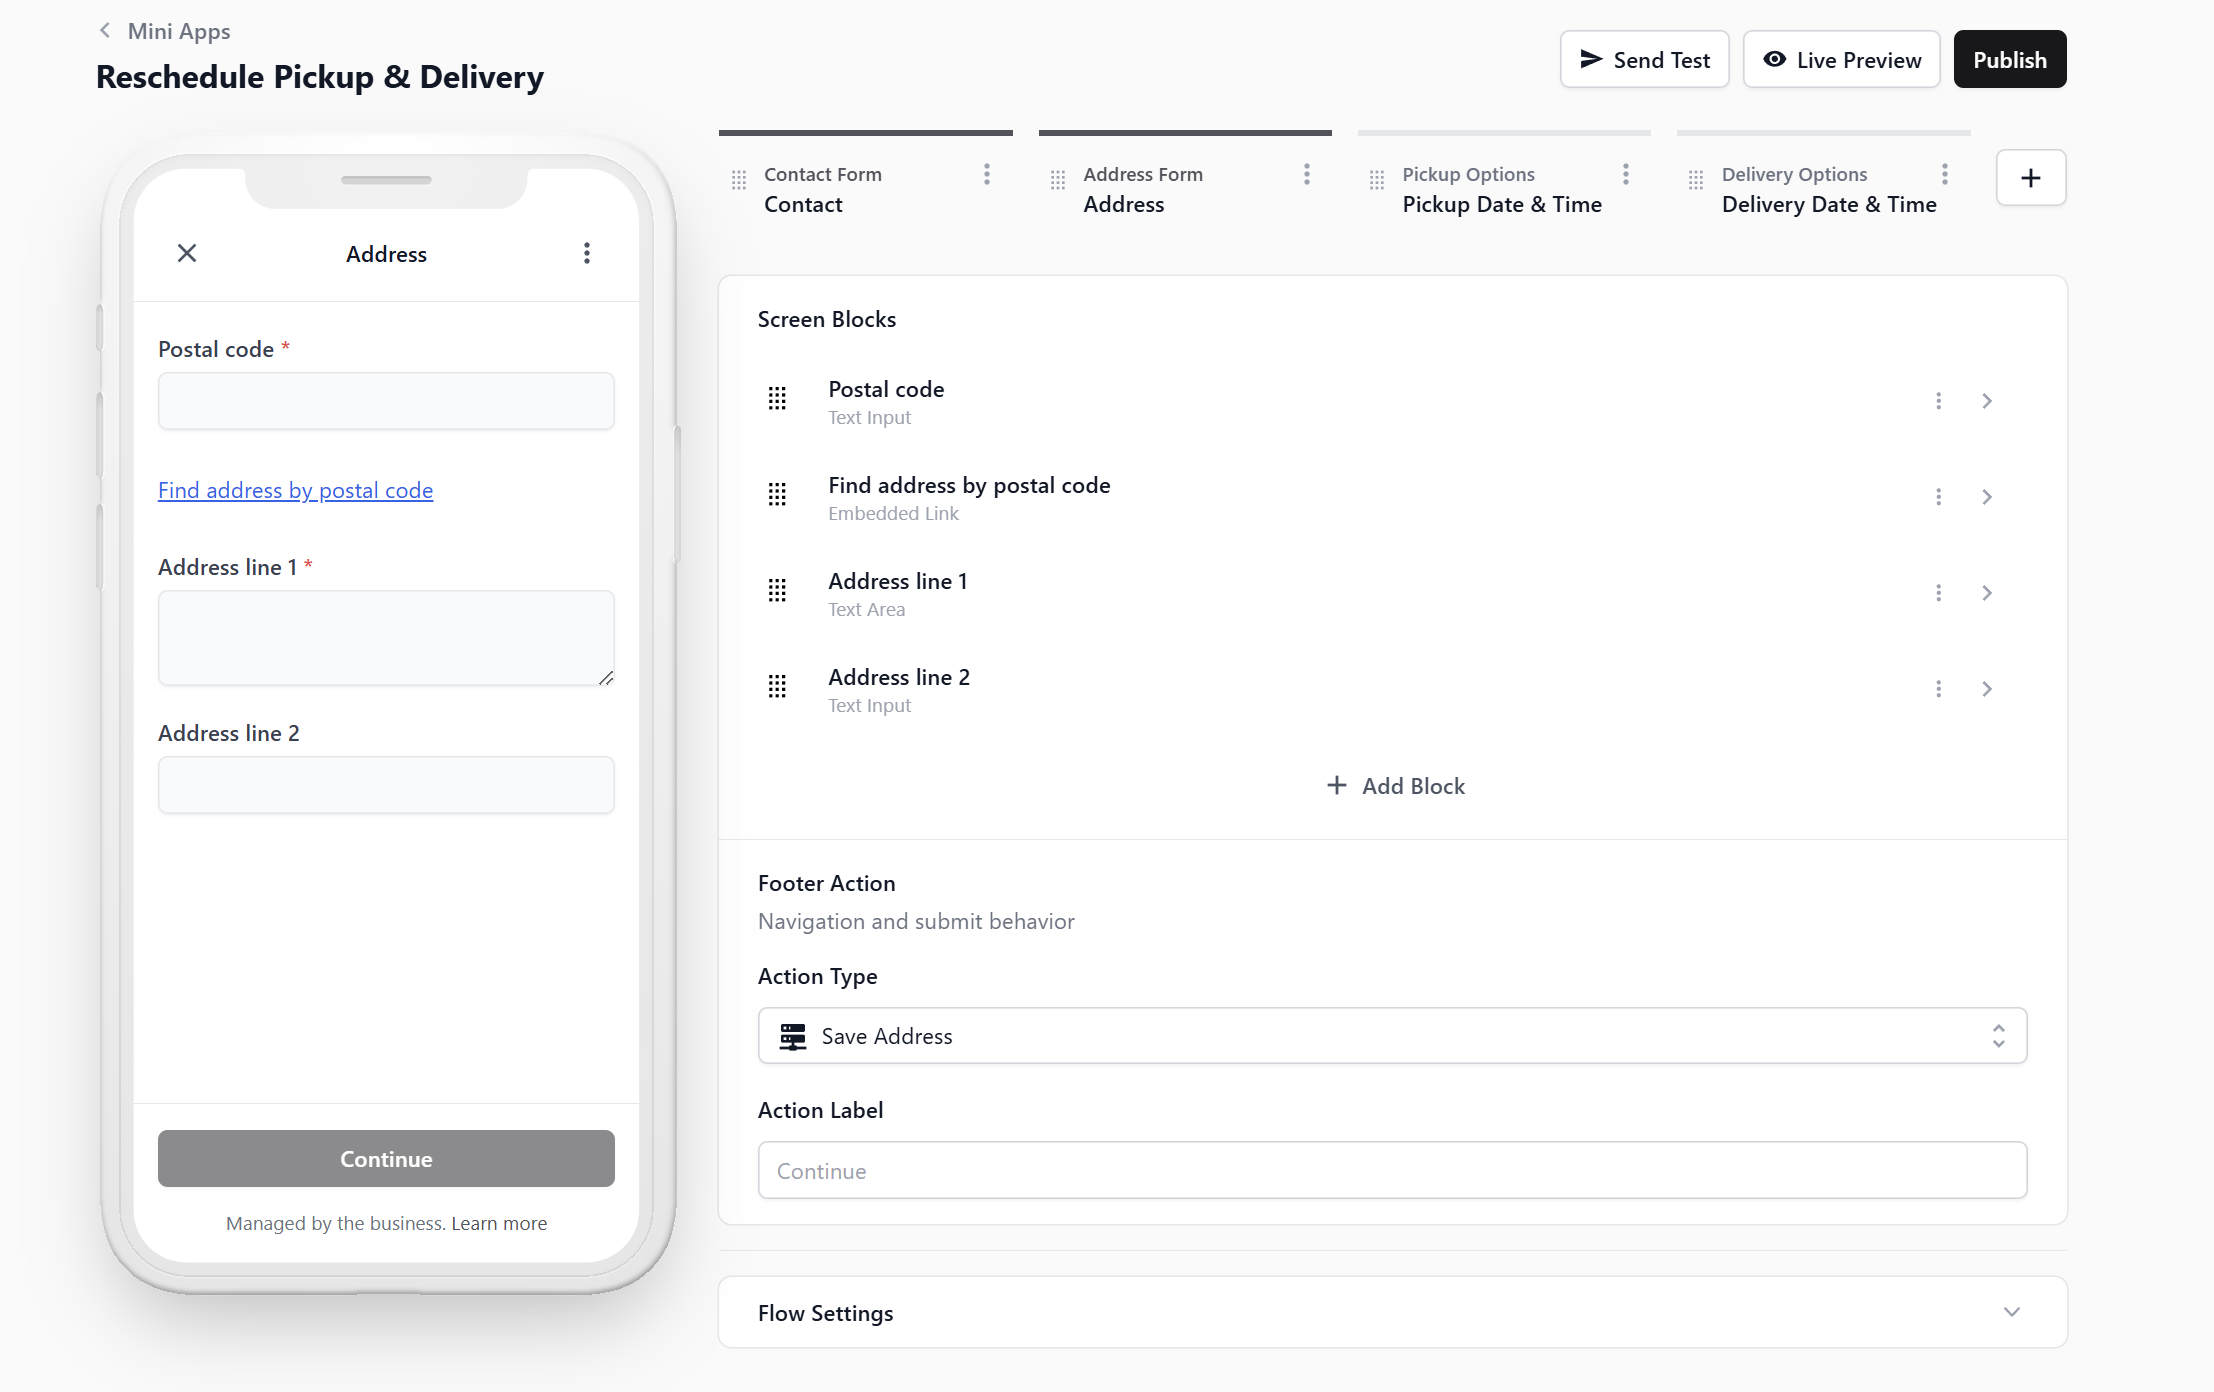
**Pickup Date & Time**
The new pickup date and time slot, with a Refresh link for the latest availability. The footer action (what happens when the customer taps the button at the bottom of the screen) is Next, which simply moves them to the last screen. Nothing is saved yet.
**Delivery Date & Time**
The new delivery date and time slot. The footer action is Schedule Job, and the button the customer taps reads Confirm Reschedule. Both the pickup and the delivery are moved at this moment, together.
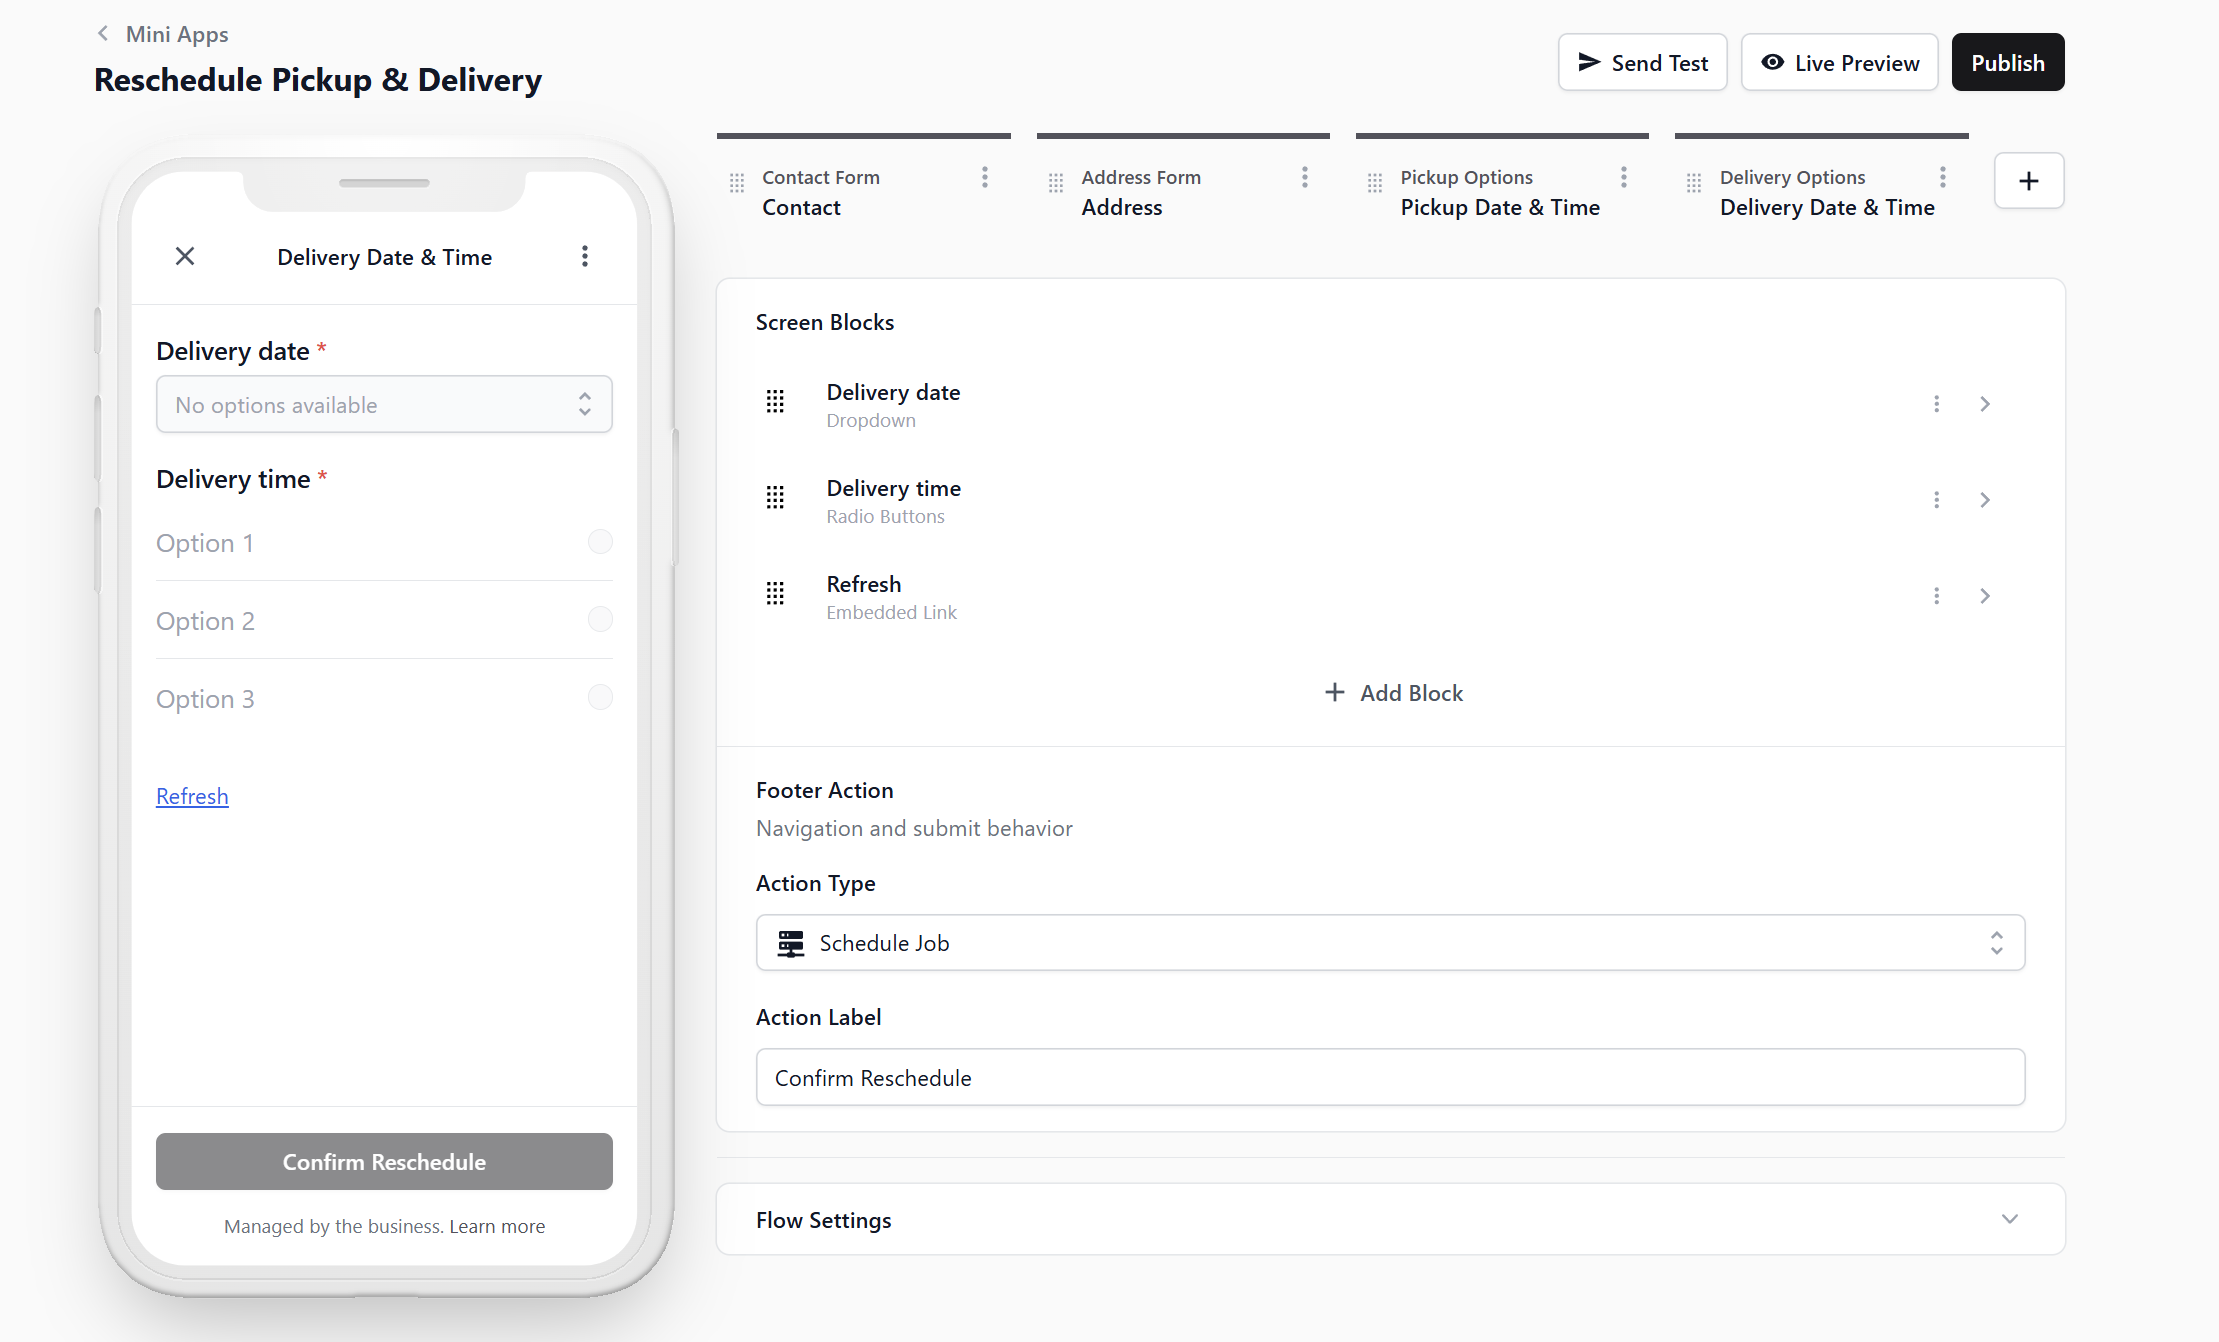
Nothing changes on the order until the customer taps that last button. If they abandon the form halfway, the original booking stays exactly as it was.
### Schedule Delivery or Reschedule?
Both Mini Apps use the Schedule Job footer action. EasyBiz checks the selected order first. If that type of job does not exist yet, it adds it. If the job already exists, it moves the existing job instead of adding another one.
| Use this Mini App | Choose it when | What the customer can change |
|---|---|---|
| Schedule Delivery | The return delivery has not been booked yet. | The delivery address, date and time. |
| Reschedule Pickup & Delivery | A pickup and delivery are already booked, and either one may need to move. | The pickup date and time, followed by the delivery date and time. |
---
## Only Rescheduling the Delivery
Some shops never move the pickup, only the return. If that is you, delete the Pickup Date & Time screen.
1. In the editor, click the ⋮ on the Pickup Date & Time screen and choose Delete.
2. Check that the Delivery Date & Time screen still has Schedule Job as its footer action. It must be the last screen.
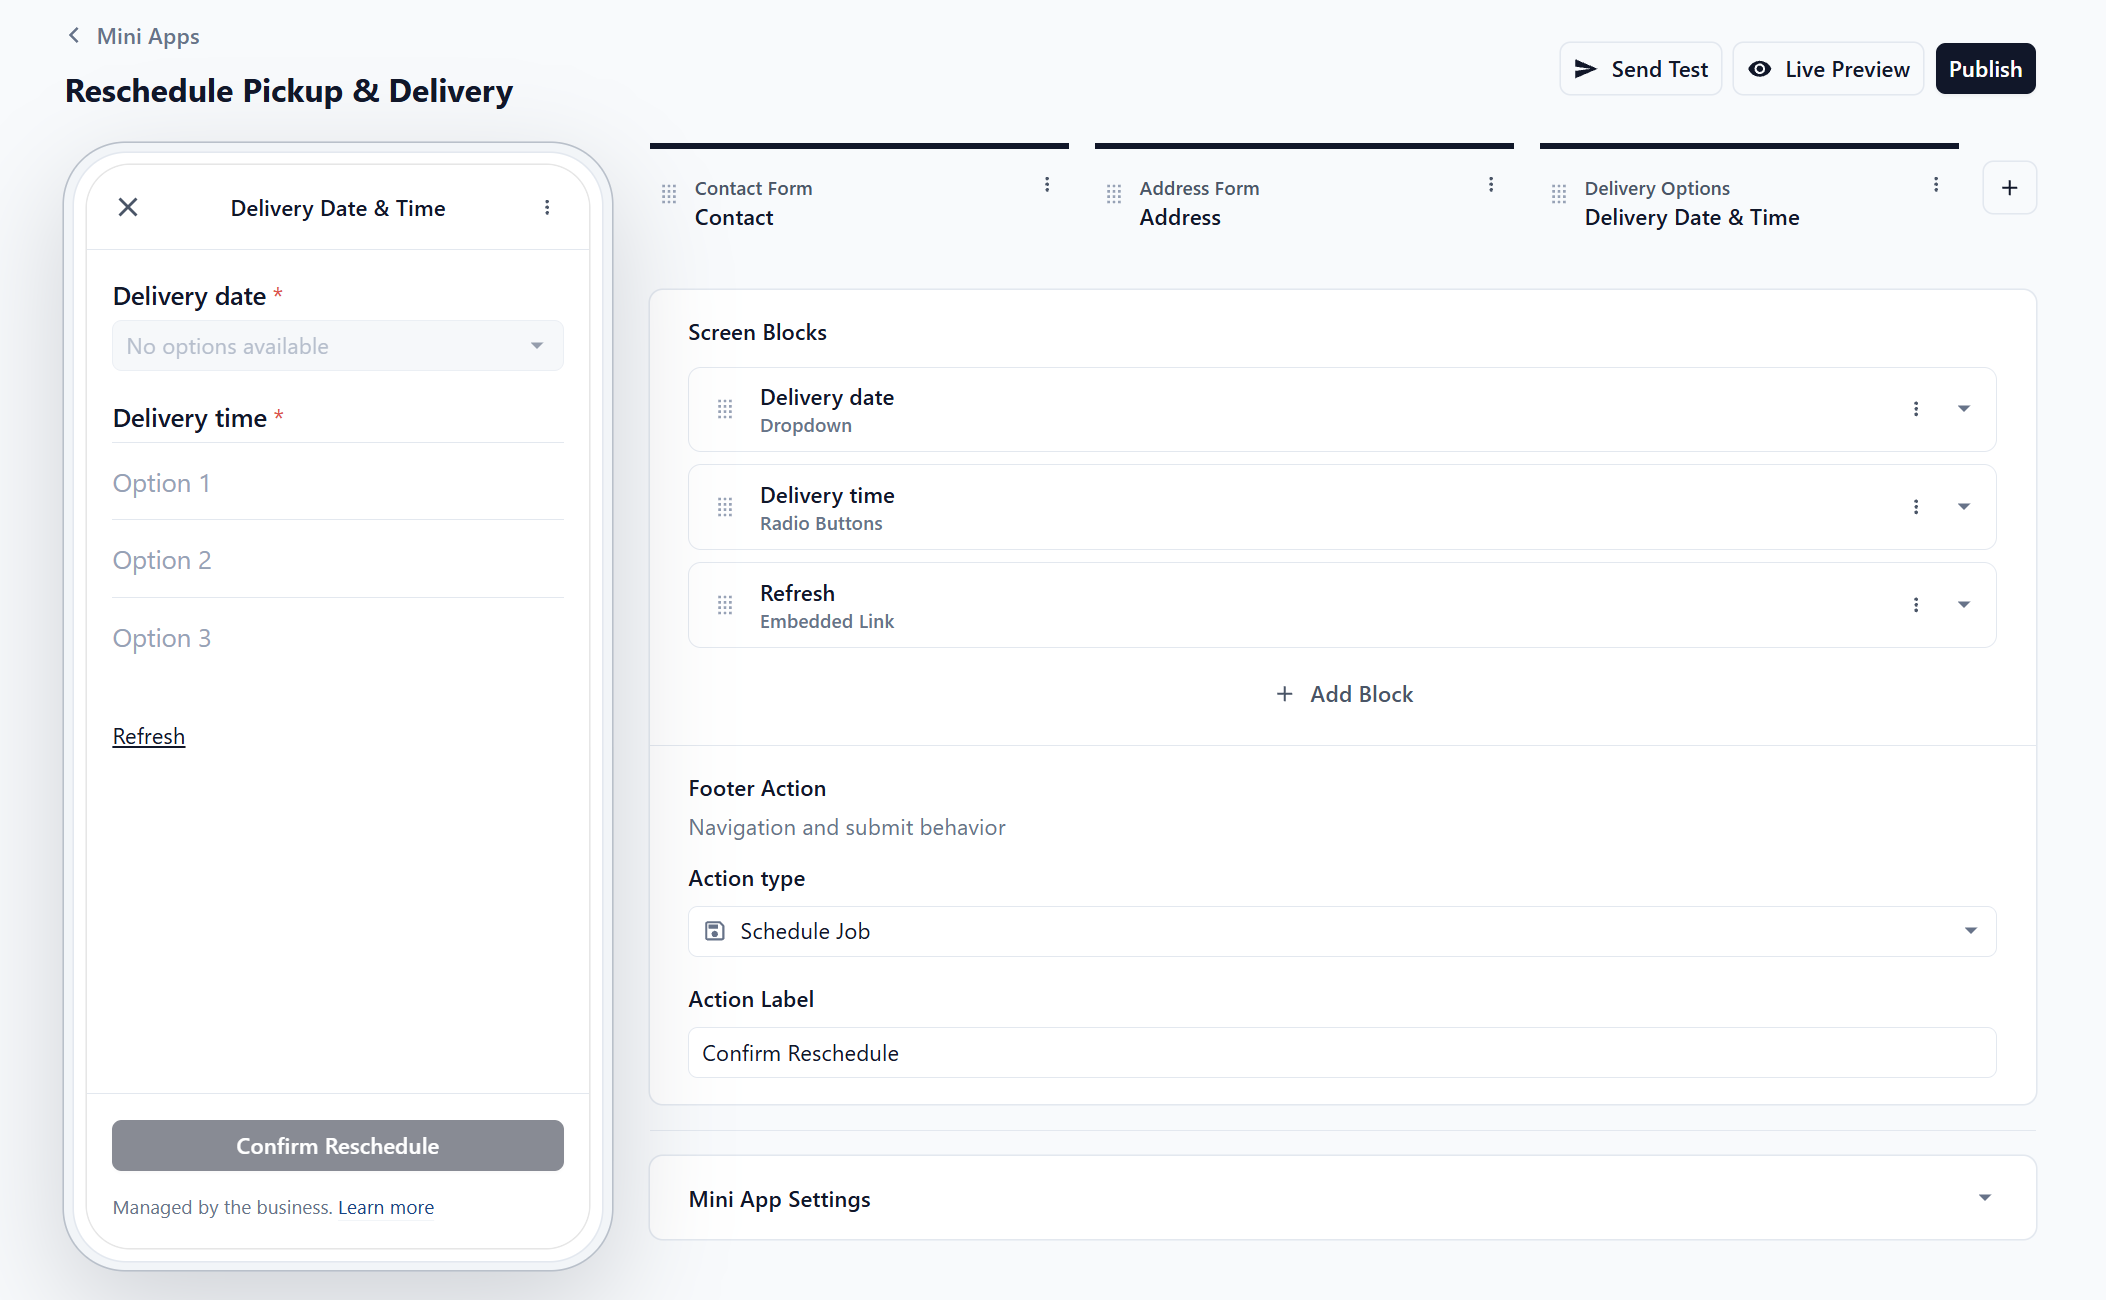
At that point this form does the same job as the Schedule Delivery template, so use whichever you find easier to keep track of.
---
### Add Only the Extra Details Your Shop Needs
The four default screens are enough to reschedule a pickup and delivery. You can add the Property Type question if your driver needs the customer's unit or floor number. Keep the form simple and only ask for details that help your driver complete the visit without calling the customer again.
| Extra detail | Add this when | How it helps your shop |
|---|---|---|
| Property Type | Your driver needs a unit or floor number for HDBs, condos and offices. | Customers in these buildings must enter the missing details, while landed-home customers can continue without them. |
Do not use this form to let customers add extra services. If they want more work done, create a new order instead.
The next section explains how to add the Property Type question.
---
## Ask for the Property Type
By default, address line 2 is optional, because landed houses have no unit number. Here is how to make it compulsory for HDB, Condo and Office only.
Add this question when your driver needs a unit number or floor number to complete the pickup or delivery. Without it, your staff may have to call or message the customer again, and the driver may be delayed at the building. Customers who choose Landed will not be forced to enter a unit number that they do not have.
**Step 1. Create the field**
1. Go to Settings, Library section, Custom Fields.
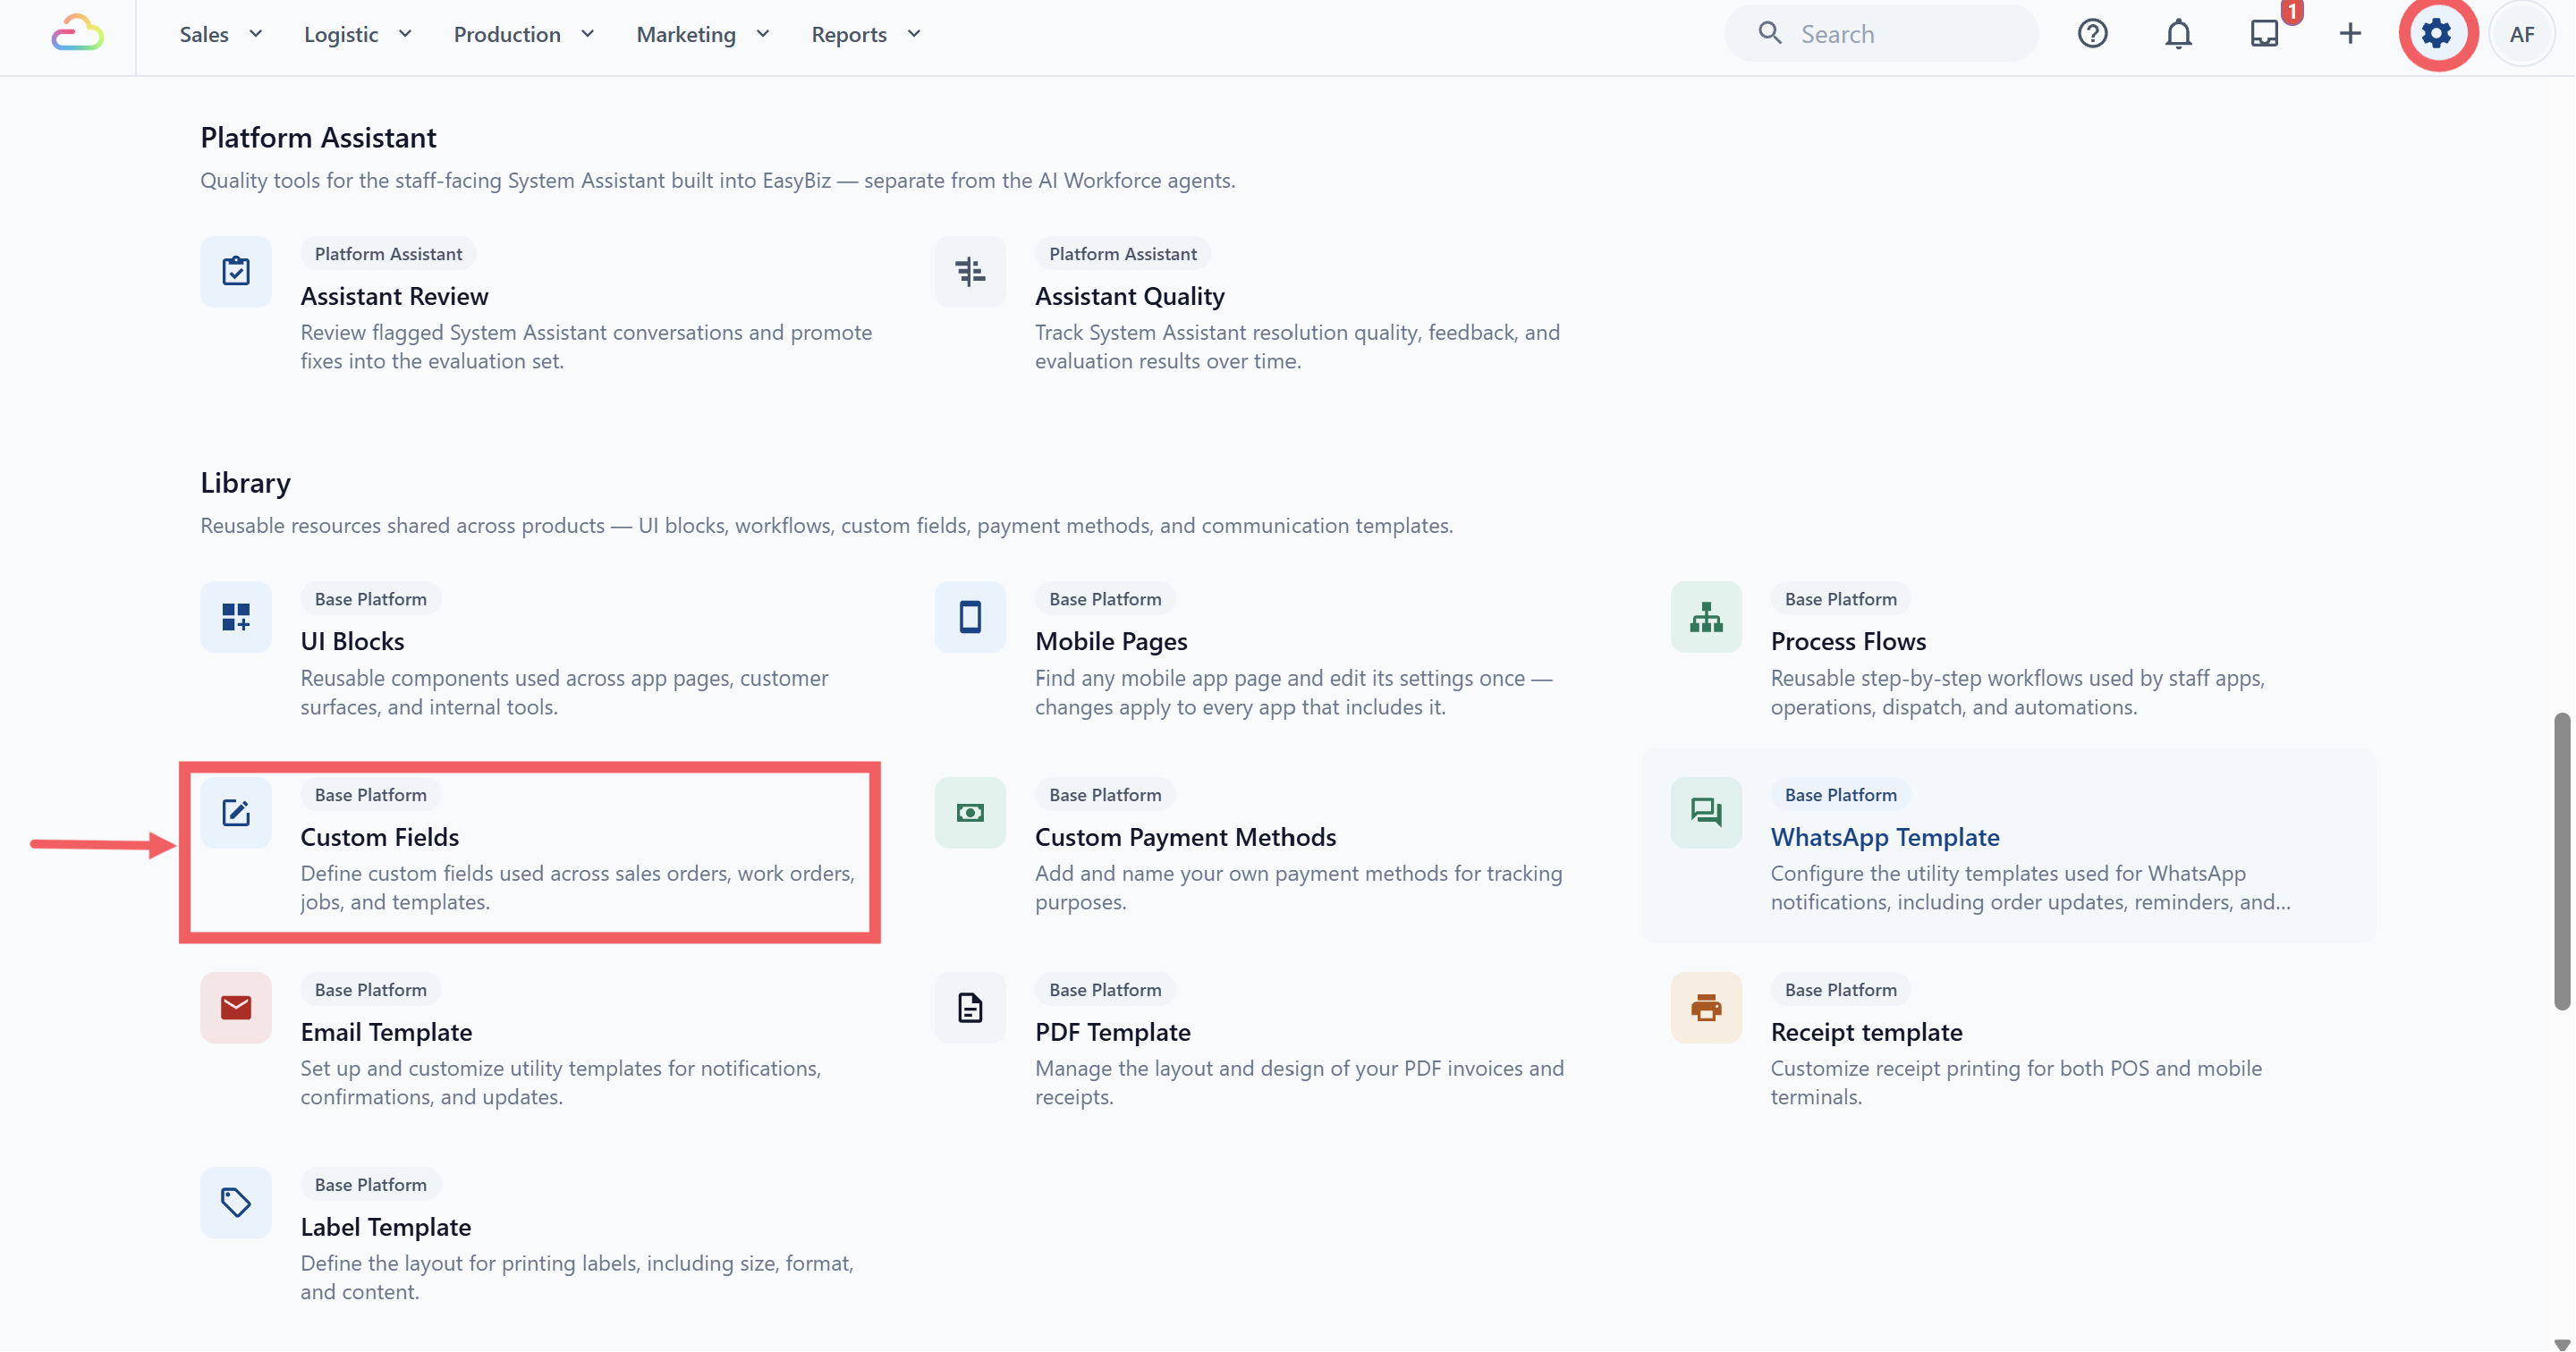
2. Click + Add Data Field. Name it Address Type and choose Options as the Data Type.
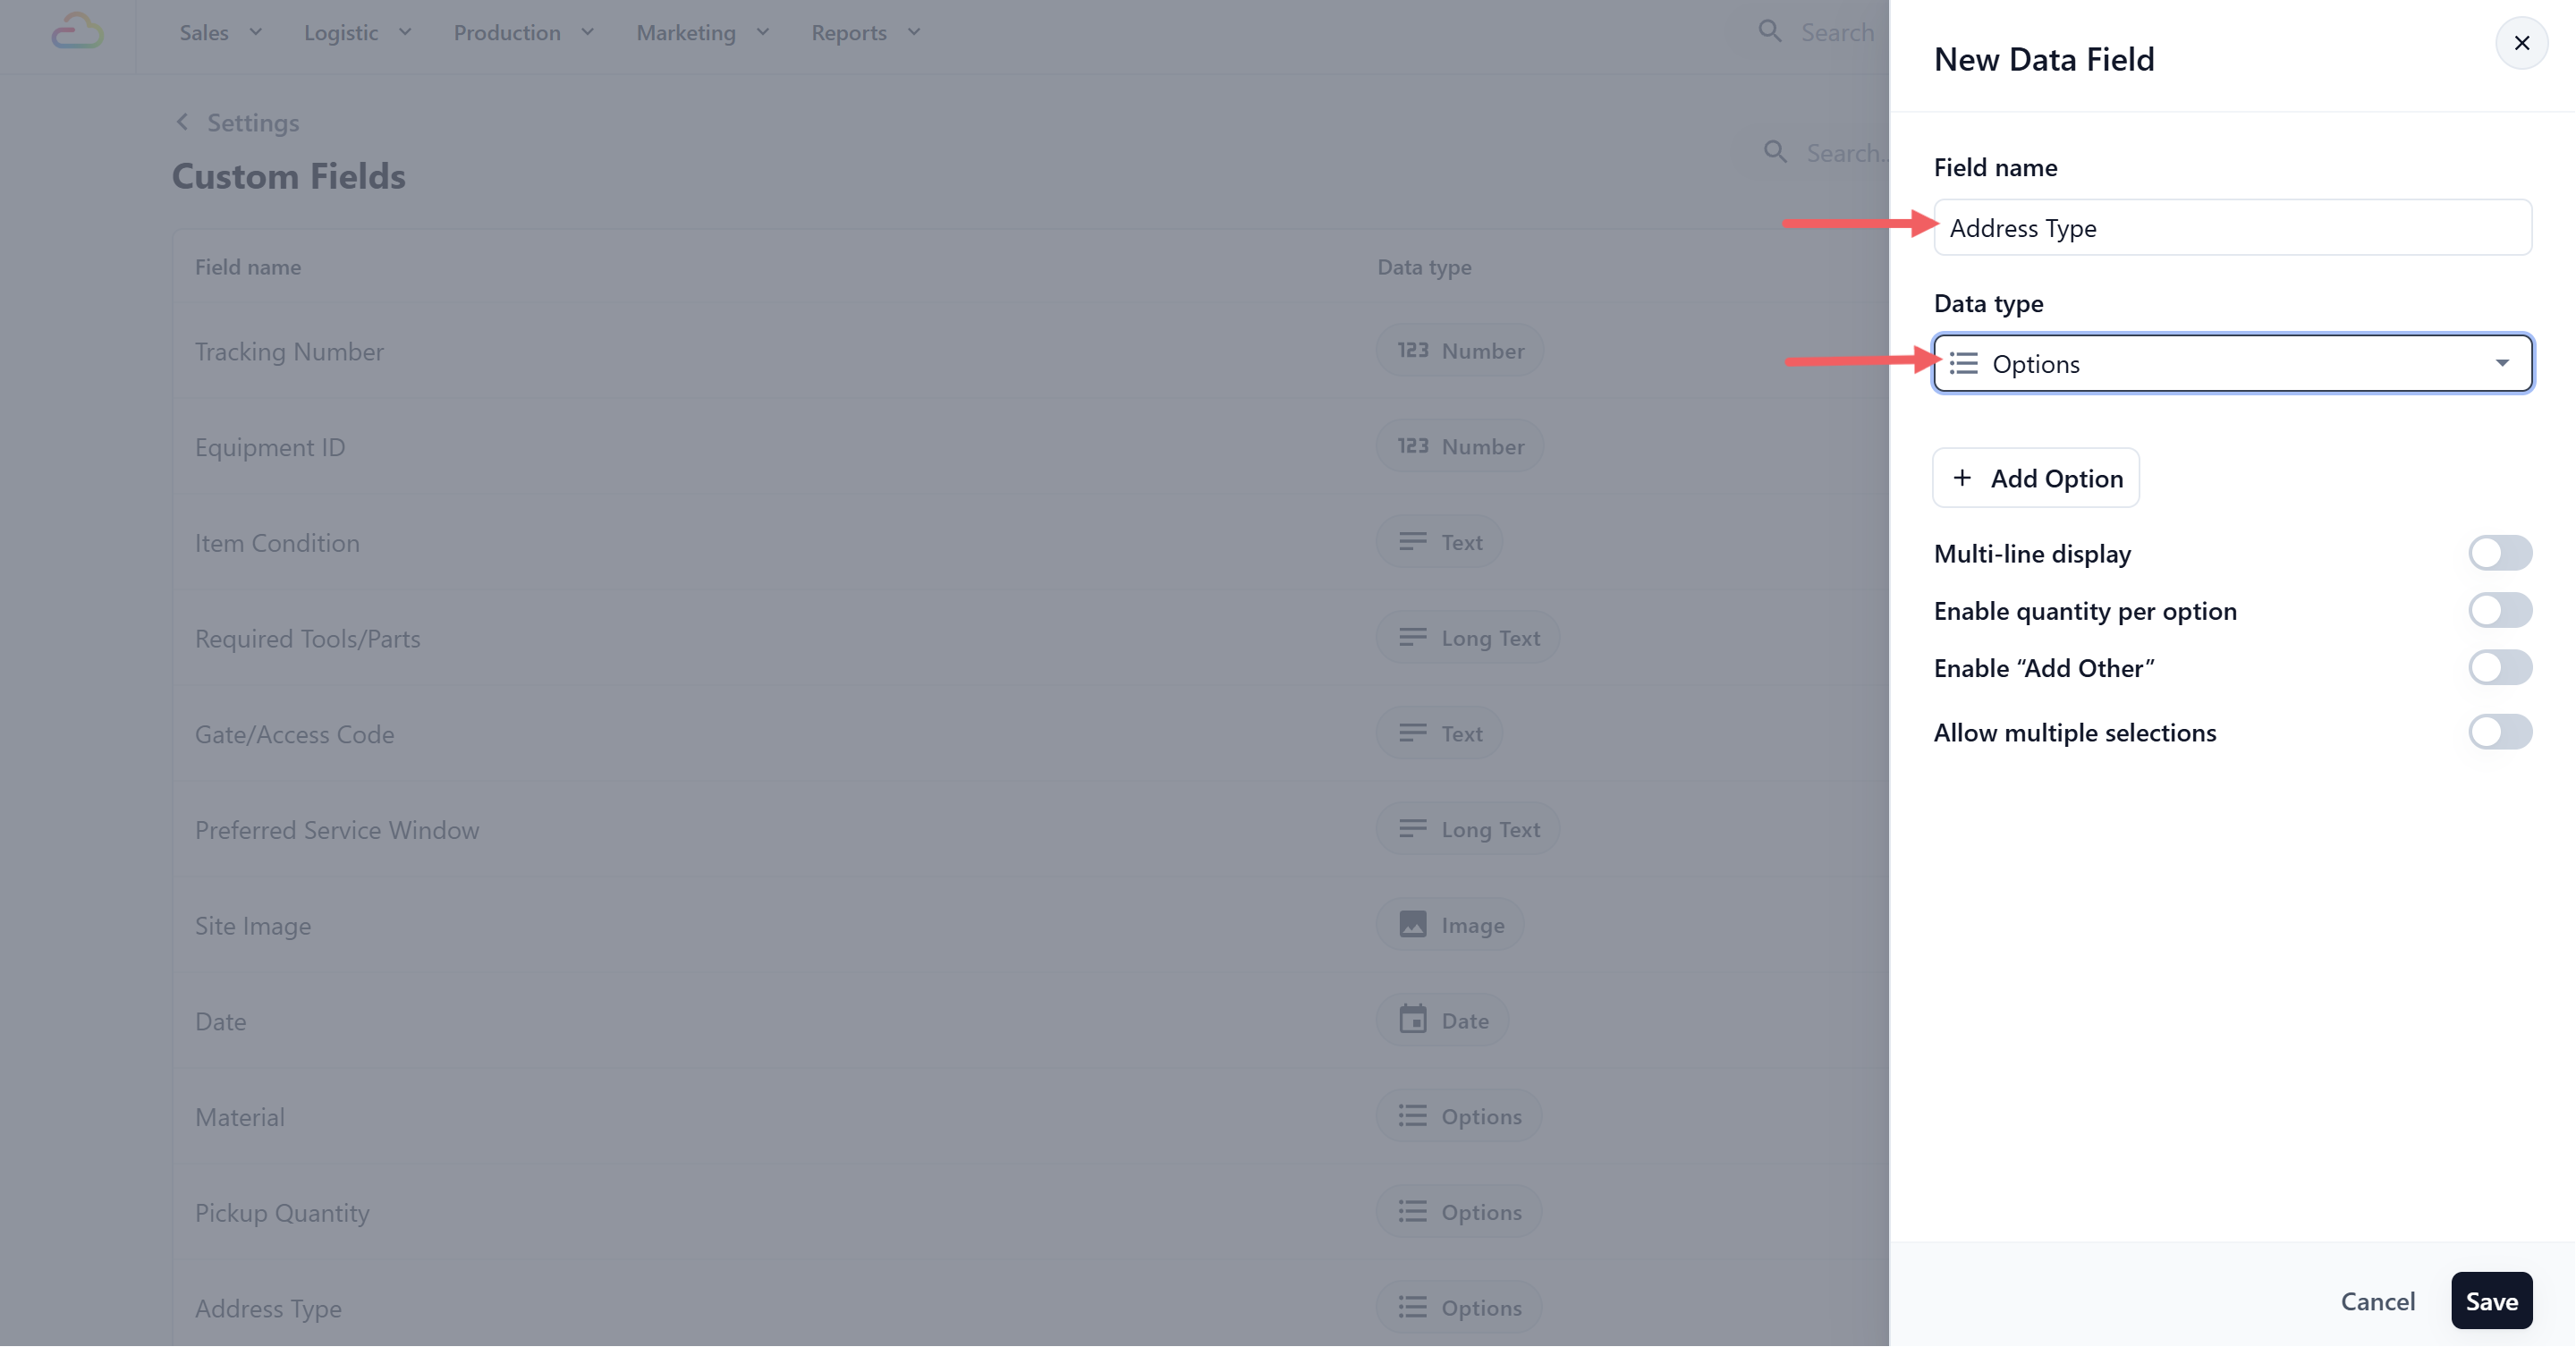
3. Type your choices: HDB, Condo, Office, Landed. Click Save.
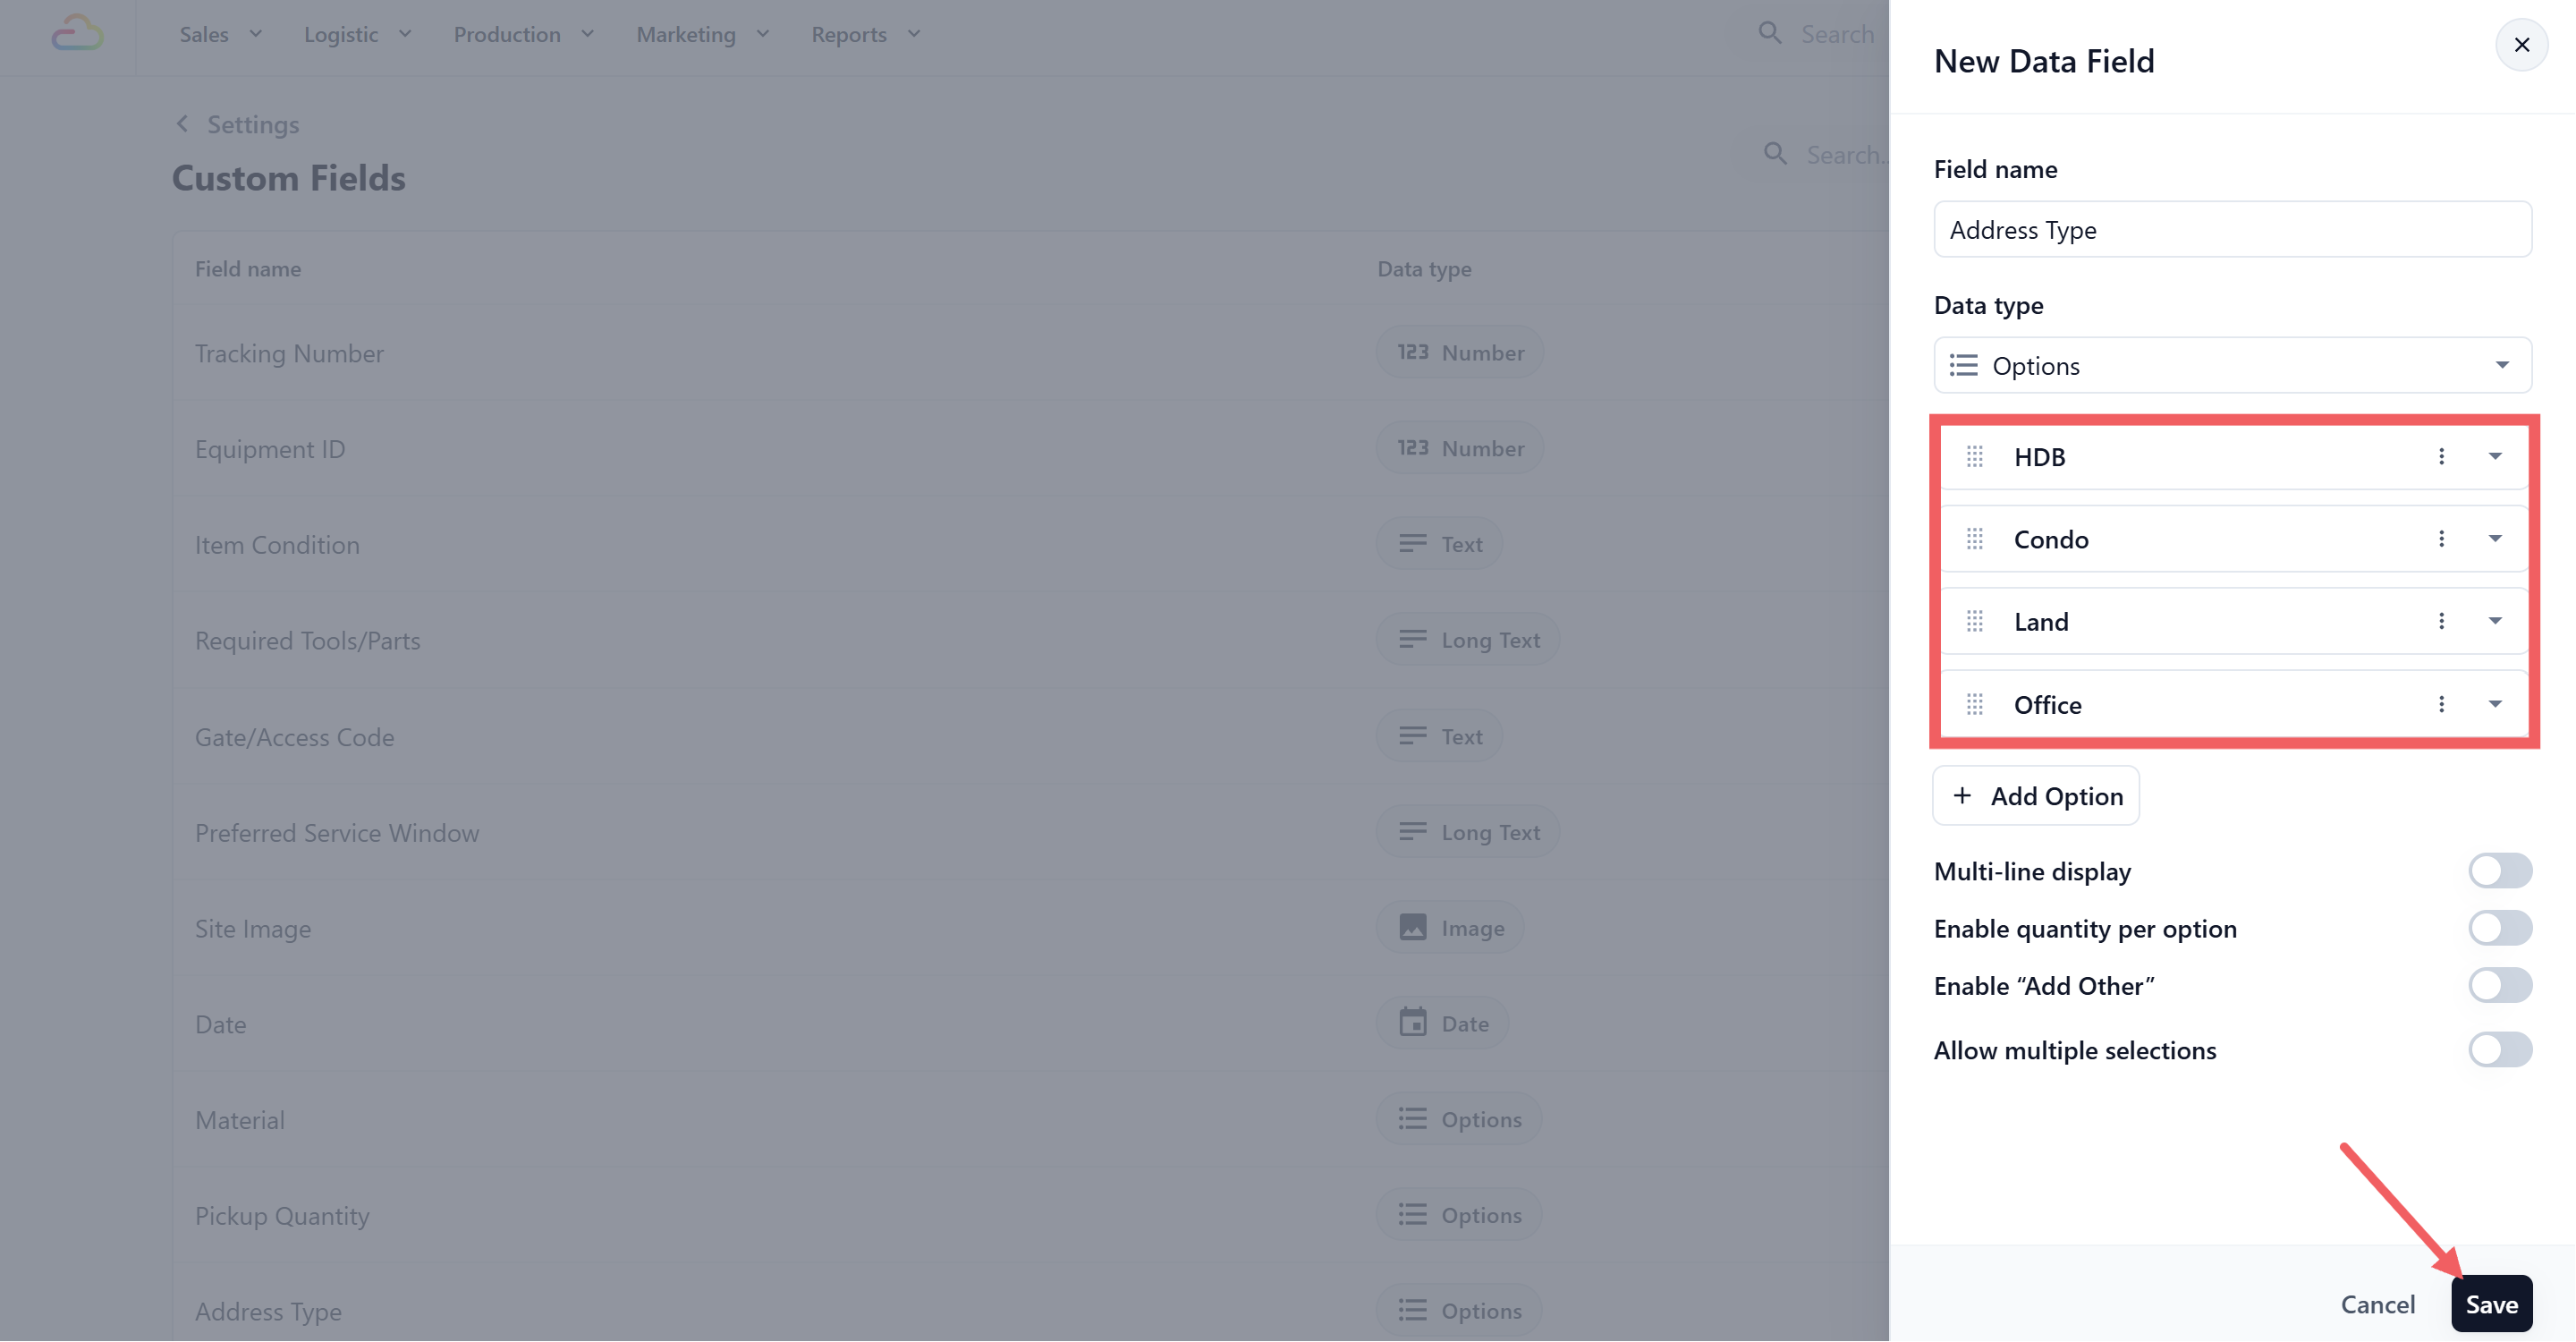
Options is the data type you pick in Custom Fields. Dropdown is a block type you pick inside the Mini App editor. They work together, but they are chosen in two different places.
**Step 2. Add the block**
1. In the editor, click your Address screen.
2. Click + Add Block.
3. Choose Dropdown.
4. Open the block settings and set Input Data Field to Address Type.
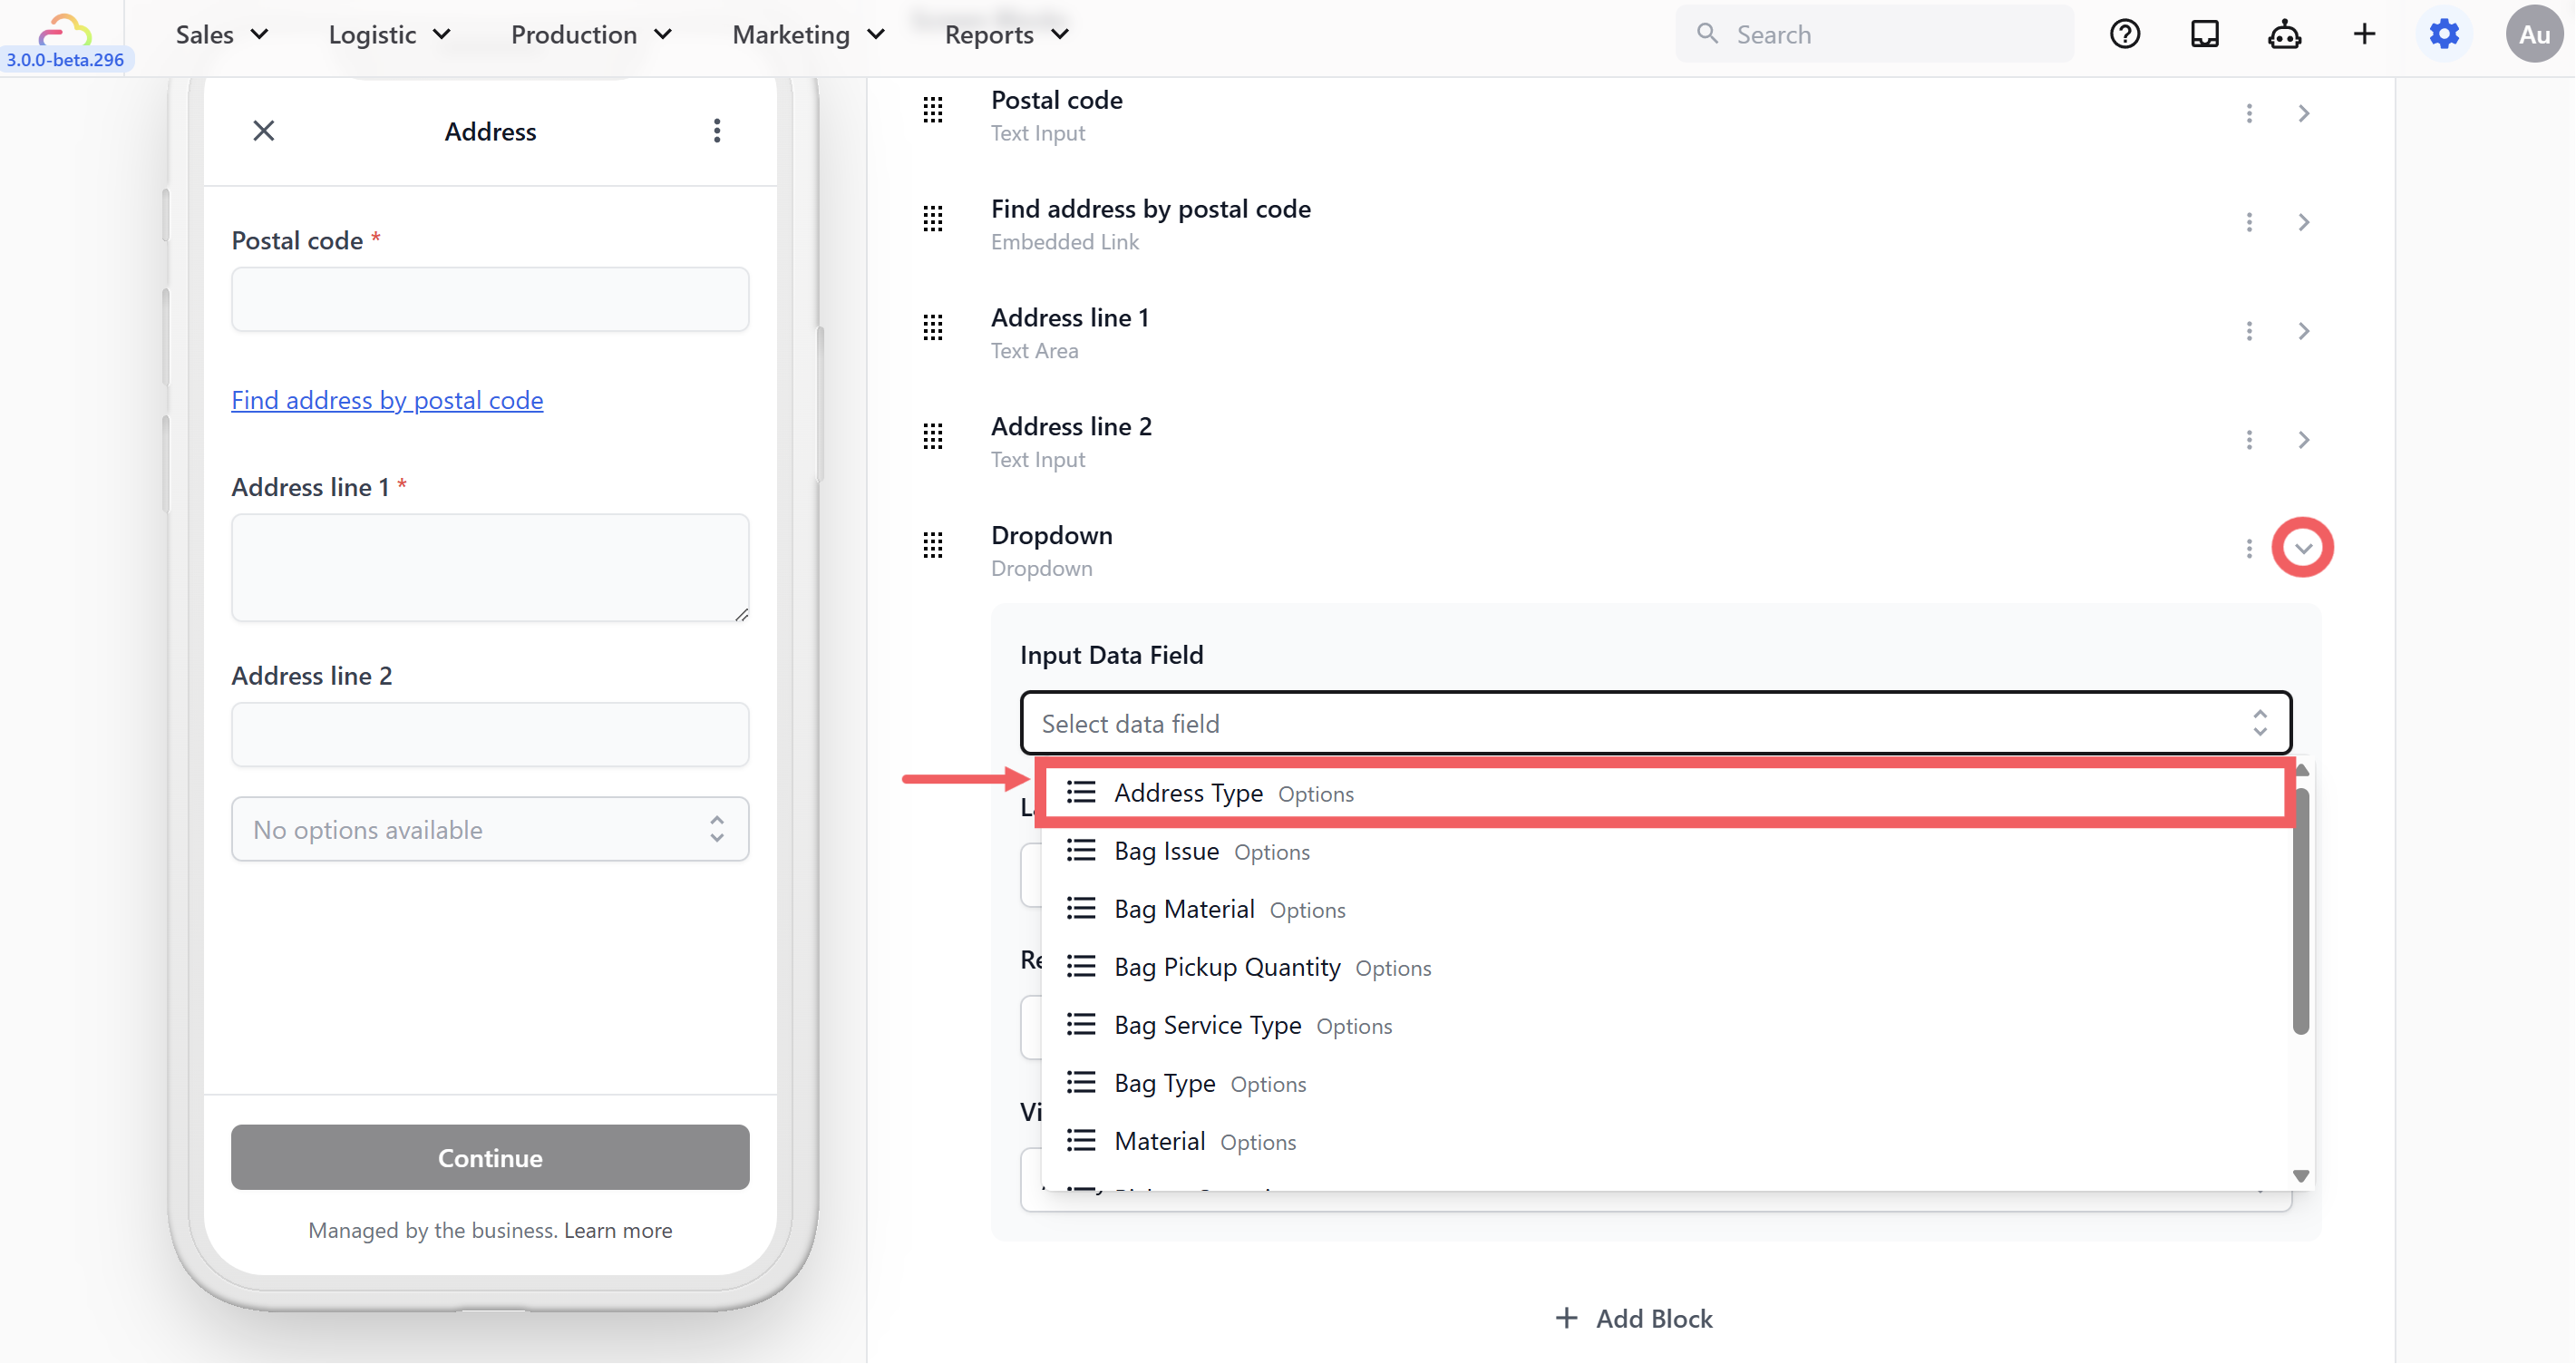
5. Set the Label to Property Type.
6. Set Visibility to Conditional, with When Address geo location and Operator Has Value. The question then appears only after the customer finds their postal code.
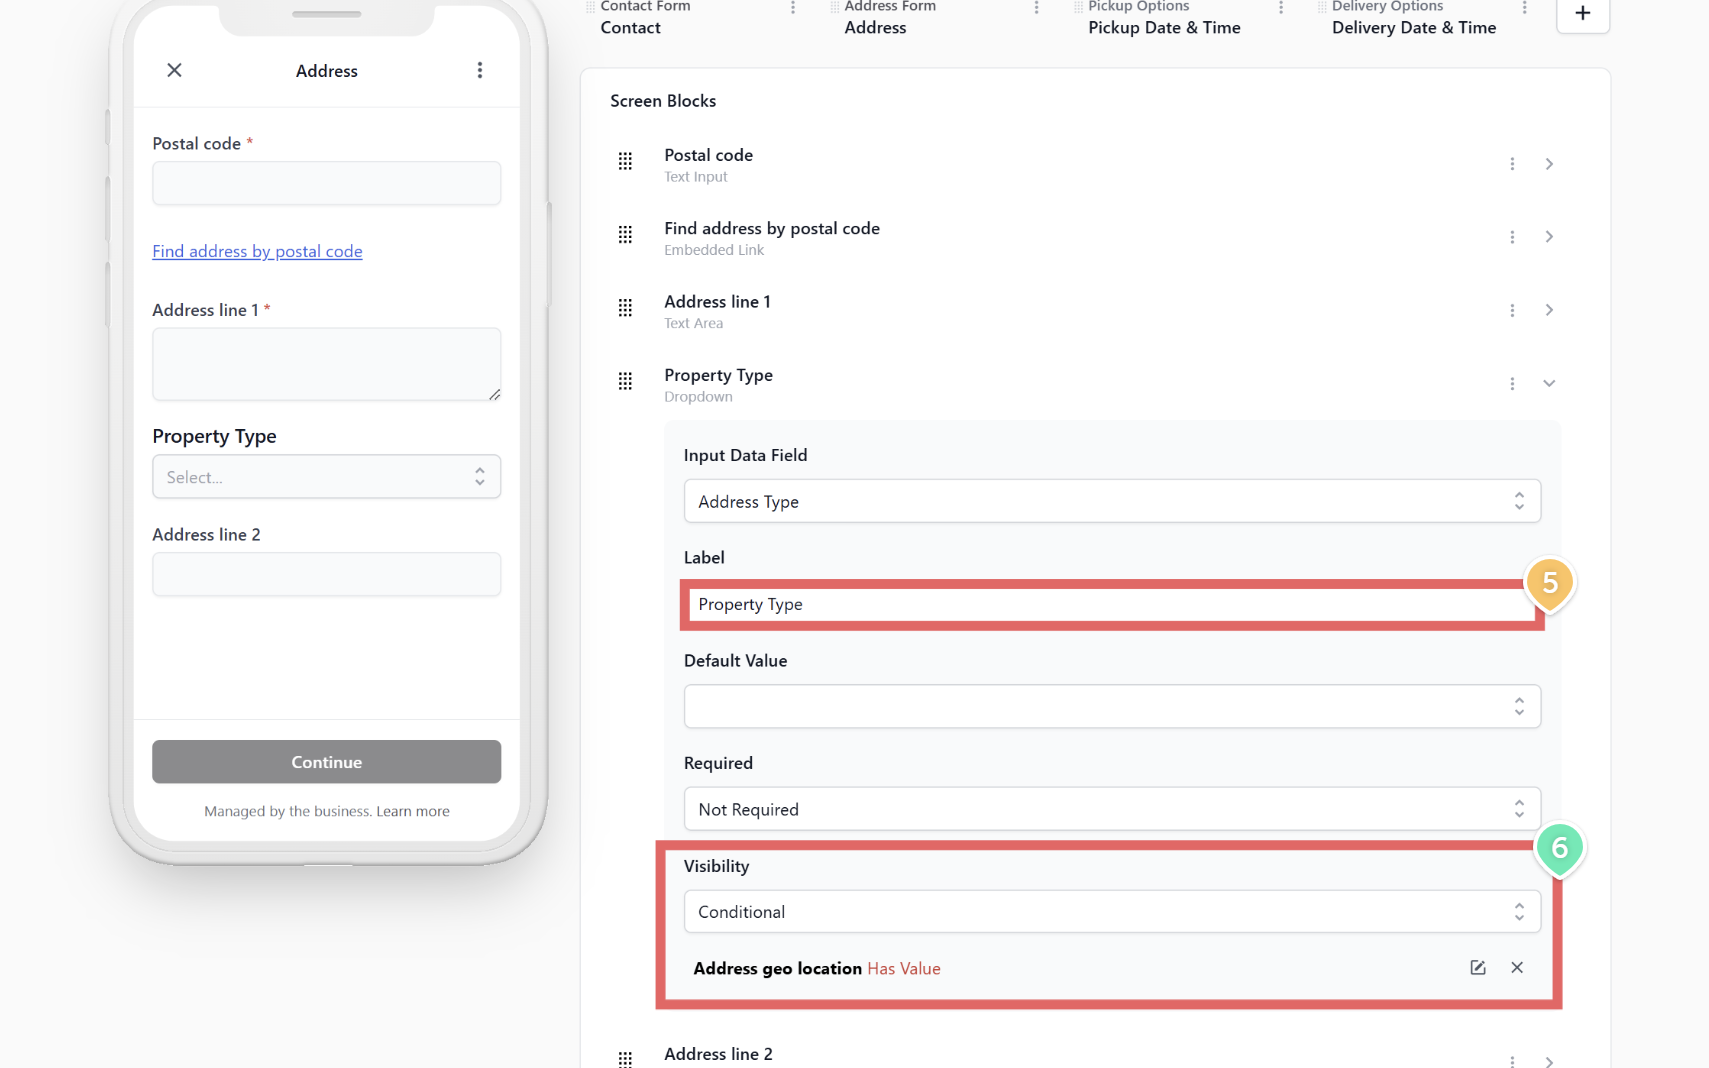
7. Drag the block above Address line 1.
**Step 3. Make address line 2 conditional**
1. Open the settings for the Address line 2 block.
2. Change Required to Conditional.
3. Set When Address Type, Operator Is Any Of, Value HDB, Condo, Office.
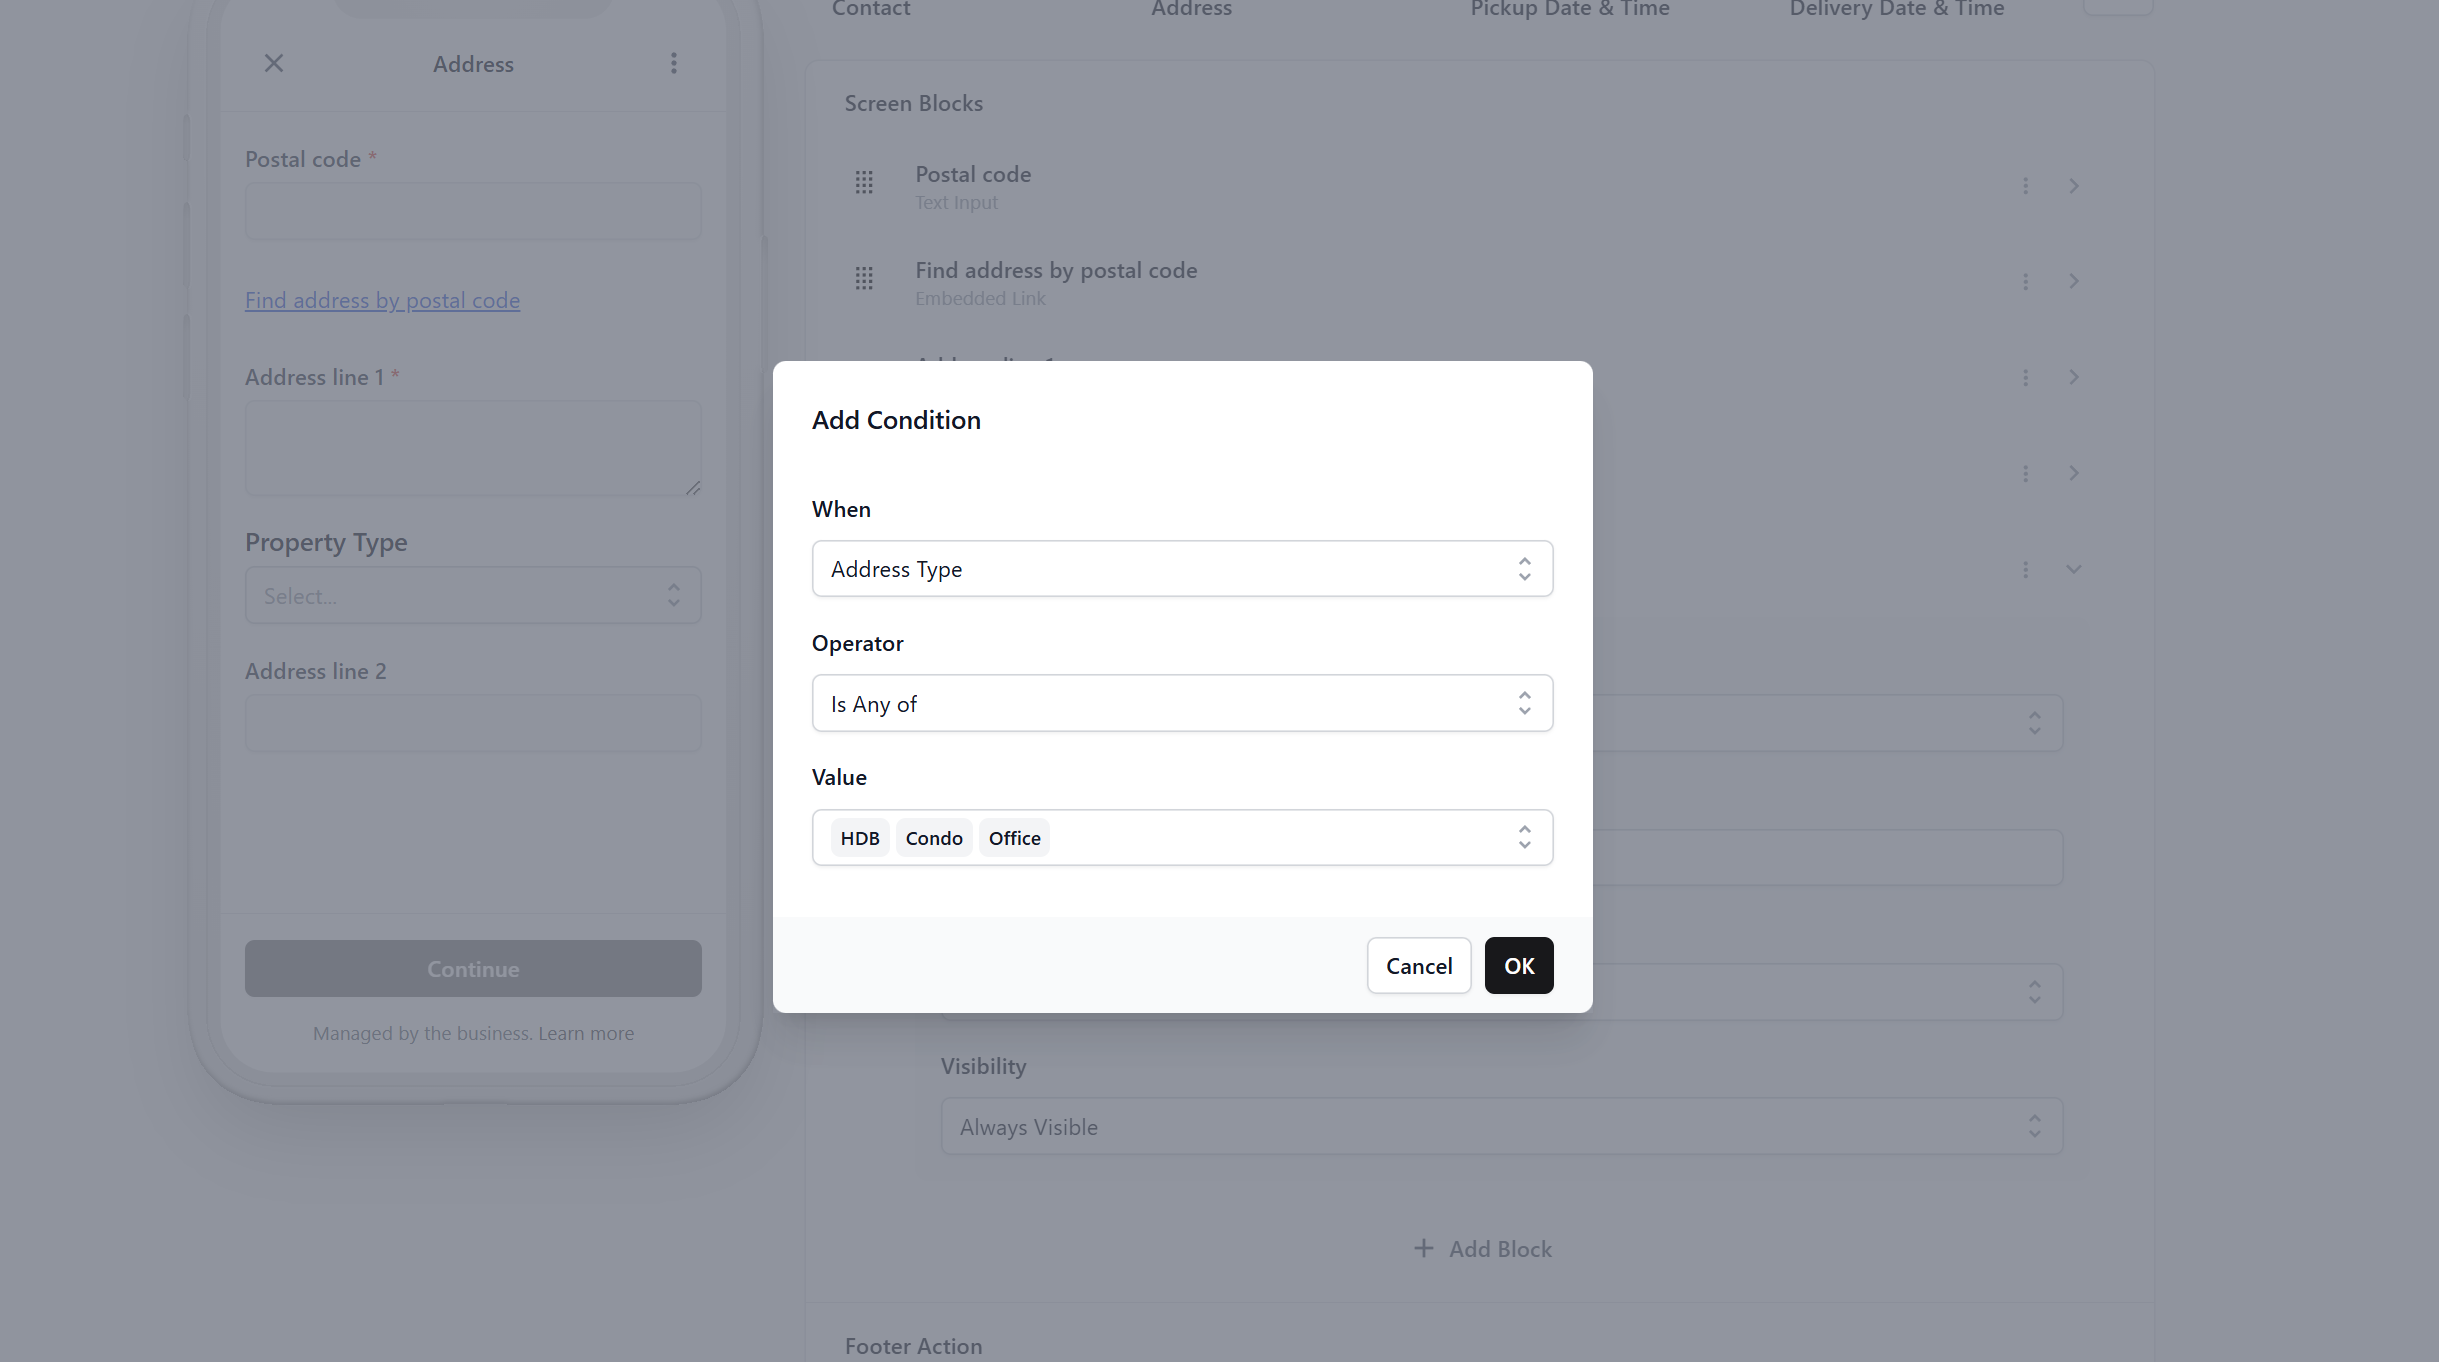
Address line 2 is now compulsory for apartments and optional for landed homes.
---
## Publish
Click Publish, confirm your WhatsApp Business Account, then use Send Test to fill the form in yourself. Full steps are in [How the Mini App Builder Works](/docs/how-the-mini-app-builder-works).
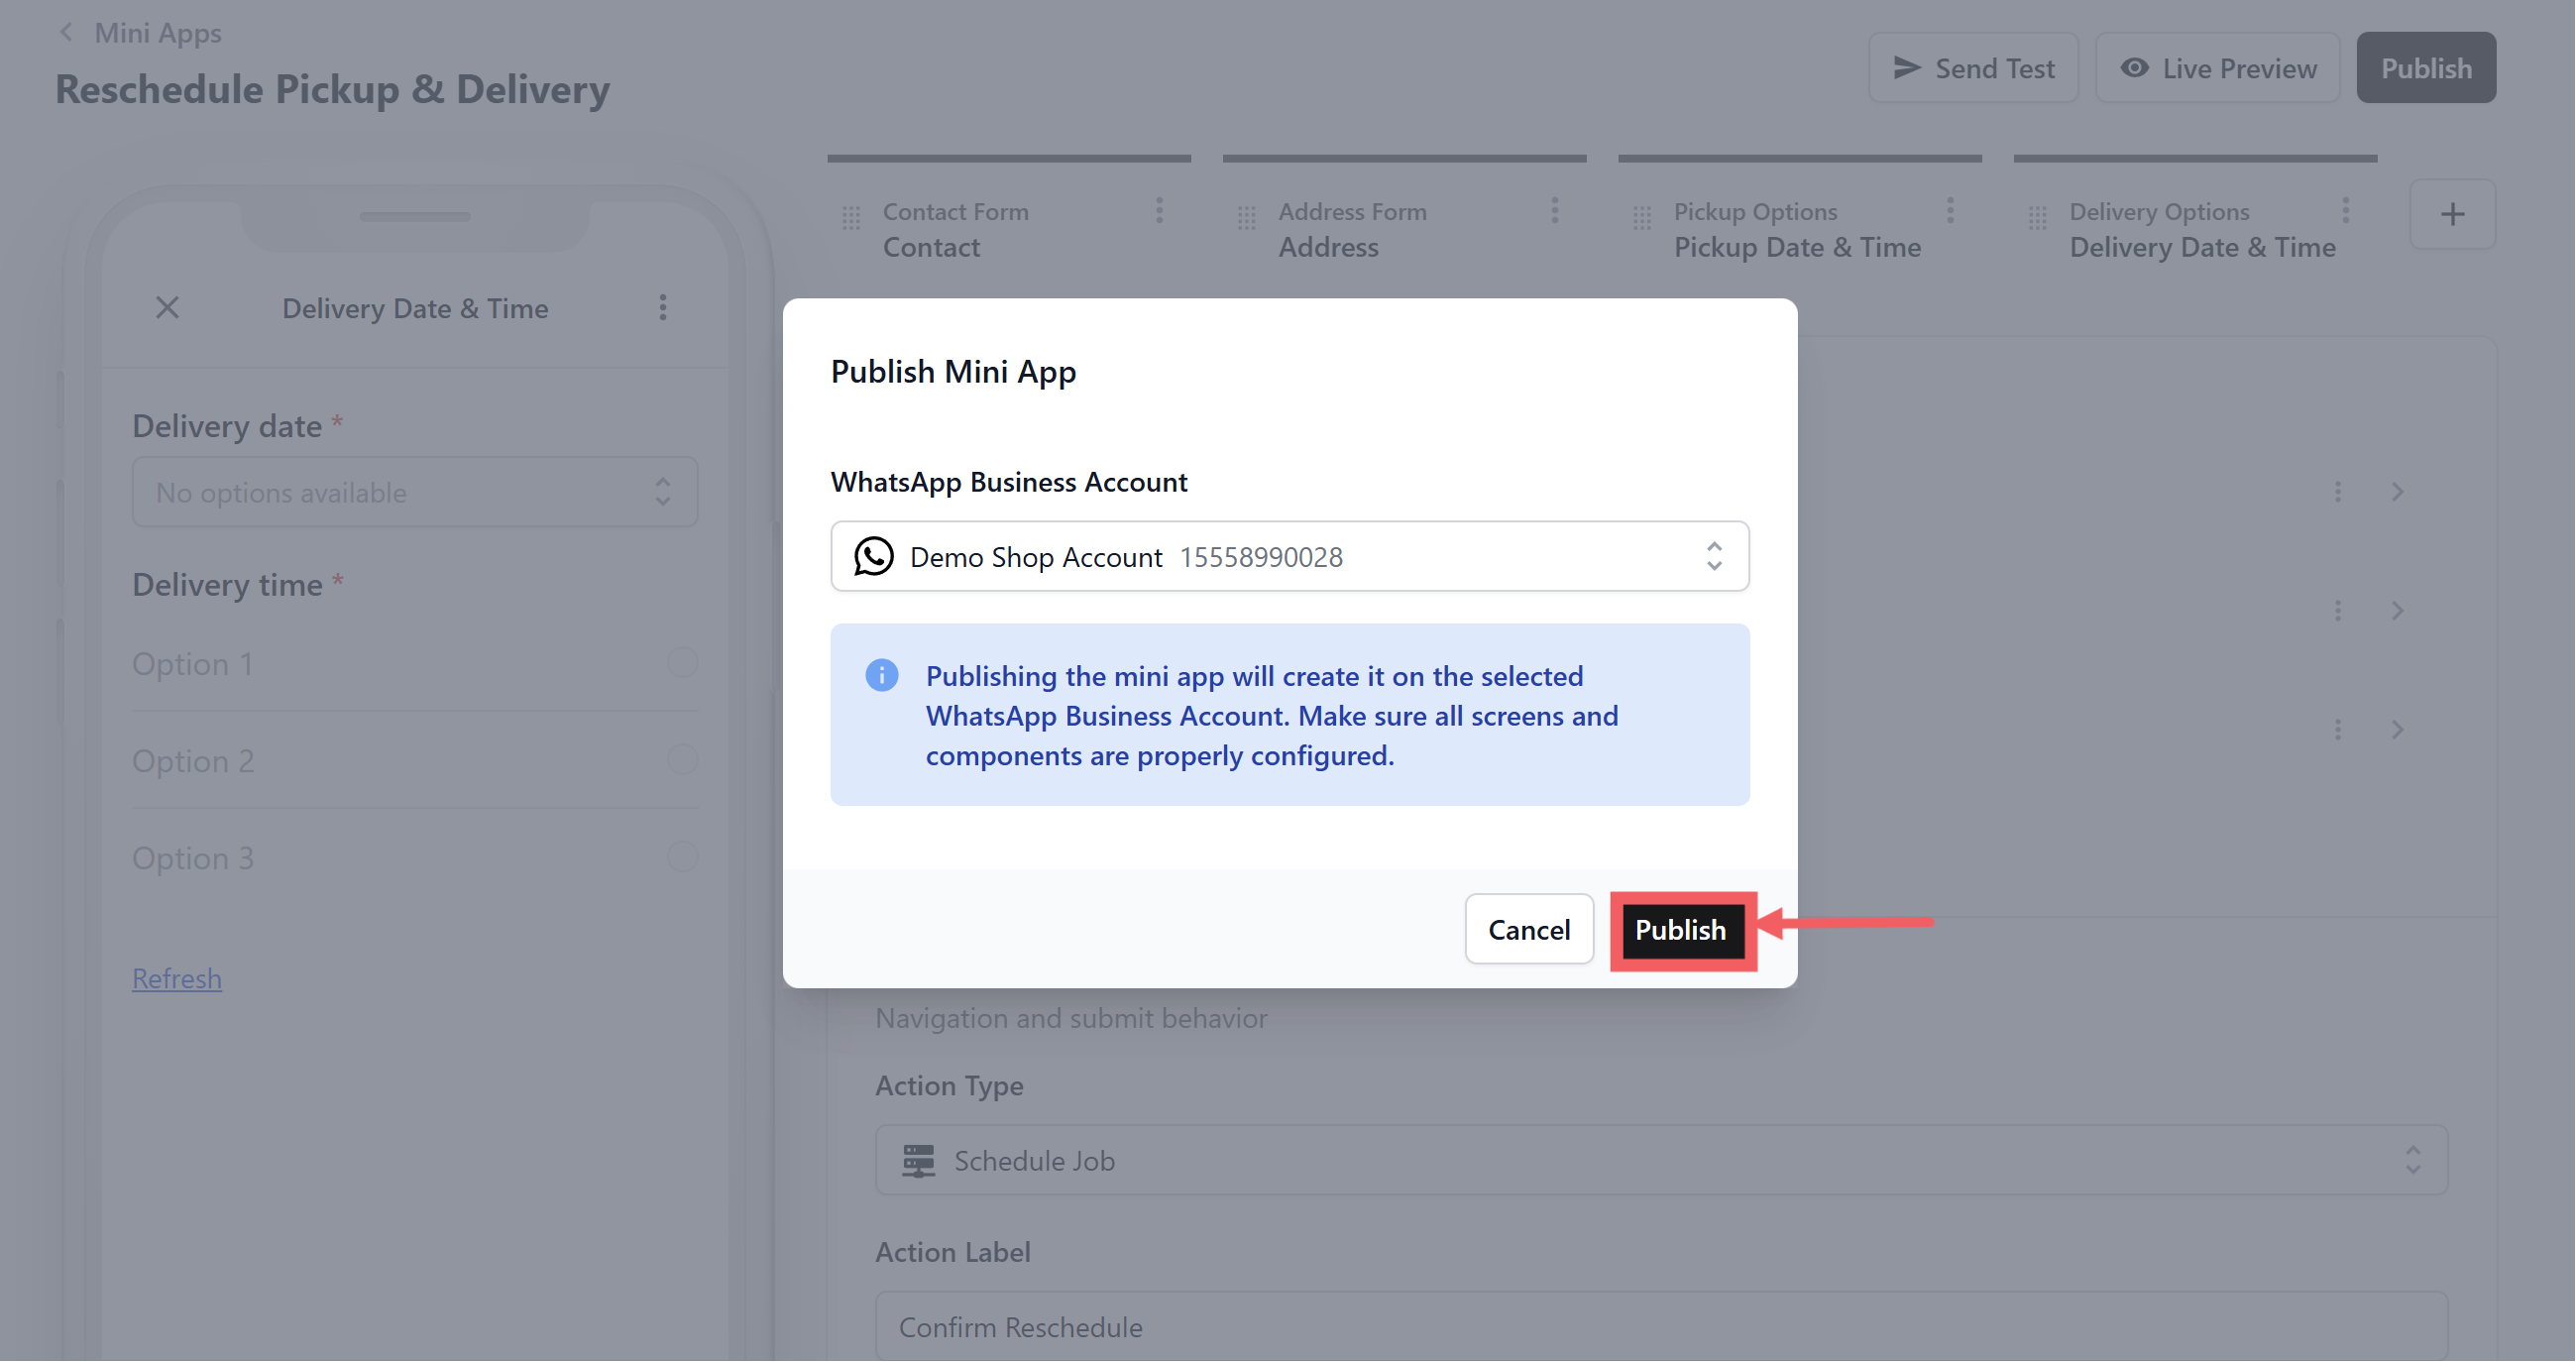
The Send Test button only appears after the Mini App is published. Publish first, then send yourself a test.
Complete the whole form using your own phone. Check that the correct order can be selected, the address is correct, and the available pickup and delivery times match what your shop can handle. Confirm that the original booking does not change until you tap the last button. If you make any changes after testing, publish the Mini App again before sending it to customers.
---
## FAQs
**Does this create a second booking?**
> No. It moves the pickup and delivery already on the order. Your driver's list shows one job at the new time, not two.
**What if I send it to a customer with no booking?**
> The form opens, but when they tap the last button there is no order for the system to move, so nothing is rescheduled. Always pick the order when you send it.
**What is the difference between this and the Schedule Delivery Mini App?**
> Both use the same Schedule Job action. Use Schedule Delivery when there is no delivery date yet. Use Reschedule when a pickup and delivery are already booked and either one may need to move.
**What if the customer only wants to move the delivery?**
> They still walk through the pickup screen. Ask them to re-pick the same pickup slot, or delete the pickup screen from your form as shown above.
**Can they reschedule after the driver has already collected the item?**
> The pickup slot they choose will not change work your driver has already done. In practice, use the Schedule Delivery Mini App once the item is with you.
**Can they change the address at the same time?**
> Yes. The Address screen is included so a customer who has moved can update it in the same form.
**Do the new dates respect my closed days?**
> Yes. The date screens use the same booking options and lead times as your counter.
**How do I know the customer actually rescheduled?**
> The order shows the new pickup and delivery times, and the conversation in your WhatsApp Inbox records that the form was submitted.
**Can I add a Service Options screen to let them request more work?**
> Not to this form. A Service Options screen cannot finish a reschedule form with the Schedule Job action. If the customer wants extra work done, take a new order instead.
**Can I let the customer cancel with this form?**
> No. This form only moves dates. A cancellation has to be handled by your team on the order itself.
**Is there a limit on how many times a customer can reschedule?**
> There is no limit built in. If it becomes a problem, send the form only when you are willing to move the job.
---
## What's Next
Your Mini App is live, but it will not reach anyone until you send it. Continue to [Sending Your Mini Apps to Customers](/docs/sending-your-mini-apps-to-customers).