## What Is Store Credit?
Store Credit is a prepaid wallet system for your shop. It gives each customer a digital store credit balance that your staff can load money into — like a rechargeable gift card, but built right into your POS.
When a customer tops up, the money goes into their wallet. The next time they come in, your cashier can deduct from their balance at checkout instead of collecting cash or card payment. You can also set up bonus credit (gift amounts) to reward customers for topping up.
---
### Why do you need it?
Without store credit, every visit means a separate payment — cash, card, or transfer. That's slower at the counter and gives customers no extra reason to come back.
With Store Credit on your POS:
- **Checkout is faster.** No fumbling with cash or waiting for card terminals — just deduct from the balance and go.
- **Customers keep coming back.** Once they've loaded money into their wallet, they have a reason to return. Add gift bonuses and it's even more compelling.
- **You get cash upfront.** Customers pay in advance, which means better cash flow for your business.
- **Staff can do it all from one screen.** Search for a customer, pick a package, process payment — all without leaving the POS.
Think of it as your own loyalty card system, but digital and built into the same screen your staff already uses.
---
## Before You Start
Make sure the following are set up in the console before adding Store Credit to your POS:
| What you need | Where to set it up |
| --- | --- |
| Top-up packages and store credit expiry configured | Settings → Loyalty & Rewards → Store Credit. See guide [Setting Up Your Store Credit Program] |
| Payment methods configured | Settings → Custom Payment Methods |
| A POS app created | Settings → Apps |
There's no separate "enable store credit" toggle. The feature is activated simply by adding the Credit Top-Up block to your POS app. If a customer doesn't have a wallet yet, one is created automatically on their first top-up.
---
## Setting Up the Store Credit Feature Block
Put the credit top-up screen right on the POS so your front counter can load customer wallets without switching apps.
The Credit Top-Up block is not enabled by default. Add it when you want the POS to handle store credit alongside taking orders.
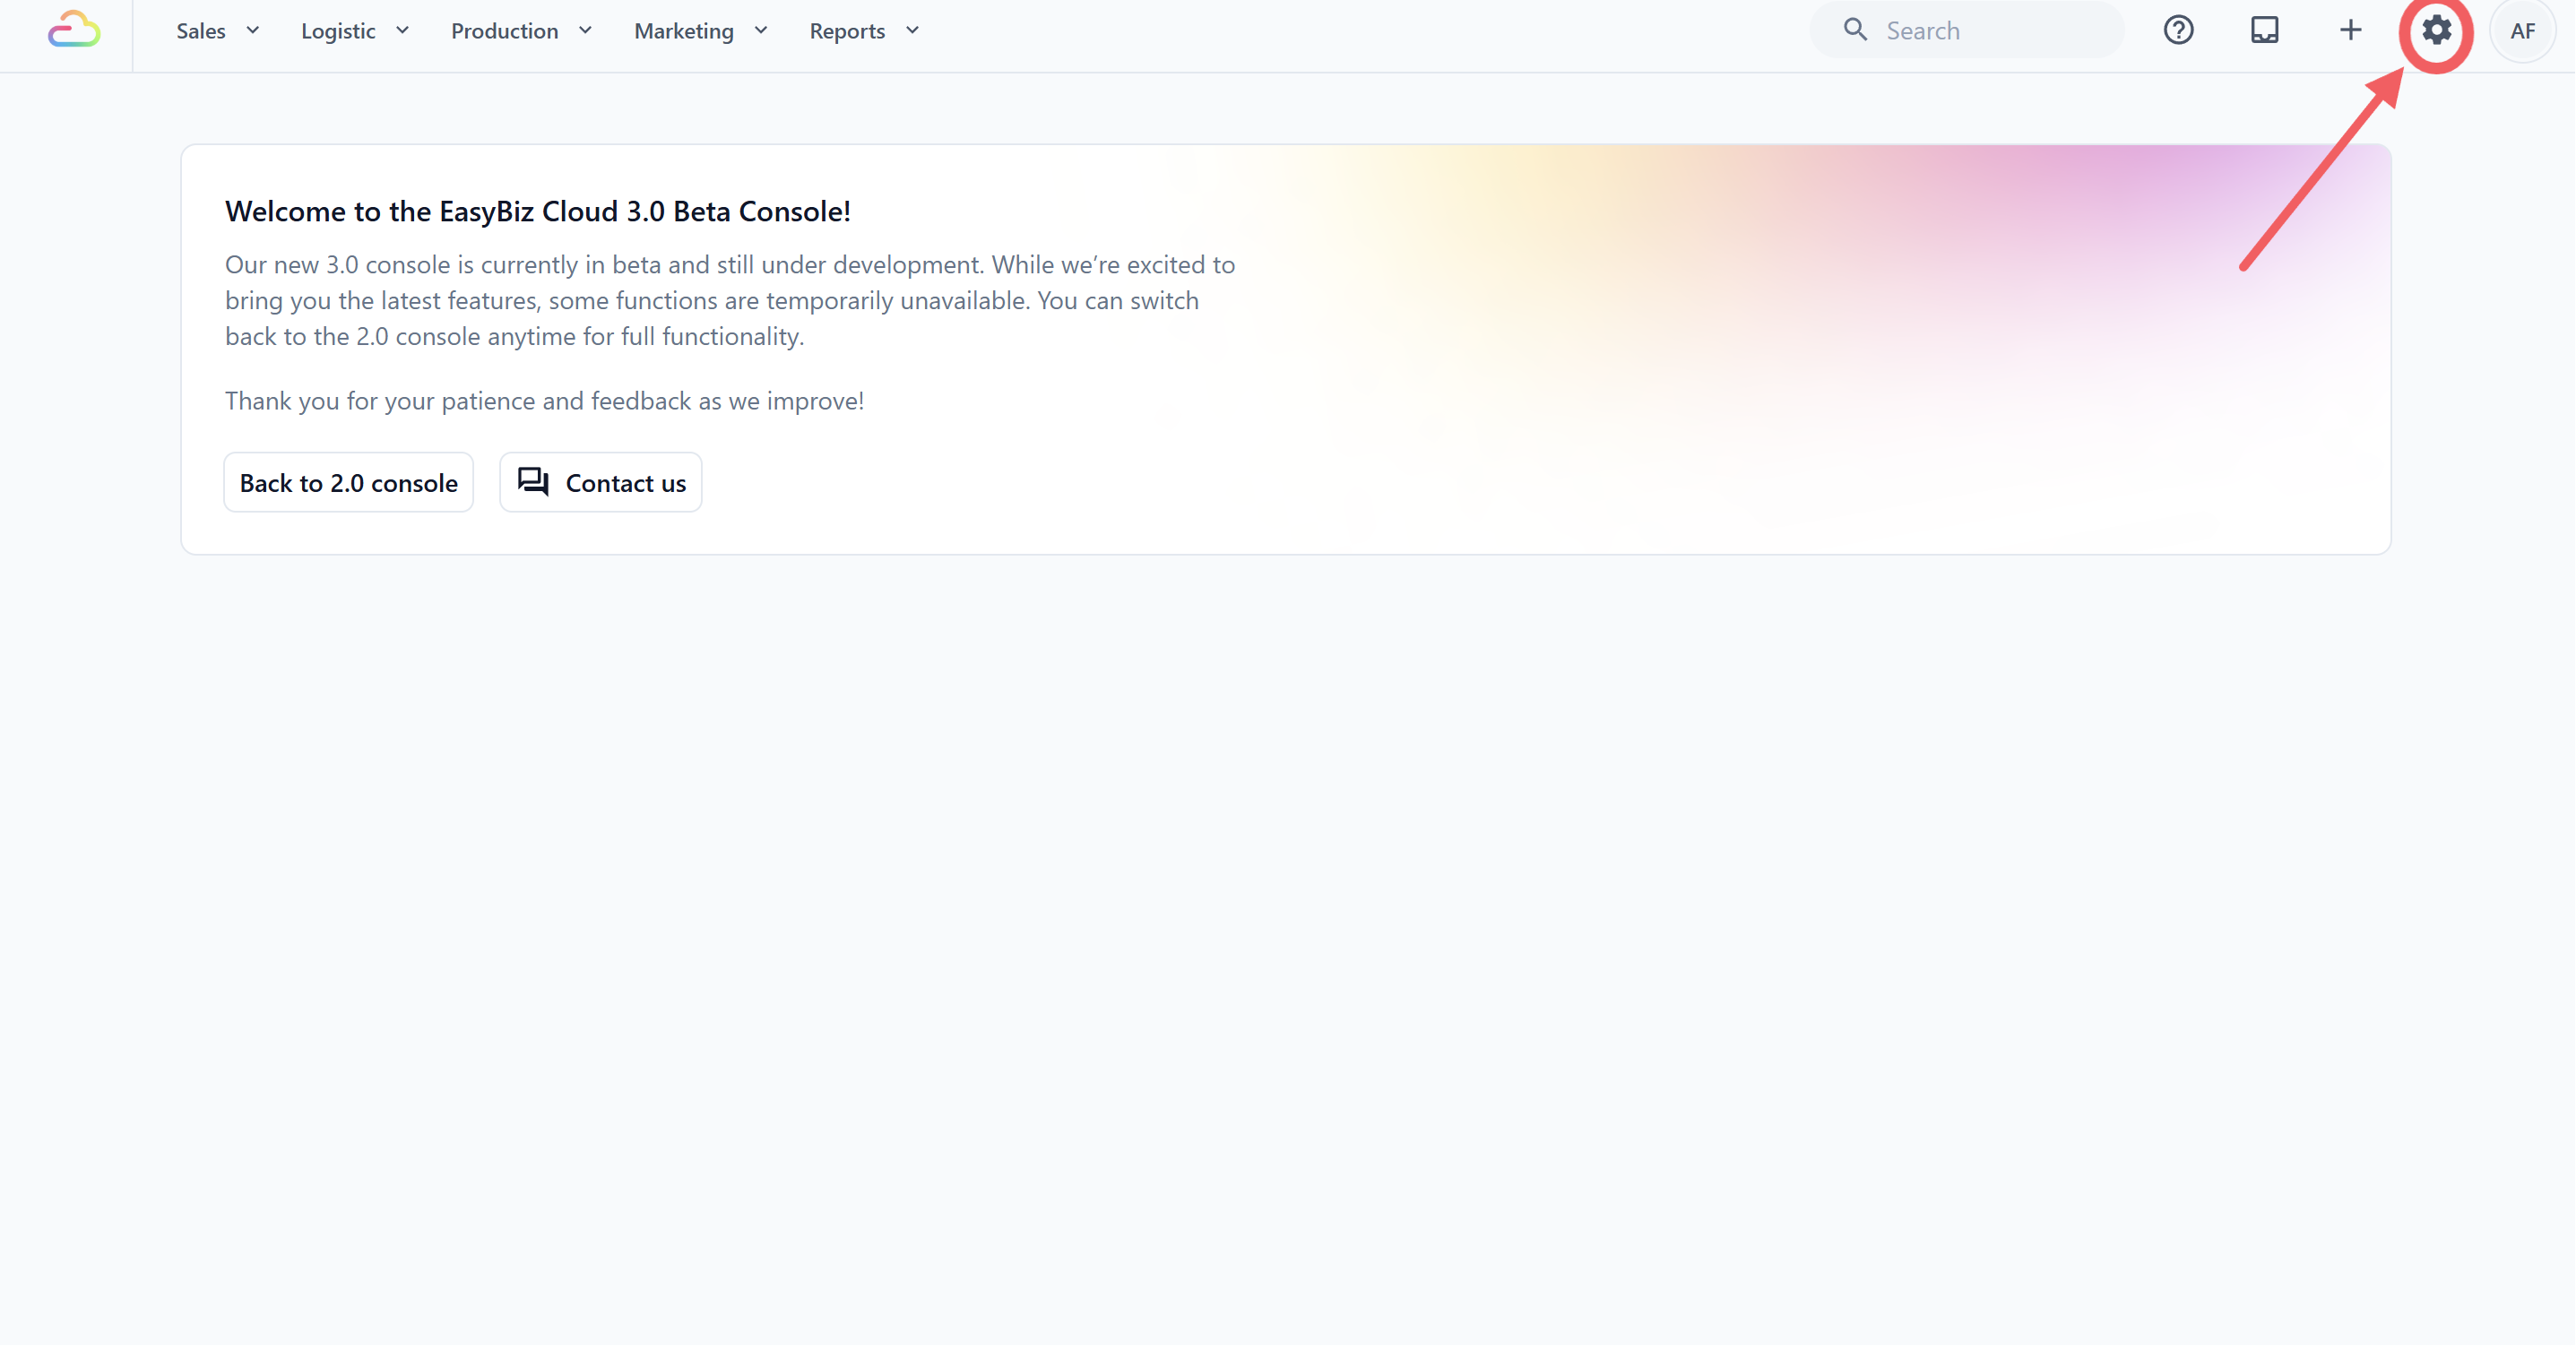
1. Click the ⚙️Settingsicon in the top-right corner.
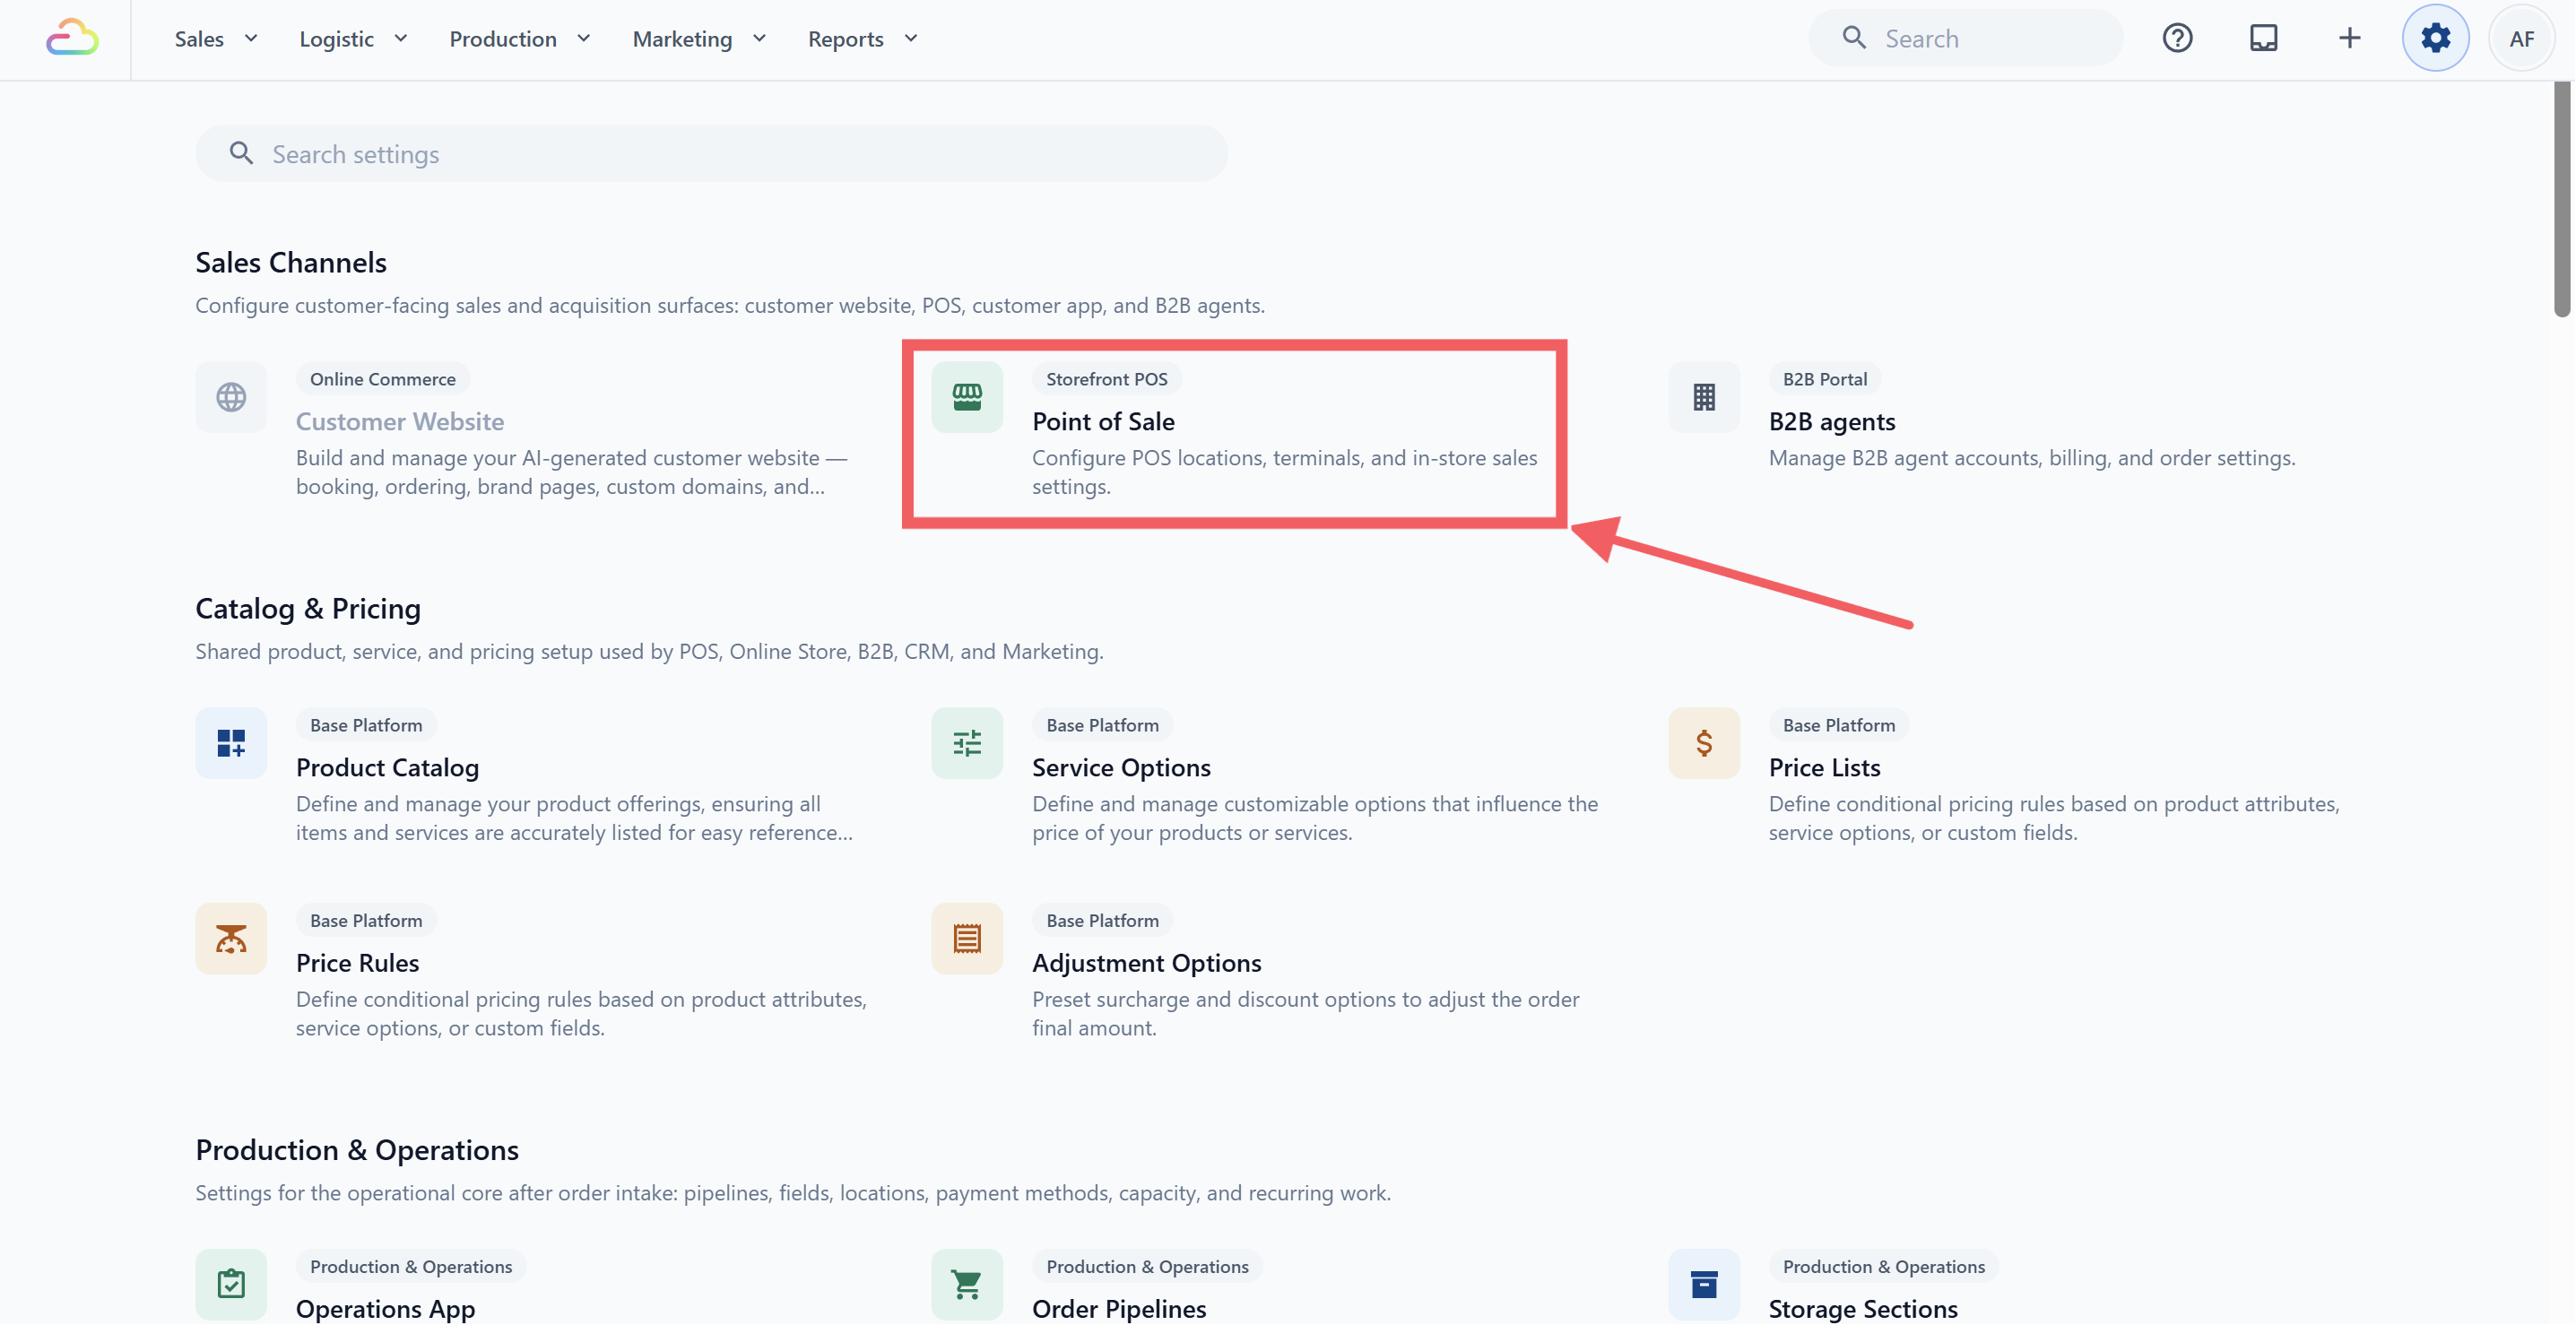
2. Under the Sales Channels section, click Point of Sale.
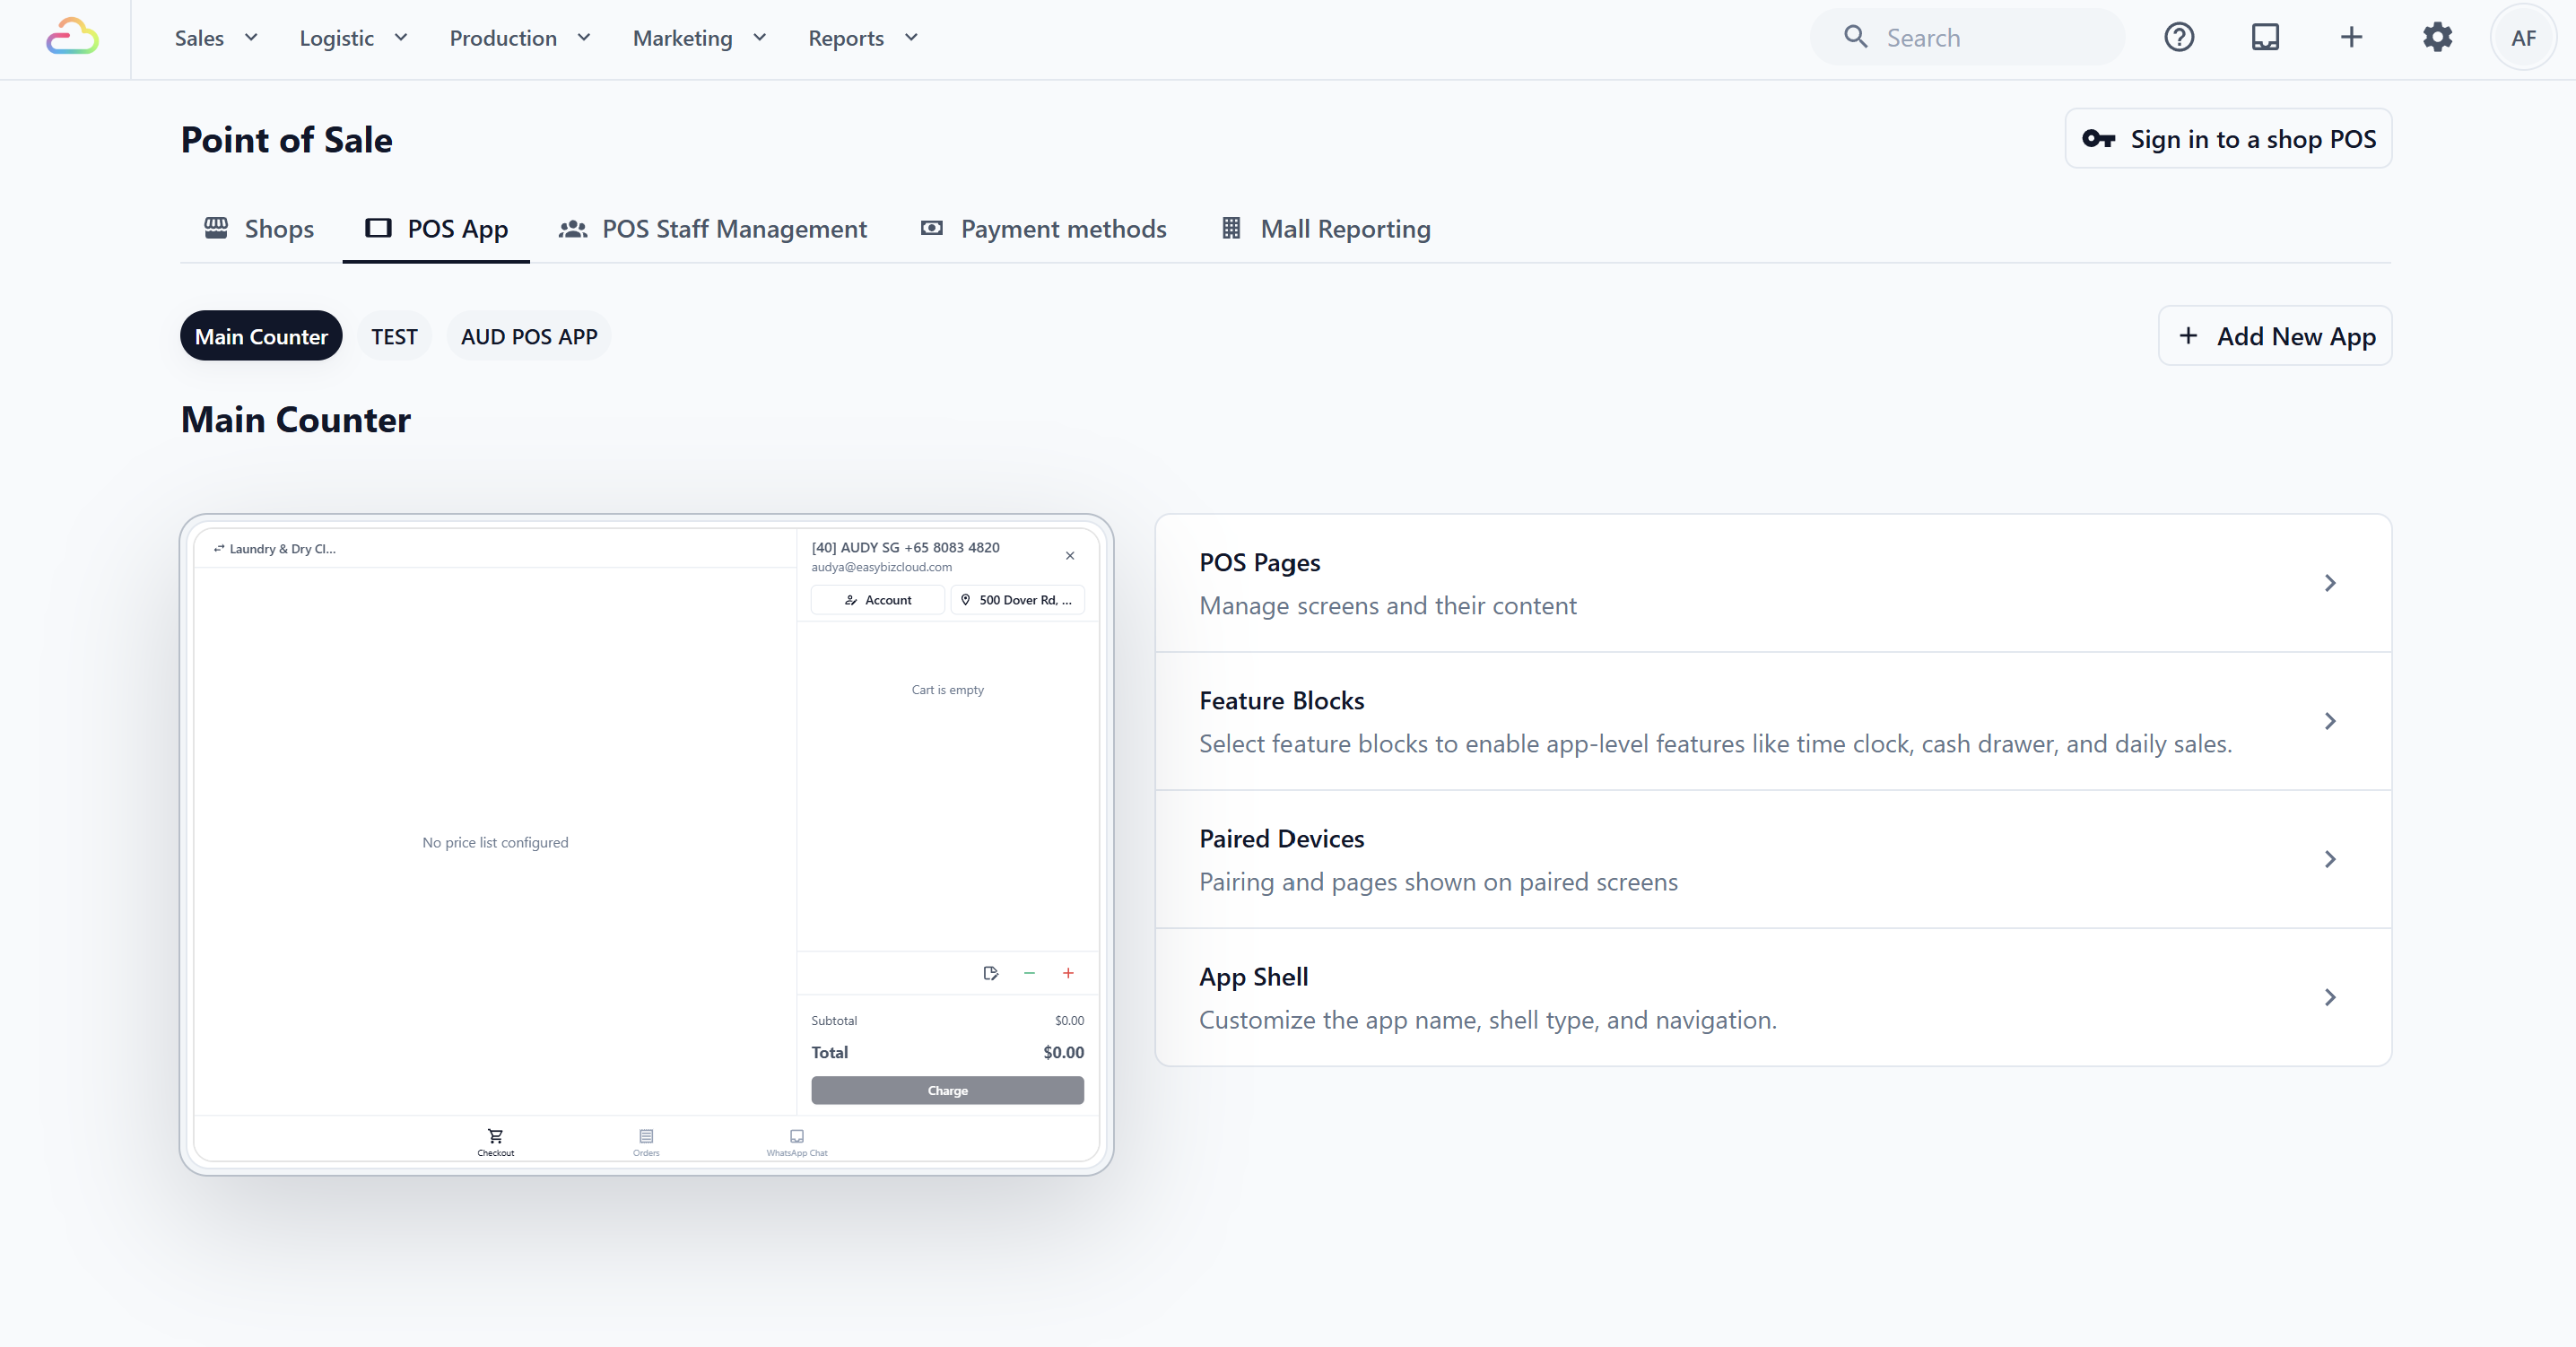
3. Click POS App, then open the app you want to set up.
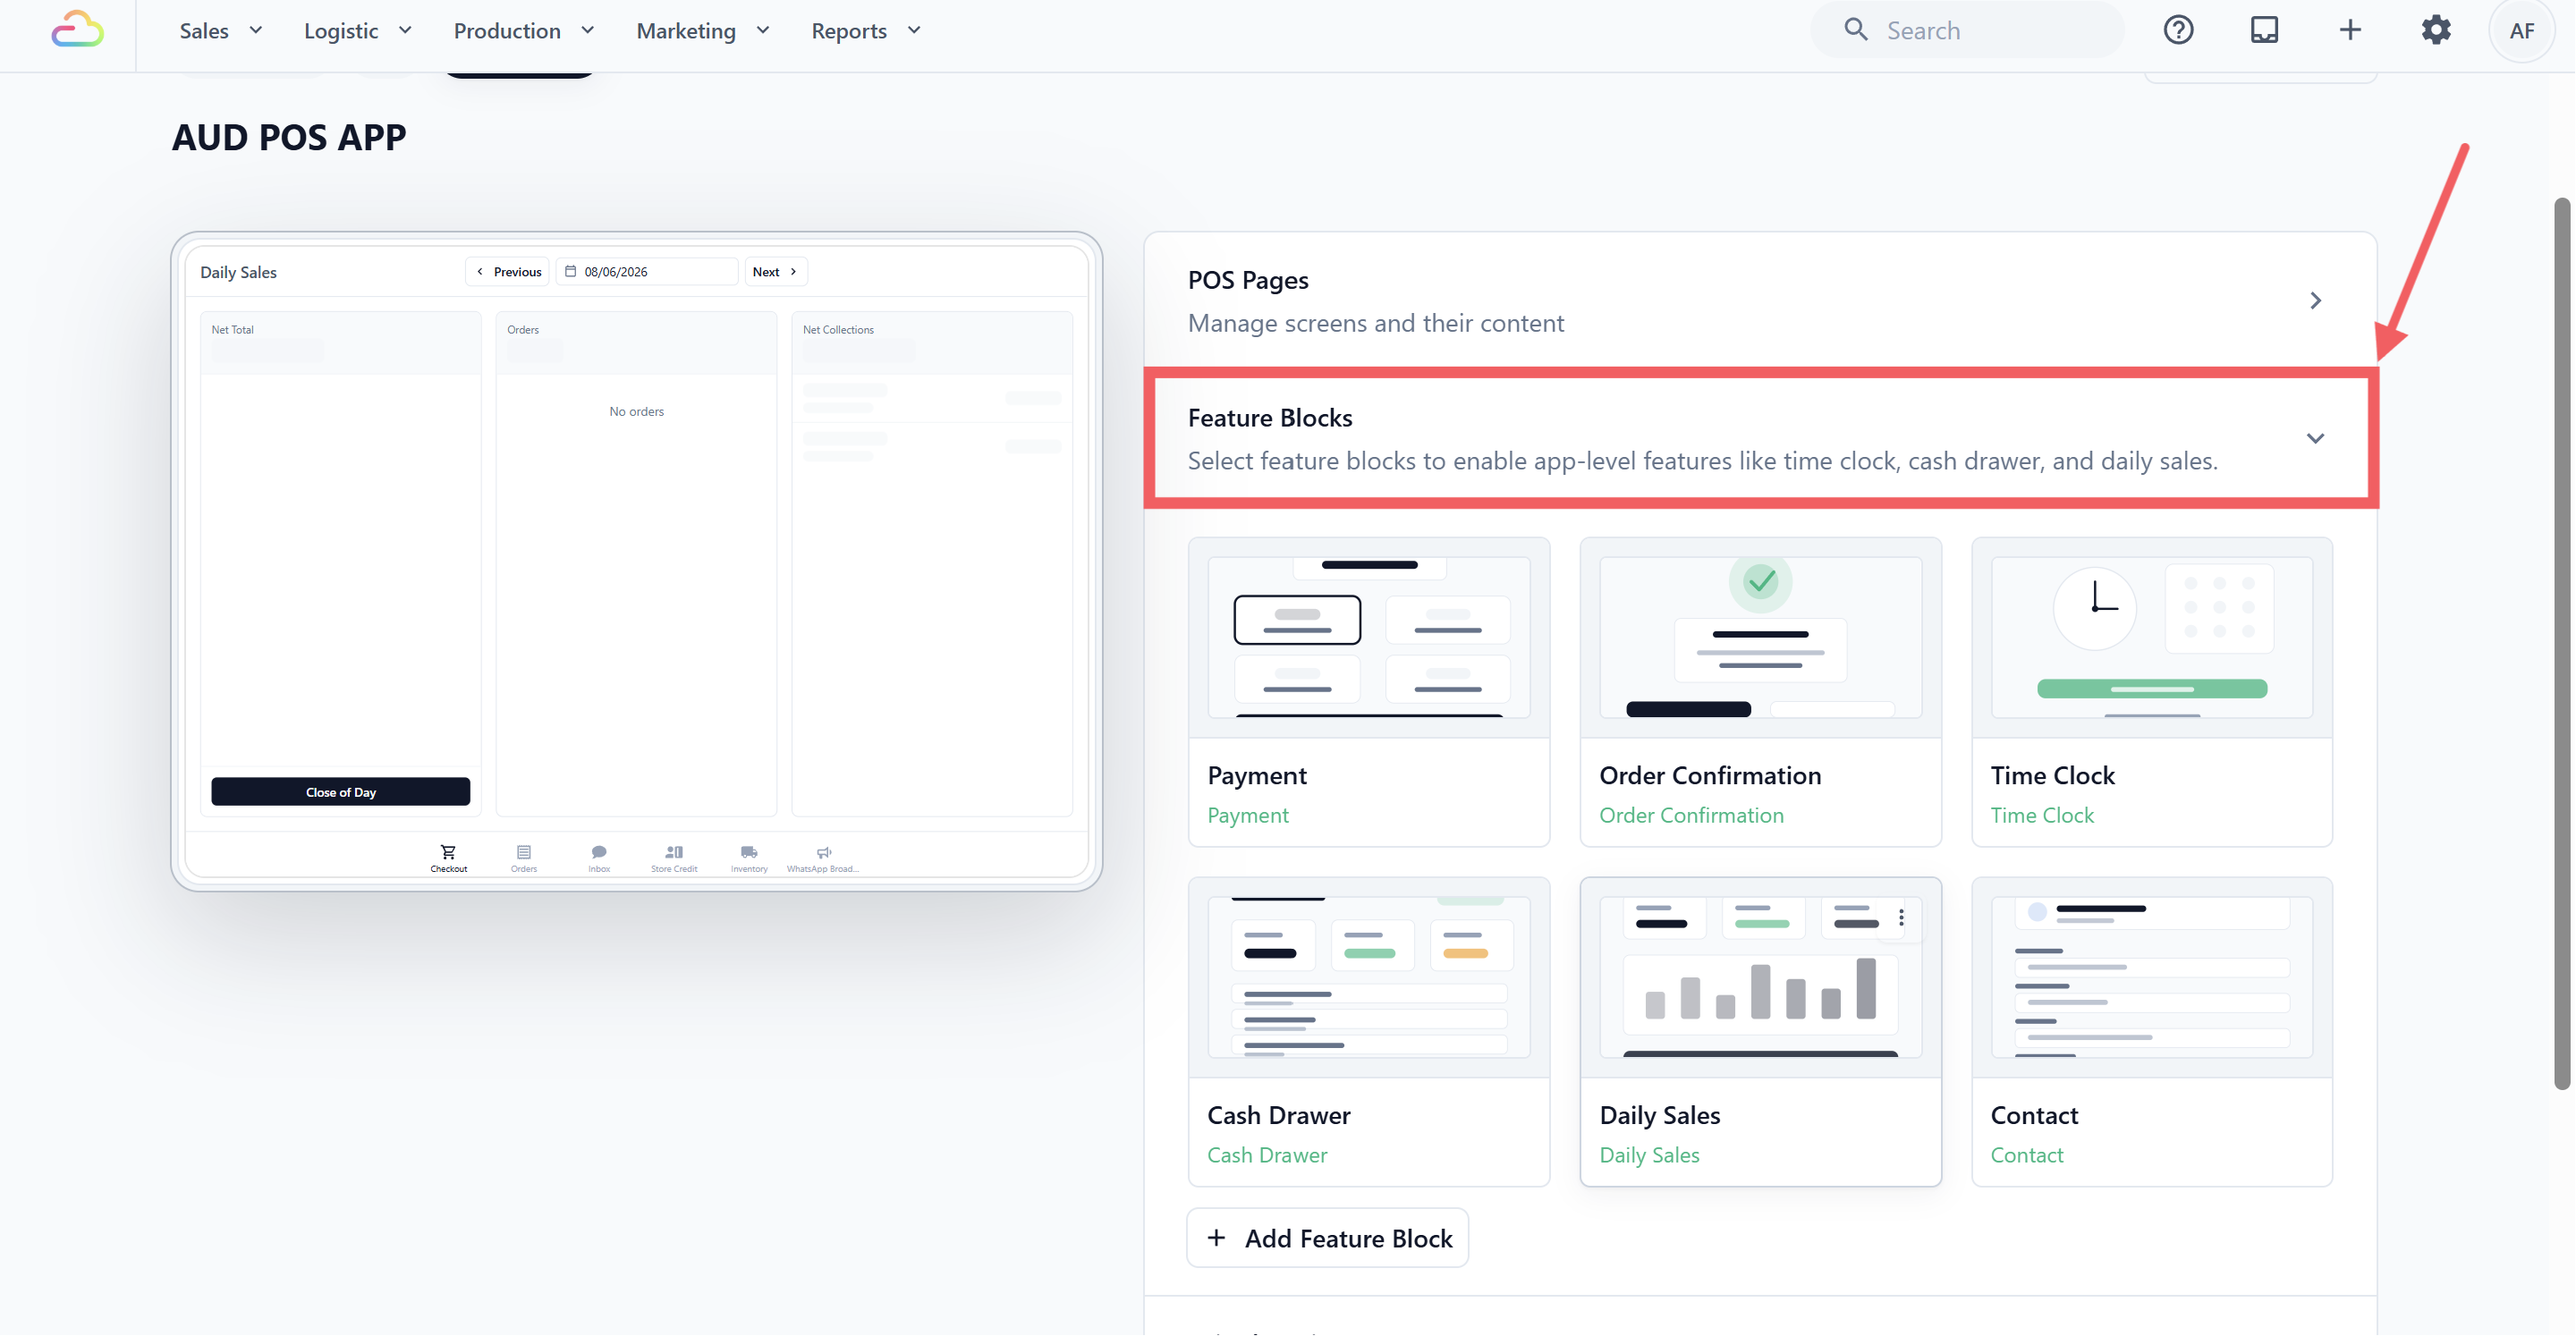
4. In the right-hand panel, click Feature Blocks to expand the section.
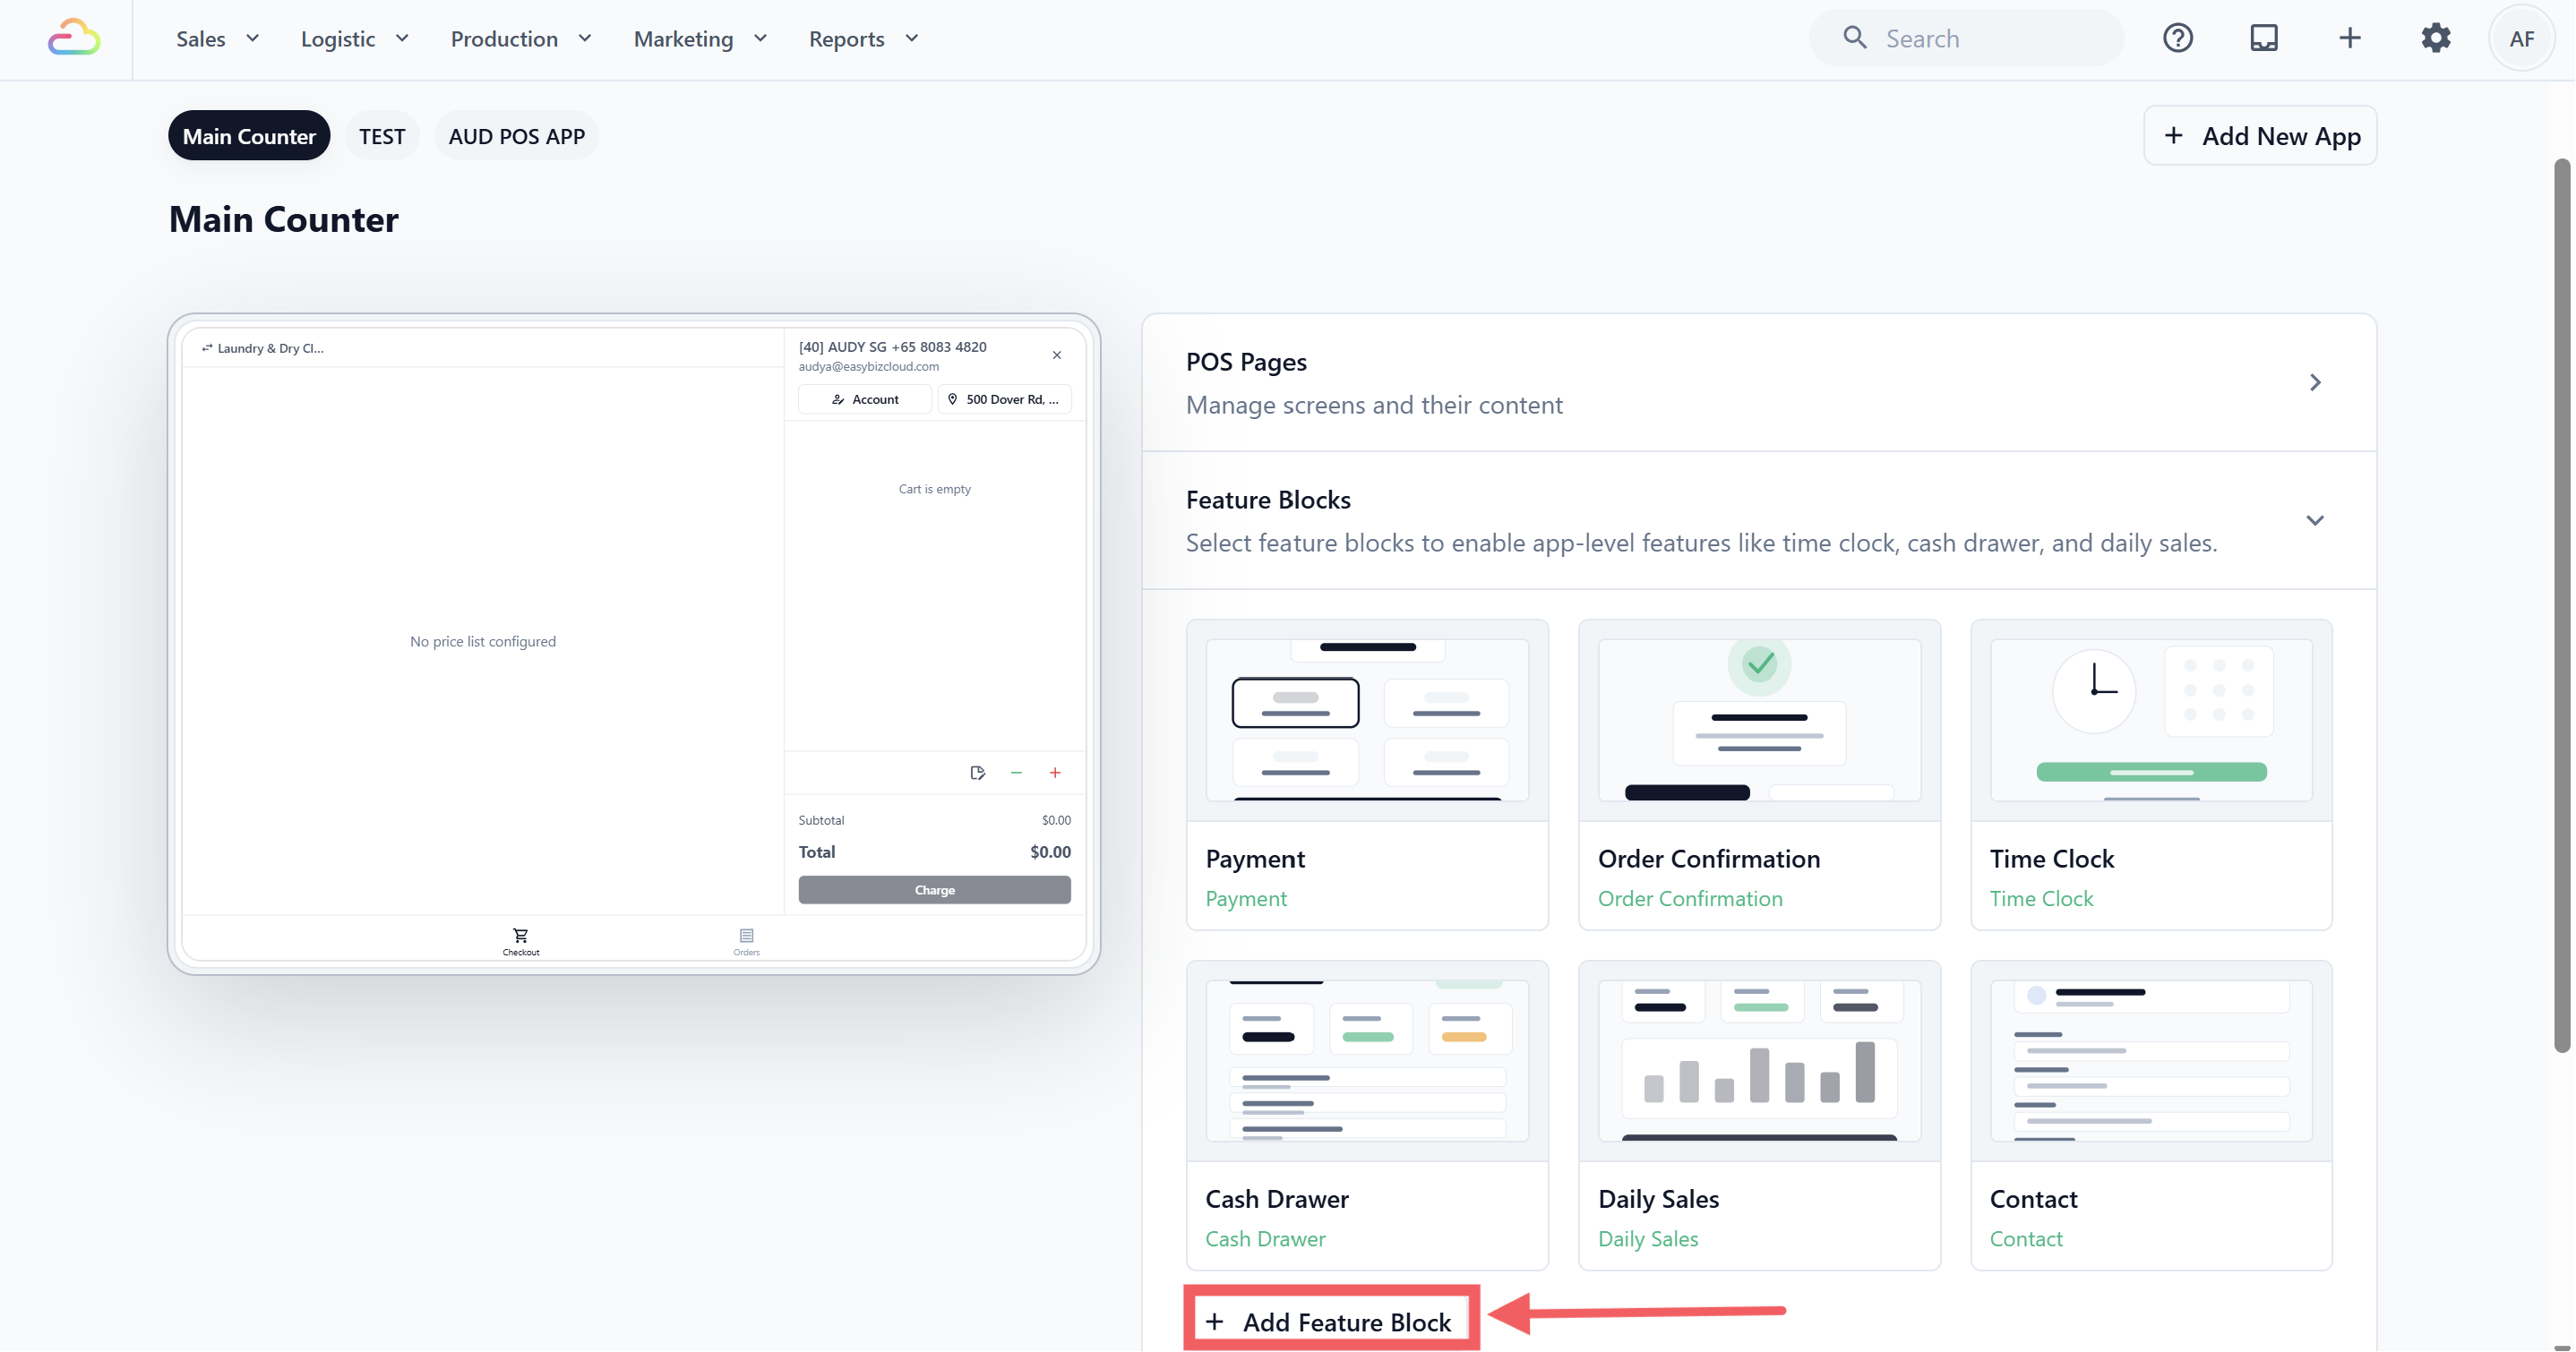
5. Click + Add Feature Block .
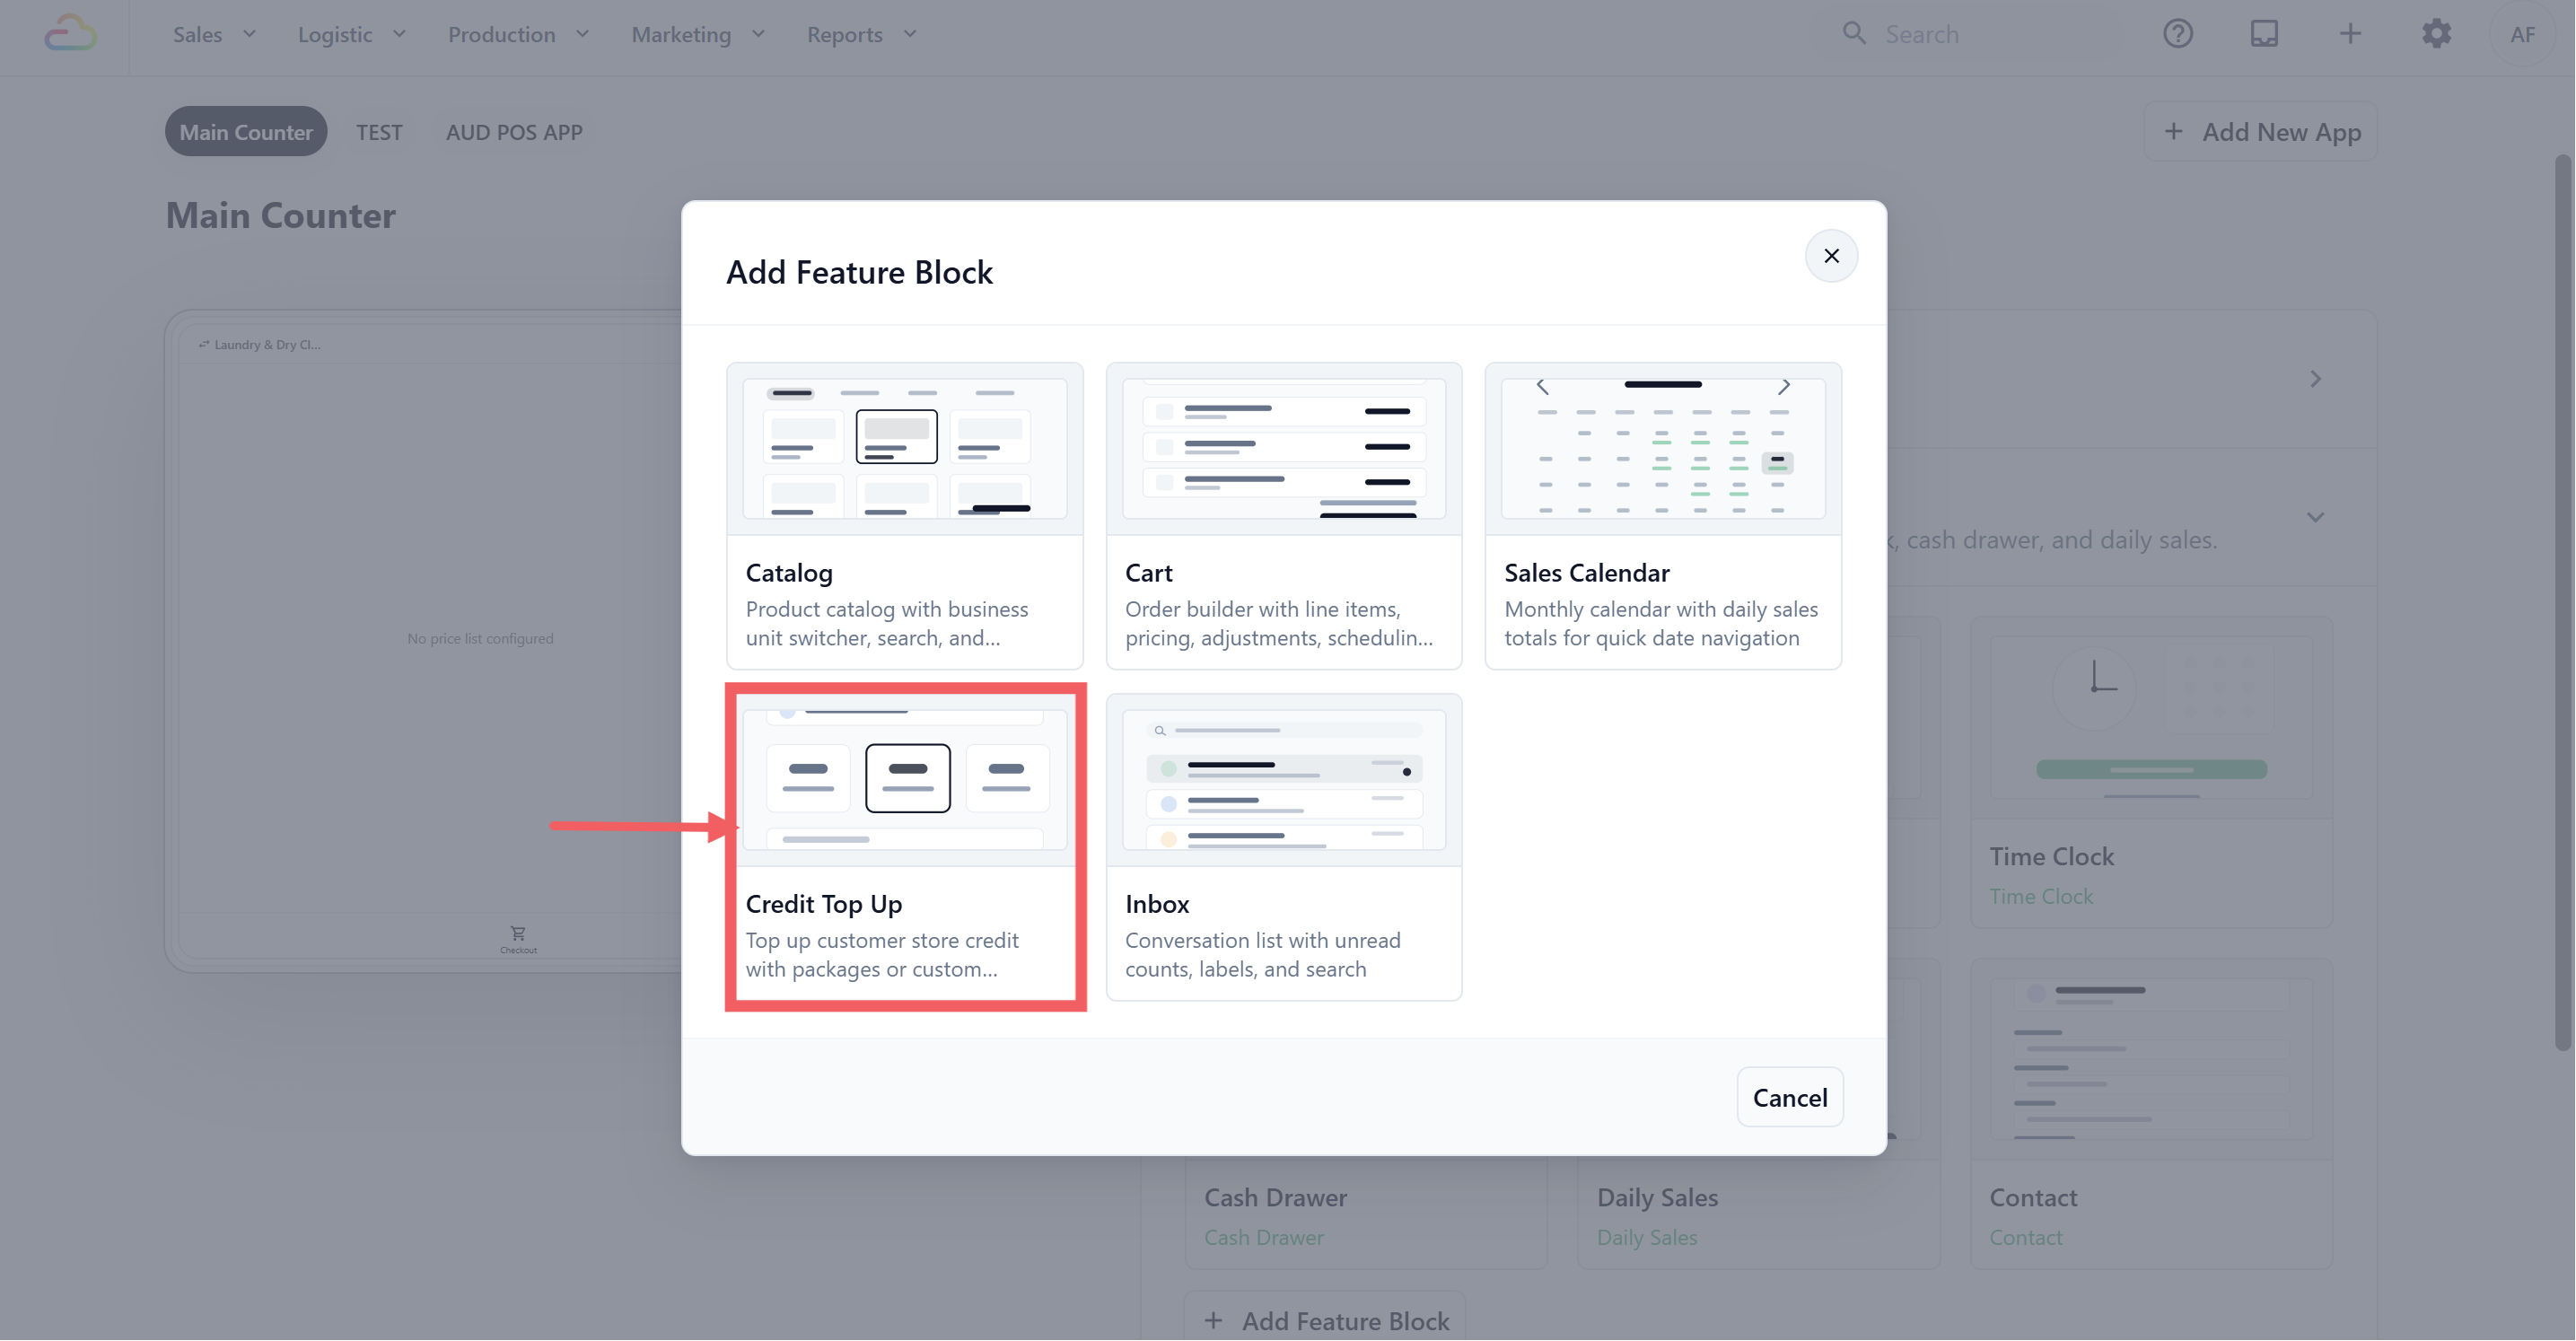
6. In the Add Feature Block dialog, click the Credit Top Up card.
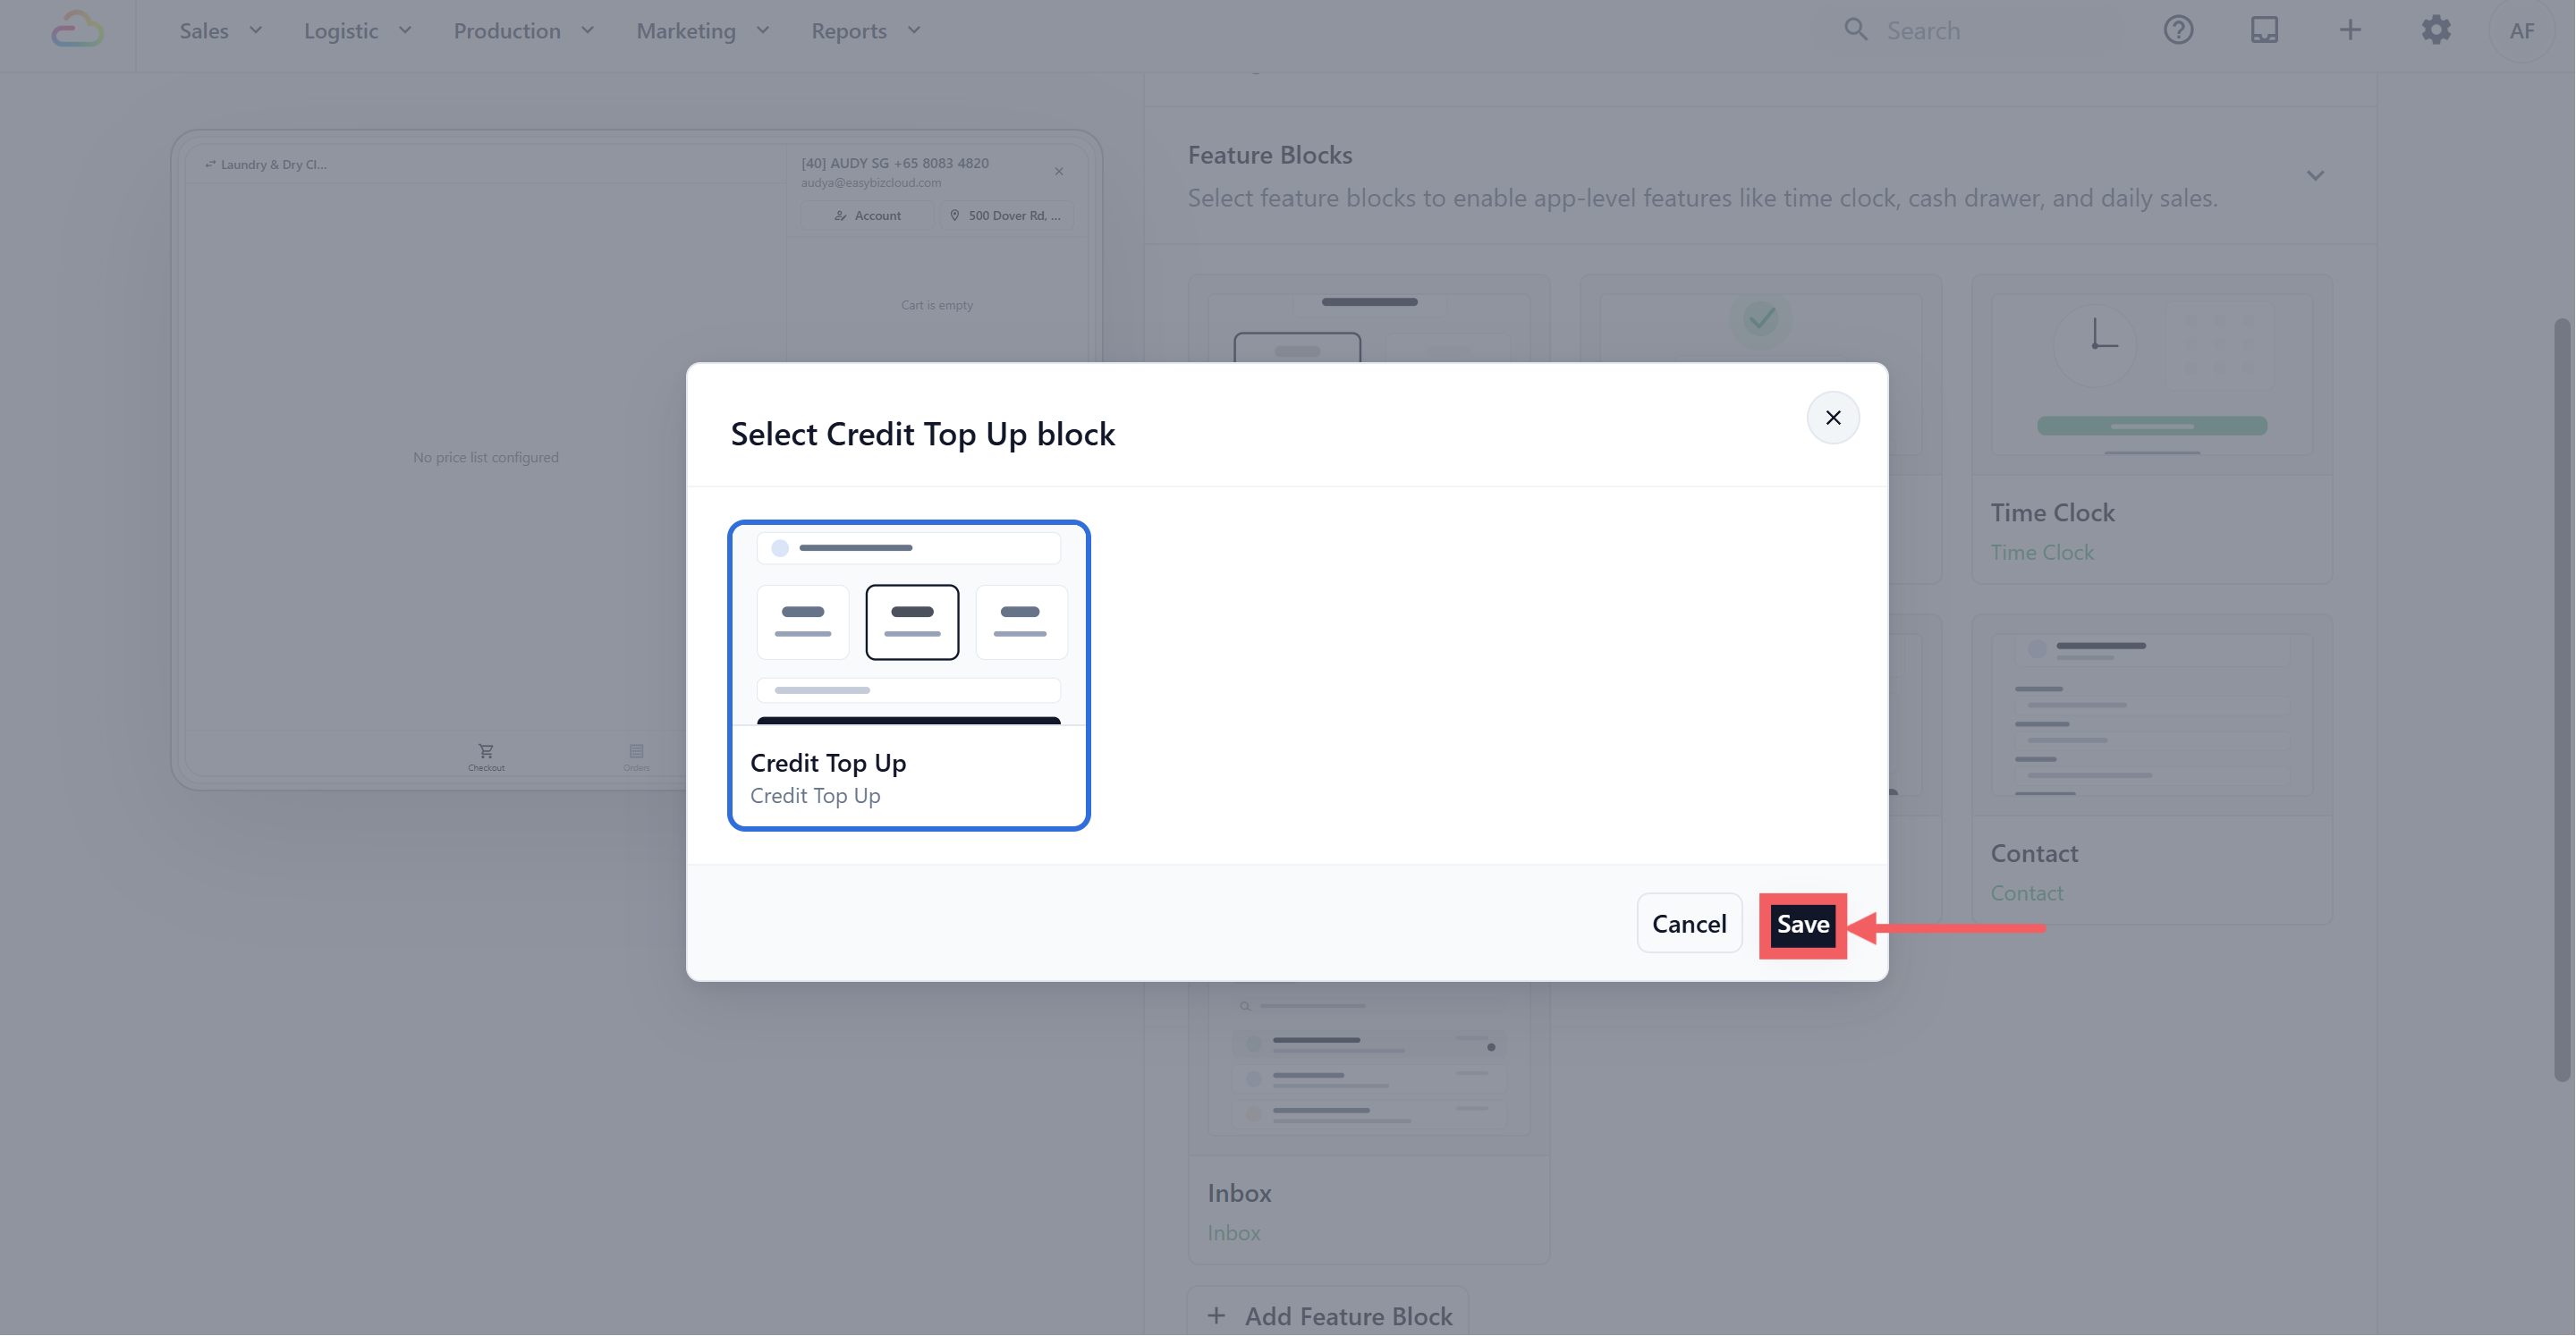
7. Click Save.
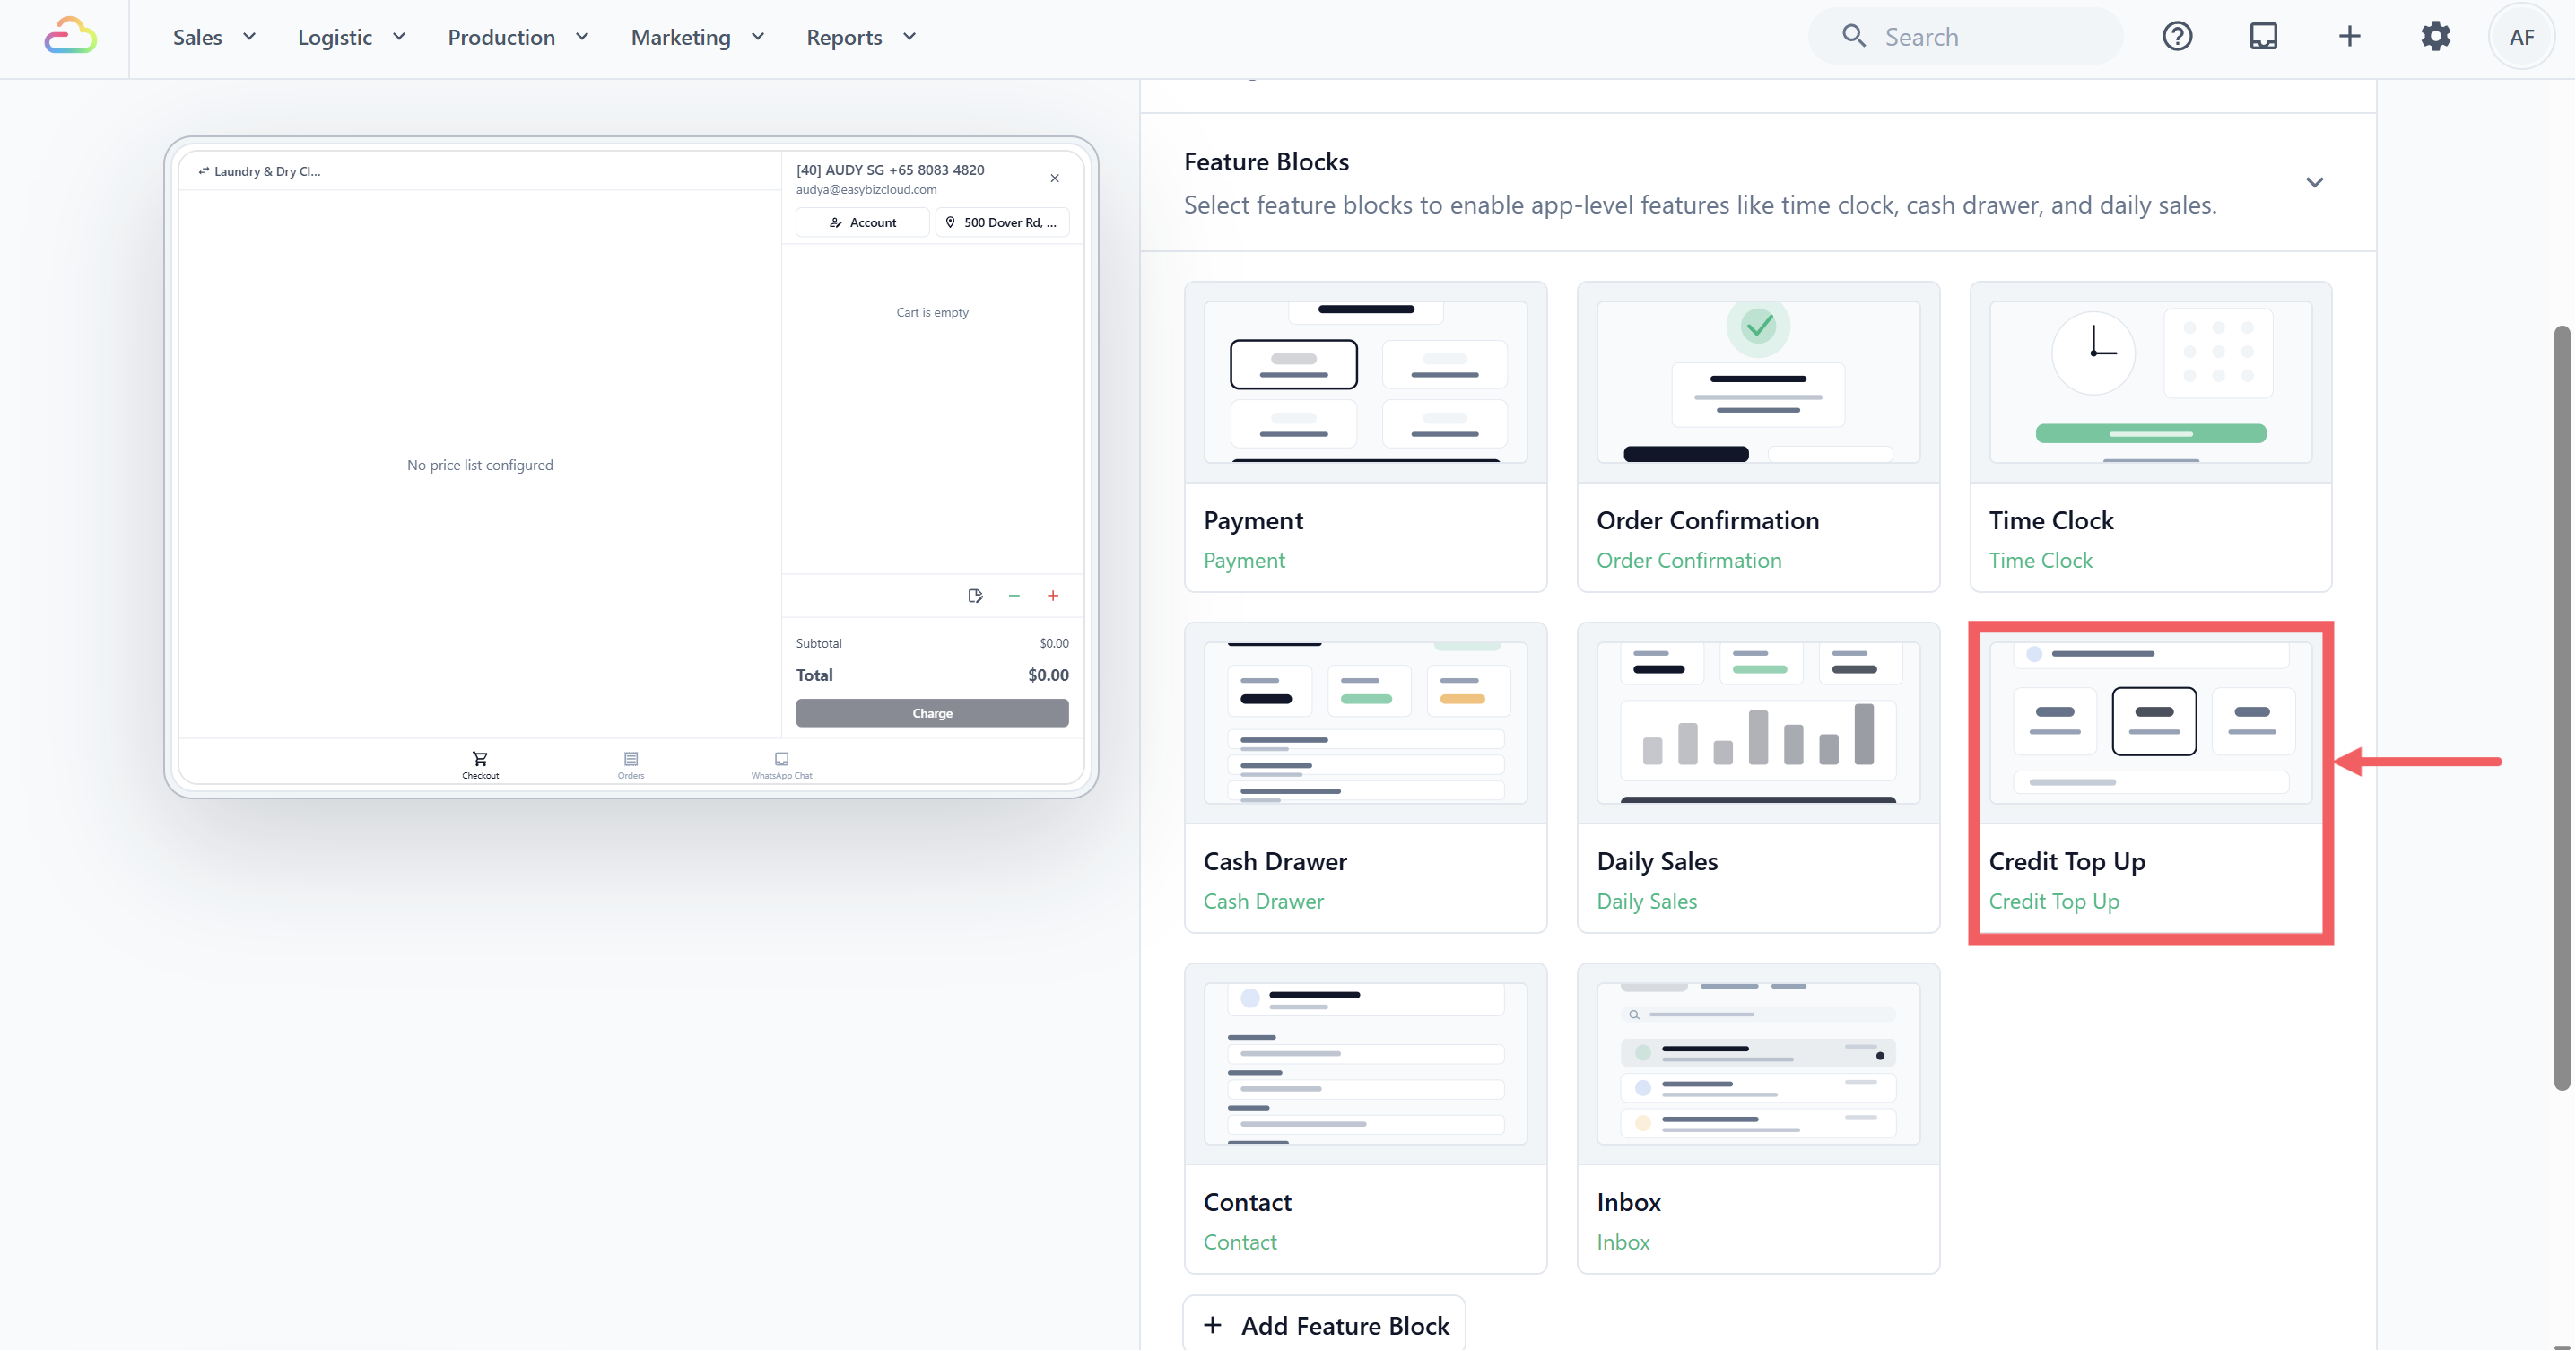
8. Click the Credit Top Up card to open its settings.
### Credit Top up Settings
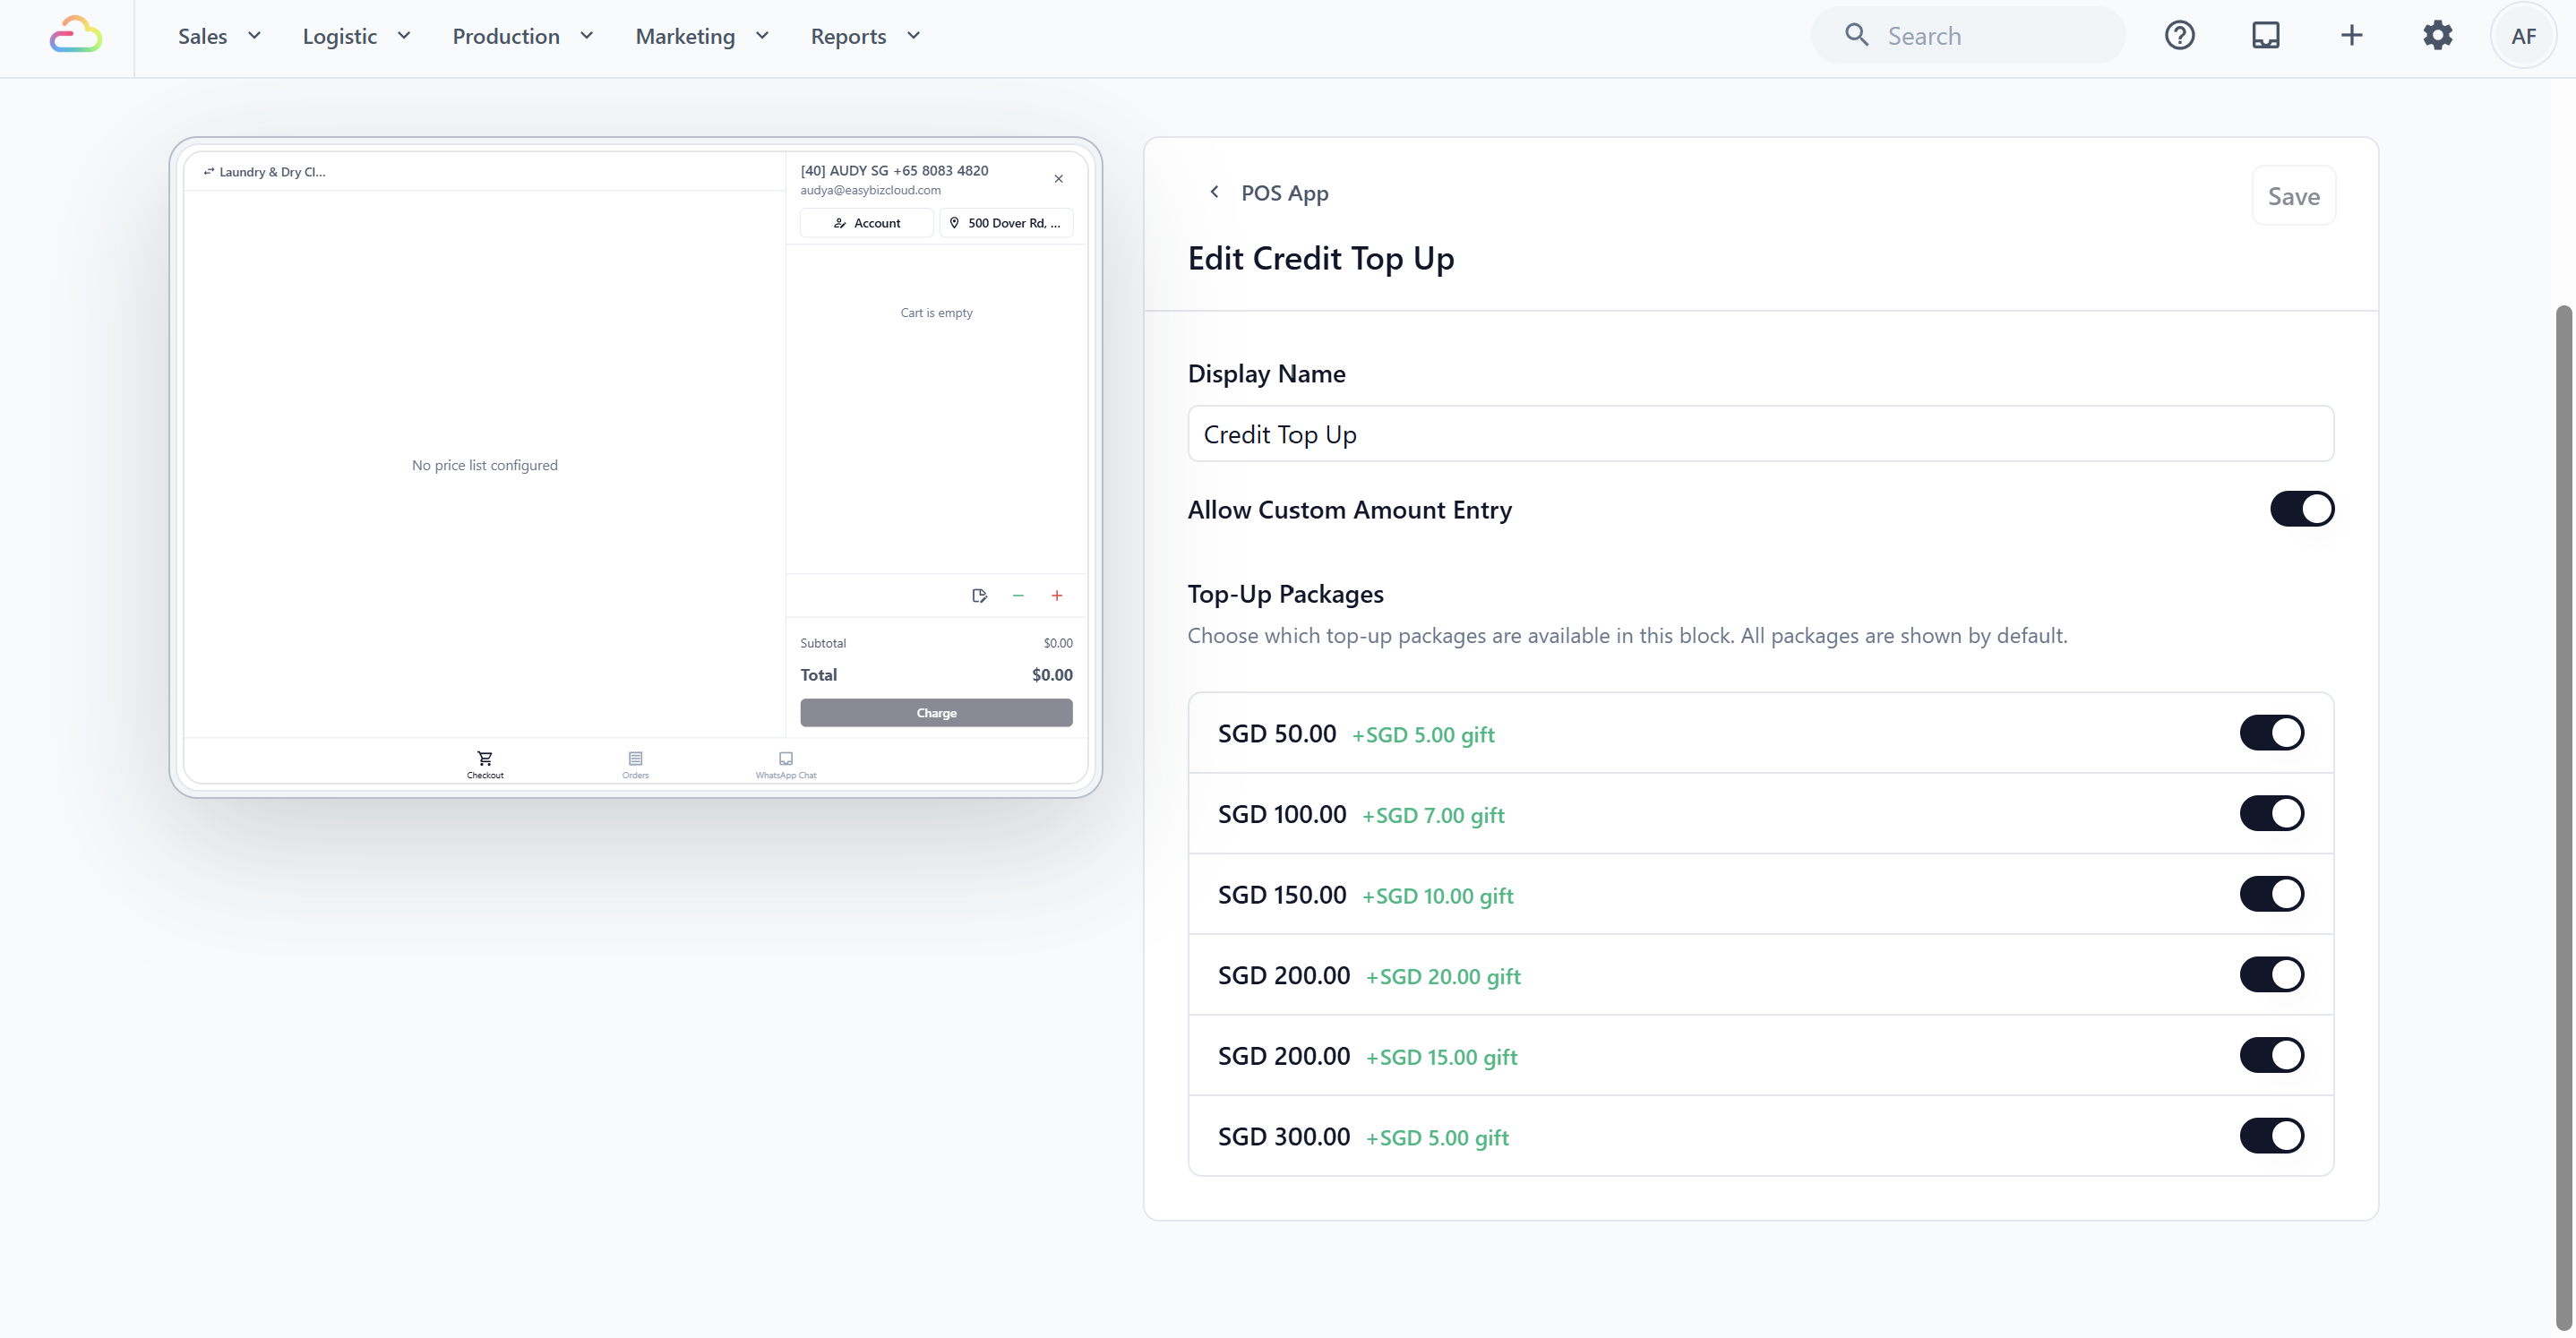
You can access these settings during block creation or anytime by tapping the Credit Top-Up block in your app editor.
| Setting | Default | What it does |
| --- | --- | --- |
| Allow Custom Amount Entry | On | Shows a Custom Amount button so staff can enter any amount instead of picking a preset package. |
| Top-Up Packages | All enabled | Choose which packages appear in this specific block. Useful if different POS stations serve different customer tiers. |
Custom amounts do not receive any gift bonus. Only preset packages can carry gift credit, so leave the packages enabled if you want staff to attach bonuses at top-up.
When you are done, click Save.
---
## Add the Store Credit Page to Your POS
The Store Credit page is the actual screen your staff will tap to load customer wallets and process topups. It is a split-screen layout: credit wallets list on the left, top-up panel on the right. You need to add this page first, then it can be opened from the POS tab bar.
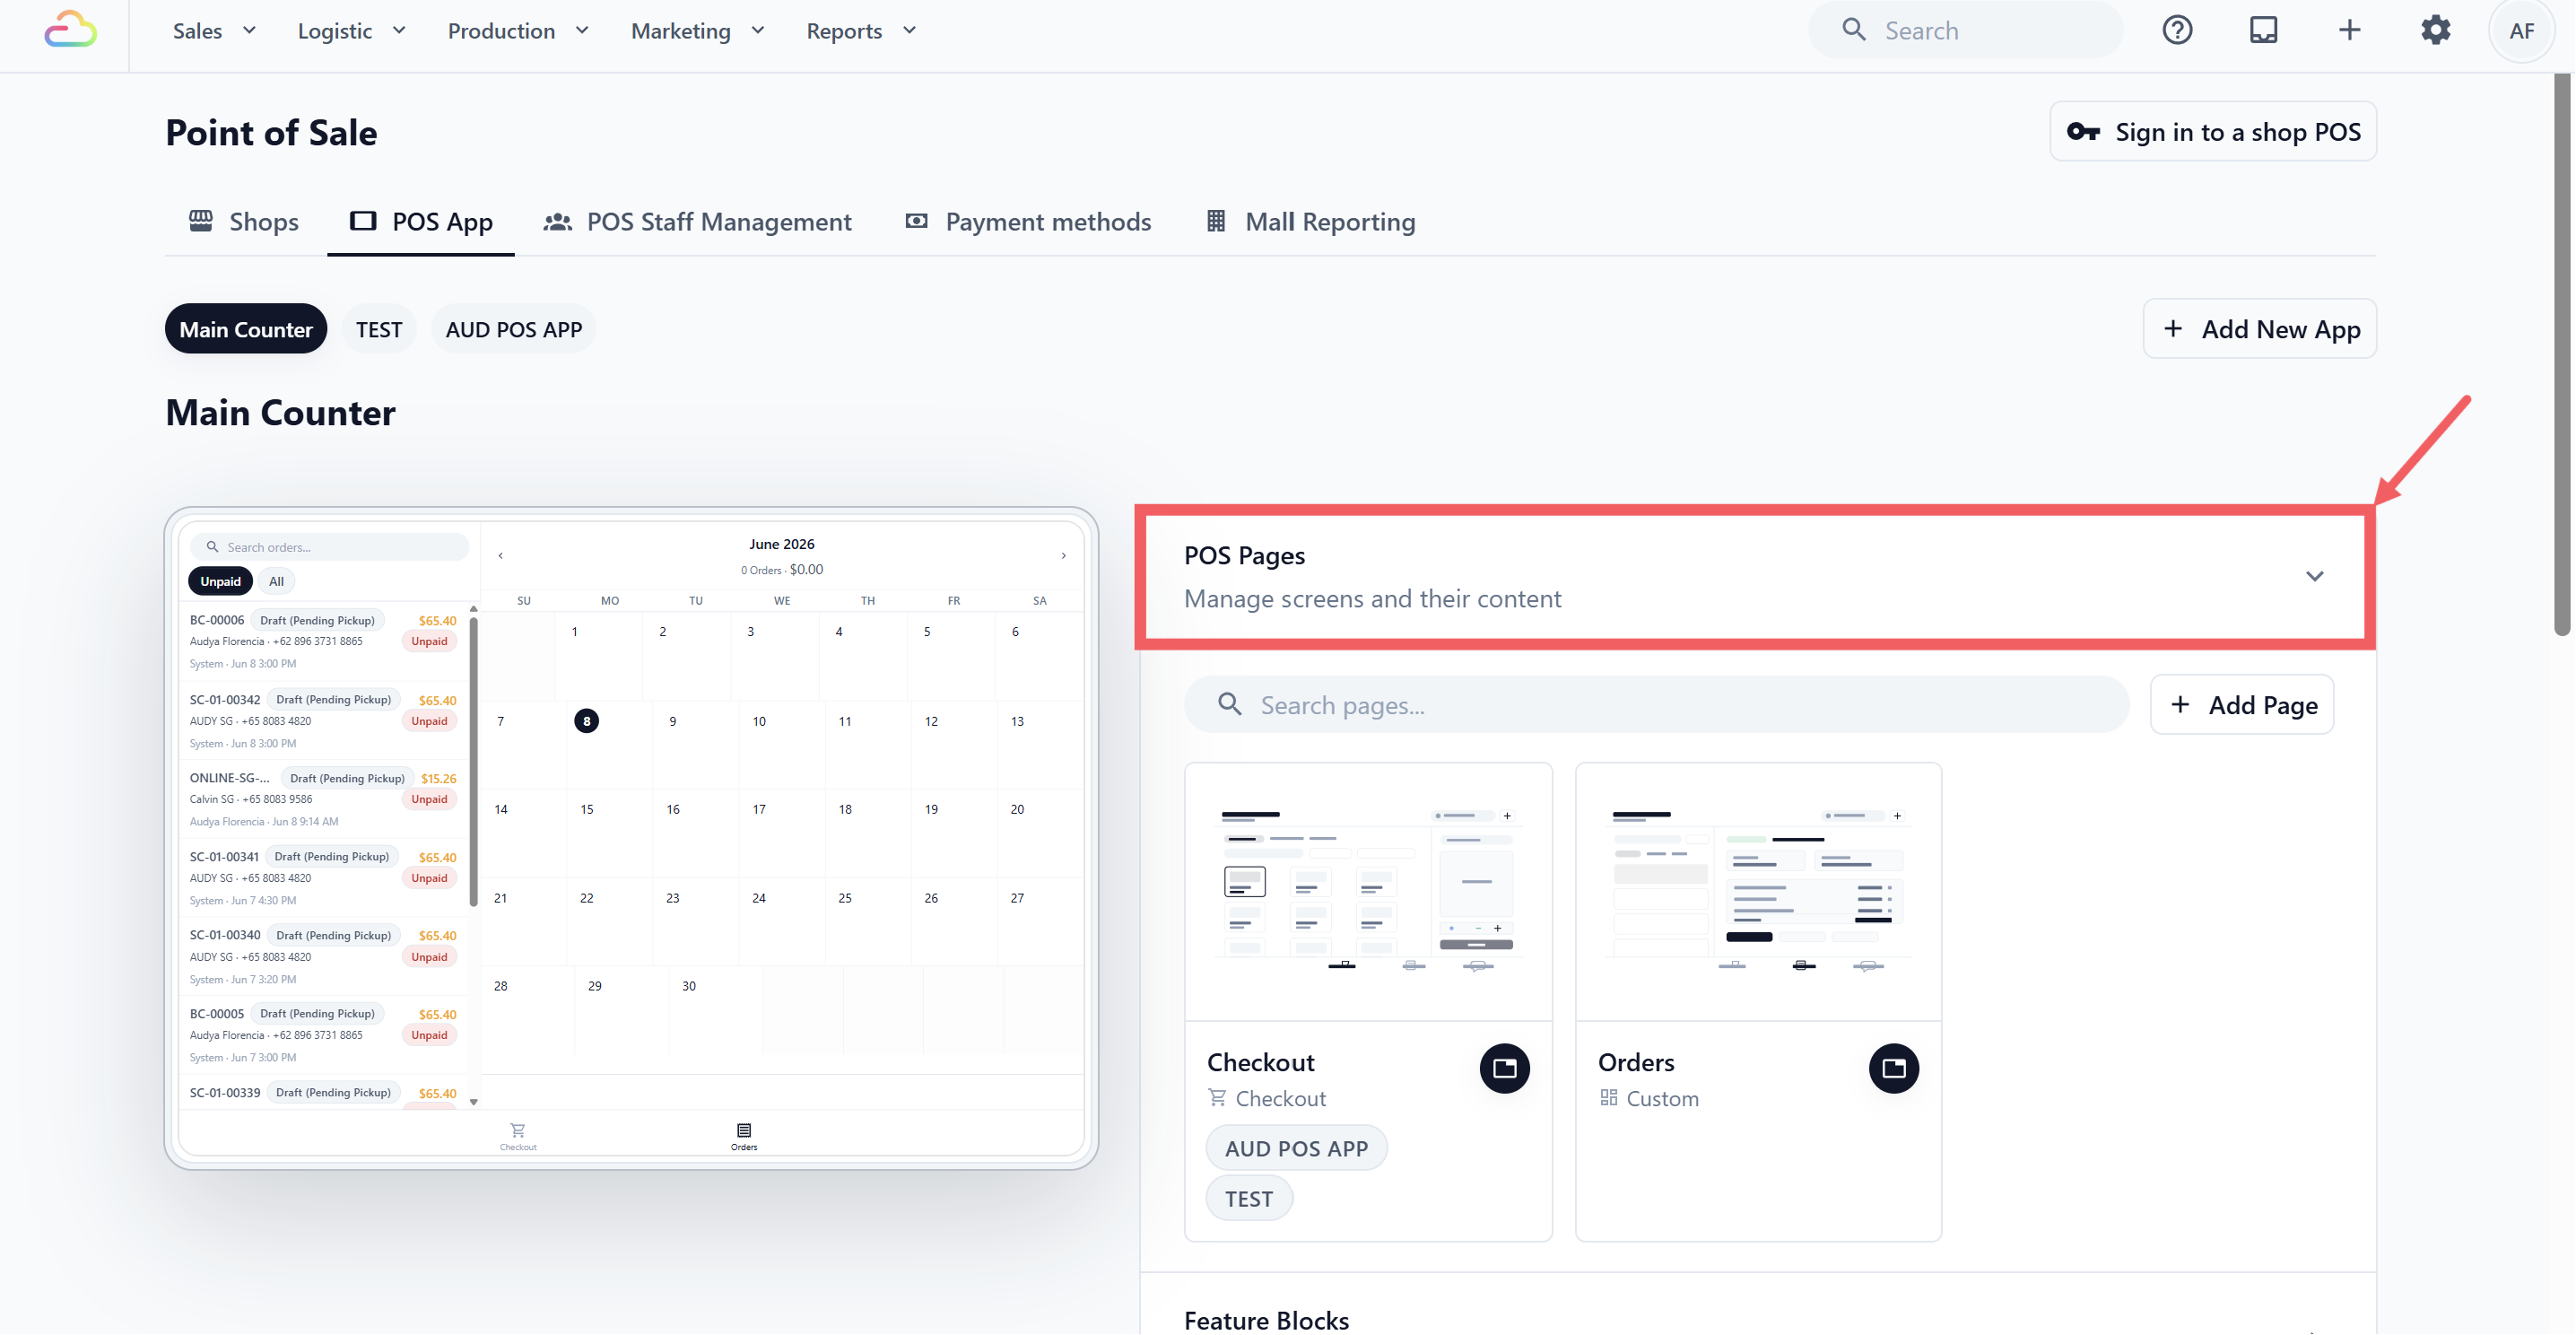
1. On the POS App page, click POS Pages to expand the section.
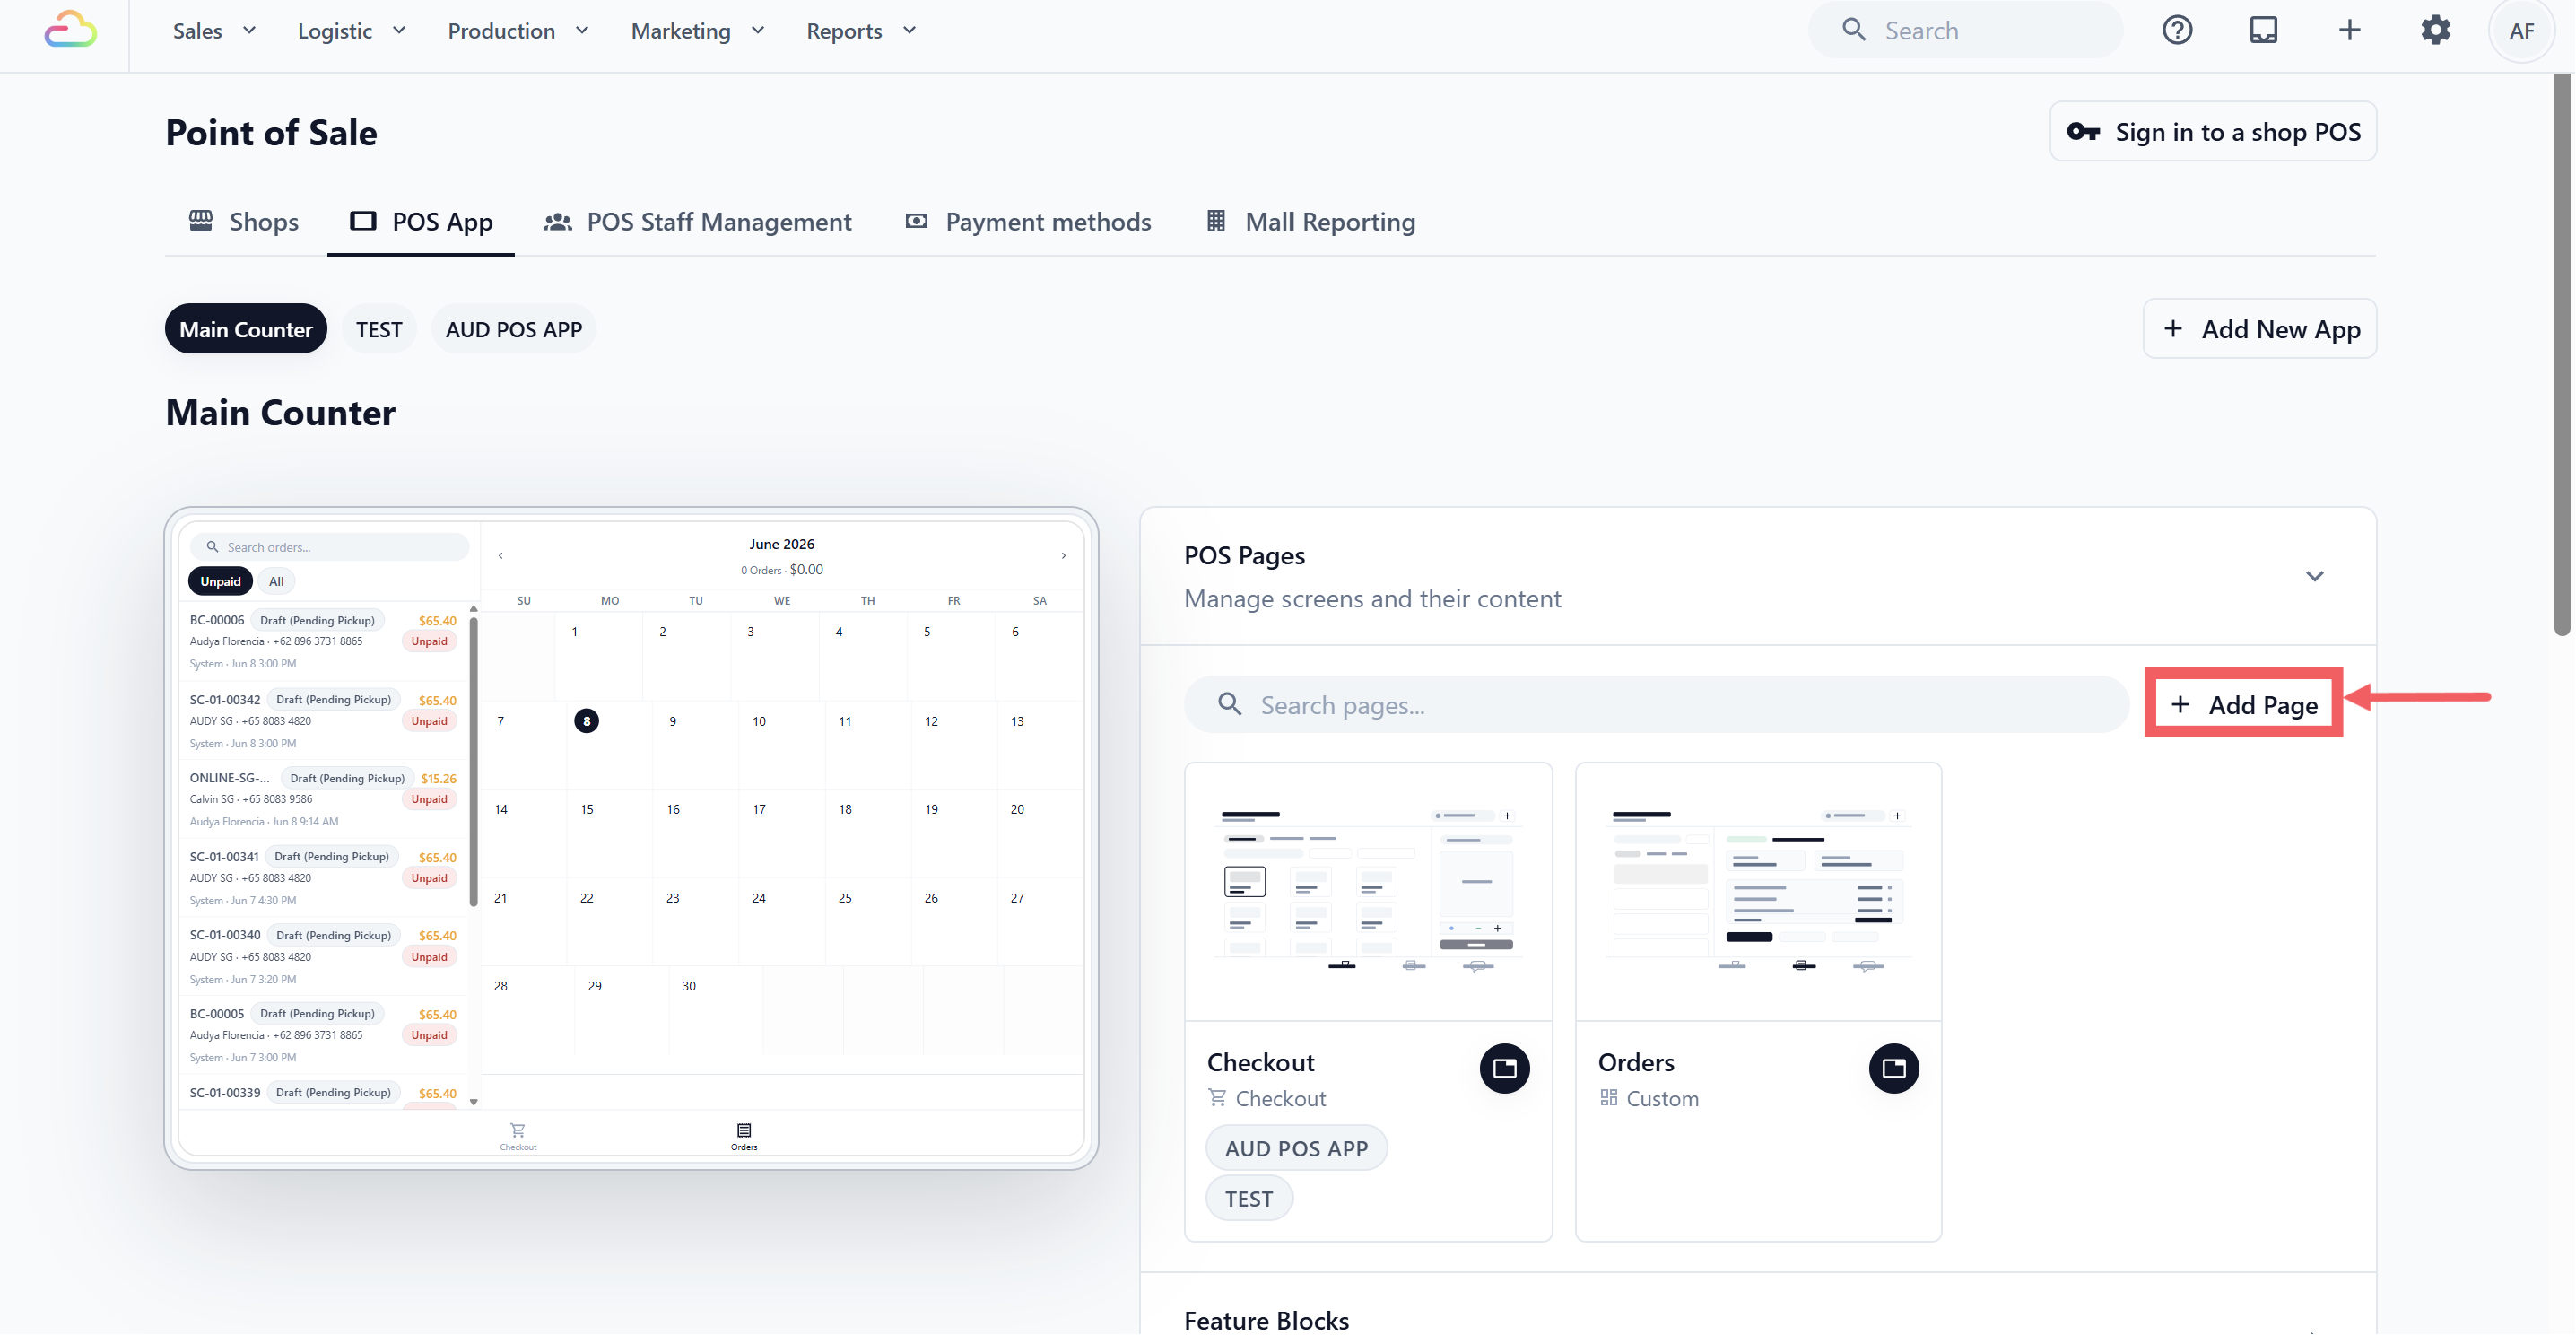
2. Click + Add Page .
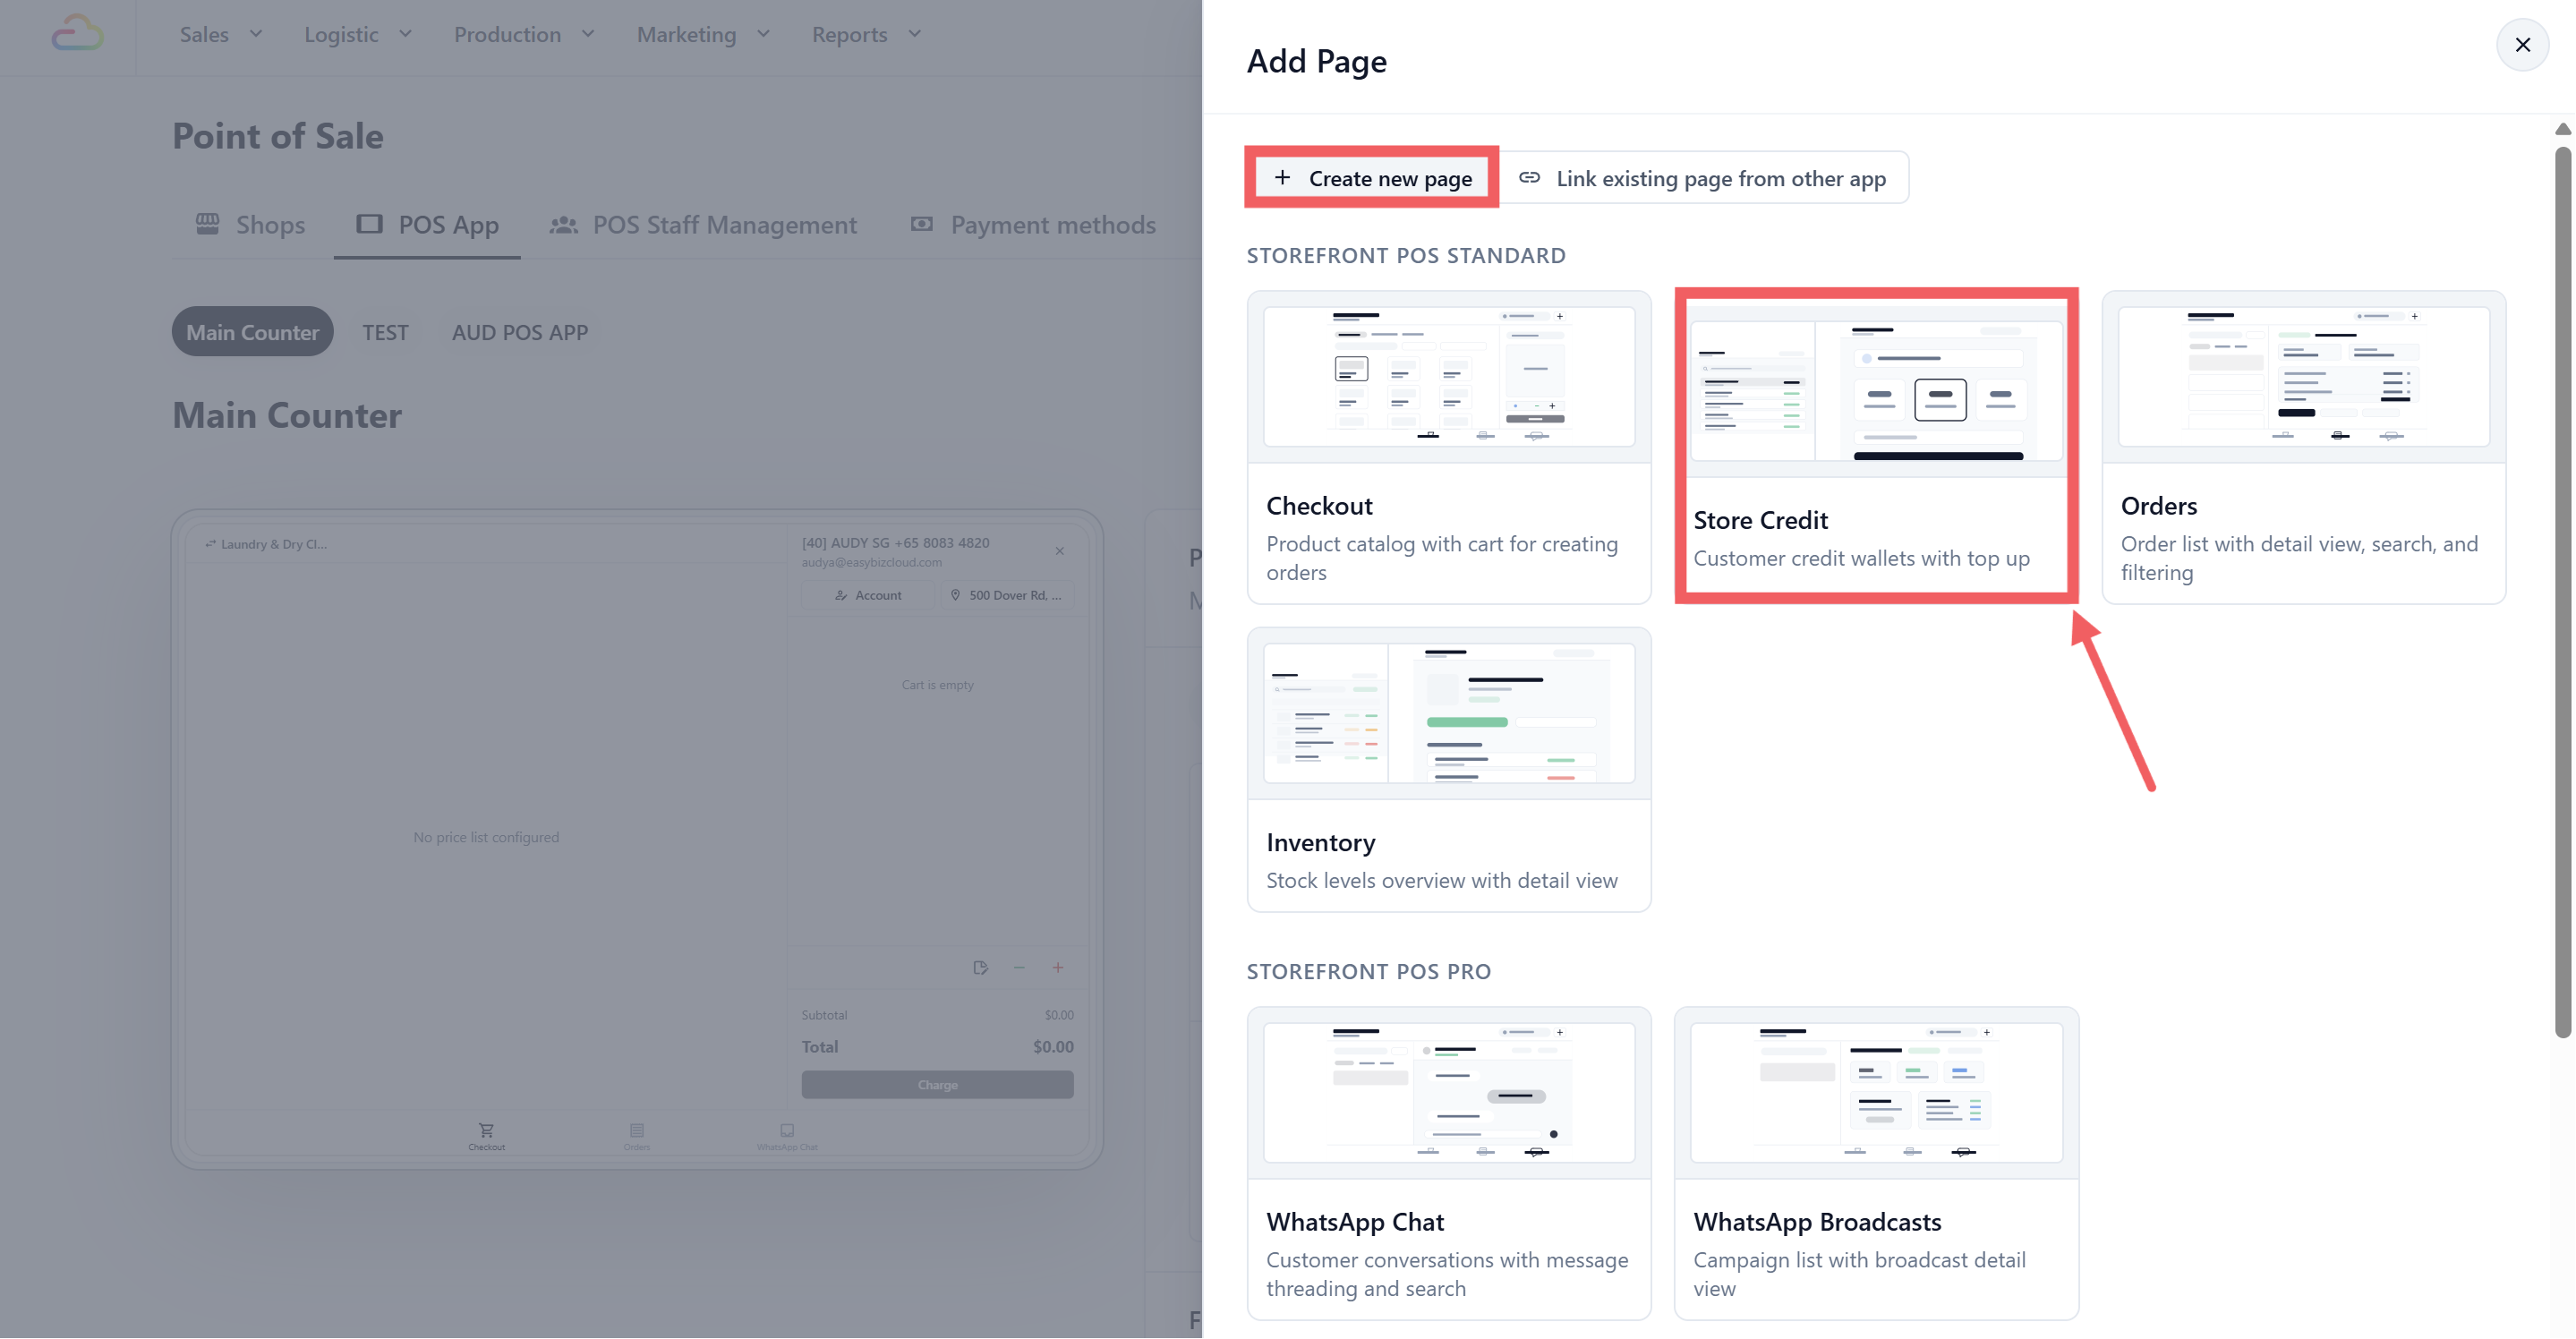
3. In the Add Page drawer, keep the Create new page tab selected.
4. Scroll to the Point of Sale Standard section and click the Store Credit template card.
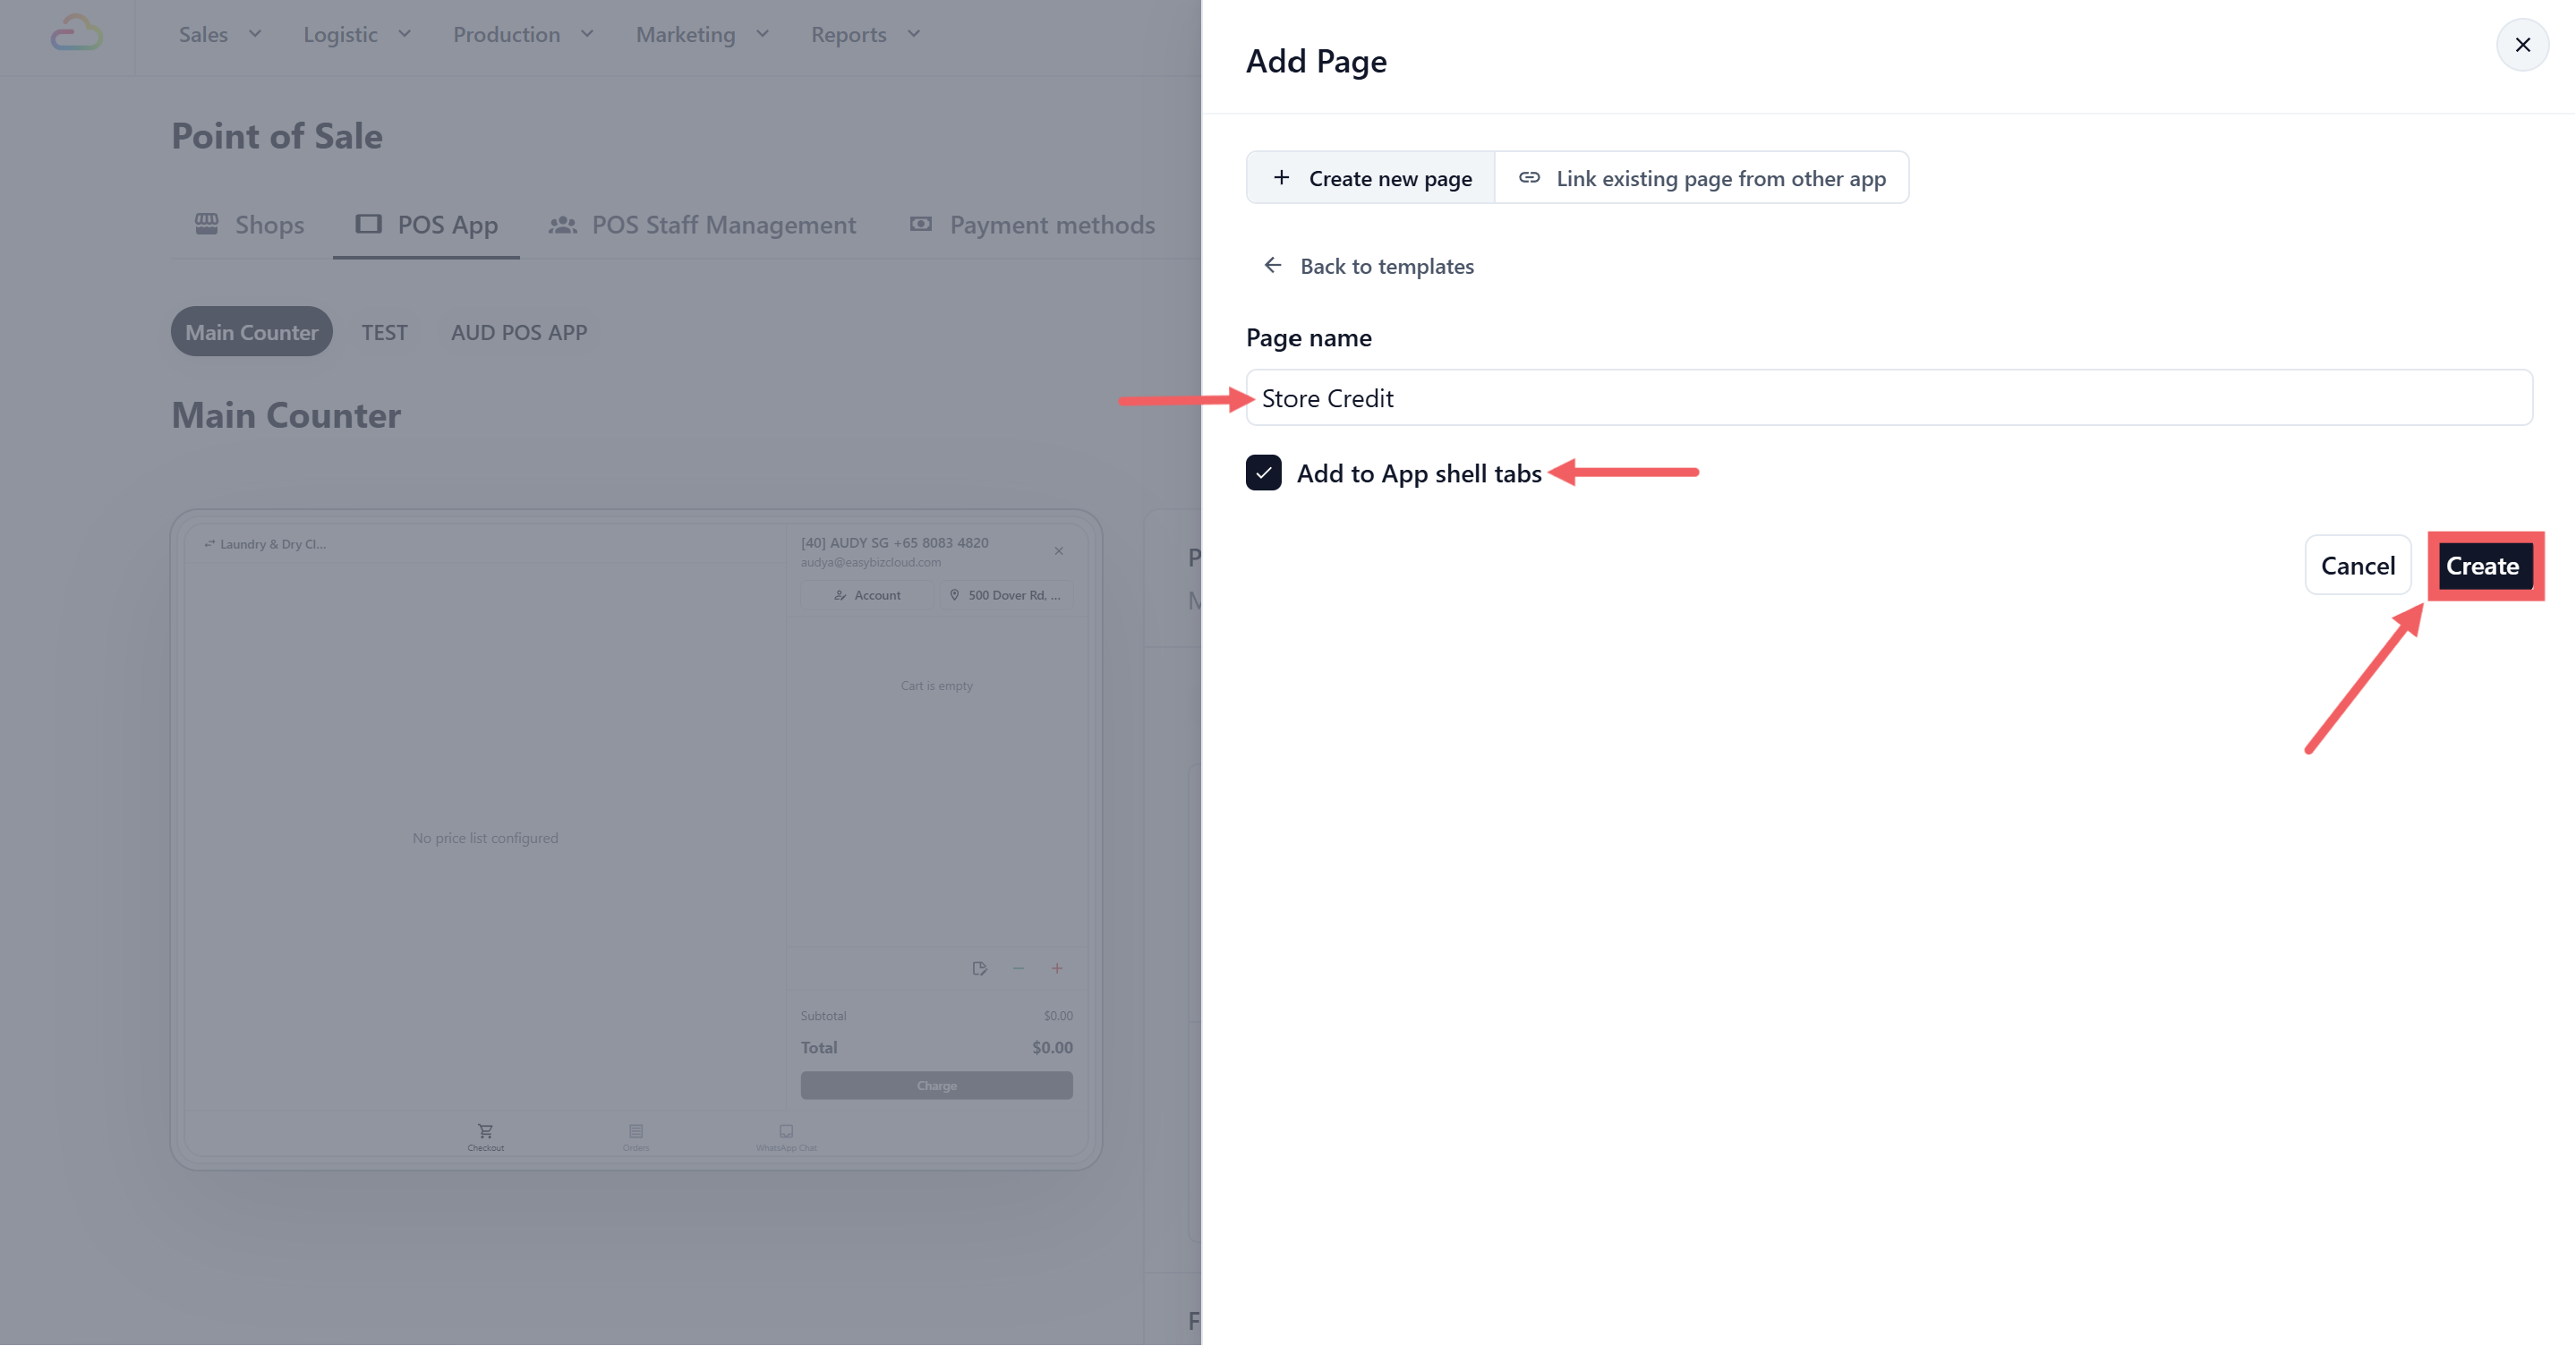
5. In the **Page Name** field, enter the label staff will see on the POS tab, for example "Store Credit" or "Top Up".
6. Tick **Add to App shell tabs** so the page shows up in the POS bottom tab bar. (Leave it unticked if you want to add it to a specific tab slot manually later.)
7. Click Create.
---
## How Your Staff Will Use It
When staff tap the **Credit Top-Up** tab on the POS, here's what they'll see and do:
---
### Finding the Customer
1. The screen starts with an empty state and a search bar: _"Search for a customer to start a top-up."_
2. Type a customer name or phone number. A dropdown appears with matching results — tap to select.
3. If the **Credit Wallets** list is on the left, staff can also tap a customer there to auto-select them in the top-up panel.
---
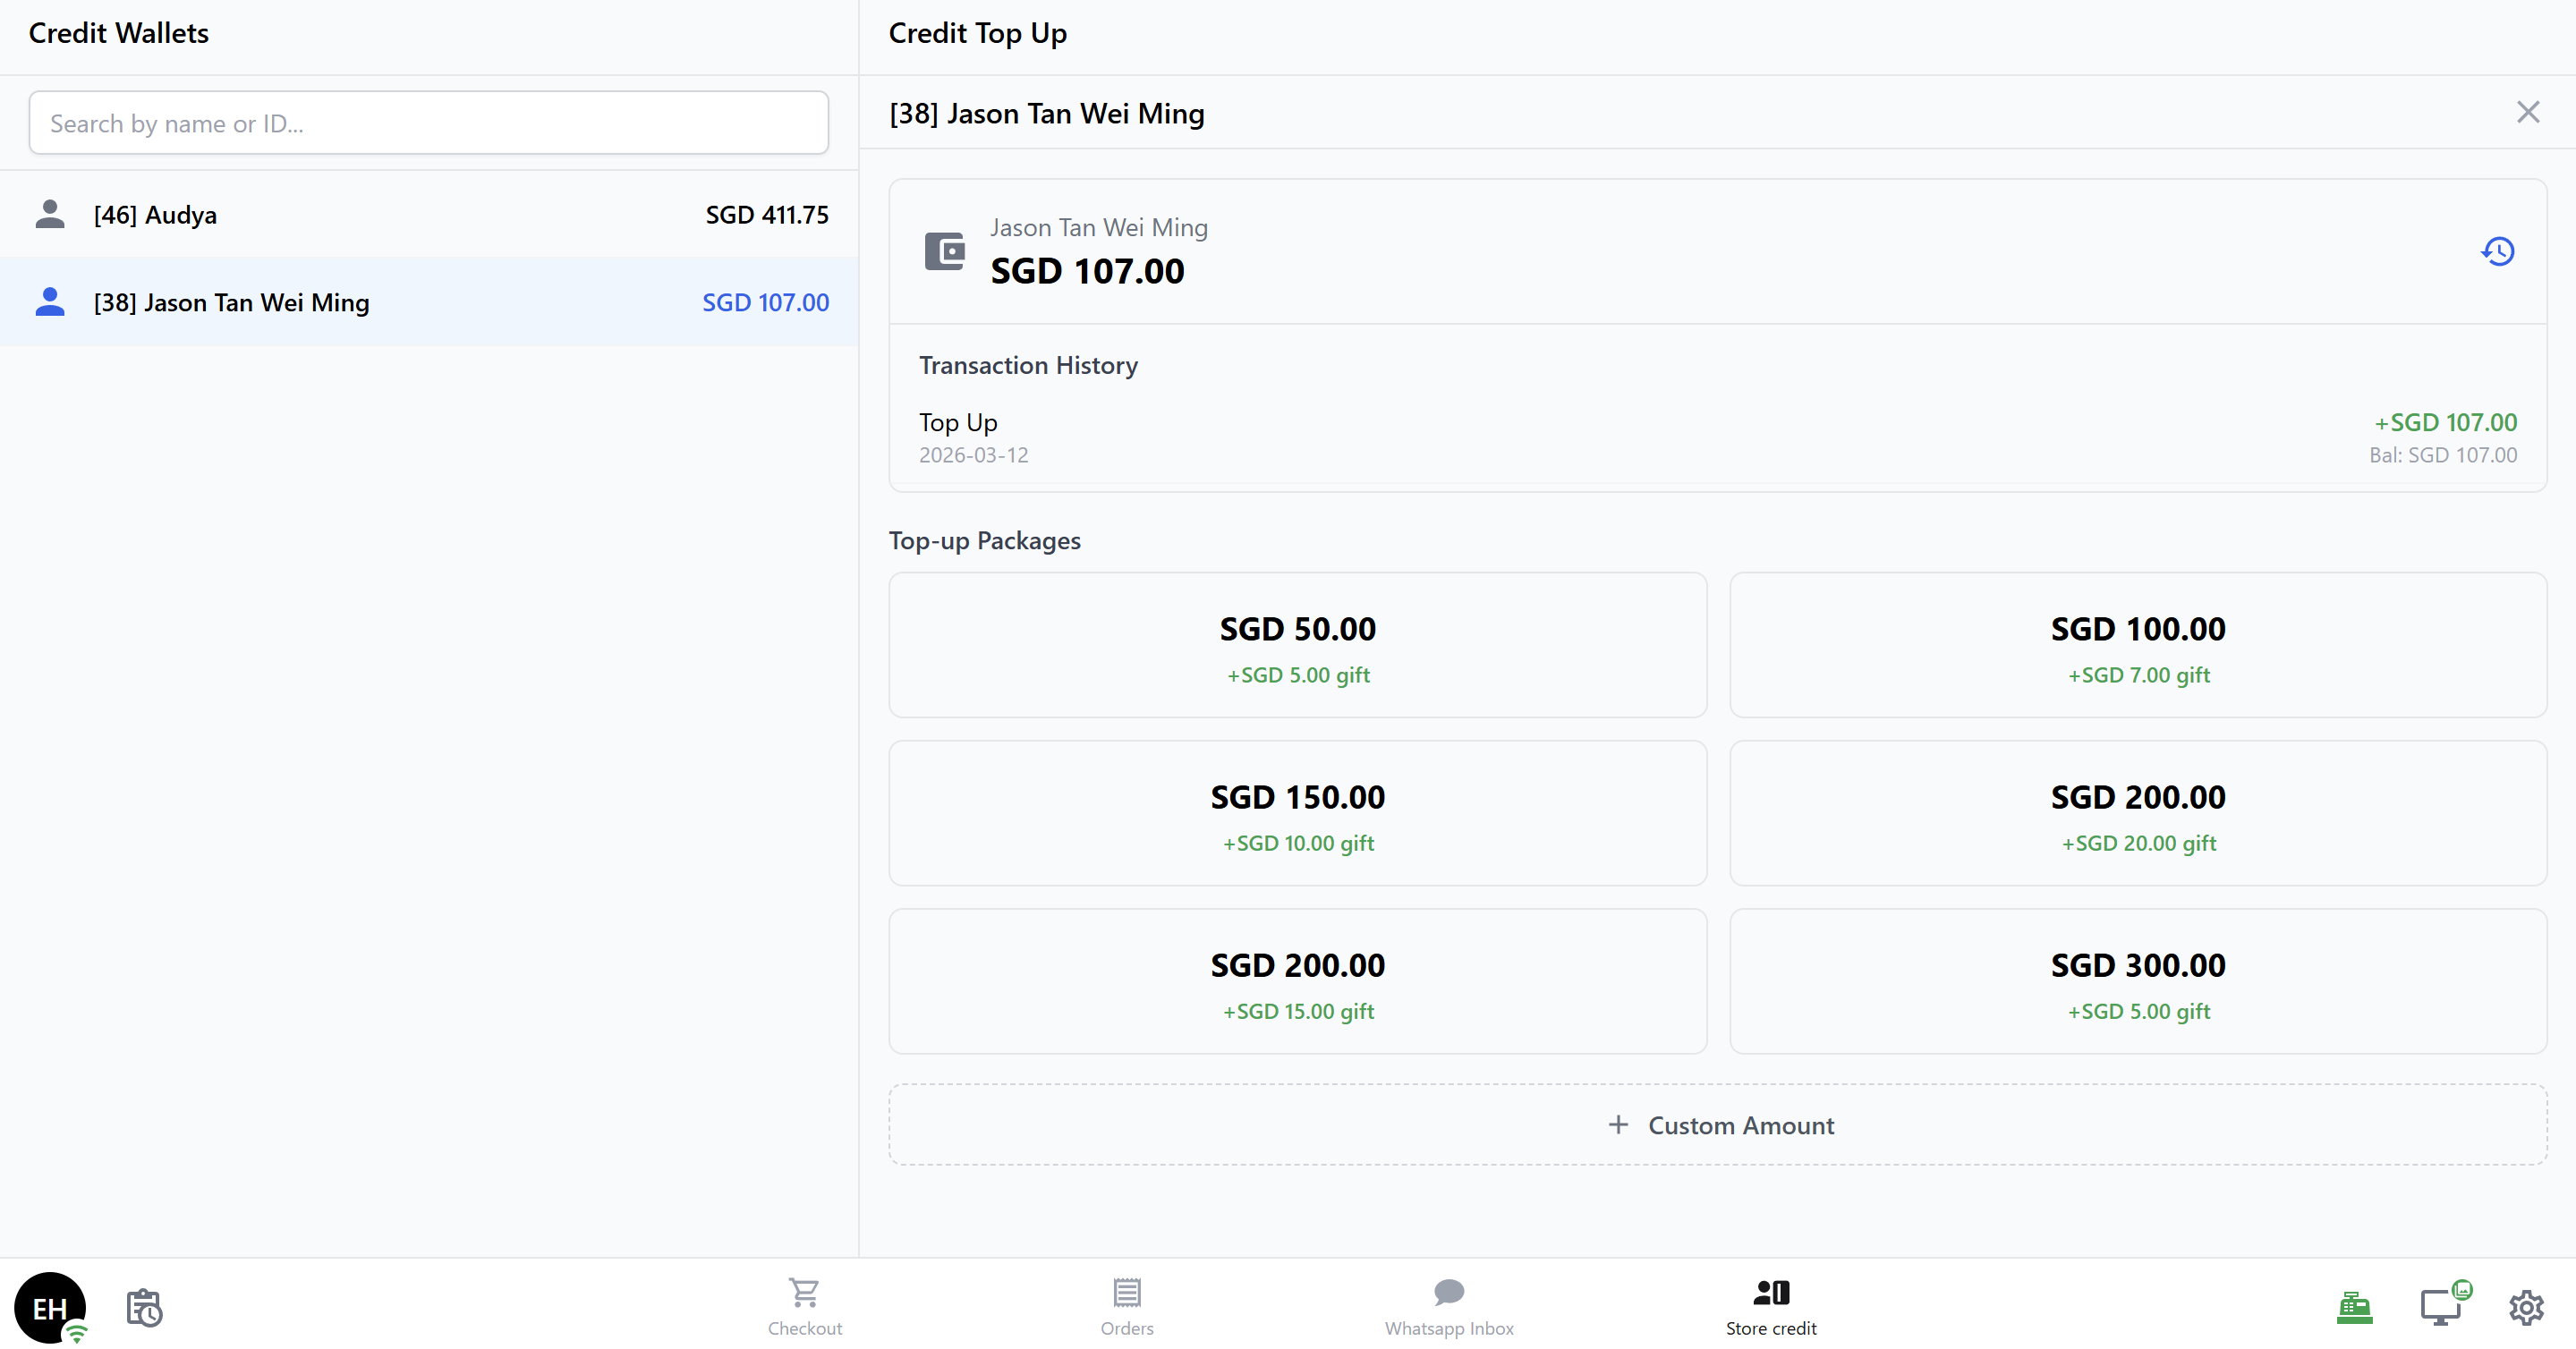
### Viewing the Customer's Balance
Once a customer is selected, a wallet card appears showing:
- The customer's **name**
- Their **current credit balance**
- A **history icon** (clock) — tap it to see their full transaction history inline (top-ups, spends, refunds, with running balances)
---
### Choosing a Top-Up Amount
- **Preset packages** appear as tappable cards in a grid, sorted by amount. Each card shows the amount, gift bonus (if any), and expiry.
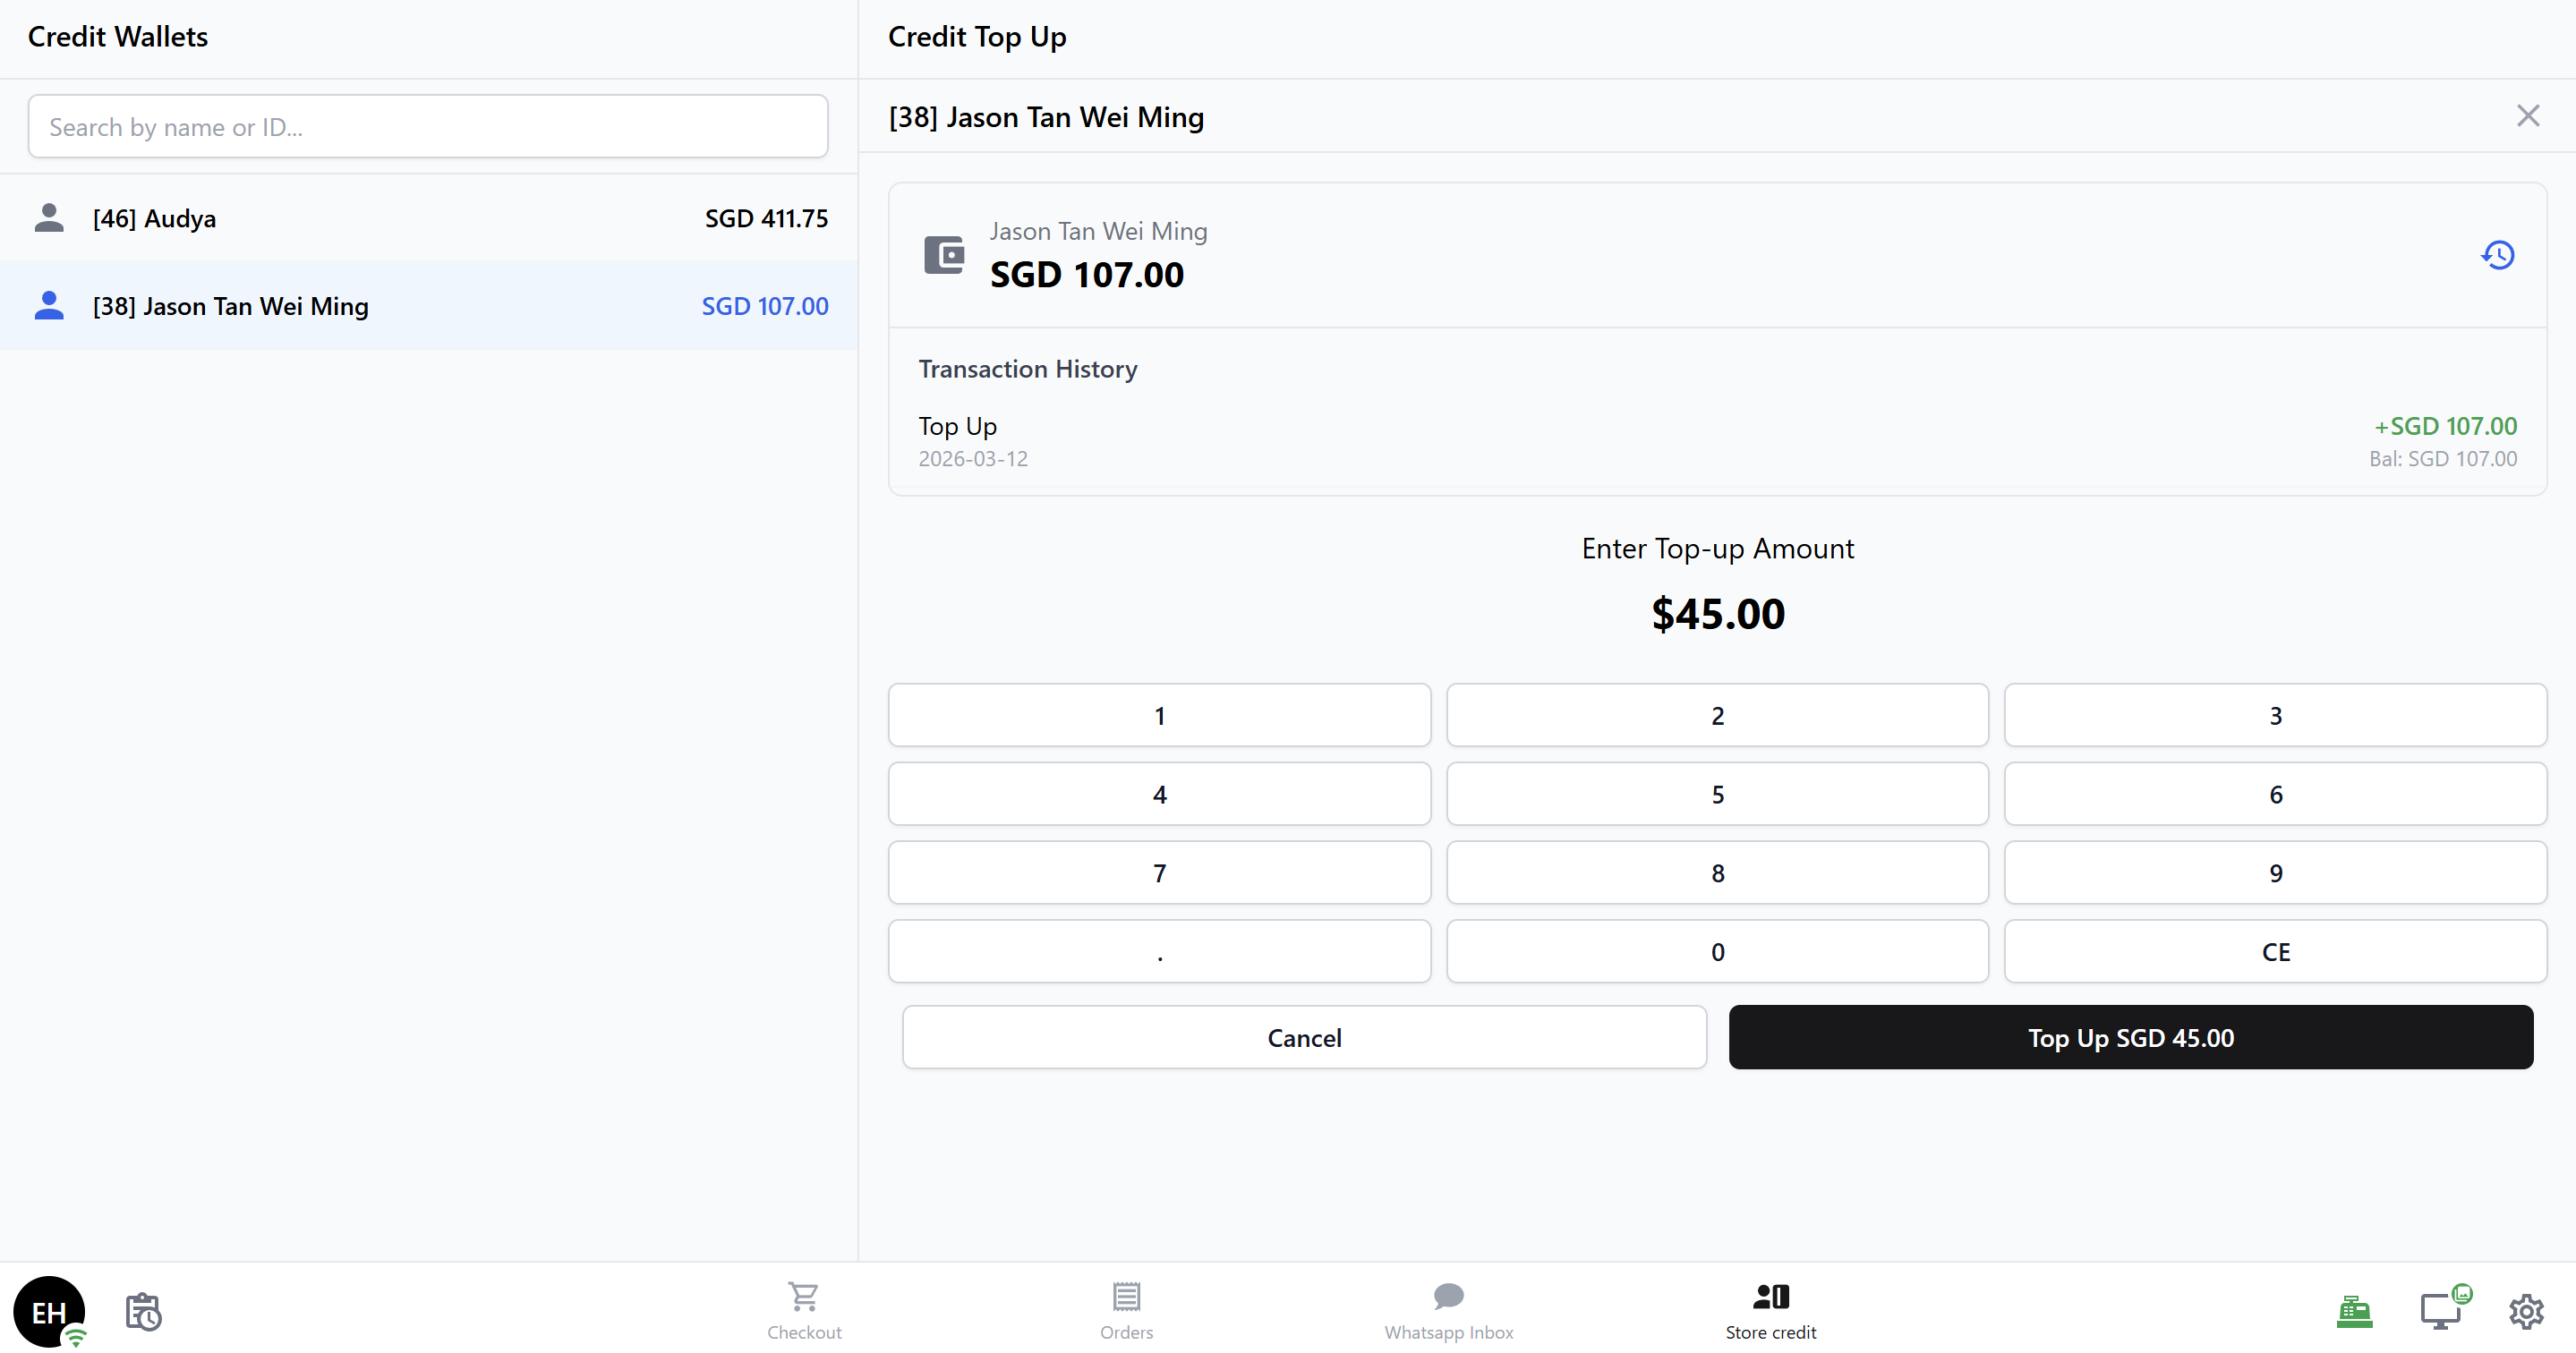
- If **Allow Custom Amount** is enabled, a **Custom Amount** button appears below the grid. Tap it to open a number pad for freeform entry.
---
### Confirming the Top-Up
A summary screen appears showing:
- Current balance
- Top-up amount (in green)
- Gift bonus (in green, if applicable)
- **New balance** after the top-up
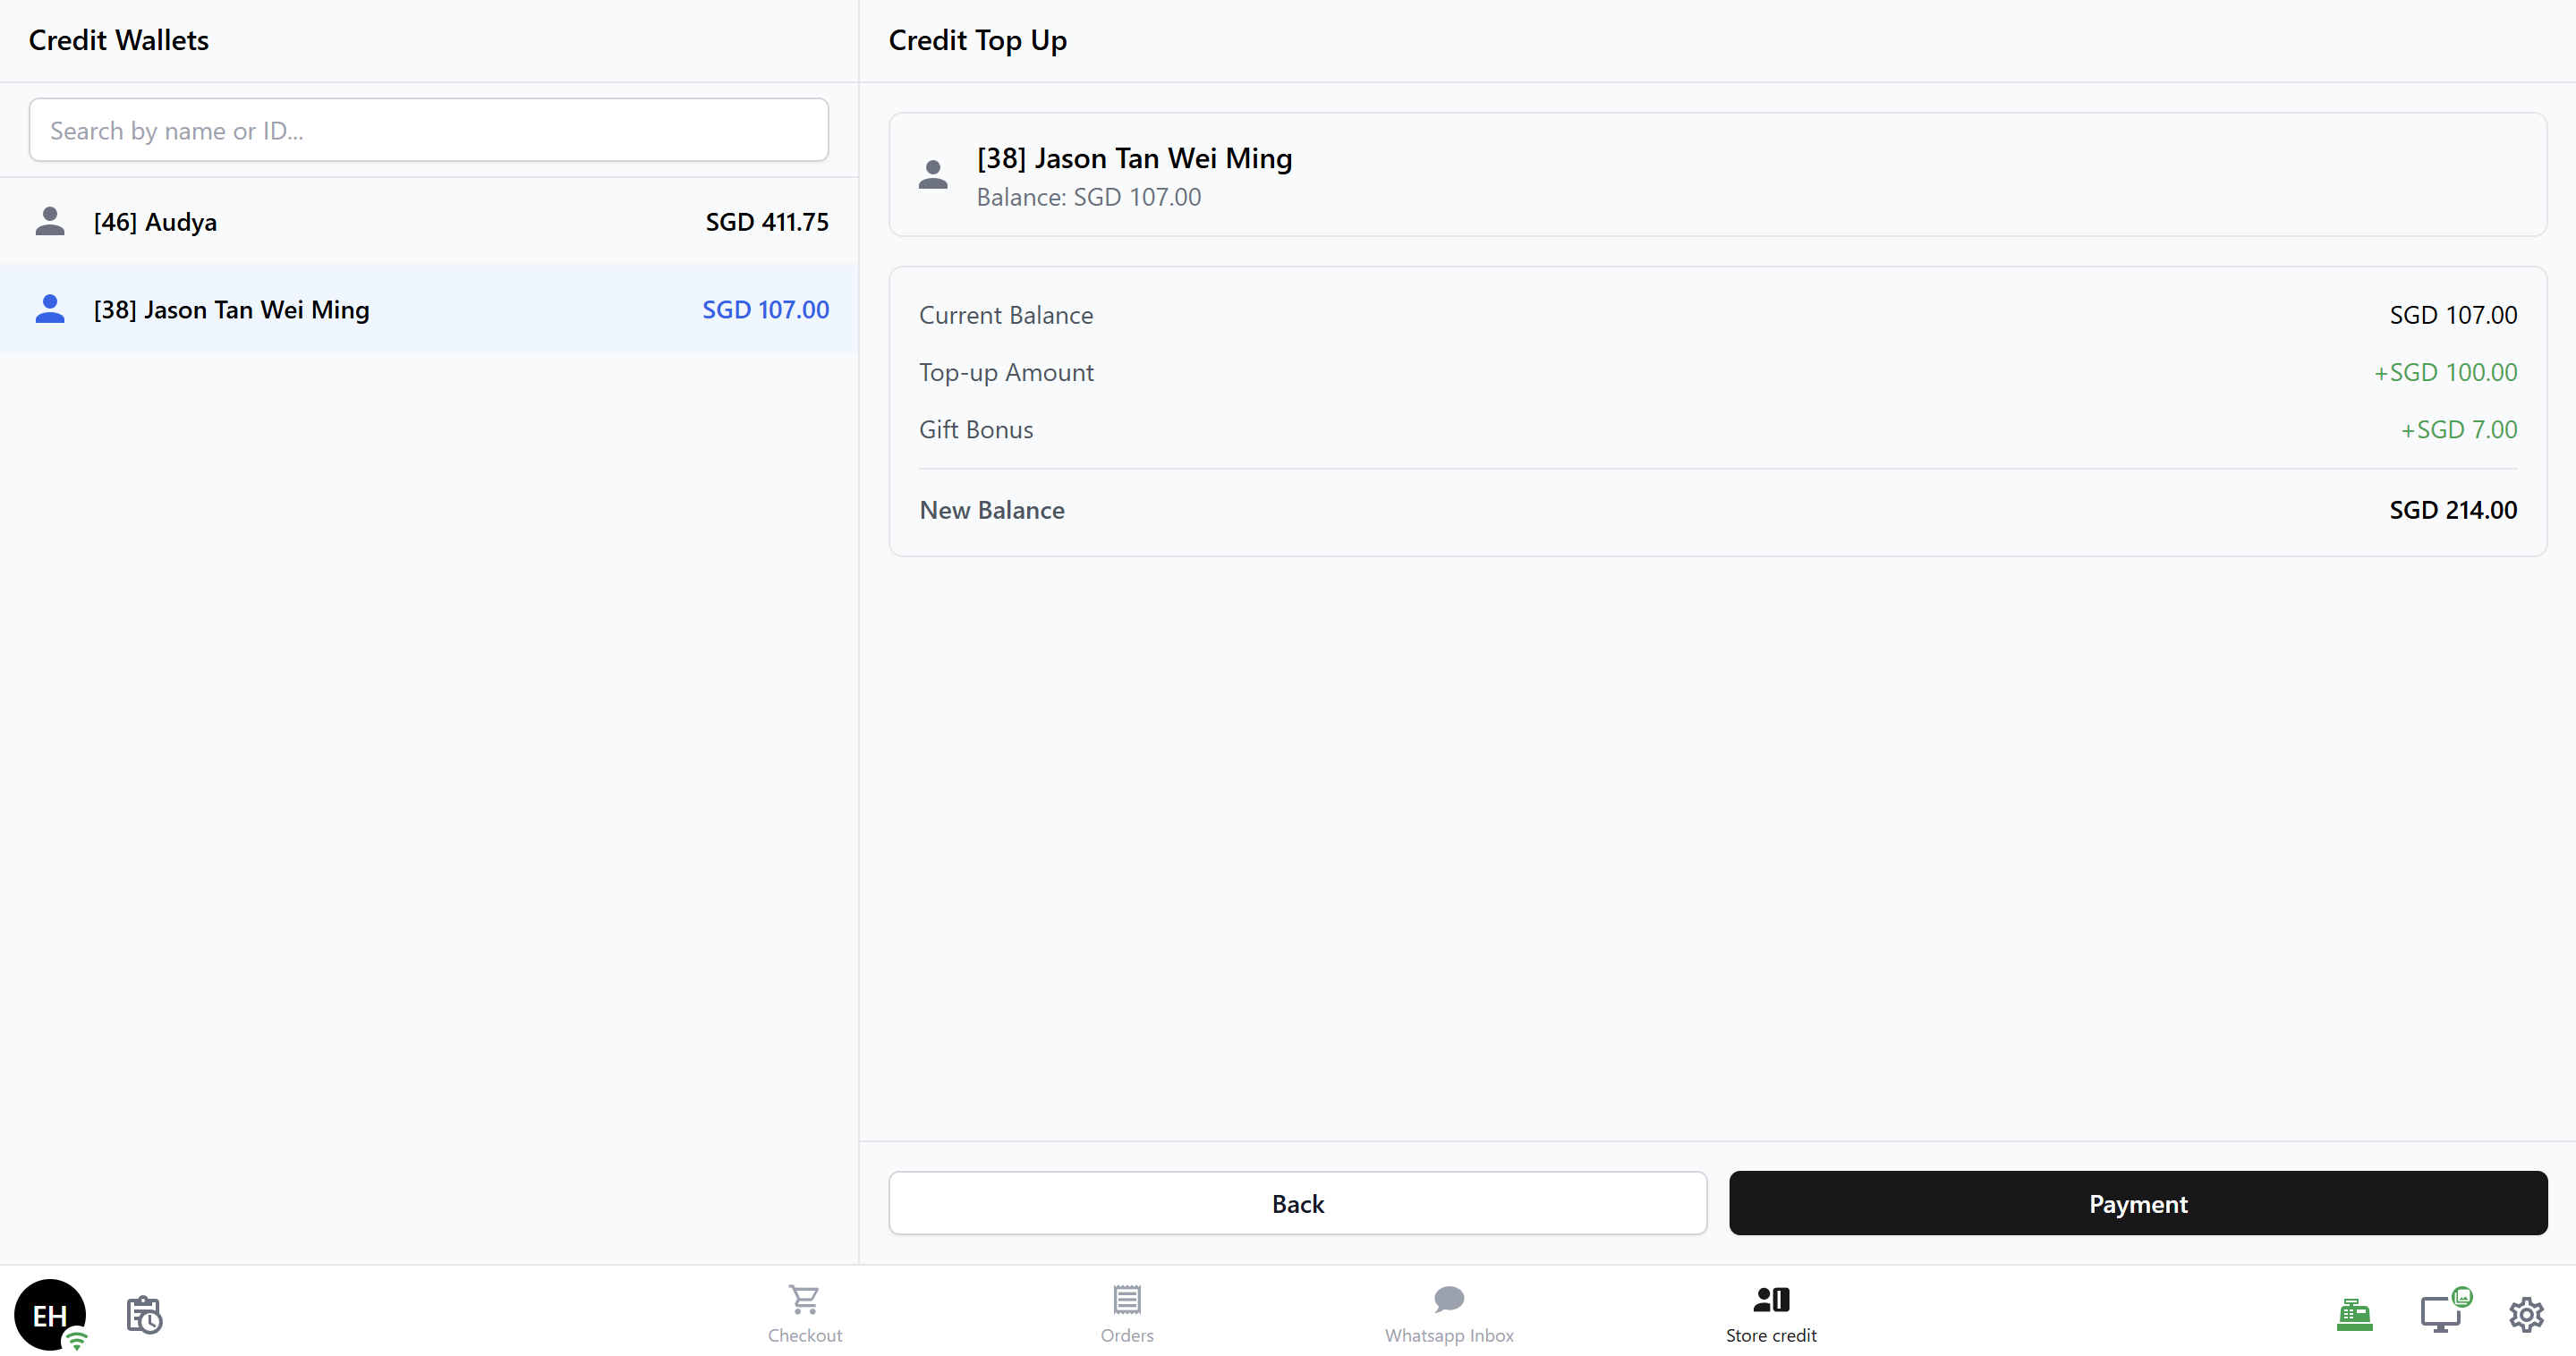
Tap **Payment** to proceed, or **Back** to change your selection.
---
### Paying for the Top-Up
1. A grid of available payment methods appears (Cash, Card, etc.).
2. Select a method:
- **Cash:** A number pad appears to enter the amount tendered. Change is calculated automatically.
- **Card / other methods:** A reference field appears for recording the transaction reference.
3. Confirm the payment.
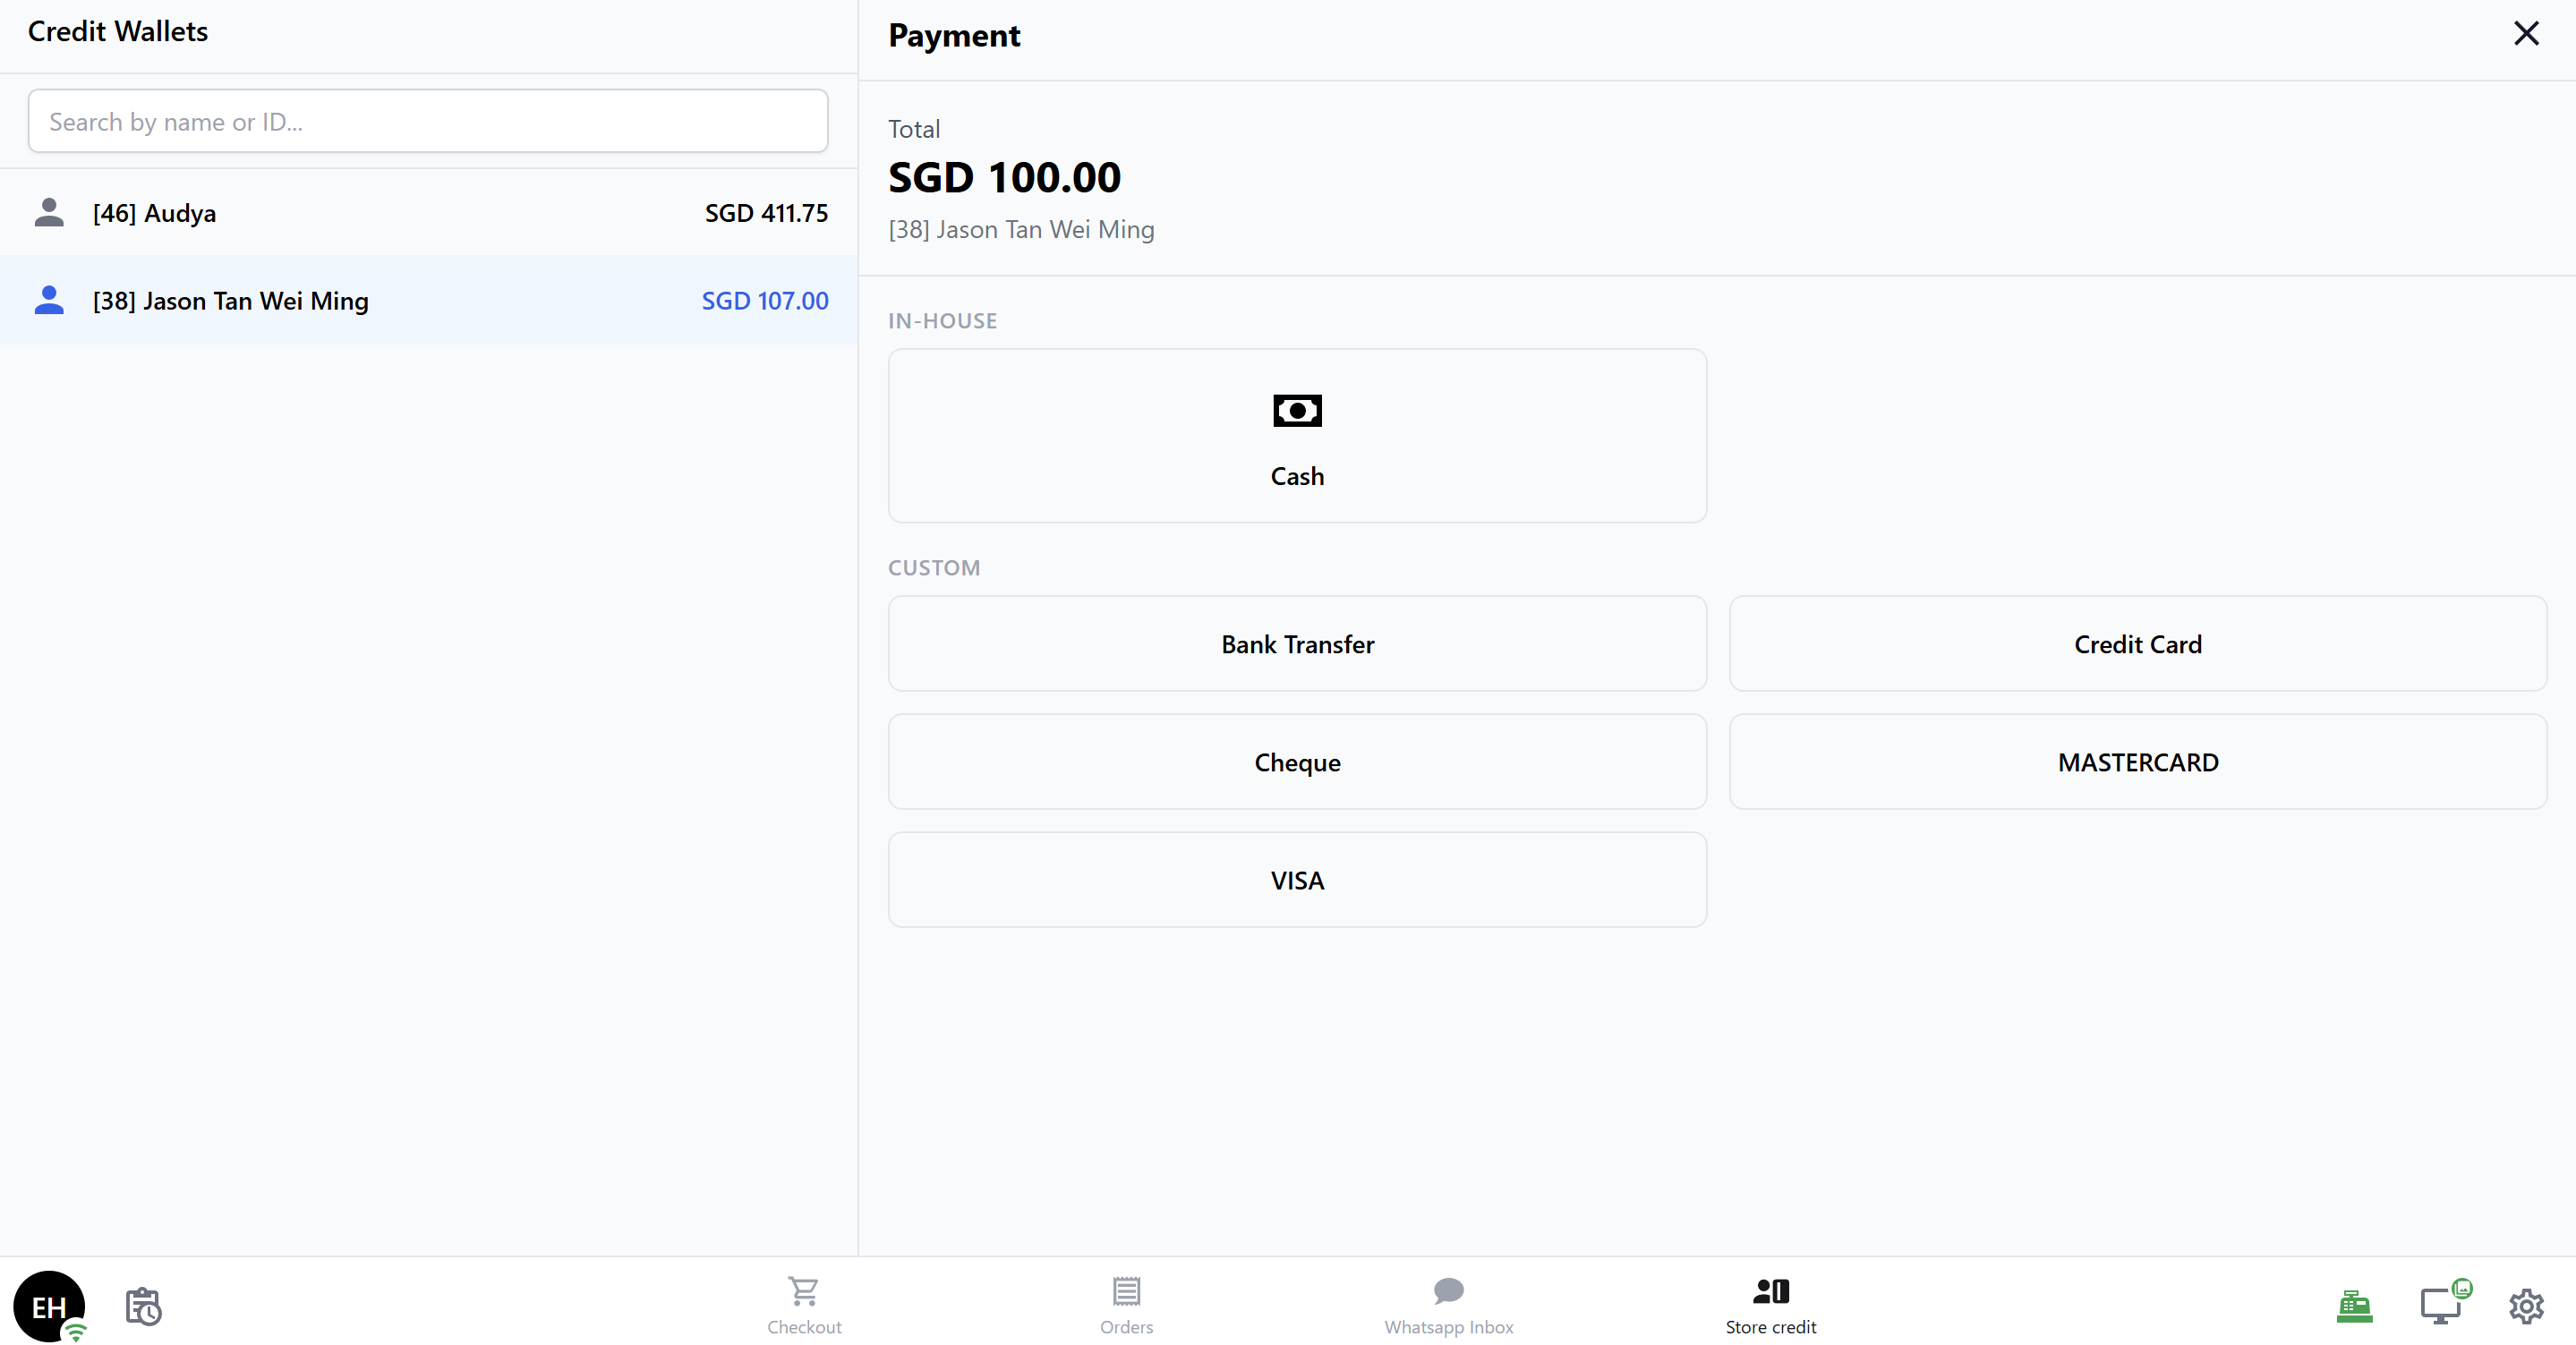
To add or manage your payment methods, see our _Payment Methods setup guide → [Coming soon]._
You cannot use store credit or loyalty points to pay for a top-up — this is by design to prevent circular usage.
---
## Where Does the Balance Show Up?
After a top-up, the customer's balance is updated everywhere in real time:
- **POS** — The Credit Wallets list and wallet card reflect the new balance immediately.
- **Console** — Viewable under the customer's contact profile in the Loyalty section.
- **Customer app** — If your customers have access to a customer-facing portal, the balance updates there too.
- **Reports** — Go to Reports**→** Creditsto see credited, debited, and expired totals by period.
---
## FAQs
**Do I need packages, or can staff just enter any amount?**
> Packages are recommended because they're faster for staff and let you attach gift bonuses. But if **Allow Custom Amount** is turned on, staff can always enter a freeform amount. Just keep in mind that custom amounts don't receive any gift bonus.
**What happens if a customer's balance runs out at checkout?**
> On the payment screen, a banner will appear saying the balance is insufficient, with a **Top Up Store Credit** button that takes staff directly to the Credit Top-Up tab.
**Can I offer different packages at different locations?**
> Yes! Each Credit Top-Up block has its own **Top-Up Packages** filter. You can choose which packages appear at each POS station.
**Can a customer top up if they've never used store credit before**
> Absolutely. A wallet is created automatically on their first top-up — no extra setup needed.
**How do first-time bonuses work?**
> The first-time bonus applies only once per package, per customer. If a customer has already used the $100 package before, they'll receive the recurring gift bonus on future top-ups but not the first-time bonus again.
Encourage customers to top up larger amounts by offering bigger gift bonuses on higher-tier packages. It's a simple way to increase average prepaid value and build loyalty.