## What Is Inventory Tracking?
Inventory Tracking is a stock management screen built into your POS app. It shows your staff exactly how many of each retail product you have at their branch — and lets them record stock coming in (deliveries) or going out (used, damaged, sold) right from the POS.
Every change is logged with a full history, so you always know what happened, when, and who did it.
---
### Why do you need it?
Without inventory tracking, your staff are guessing. They don't know how many laundry bags are left until they physically go check the shelf. By then, you might already be out — and a customer is waiting.
With Inventory Tracking on your POS:
- **Staff know what's in stock at a glance.** Colour-coded quantities make it obvious — green means good, yellow means zero, red means you're in the negative.
- **Deliveries are logged instantly.** When a supplier drops off stock, your staff can record it on the spot with a few taps.
- **Usage is tracked too.** Items consumed, damaged, or expired can be recorded as stock-out — so your counts stay accurate.
- **Each branch has its own count.** Stock is tracked per location, so you always know what's where. Staff can even peek at other branches' stock from the detail panel.
- **Sales auto-deduct.** When a retail product is sold at checkout, the stock count goes down automatically — no manual logging needed.
Think of it as a live stock counter for your shop, built into the same screen your staff already uses every day.
---
## Before You Start
Make sure the following are in place before adding Inventory Tracking to your POS:
| What you need | Where to set it up |
| --- | --- |
| Retail products in your catalog | Setting⚙️ → Products Catalog |
| Store locations configured | Setting⚙️→ +Add POS Shop |
| A POS app created | Setting⚙️ → +Add new POS app |
Inventory Tracking is a standalone feature — it doesn't depend on any other module. You can set it up without touching orders, logistics, or anything else.
---
## Setting Up the Inventory Page
The Inventory page is the actual screen your staff will tap to view stock, record deliveries, and mark items as used. It is a split-screen layout: product list on the left, product detail on the right. You add this page from POS Pages, then it can be opened from the POS tab bar.
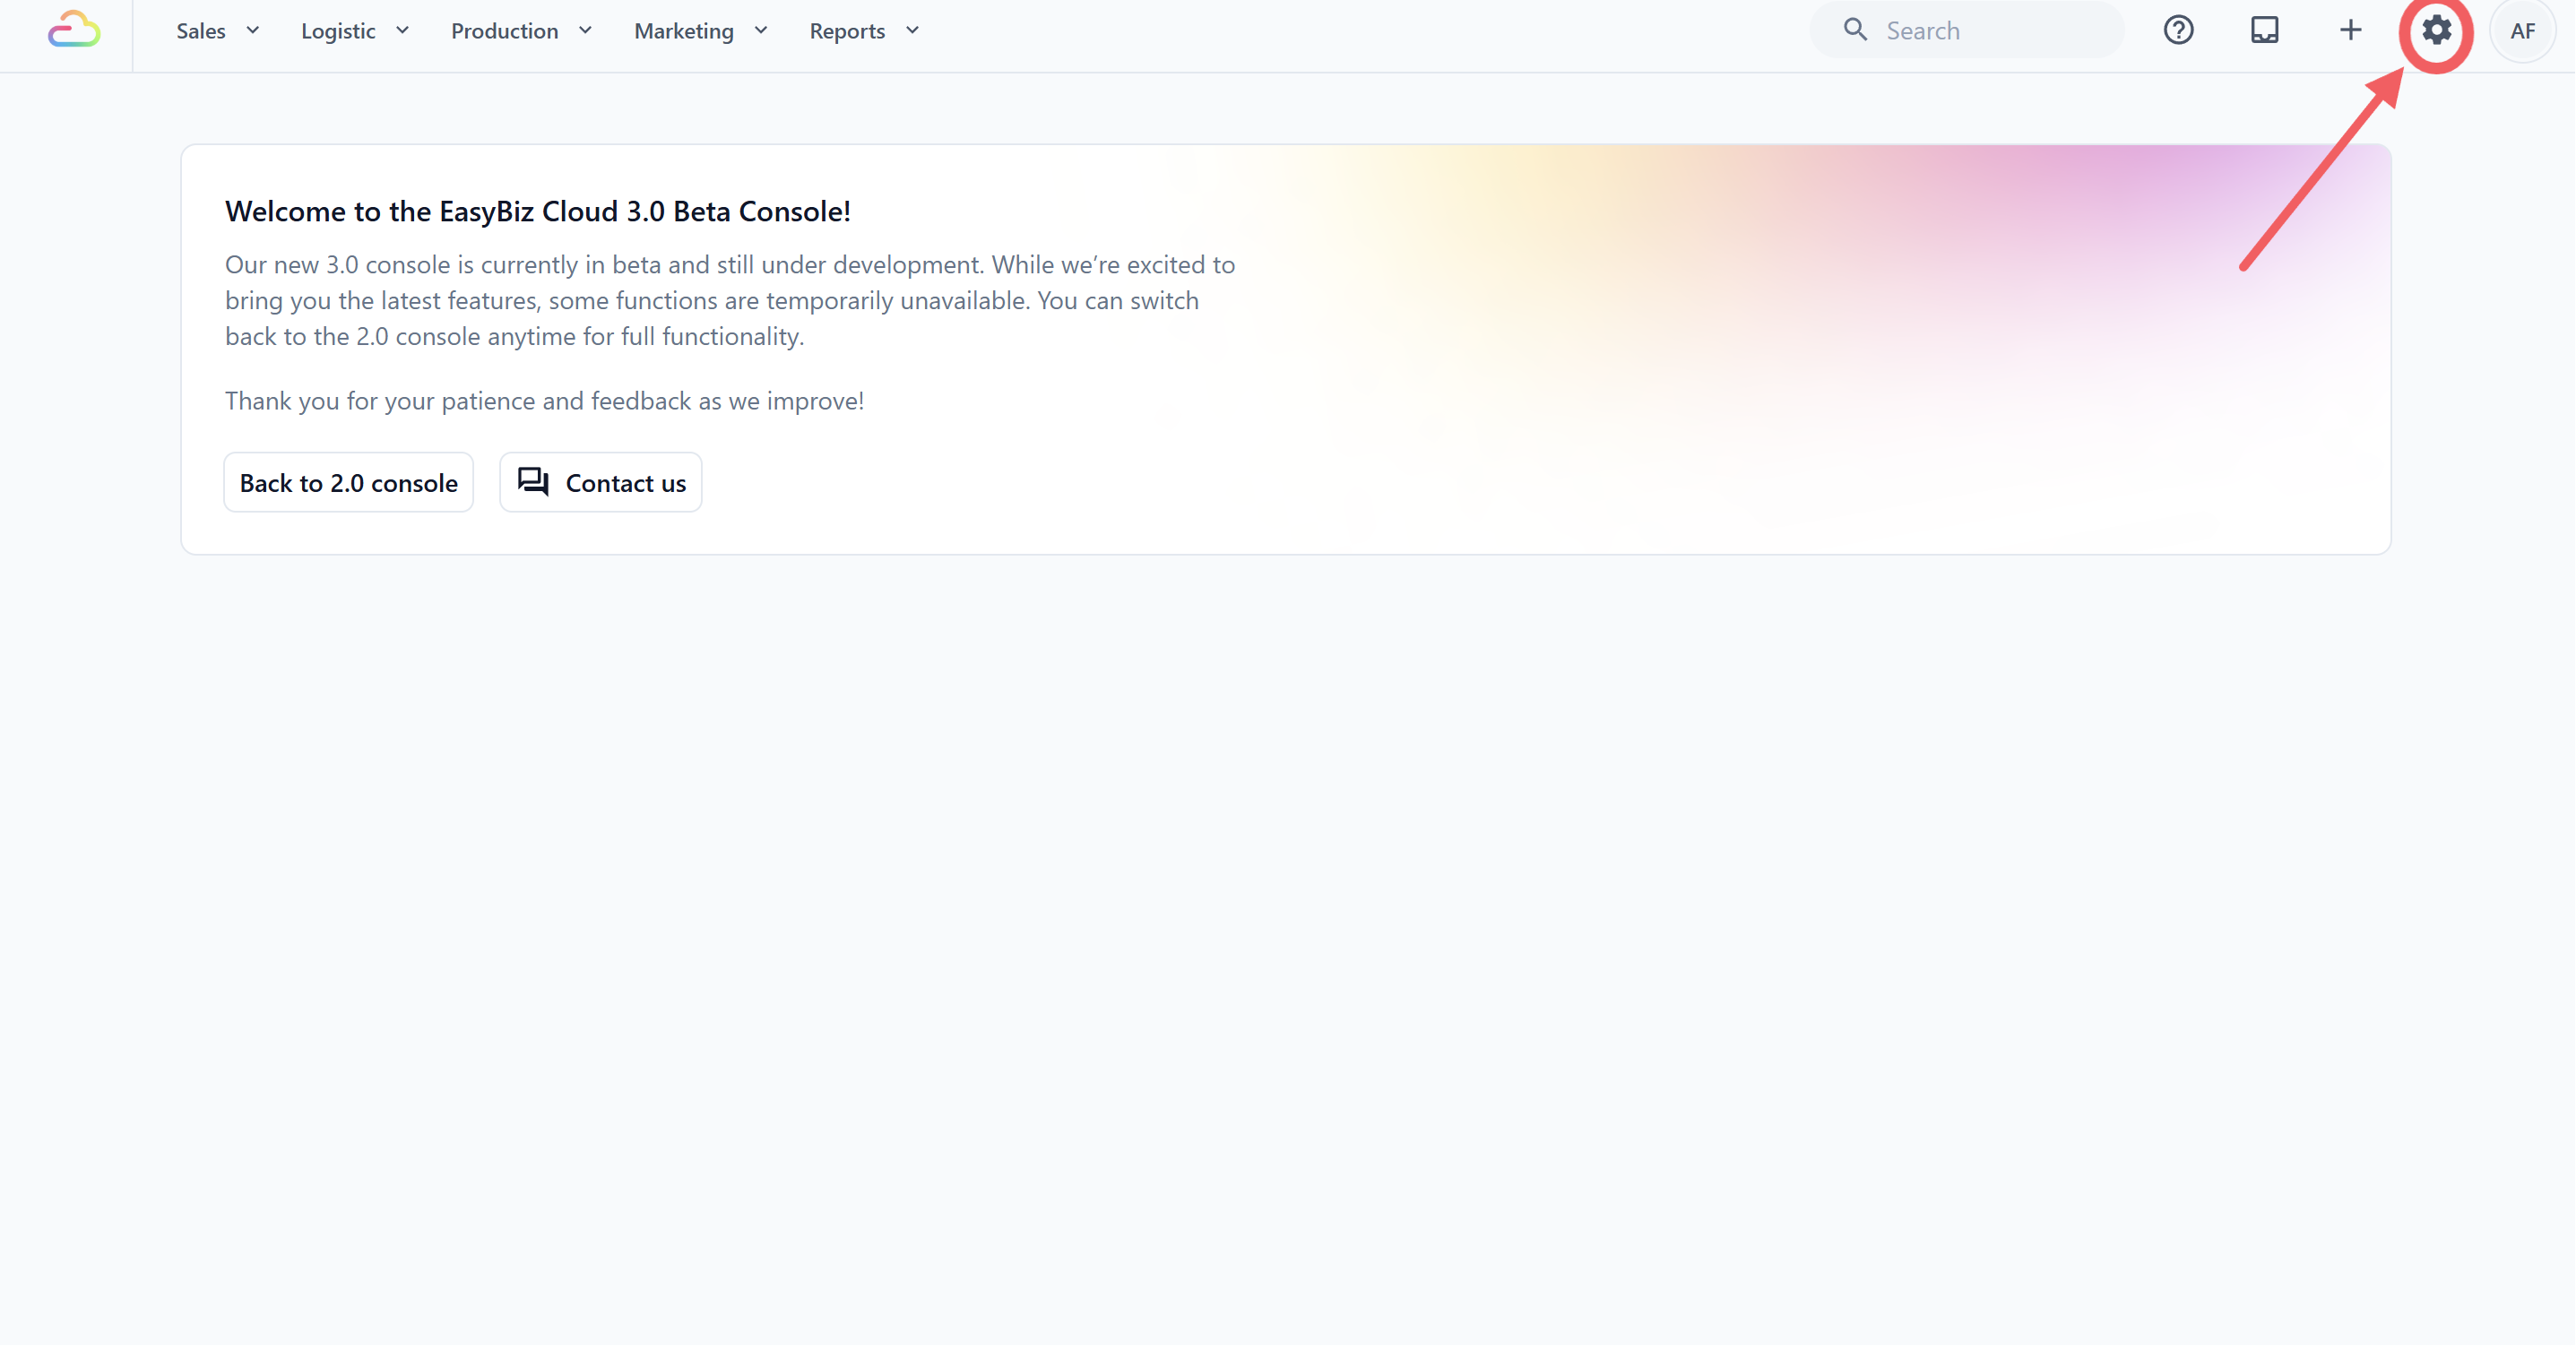
1. Click the ⚙️ Settings icon in the top-right corner.
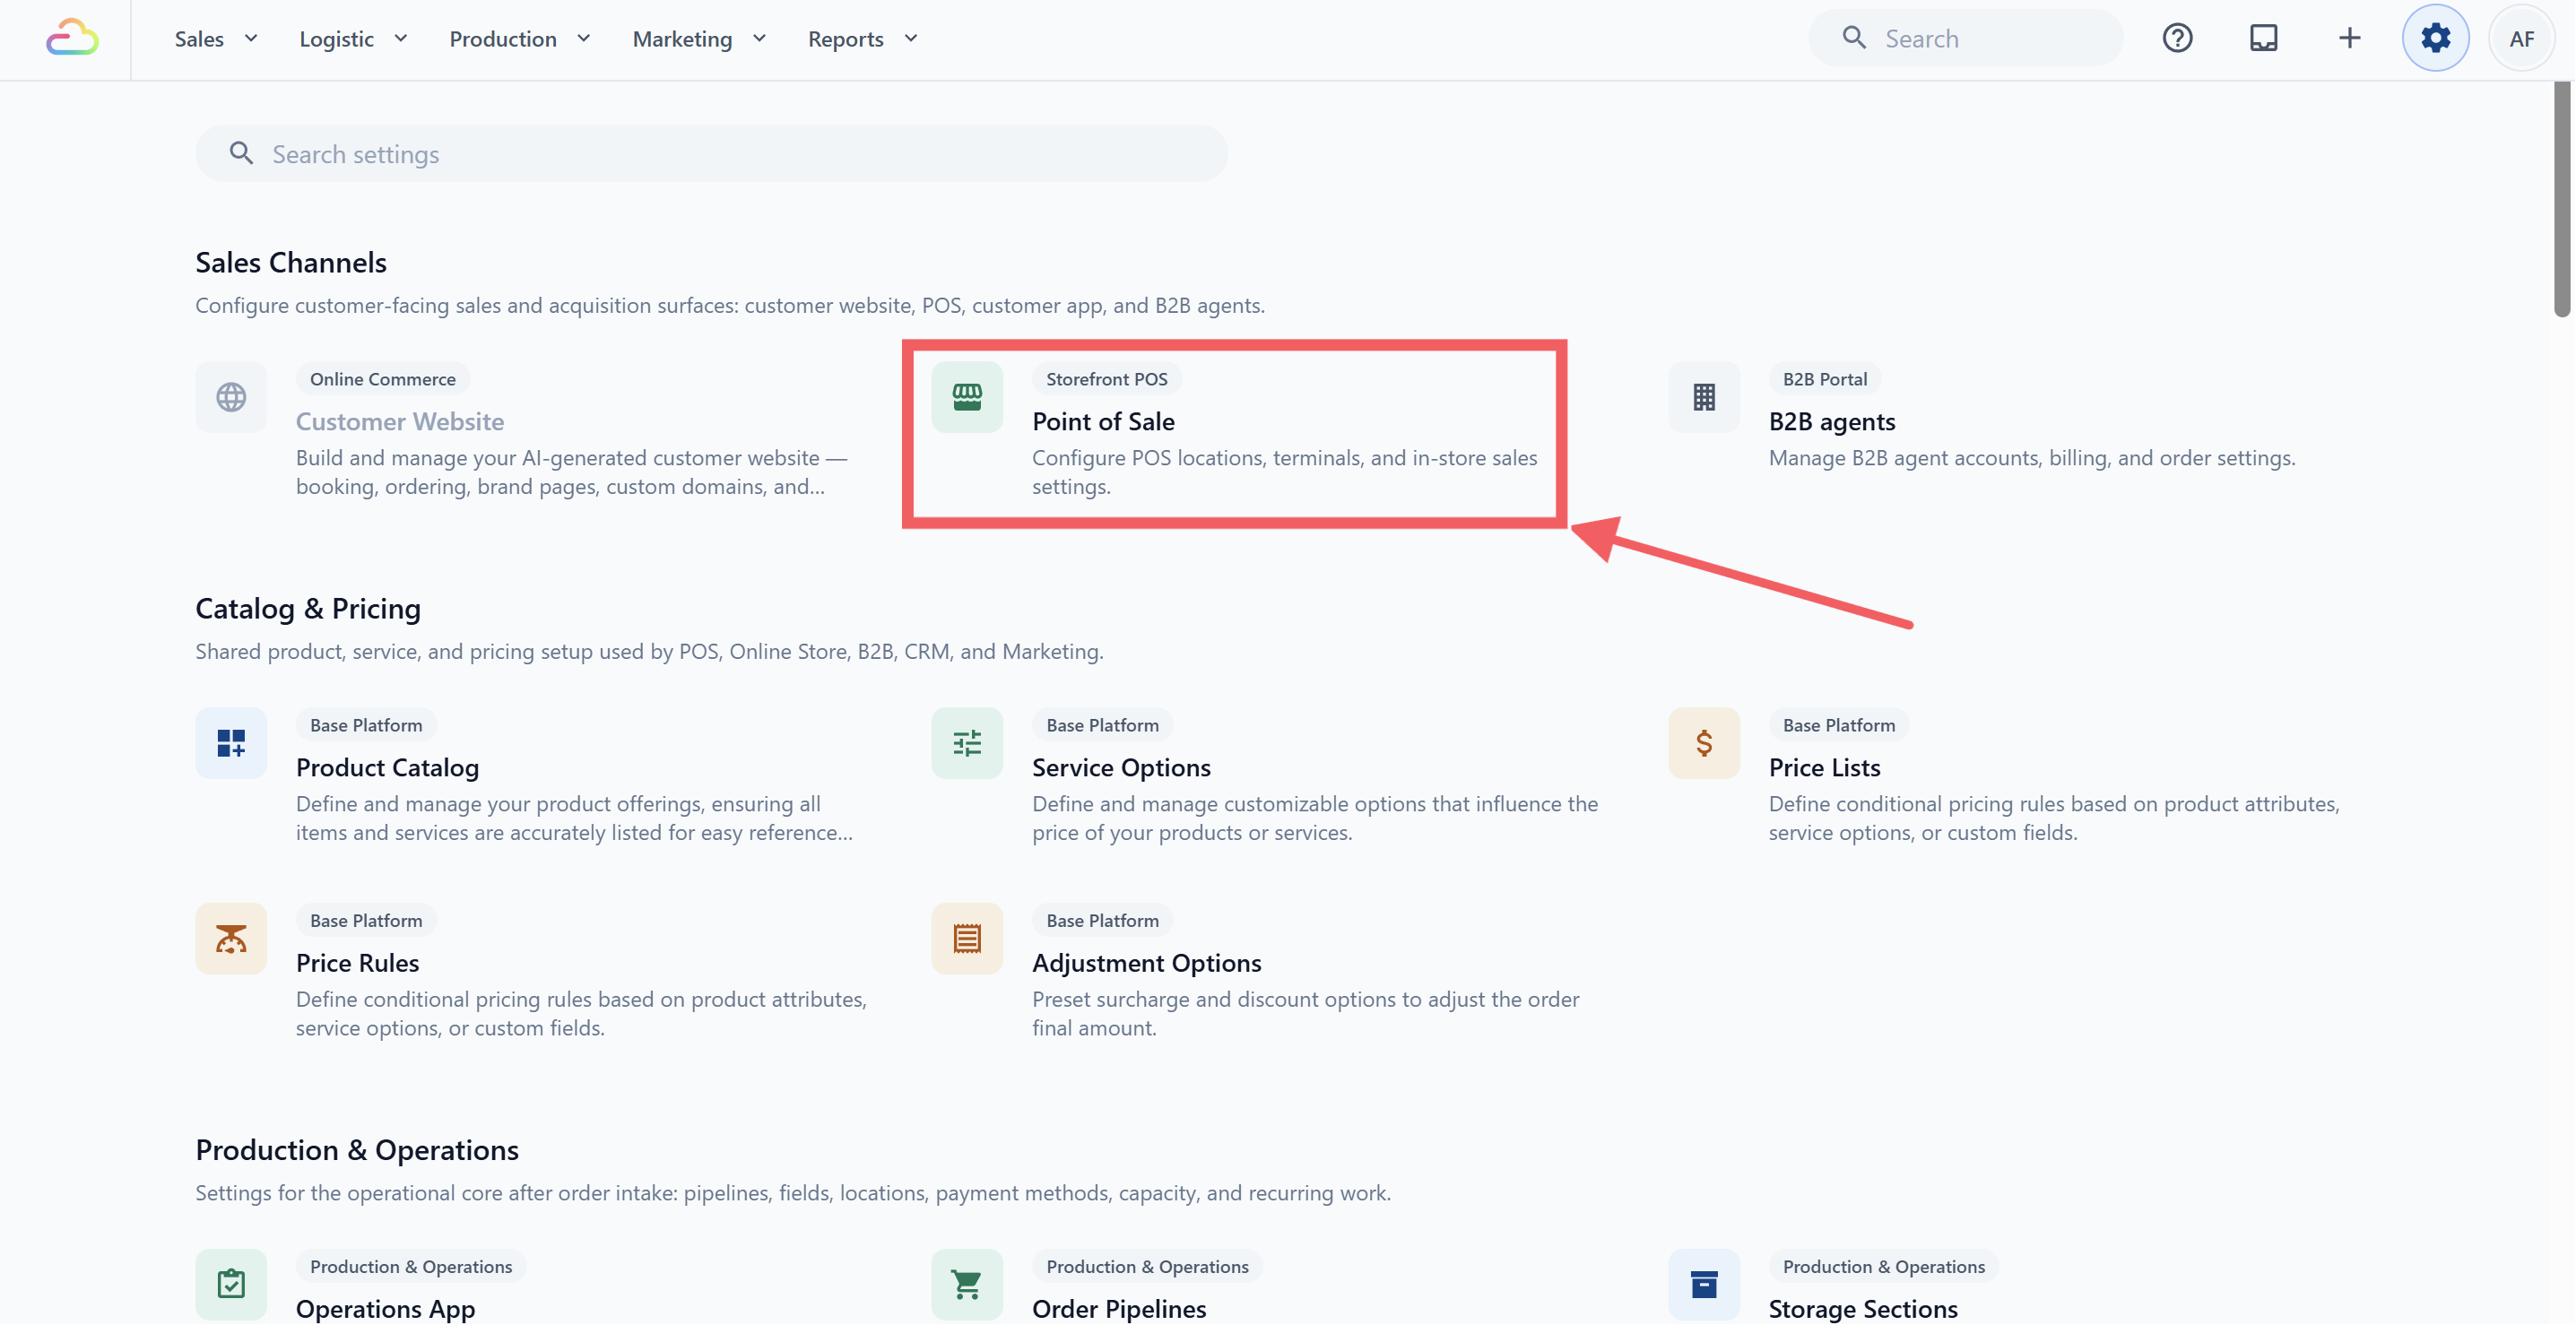
2. Under the Sales Channels section, click Point of Sale .
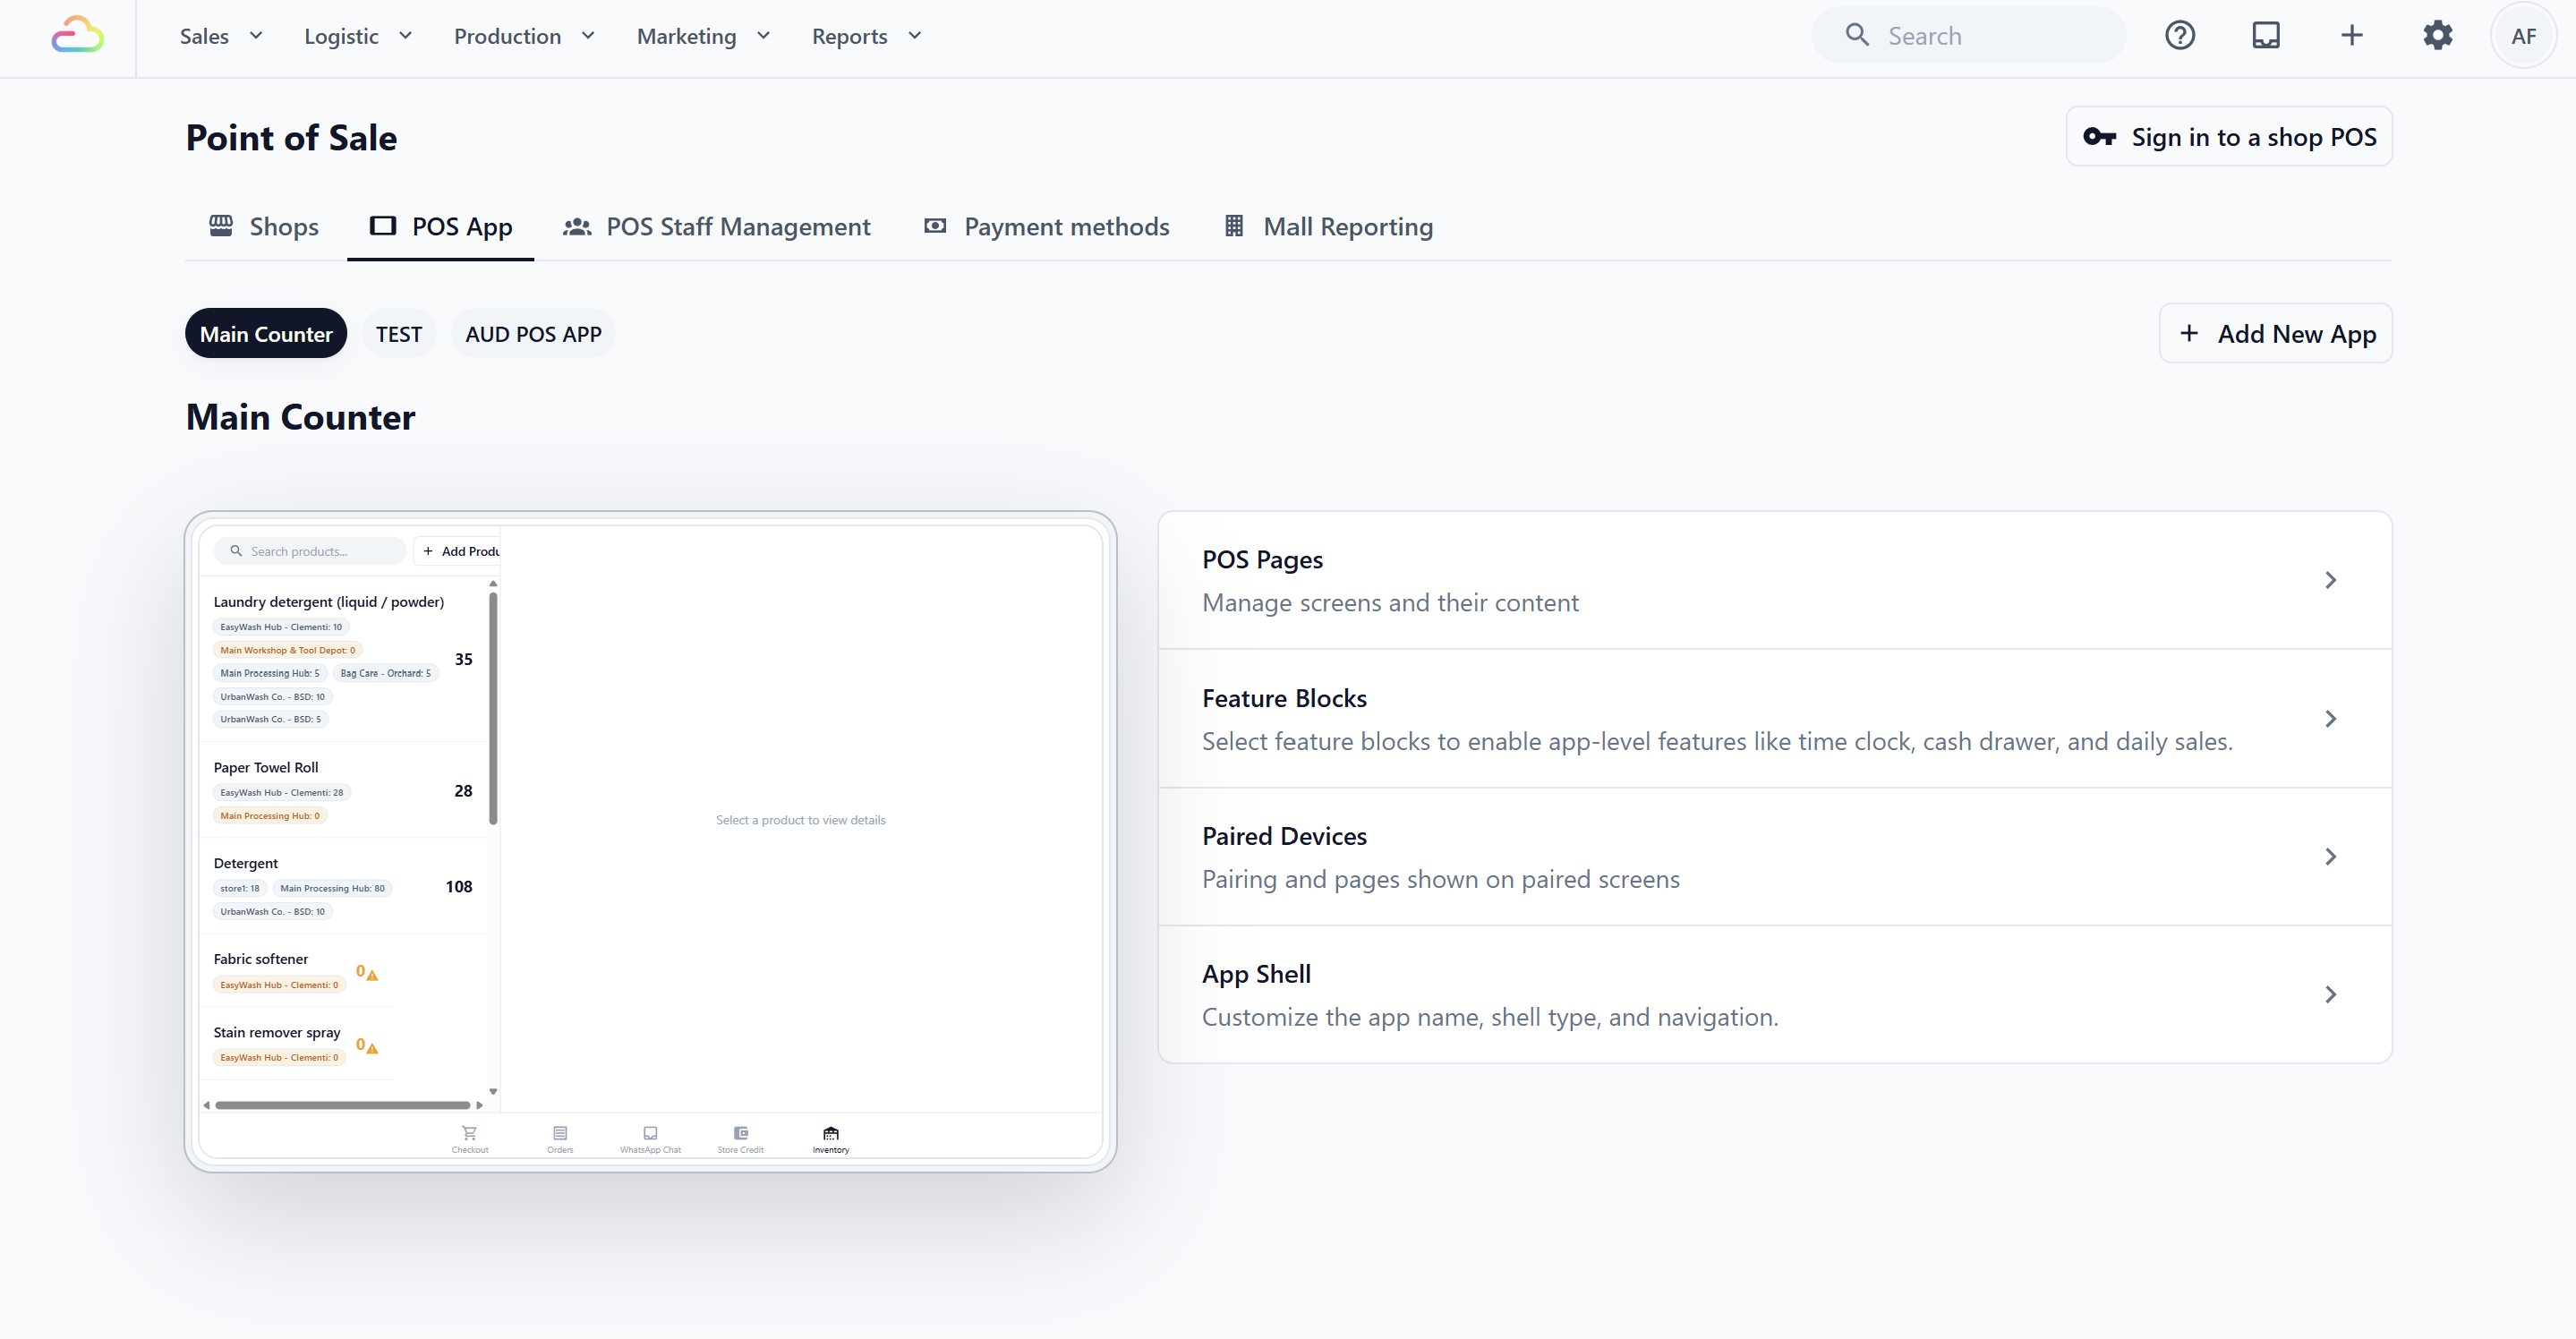
3. Click POS App, then open the app you want to set up.
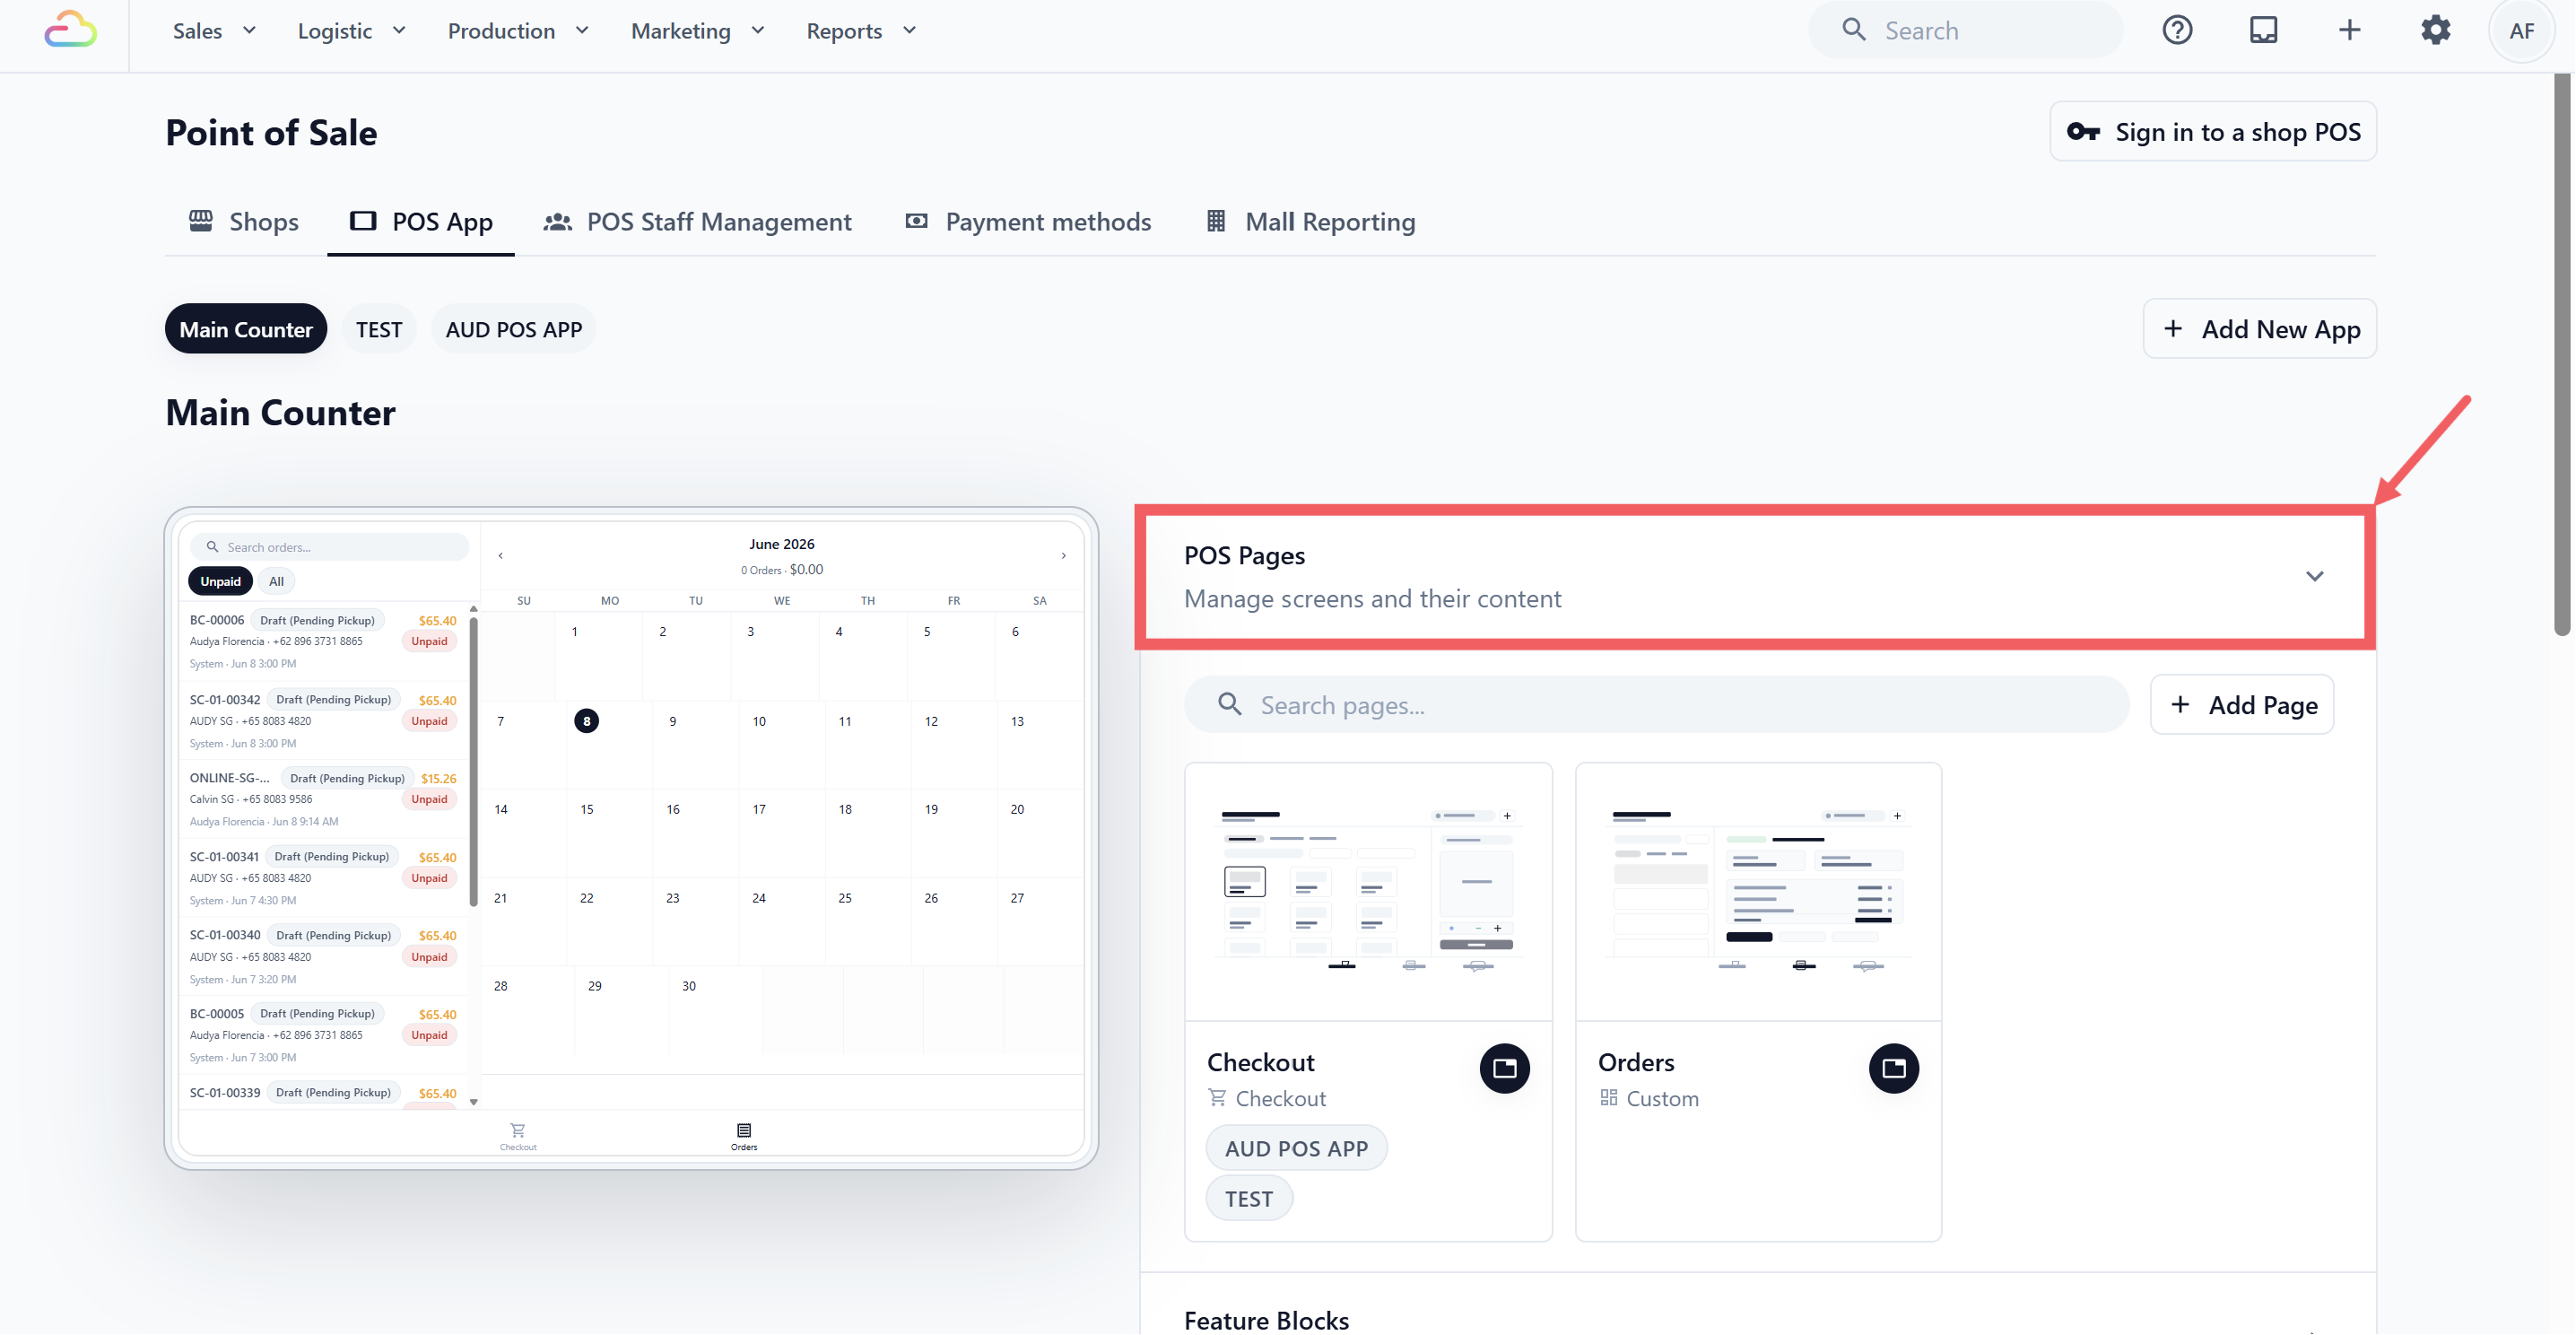
4. In the right-hand panel, click POS Pages to expand the section.
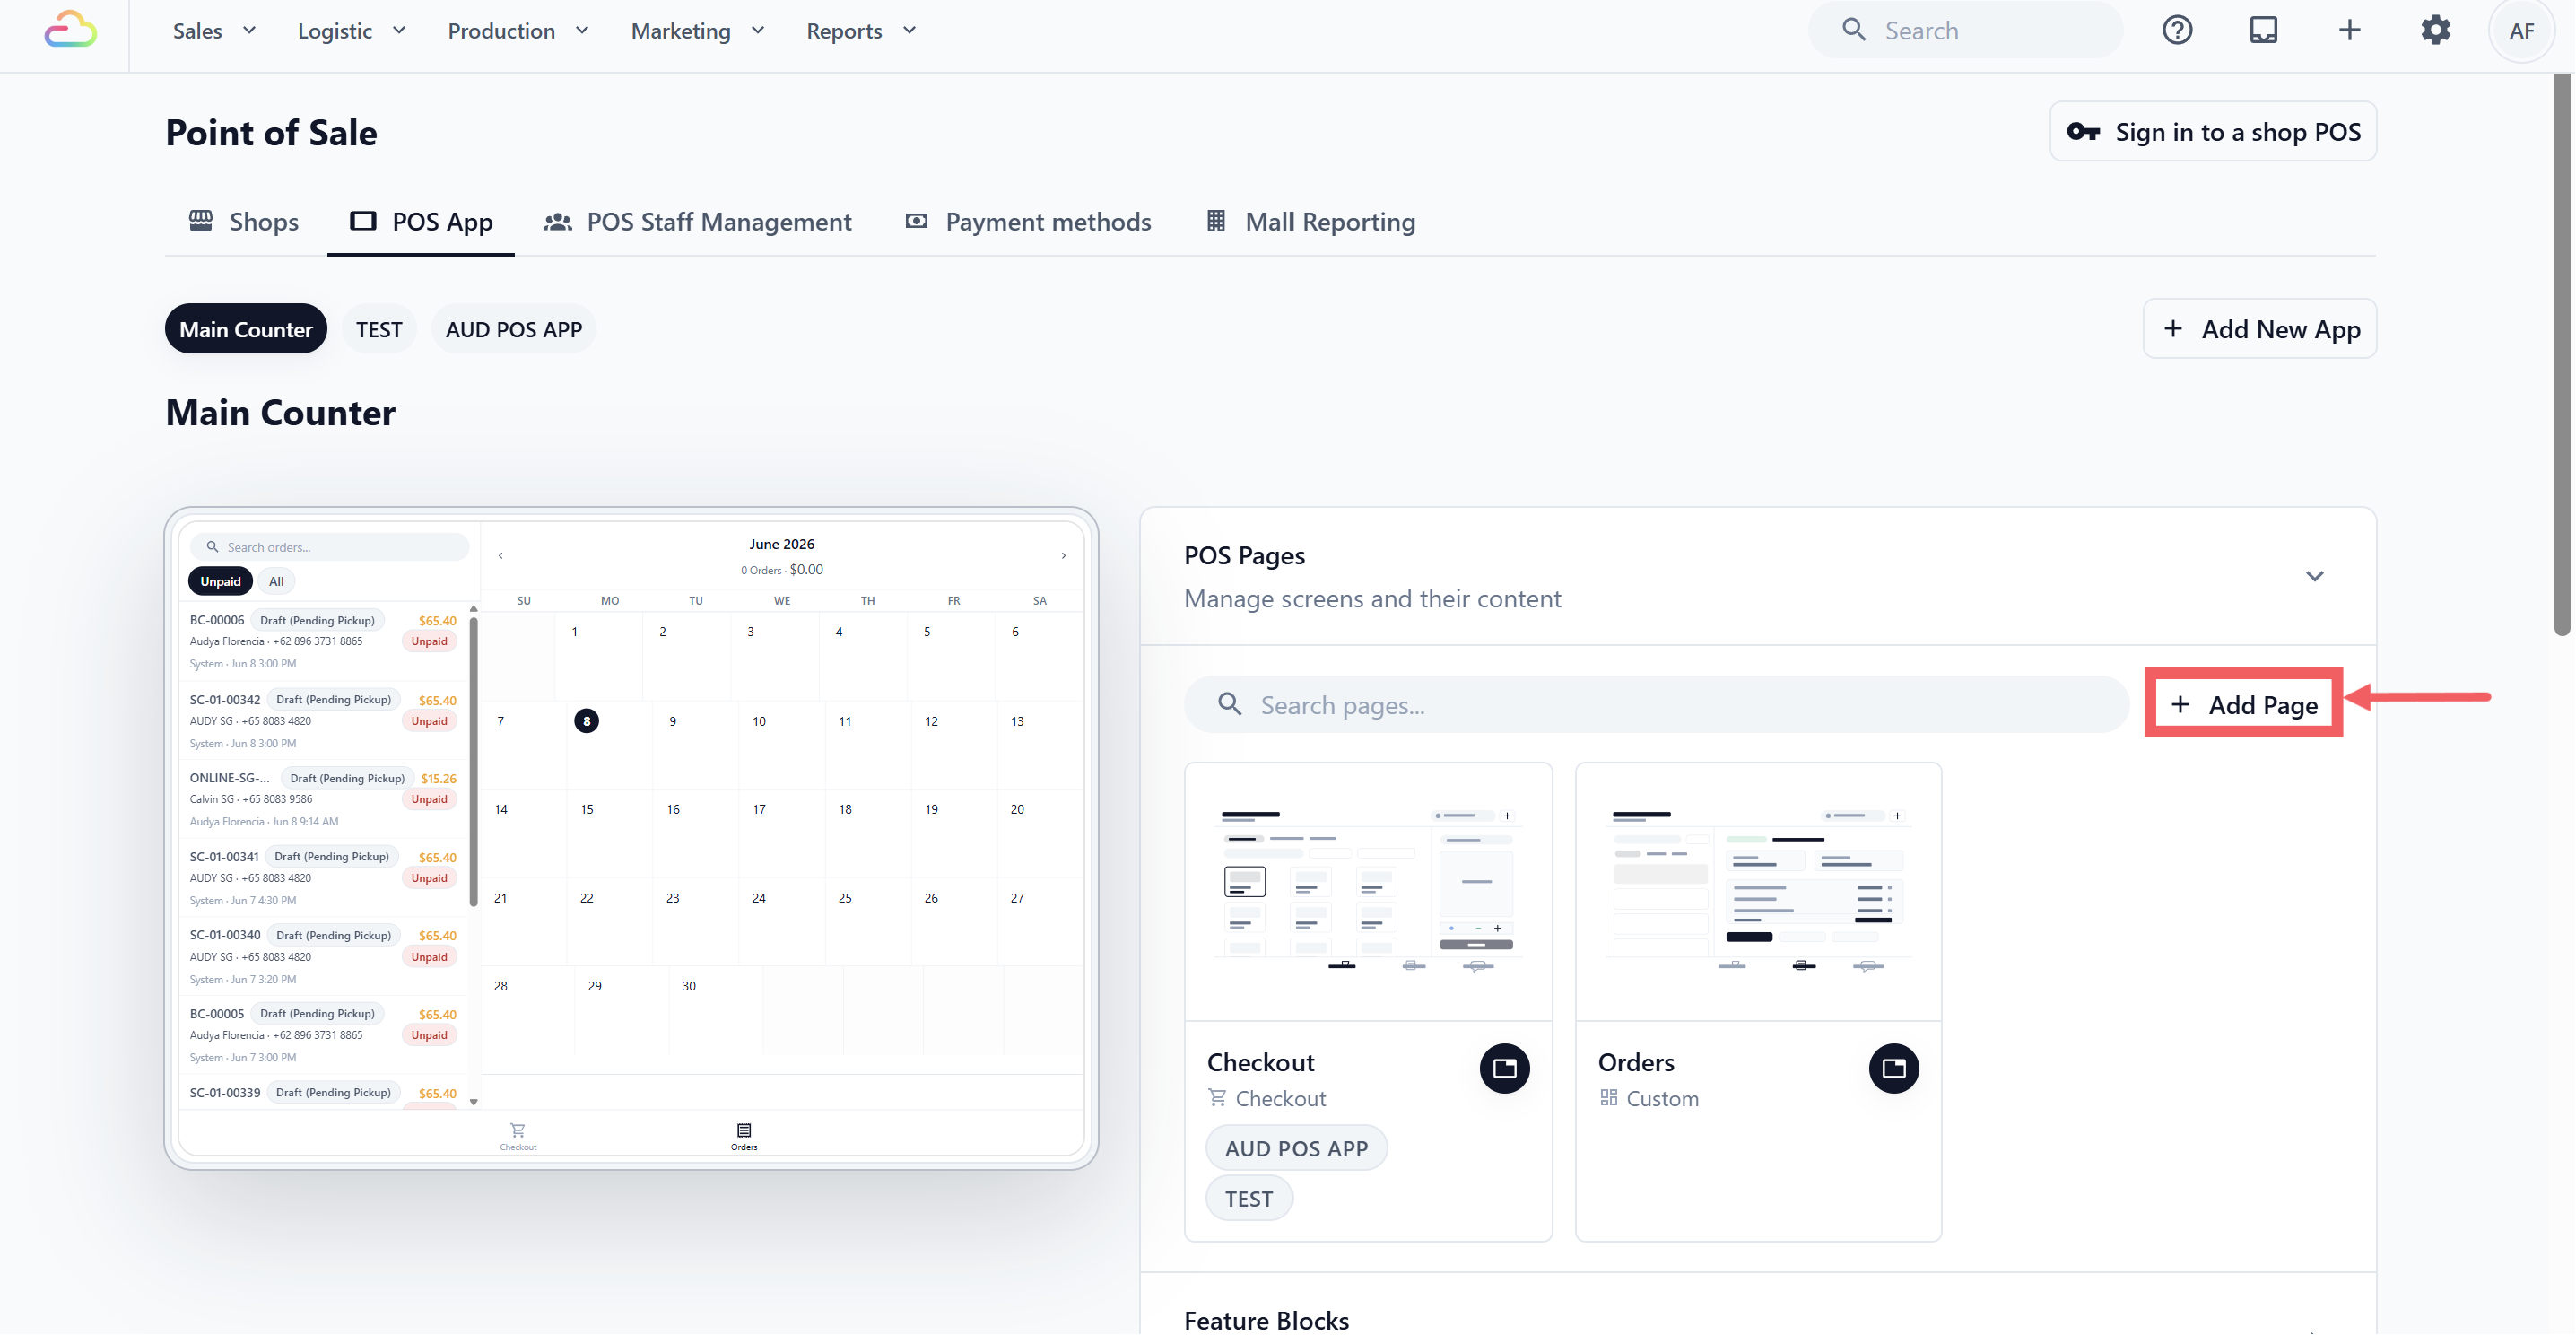
5. Click + Add Page .
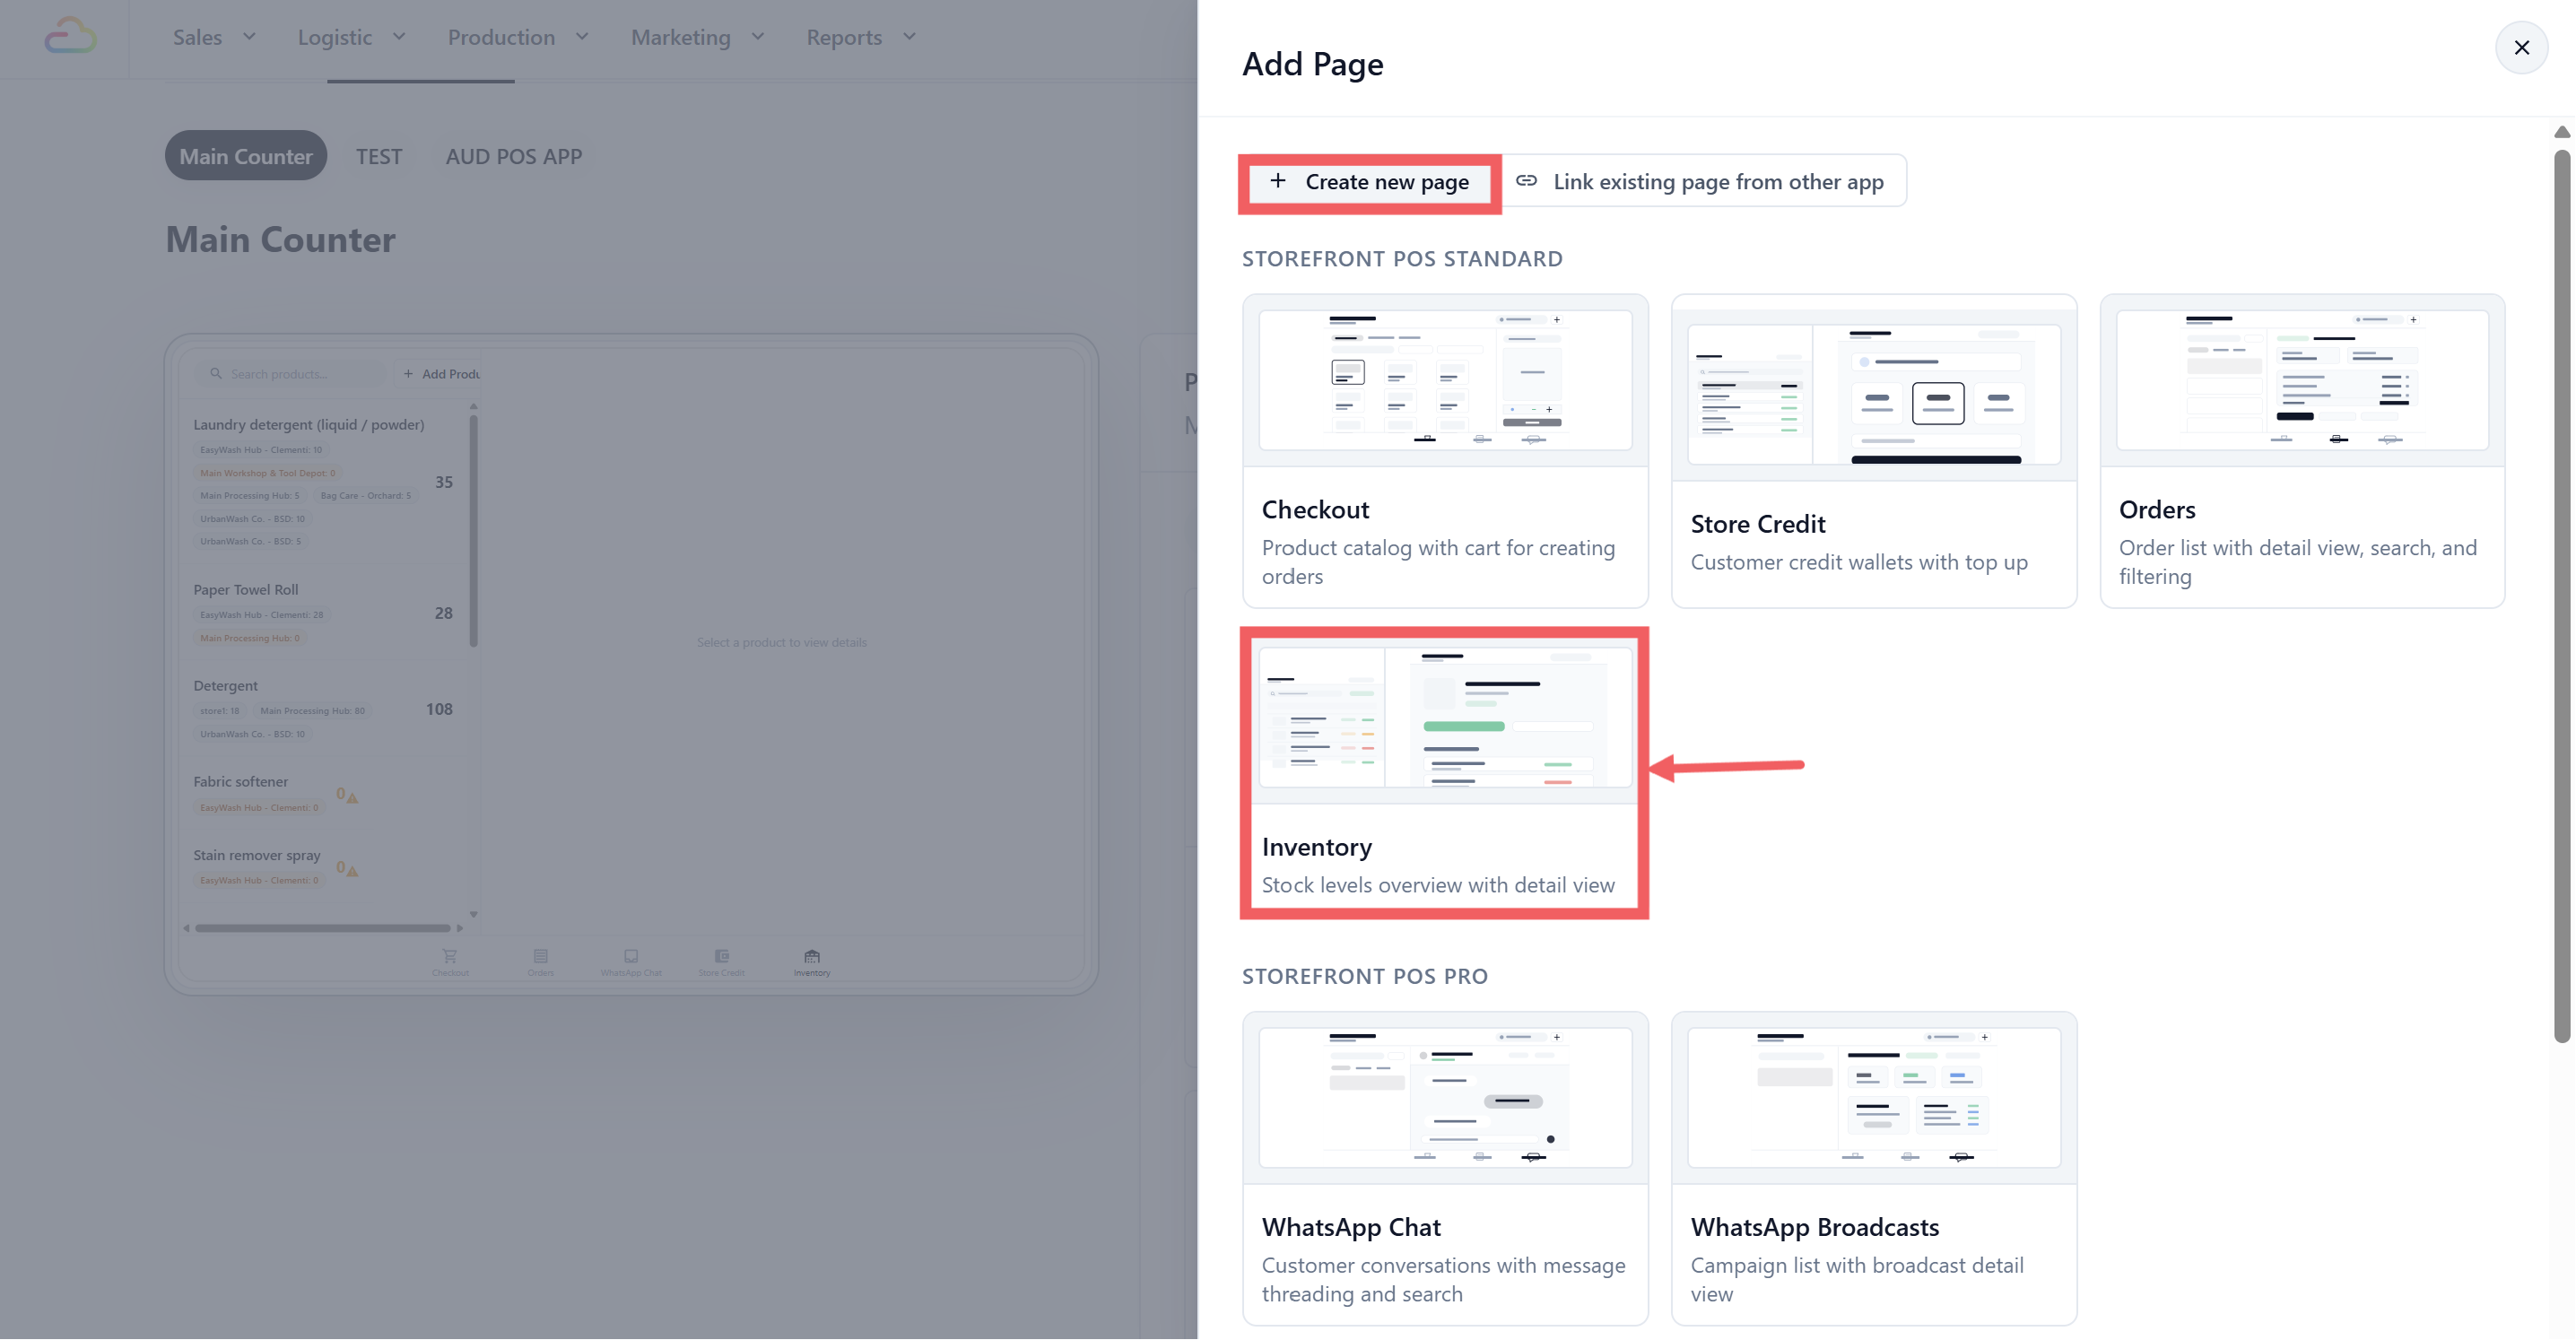
6. In the Add Page drawer, keep the Create new page tab selected.
7. Scroll to the Point of Sale Standard section and click the Inventory template card.
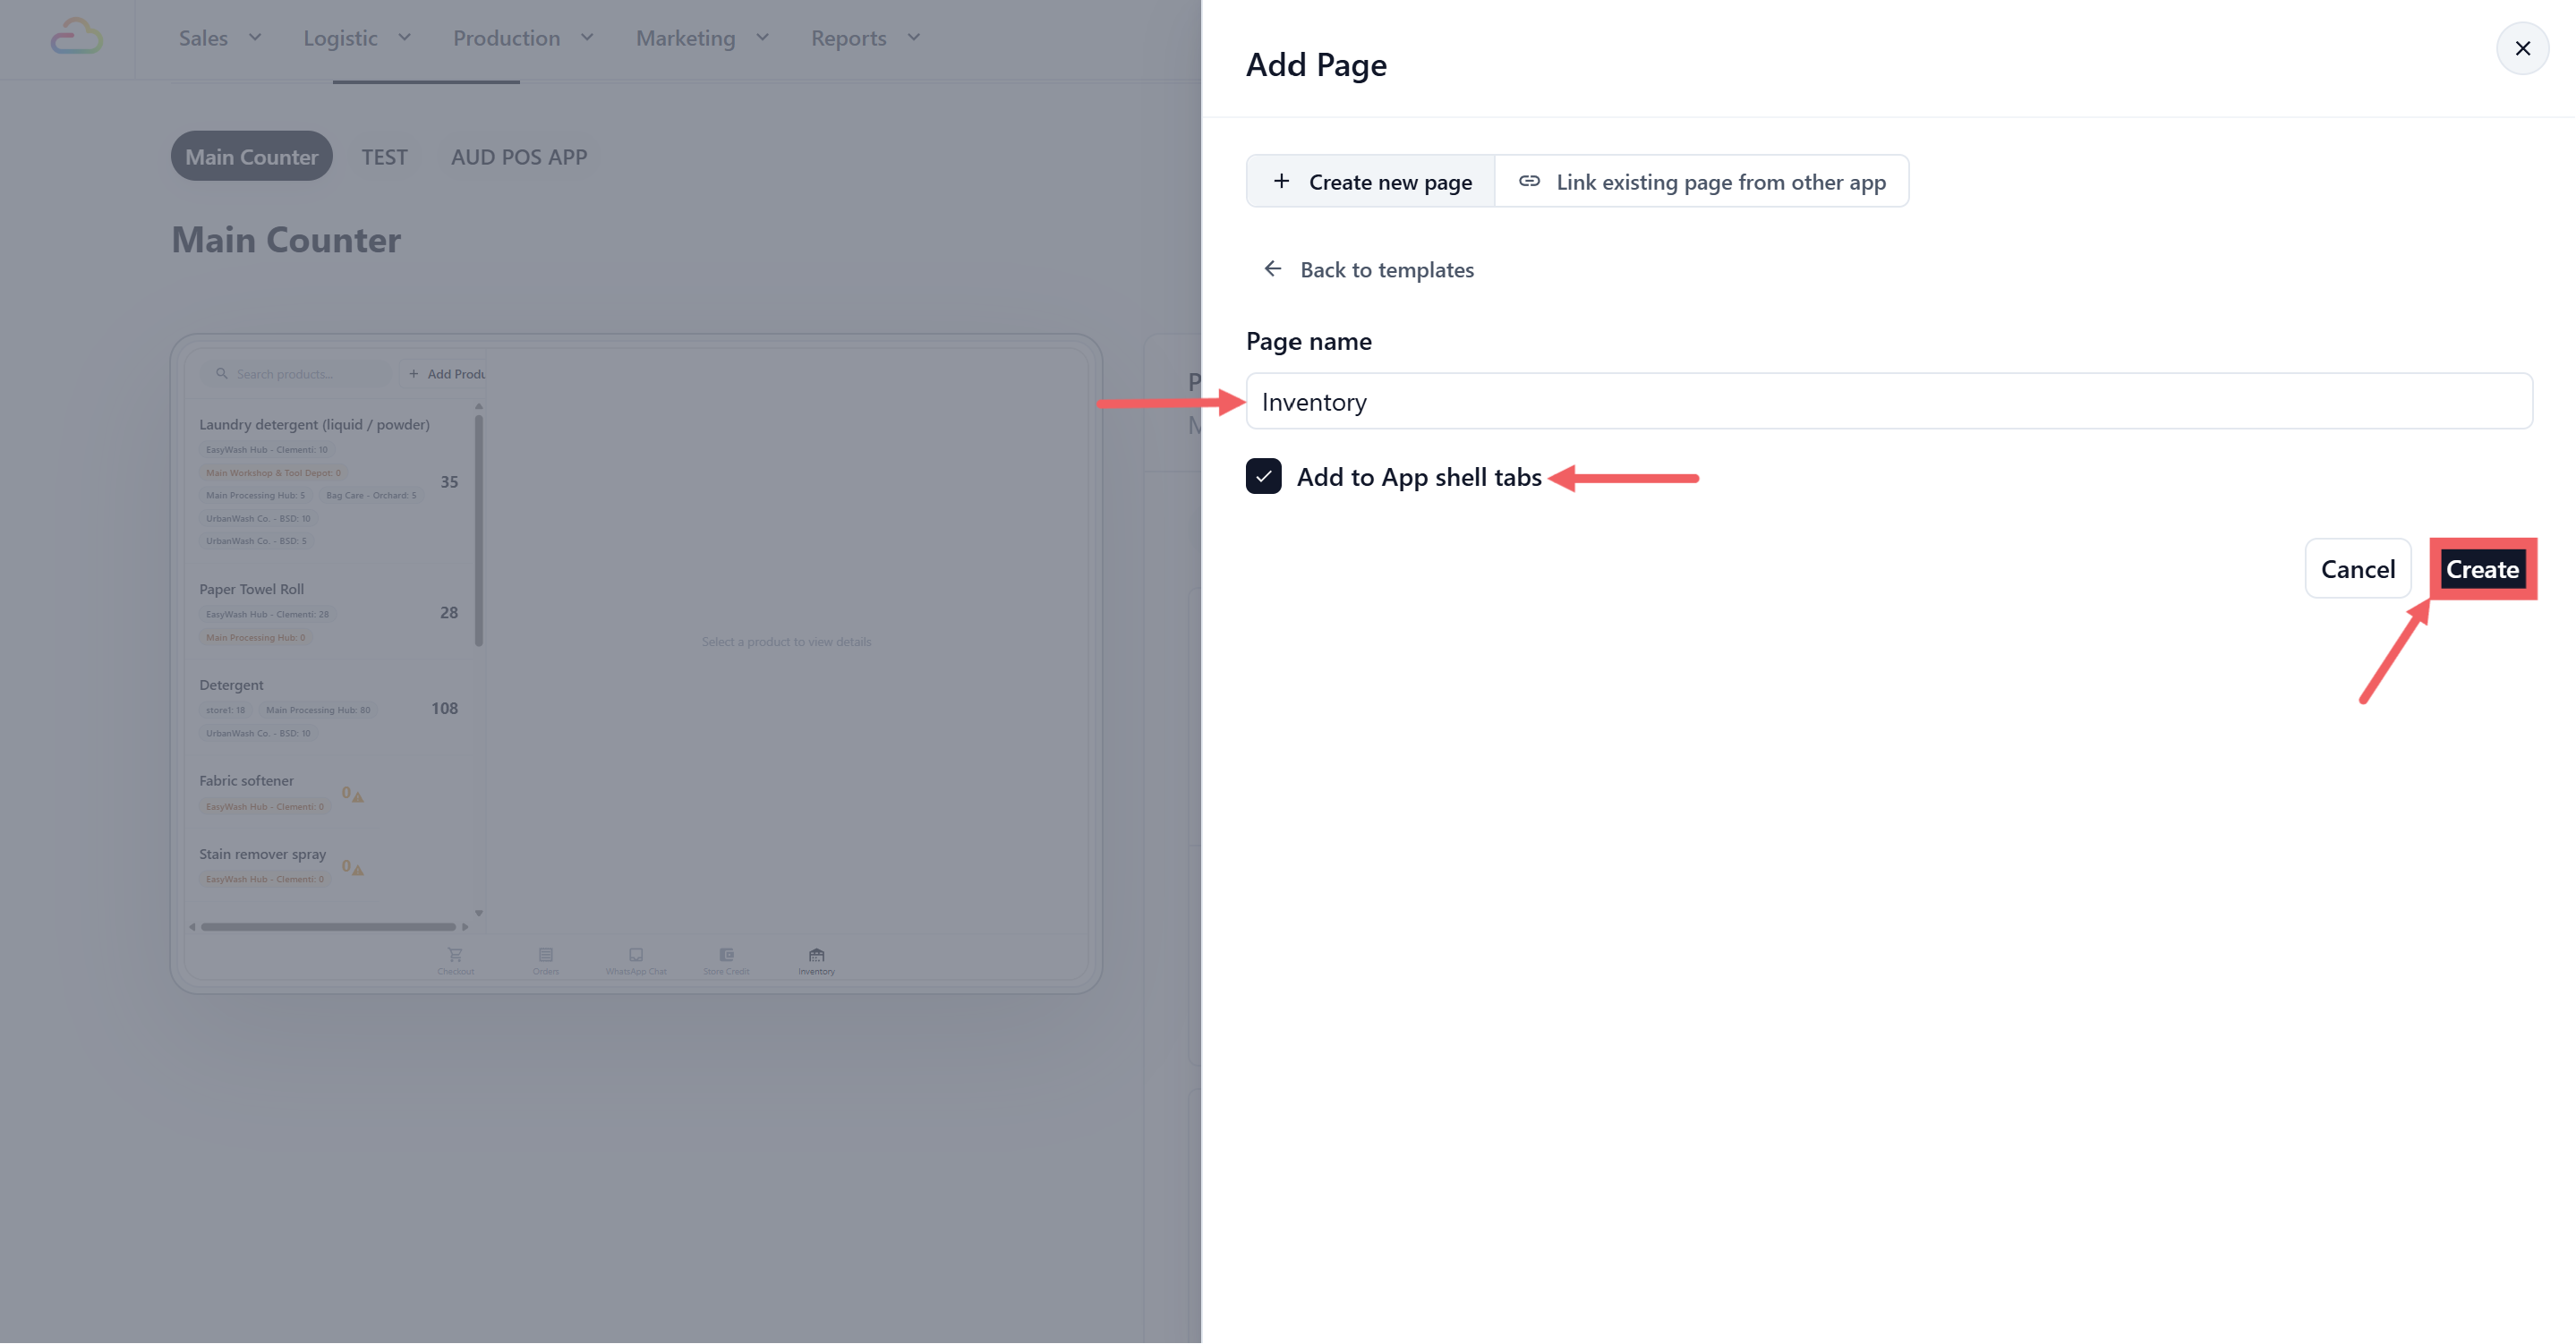
8. In the **Page Name** field, enter the label staff will see on the POS tab, for example "Inventory" or "Stock".
9. Tick **Add to App shell tabs** so the page shows up in the POS bottom tab bar. (Leave it unticked if you want to add it to a specific tab slot manually later.)
10. Click Create.
---
## Inventory Settings
Both blocks have simple toggle settings you can adjust in Settings→ Point of Sale → POS App → **your app** → Feature Blocks:
### Left Panel - Product List
| Setting | Default | What it does |
| --- | --- | --- |
| Show Stock In Button | On | Shows or hides the + Add Product button in the header, used for receiving stock for a product not yet tracked at this location. |
| Show Stock Out Actions | On | Enables or disables the Stock Out form in the detail panel. |
### Right Panel - Detail
| Setting | Default | What it does |
| --- | --- | --- |
| Show Stock In | On | Shows the Stock In section for recording incoming stock. |
| Show Stock Out | On | Shows the Stock Out section (collapsed by default — staff tap to expand it). |
If you only want staff to record incoming deliveries but not stock-outs, turn off **Show Stock Out** on both blocks. You can always turn it back on later.
---
## How Your Staff Will Use It
When staff tap the **Inventory** tab on the POS, here's what they'll see:
### Left Panel — Product List
- A **search bar** at the top to filter products by name.
- A list of all tracked retail products, each showing:
- Product name
- Current stock quantity at **this store only** (large number on the right)
- A variant badge if the product has multiple variants.
- **Colour coding:** normal = in stock, yellow = zero, red = negative
- An + Add Product button (top right) to start tracking a new product at this location.
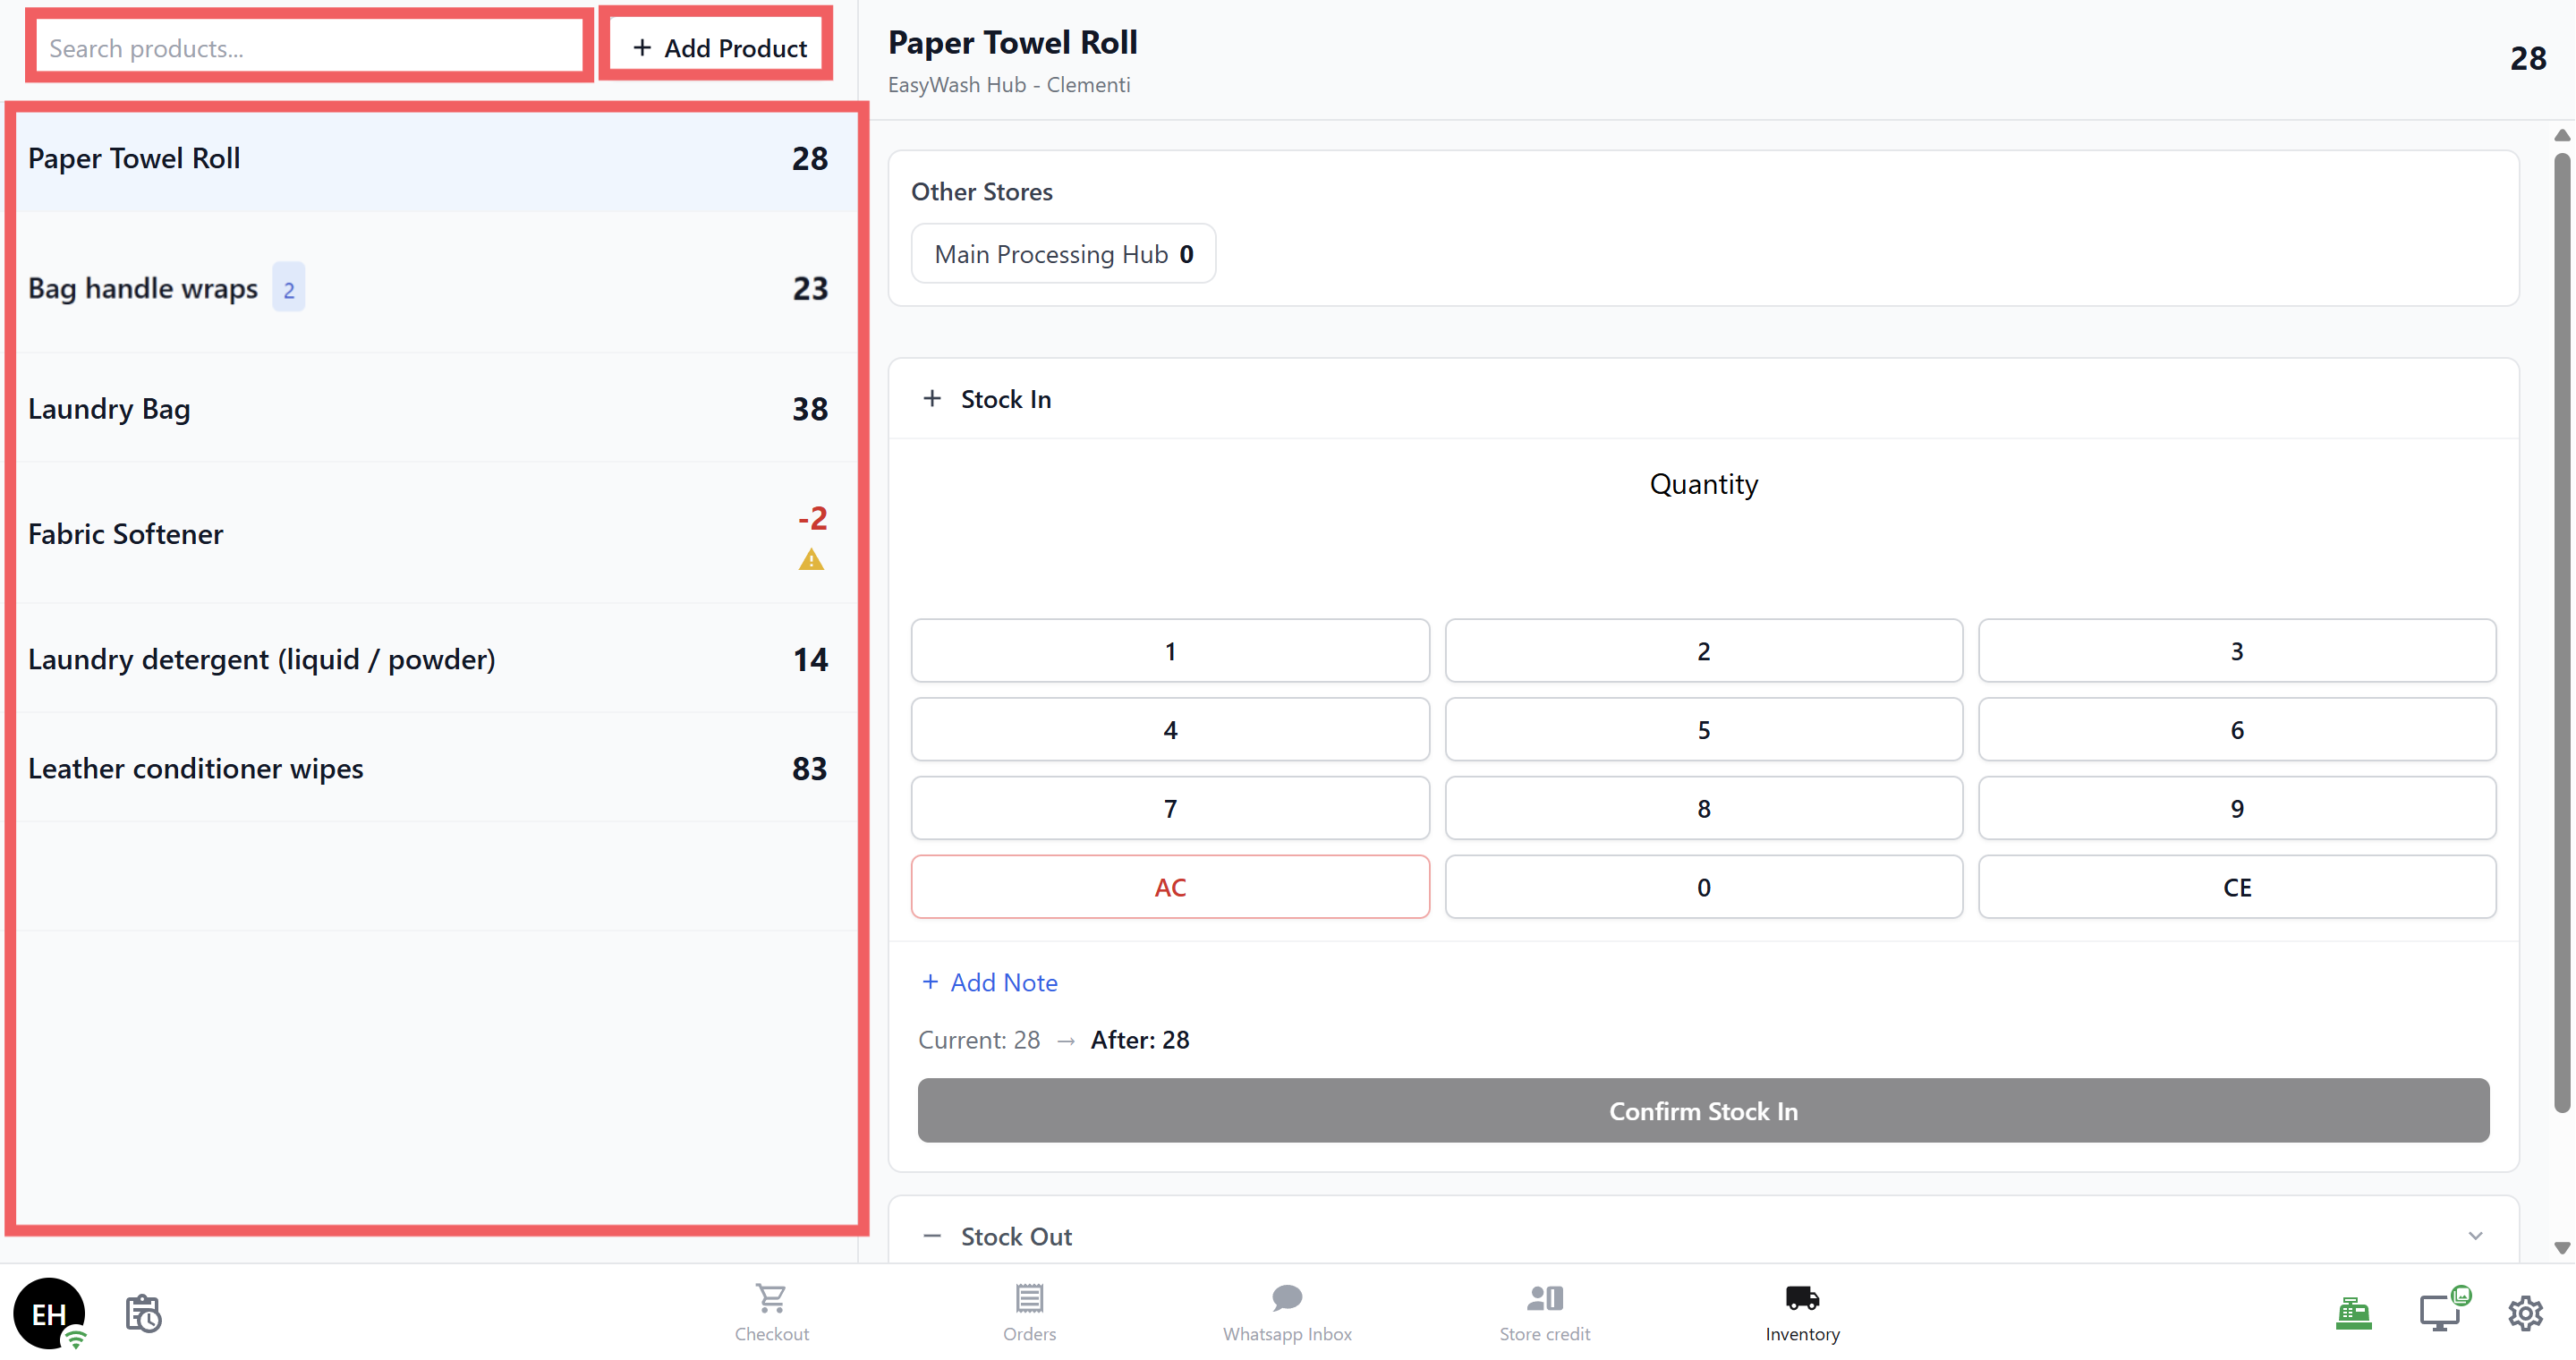
If there are stock transfers on the way to this location from another branch, an **orange banner** appears at the top showing _"Incoming Transfers."_ Tap it to see the details.
### Right Panel — Product Detail
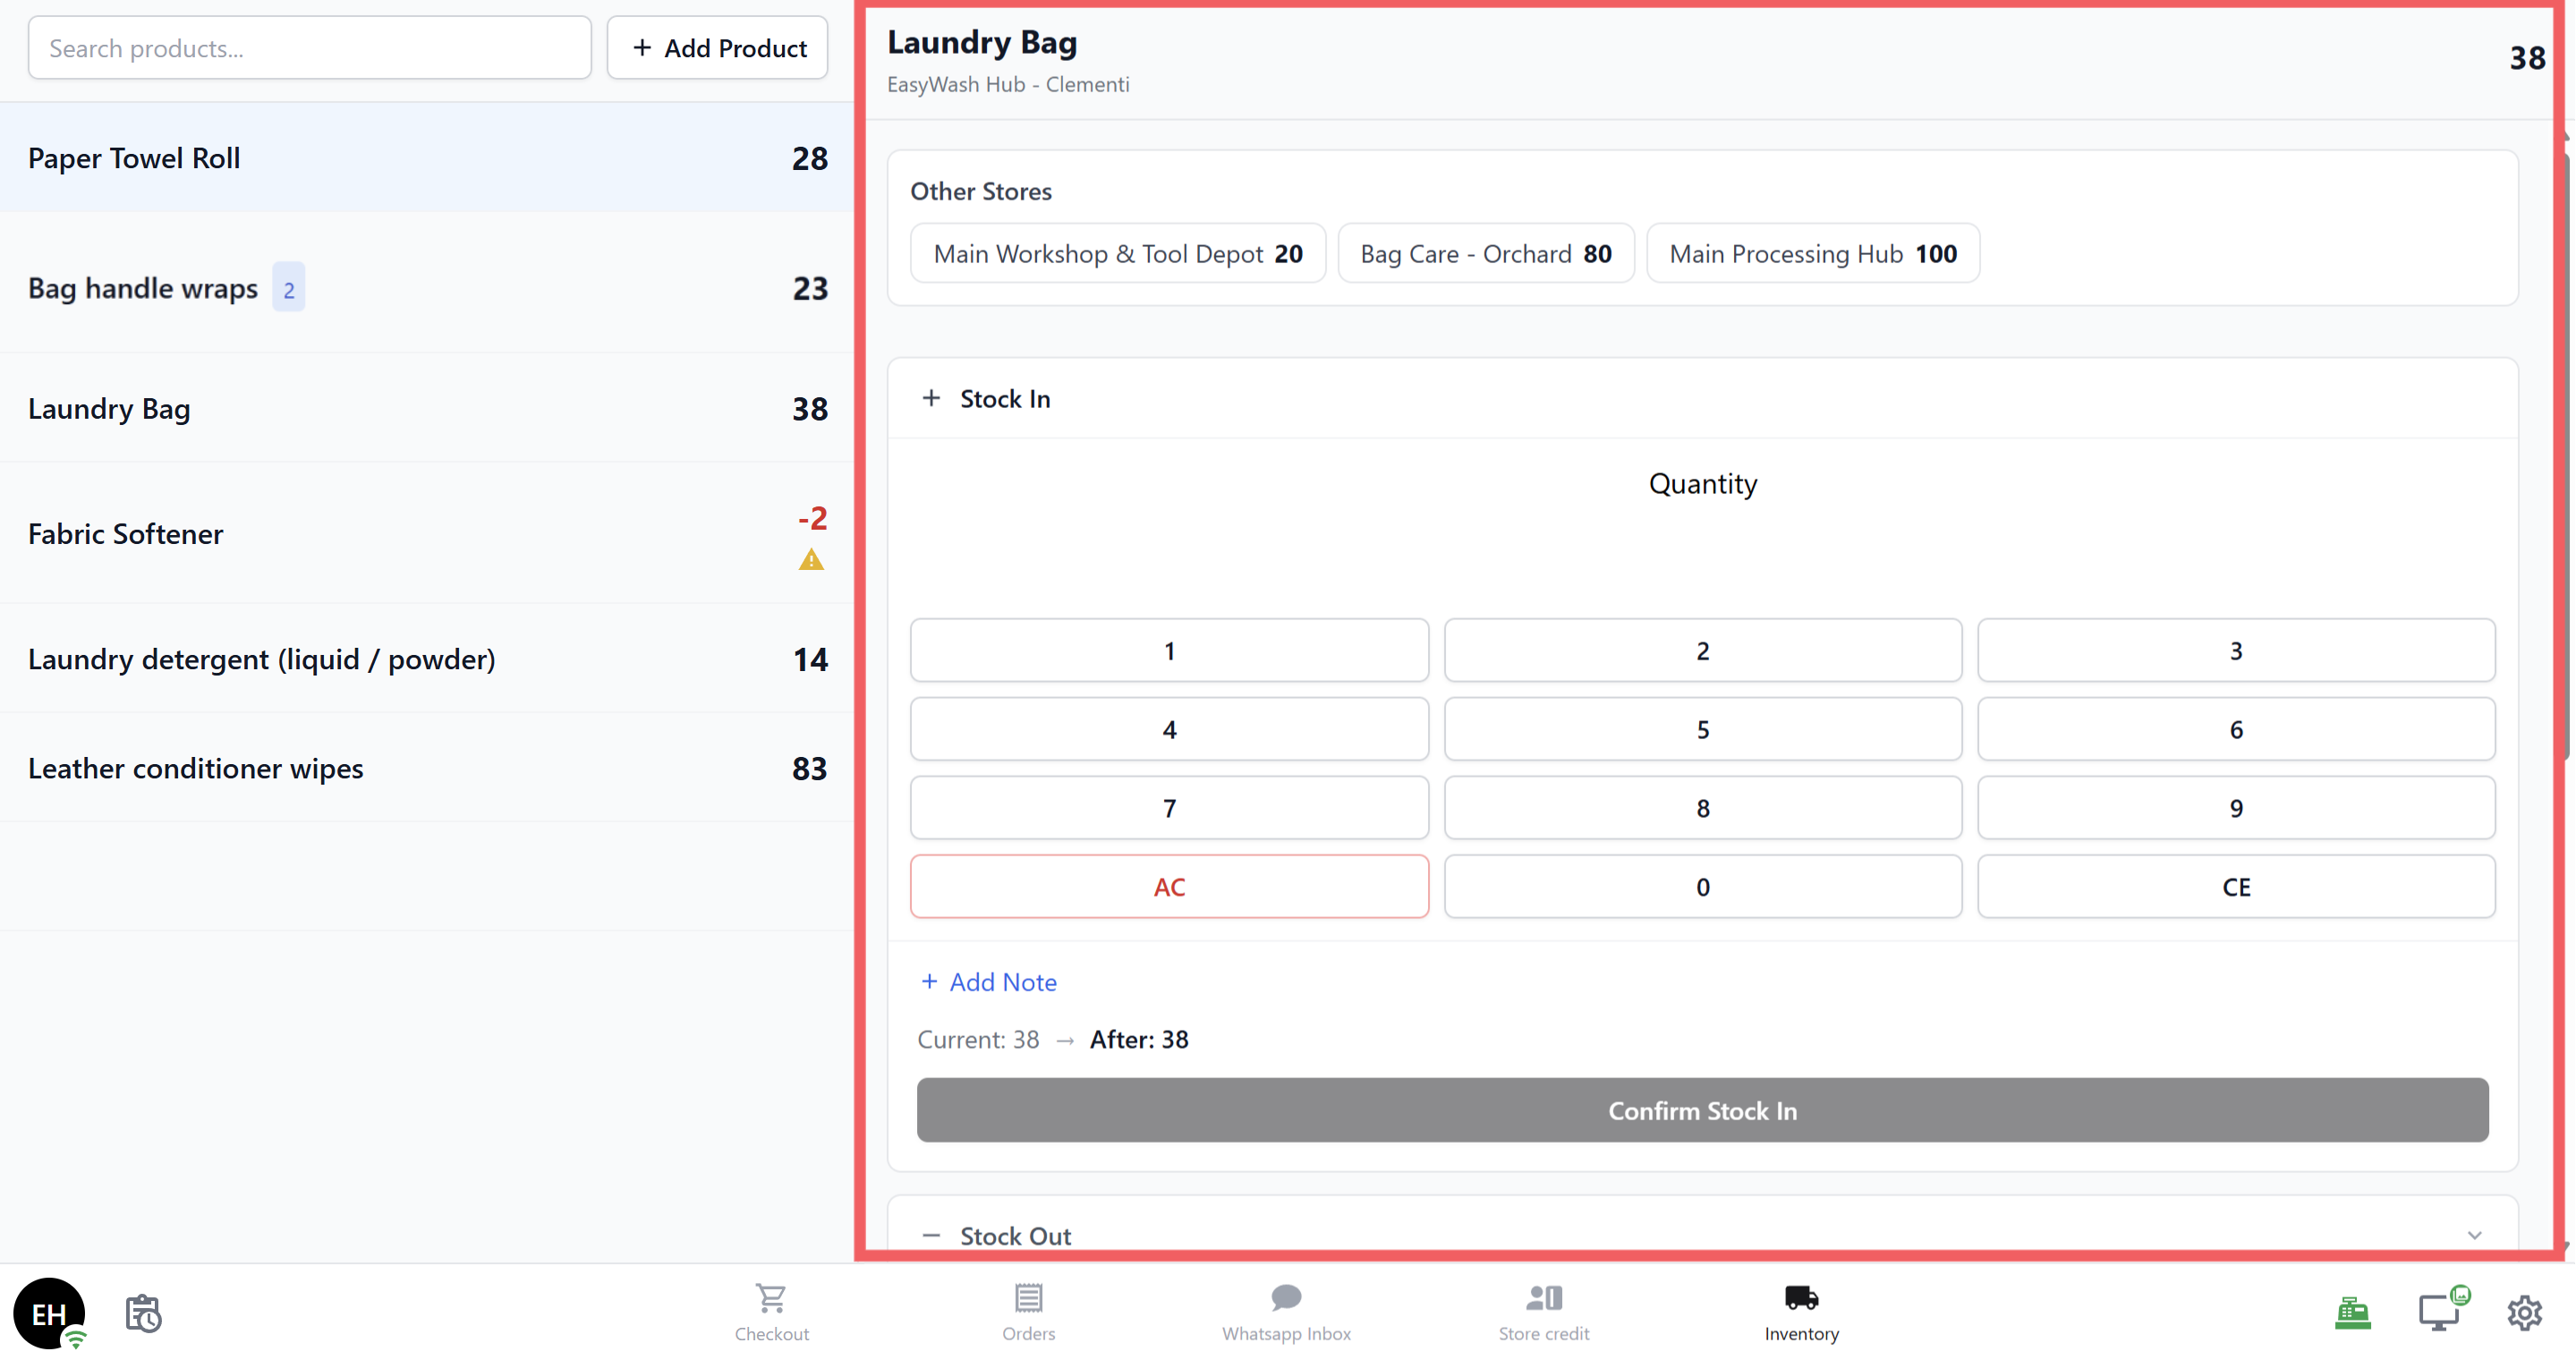
Tap any product in the list to open its detail view. The panel has four collapsible sections:
**Overview**
- Shows the **current stock quantity** at this location (large, colour-coded number).
- For products with variants: a grid showing each variant and its individual quantity.
- **Other Stores** section: shows stock at your other branches. Tap any location to expand its variant breakdown.
**Stock In**
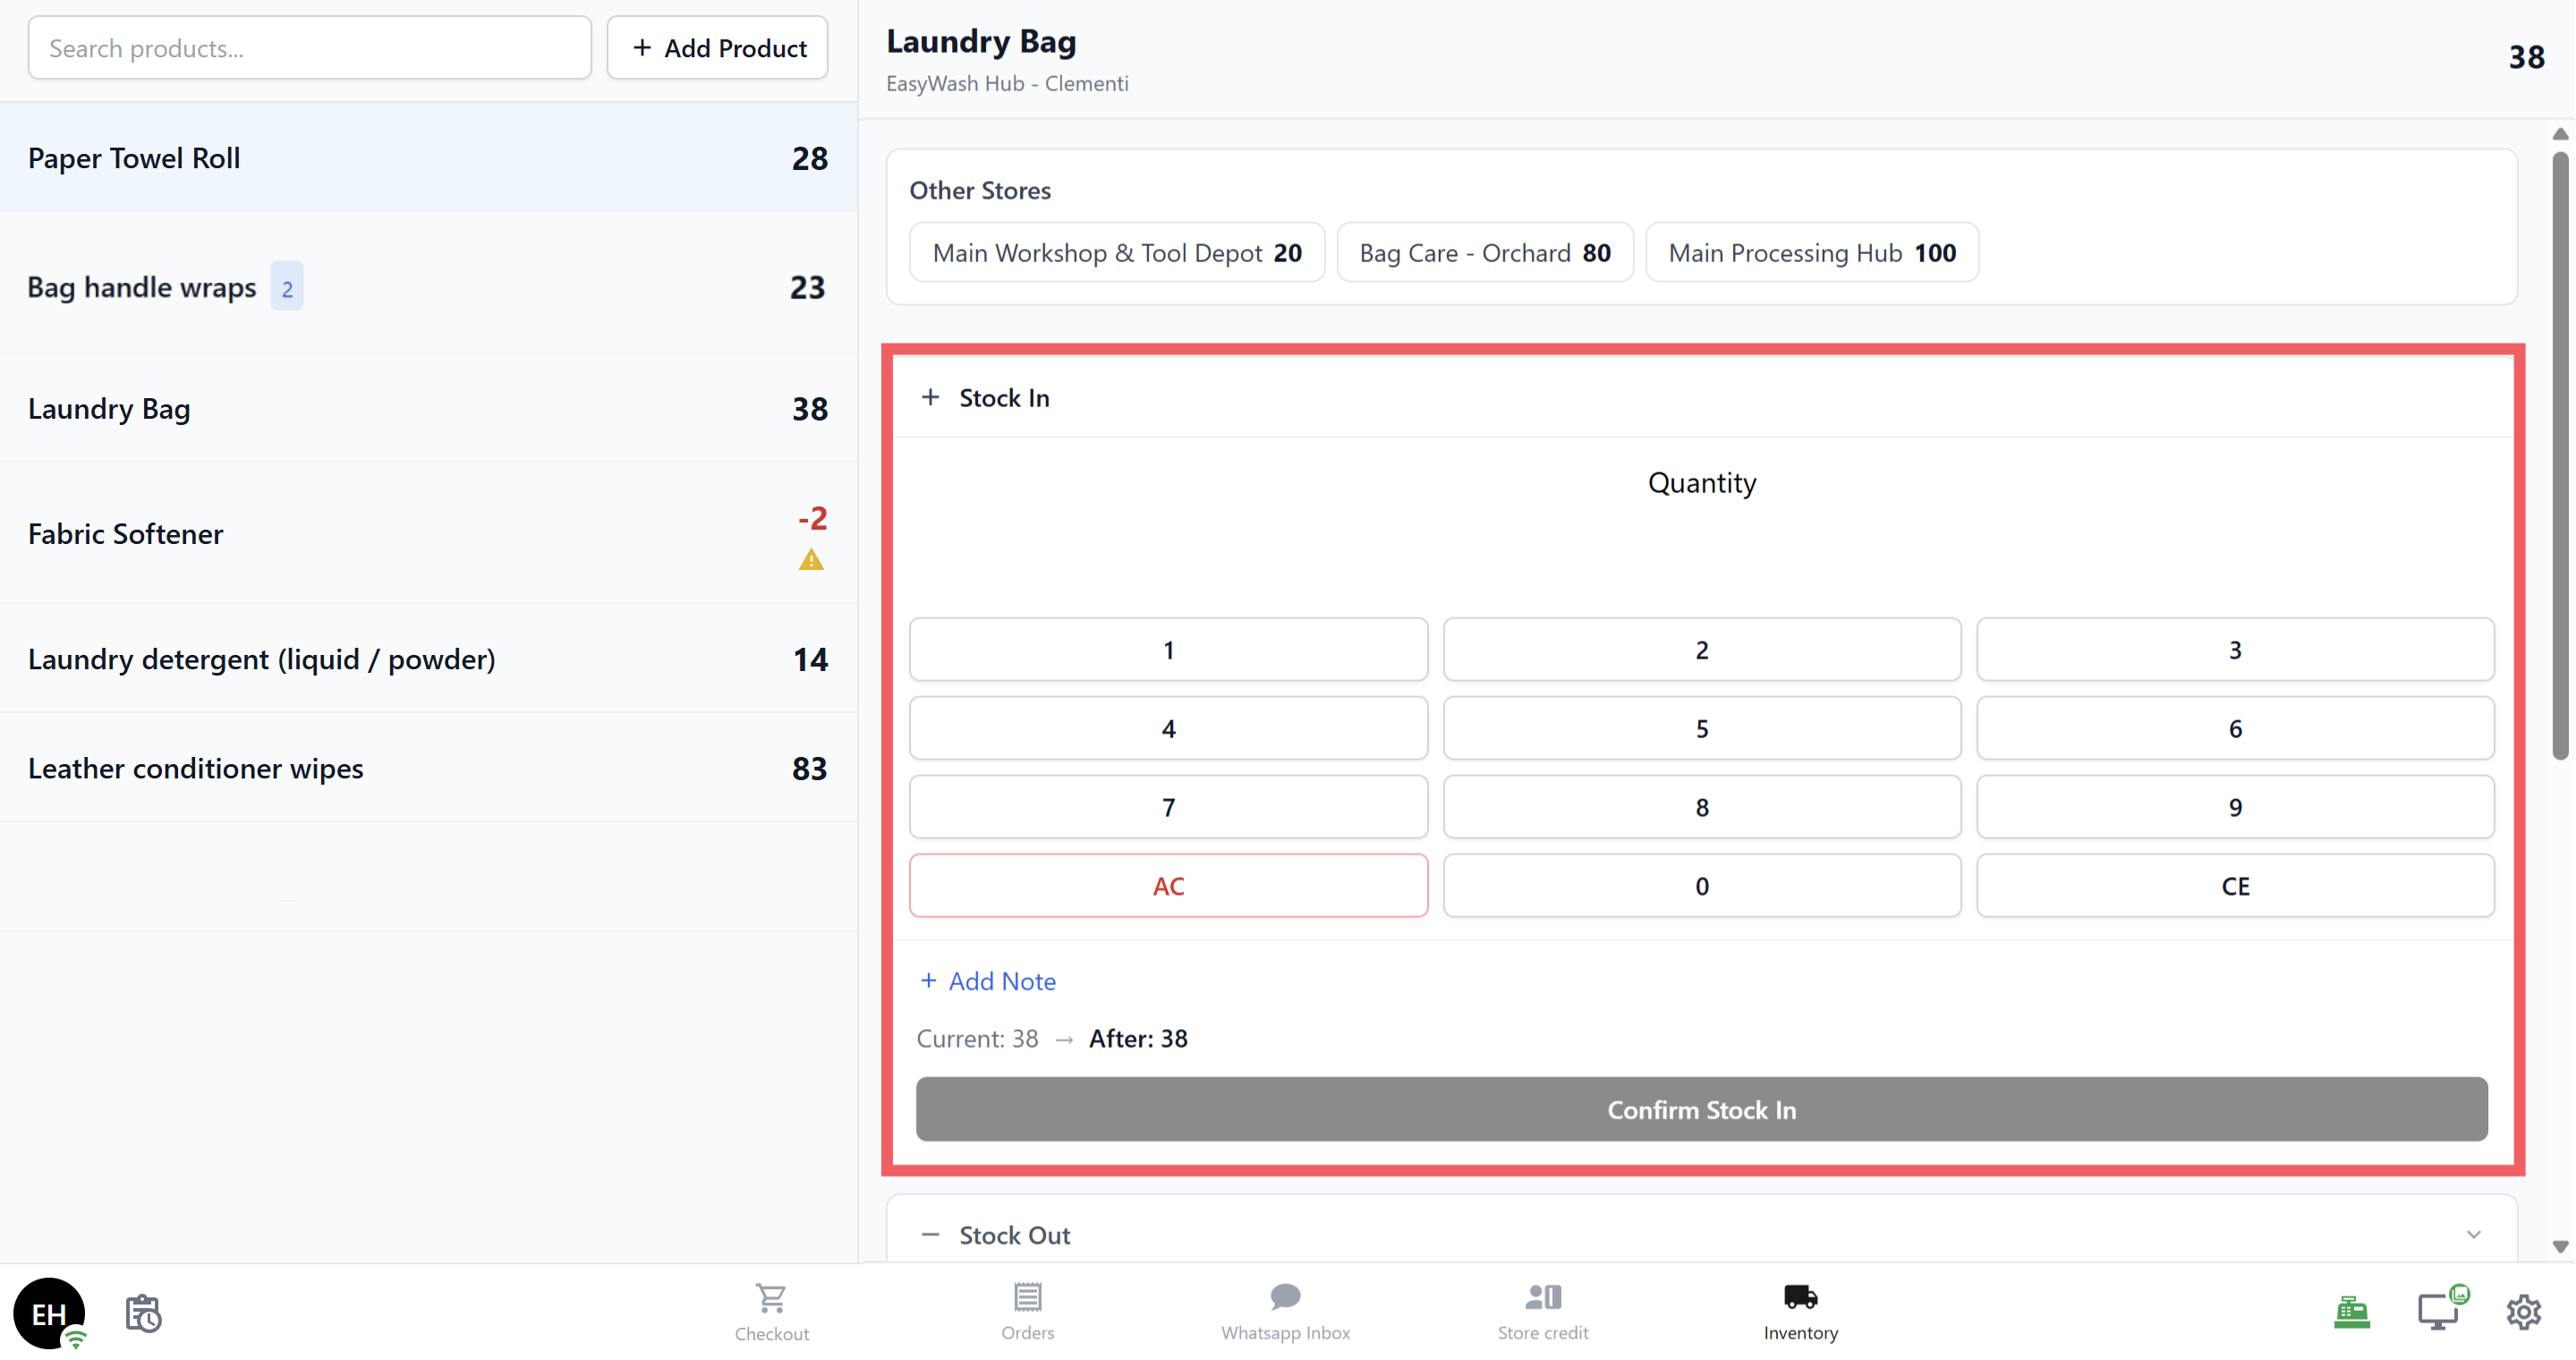
Use this to record new stock received (e.g., a supplier delivery).
1. If the product has variants, select the variant first.
2. Use the **dial pad** to enter the quantity received.
3. The screen shows _"Current: X → After: Y"_ so you can see the result before confirming.
4. Optionally tap **Add Note** to record a reason (e.g., _"Supplier delivery"_).
5. Tap **Confirm Stock In**.
**Stock Out**
Use this to record stock used or removed (e.g., items consumed, damaged, or expired). This section is **collapsed by default** — tap the header to expand it.
1. Select a variant (if applicable) and enter the quantity on the dial pad.
2. Optionally add a note (e.g., _"Damaged"_ or _"Used for cleaning"_).
3. Tap **Confirm Stock Out**.
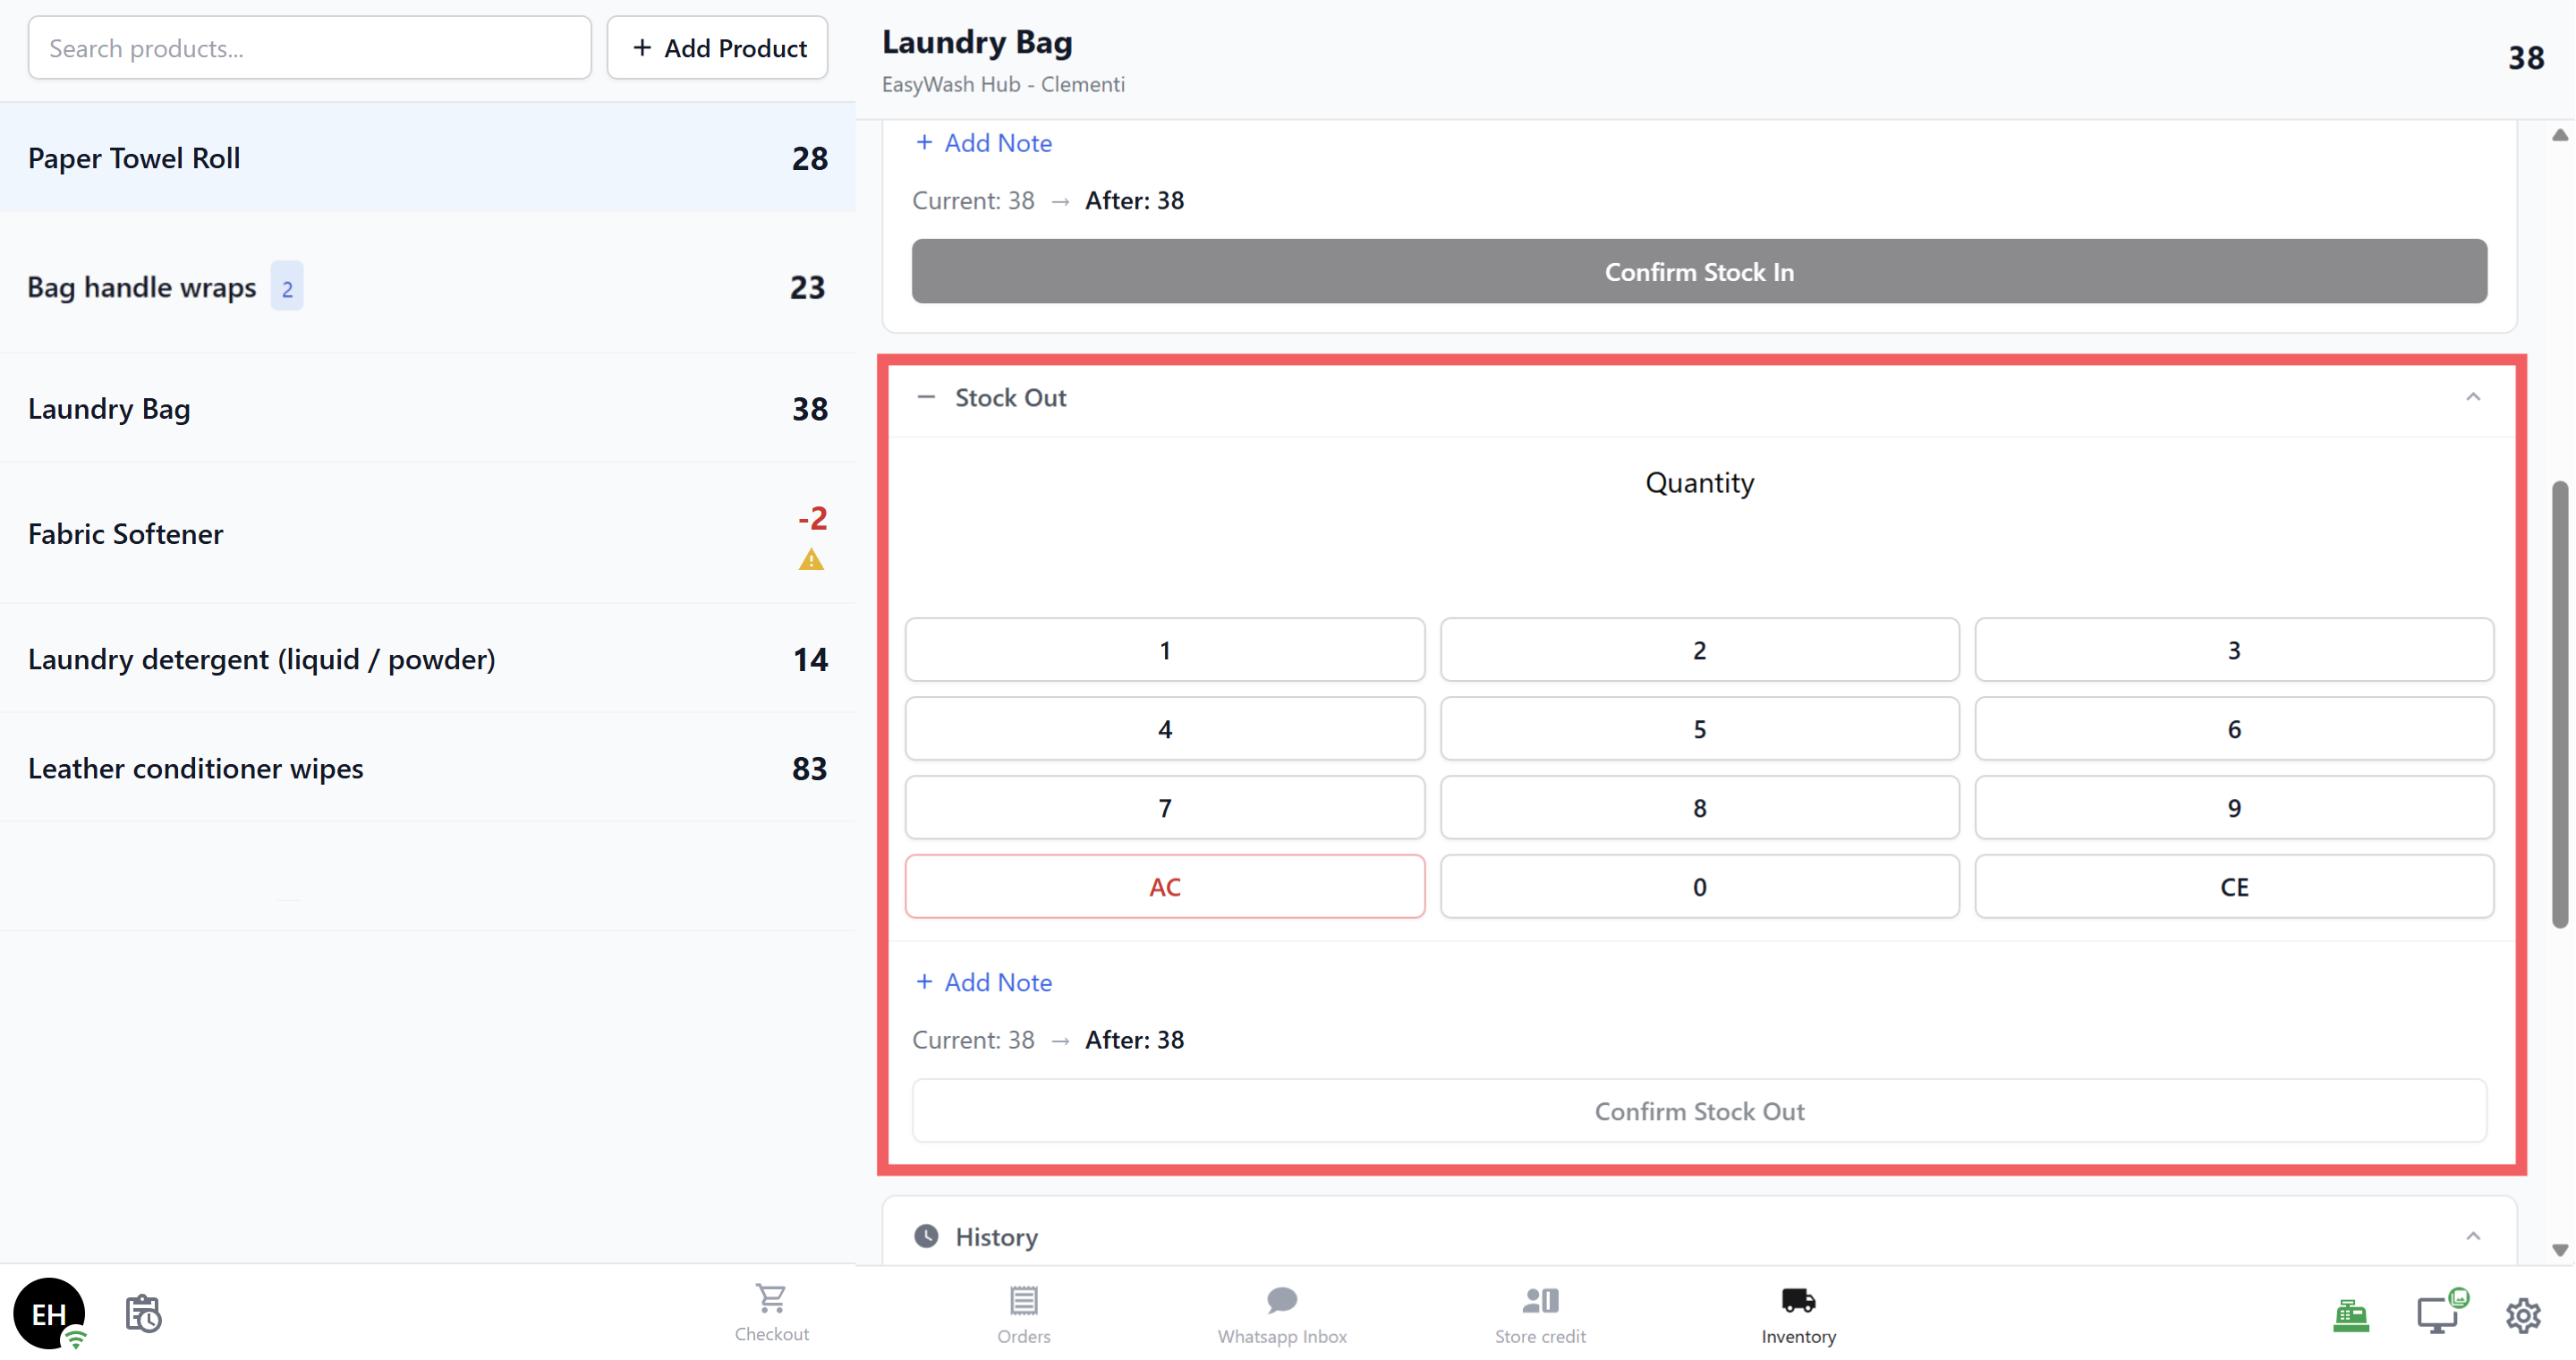
The system will show a **warning** if the quantity would go negative, but it won't block the action. This is by design — sometimes you need to record stock that was already used before it was logged.
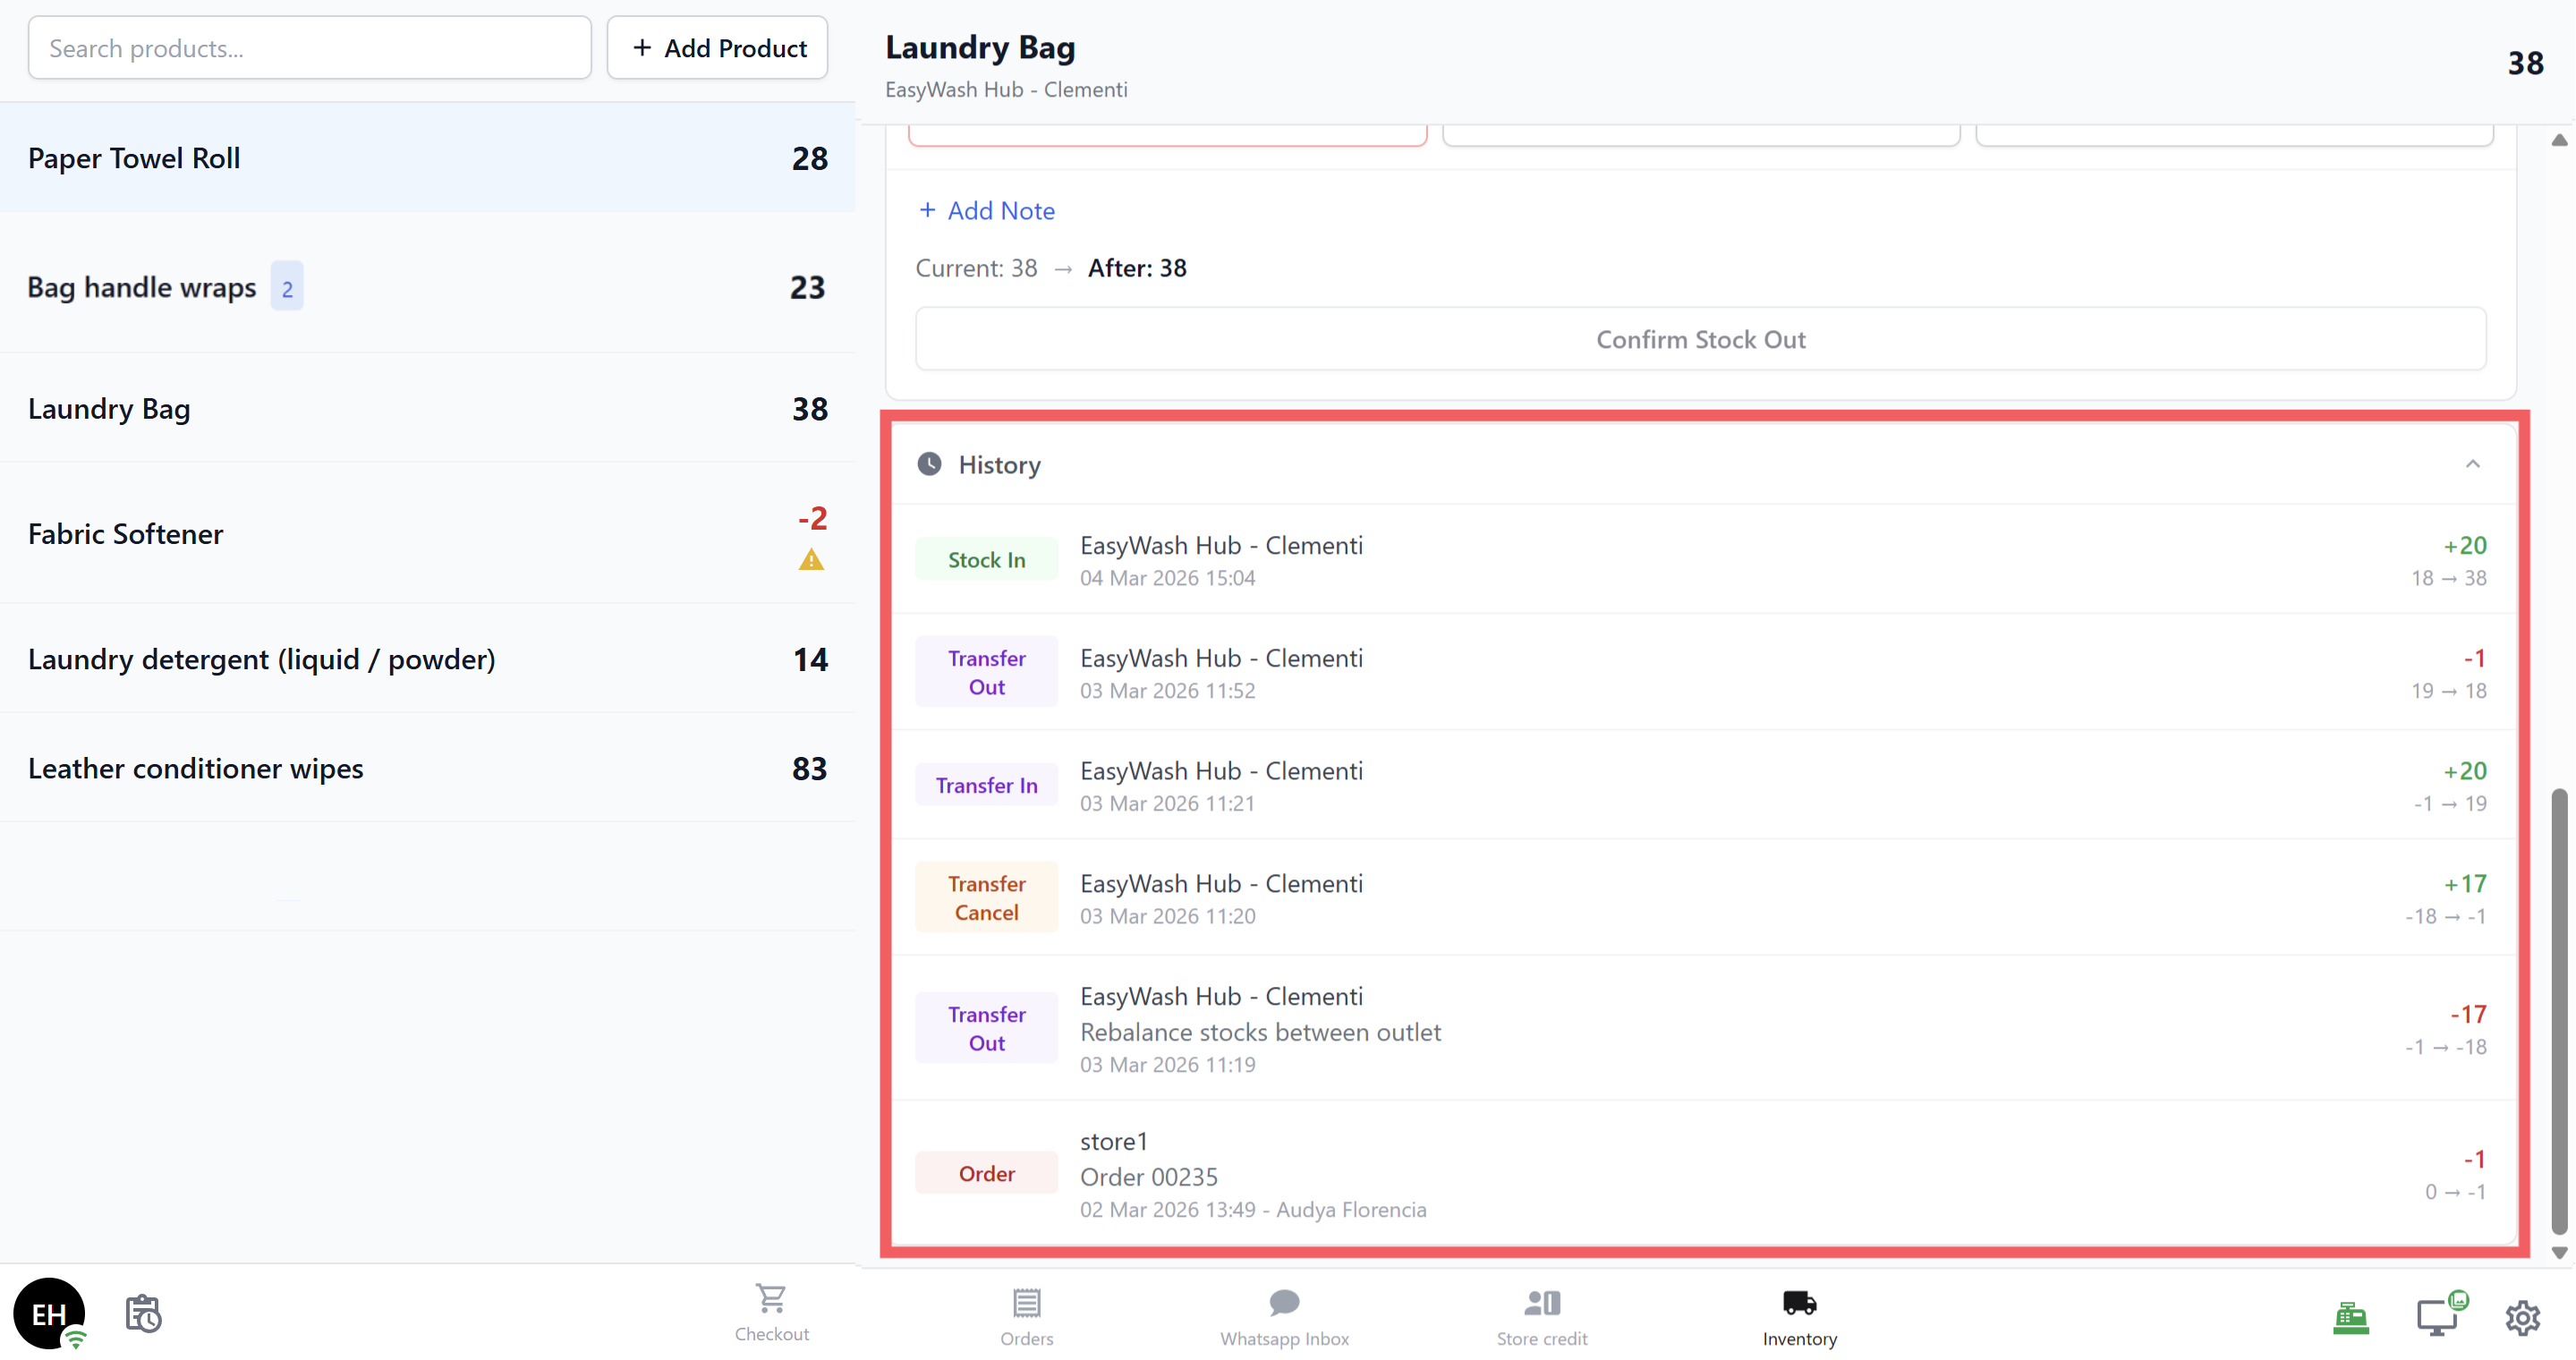
**History**
Tap to expand a log of all stock movements for this product at this location. Each entry shows:
- **Movement type** (colour-coded badge)
- Date and time
- Quantity change (+/-)
- Note/reason (if one was entered)
### Adding a New Product
If a product isn't being tracked at this location yet:
1. Tap the **+ Add Product** button in the top-right of the product list.
2. The right panel switches to an **Add Product** view with a search field (filtered to retail products only).
3. Search for and select the product.
4. Use the dial pad to enter the starting quantity, then tap **Confirm Stock In**.
The product now appears in your inventory list.
---
## Incoming Transfers
If another branch sends stock to your location, an **orange banner** appears at the top of the product list showing the number of pending transfers.
1. Tap the banner to see the transfers.
2. Each transfer shows: where it's from, what items are included, quantities, and who created it.
3. Tap **Receive All** to accept the full transfer in one go.
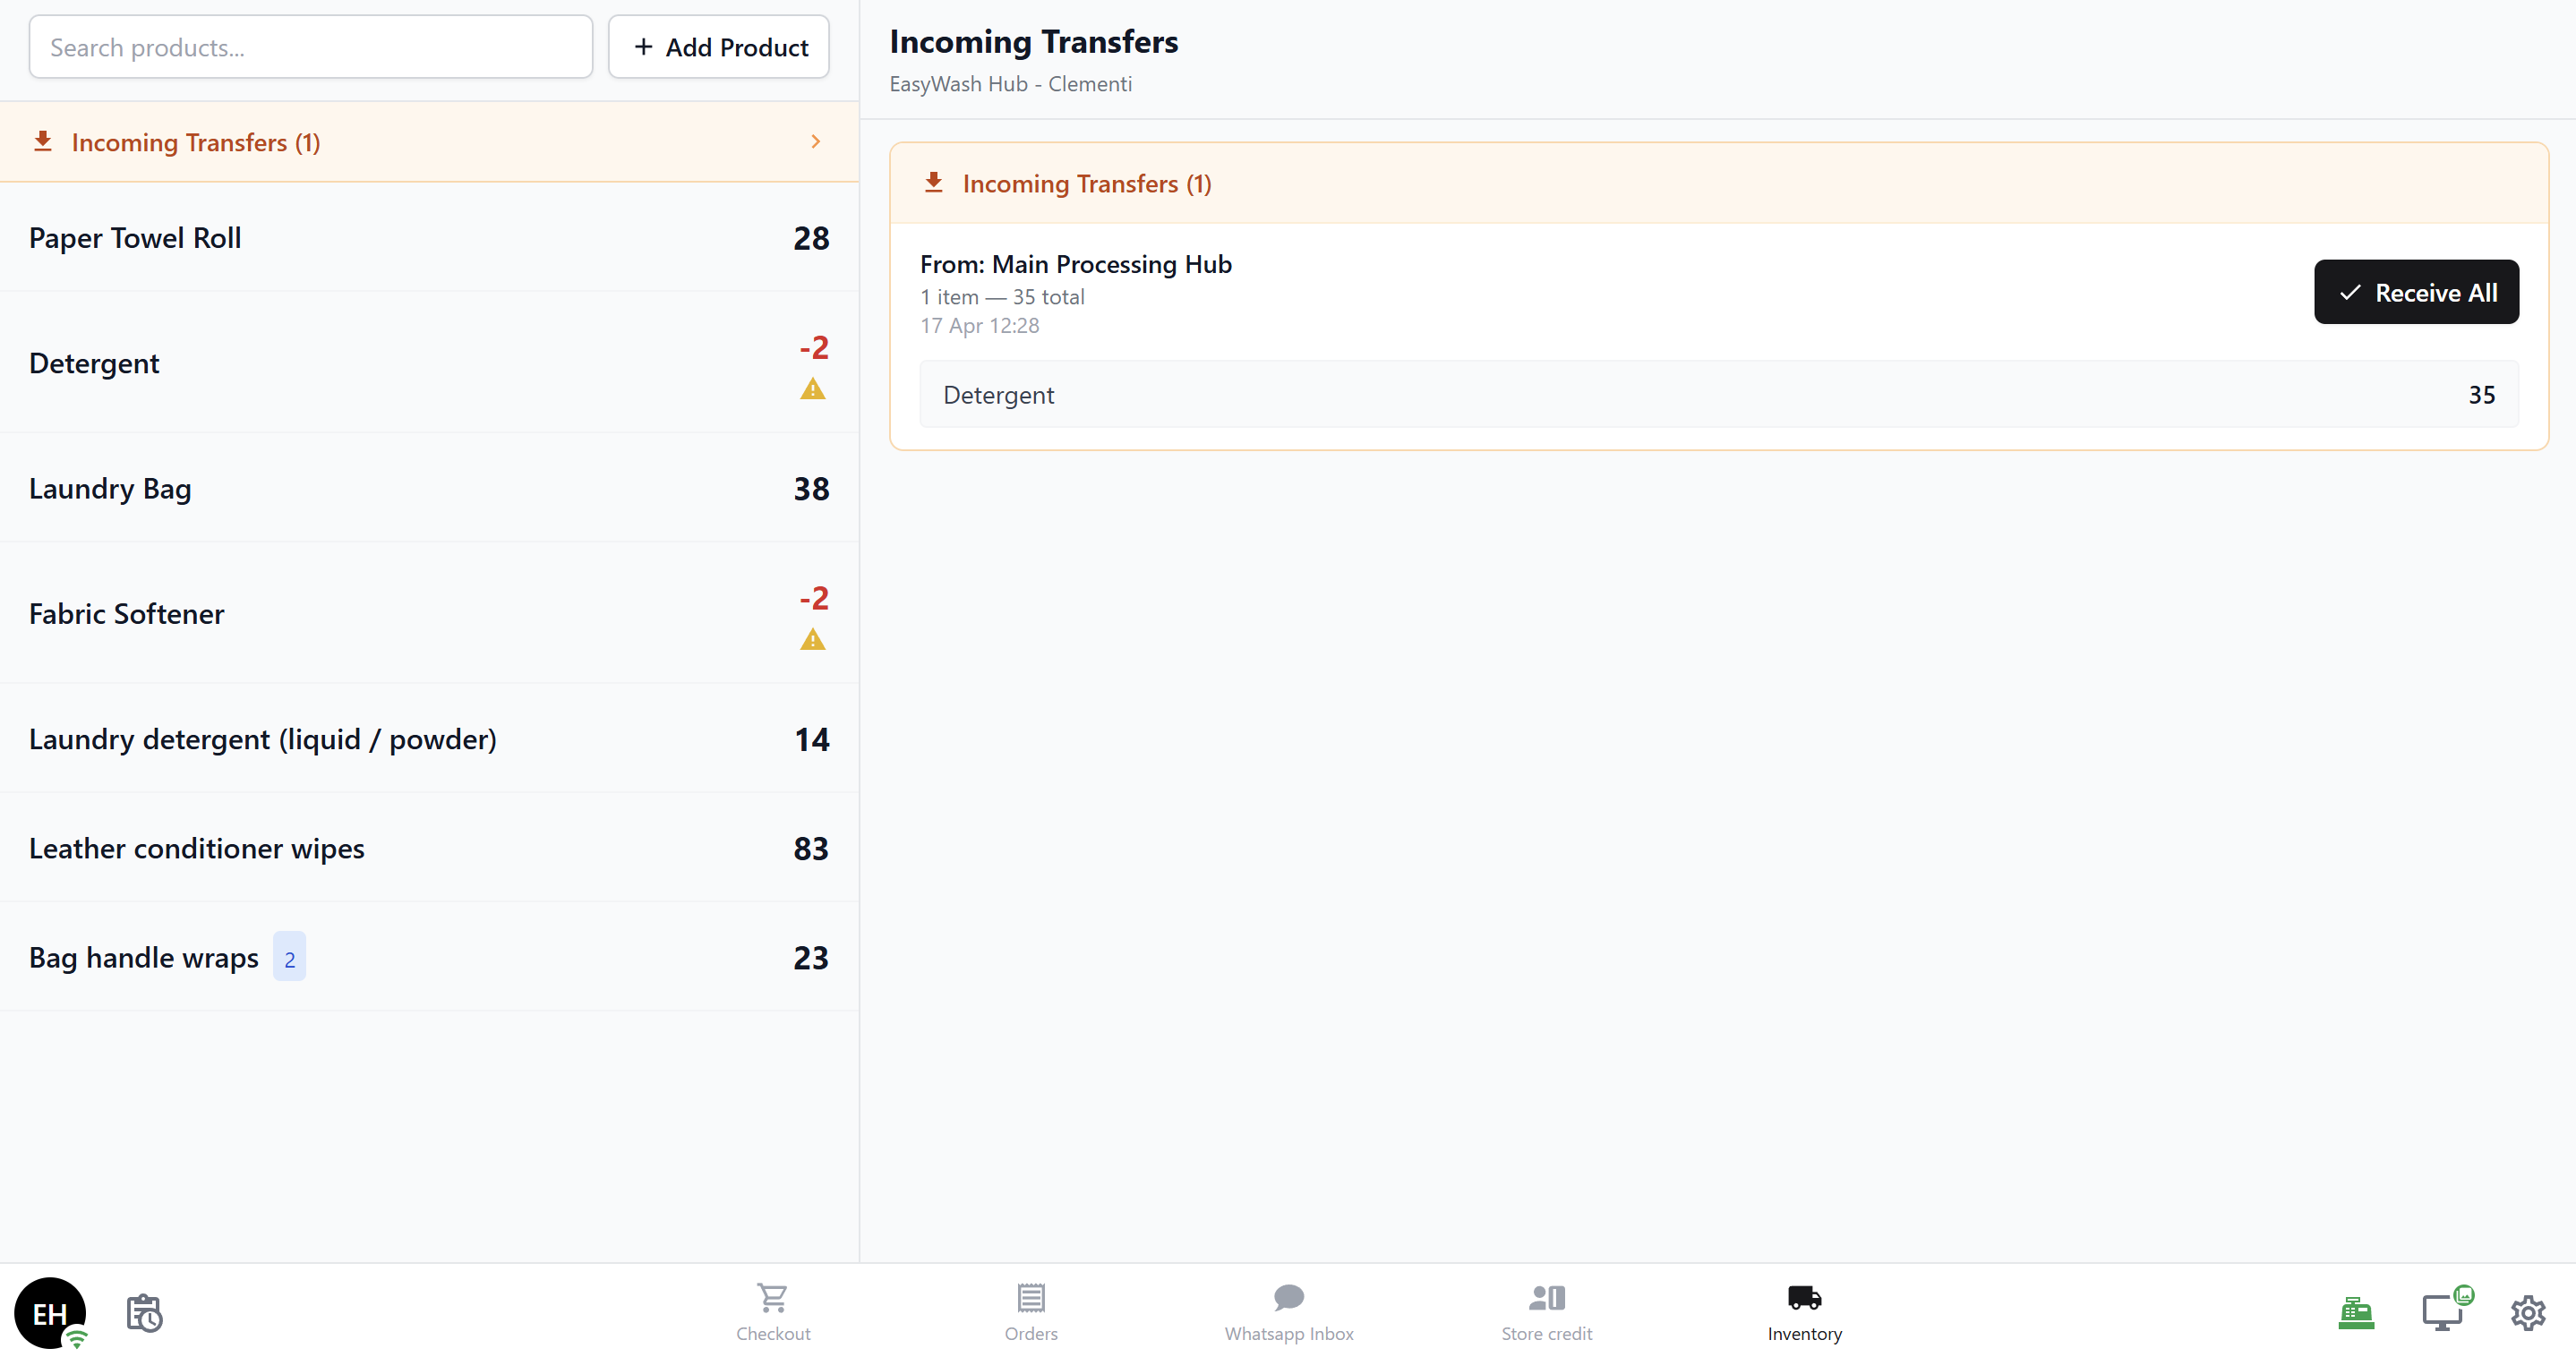
Transfers can only be received in full — partial receiving is not available on the POS. Transfers are created from the console by your admin.
---
## Where Do the Stock Changes Go?
Stock changes on the POS are reflected everywhere in real time:
- **POS** — The product list and detail panel update immediately.
- **Console** — Admins can see all stock across all locations under **Inventory**, with filters, history, and Excel export.
- **Auto-deduction** — When a retail product is sold at checkout, stock is automatically deducted. It appears in the history as an _"Order"_ movement.
---
## FAQs
**Does this track my services (like wash or dry clean)?**
> No — Inventory Tracking only works with retail products (physical items you stock and sell). Services are not tracked here.
**Can my staff see stock at other branches?**
> Yes, but only in the product detail panel under **Other Stores**. The main list always shows stock for **this location only**.
**What if we go negative?**
> The system allows negative stock and shows a warning. This is useful when staff forget to log stock-in before using items — they can record the stock-out now and fix the count later with a stock-in.
**Can staff adjust the stock count after a physical count?**
> Stock adjustments (setting an exact number) are done from the **console**, not the POS. On the POS, staff can only do Stock In and Stock Out.
**Can staff create transfers between branches from the POS?**
> No — transfers are created from the console. POS staff can only **receive** incoming transfers.
Make it part of your daily routine — have staff check the Inventory tab at the start and end of each shift. A quick glance at the colour-coded quantities tells them immediately if anything needs reordering.