## Before You Start
- **Mini-Apps published** — You need at least one scheduling-related Mini App published (e.g. "Schedule Delivery" or "Reschedule Pickup & Delivery"). Your Mini Apps are configured in the Mini-Apps tab within WhatsApp settings.
- **Test Group** — Add at least one phone number in [General Settings](/docs/whatsapp-general-settings).
If you are new to auto reply rules, read [Setting Up Auto Reply Rules](/docs/setting-up-auto-reply-rules-for-your-whatsapp) first.
---
## When This Rule Fires
Pre-configured condition:
- **App submitted** — Fires when a customer completes and submits a Mini App. The default message is tailored to include pickup date and time details.
Set the app filter to your scheduling-related Mini App(s) only — not "Any app."
---
## How to Set It Up
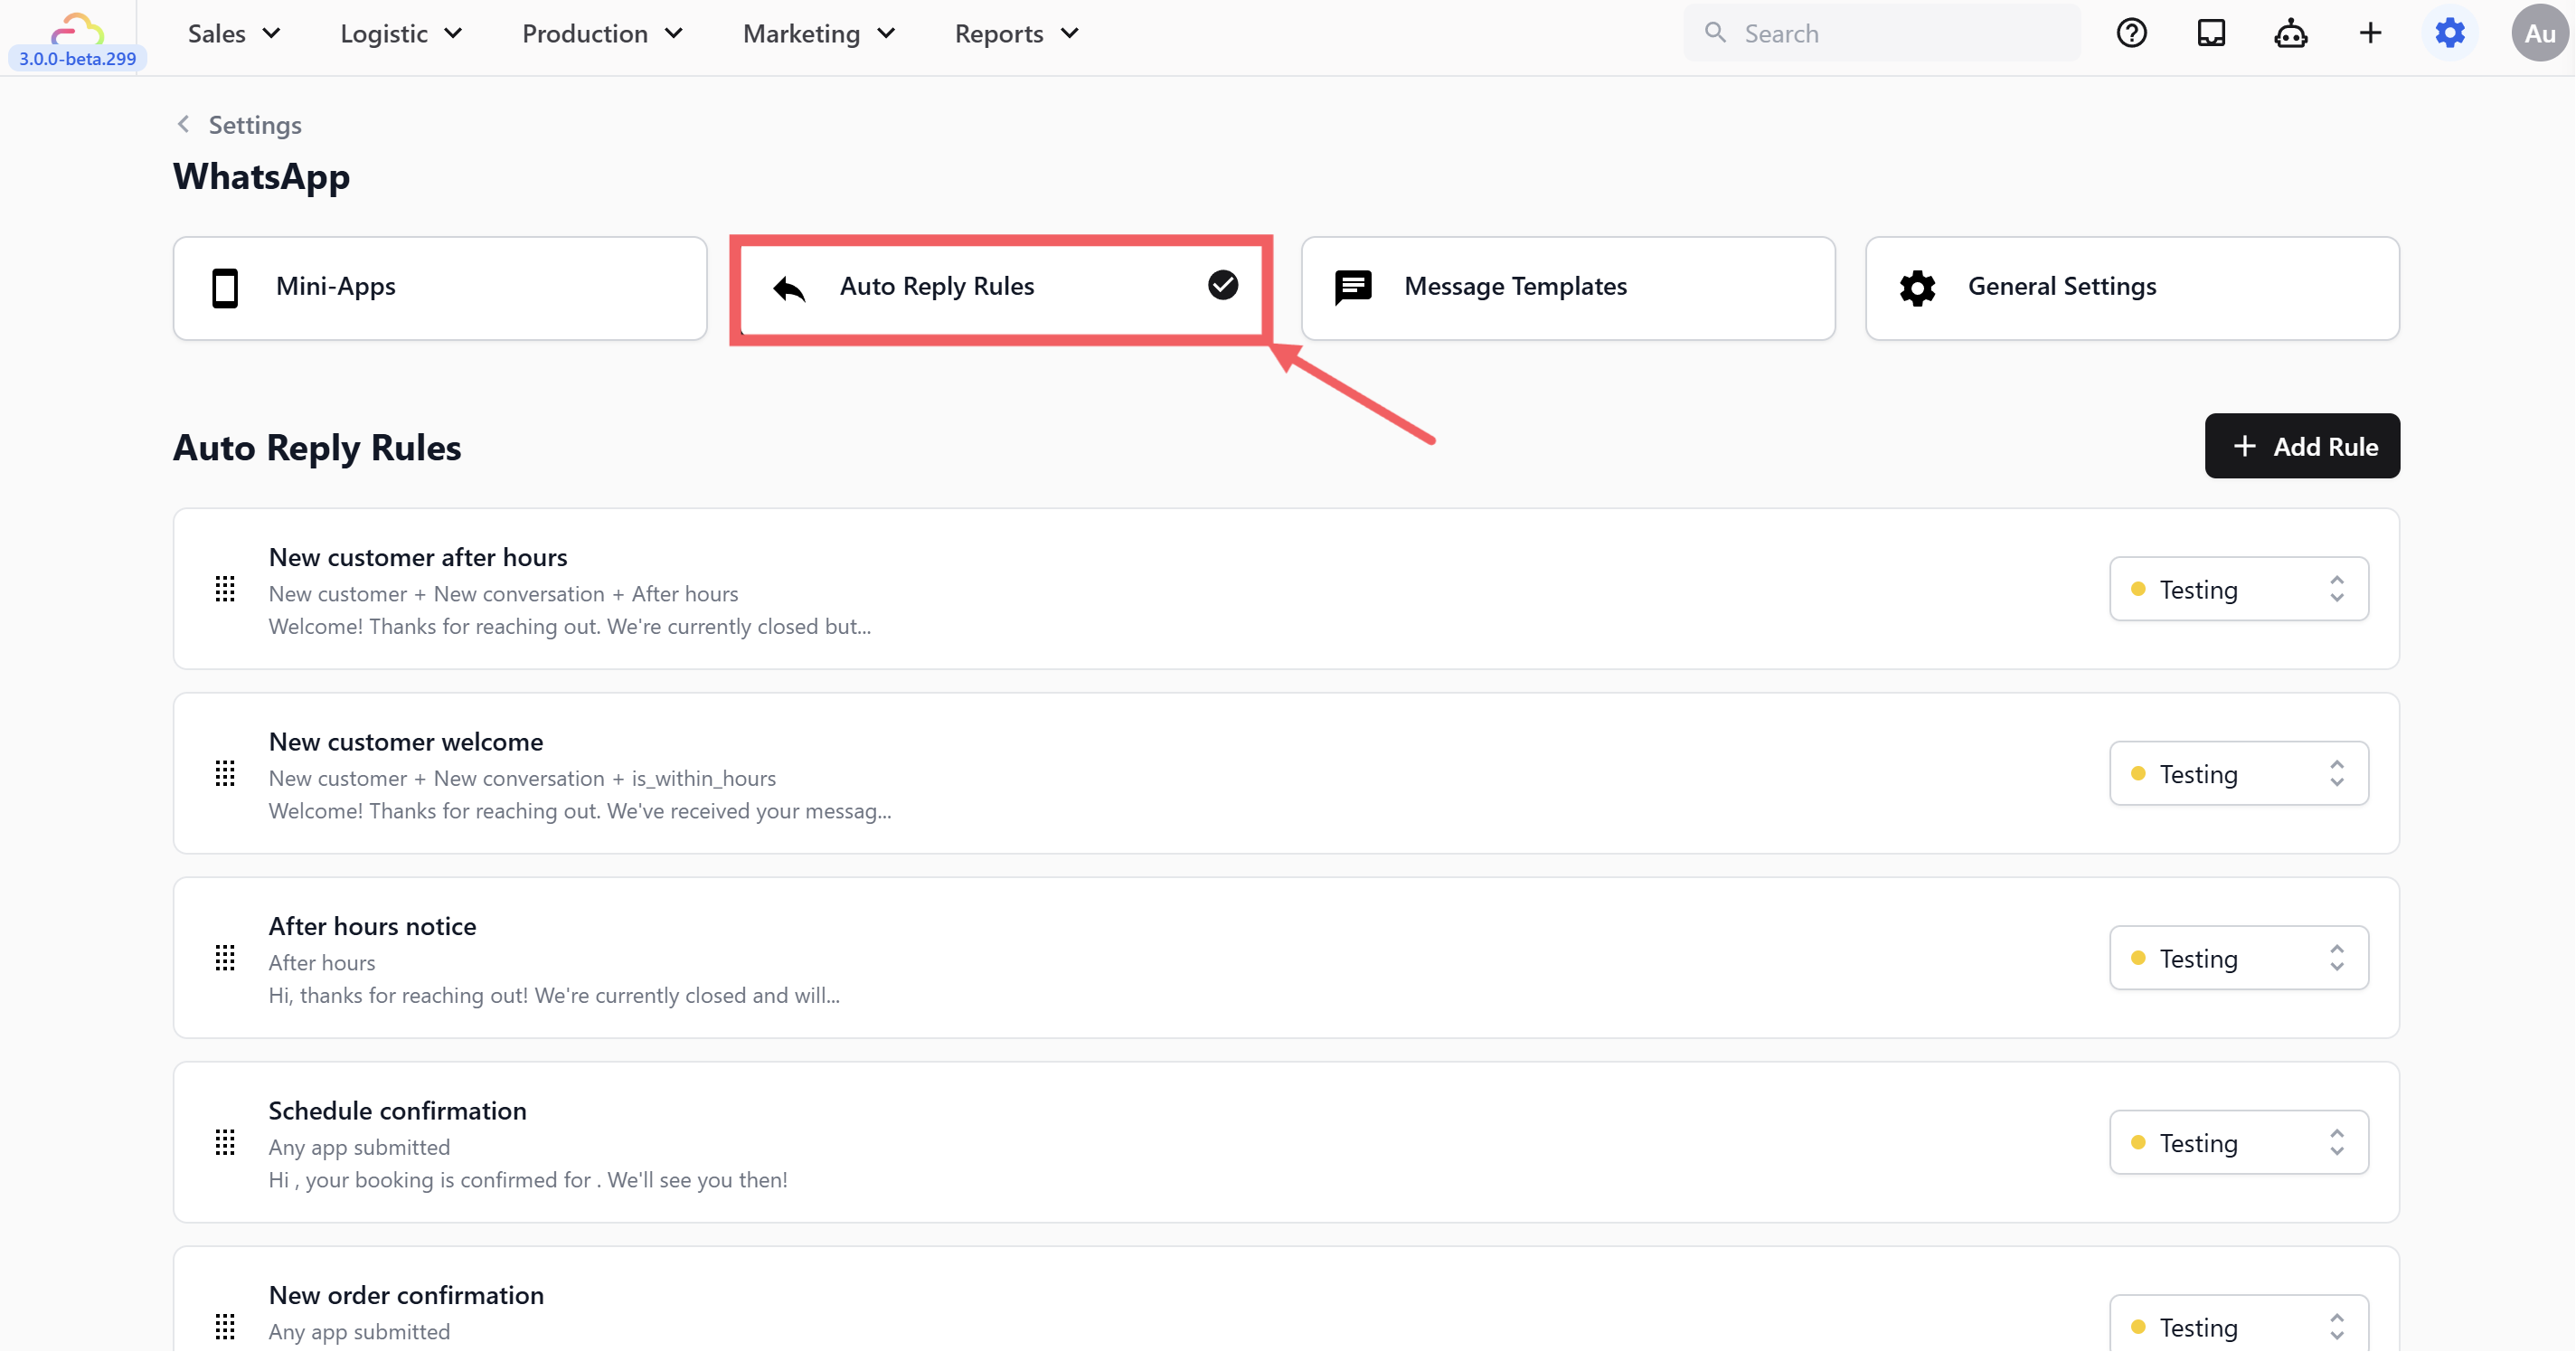
1. Go to **WhatsApp Settings** → Auto Reply Rules tab
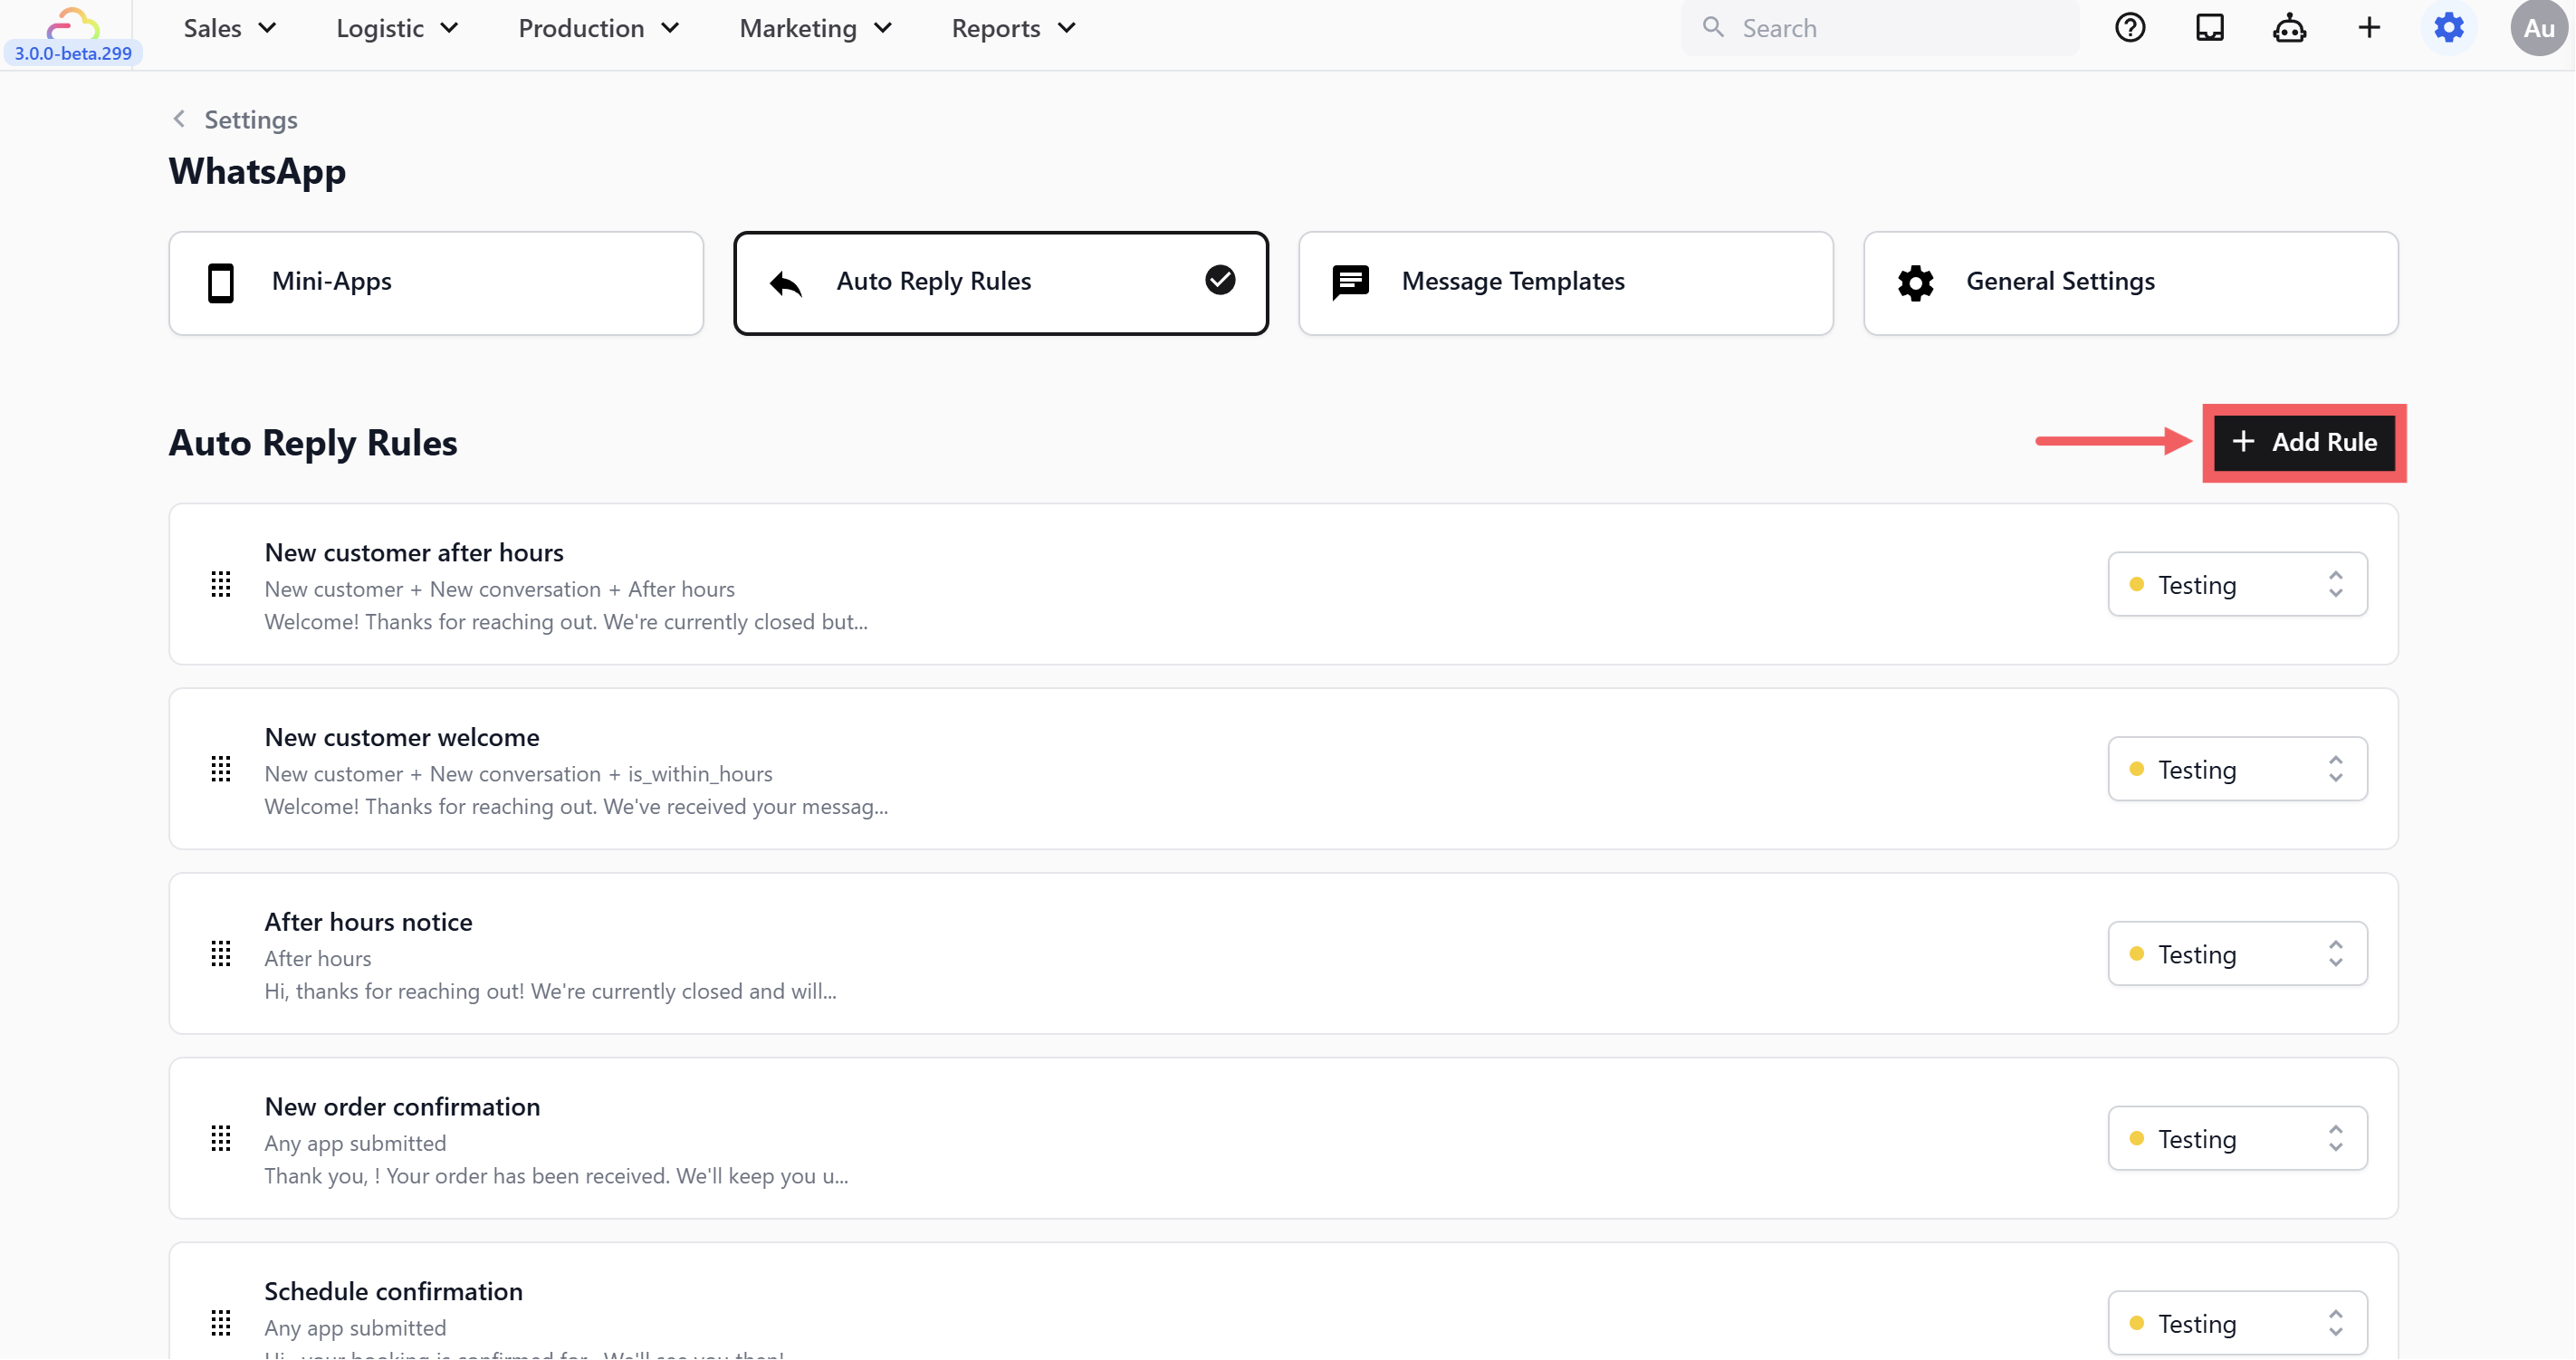
2. Click + Add Rule
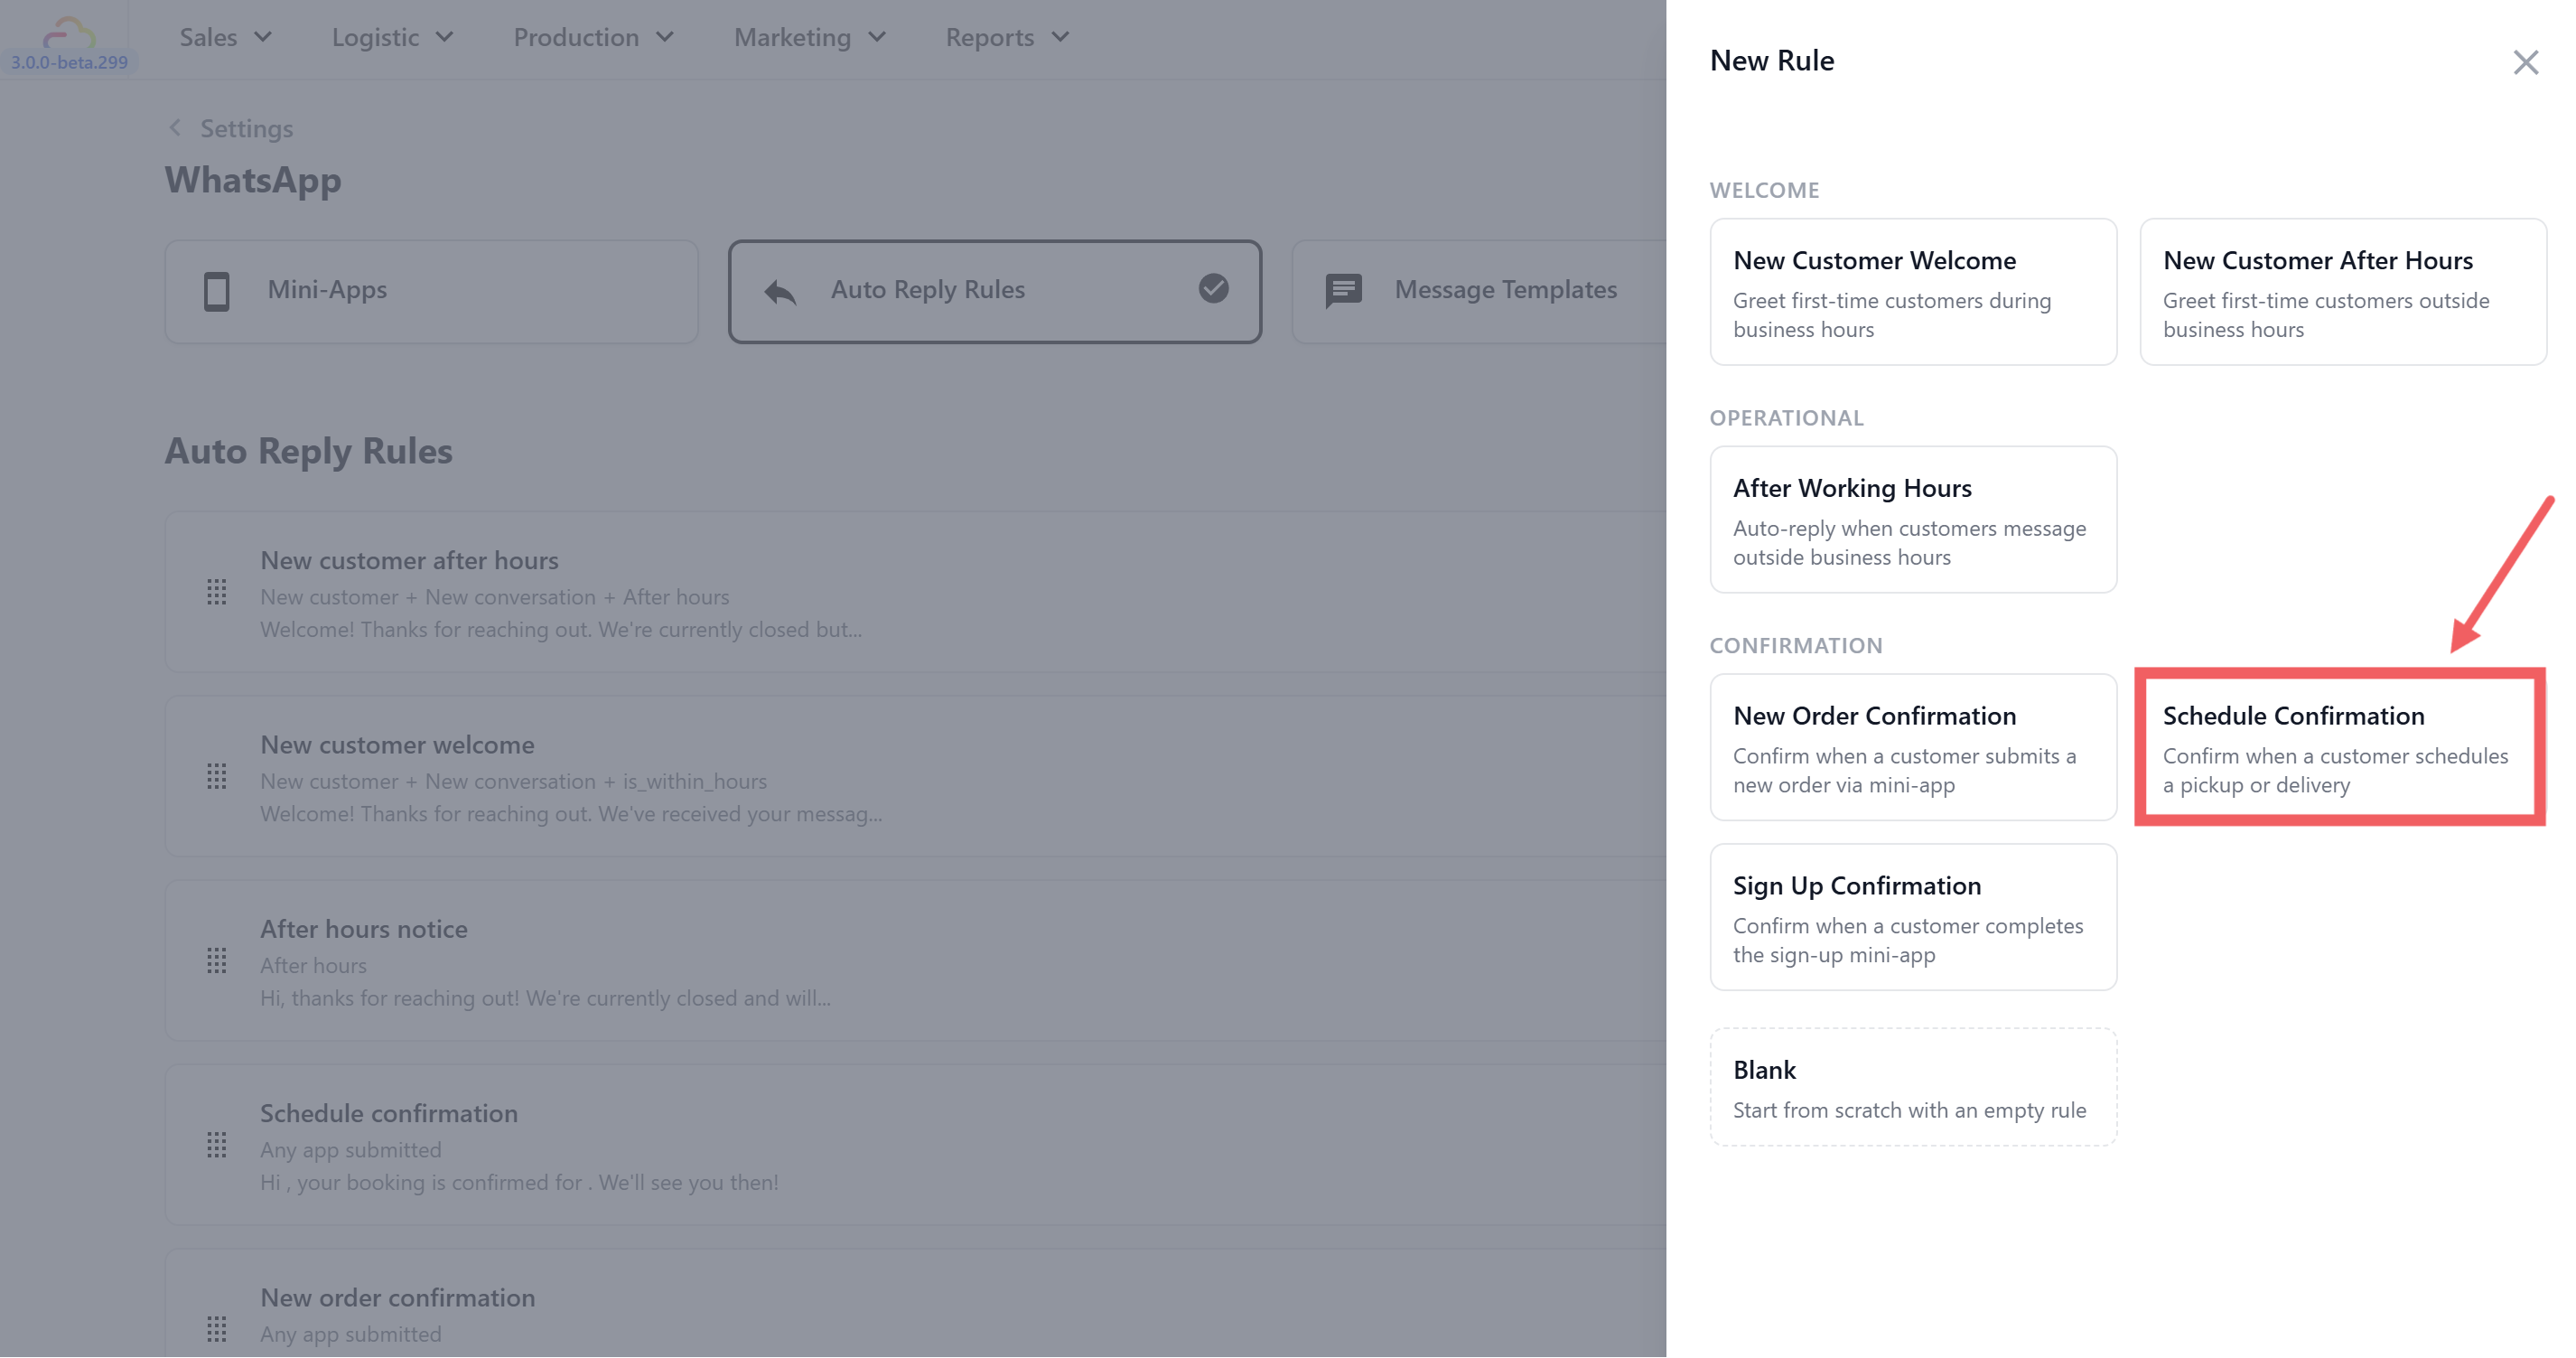
3. Under **Confirmation**, select **Schedule Confirmation**
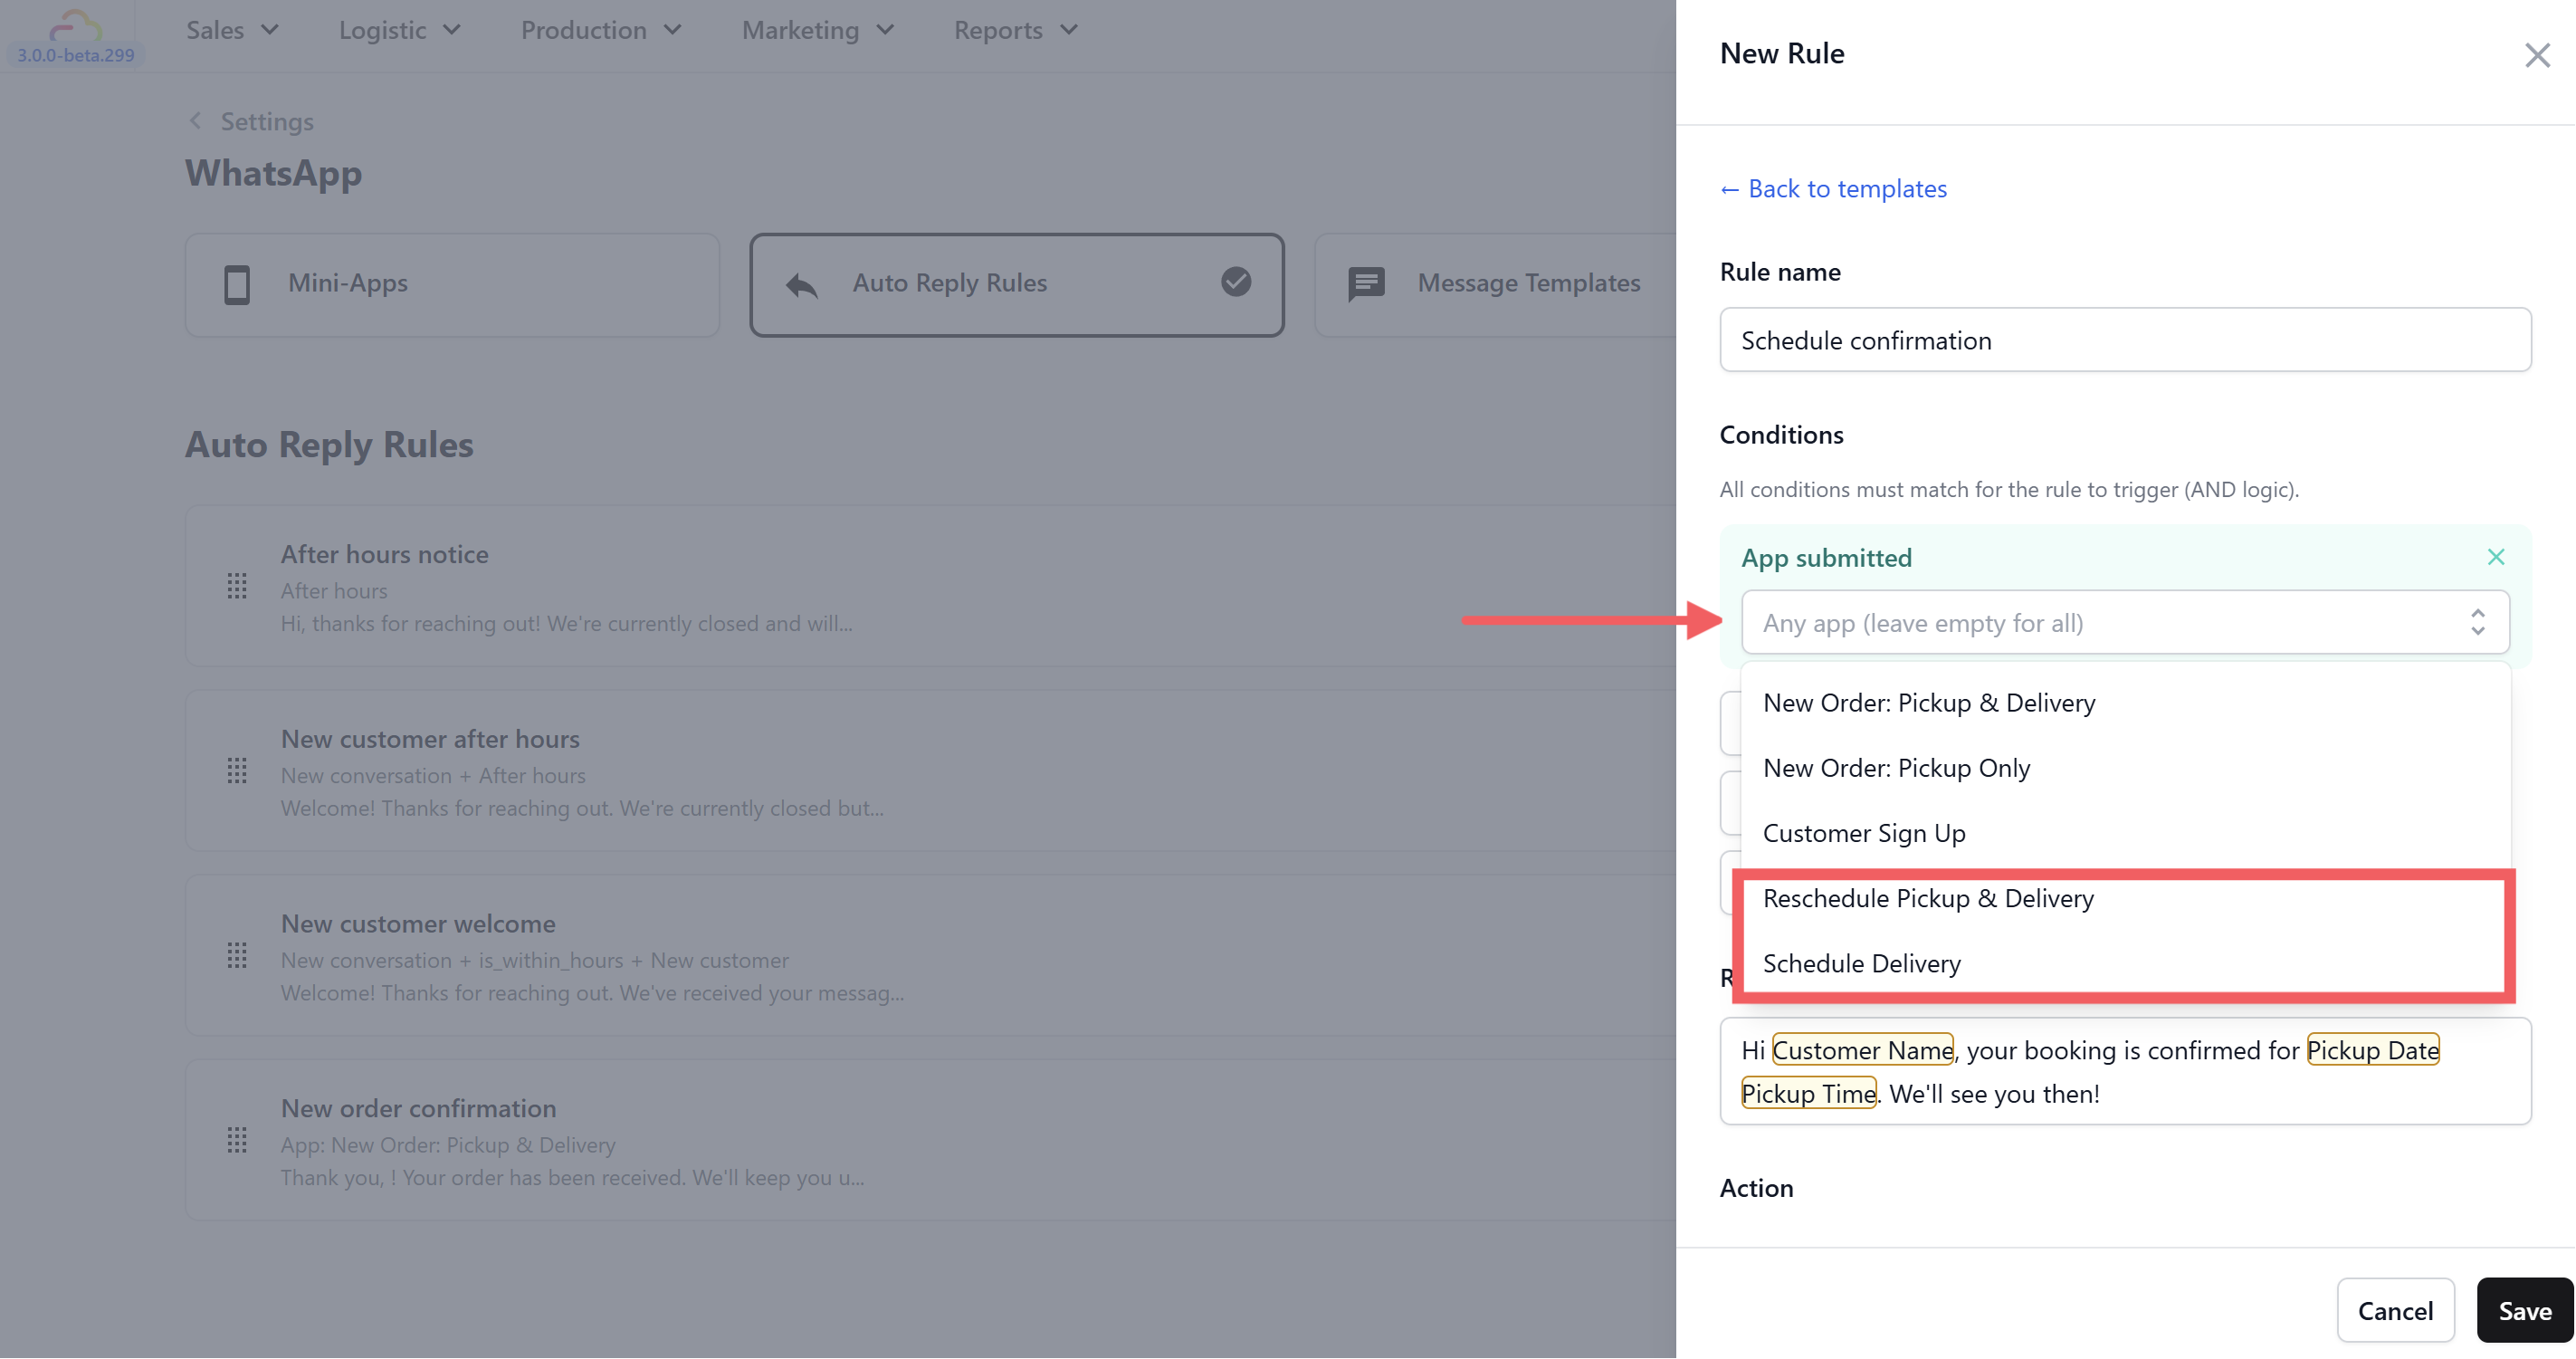
4. **Set the app filter** — click the dropdown and select your scheduling Mini App(s):
- **Schedule Delivery**
- **Reschedule Pickup & Delivery**
Haven't set up your Mini Apps yet? Head to our [Mini Apps guides](/docs/what-is-a-mini-app) to get started first.
5. Edit the **reply message** (optional). The default is:
> "Hi @Customer Name, your booking is confirmed for @Pickup Date @Pickup Time. We'll see you then!"

6. Set **Action type** — the default is **None**.
7. Set **Send frequency** to **Every time** — a customer might reschedule or book multiple deliveries in the same conversation.
8. Click Save.
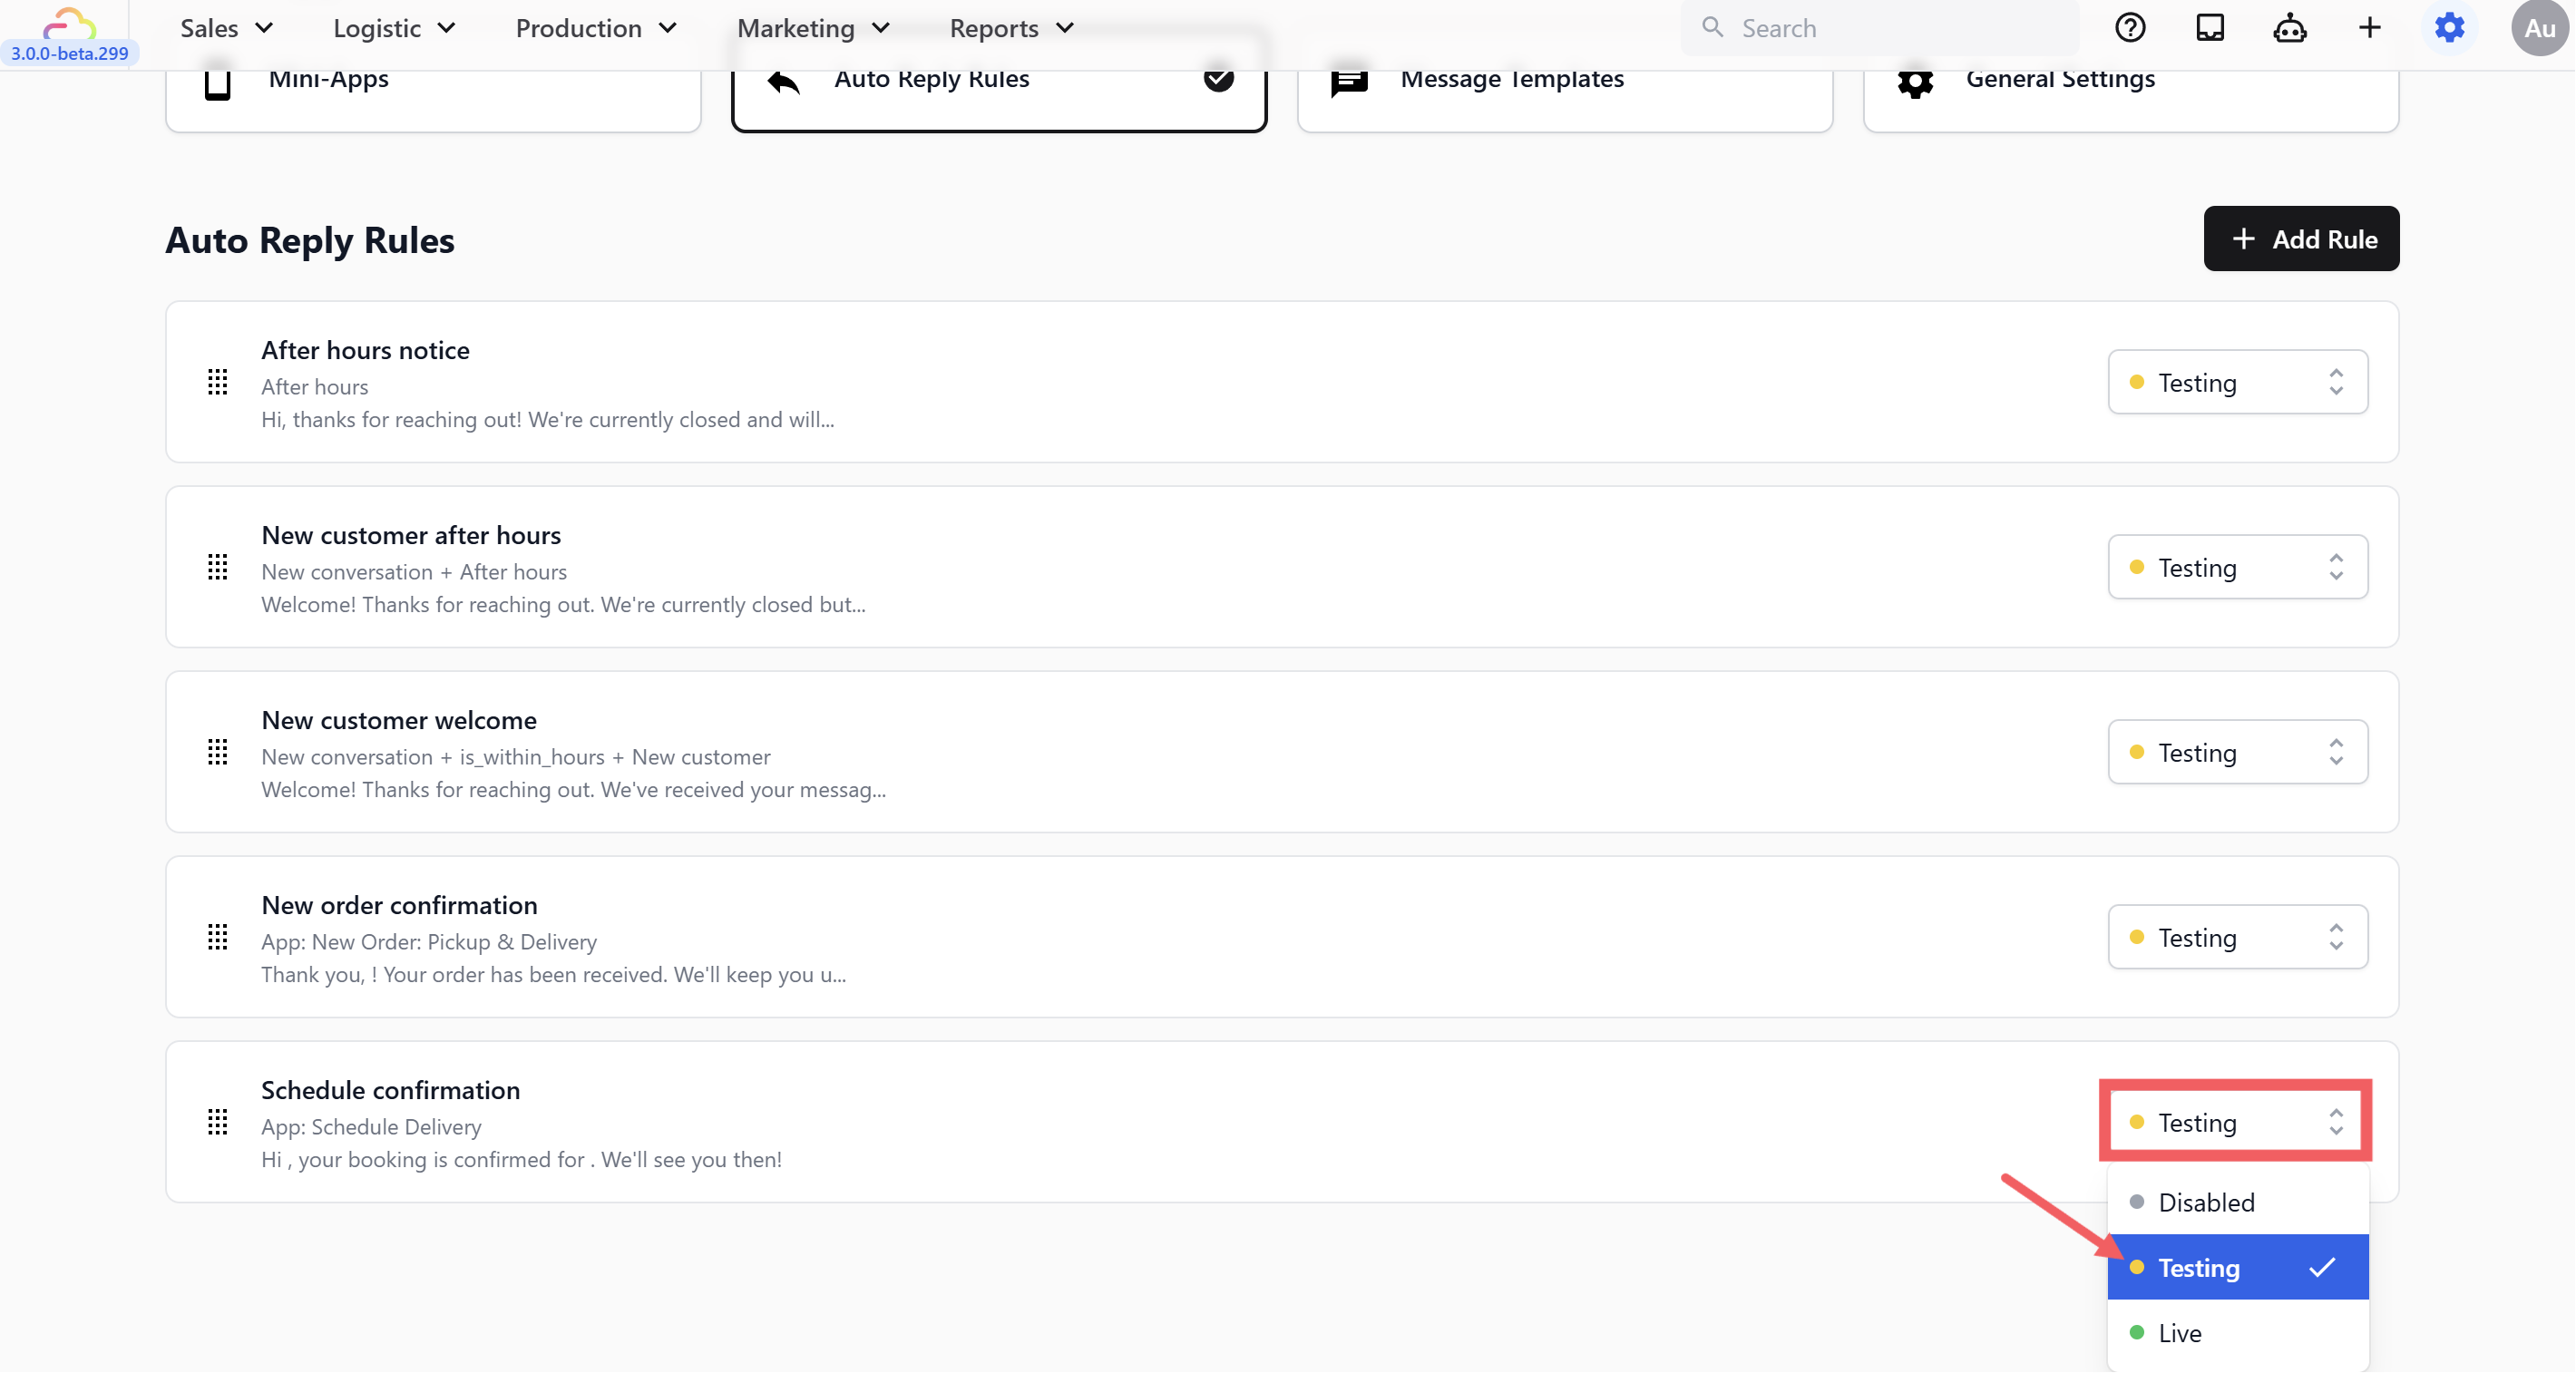
9. Set **Status** to **Testing**.
The @Pickup Date and @Pickup Time placeholders pull from the booking details the customer entered in the Mini App. Make sure your scheduling Mini App collects a date and time, otherwise these will appear blank.
---
## Testing the Rule
1. Make sure the rule is set to **Testing** status
2. Confirm your test phone number is in the **Test Group** ([General Settings](/docs/whatsapp-general-settings))
3. From your test number, open your scheduling Mini App on WhatsApp and submit a test booking
4. You should receive the schedule confirmation with the correct date and time filled in
5. Verify you **only** receive this confirmation — not an order or sign-up confirmation on top of it
Once verified, switch the status from **Testing** to **Live**.
You can use [New Order Confirmation](/docs/new-order-confirmation) and Schedule Confirmation at the same time — just point each one at a different Mini App to avoid sending two messages for the same booking. For example, point New Order Confirmation at your Laundry Pickup form and Schedule Confirmation at your Reschedule form.
---
## What's Next
Now that schedule details are confirmed automatically, continue to [Sign Up Confirmation](/docs/sign-up-confirmation) to set the welcome reply that goes out when a customer signs up through one of your mini apps.