## Before You Start
1. Finish your website or landing page first. See [Creating and Editing Your Website](/docs/creating-and-editing-your-website) or [Creating Landing Pages for Promotions and Ads](/docs/creating-landing-pages).
2. To use your own domain, have the login for the place where your domain's settings are managed. This is usually the company you bought it from, such as GoDaddy, Namecheap, Cloudflare, Vodien or Exabytes. If your web developer set up your domain, for example on Google Cloud, ask them to help.
3. Only the owner and staff with the **Manage Billing** permission can link a domain, because it adds a charge to your EasyBiz bill.
---
## What Publishing and Hosting Mean
Until you publish, your website is a draft that only you and your staff can see in the Design Agent. **Publishing** puts it on the internet so customers can open it. **Hosting** is the service that keeps it online all day, every day. EasyBiz hosts every website for free.
A **domain** is your shop's own web name, such as `cleanfastlaundry.com`. You rent it yearly from a domain company. Without one, customers still find you at a free `easybizcloud.app` address. With one, your website looks more trustworthy and is easier to remember and print on flyers.
If you skip publishing, nobody outside your shop can see your website, and the links in your ads, WhatsApp messages and Google profile lead nowhere.
---
## Preview on Desktop and Mobile
Most of your customers will open your website on a phone, so always check both sizes before you publish.
1. In the Console menu, click **AI**, then **Design Agent**.
2. Click your website or landing page to open it.
3. Above the page, click Desktop, Tablet or Mobile to see it at that size.
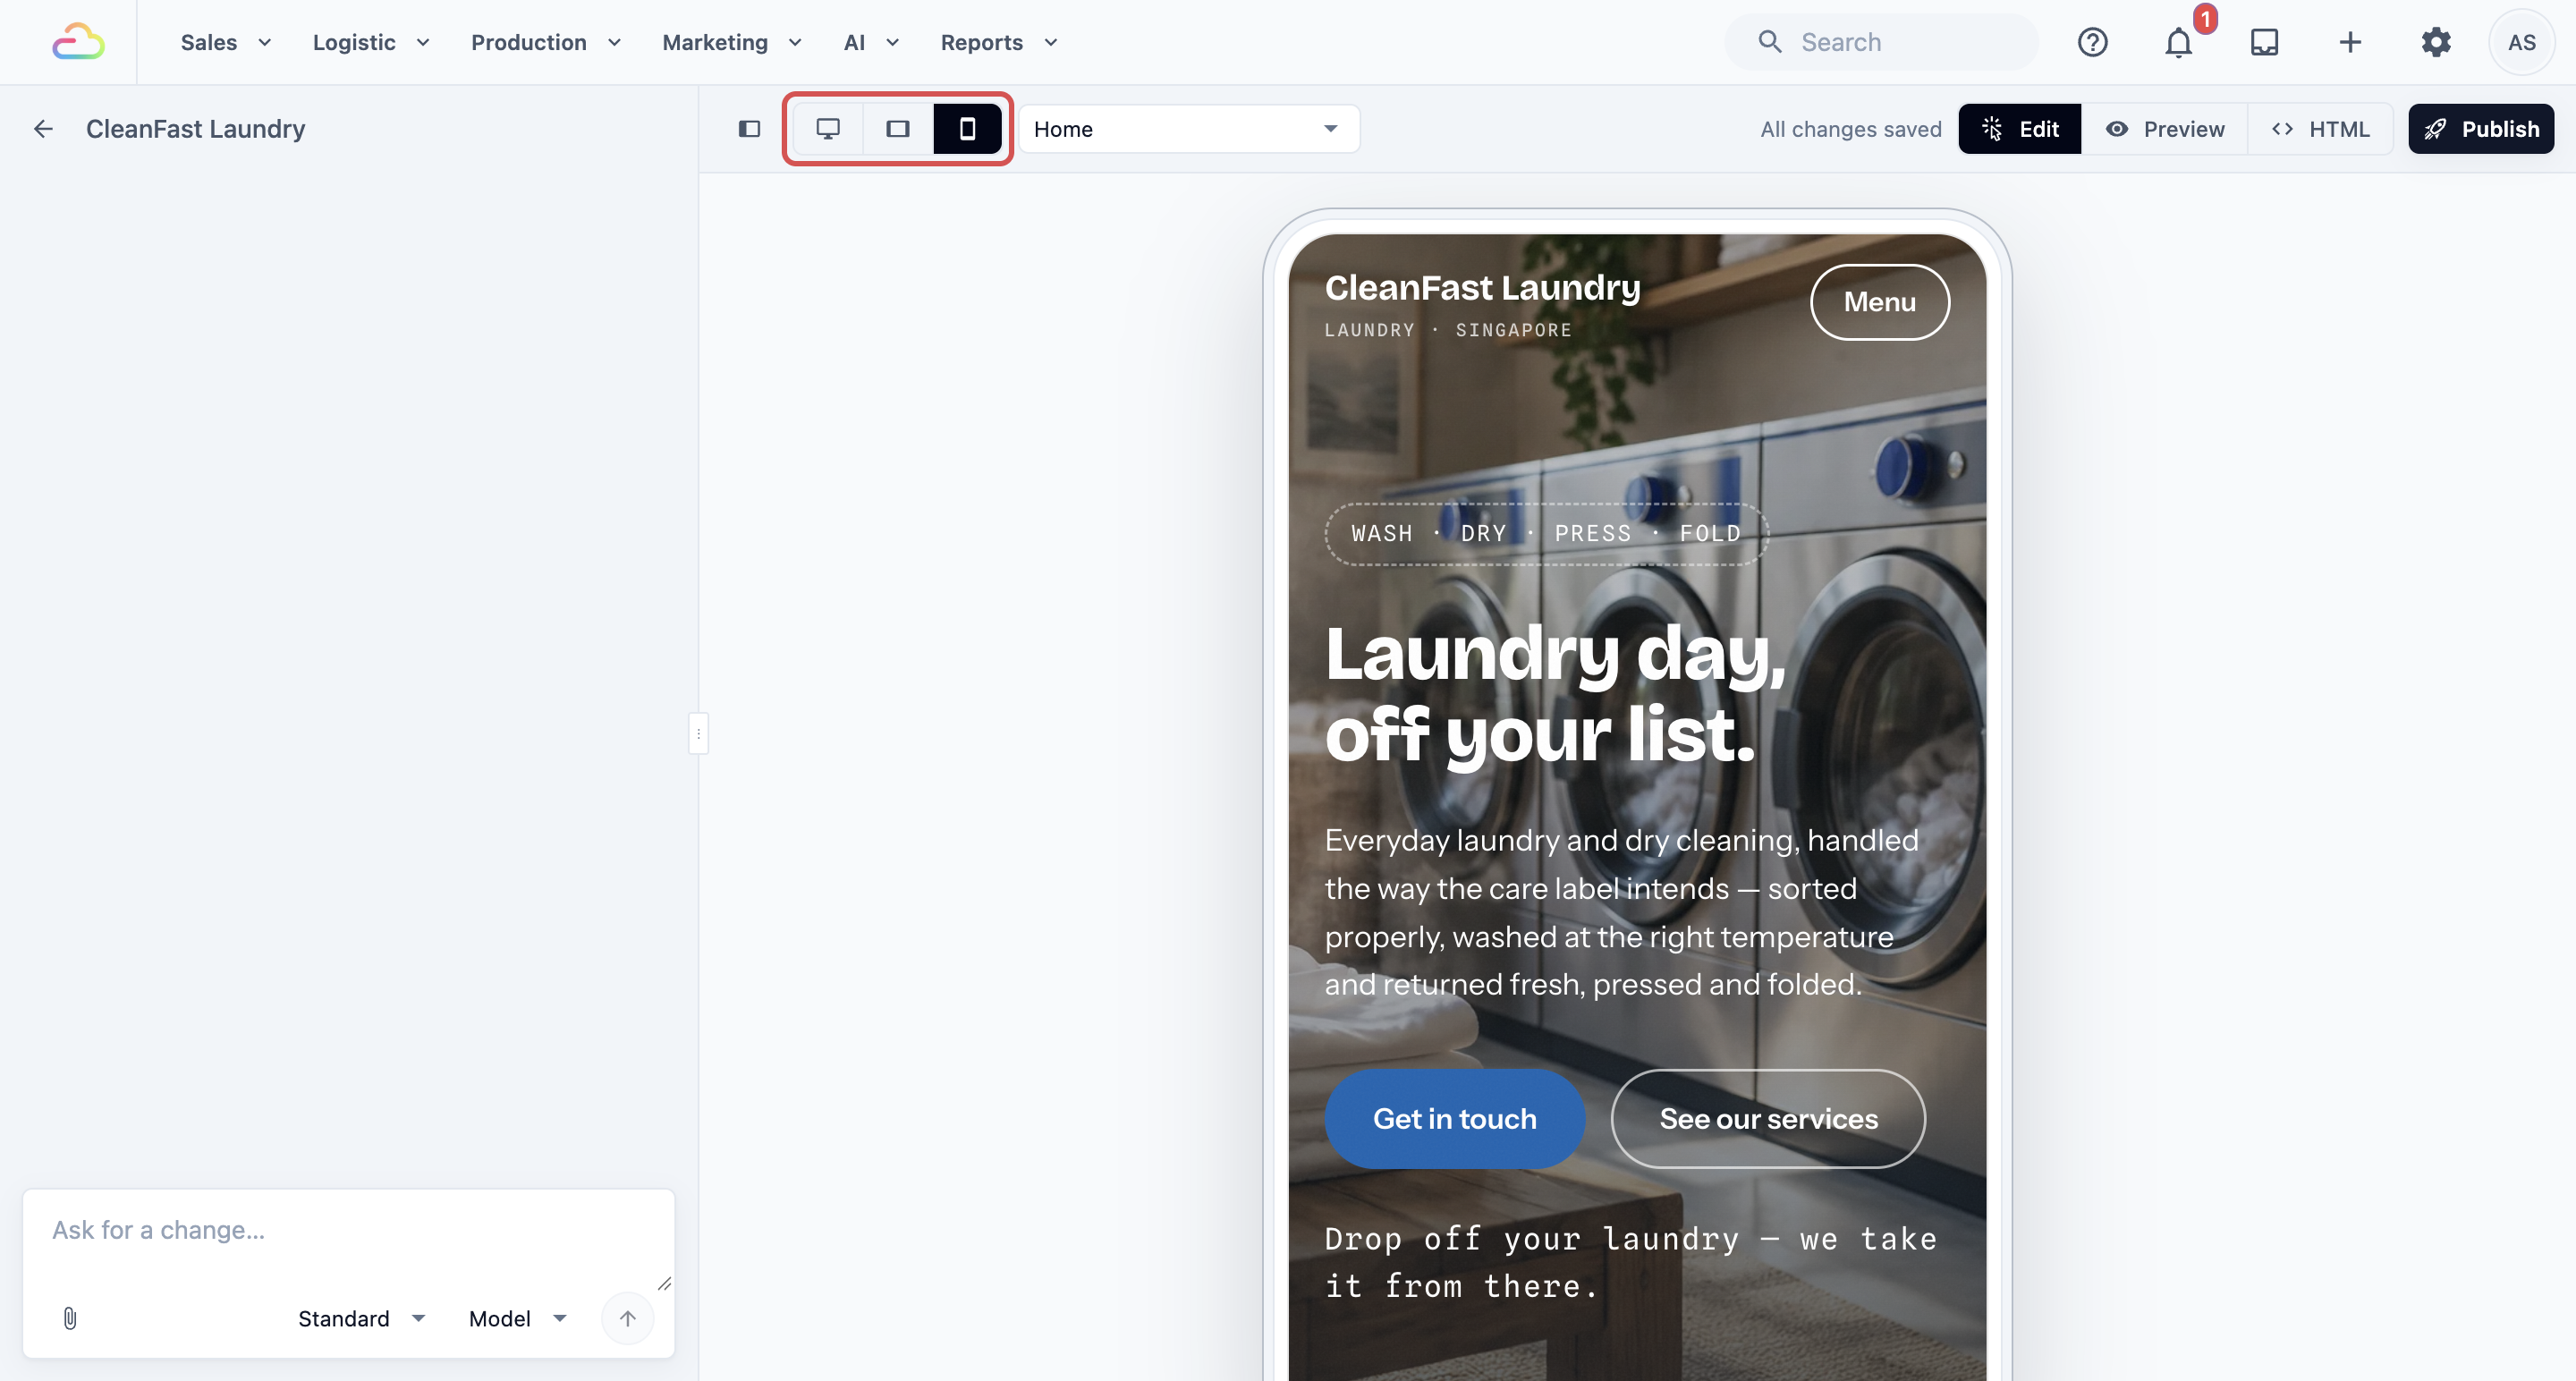
If something looks wrong, just tell the Design Agent. Type your request (called a **prompt**) in the chat box, for example:
- "On mobile, the price list is too small to read. Make the text bigger."
- "Move the WhatsApp button to the top of the page on phones."
- "The photo on the home page cuts off the shop sign on mobile. Show the whole sign."
---
## Publish
1. With your website open, click Publish at the top.
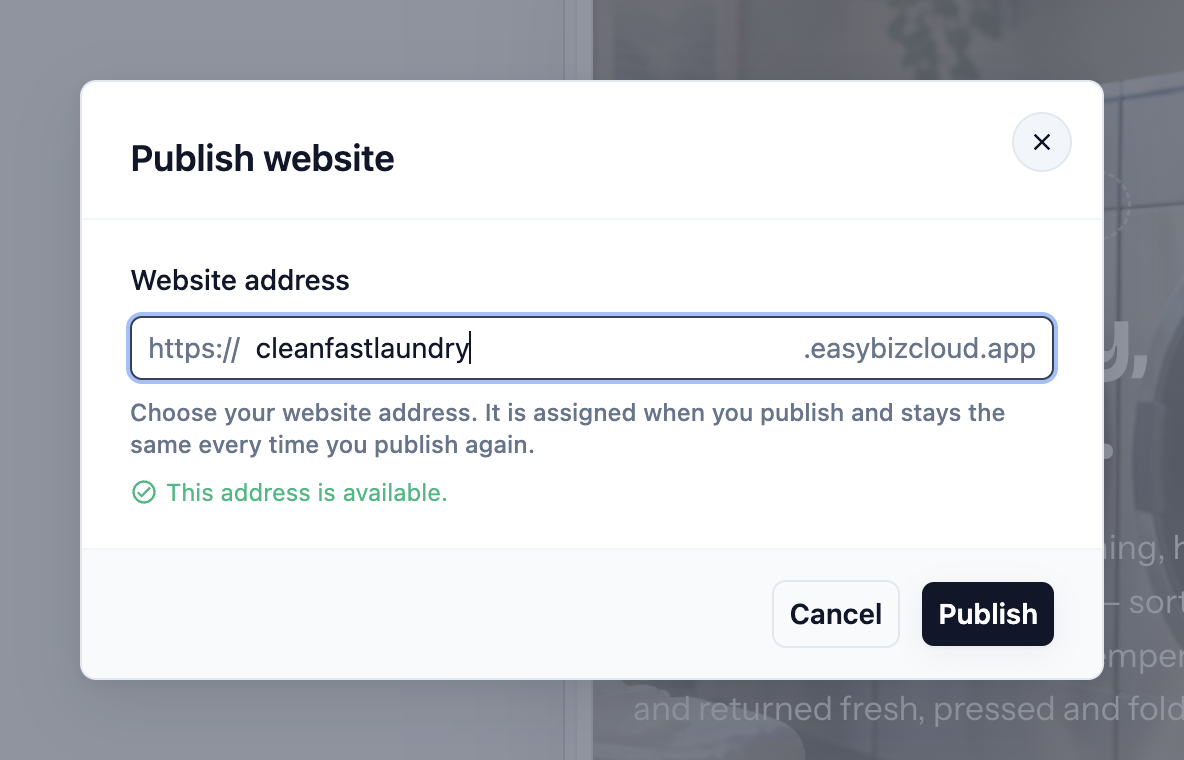
2. **First publish of a website only:** under **Website address**, type the name you want, for example `cleanfastlaundry`. Use 3 to 32 lowercase letters, numbers and single hyphens. Wait for **This address is available.**
3. Click Publish in the window.
When it finishes, you see **Your site is live** with your address. Click Visit to open it.
Your website's free address is set on its first publish and stays the same every time you publish again. You cannot rename it later, so pick one you are happy to print.
If the window says a page has not been created yet, a page in your menu is still empty. Click Create this page and publish once the Design Agent has written it.
**Making changes later:** your customers keep seeing the published version while you edit. Ask the Design Agent for changes, check them, then click Publish again. The window says **Your latest pages will be published to** your address.
---
## Your Free easybizcloud.app Address
Every website gets a free address straight away, such as `cleanfastlaundry.easybizcloud.app`. It works on any phone or computer, with no extra cost, for as long as your EasyBiz subscription is active.
Landing pages get their own free address on `pages.easybizcloud.app`. You can put either address in your Facebook or Instagram bio, Google Business Profile, WhatsApp status and flyers.
---
## Link Your Own Domain
Linking a domain means telling the internet that `www.cleanfastlaundry.com` should open your EasyBiz website. You keep the domain with the company you bought it from. You only add one setting, called a **DNS record**. DNS is the internet's address book: the record tells it where your website lives. You add the record in your domain's DNS settings, which are usually with the company you bought the domain from.
Your own domain comes with **Pro hosting**, which includes:
- Your domain with HTTPS (the padlock that tells customers your site is safe)
- No "Made with EasyBiz" badge
- Visit and click analytics
Pro hosting costs **S$19 per website per month**, added to your monthly EasyBiz bill from the month your domain goes live. You are not charged during your free trial.
Only websites can link a domain. Landing pages stay on their free `pages.easybizcloud.app` address. To use a landing page on your domain, ask the Design Agent to add it to your website as a new page instead.
### Step 1: Start linking
1. In the Console menu, click **AI**, then **Design Agent**.
2. On your published website's card, click Link domain.
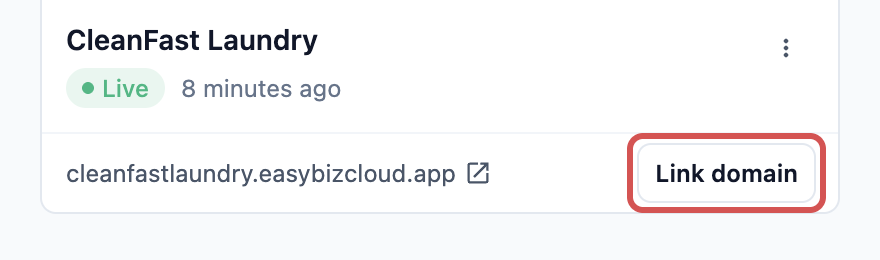
The button appears only after the website's first publish, and only for the owner and staff with the **Manage Billing** permission. Landing page cards never show it.
### Step 2: Enter your domain
1. Under **Your own domain**, type your domain, for example `cleanfastlaundry.com`.
2. Check the address shown under **Your website's address will be**. A plain domain opens at its `www` version, such as `www.cleanfastlaundry.com`.
3. Read the price under **Pro hosting includes**, then click Add to subscription.
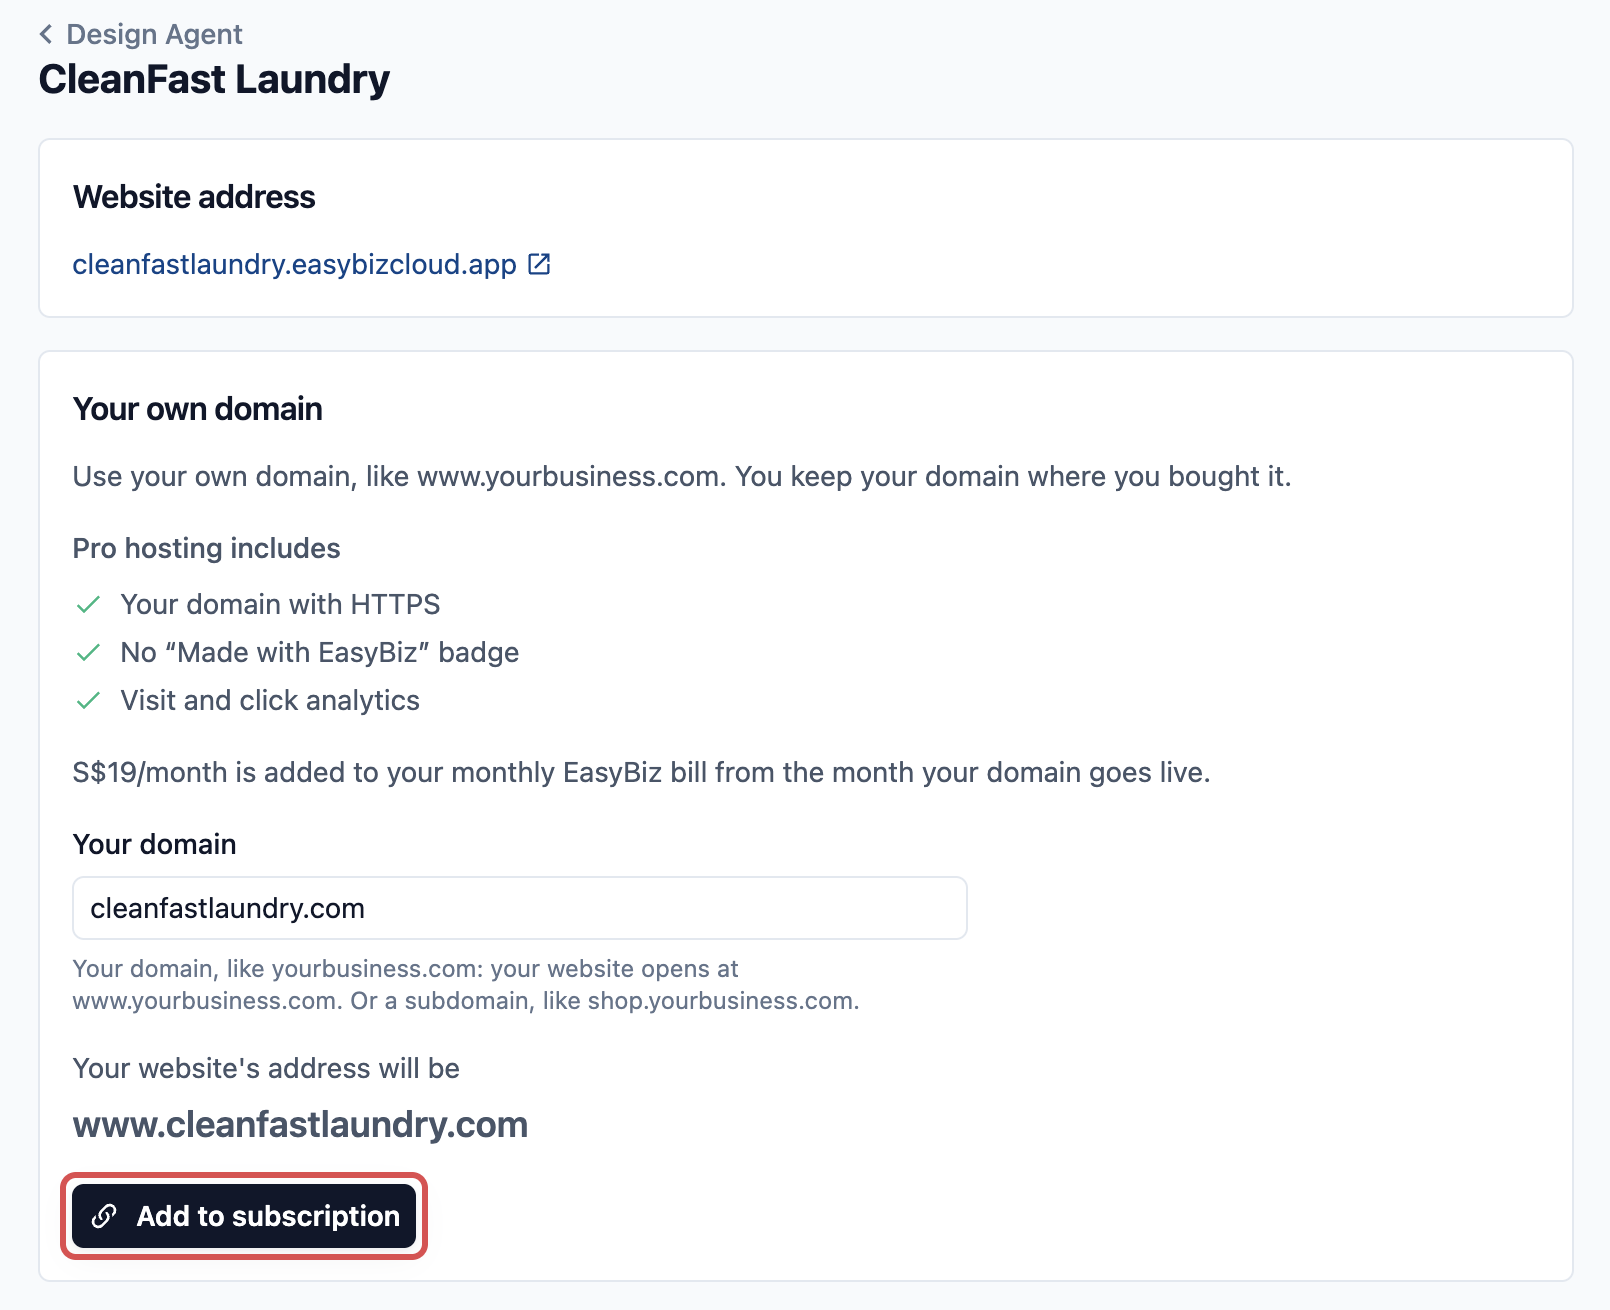
If your account is still on older EasyBiz billing, the button says Link domain instead, and the page says Pro hosting is free until your account moves to the new billing.
### Step 3: Add the DNS record
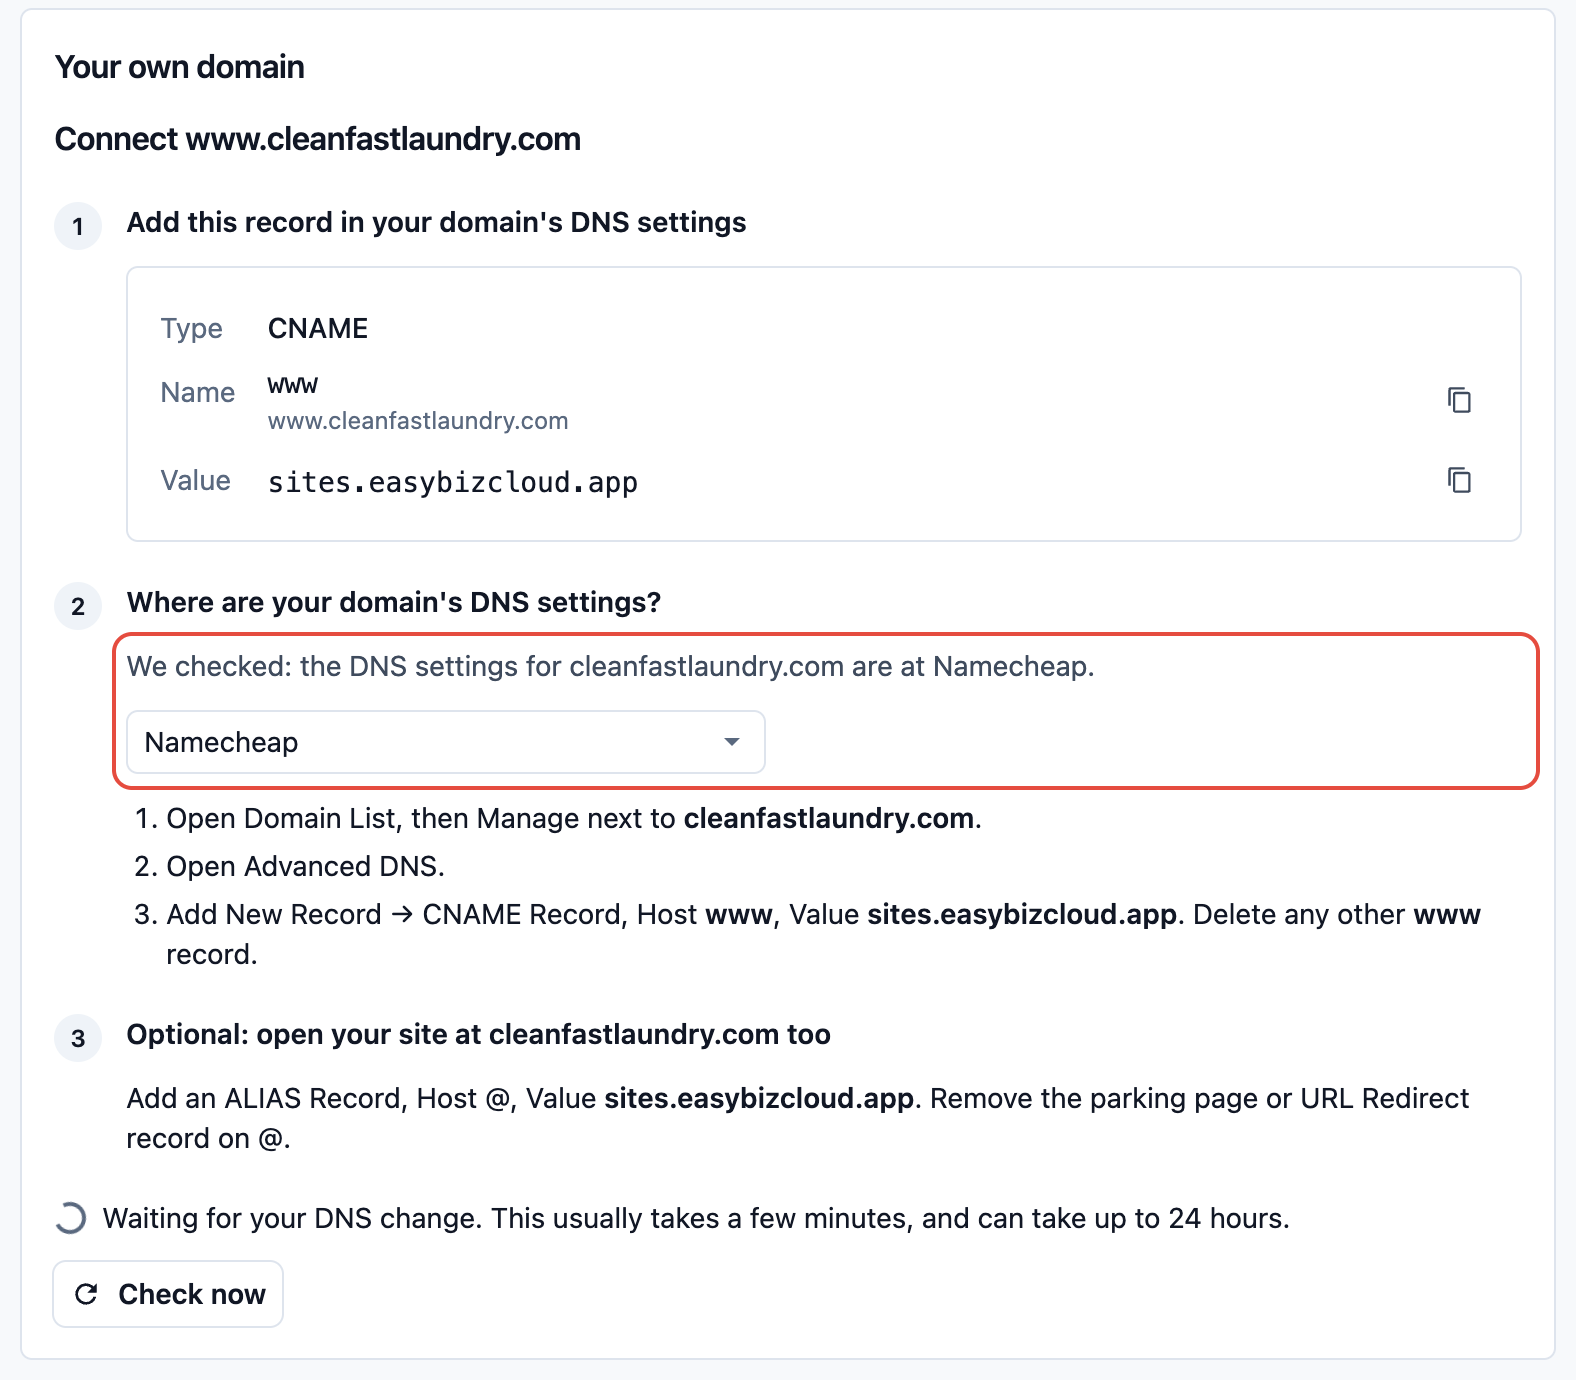
1. Under **Add this record in your domain's DNS settings**, note the **Type**, **Name** and **Value**.
2. Under **Where are your domain's DNS settings?**, check the company the page chose. The page looks up where your DNS settings are and shows that company's steps, with a line such as **We checked: the DNS settings for cleanfastlaundry.com are at Namecheap.** If there is no such line, choose your domain company yourself, or **Other**.
3. Log in there, open the DNS settings, and add the record exactly as shown.
Your DNS settings can be kept somewhere other than where you bought your domain, for example on Google Cloud DNS when your web developer set it up. Add the record where the page says they are, or send the record to your web developer.
### Step 4: Wait for it to go live
The page says **Waiting for your DNS change. This usually takes a few minutes, and can take up to 24 hours.** It checks by itself, or you can click Check now.
When it works, the page shows **www.cleanfastlaundry.com is live** and your website card's button changes to Manage domain.
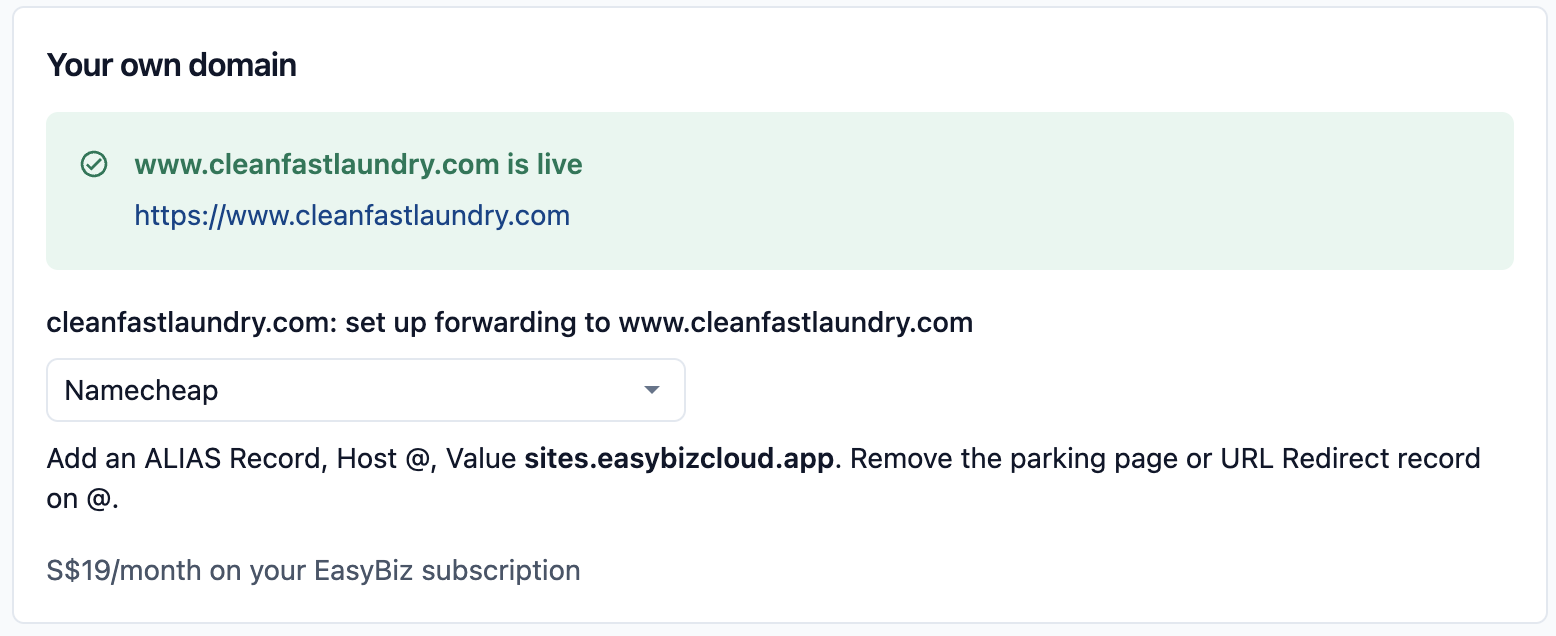
**Optional:** to open your site at `cleanfastlaundry.com` without "www" too, follow the extra step under **Optional: open your site at cleanfastlaundry.com too**. It depends on where your DNS settings are:
- At most domain companies, you set up forwarding to `www.cleanfastlaundry.com`, or add one more record. The page shows how.
- On Google Cloud DNS, keep `cleanfastlaundry.com` on your current web server, and ask your web developer to have it redirect to `https://www.cleanfastlaundry.com`. Keep that server running for this redirect after your new website is live.
Once your domain is live, this step shows **cleanfastlaundry.com: set up forwarding to www.cleanfastlaundry.com** until it works. After you make the change, click Check now. When it works, the page shows **cleanfastlaundry.com forwards to www.cleanfastlaundry.com** or **cleanfastlaundry.com also opens your site**.
### Moving from an old website
If you had a website on this domain before, old links such as `/services.html` may now lead nowhere. Under **Redirects** on the same page, send each old address to the right new page, so customers and Google still find you.
### Removing your domain
On the same page, click Remove domain. Your website goes back to its free address only, and Pro hosting stops and is removed from your subscription.
---
## Connect Google Analytics or Google Tag Manager
Google Analytics is Google's free tool that shows how many people visit your website and where they came from, such as a Facebook ad or Google search. Google Tag Manager lets your marketing agency add other tracking, such as a Meta Pixel. Without one of them, you cannot tell which ads actually bring customers.
This works on the free address too. You do not need Pro hosting.
1. In Google Analytics, open **Admin** › **Data streams** and copy your ID. It starts with `G-`. A Tag Manager ID starts with `GTM-`.
2. Open your website in the Design Agent.
3. Tell the Design Agent, for example: "Add my Google Analytics ID G-AB12CD34EF to my website."
4. Check the ID in the card that appears in the chat, then click Save.
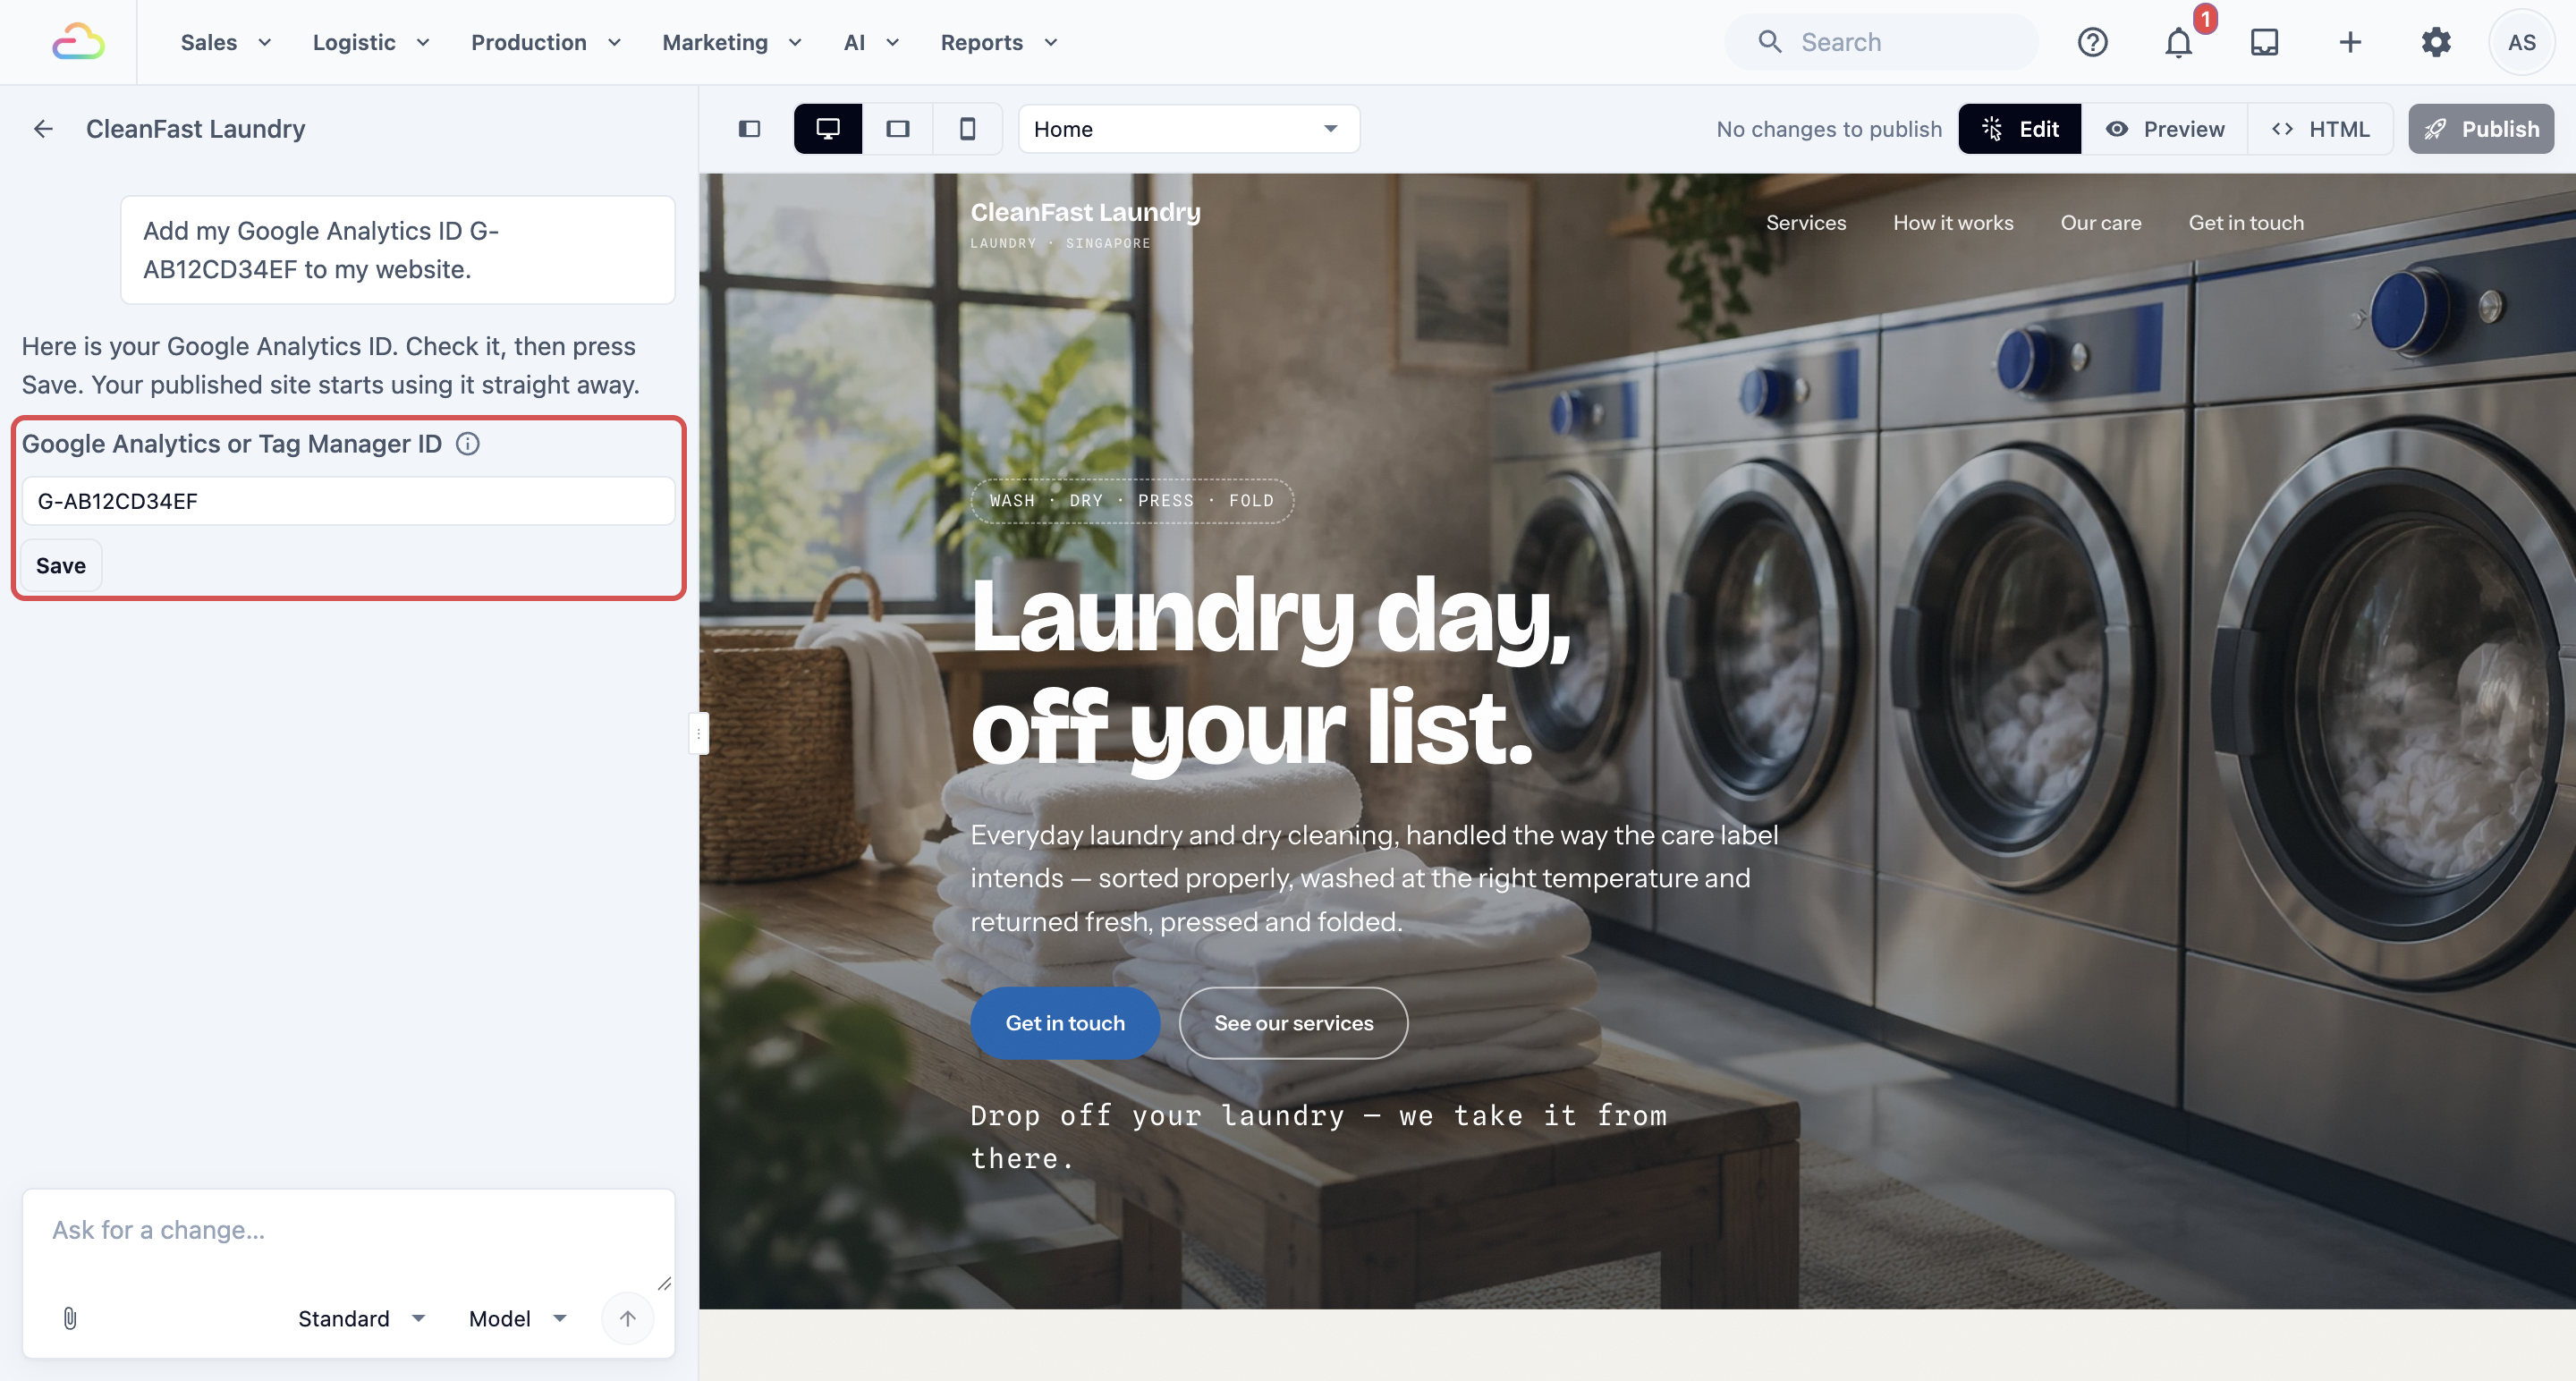
You see **Saved. Your published site now loads it.** You do not need to publish again. The same setting is also under **Google Analytics** on your website's Link domain page.
---
## Example: CleanFast Laundry
CleanFast Laundry already owns `cleanfastlaundry.com` from Namecheap.
1. The owner checks the website on Mobile and asks: "Make the Book a pickup button bigger on phones."
2. They click Publish and choose `cleanfastlaundry` as the address. The site is live at `cleanfastlaundry.easybizcloud.app`.
3. On the website card, they click Link domain, type `cleanfastlaundry.com` and click Add to subscription.
4. Under **Where are your domain's DNS settings?**, the page shows Namecheap, and they add the record in Namecheap.
5. Twenty minutes later, the page shows **www.cleanfastlaundry.com is live**.
6. They ask the Design Agent: "Add my Google Analytics ID G-AB12CD34EF to my website."
From next month, their EasyBiz bill shows S$19 for Pro hosting.
---
## What Customers See Online
- Customers type `www.cleanfastlaundry.com` or tap a link, and your website opens with the padlock in the browser bar.
- With Pro hosting, there is no "Made with EasyBiz" badge on the page.
- The free `easybizcloud.app` address keeps working, so links you shared before still open your website.
- Customers always see the last version you published, never your unpublished edits.
---
## FAQs
**When does Pro hosting billing start and stop?**
> It starts in the month your domain goes live, not when you click Add to subscription. If the DNS record is never added, you are not charged. It stops when you click Remove domain. Each website with its own domain is charged separately.
**What happens to my website if my EasyBiz subscription ends?**
> Your websites go offline, including those on your own domain, and visitors see an unavailable page. Your designs are kept. When you renew, your websites come back. Your domain itself stays yours, because you pay for it at your domain company.
**Does my Online Store's own domain cost extra?**
> No. A domain for your Online Store is included at no extra cost and is linked on the store card, not in the Design Agent. See [Connecting Your Own Domain](/docs/connecting-your-own-domain).
**I already have a website on my domain. What happens to it?**
> Once your domain is live on EasyBiz, it opens your new website instead of the old one. Cancel the old hosting only after the new site is live. Use **Redirects** so old page links still reach the right page.
**Does linking a domain renew or pay for my domain?**
> No. S$19 a month is for Pro hosting only. You still renew the domain yearly with the company you bought it from. If it expires, your website stops opening at that domain.
**My staff built the website. Why can't they link the domain?**
> Linking adds a monthly charge, so only the owner and staff with the **Manage Billing** permission see Link domain. Your staff can still edit and publish the website.
**My web developer looks after my domain. What do I send them?**
> Send them the record under **Add this record in your domain's DNS settings** and the steps the page shows for your DNS settings. If you want `cleanfastlaundry.com` without "www" too, send them the extra step as well. The page checks by itself, so you see when your domain is live.
---
## What's Next
You have now previewed your website on desktop and mobile, published it on its free address, linked your own domain and connected Google Analytics. Next, make matching logos, photos and posters for your shop with the Design Agent. See [Creating Logos, Photos and Posters](/docs/creating-images-with-design-agent).