## What These Terms Mean
Before you start, here is a quick explanation of the three main actions on this page:
- **Stock In** → Adding new stock to a location. Use this when items arrive from a supplier or you are recording starting stock for the first time.
- **Stock Out** → Removing stock from a location. Use this when items are damaged, expired, used internally, or written off.
- **Transfer** → Moving stock from one location to another within your business. The total stock count stays the same — you are just moving units between locations. Use this when you want to rebalance stock between outlets or send items from a production center to a counter.
---
## How to Find the Inventory Page
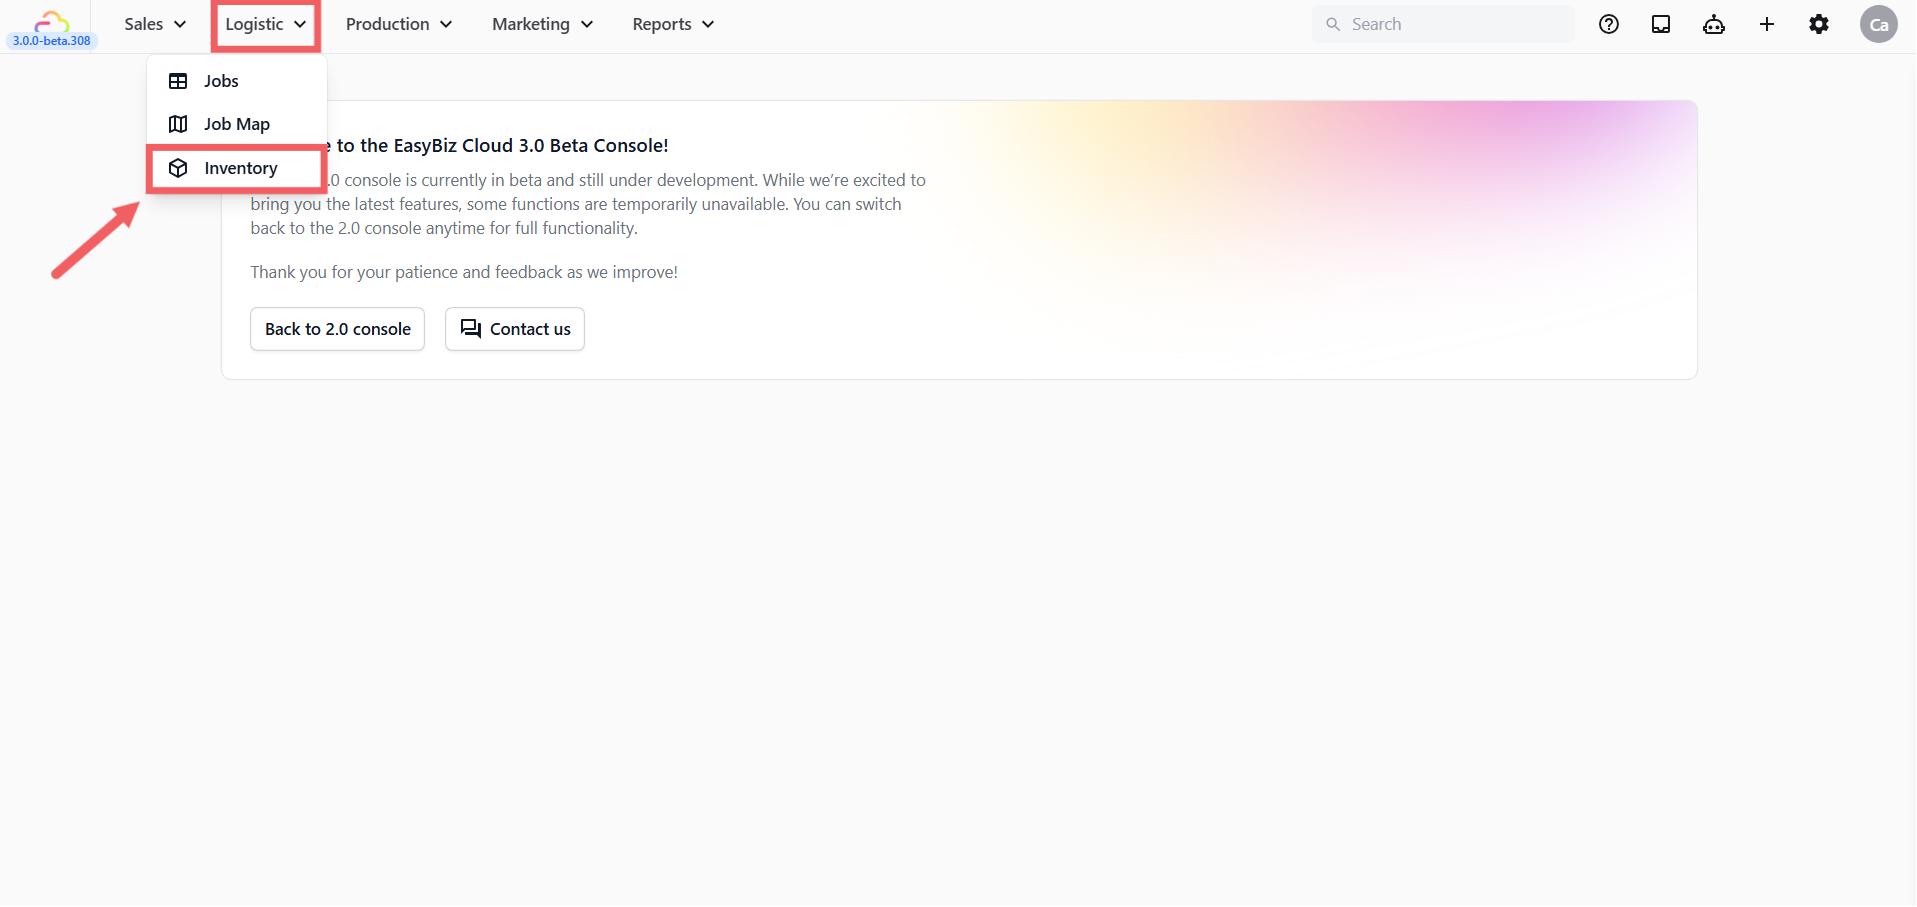
1. In the main navigation header, click the **Logistic** dropdown.
2. Click Inventory.
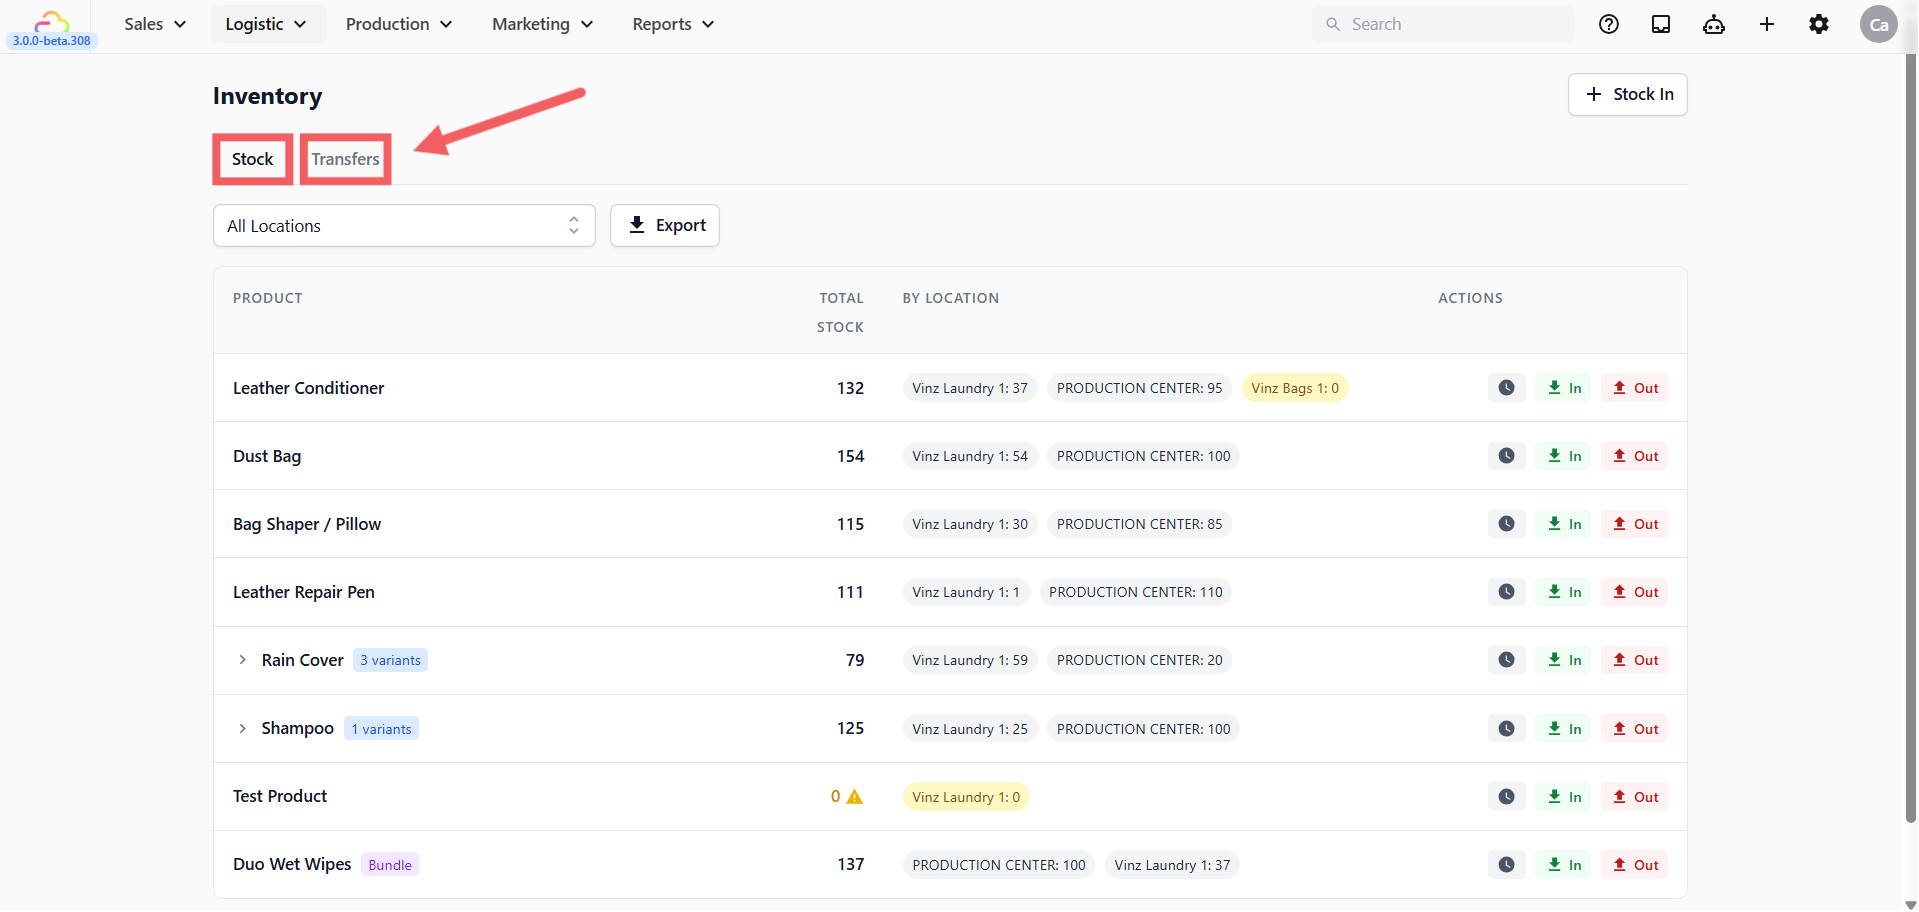
3. Use the Stock tab or Transfers tab.
---
## How to Read the Stock List
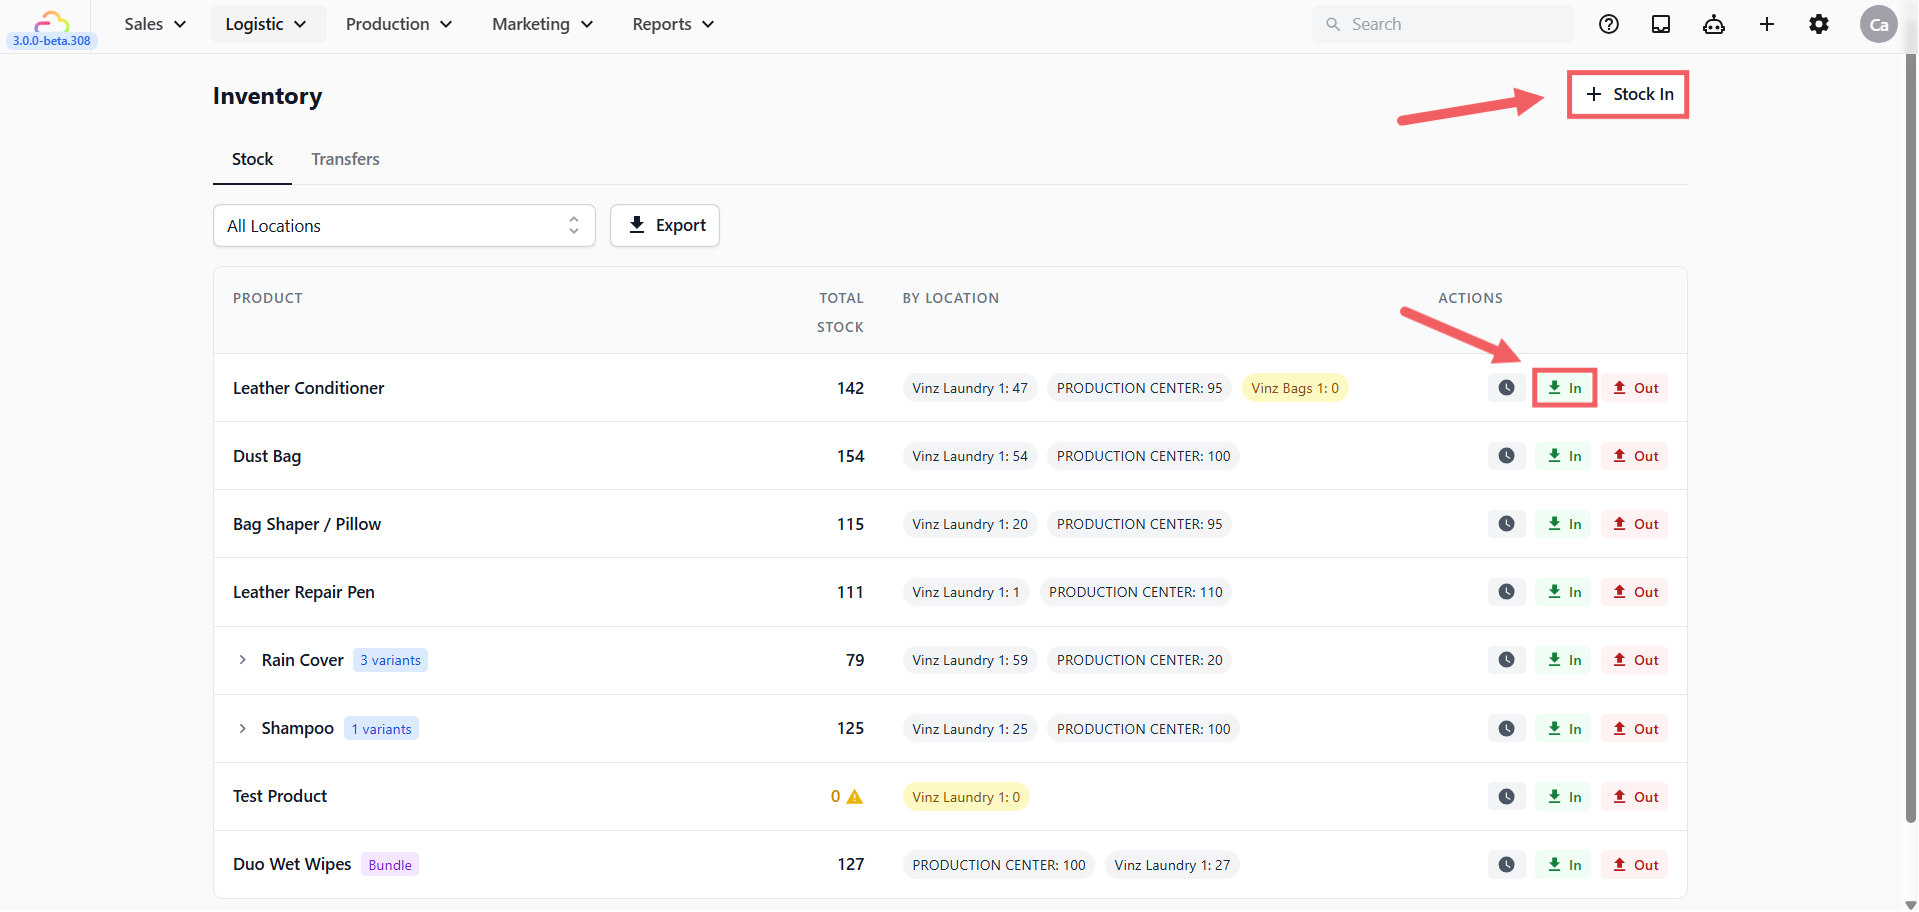
The Stock tab shows one row per product. Each row includes the product name, Total Stock across all locations, and By Location showing the count at each individual location.
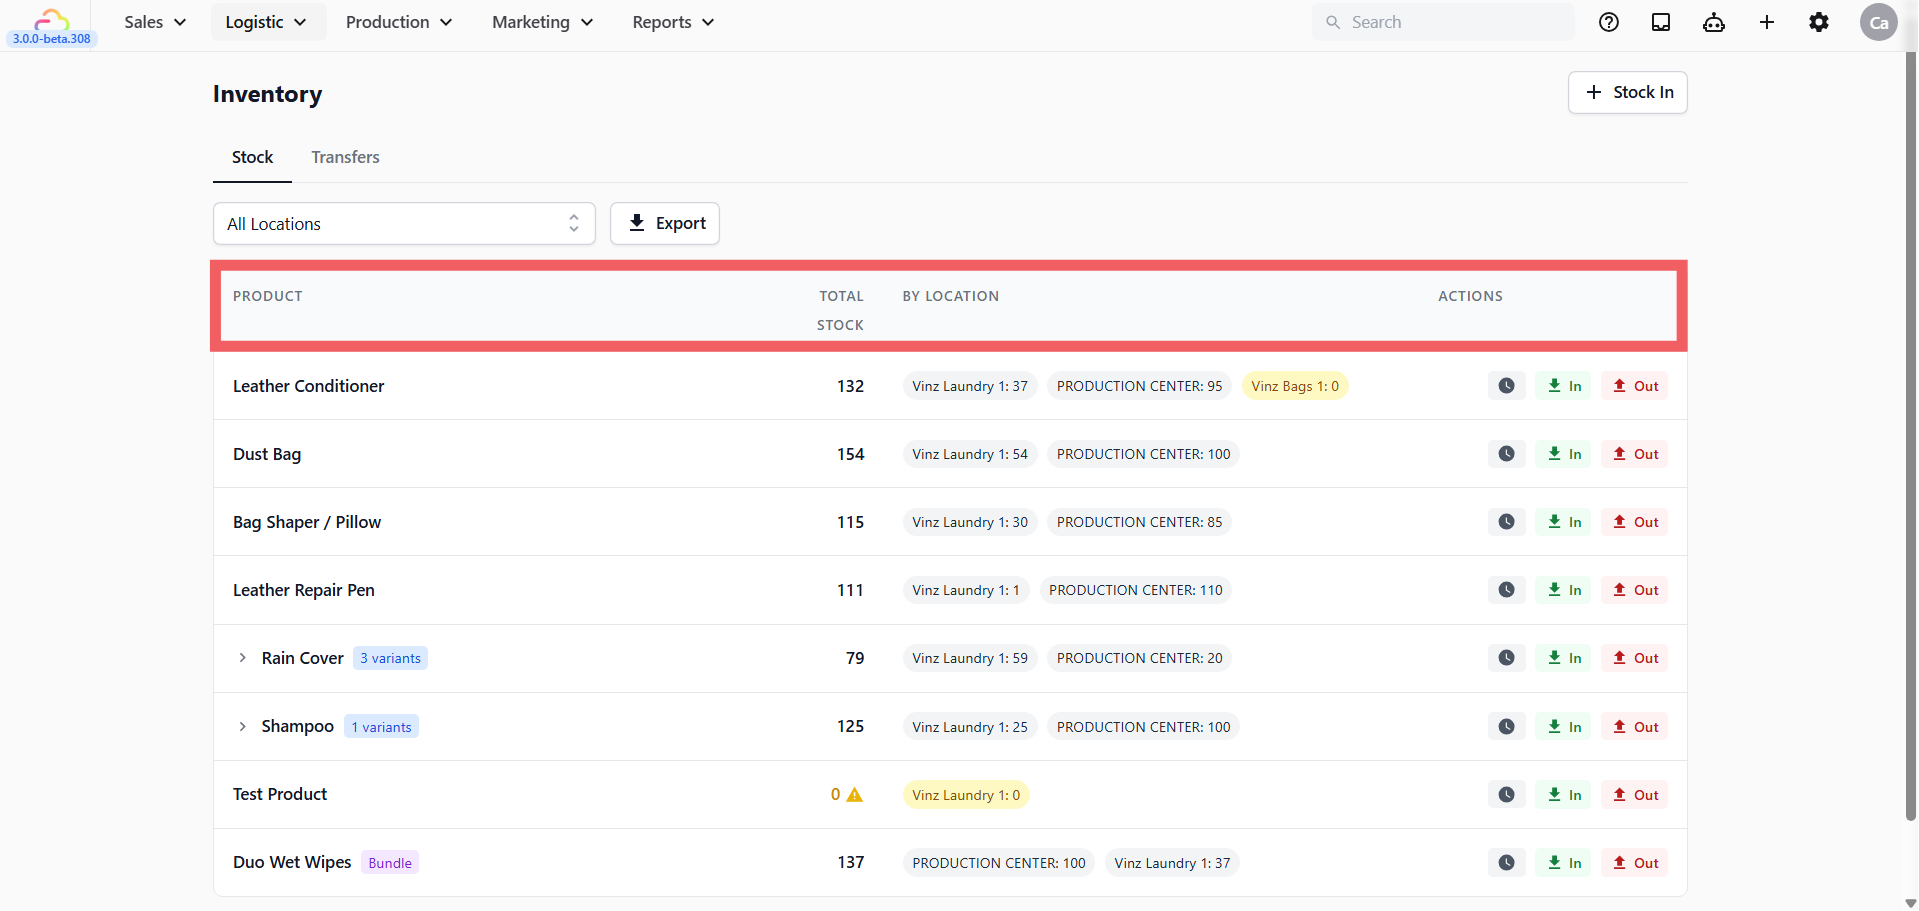
If a product has variants, click the expand arrow on the row to view each variant separately with its own stock count.
Each row has three action buttons:
| Action | What it does |
| --- | --- |
| Clock icon | Opens Stock History for that product |
| In | Opens Stock In for that product |
| Out | Opens Stock Out for that product |
---
## How to Filter by Location
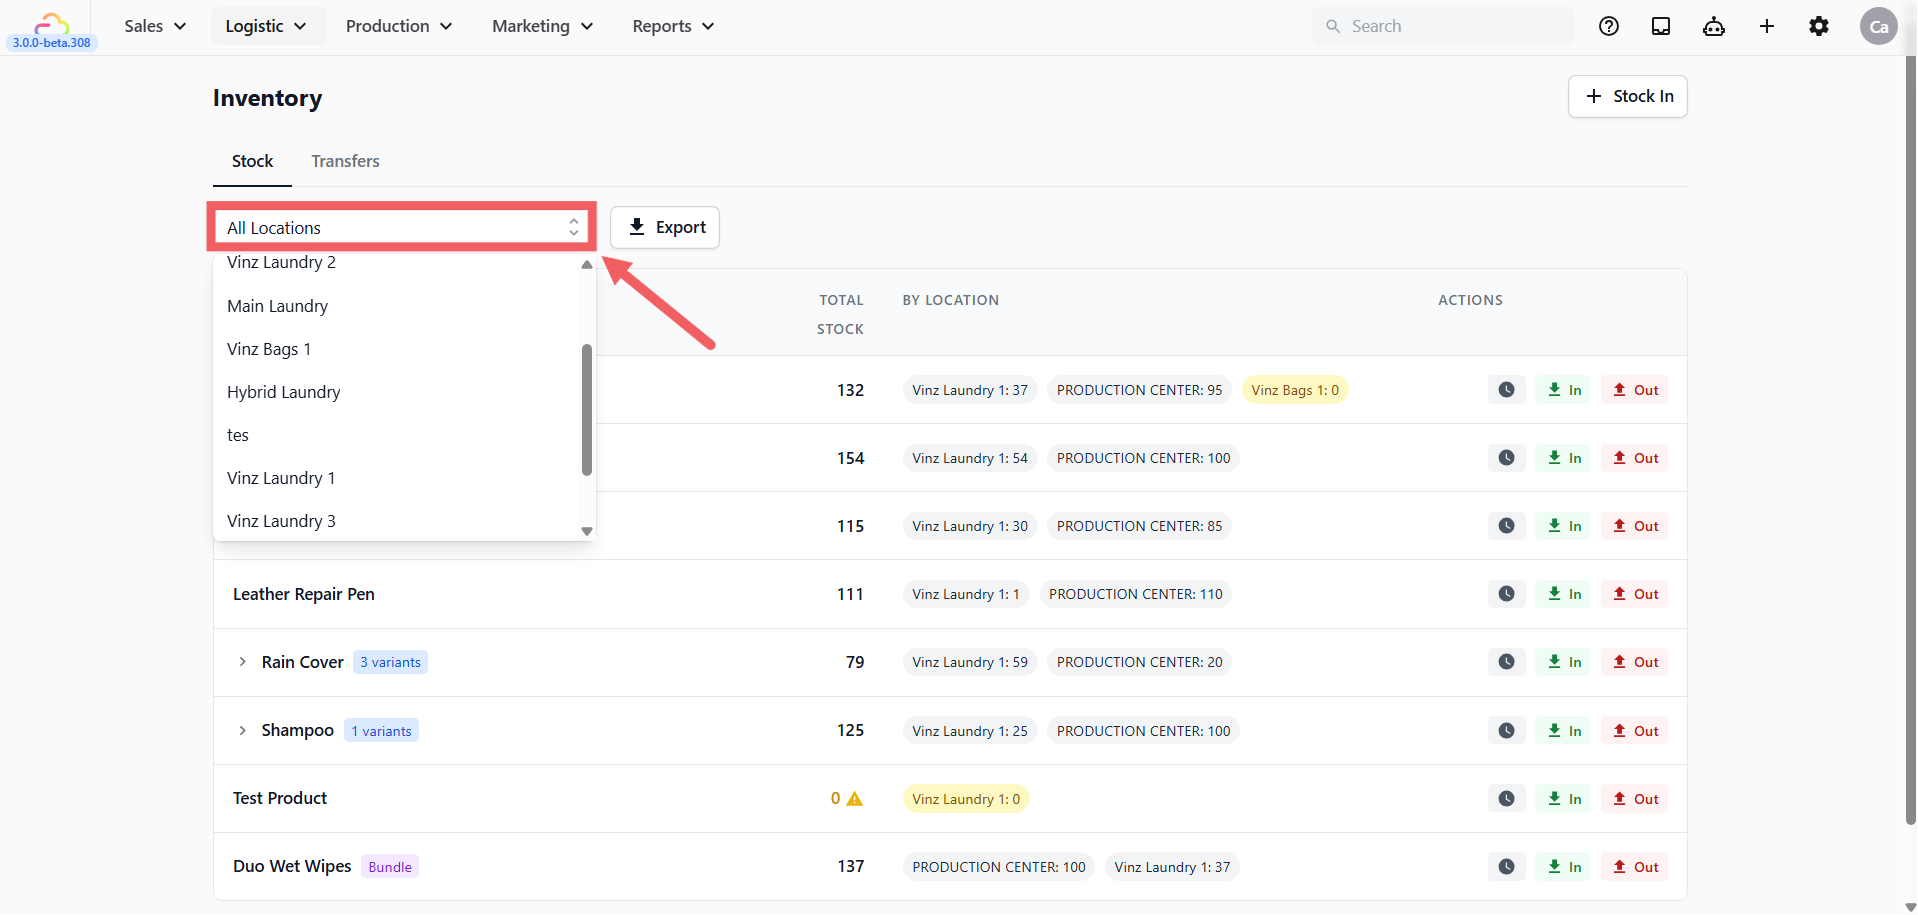
1. On the **Stock** tab, click the All Locations dropdown at the top left.
2. Select the location you want to view.
3. Select **All Locations** again to return to the full view.
---
## How to Do a Stock In
1. Click + Stock In at the top right, or click the In button on a product row.
2. Fill in the Stock In dialog.
3. Click Confirm.
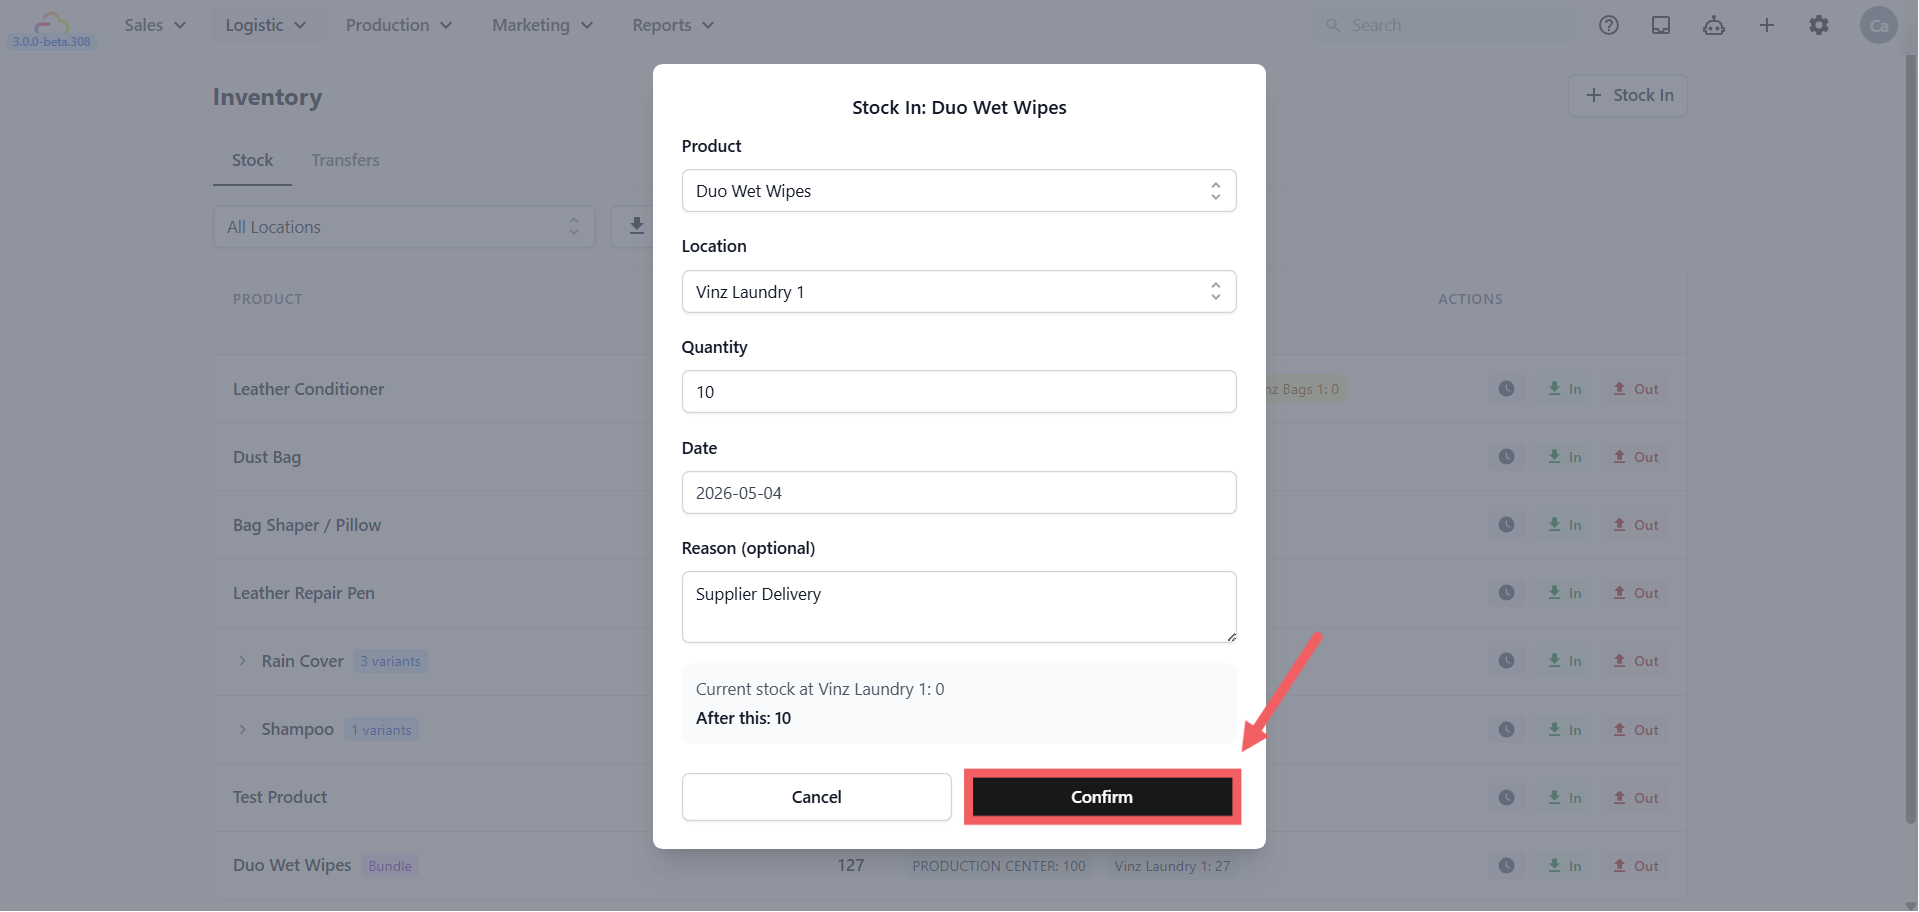
### Product
| Pick this | Result |
| --- | --- |
| Select product from dropdown | Choose the retail product to add stock for |
| Pre-filled product | Appears automatically when you clicked In from a product row |
### Location
| Pick this | Result |
| --- | --- |
| POS location | Adds stock to that outlet |
| Production center | Adds stock to that work center |
### Quantity
| Pick this | Result |
| --- | --- |
| Any positive number | Adds that quantity to the selected location |
### Date
| Pick this | Result |
| --- | --- |
| Today's date (pre-filled) | Records the stock in for today |
| An earlier date | Records the movement for a past date if needed |
### Reason (optional)
| Pick this | Result |
| --- | --- |
| Leave empty | Saves without a note |
| Type a reason, e.g. Supplier delivery | Keeps a clear record in stock history |
---
## How to Do a Stock Out
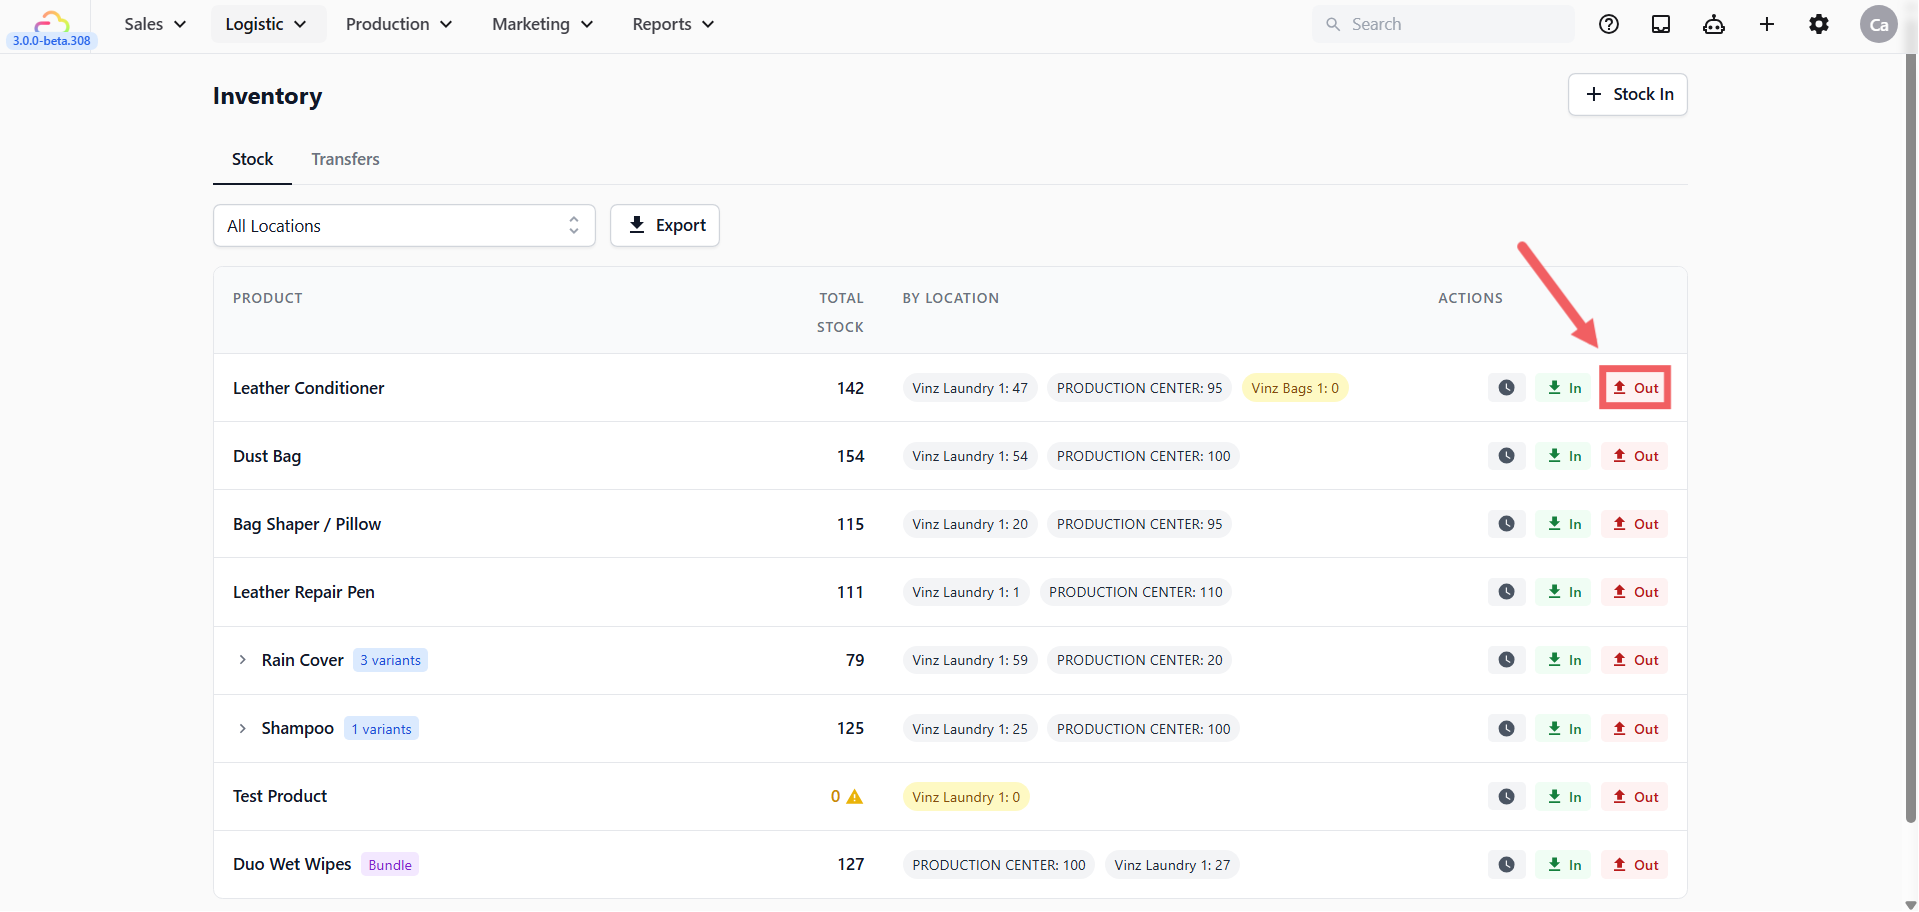
Stock Out follows the same steps as Stock In. Click the Out button on a product row, fill in the same fields — product, location, quantity, and date — and click Confirm.
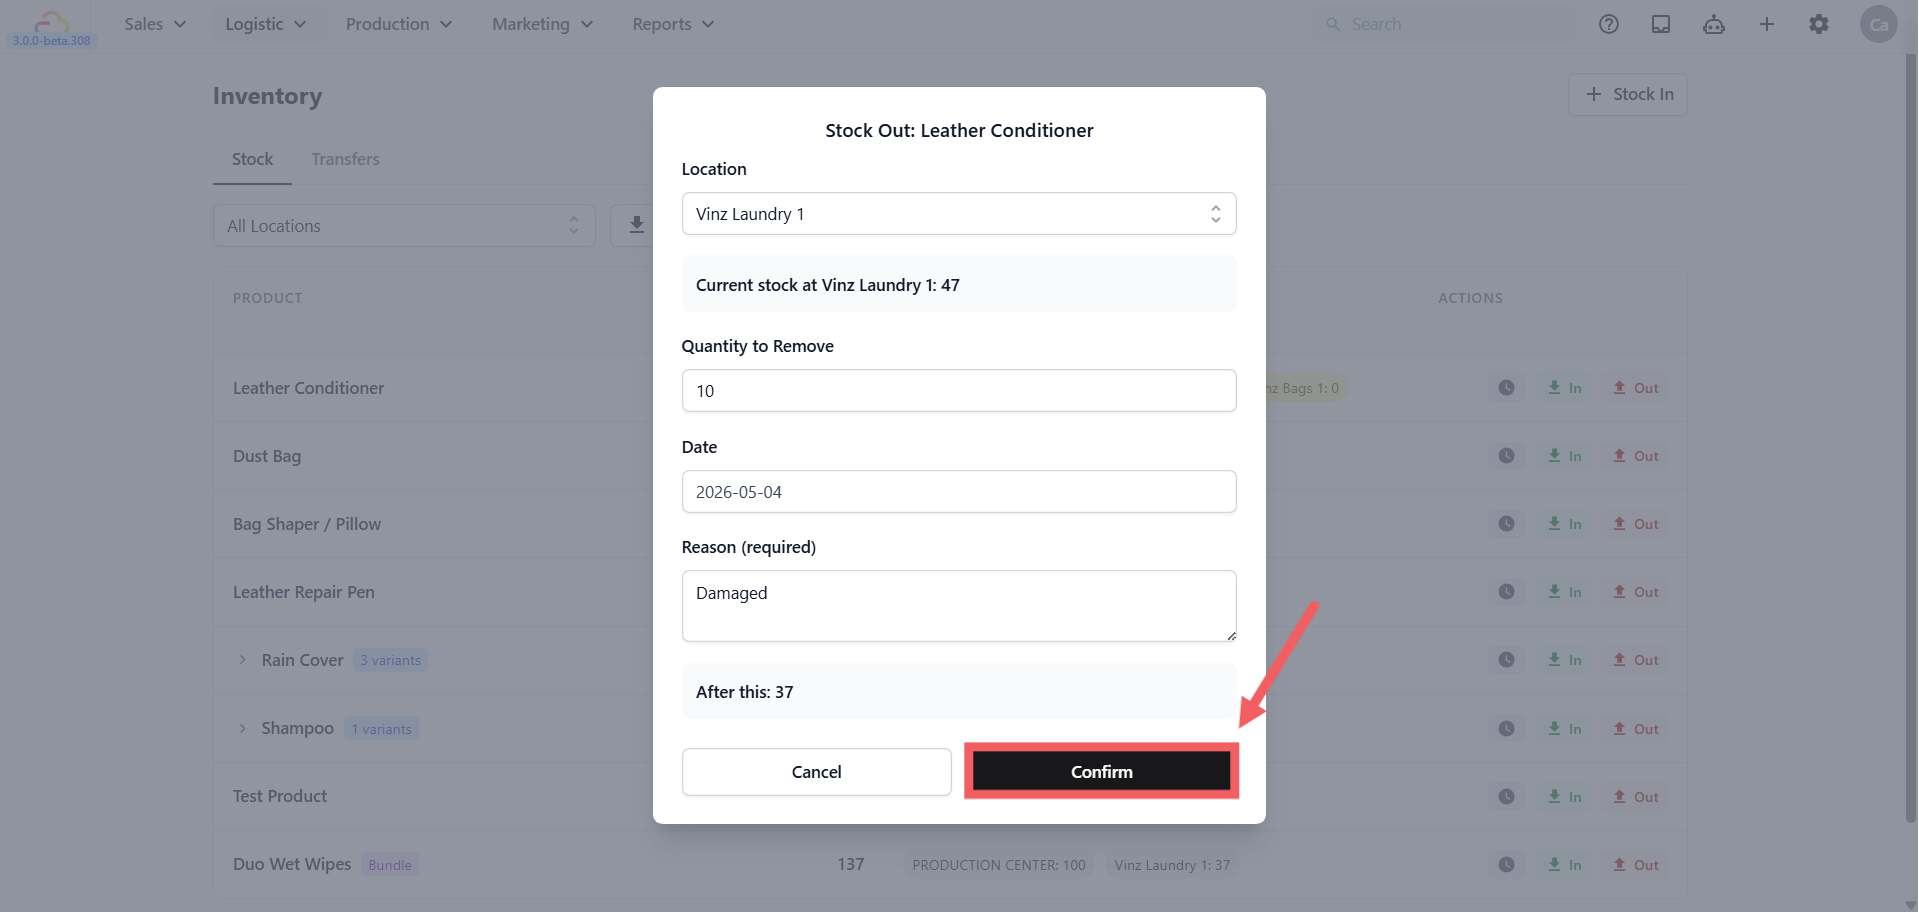
Two things are different from Stock In:
- The quantity field is labelled **Quantity to Remove** instead of Quantity.
- **Reason is required.** You must enter a reason before confirming, to keep the audit trail clear.
The dialog shows the current stock and what the count will be after removal. If the removal would take stock below zero, a warning is shown.
---
## How to View Stock History
1. Click the 🕓 Clock icon on any product row.
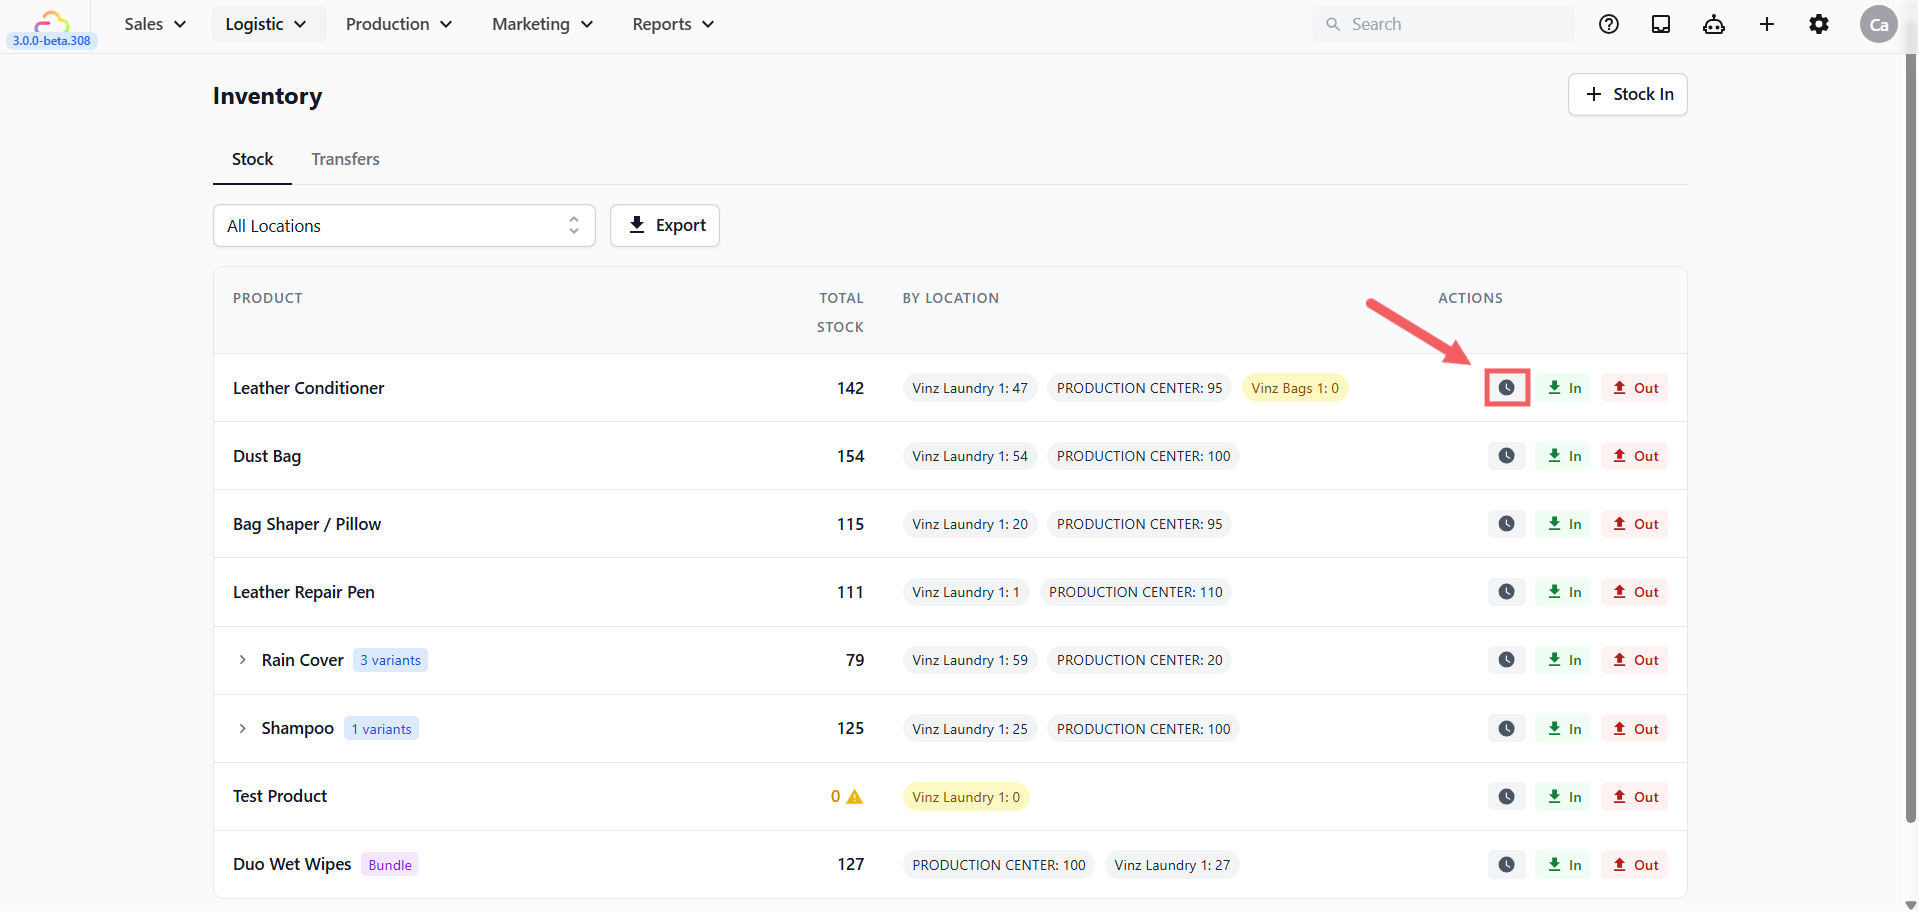
2. The Stock History drawer opens for that product.
3. Use the Location, date range, or Variant filters to narrow the results.
4. Click Export inside the drawer if you need the movement history as a file.
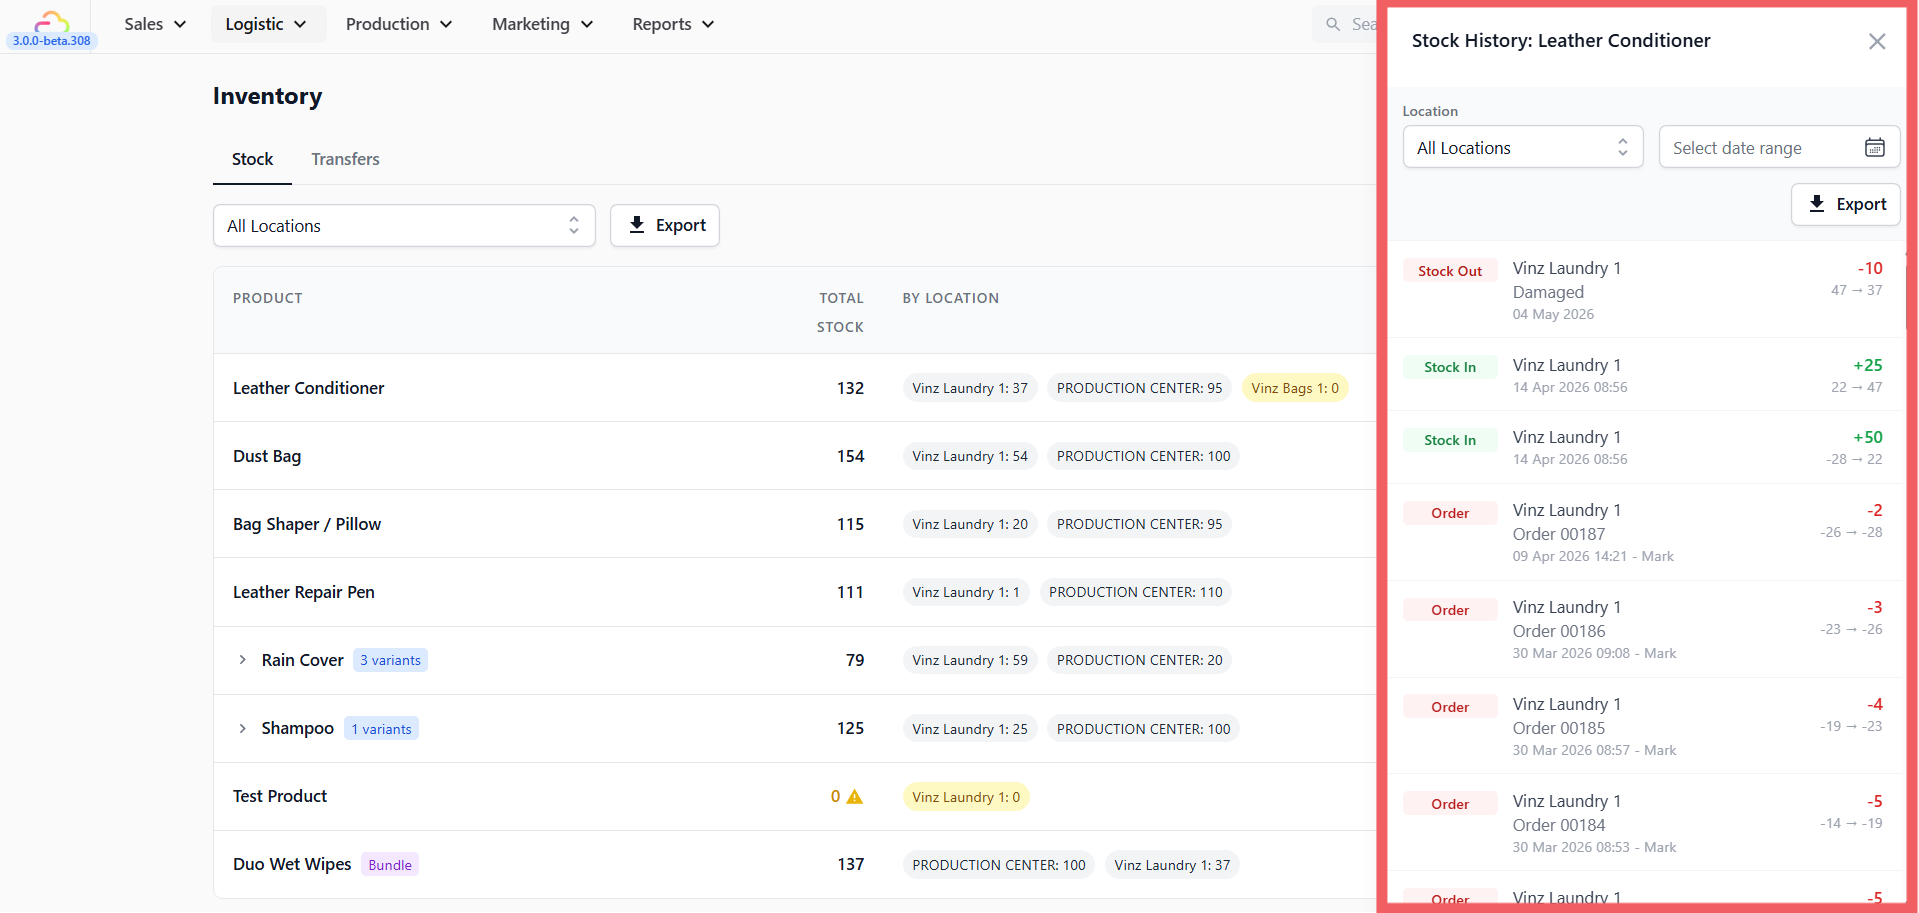
Stock History shows each movement with Date, Type, Product, Variant, Location, Quantity, Before, After, Reason, and Operator.
---
## How to Create a Transfer
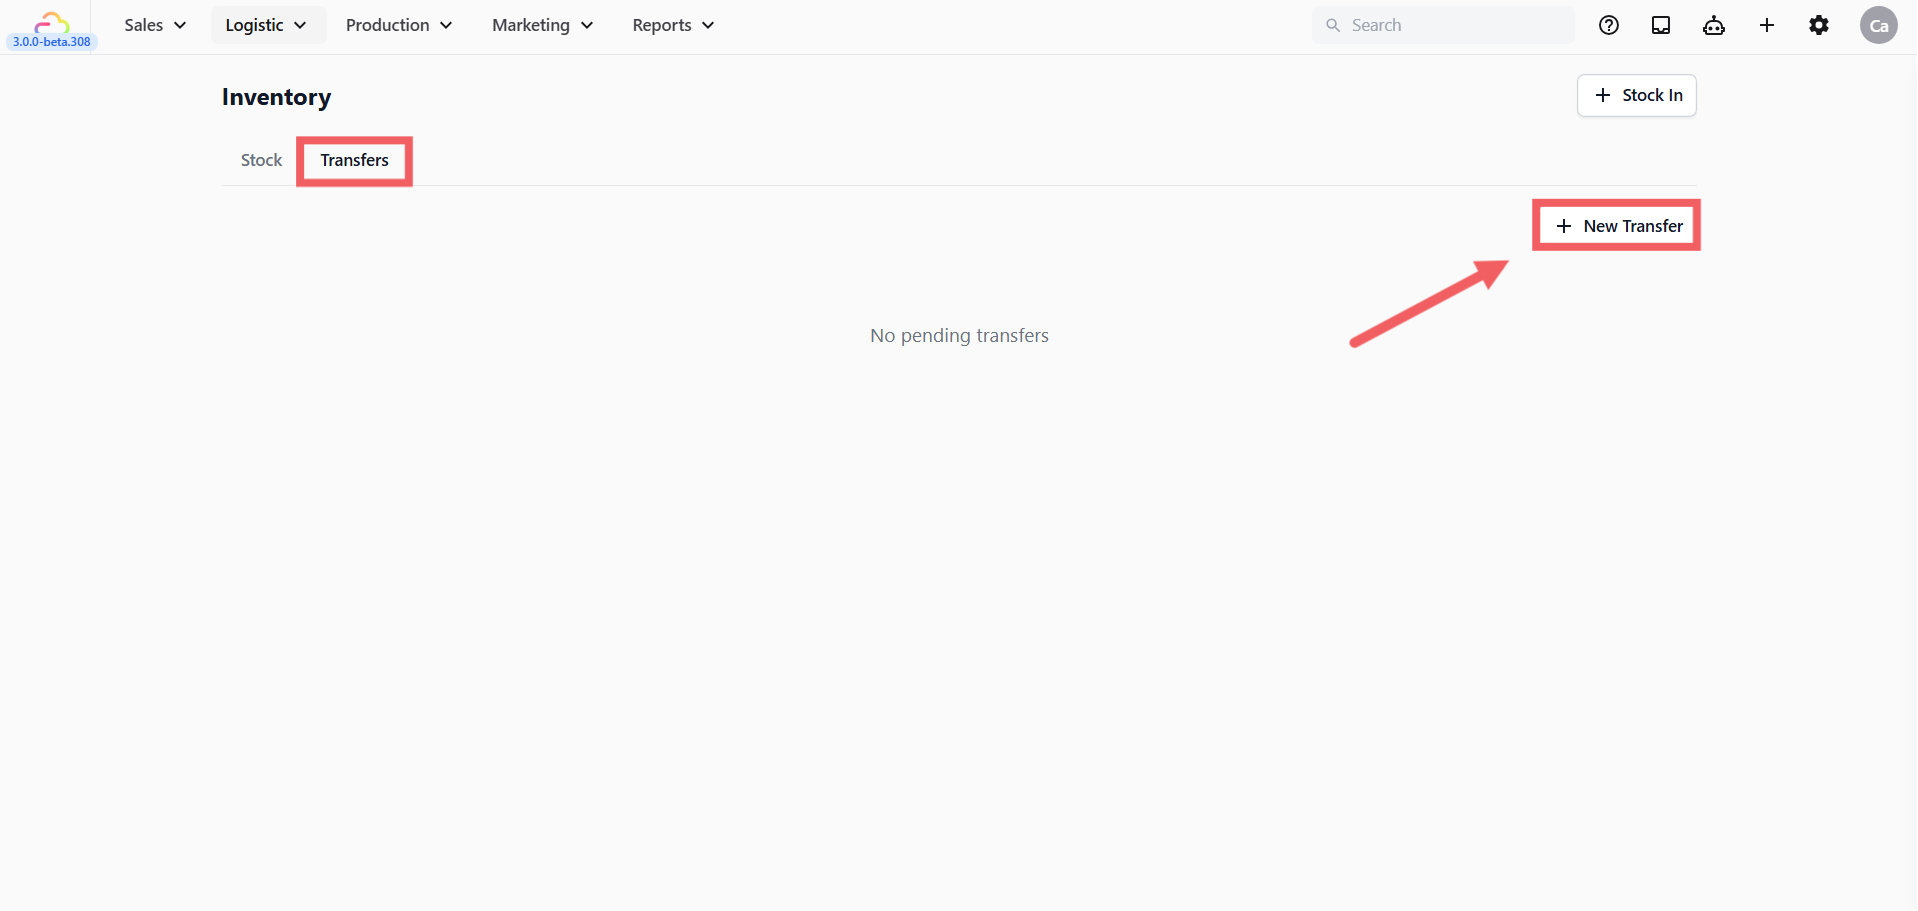
1. Click the Transfers tab.
2. Click + New Transfer.
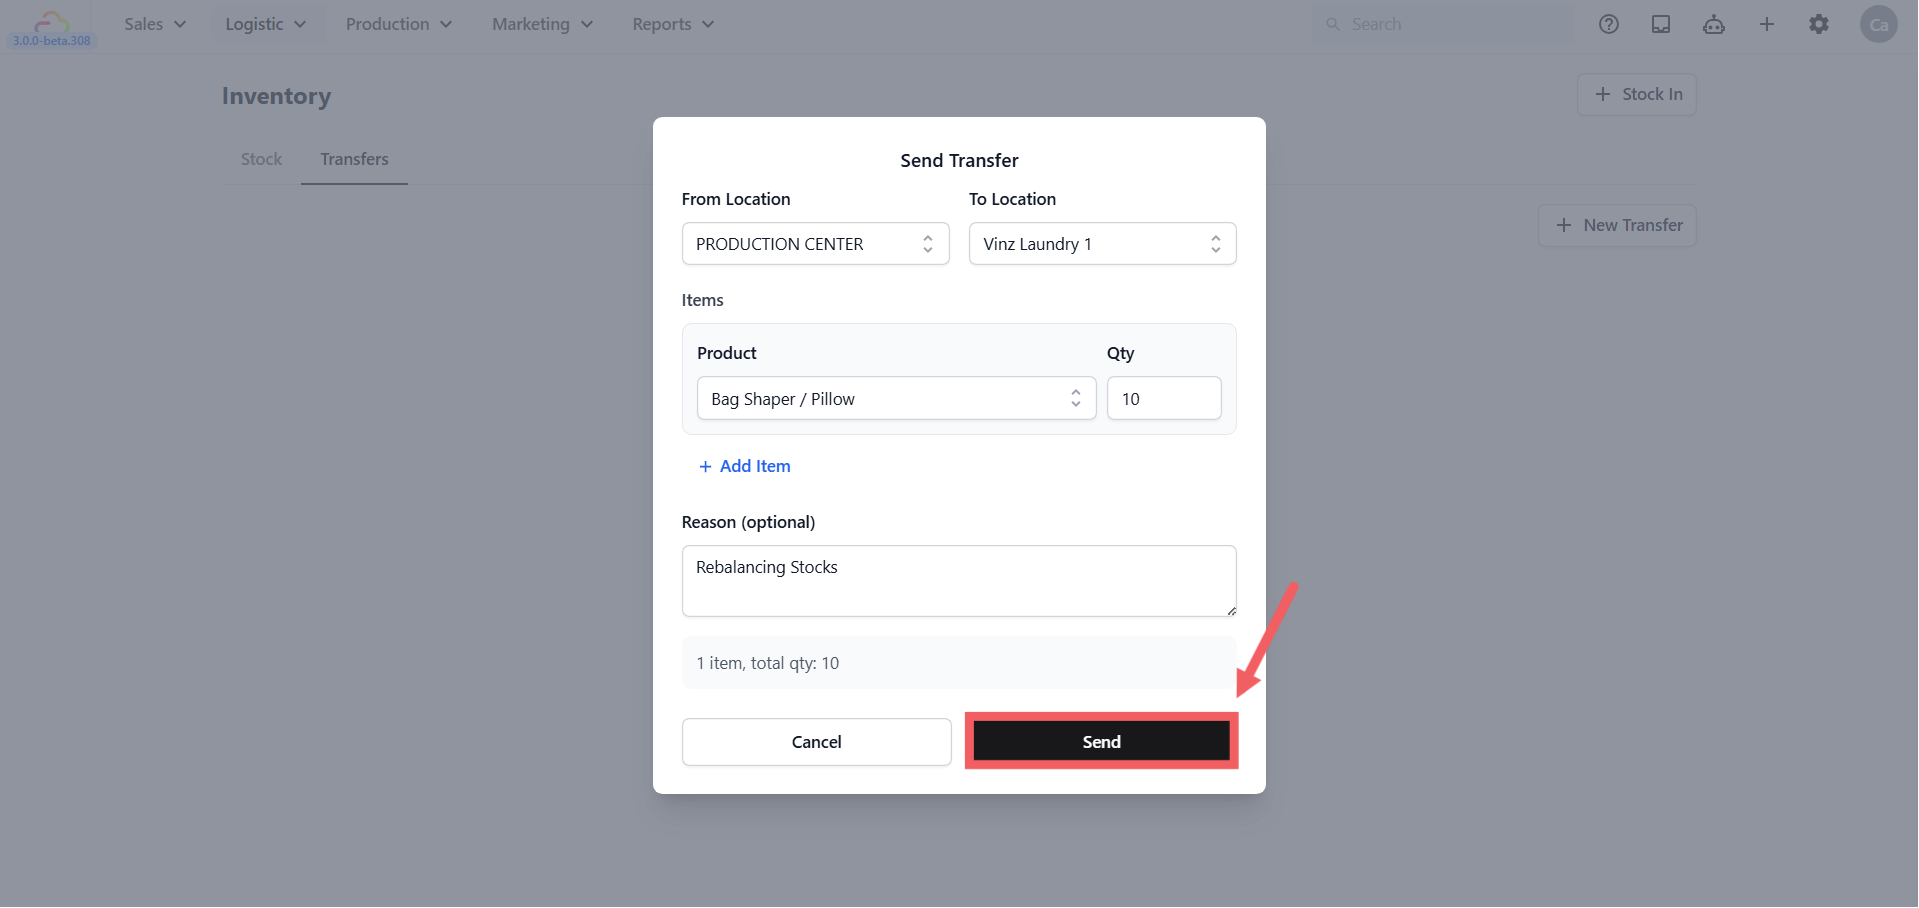
3. Fill in the Send Transfer dialog.
4. Click Send.
### From Location
Stock is deducted from this location when the transfer is sent
### To Location
Stock is added here after the transfer is received
### Items
| Fill this | Result |
| --- | --- |
| Product | Select the retail product to transfer |
| Qty | Enter how many units to transfer |
| + Add Item | Add another product row to include more items in the same transfer |
### Reason (optional)
| Pick this | Result |
| --- | --- |
| Leave empty | Sends the transfer without a note |
| Type a reason, e.g. Rebalancing stock between outlets | Keeps a clear record of why the transfer was made |
The sending location's stock is deducted when you click Send. The receiving location's stock increases only after the transfer is received at the other end.
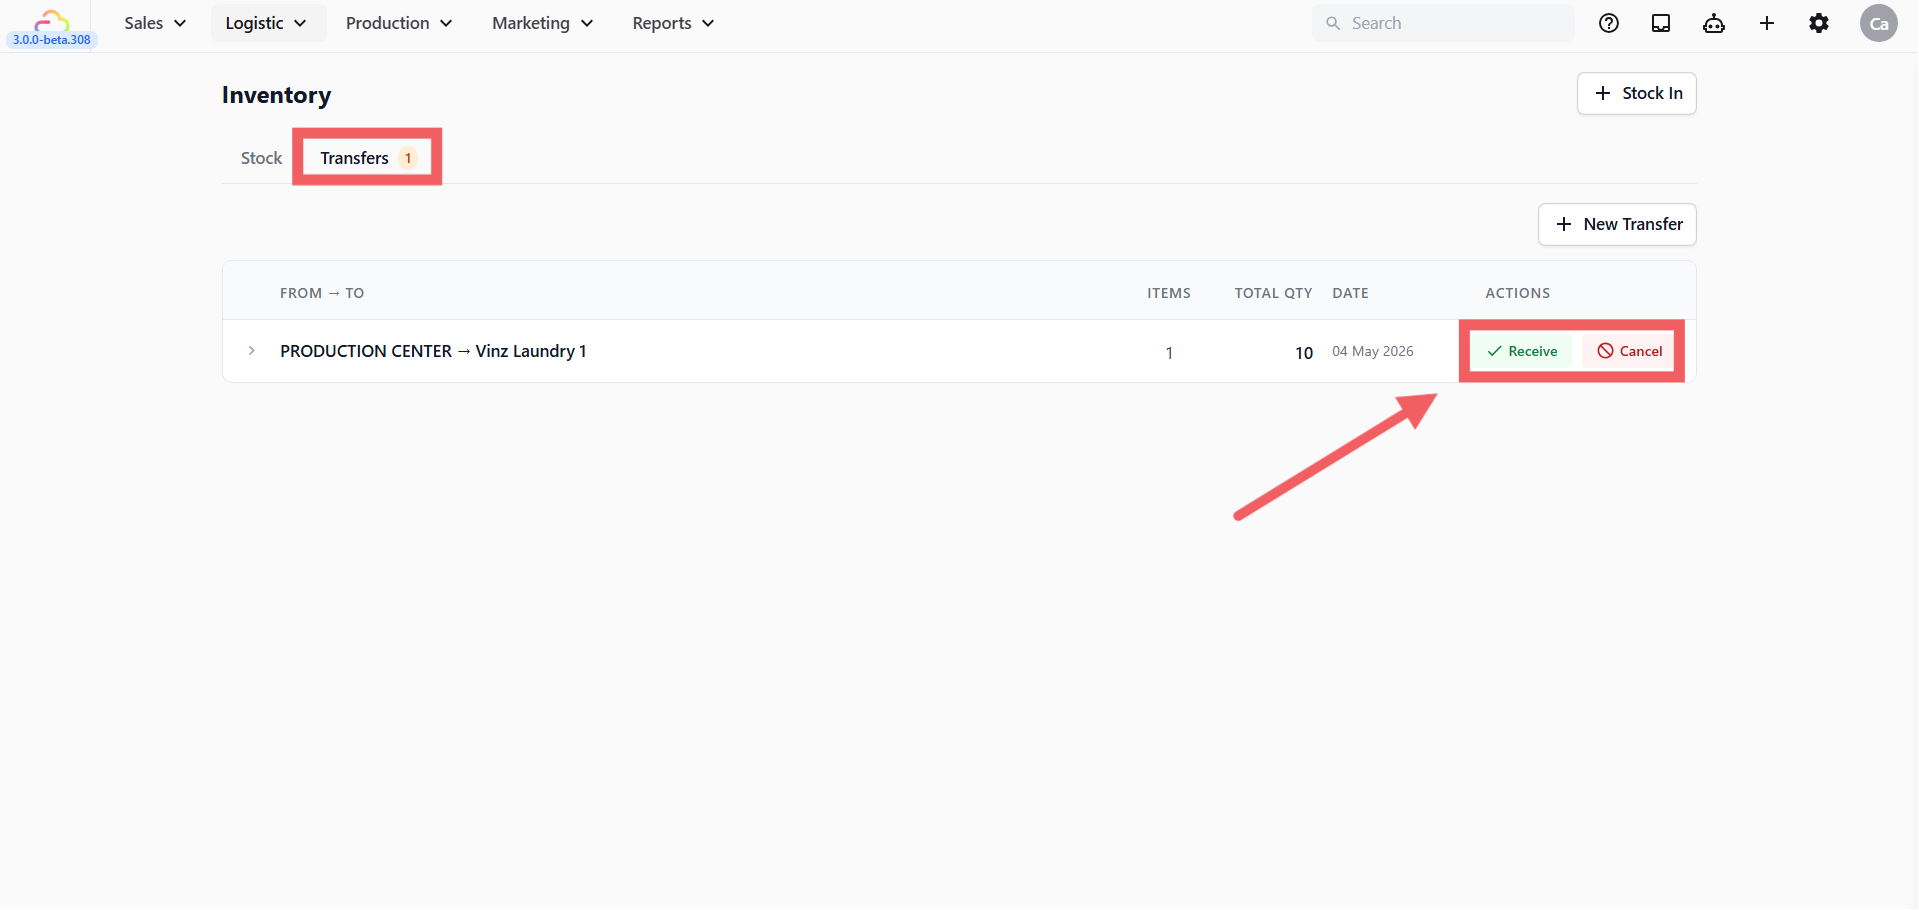
Pending transfers appear in the Transfers tab showing From location, To location, Items, Total Qty, Date, and options to Receive or Cancel.
---
## FAQs
**Why is Reason required for Stock Out but optional for Stock In?**
> Stock Out removes stock, so a reason is required to keep the audit trail clear. Stock In is typically a straightforward addition so the reason is optional.
**Can I stock in a product that has variants?**
> Yes. Select the product first, then select the specific variant before entering the quantity.
**What happens when I send a transfer?**
> The sending location's stock is deducted immediately. The receiving location increases only after someone receives the transfer at the other end.
**Can I cancel a pending transfer?**
> Yes. Use the Cancel option on the pending transfer row in the Transfers tab. The stock is returned to the sending location.
**Can I export stock for just one location?**
> Yes. Select the location from the All Locations filter first, then click Export.
**How do I know if a product is running low?**
> A zero-stock location is highlighted in yellow on the stock list. If stock goes below zero it is highlighted in red.