## Before You Start
- Your customers are already in your contact list. See [Find, Filter and Export Contacts](/docs/find-filter-and-export-contacts) and [Add a New Customer](/docs/add-a-new-customer).
- You know what each part of a customer's page shows. See [See Everything About a Customer](/docs/see-everything-about-a-customer).
- You need access to the shop's app settings in **Settings**. Owners have it.
- **If you set this up before:** the list columns and customer page sections are now both set in **Settings › EasyBiz Console**, and they only change for your team after you click Publish .
---
## Overview
The contact list is the table staff see when they open Contacts. The customer page, called Contact Detail in the settings, is what staff see when they click a customer. You choose the columns on the list and the sections on the customer page, including their order and which side of the page each section sits on. The layout is the same for every staff member in your shop, so the whole team works from one view. Changing the layout never adds, changes or removes any customer information.
**Where it works**
- **Console:** the Contacts list and every customer's page, for every staff member, after you publish.
- **POS and the staff mobile app:** not affected. These settings change the Console only.
- **Customers:** see nothing different. These are staff screens.
---
## Why Set It Up
- **Less scrolling and squinting.** Staff see the phone number and last order straight away instead of reading past columns they never use.
- **Fewer mistakes at the counter.** Put Loyalty near the top so staff see a customer's store credit and prepaid packages before they take the next order.
- **One view for the whole team.** You set it once, and every staff member's Console shows the same layout.
If you skip this, the Console uses the standard layout. The list shows **#**, **Customer**, **Phone**, **Email**, **Last Order**, **Orders** and **Registered**. The customer page shows Payment History, Invoice History and Order History on the left, and Insights, Contact Info, Address, Sequences, Loyalty and Saved Cards on the right.
---
## Where to Find It
1. Click the ⚙️ Settings icon in the top-right corner.
2. Under the **Administration** section, click **EasyBiz Console**.
3. The editor opens. Your settings are on the left, and a live preview of your Console is on the right. Under **Pages**, you will see **Contacts** (the list) and **Contact Detail** (the customer page).
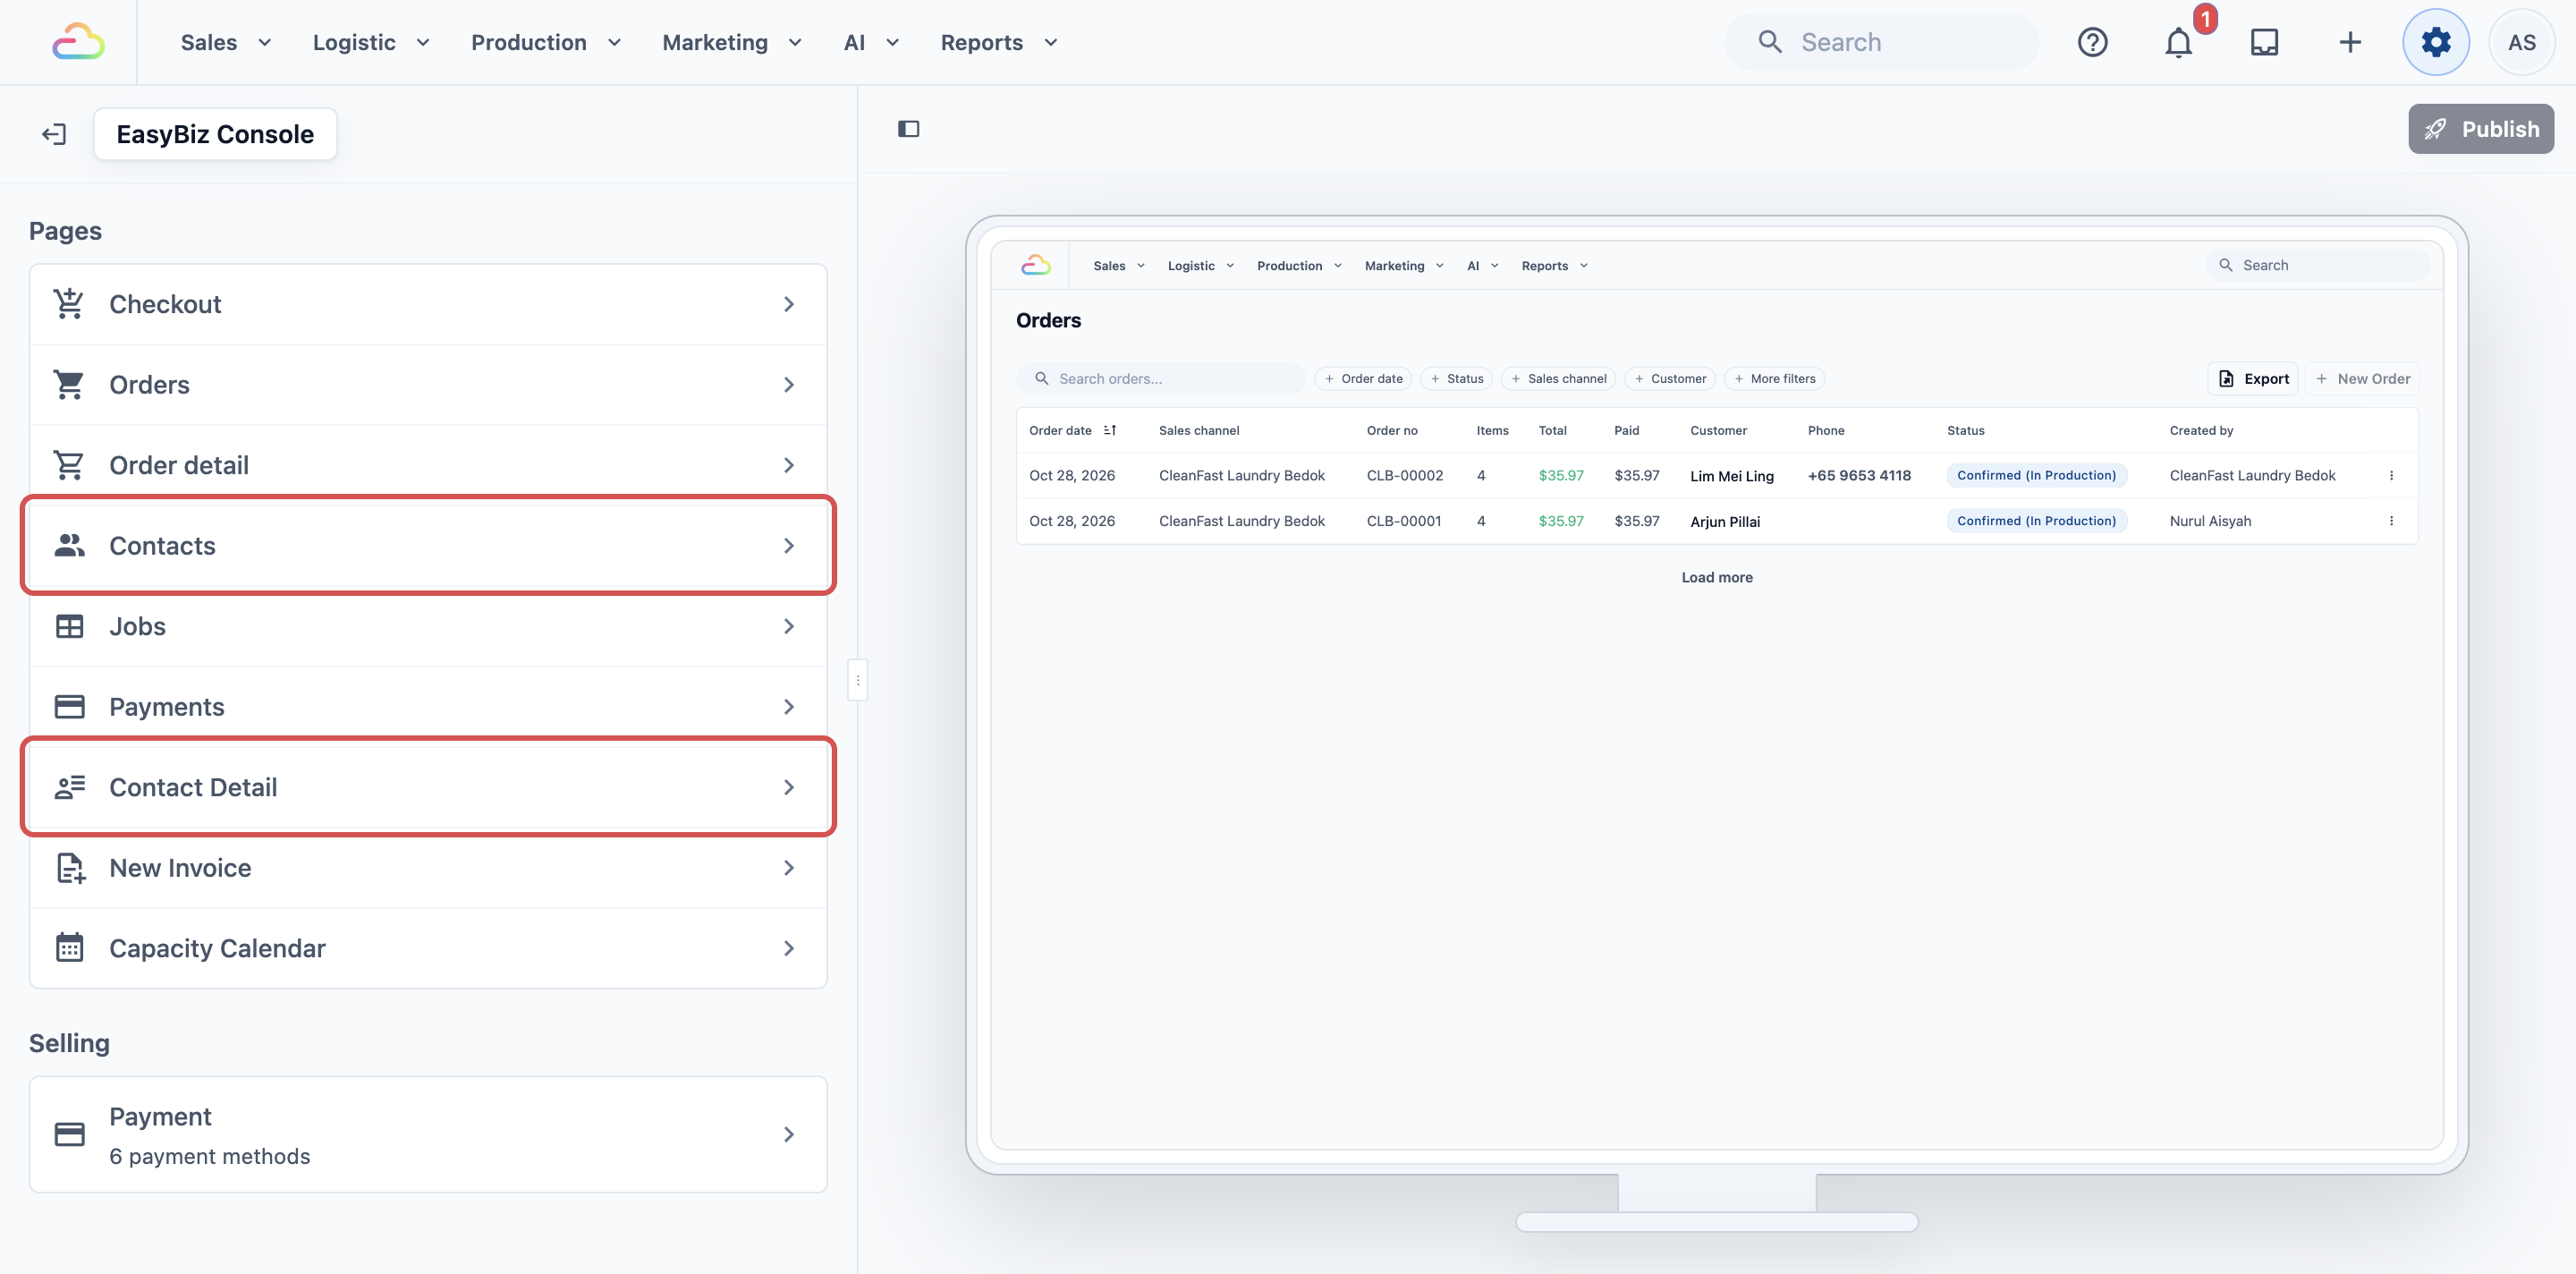
Every change waits in the editor until you click Publish . A page with unpublished changes shows a dot beside its name, and leaving the editor first asks **Leave without publishing?**
---
## Set Up the Contact List Columns
1. Under **Pages**, click **Contacts**. The **Table Columns** list shows the columns in the order the list shows them, from left to right.
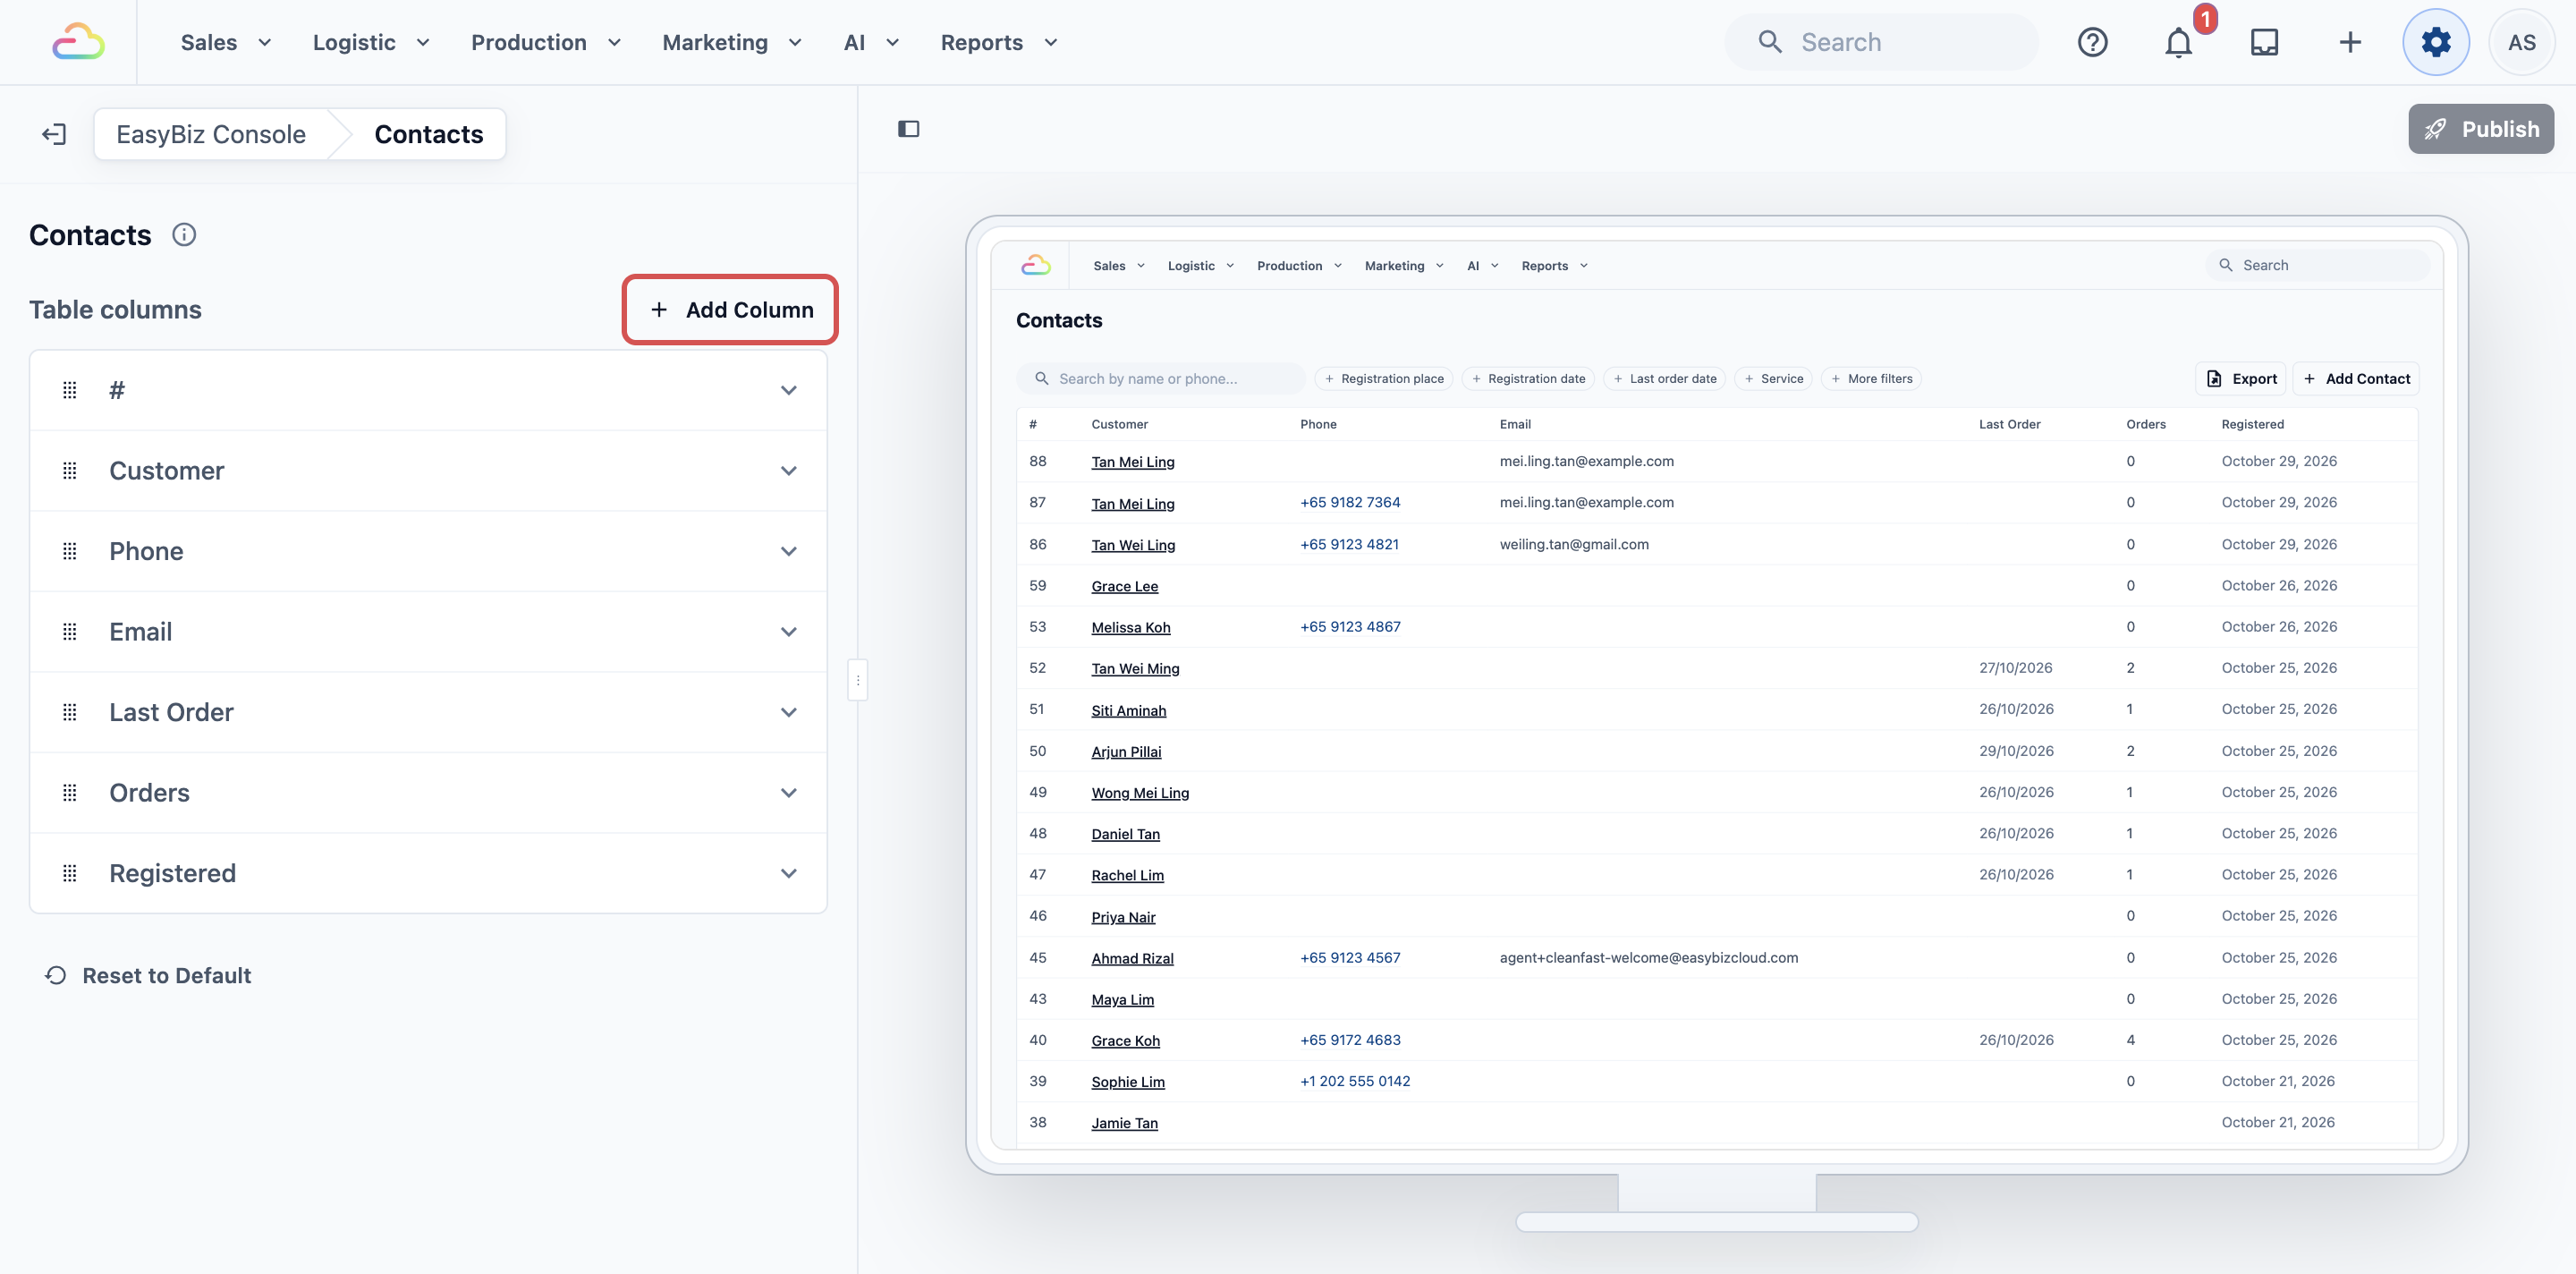
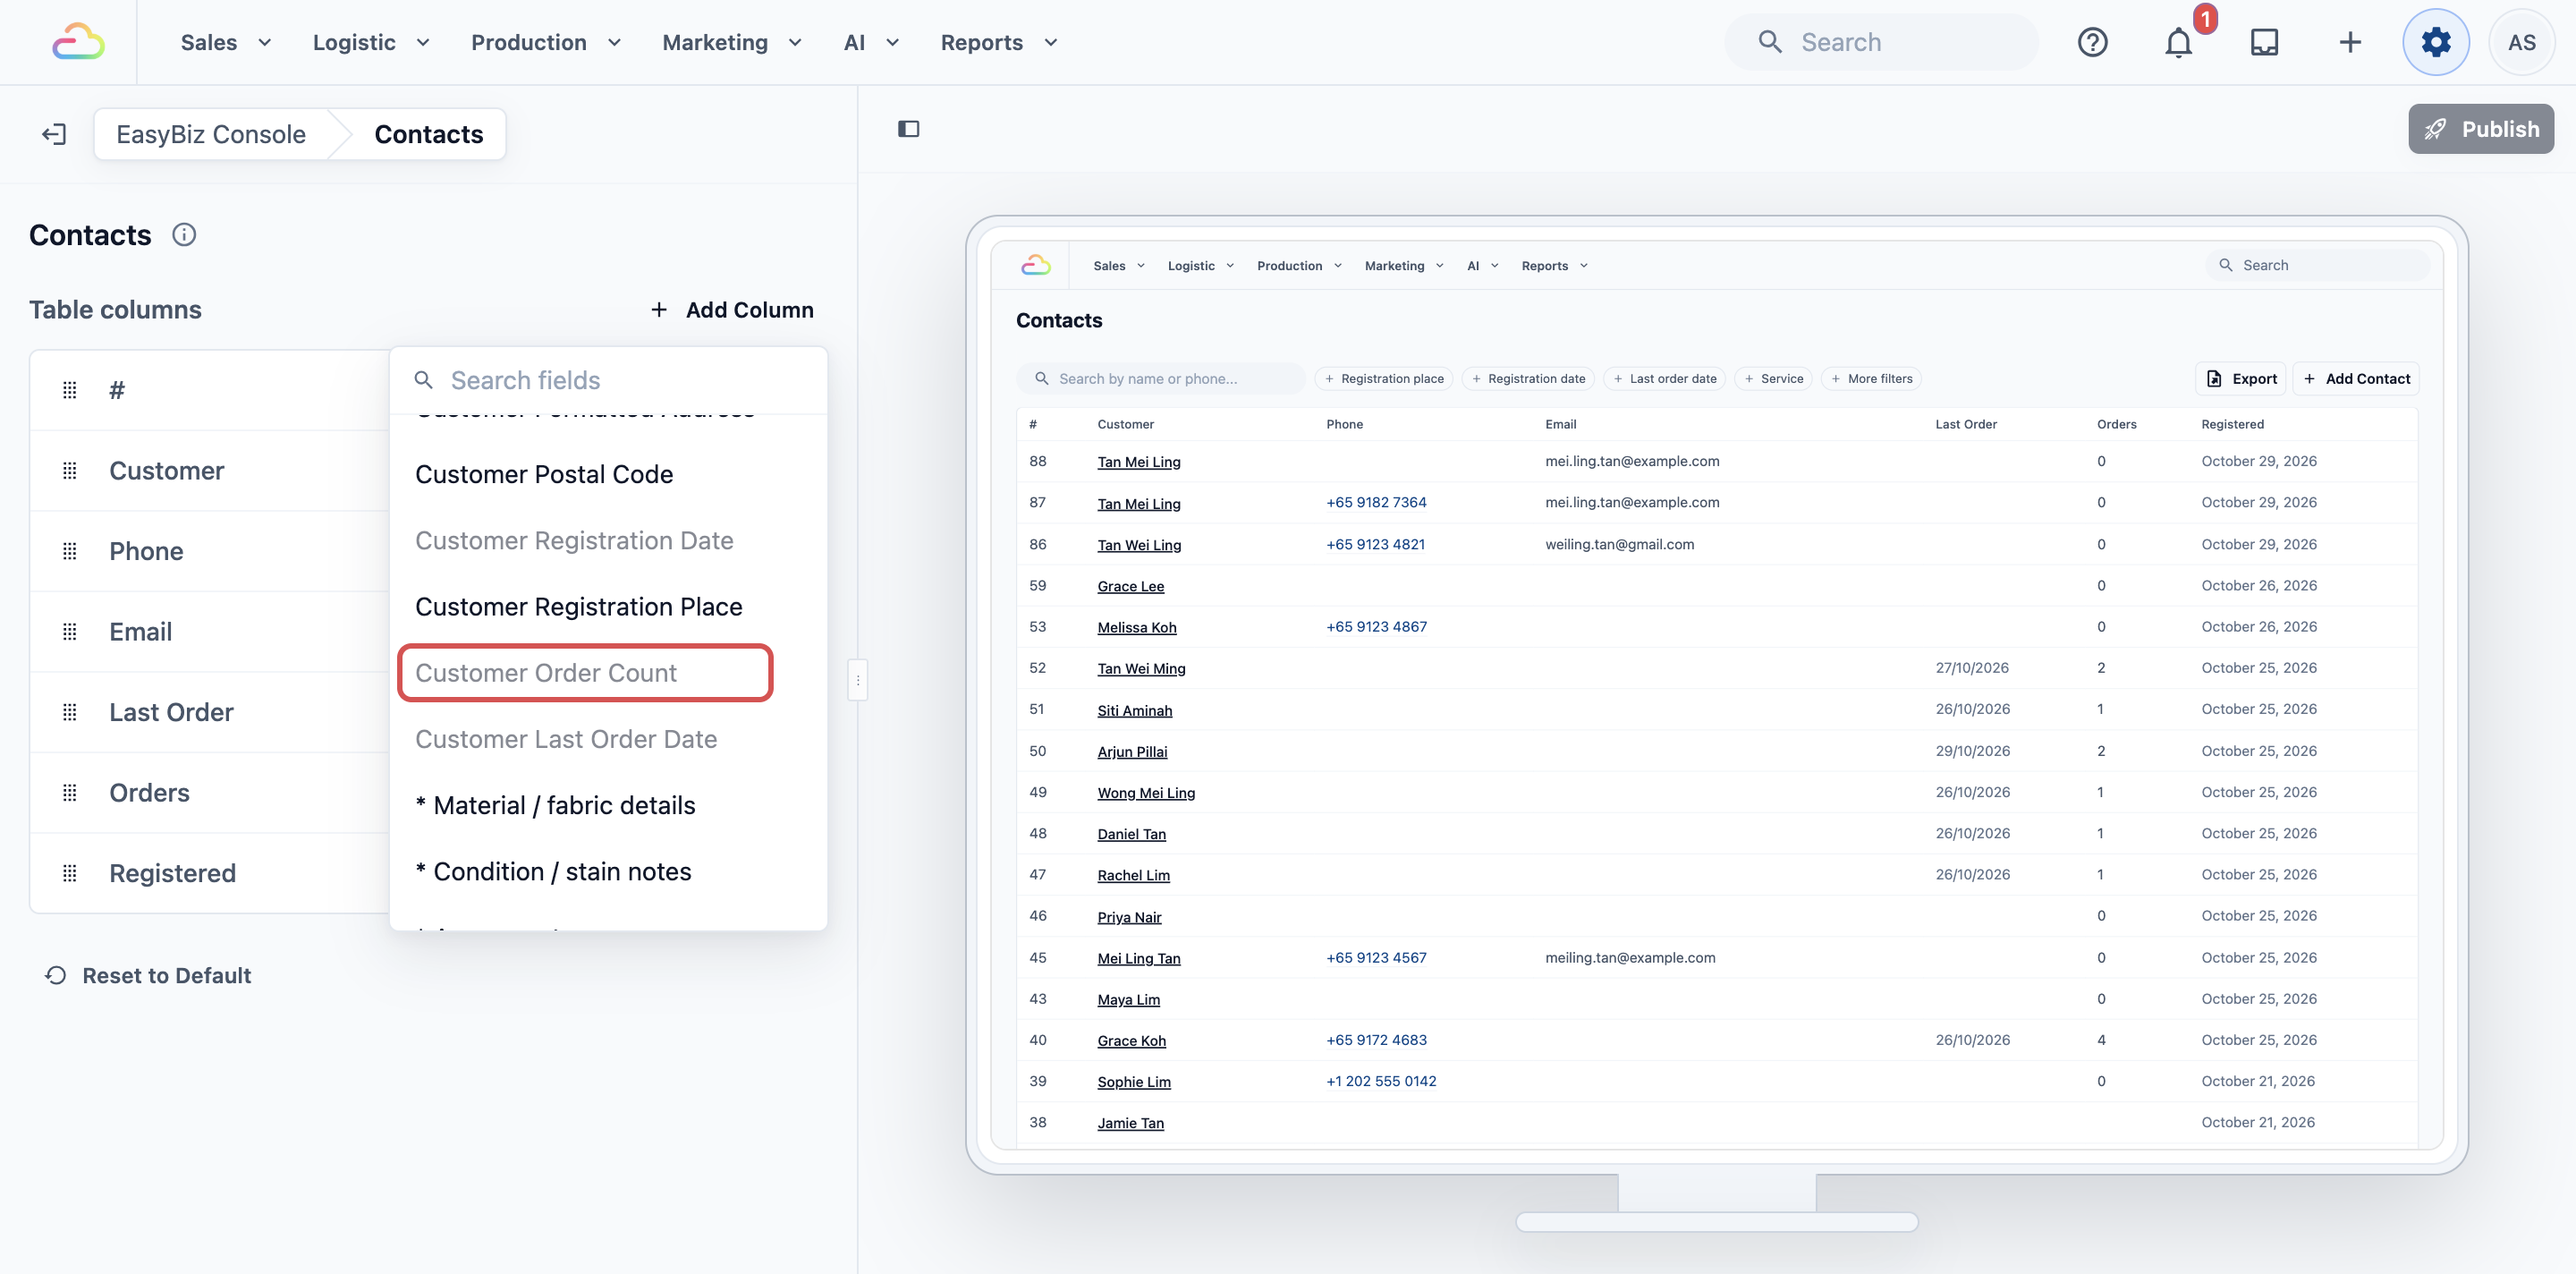
2. **To add a column**, click Add Column , then pick a field. Type in **Search fields** to find one quickly. Fields already on the list show as greyed out.
3. **To change the order**, drag a column by its handle on the left of its row. The top row is the first column on the list.
4. **To rename a column**, click its row and type a new name in **Column Header**. Leave it empty to use the standard name.
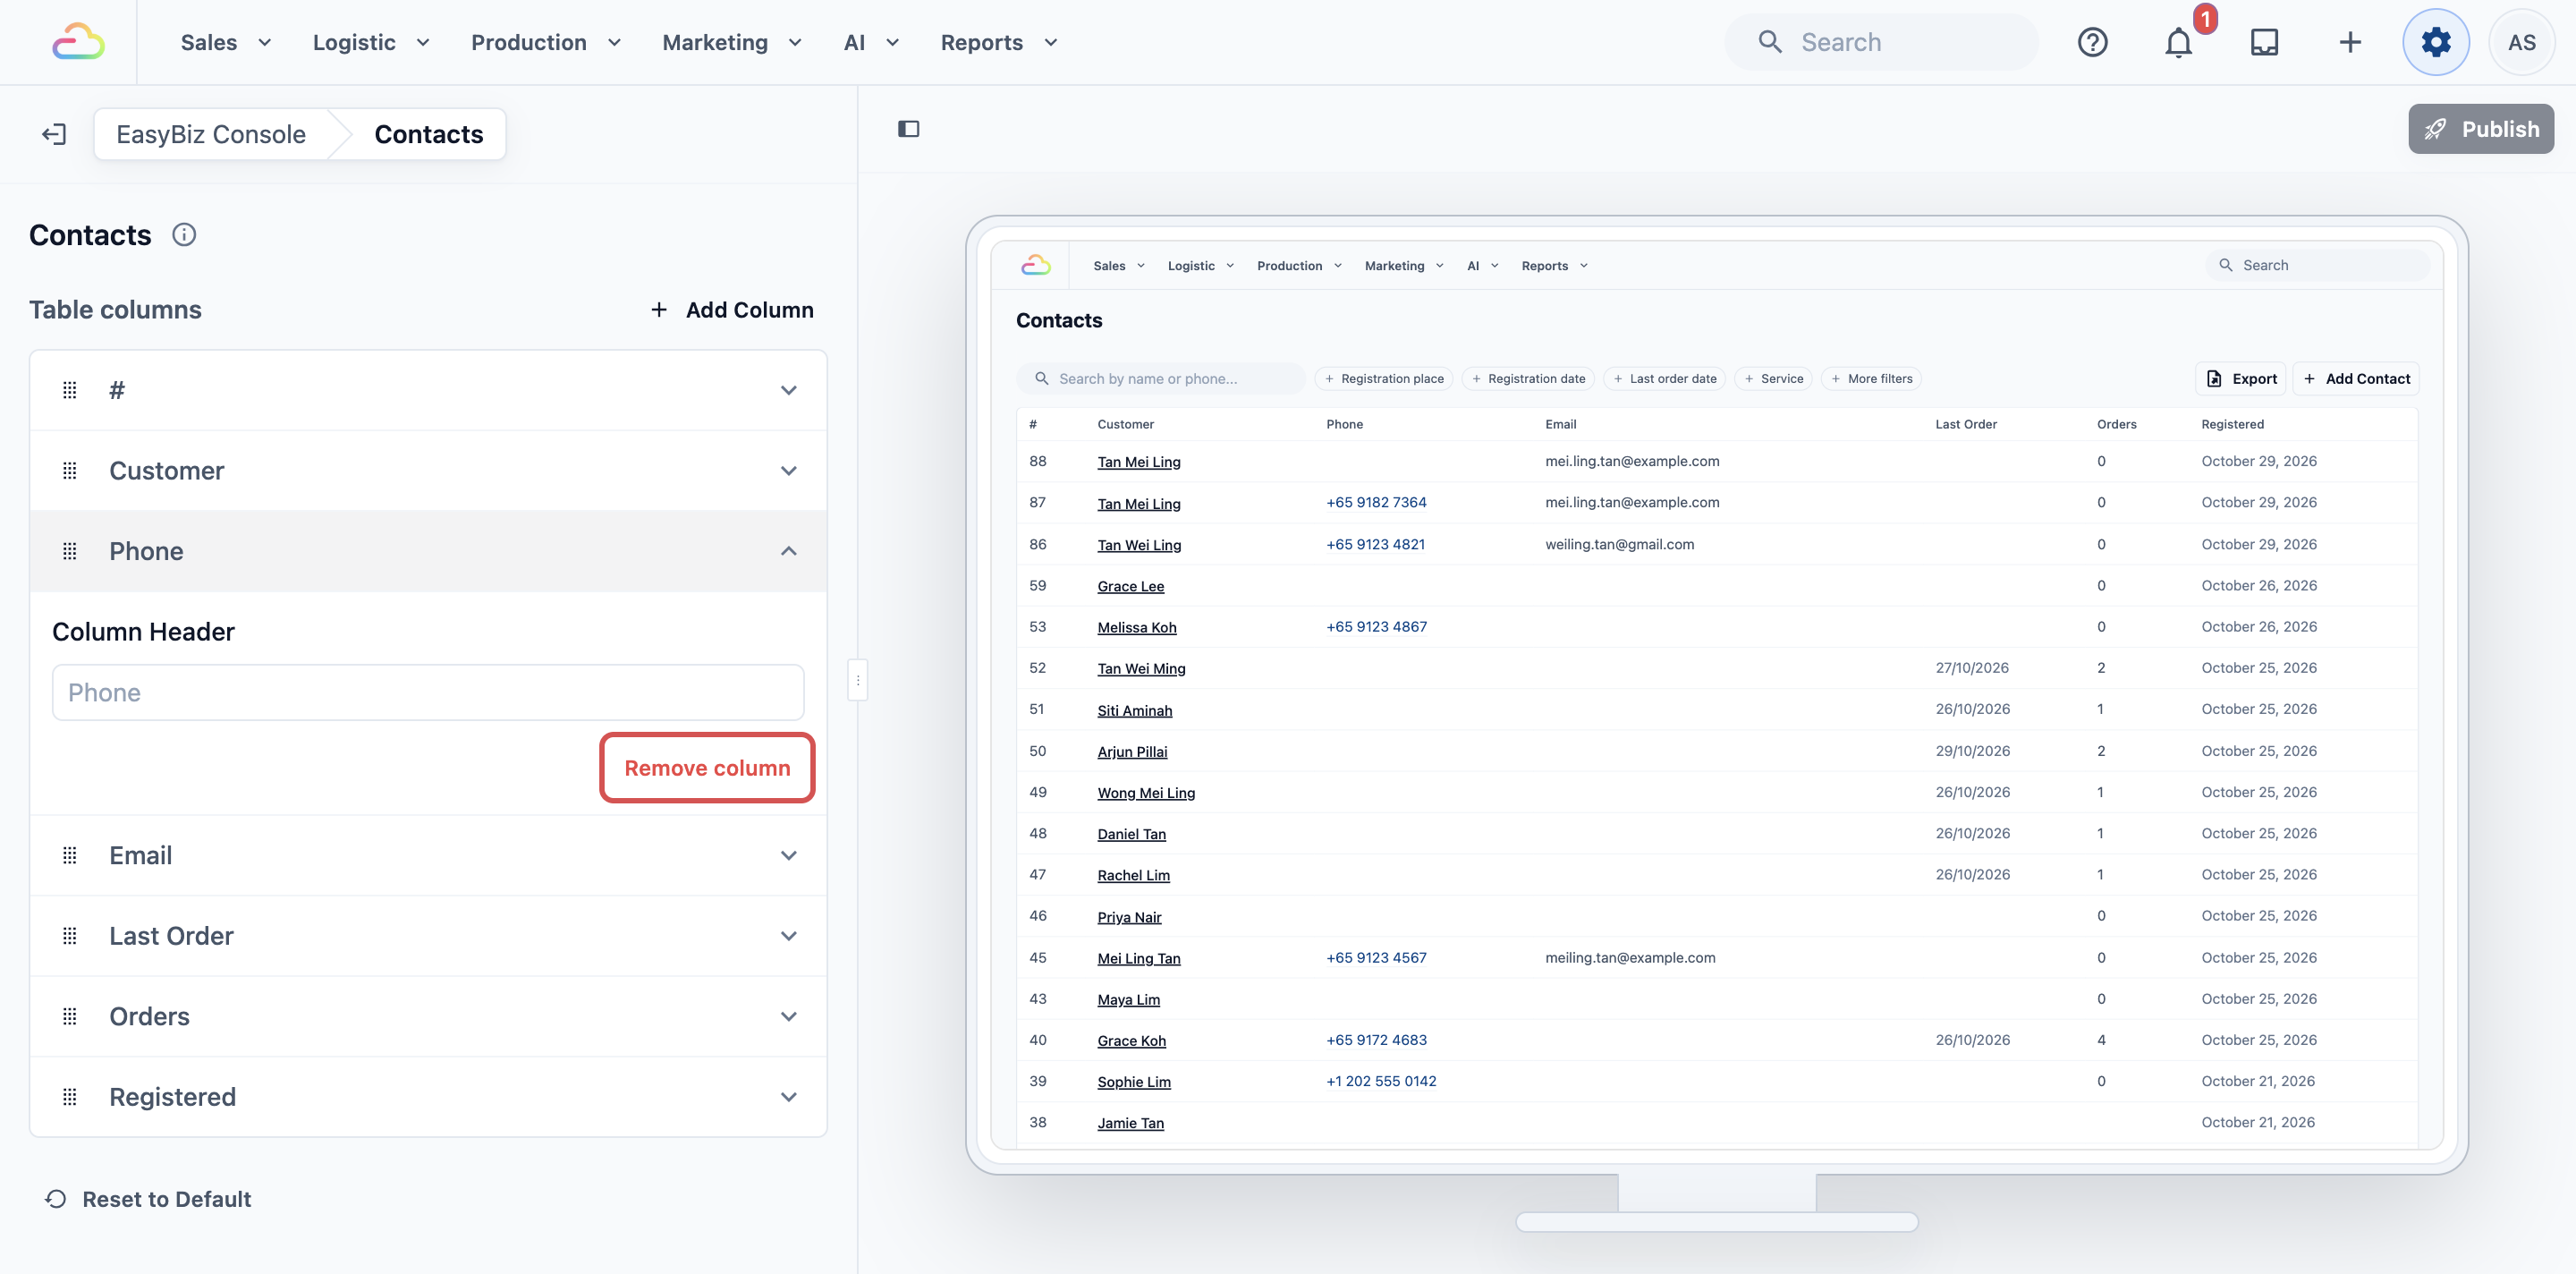
5. **To hide a column**, click its row, then click Remove column . You can add it back at any time.
6. Click Publish at the top right of the preview. Check the changes in **Review your changes**, then click Publish again.
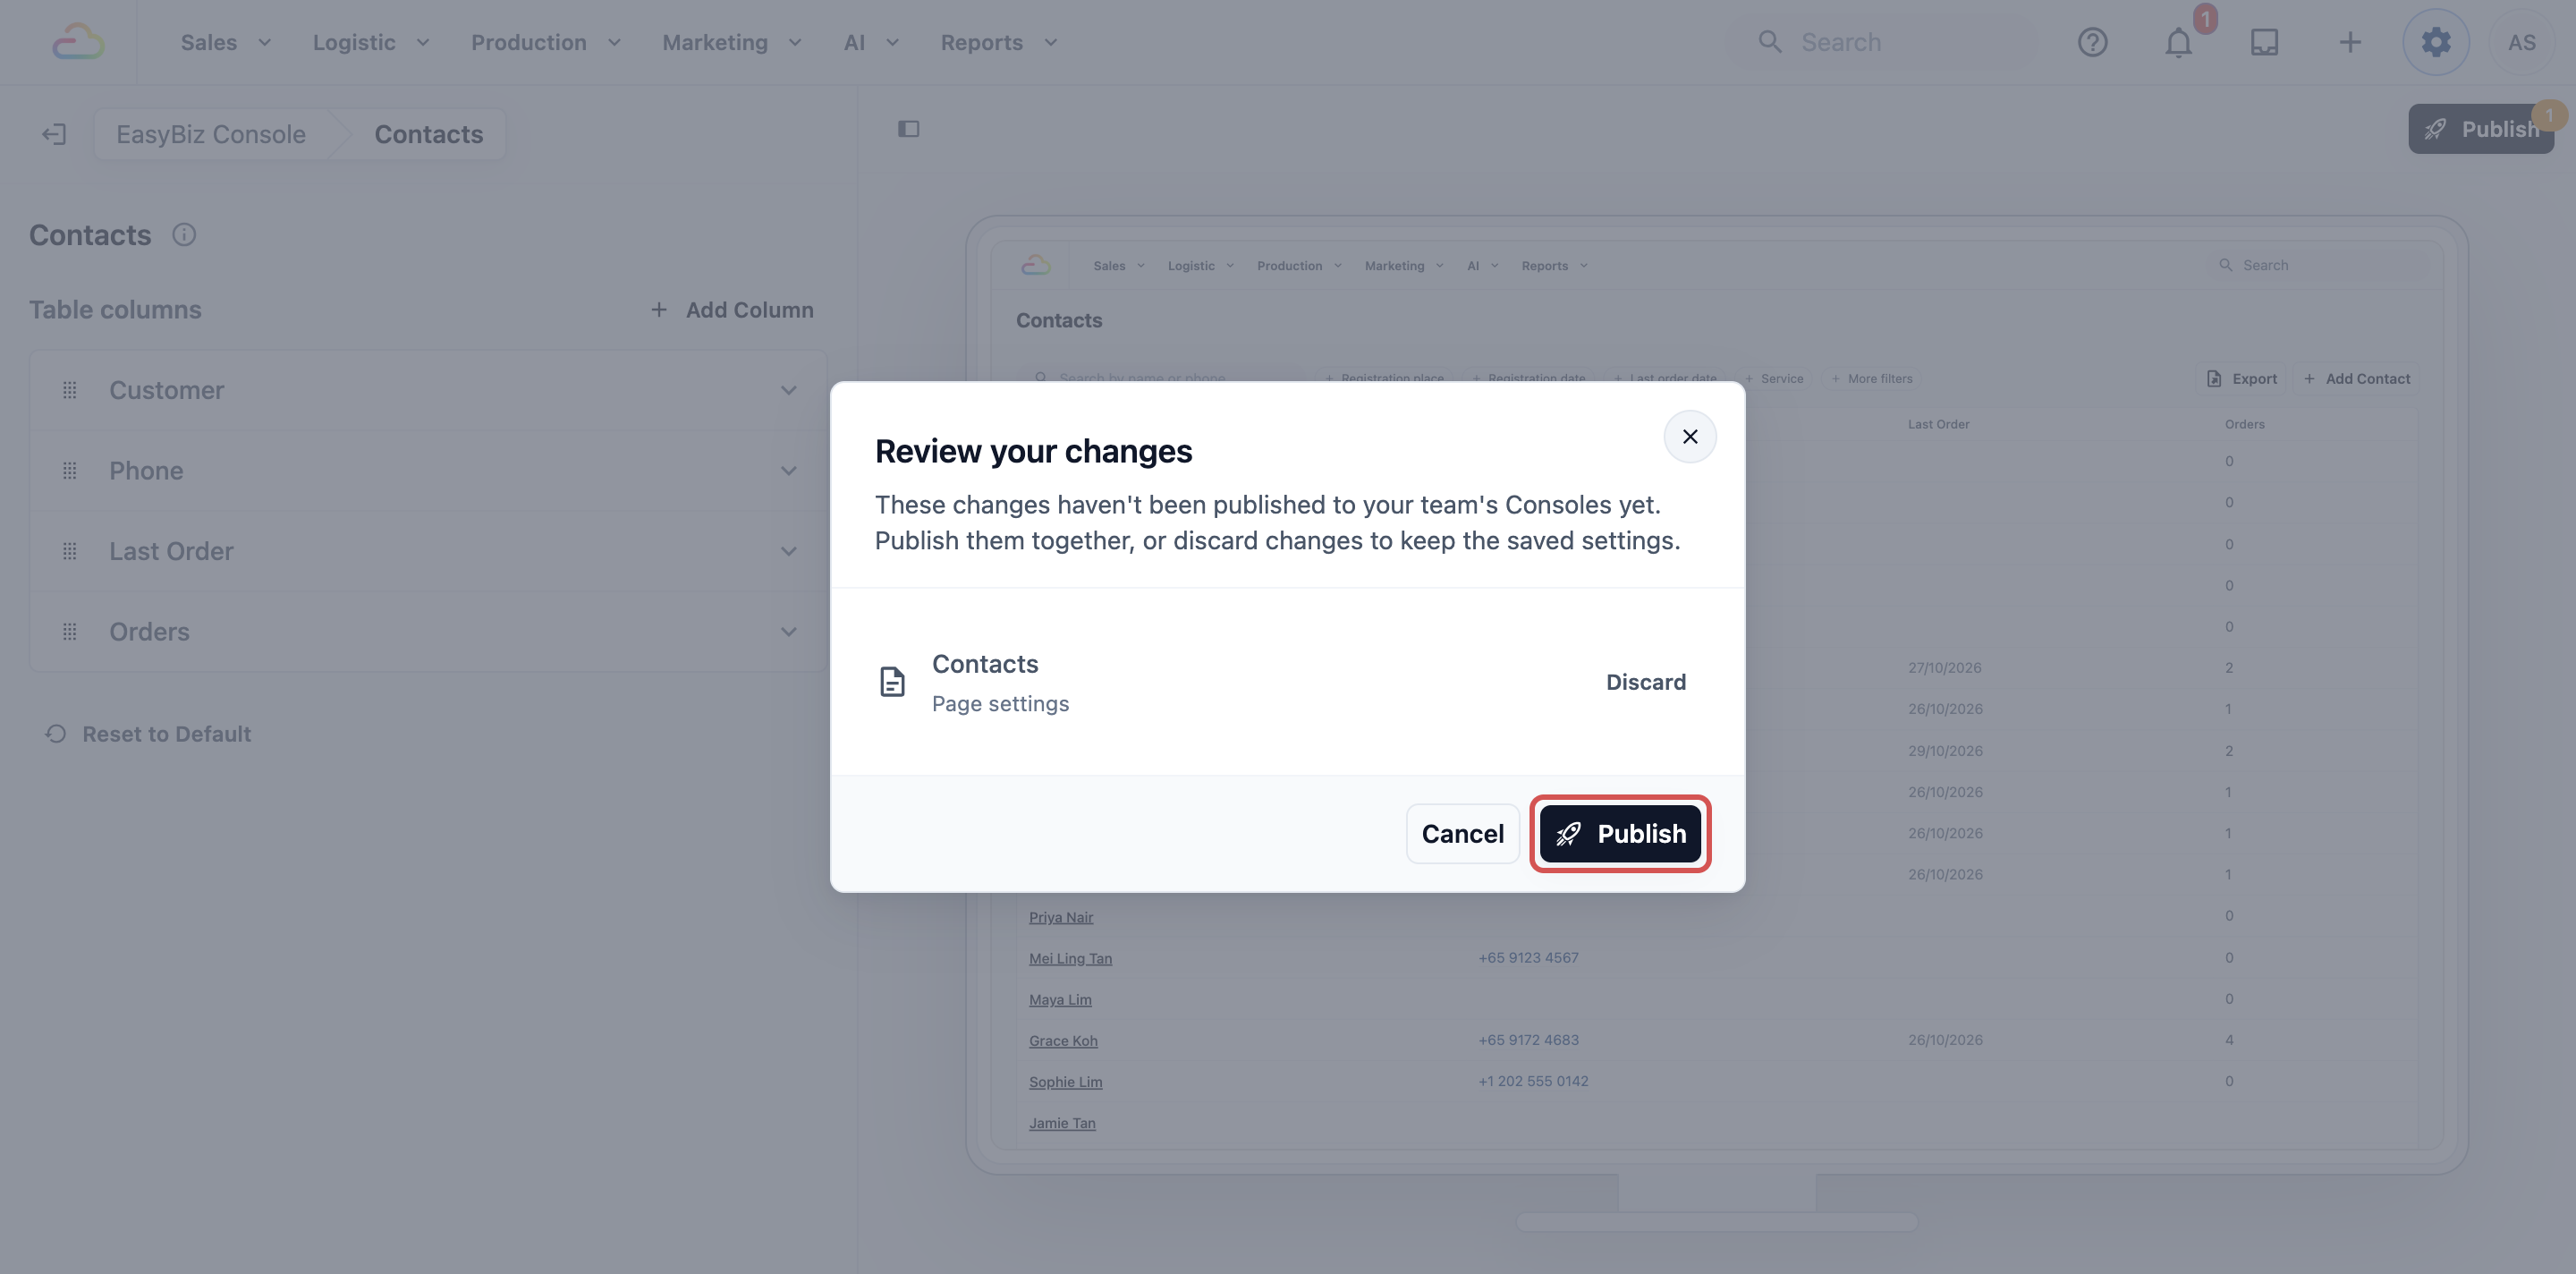
You see **Published. Your team's Consoles have the changes.**
**Columns you can add**
| **Field** | **What the column shows** |
| --- | --- |
| Customer Index | The customer's running number in your shop |
| Customer Name | The customer's name |
| Customer Phone | The mobile number, ready to tap or copy |
| Customer Phone (Raw) | The number as one plain string of digits |
| Customer Email | The email address |
| Customer Private Note | Your team's internal note about the customer |
| Customer Address, Unit Number, Formatted Address, Postal Code | The customer's saved address, in full or in parts |
| Customer Registration Date | The day the customer was added |
| Customer Registration Place | The shop, Online Store or other channel the customer first joined through |
| Customer Order Count | How many orders the customer has made |
| Customer Last Order Date | The date of their most recent order |
| Customer ID | The system's own reference for the customer, mainly for support |
| Mix and match | Add as many as you need, in any order. Each field can be added once |
Fields your shop added yourself also appear in the list, marked with a *.
---
## Set Up the Customer Page Sections
1. Go back to the editor's start using the **EasyBiz Console** link at the top, then under **Pages**, click **Contact Detail**. The **Sections** list opens. The info icon beside it reads: "Choose what staff see when they open a customer. For example, turn on Loyalty to show their store credit and prepaid packages."
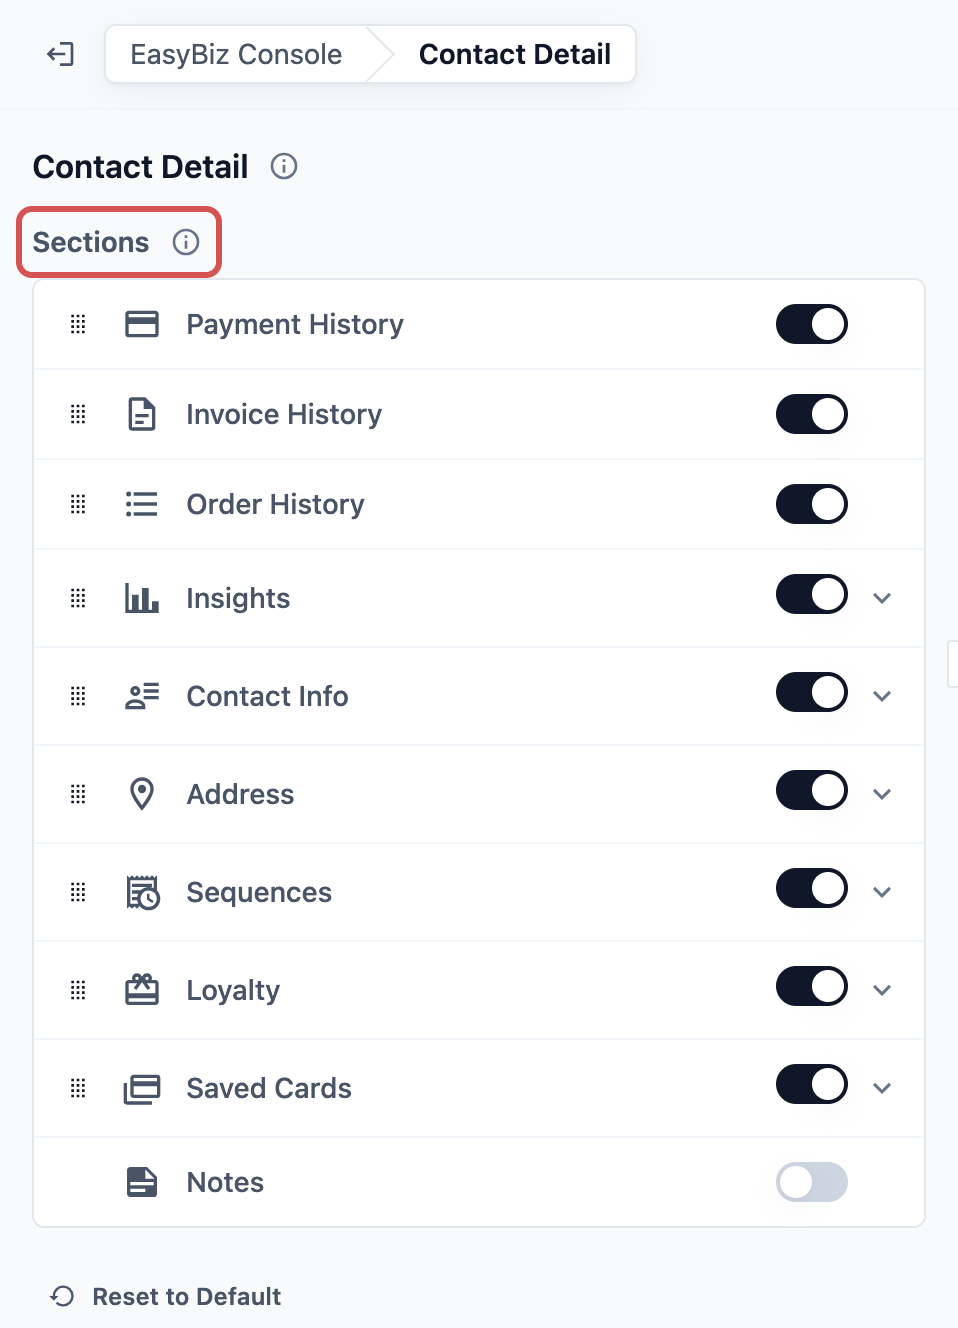
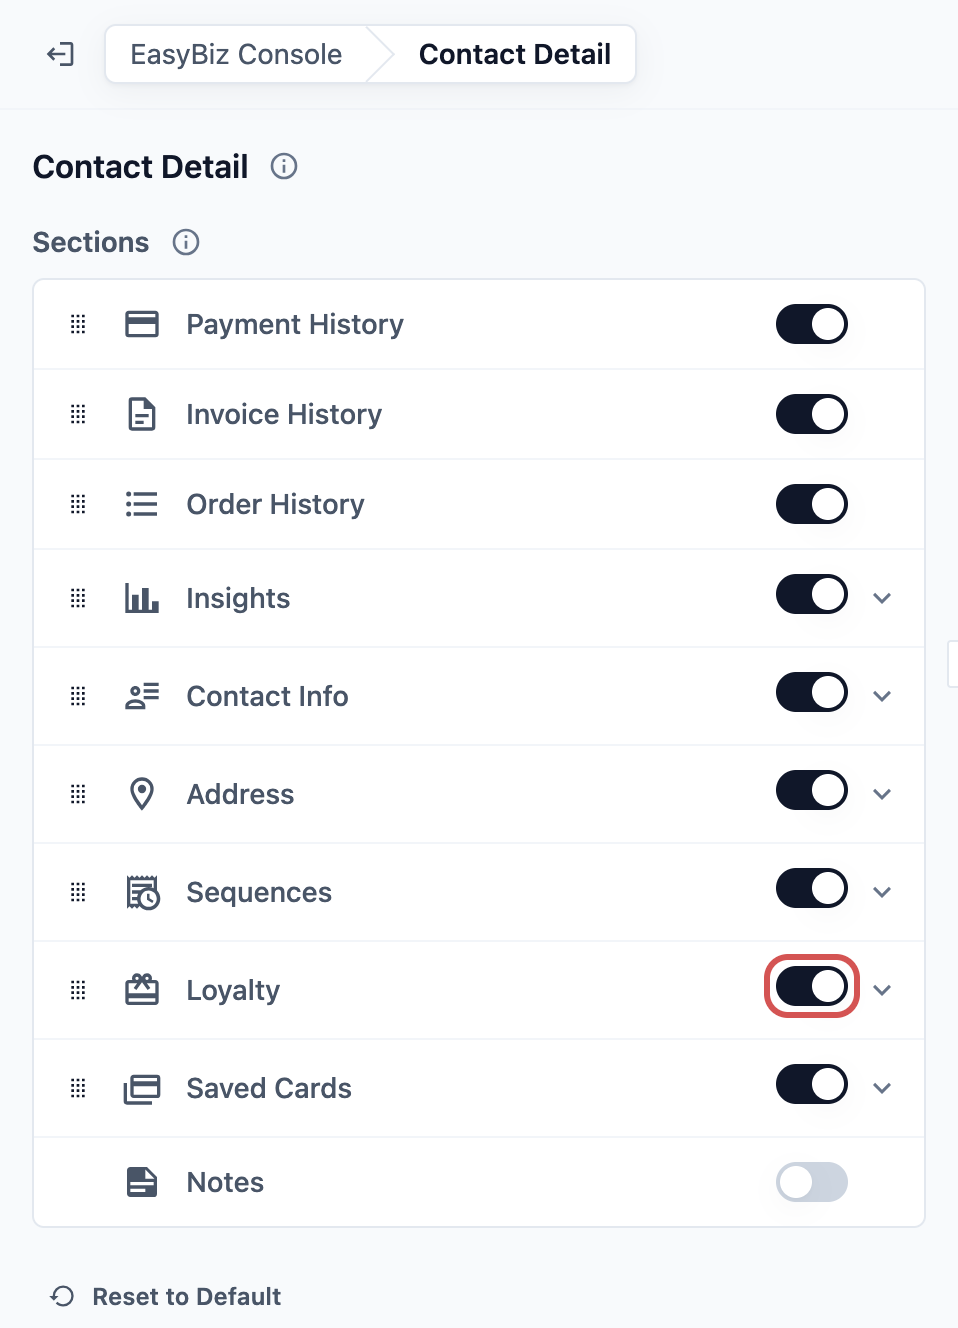
2. **To show or hide a section**, use the switch on the right of its row. Sections that are on are listed first, in page order: the left column from top to bottom, then the right column. Sections that are off follow below them.
If you turn a section on, it appears on every customer's page in its usual column. If you turn it off, staff no longer see it, but the information stays saved.
3. **To change the order**, drag a section by its handle on the left of its row. You can drag it into the other column if it fits there.
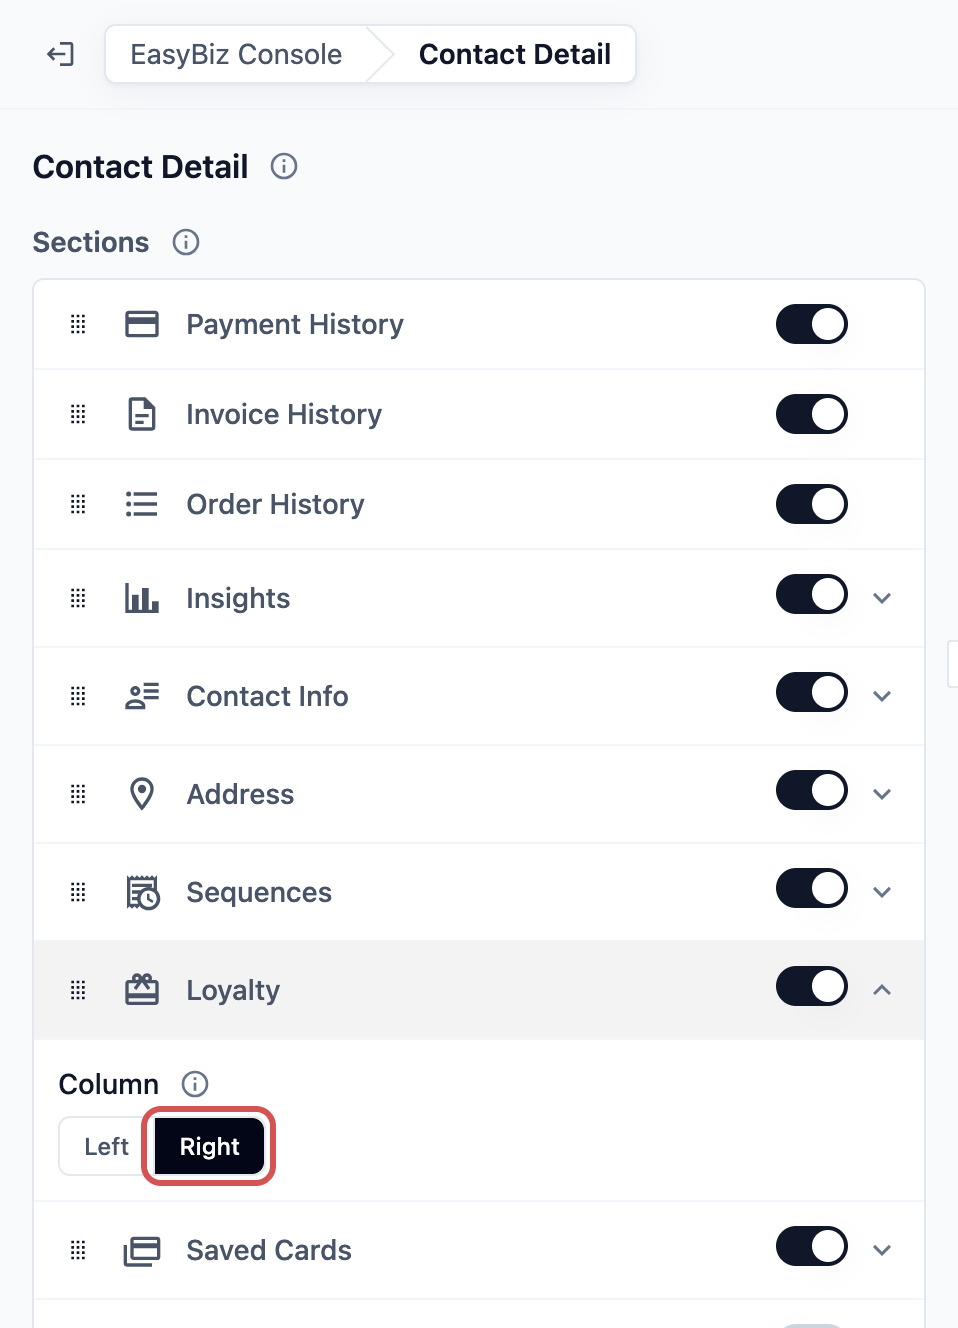
4. **To choose the column**, click a section that is on, then under **Column**, choose Left or Right . The left column is the wide one and the right column is the narrow one. On a small screen, the right column moves below the left.
5. Click Publish , then Publish again in **Review your changes**.
**Sections you can show**
| **Section** | **What staff see** | **Column** |
| --- | --- | --- |
| Payment History | Past payments with the date, amount, method and status | Left only |
| Invoice History | The customer's invoices, with a way to create a new one | Left only |
| Order History | Past orders with the date, items, amount and status | Left only |
| Insights | Total spend, number of orders, average order value and top services | Left or right |
| Contact Info | Name, phone, email, customer number and the date they joined | Left or right |
| Address | The customer's saved address | Left or right |
| Sequences | Automatic follow-up messages the customer is in, and what was sent | Left or right |
| Loyalty | Store credit, points, membership and prepaid packages | Left or right |
| Saved Cards | Cards the customer saved for online payments, with a way to remove one | Left or right |
| Notes | Your team's internal notes about the customer. Off as standard | Left or right |
Turned a section off by mistake? Turn it back on before you publish and it returns to the same place.
---
## Reset Back to the Default
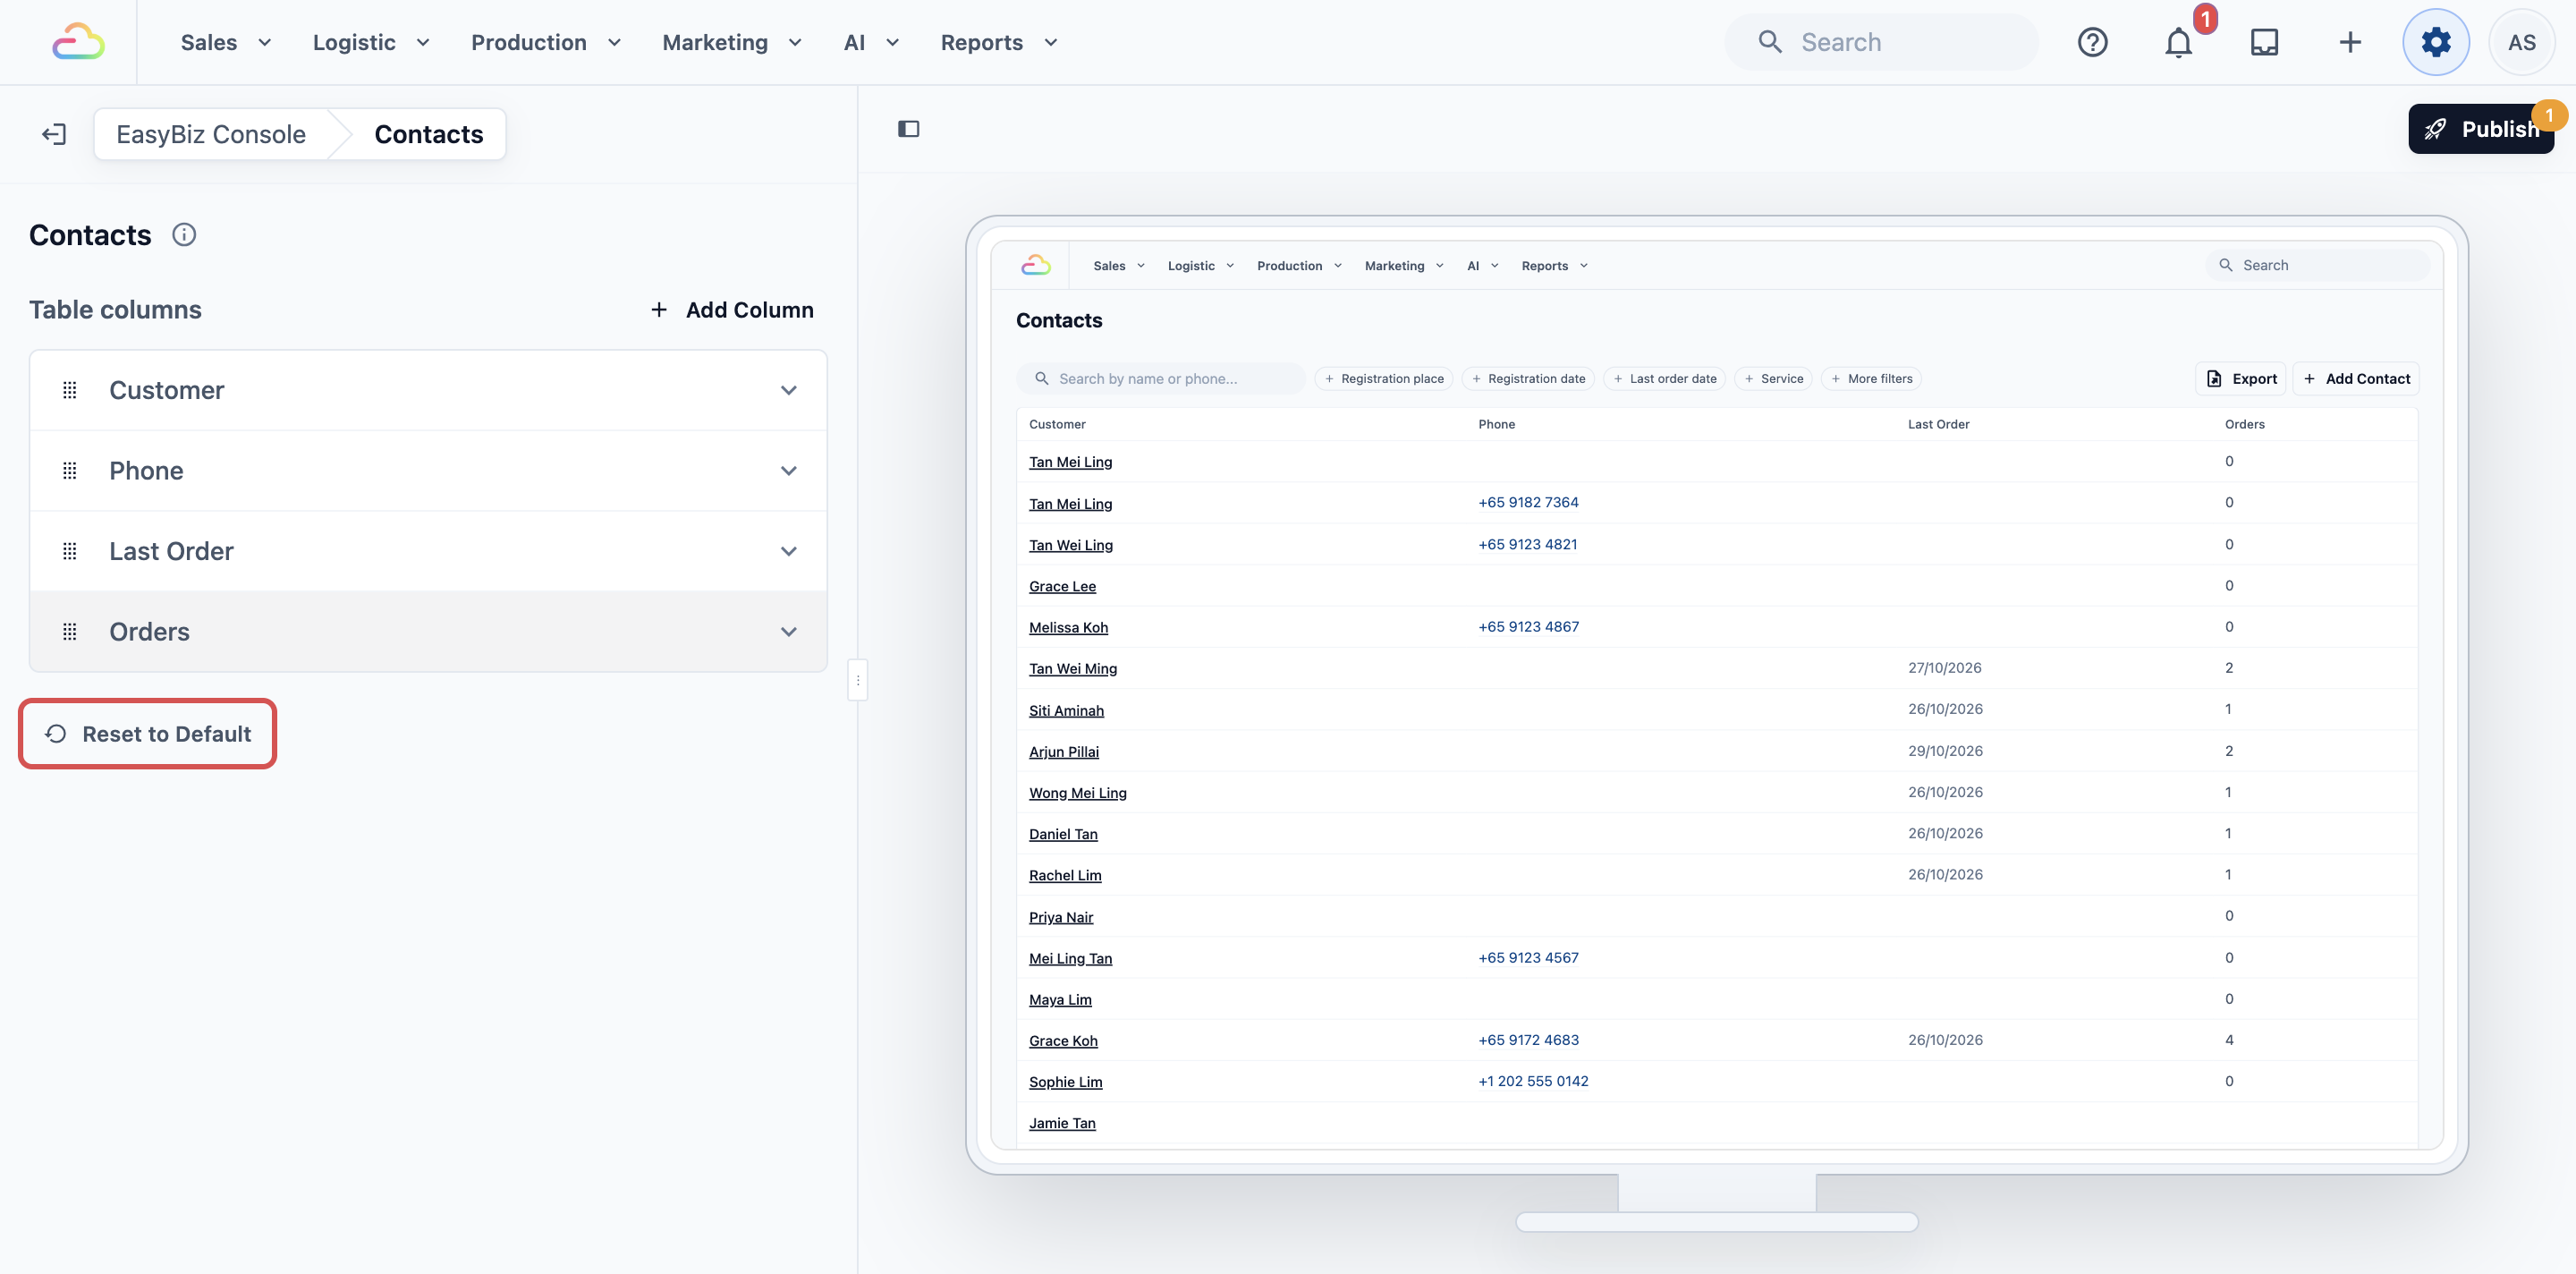
Each page has Reset to Default at the bottom of its settings.
1. Open **Contacts** or **Contact Detail** in the editor.
2. Click Reset to Default . The list goes back to the standard columns and names, or the customer page goes back to the standard sections and columns.
3. Click Publish to apply it for your team. Until then, you can still change your mind.
---
## Example Setup
CleanFast Laundry runs shops in Tampines and Jurong. Counter staff mostly call customers about ready orders and check who has store credit.
**Contact list:**
1. They remove **#**, **Email** and **Registered**.
2. They drag **Phone** to sit right after **Customer**.
3. They keep **Last Order** and **Orders**.
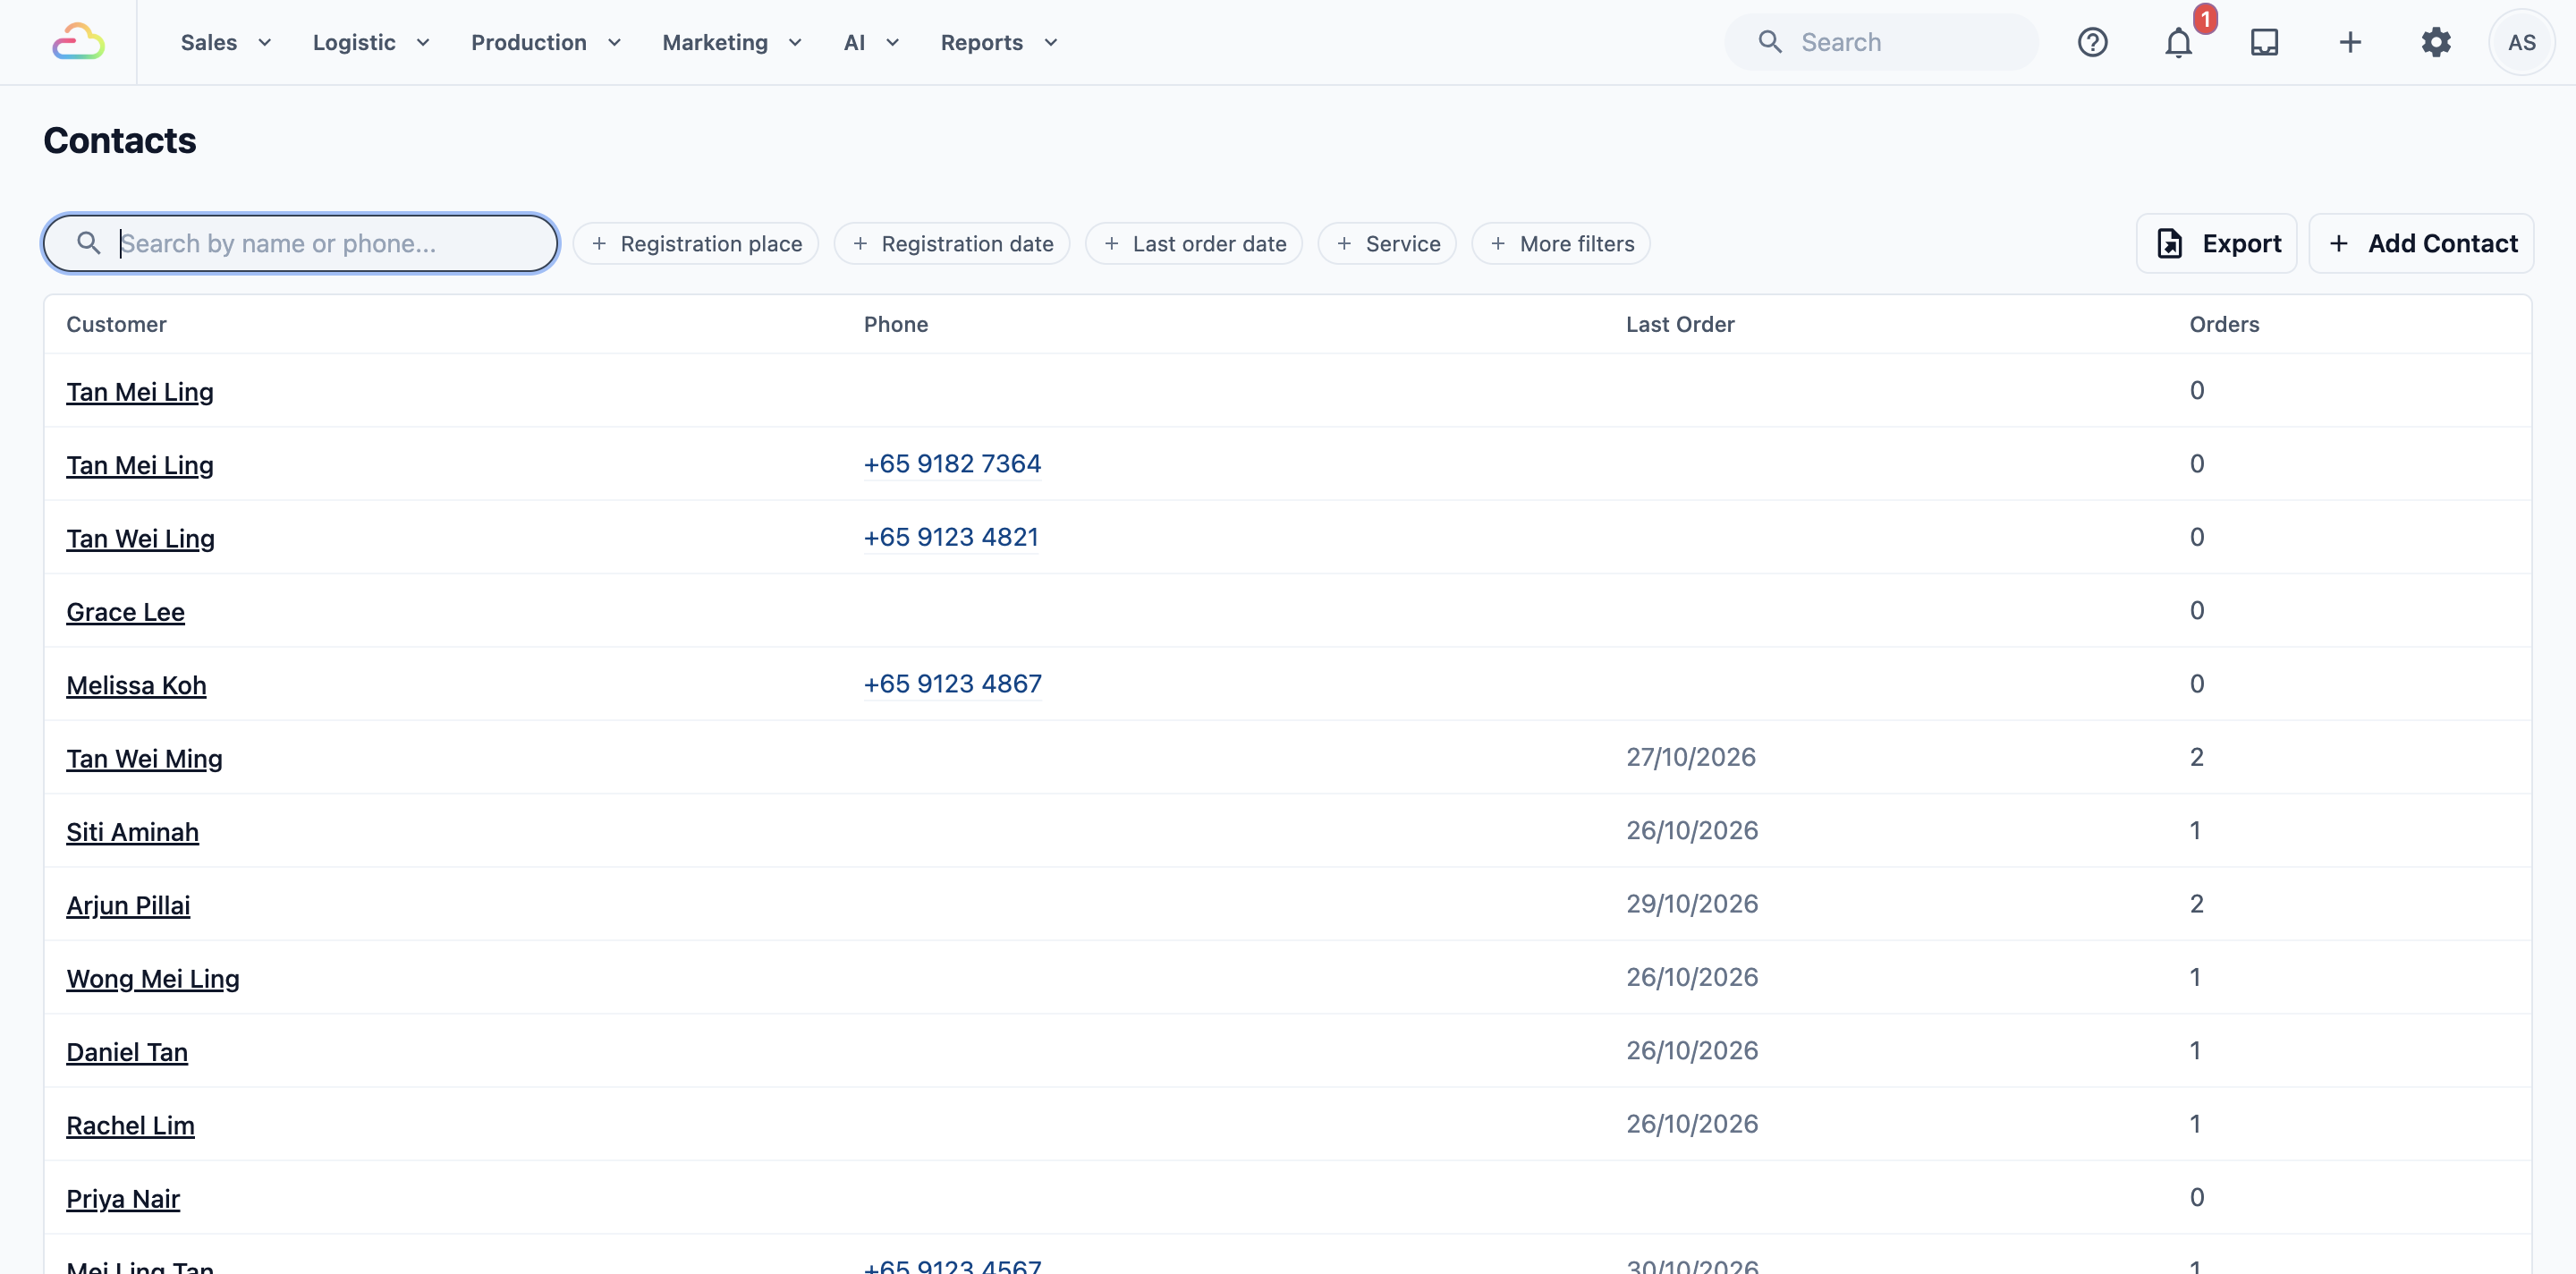
The list now shows: Customer, Phone, Last Order, Orders.
**Customer page:**
1. They turn off **Sequences** and **Saved Cards**, since they don't use them.
2. They drag **Loyalty** to the top of the right column, above Insights.
3. They turn on **Notes** so staff see standing instructions, like "No starch on shirts".
4. They click Publish .
---
## What Staff See
After publishing, every staff member's Console shows the new layout the next time they open Contacts.
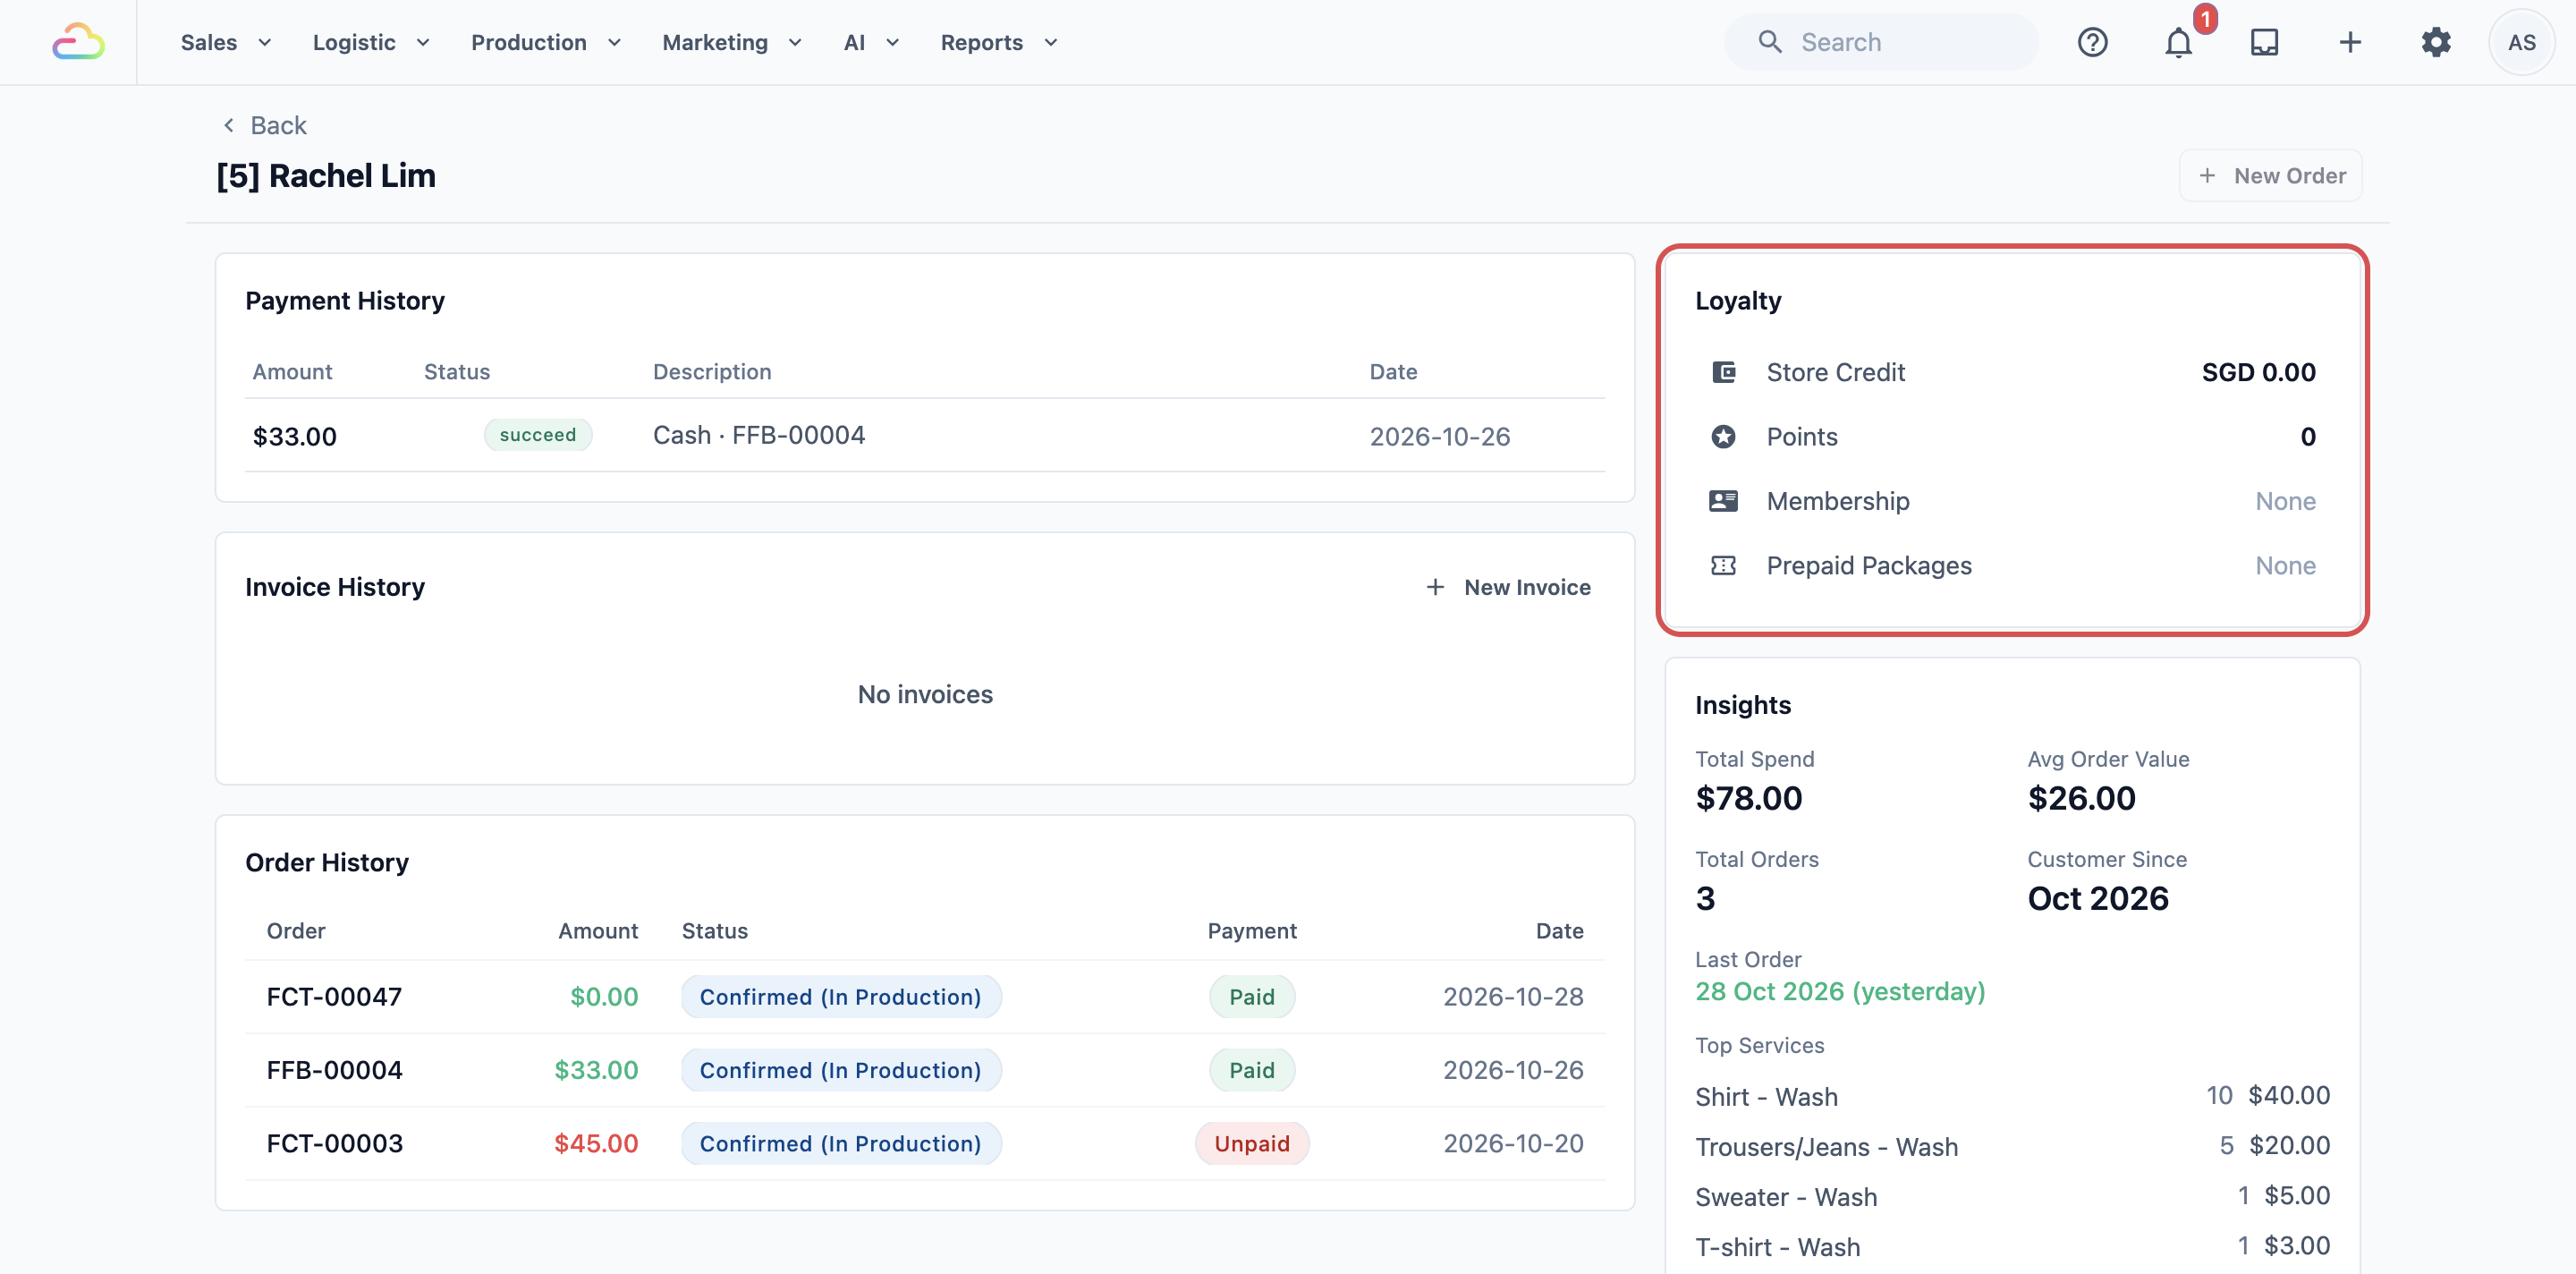
When staff click a customer, Loyalty is at the top of the right column, so they see store credit and prepaid packages before anything else. Notes sits below it.
---
## FAQs
**Does hiding a column or section delete any customer information?**
> No. It only changes what staff see. Turn it back on and everything is still there.
**Do all my staff see the same layout?**
> Yes. The layout is set for the whole shop, not per person. Once you publish, every staff member's Console shows it.
**Does this change the POS or the staff mobile app?**
> No. These settings change the Console only. Customers don't see any difference either.
**Can I show a customer's store credit as a column on the list?**
> Not yet. Store credit, points and prepaid packages show in the **Loyalty** section on the customer's page. Keep it near the top so staff see it straight away.
**Does removing a column change my contact export?**
> No. Exporting from the contact list always includes the standard export columns, whatever the list shows.
**I changed the layout but my staff still see the old one. Why?**
> The change hasn't been published yet. Open **Settings › EasyBiz Console**, check for a dot beside **Contacts** or **Contact Detail**, and click Publish .
---
## What's Next
Your contact list and customer pages now show exactly what your team needs. Next, keep the list clean by combining customers who were added twice and removing ones you no longer need: [Merge or Delete a Contact](/docs/merge-or-delete-a-contact).