## Here's what we're building
Watch this short video to see what the finished POS looks like in action before you start setting it up
---
## Creating Your POS App
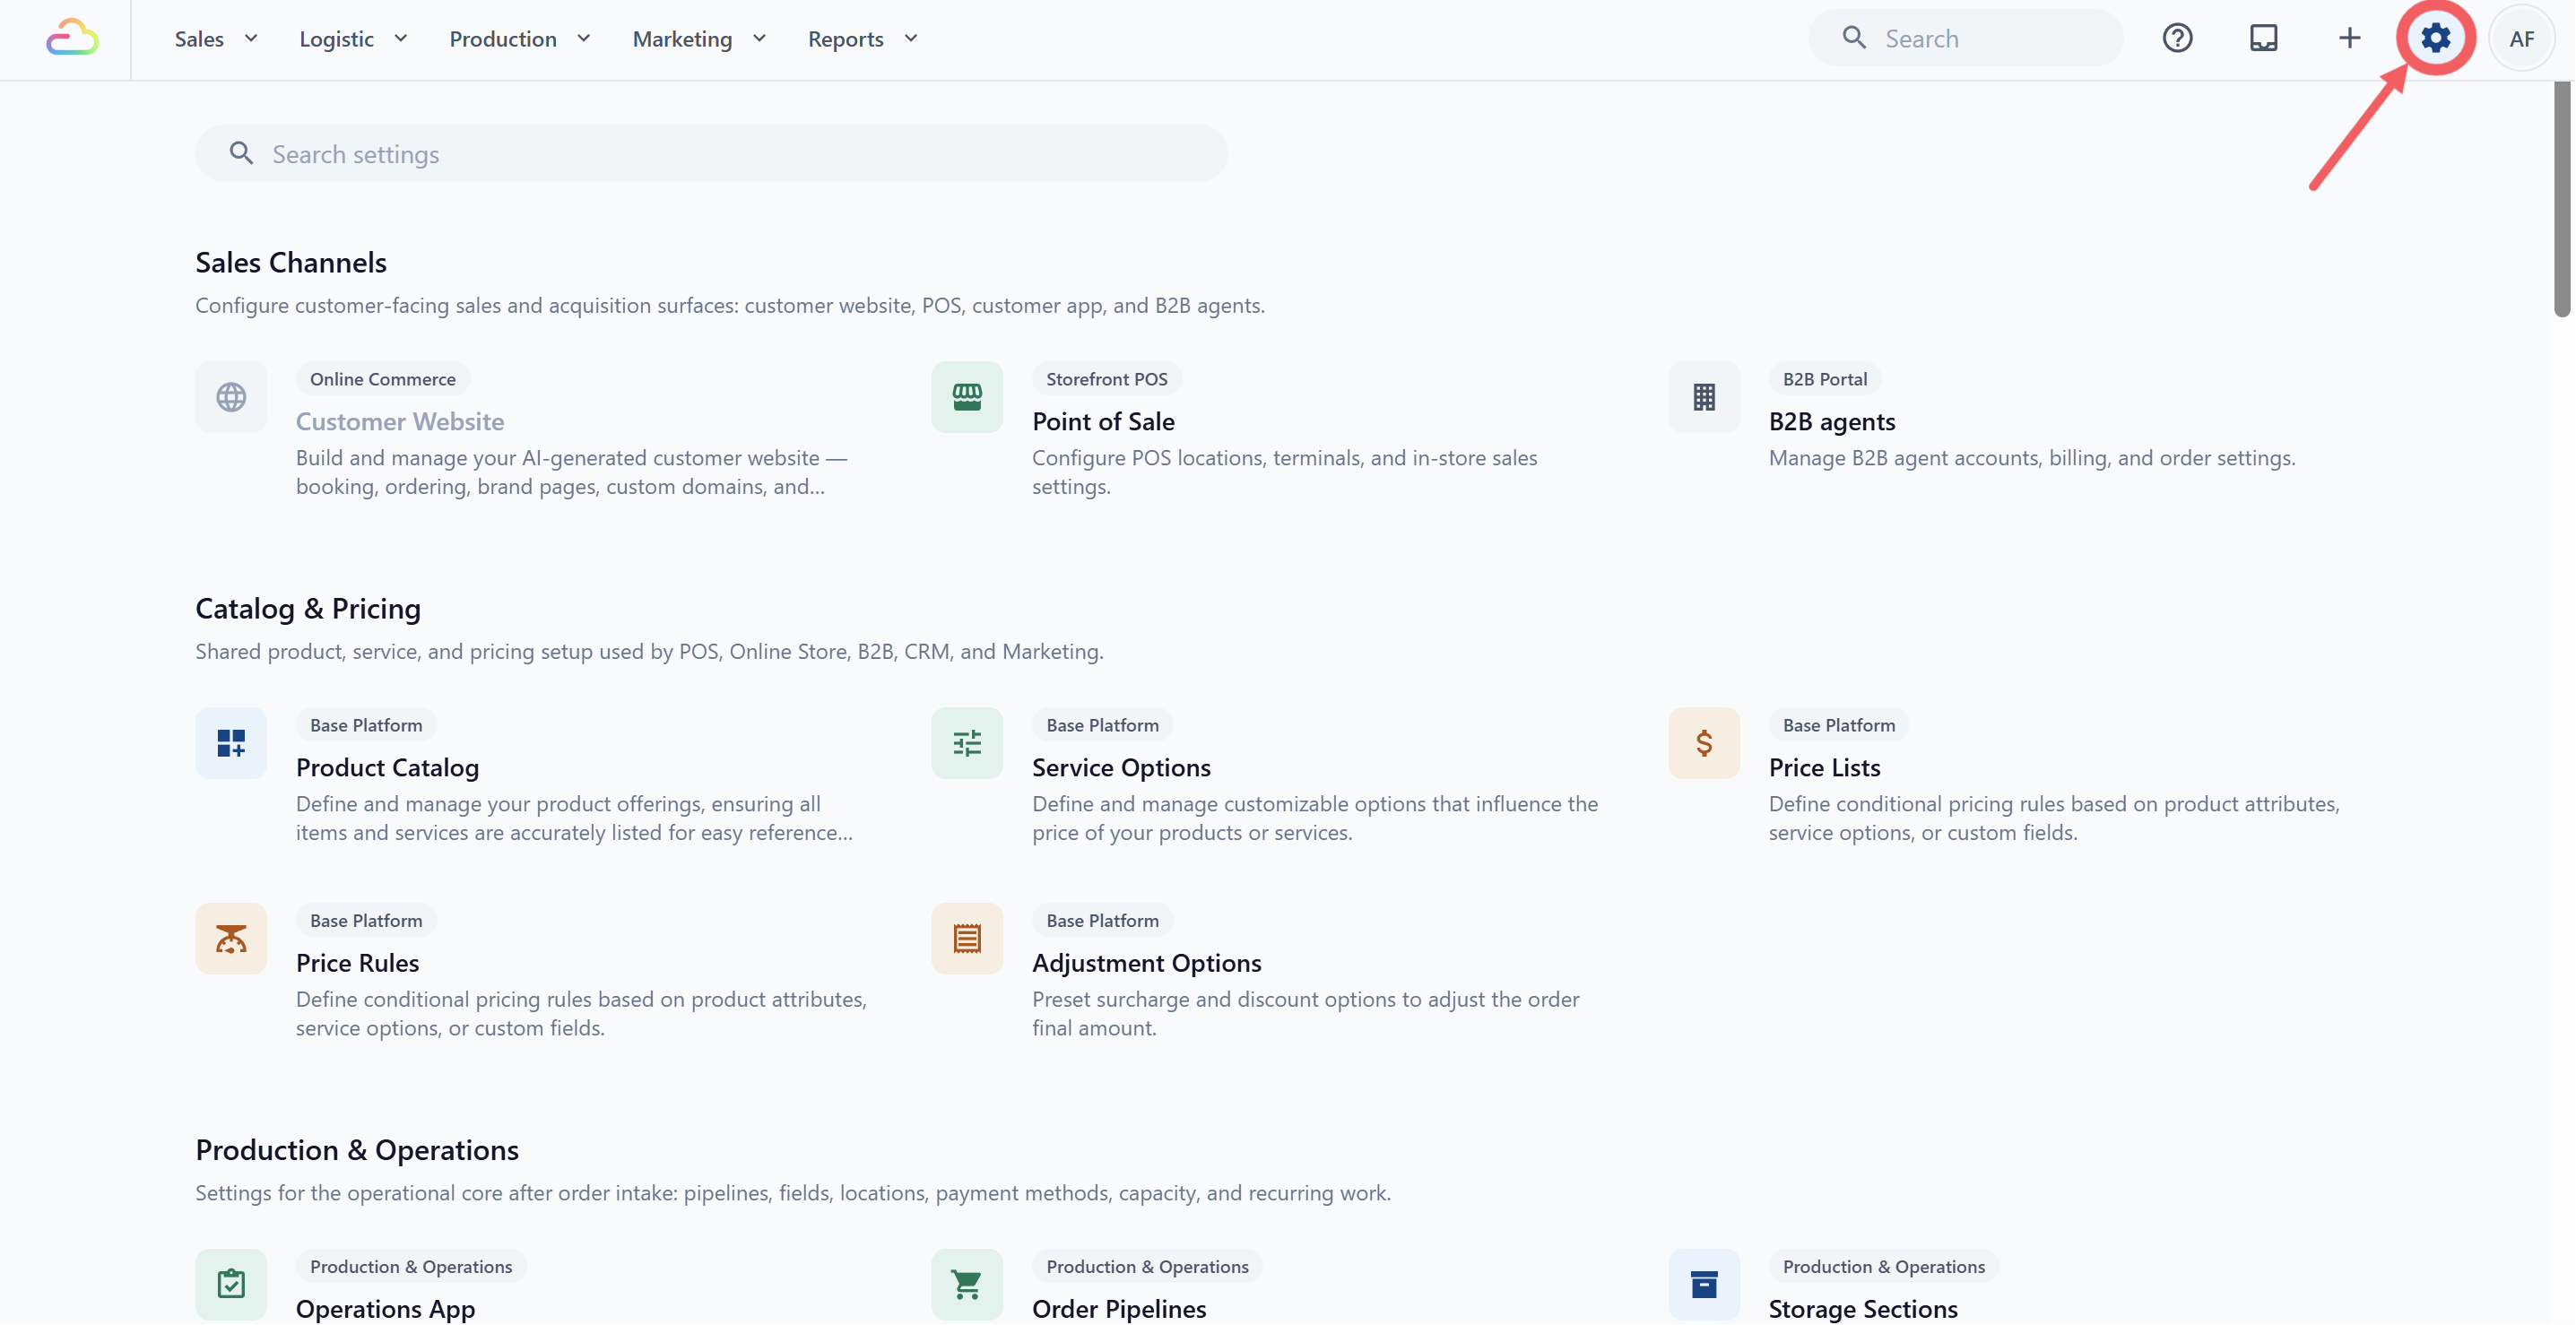
1. Go to ⚙️ Settings from the top navigation bar
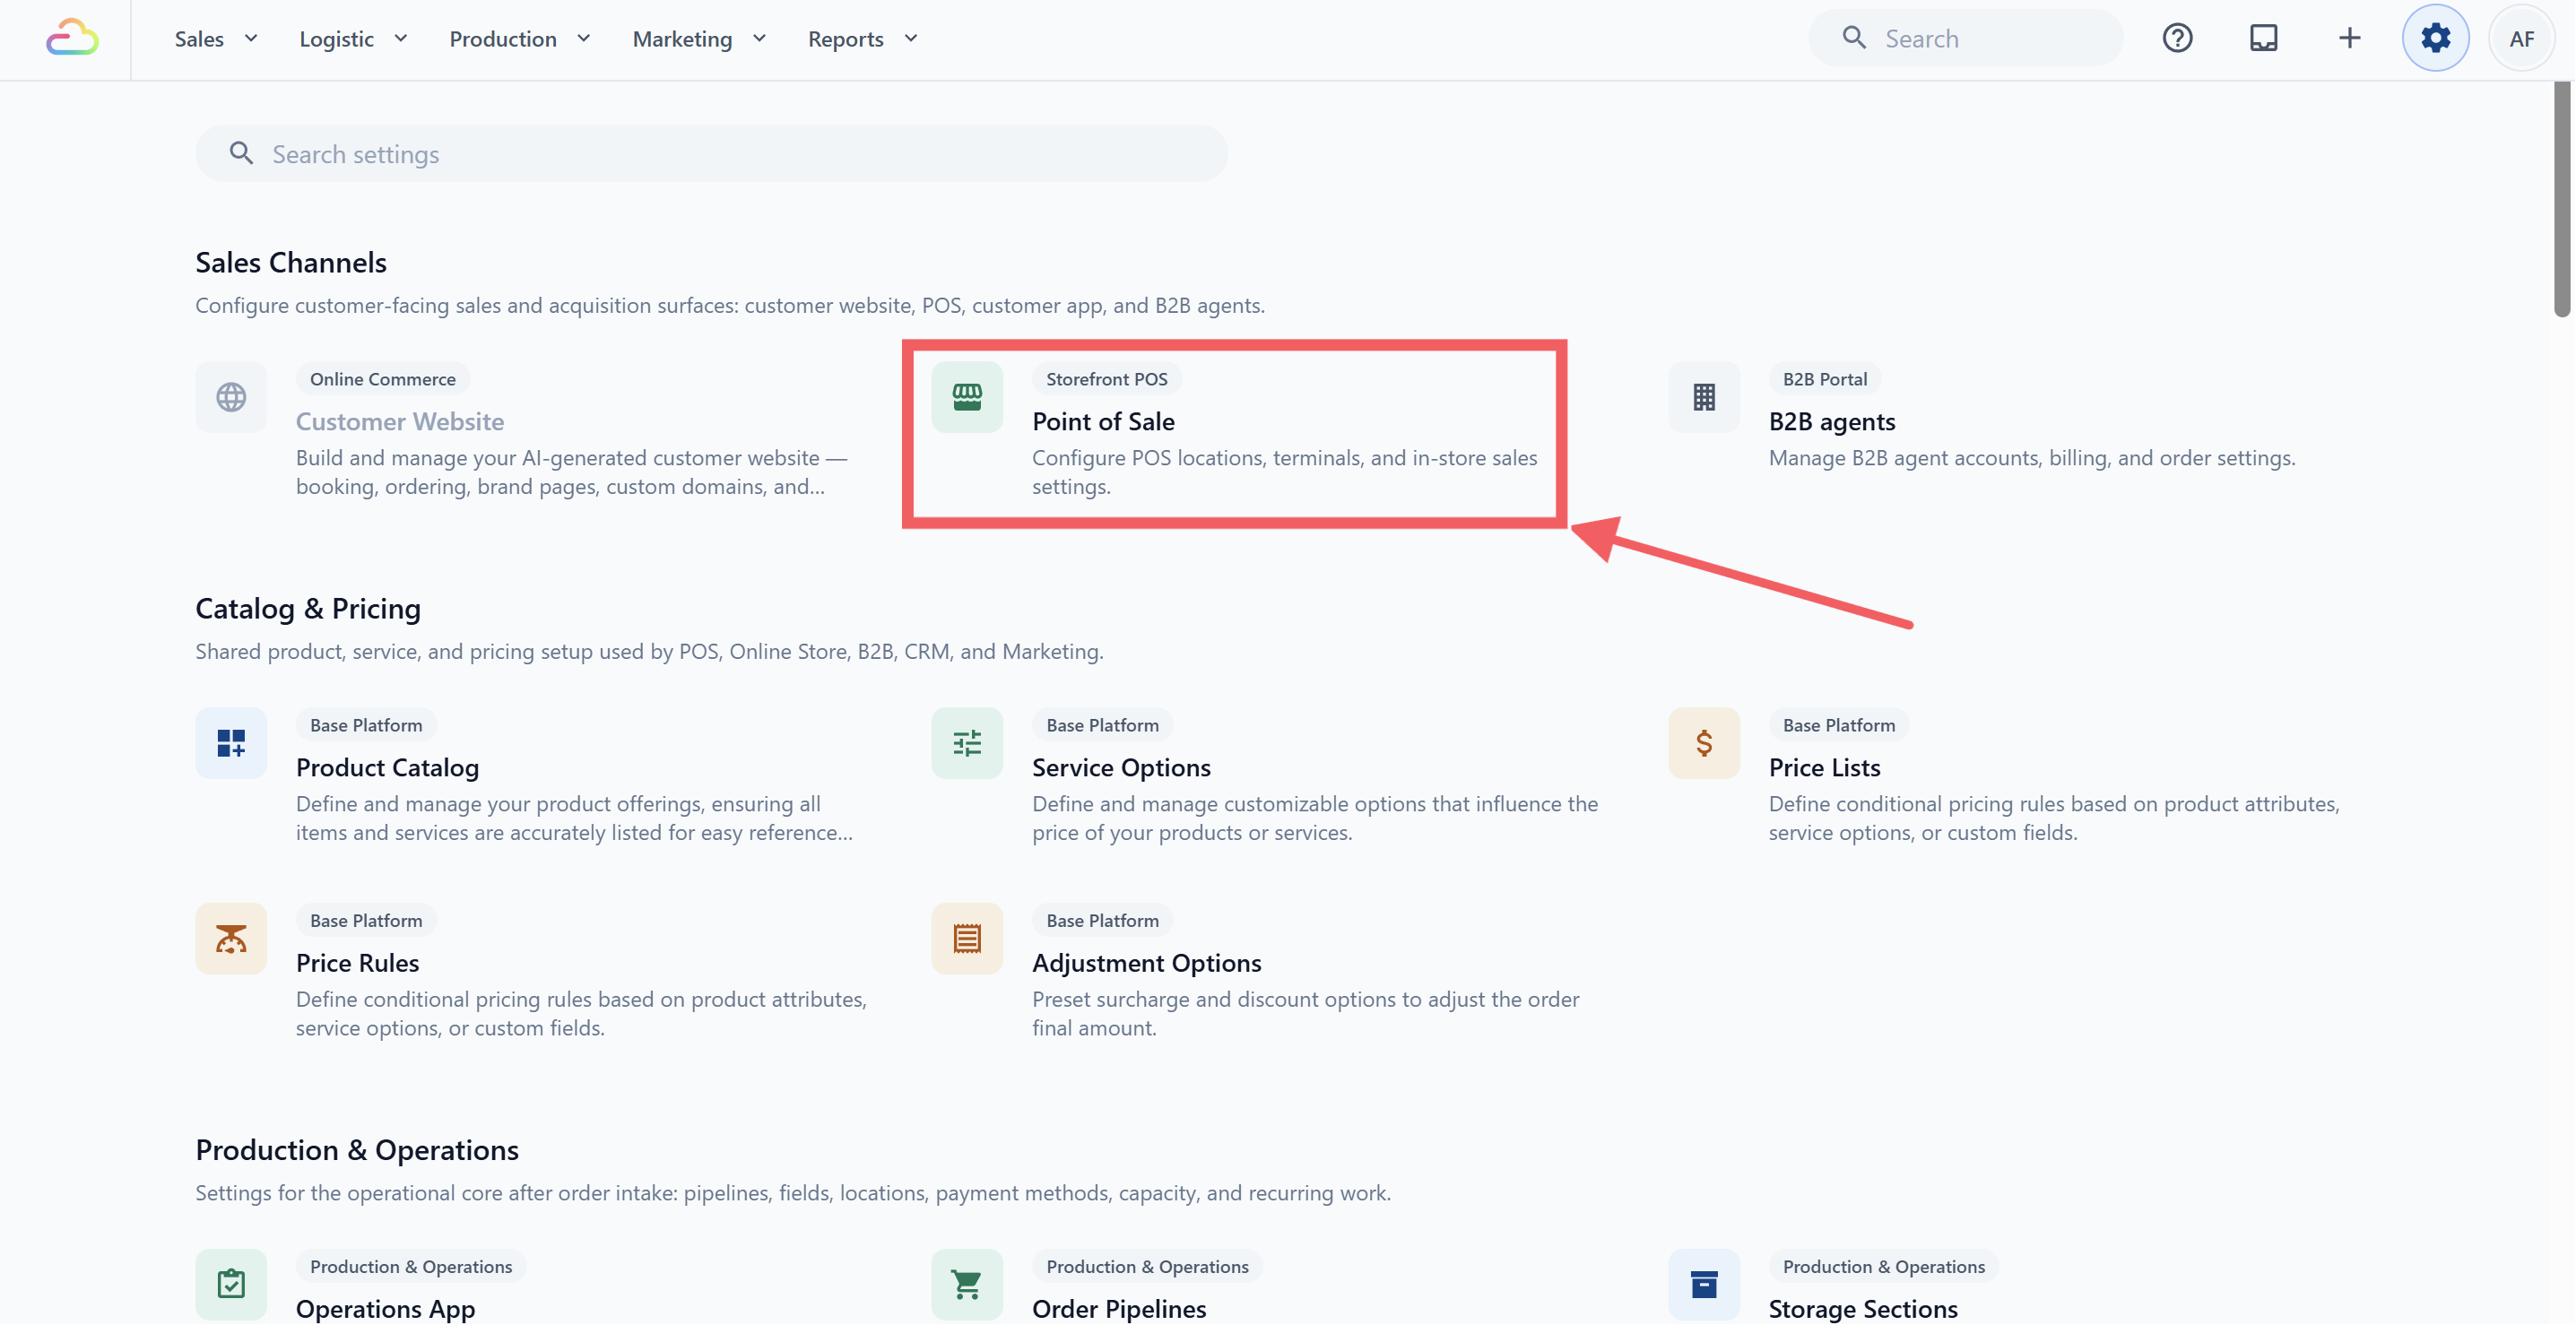
2. Under the Sales Channels section, click Point of Sale.
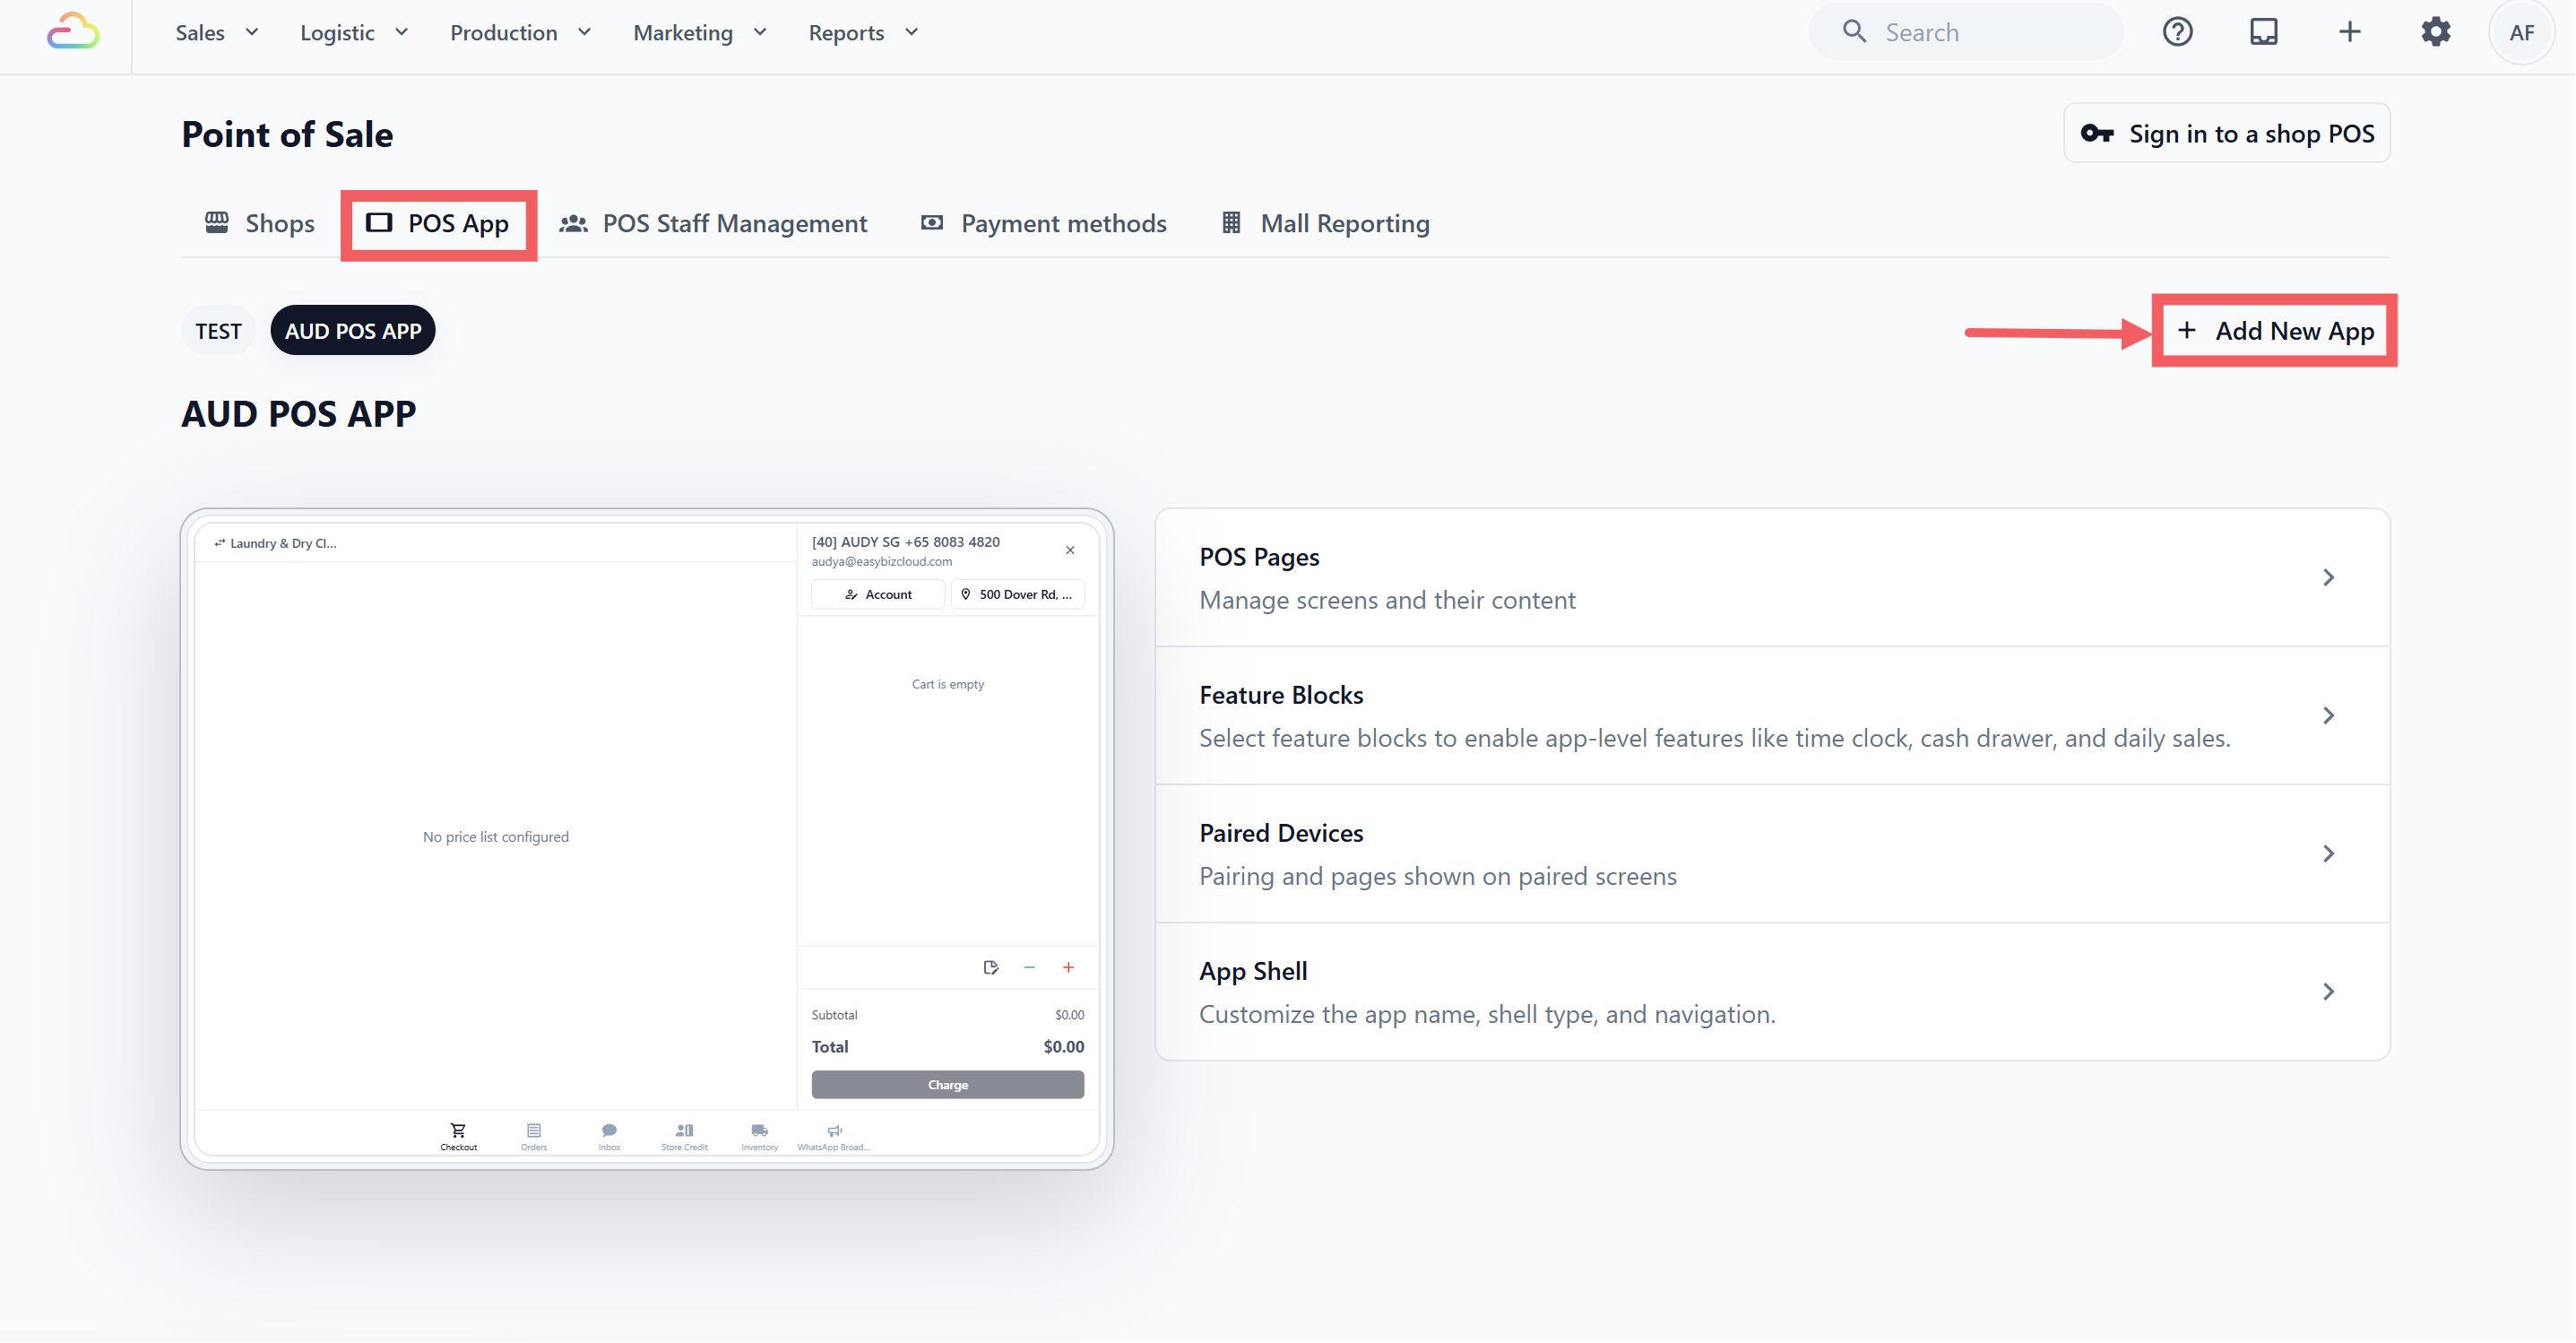
3. Choose POS App tab and Click + Add New App at the top right
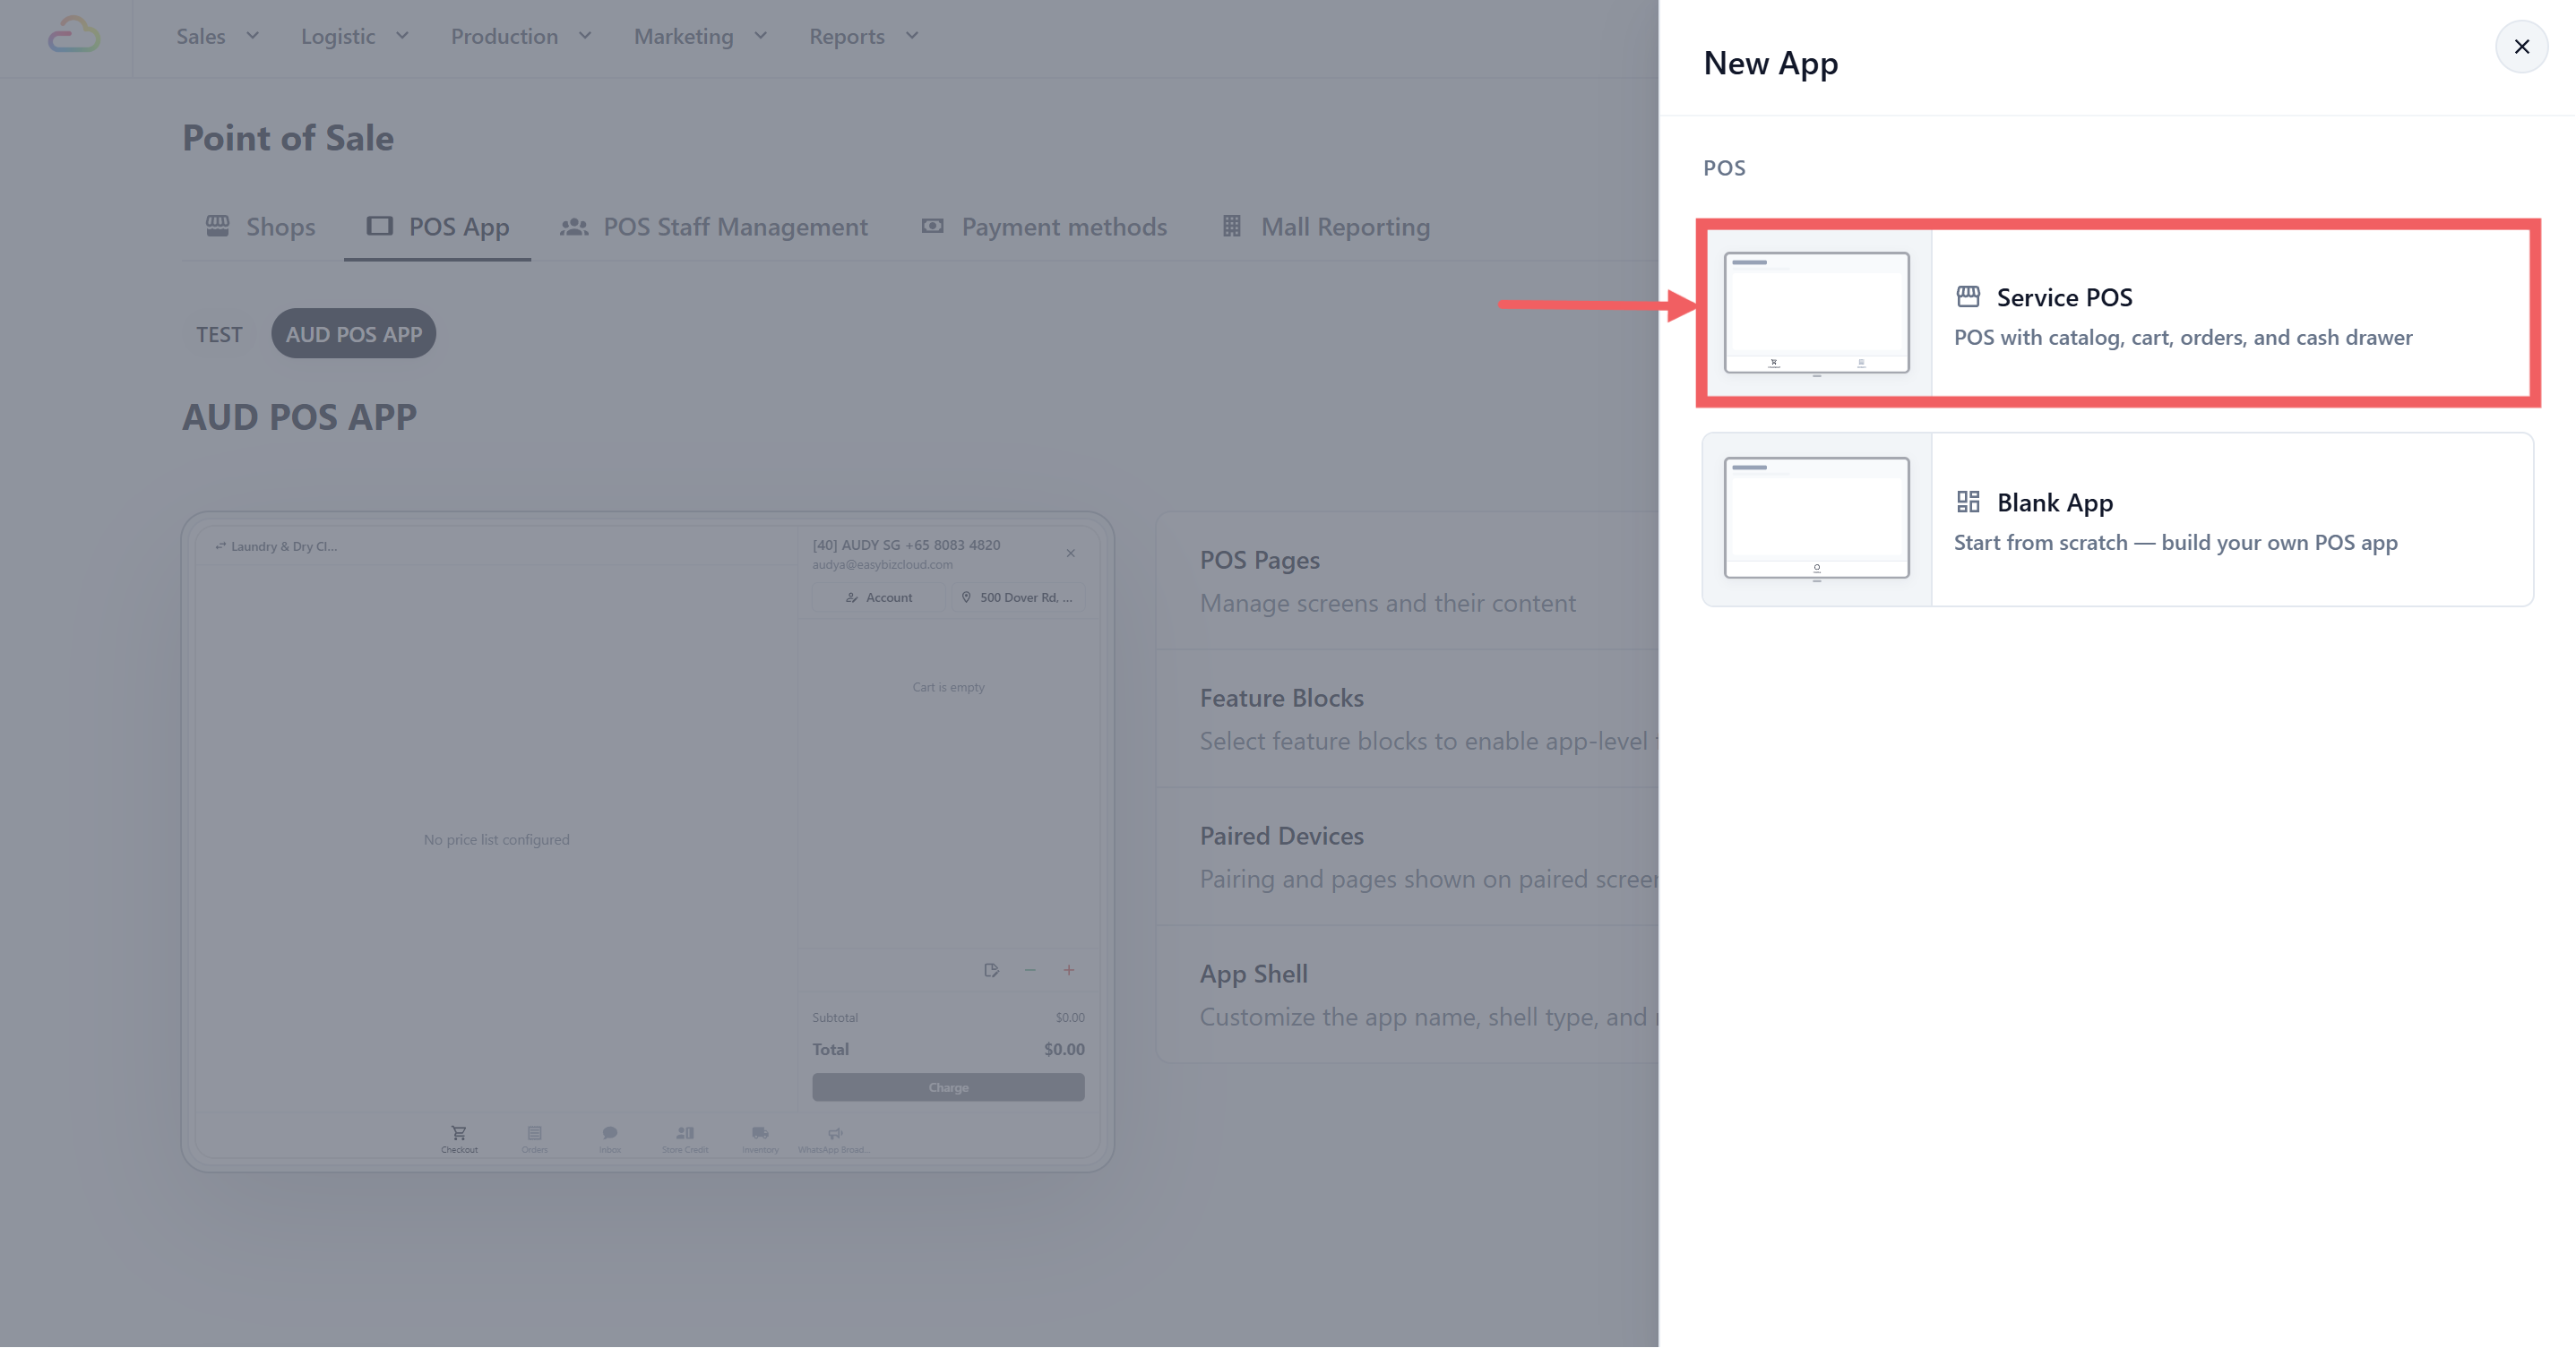
4. Select Service POS, this is the template for all service businesses (laundry, bag repair, tailoring, and so on)
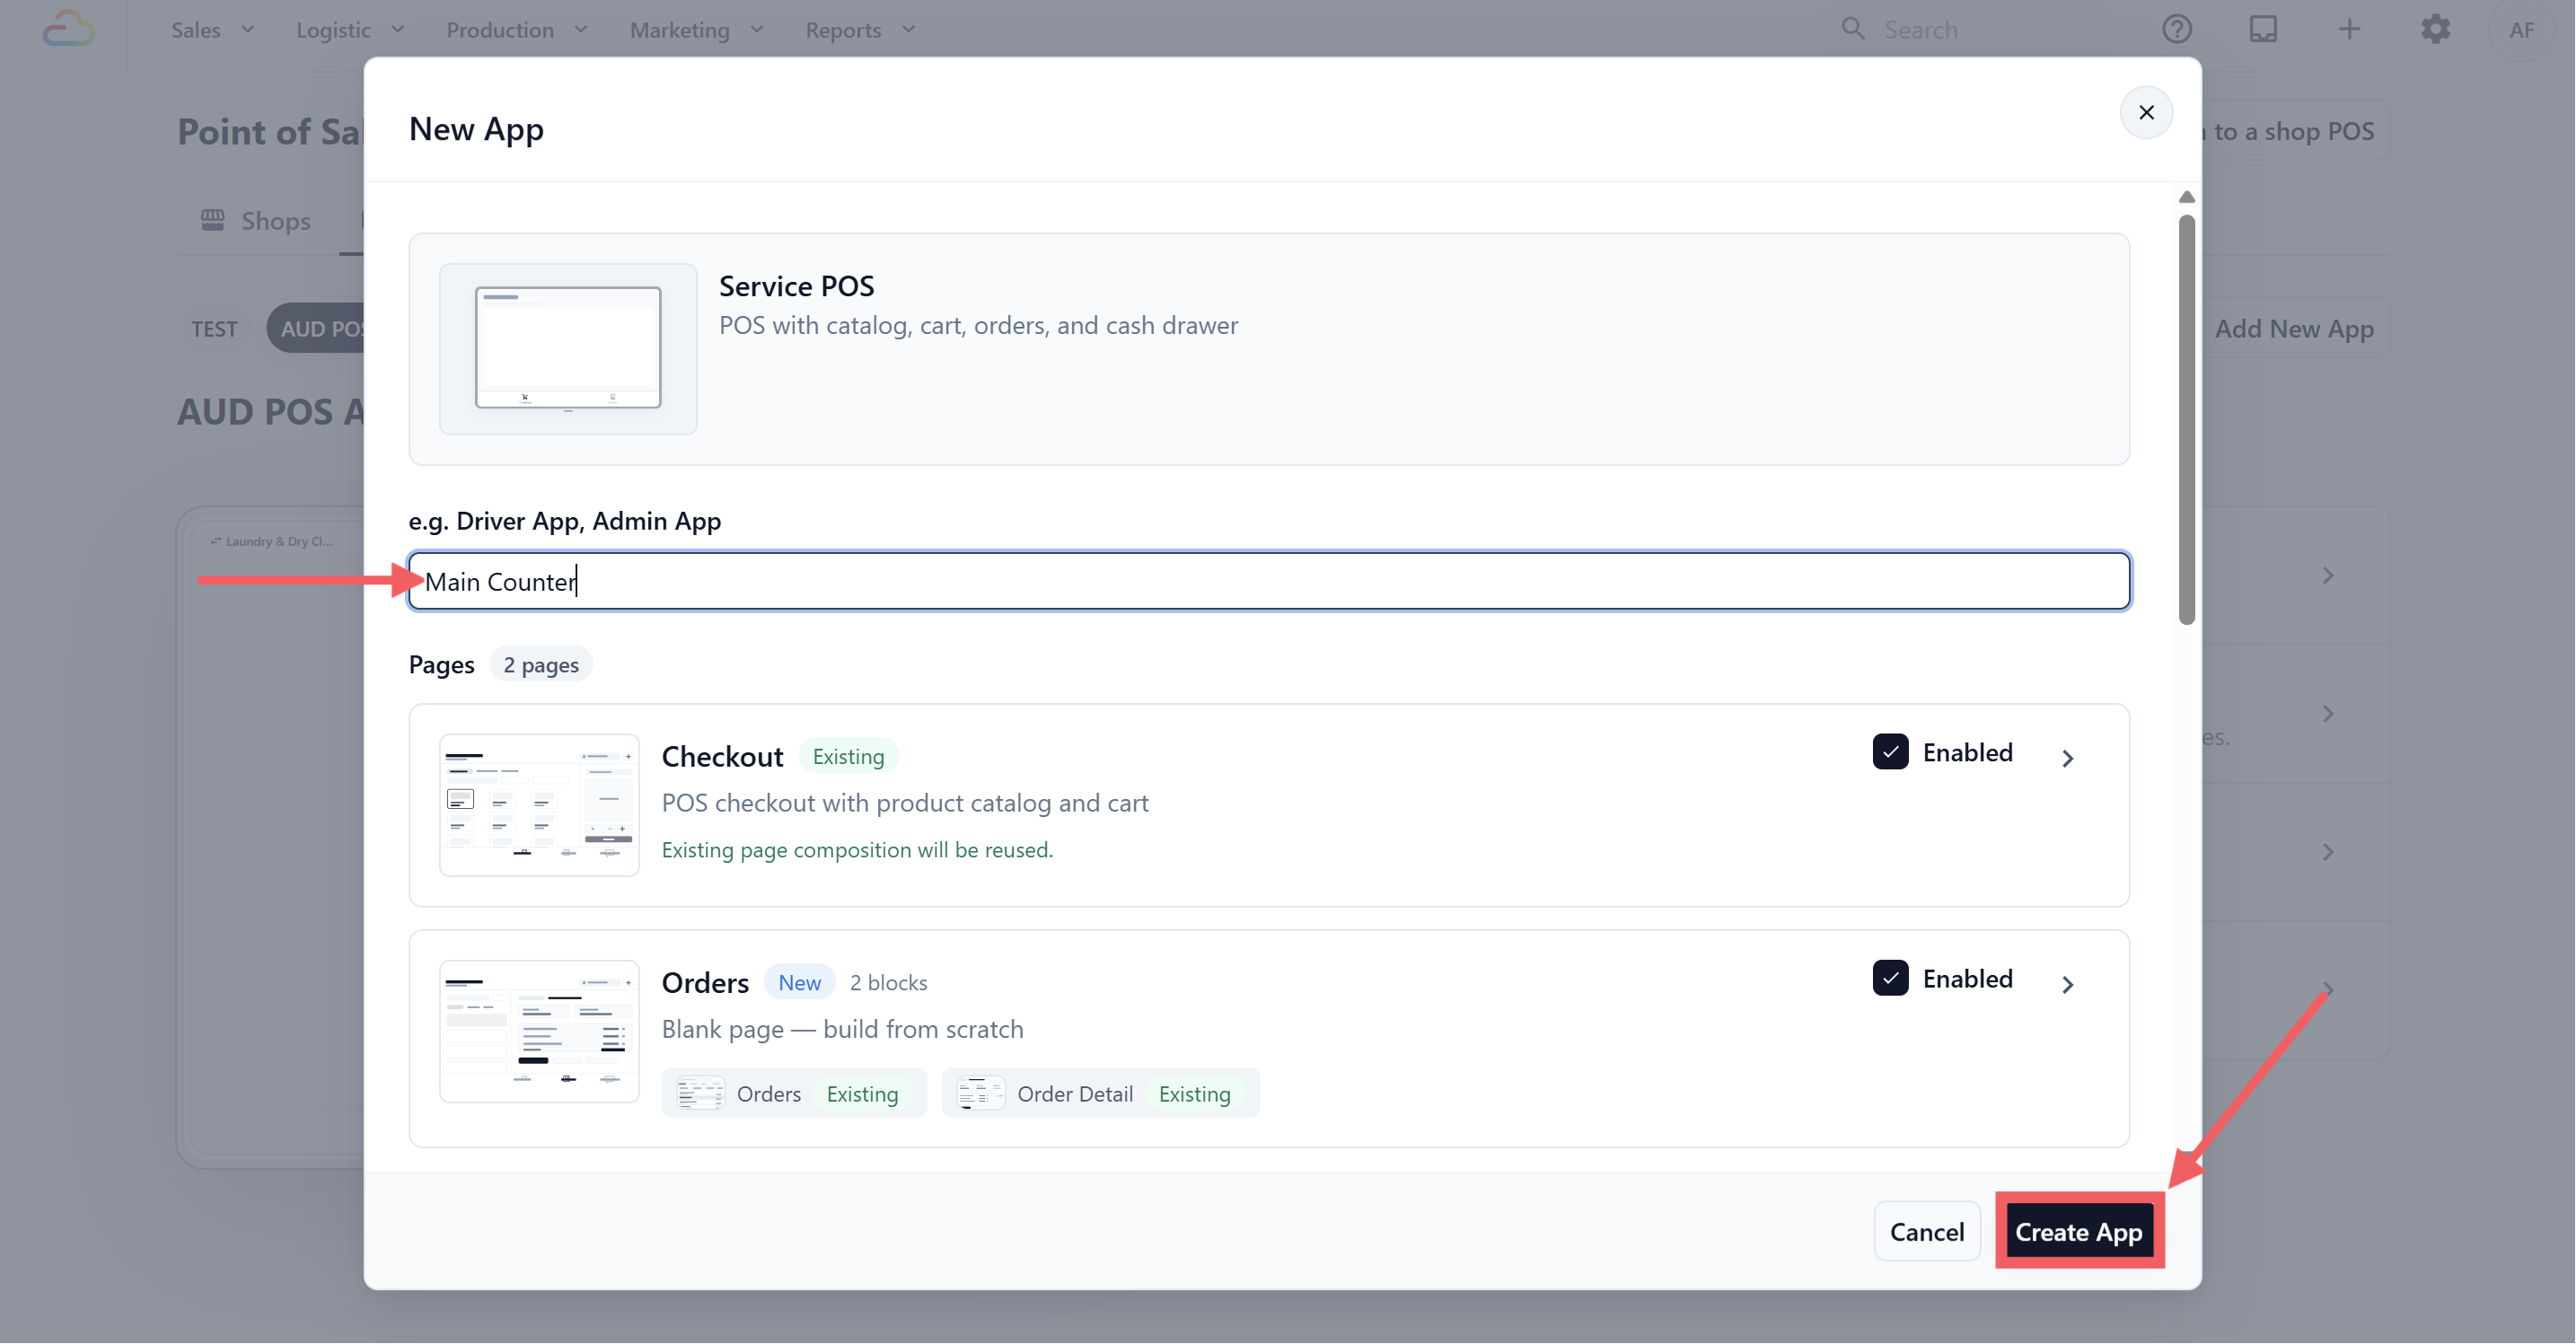
5. Give your app a name, something simple like **Main Counter** or your branch name (e.g. _Vinz Laundry Tampines_)
6. Click Create App
That's it. EasyBiz builds your POS app and takes you straight to the app overview page.
The name you give here is for your own reference — it appears in Settings so you can tell your apps apart if you have more than one counter. It does not appear on receipts.
---
## How Your POS App Is Structured
Before configuring anything, it helps to understand how the pieces fit together — especially since you'll be visiting a few different pages in Settings.
Your POS app is made up of three layers:
### The App Itself
This is what you just created. It holds everything together — your screens, tools, and settings. You manage it from Settings→ POS → POS App.

### Pages / Screens
These are the tabs your staff switches between at the bottom of the POS. EasyBiz automatically sets up two screens:
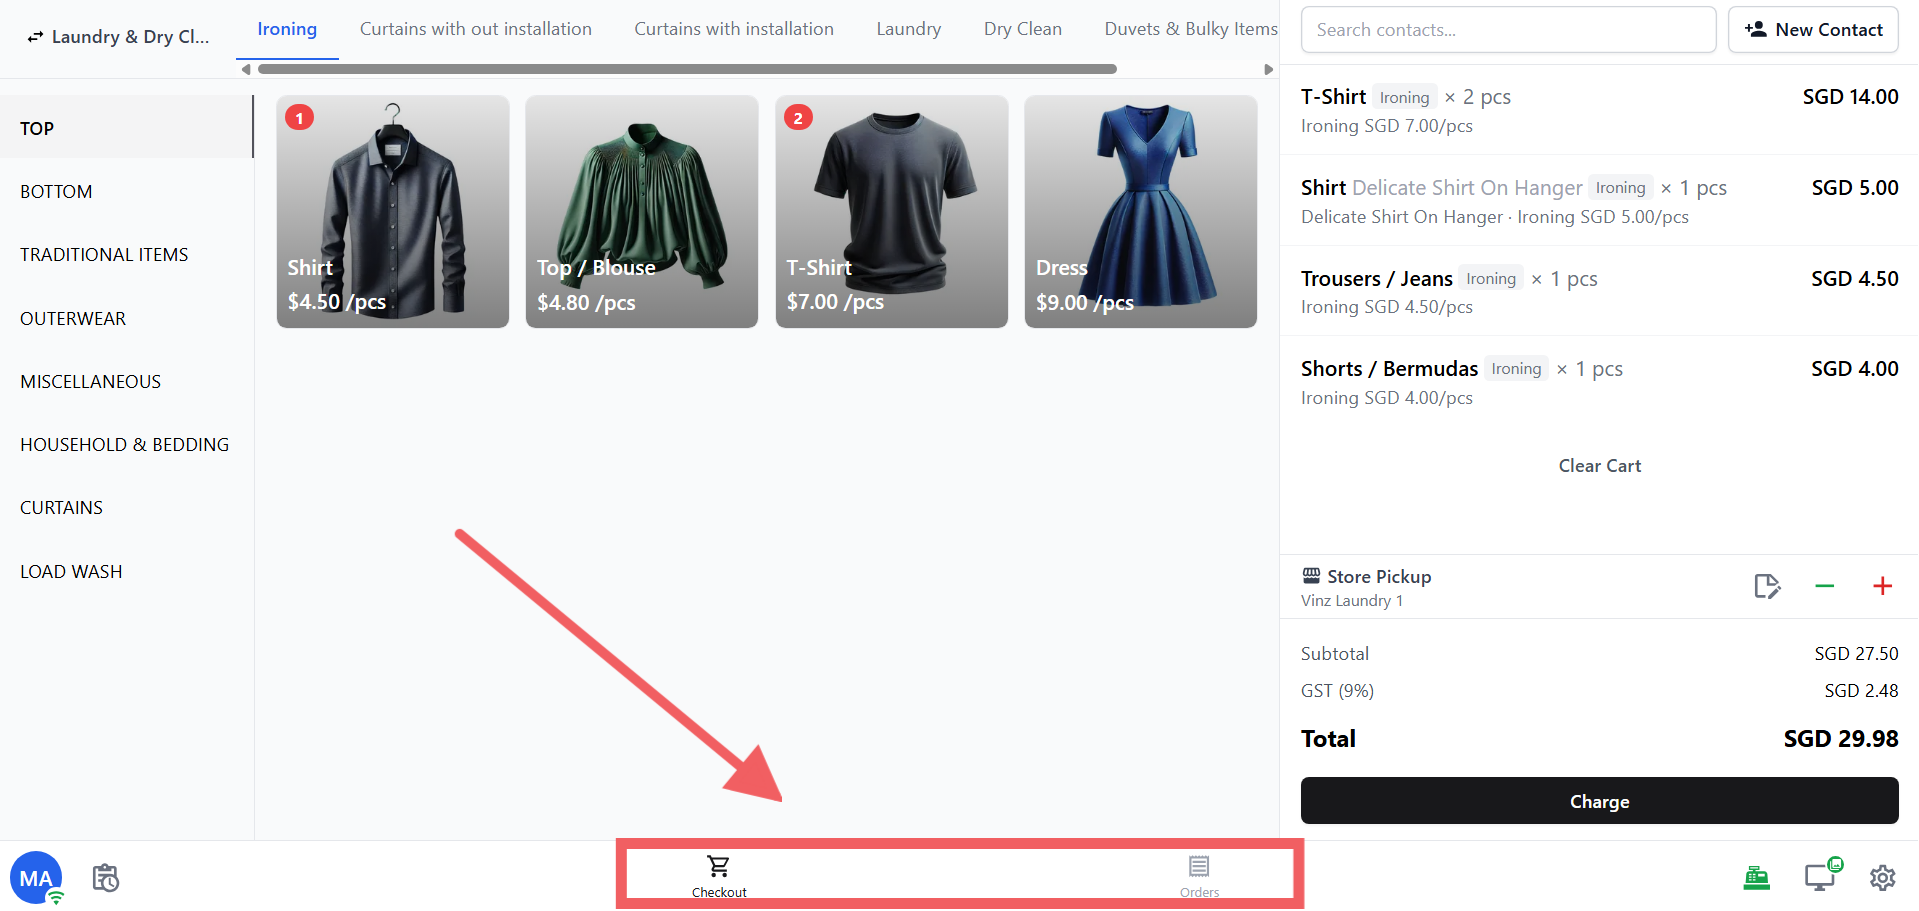
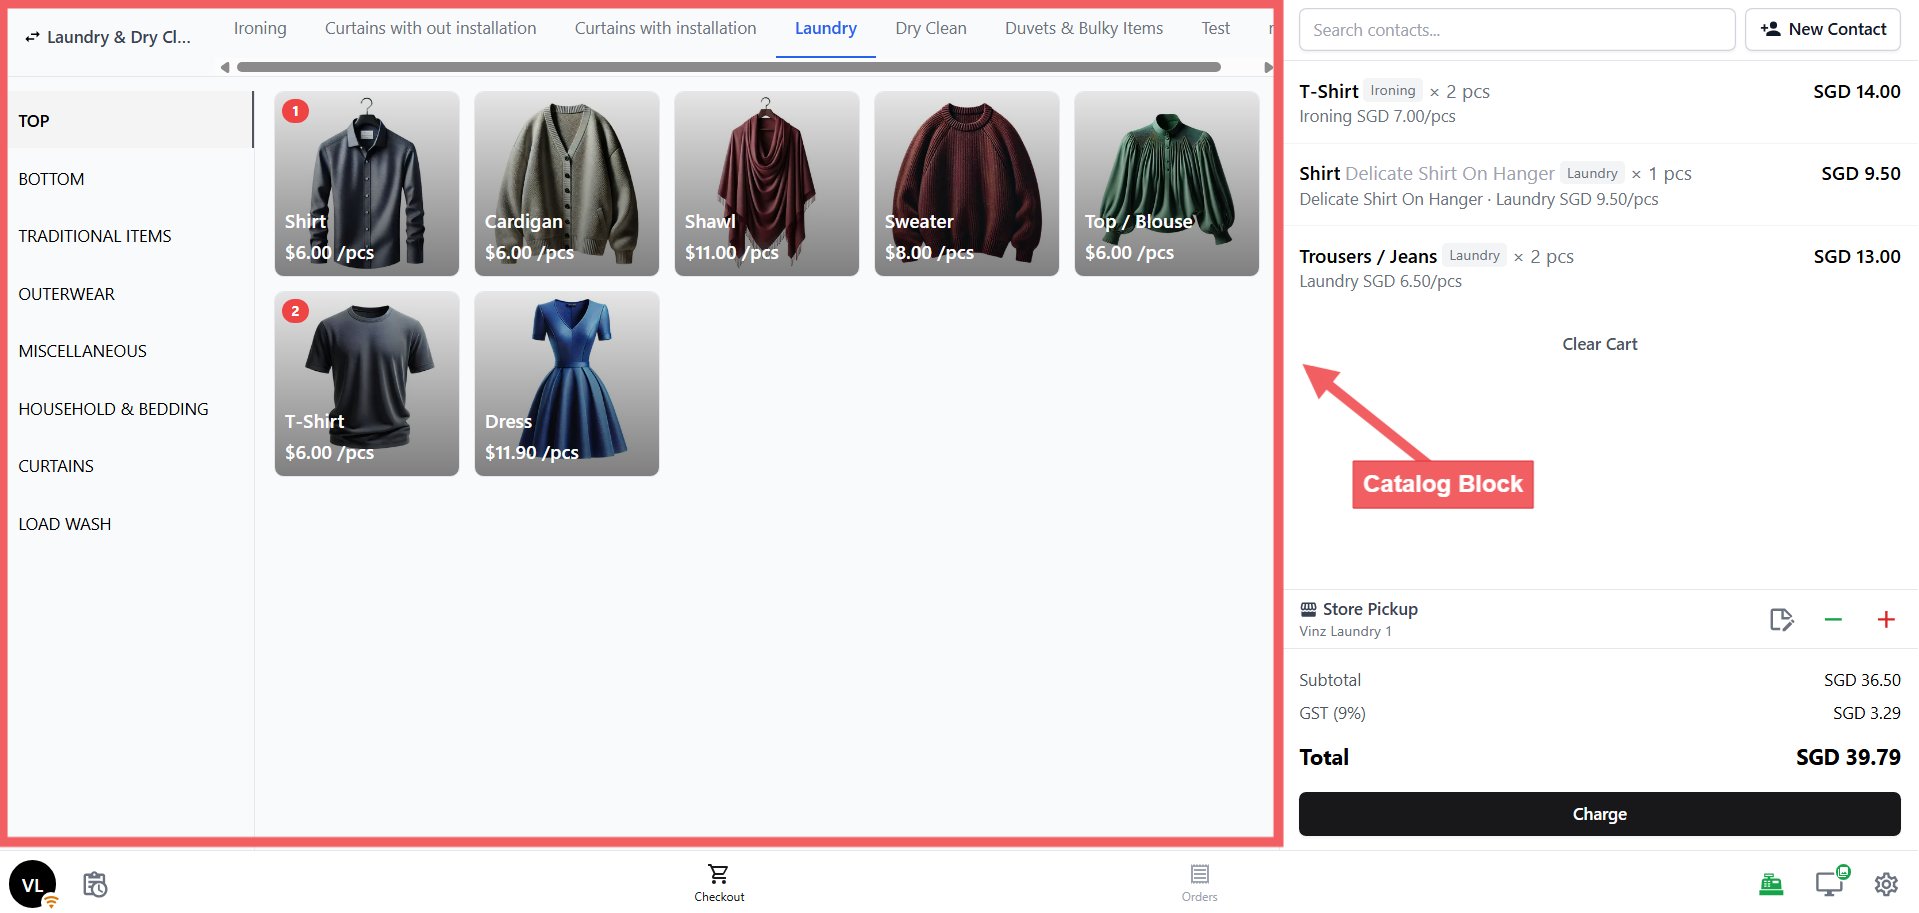
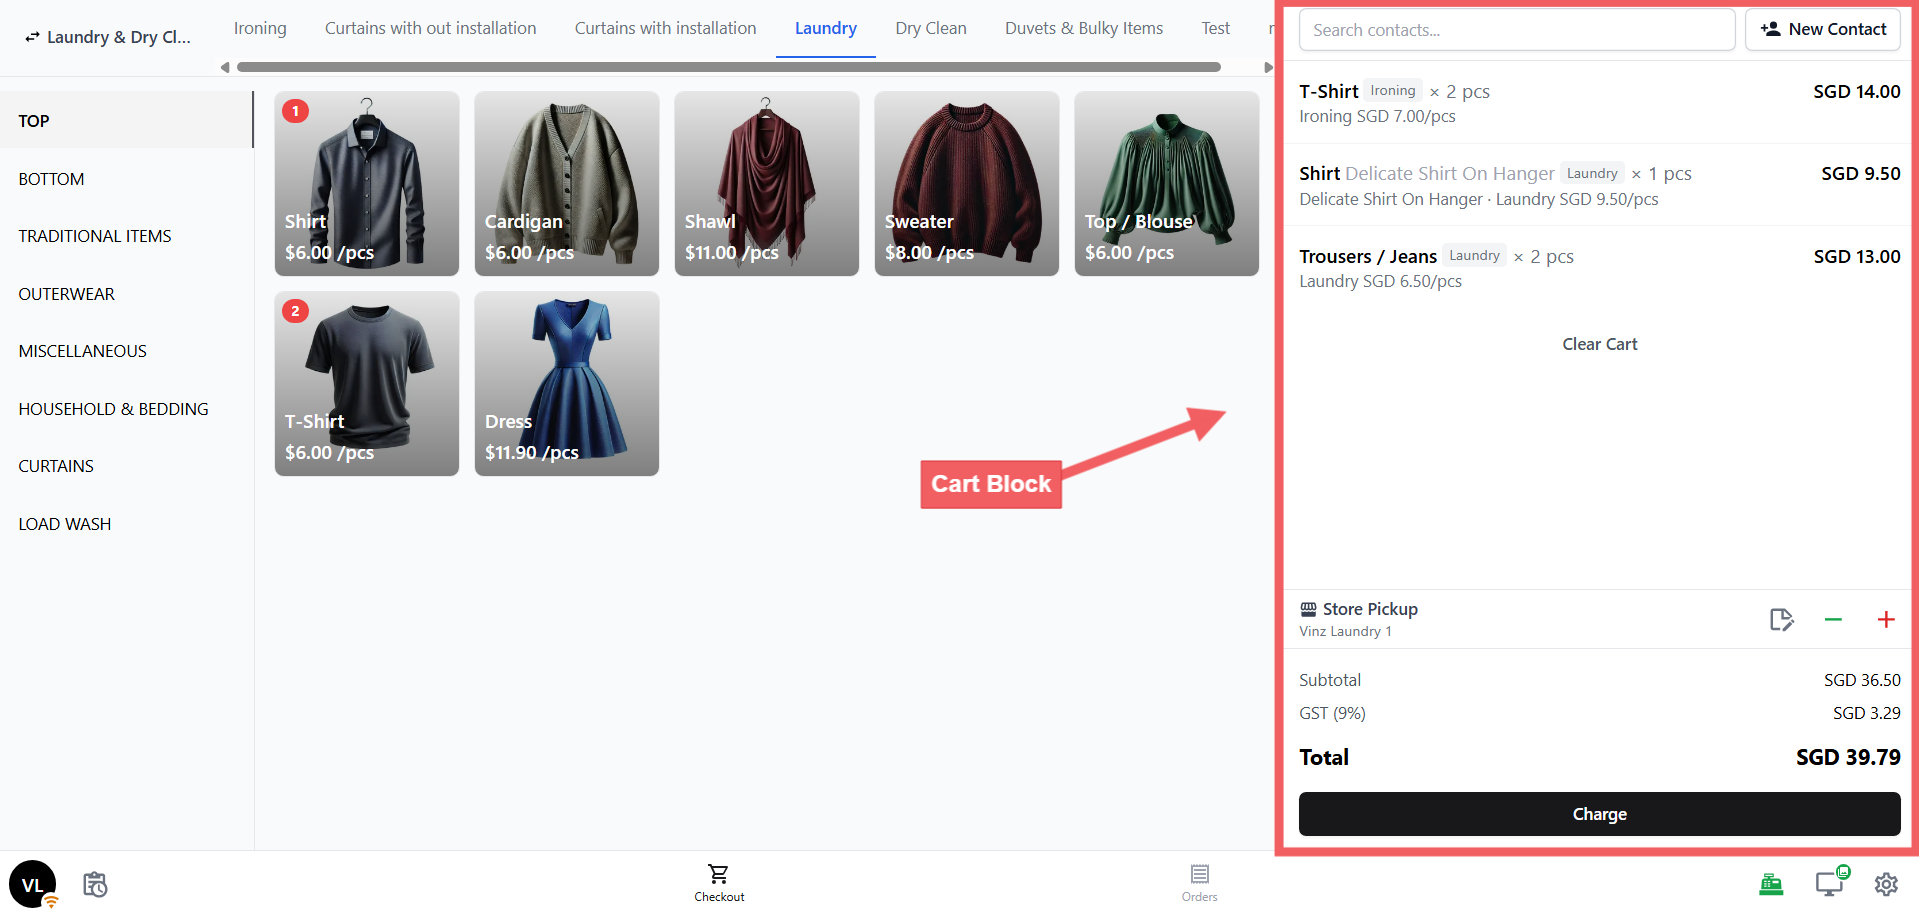
- **Checkout** → where staff adds items and processes payment (catalog on the left, cart on the right)
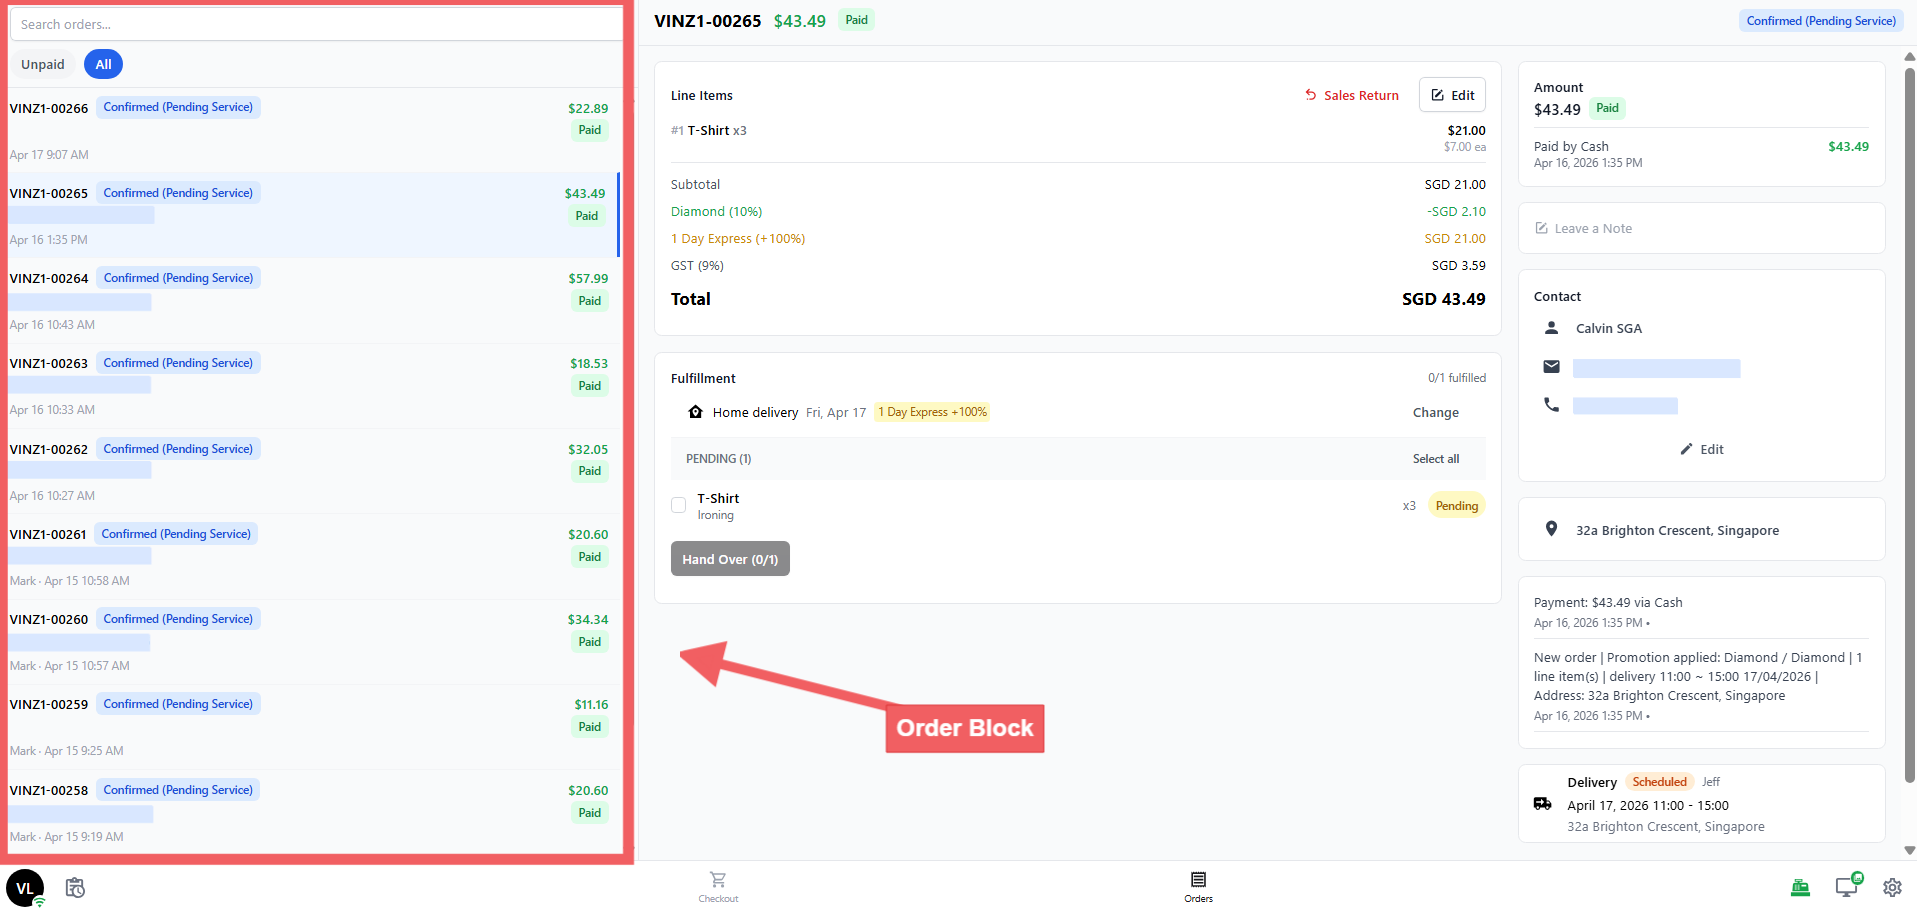
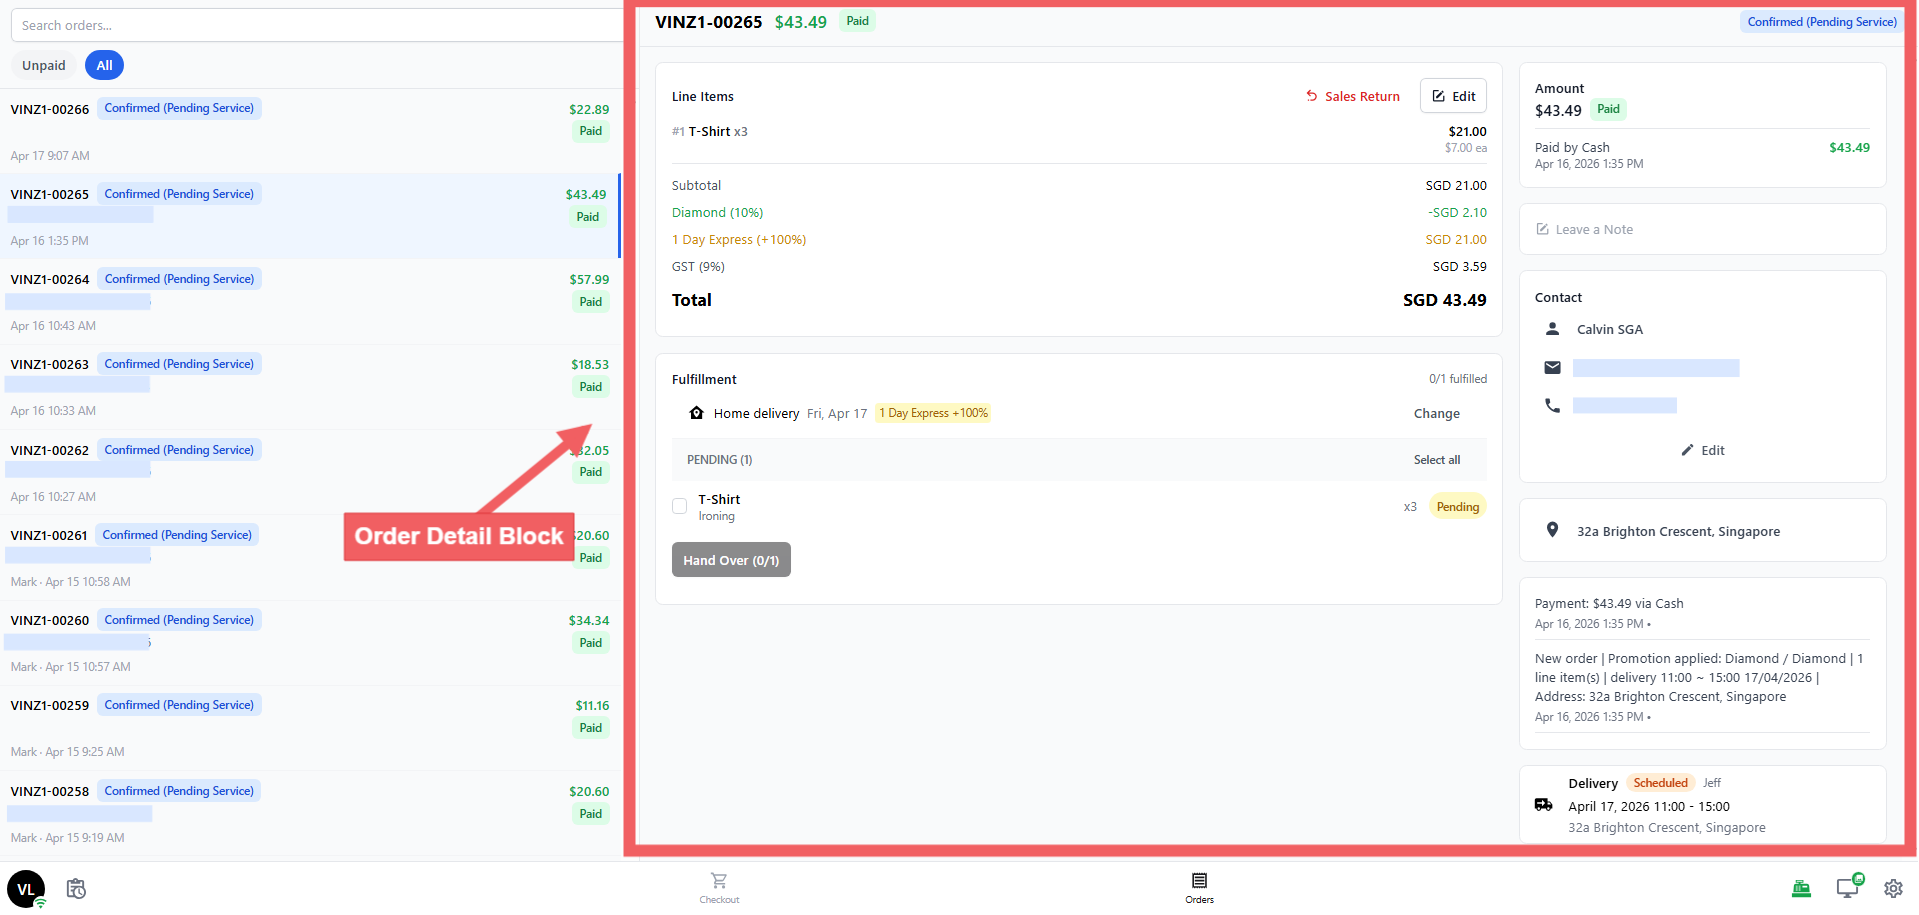
- **Orders** → where staff views and manages existing orders (order list on the left, order detail on the right)
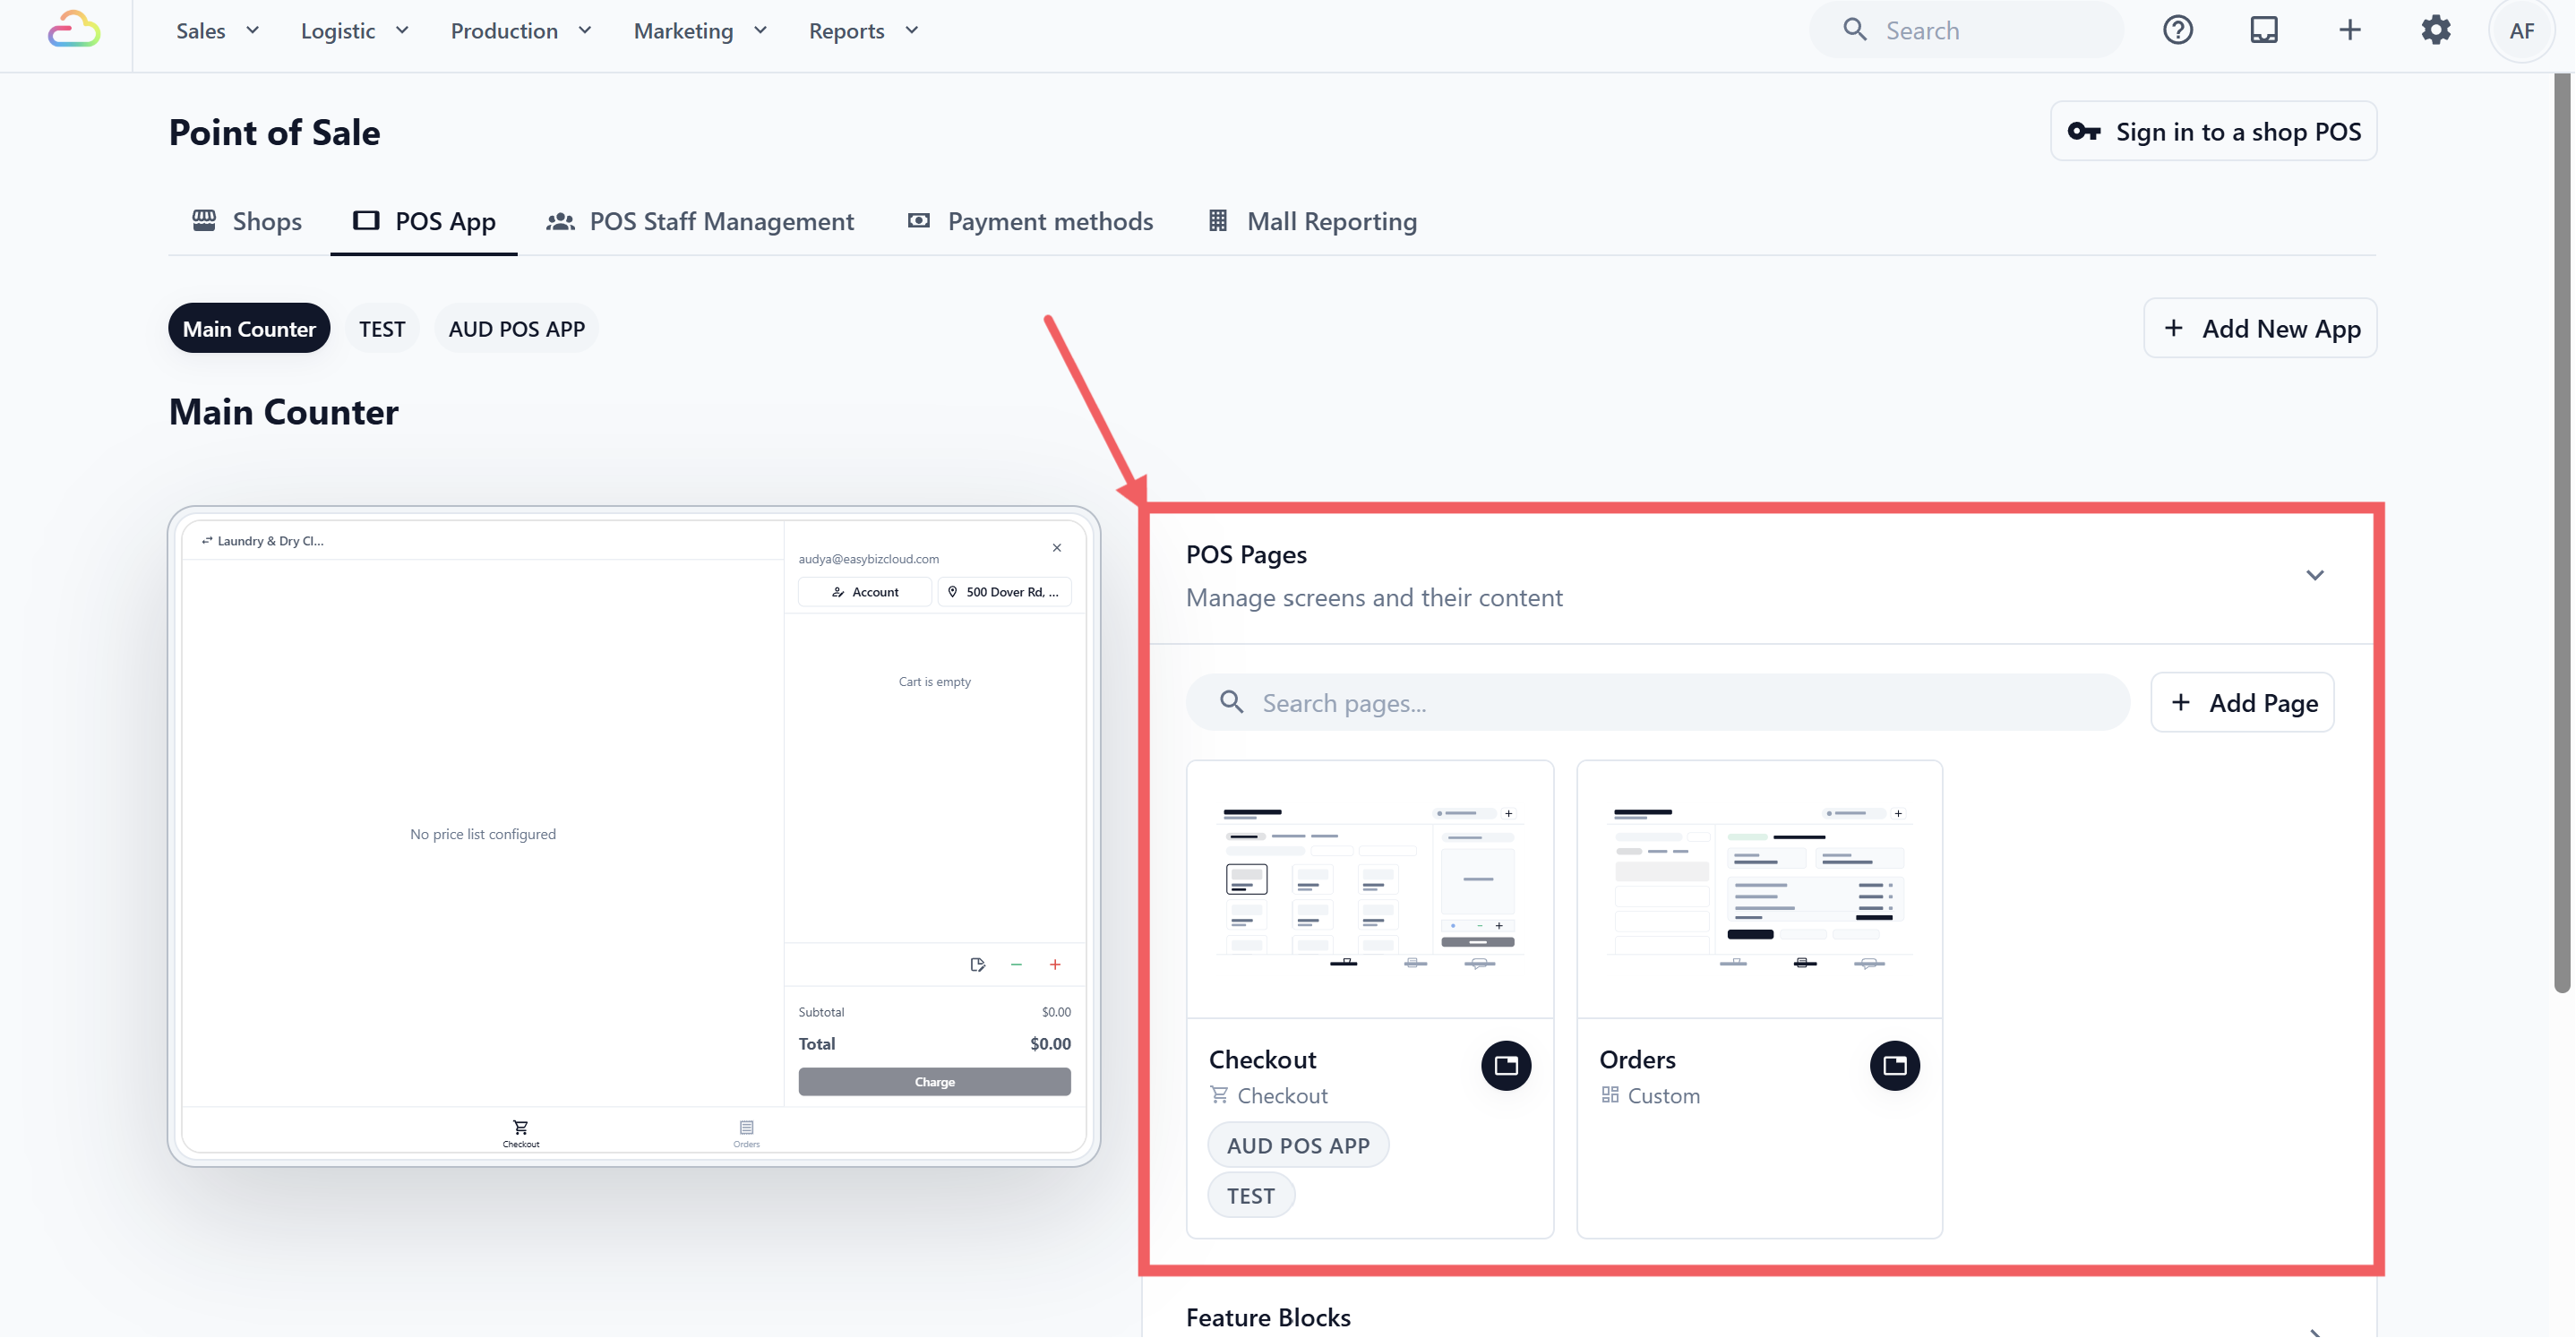
You can view these screens by going to Settings→ POS → POS App **→** POS Pages. You don't need to change anything here, EasyBiz sets them up correctly for you.
### Blocks
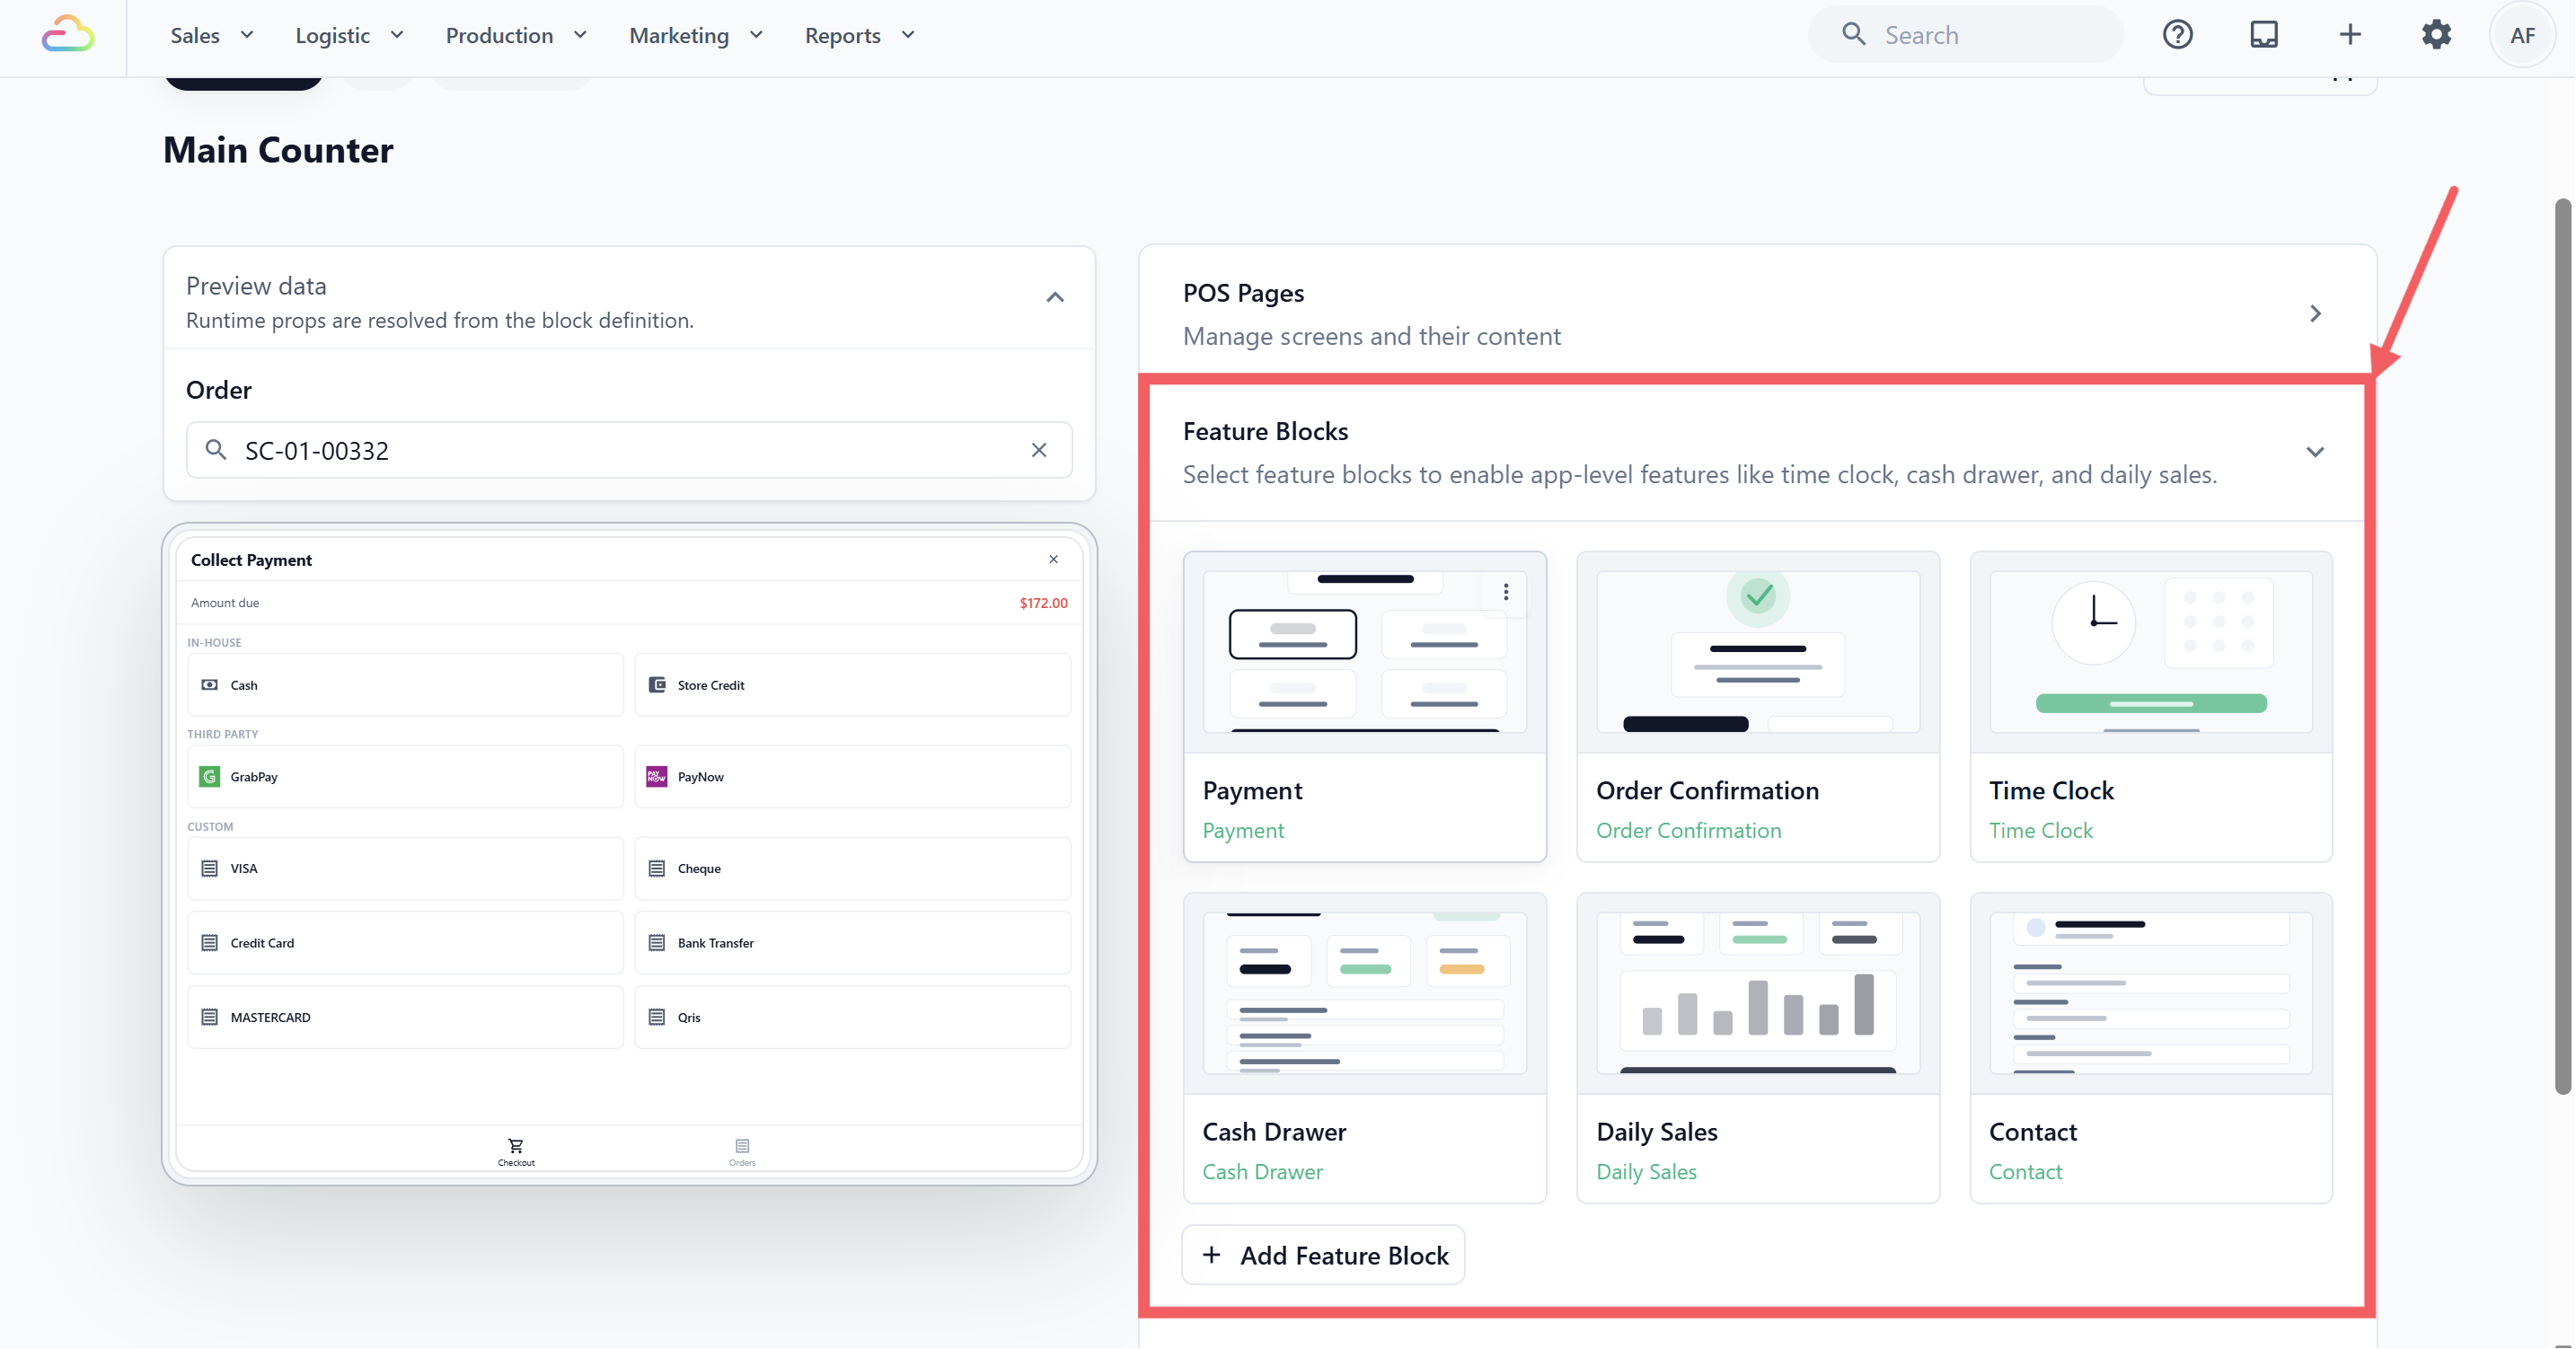
The tools that live inside each screen. Each block does one specific job — the Catalog block shows your items, the Cart block handles the order and payment button, the Orders block lists past orders, and so on. Some blocks are app-wide tools (like Payment, Cash Drawer, and Time Clock) that your staff accesses from icons on the POS rather than from a specific screen.
You configure your blocks by going to Settings→ POS → POS App **→** Feature Blocks
---
## What Gets Created Automatically
When you create a Service POS app, EasyBiz automatically sets up two screens/pages and ten blocks. You don't need to build any of this from scratch.
The two pages/screens:
| Screen | What it shows |
| --- | --- |
| Checkout | Catalog on the left, cart on the right |
| Orders | Order list on the left, order detail on the right |
The ten blocks:
| Block | Lives in | What it does | Ready to use? |
| --- | --- | --- | --- |
| Catalog | Checkout screen | Your service items — what staff taps to add to an order | ✅ Works straight away |
| Cart | Checkout screen | The cart, totals, and Charge button | ⚙️ A few settings to check |
| Orders | Orders screen | The order list and filter tabs | ✅ Works straight away |
| Order Detail | Orders screen | The full order view when you open an order | ⚙️ A few settings to check |
| Payment | App-wide | All your payment methods (cash, card, etc.) | ⚙️ Turn on the methods you accept |
| Cash Drawer | App-wide | Tracks all cash in and out each day | ⚙️ Set your starting amount |
| Daily Sales | App-wide | Your end-of-day sales summary and close-out | ⚙️ Needs a one-time setup |
| Time Clock | App-wide | Staff clock in and out for their shifts | ✅ Optional — works as-is |
| Order Confirmation | App-wide | Screen shown after an order is created | ⚙️ Link your receipt and label template |
| Contact | App-wide | Customer form when adding a new customer | ✅ Works straight away |
You don't need to configure everything before your first order. At minimum, turn on your payment methods and link your receipt template — everything else can be done as you go.
---
## Configuring Your Blocks
To configure your blocks, go to Settings **→** Staff Apps **→** Blocks and click the POS tab. Click any block to open its settings.
Most of these settings work fine out of the box. You don't need to go through every option — just focus on the blocks marked ⚙️ in the table above and follow the guidance below for each one.
### Catalog
Displays your service items on the Checkout screen.
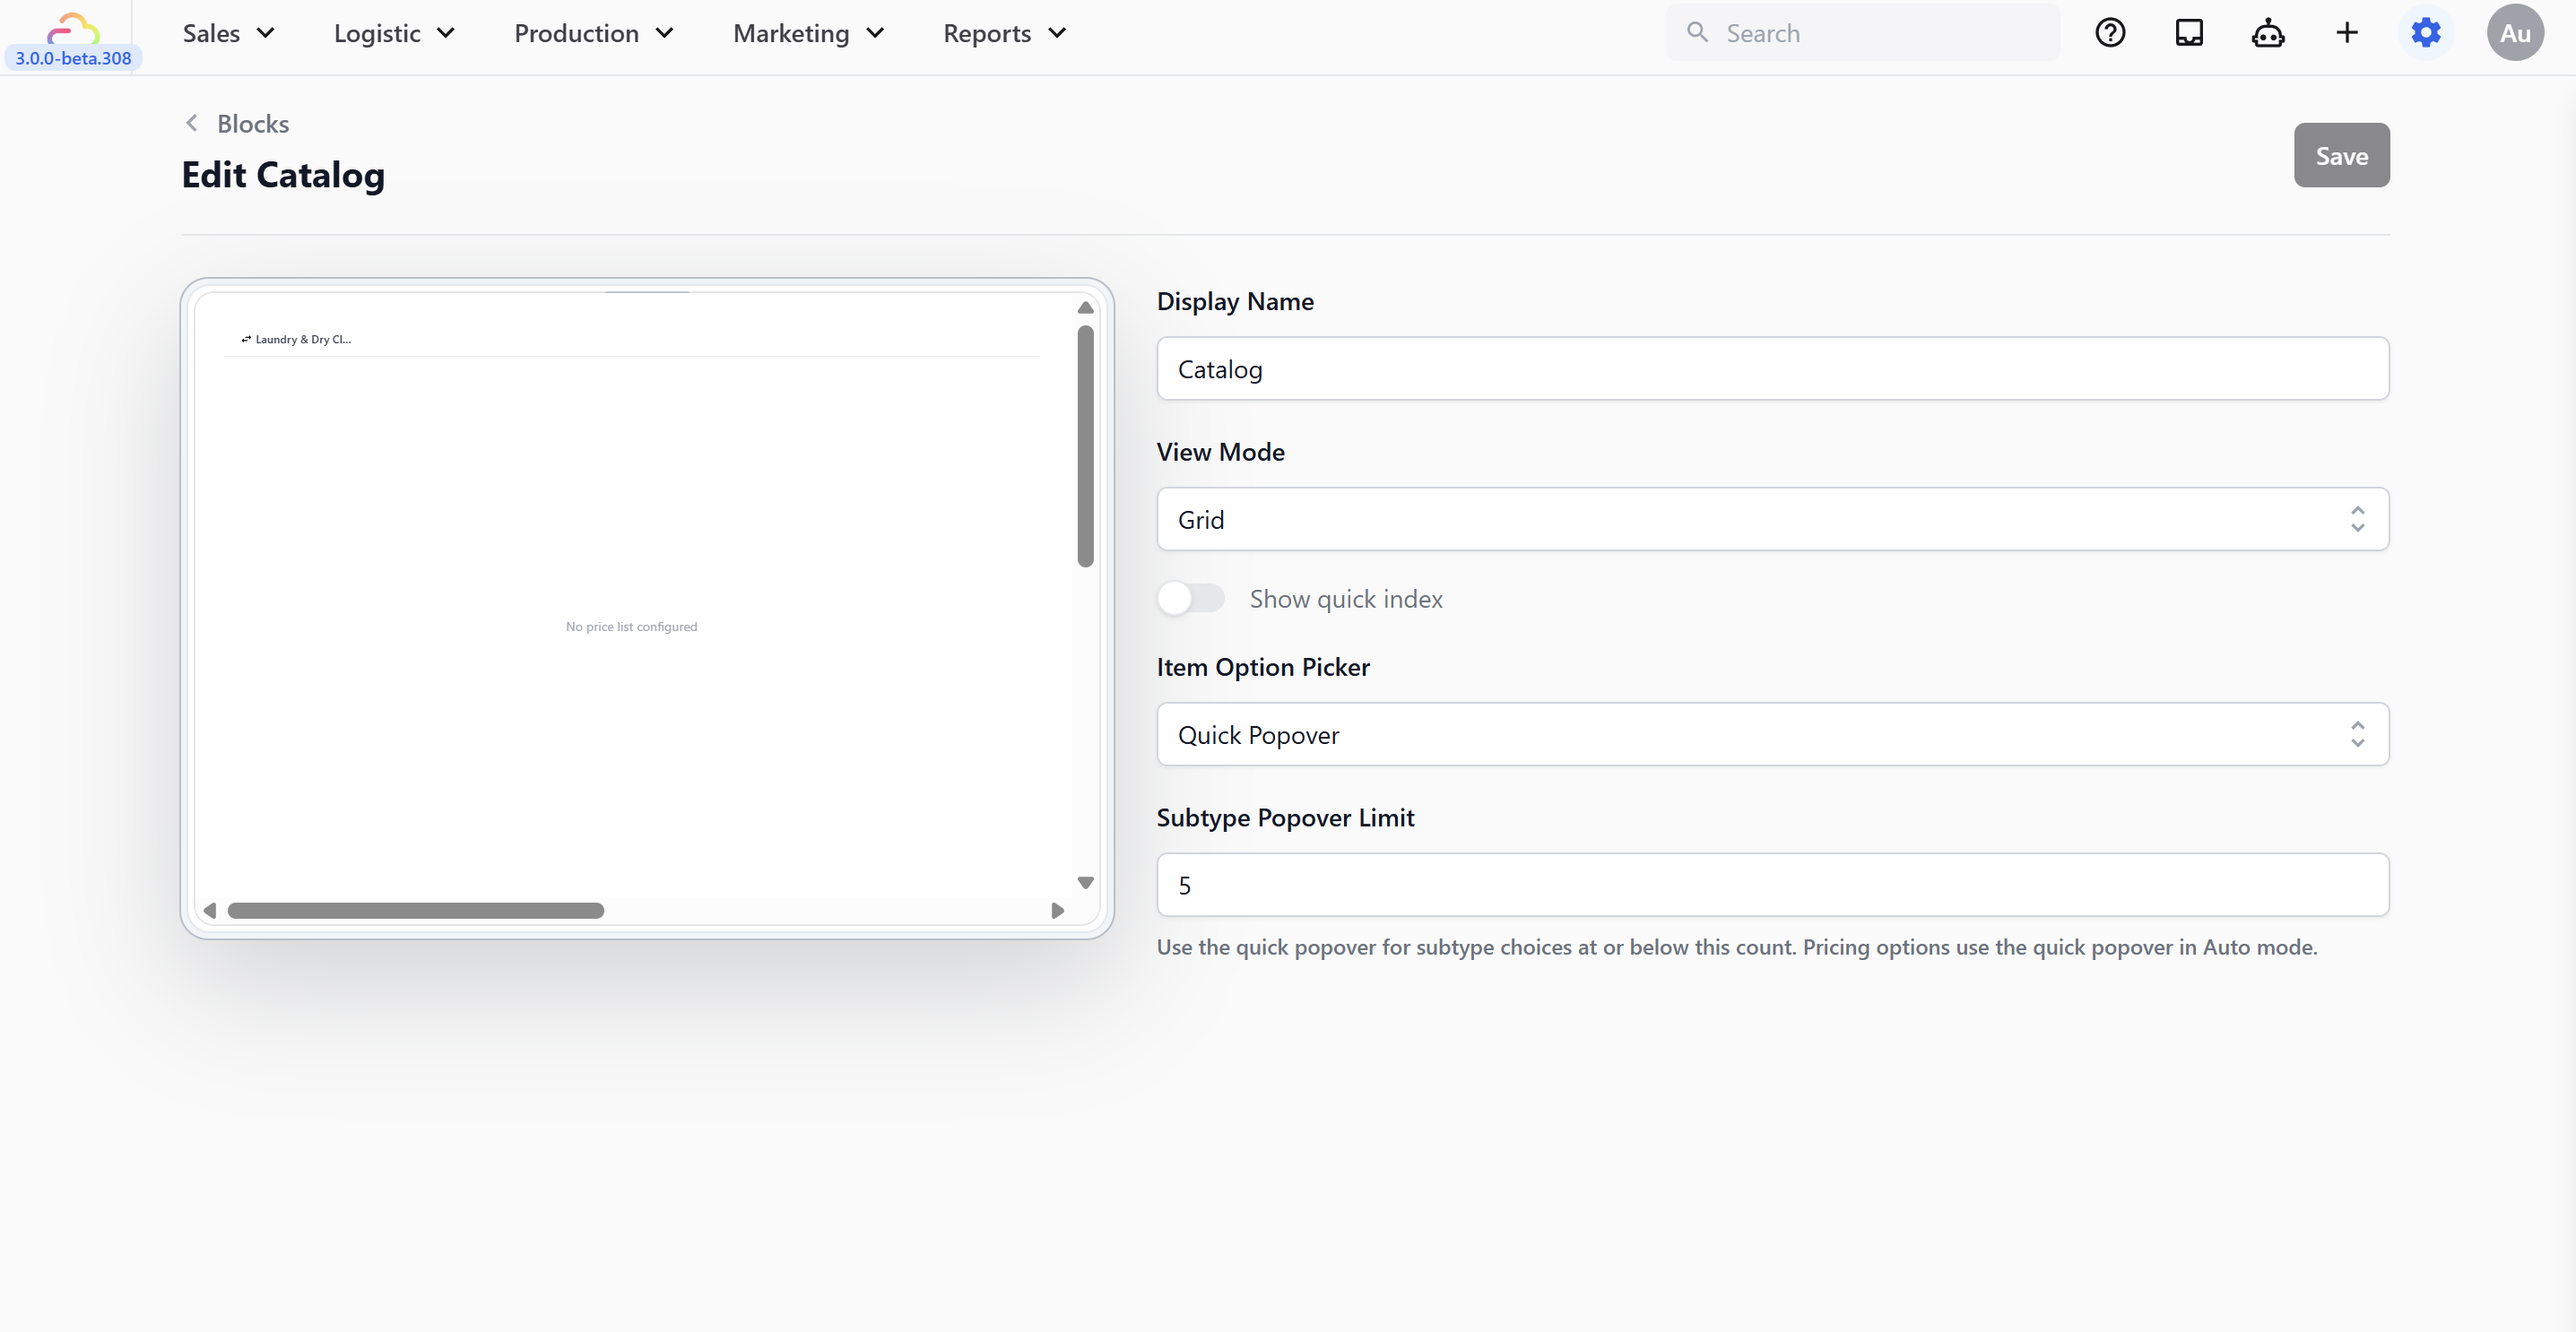
- **Display Name** → the label shown at the top of the catalog. Leave as "Catalog" or rename it.
- **View Mode** → **Grid** (image tiles, good for visual browsing) or **List** (scrollable list, good for long price lists).
- **Item Option Picker** → how subtype/option choices appear when staff tap a product with variants.
- **Subtype Popover Limit** → max number of subtype choices that still use the quick popover. Above this number, the picker switches to the full inline panel automatically.
The Catalog block only shows items if your Business Unit already has a price list or product catalog linked to it. If your catalog appears empty when you open the POS, check your [Business Unit settings](/docs/setting-up-your-business-unit-for-laundry).
Click Save when done.
---
### Cart
The order summary and checkout button.
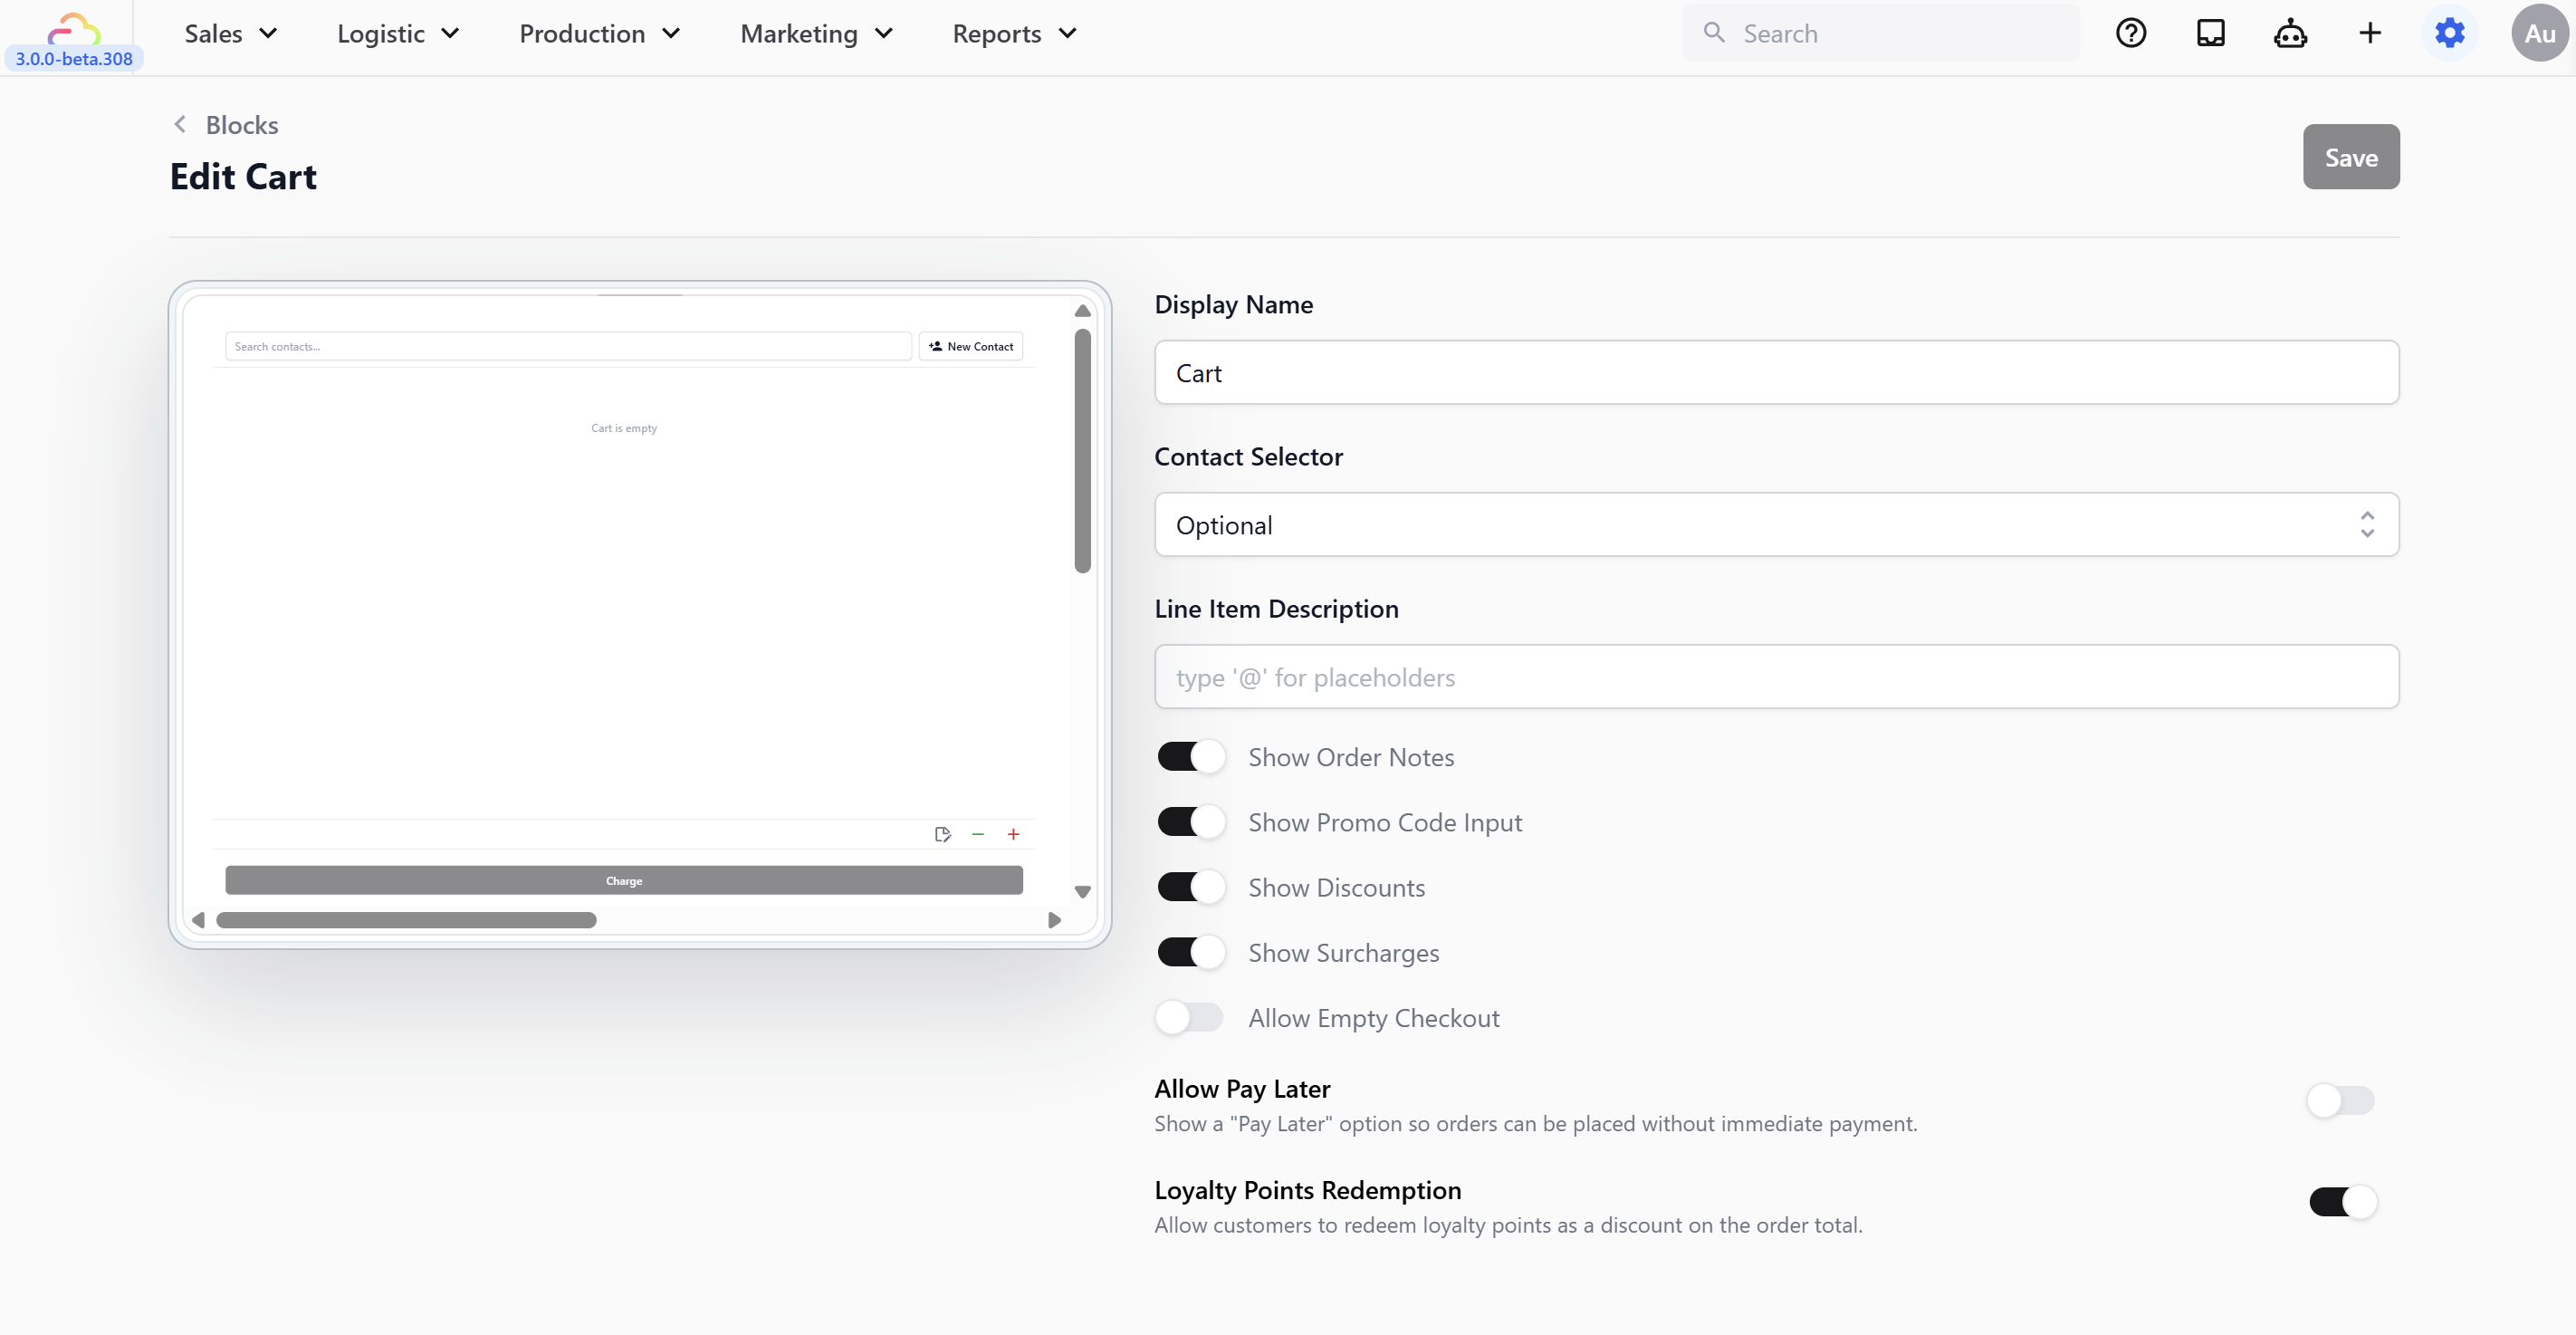
- **Display Name** → the label shown at the top of the cart panel. Leave as "Cart" or rename it.
- **Contact Selector** → controls whether staff must link a customer to the order.
| Option | What happens |
| --- | --- |
| None | No customer field shown. Orders are created without any customer linked. |
| Optional | A customer search bar appears. Staff can search or skip — the Charge button is always available. |
| Mandatory | A customer search bar appears. The Charge button stays disabled until a customer is selected. Staff cannot proceed to payment without linking a customer. |
| Setting | What it does |
| --- | --- |
| Line Item Description | Customize cart item labels using @ placeholders |
| Show Order Notes | Free-text note field on the order |
| Show Promo Code Input | Coupon or promo code field |
| Show Discounts | Flat or percentage discount |
| Show Surcharges | Add a surcharge to the order |
| Allow Empty Checkout | Proceed to payment with an empty cart (e.g., deposits) |
| Allow Pay Later | Creates the order as Unpaid for later collection |
| Loyalty Points Redemption | Redeem points as a discount |
| Terms & Conditions | Text shown on the customer-facing display |
Click Save when done.
---
### Orders
The order list and filter tabs.
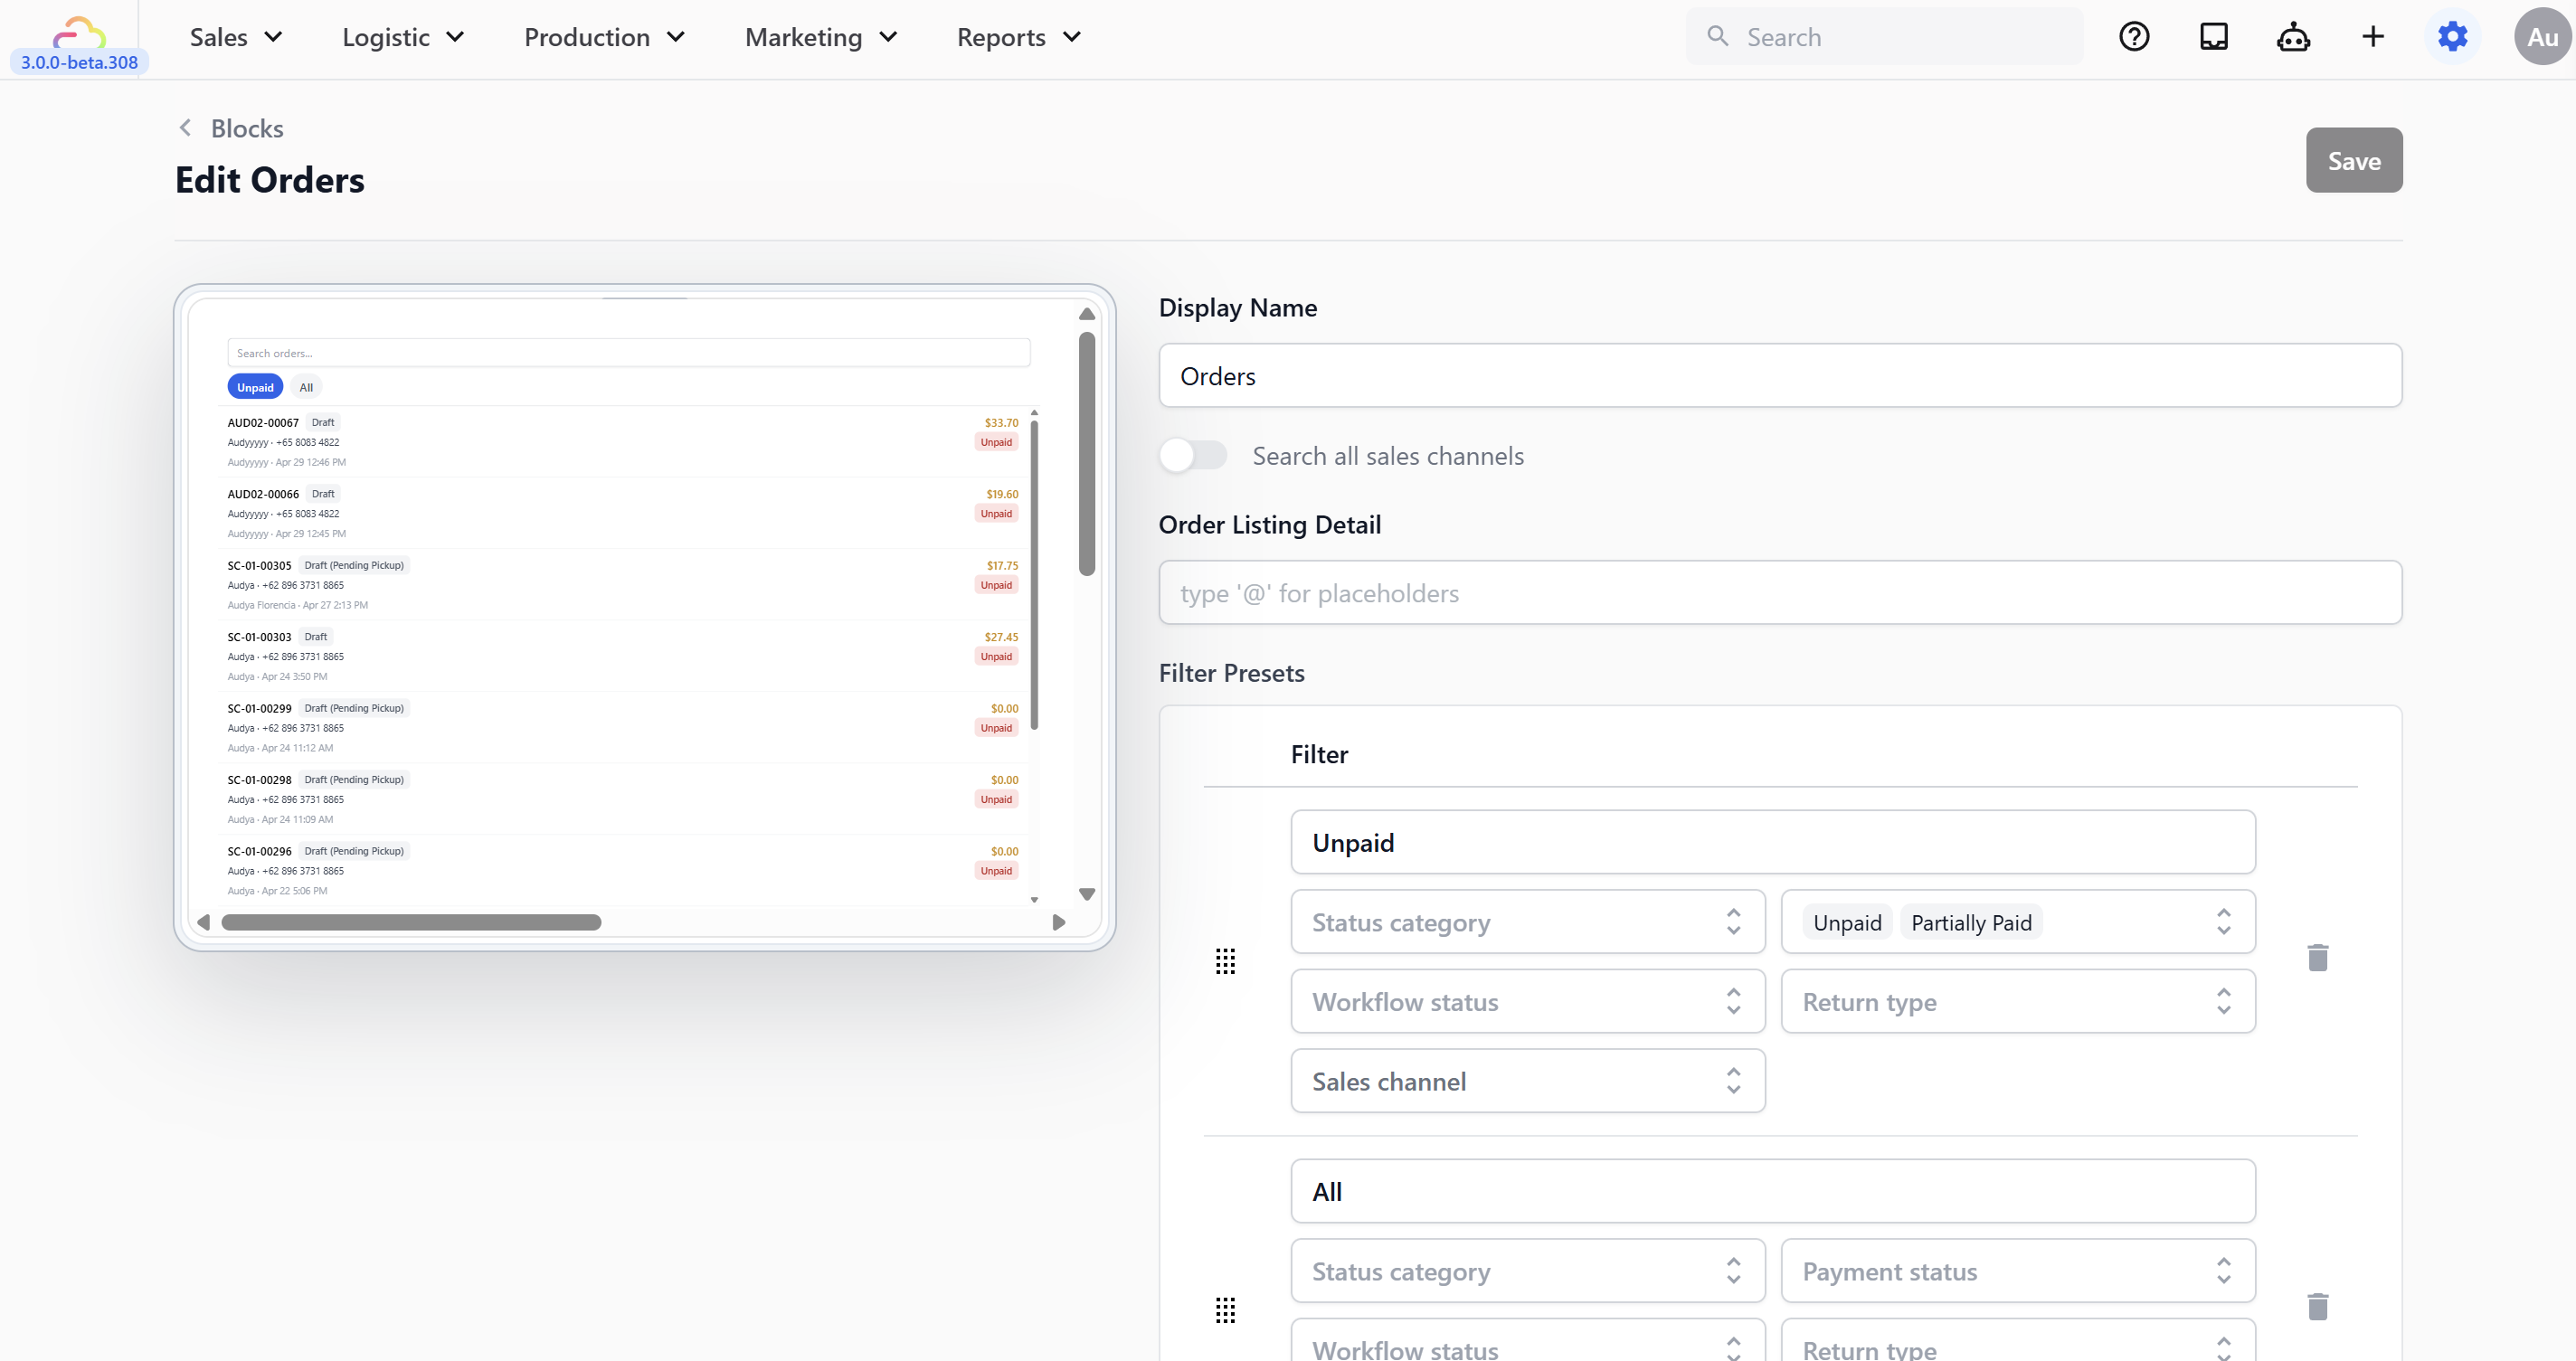
- **Display Name** → the label shown at the top of the orders panel. Leave as "Orders" or rename it.
- **Search all sales channels** → off by default (shows orders from this location only). Turn on to see orders from all branches.
- **Order Listing Detail** → customize the second line under each order using `@` placeholders.
- **Filter Presets** → comes with **Unpaid** and **All**. Add more to filter by workflow stage or sales channel.
Click Save when done.
---
### Order Detail
The full order view when you open an order.
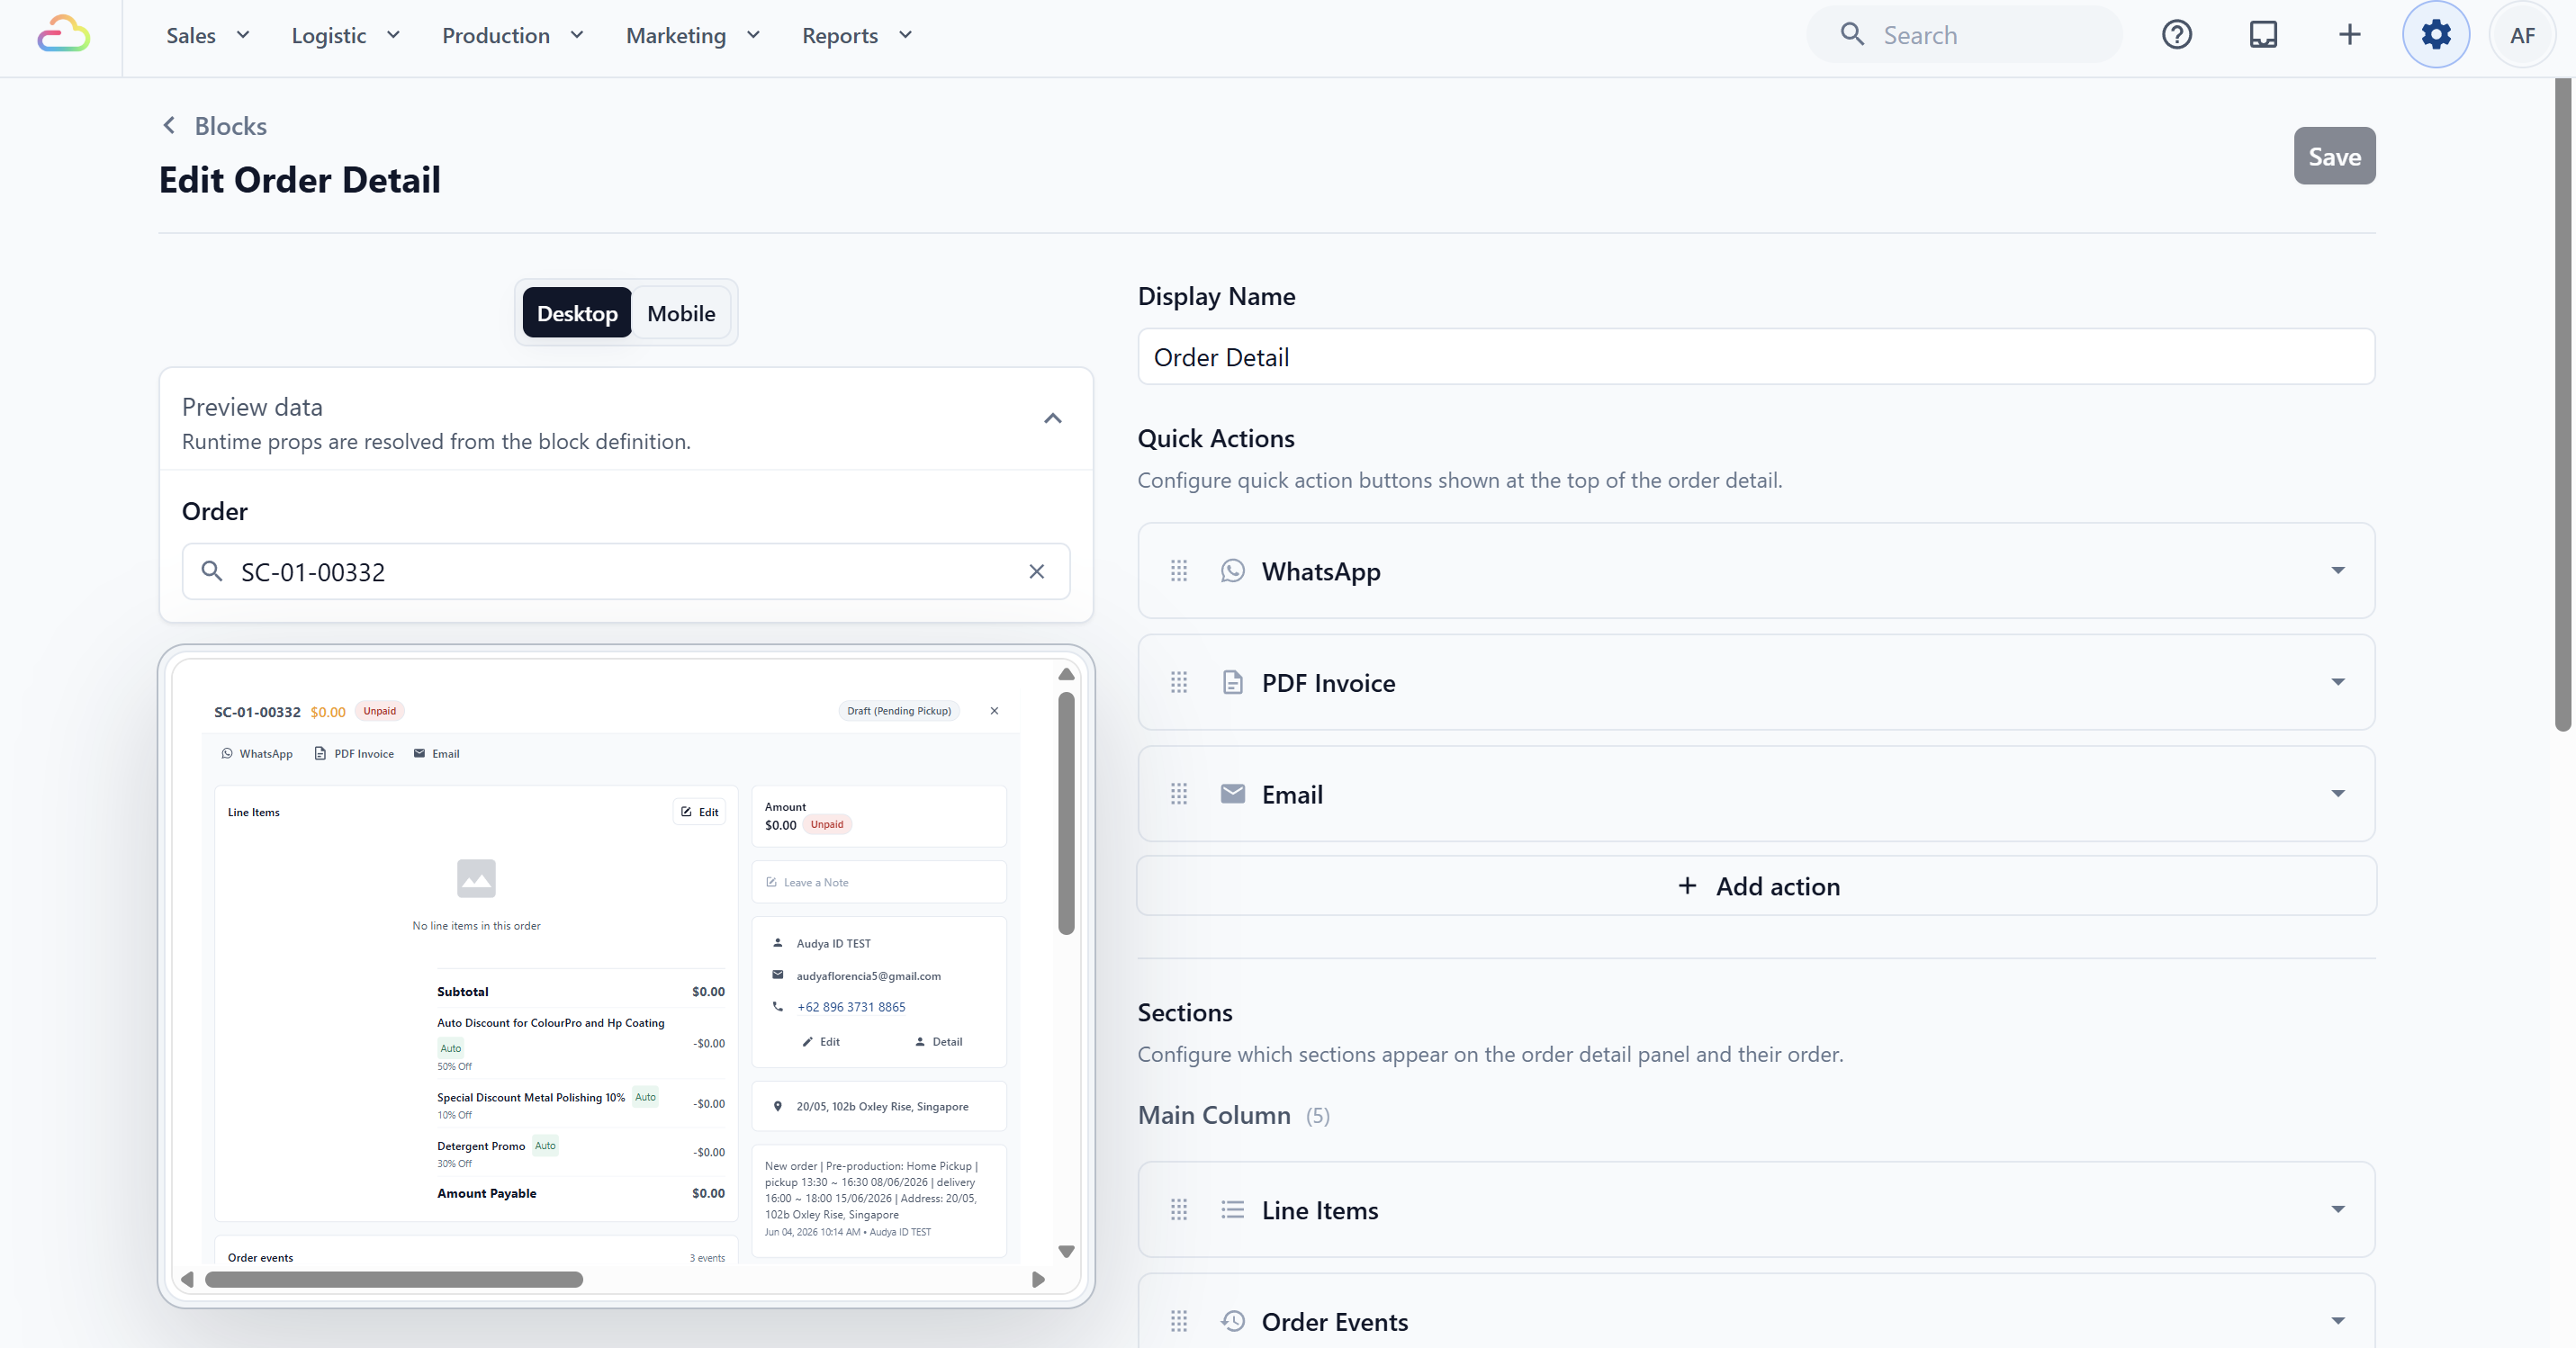
- **Display Name** → the label shown at the top of the order detail panel. Leave as "Order Detail" or rename it.
- **Quick Actions** → shortcut buttons at the top of every order. Default: Line Items, Order Events (main column), Payment, Notes, Contact, History (side column).
- **Sections** → add **Fulfillment** to the main column so staff can mark items as collected. Add **Delivery Jobs** to the side column if you offer home delivery.
Click Save when done.
---
### Payment
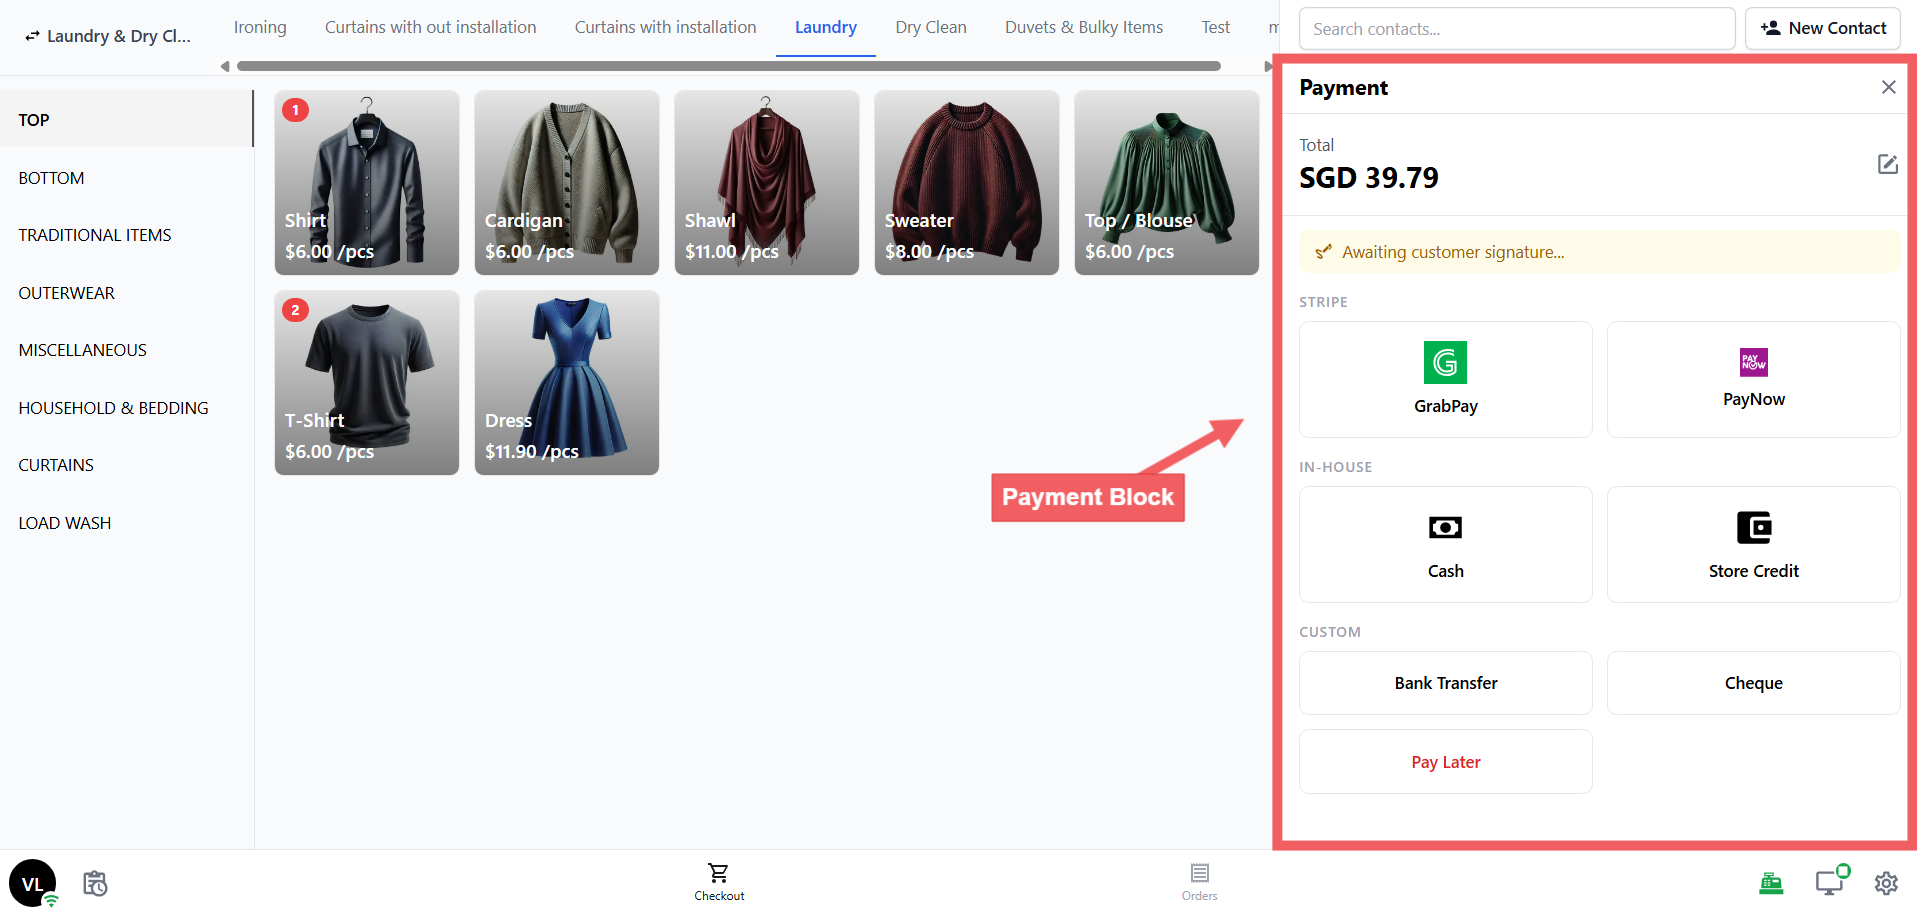
Turn on the payment methods your store accepts.
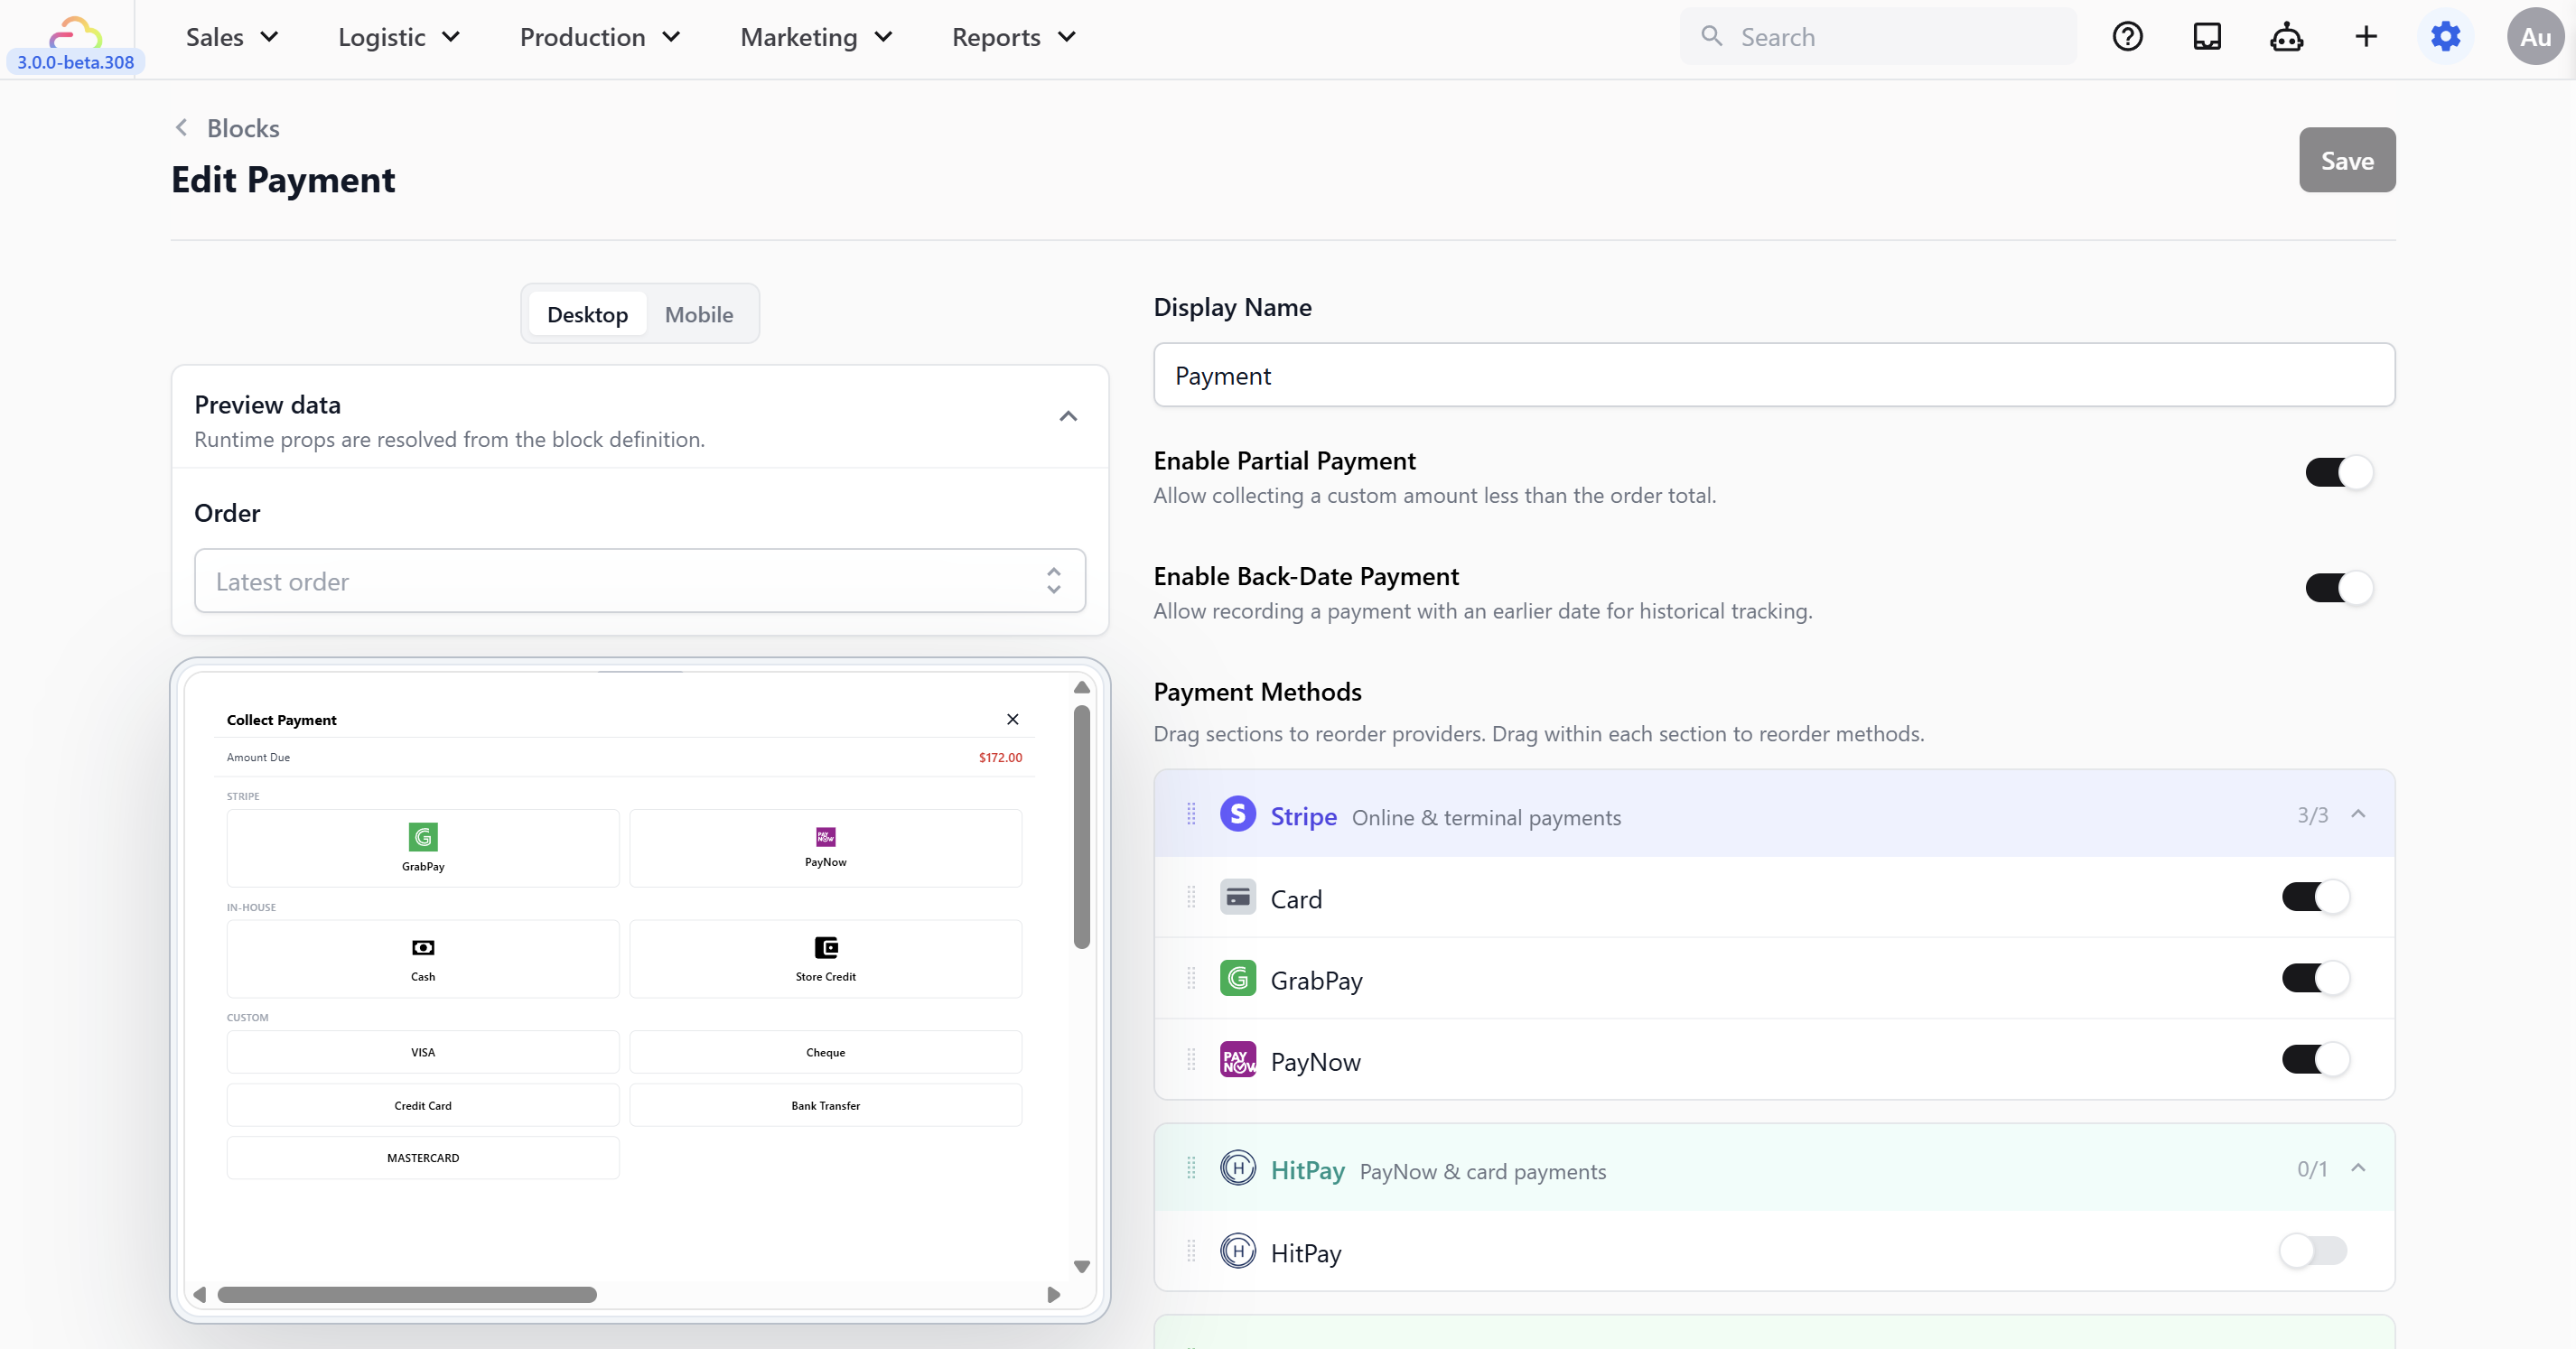
The methods available here come from what you've set up under **⚙️** Settings **→ Sales Channels section →** Point of Sale **→ Payment methods** tab. That tab decides which methods are available to your POS. This Payment block decides which available methods actually show at the counter, and the order they appear in. To configure it see [Setting Up Your Payment Methods at POS](/docs/setting-up-your-payment-methods-at-pos)
- **Display Name** → the label shown at the top of the payment panel. Leave as "Payment" or rename it.
- **Enable Partial Payment** → lets staff collect less than the full amount (e.g., split payments or deposits).
- **Enable Back-Date Payment** → lets staff record a payment with an earlier date.
- **Payment Methods** → turn on the methods you accept:
| Provider | Methods available at POS |
| --- | --- |
| Stripe | PayNow, GrabPay |
| In-House | Cash, Store Credit |
| Custom Methods | Any methods you have added under [Custom Payment Methods] |
Drag payment methods to reorder — put your most-used method at the top.
Click Save when done.
---
### Order Confirmation
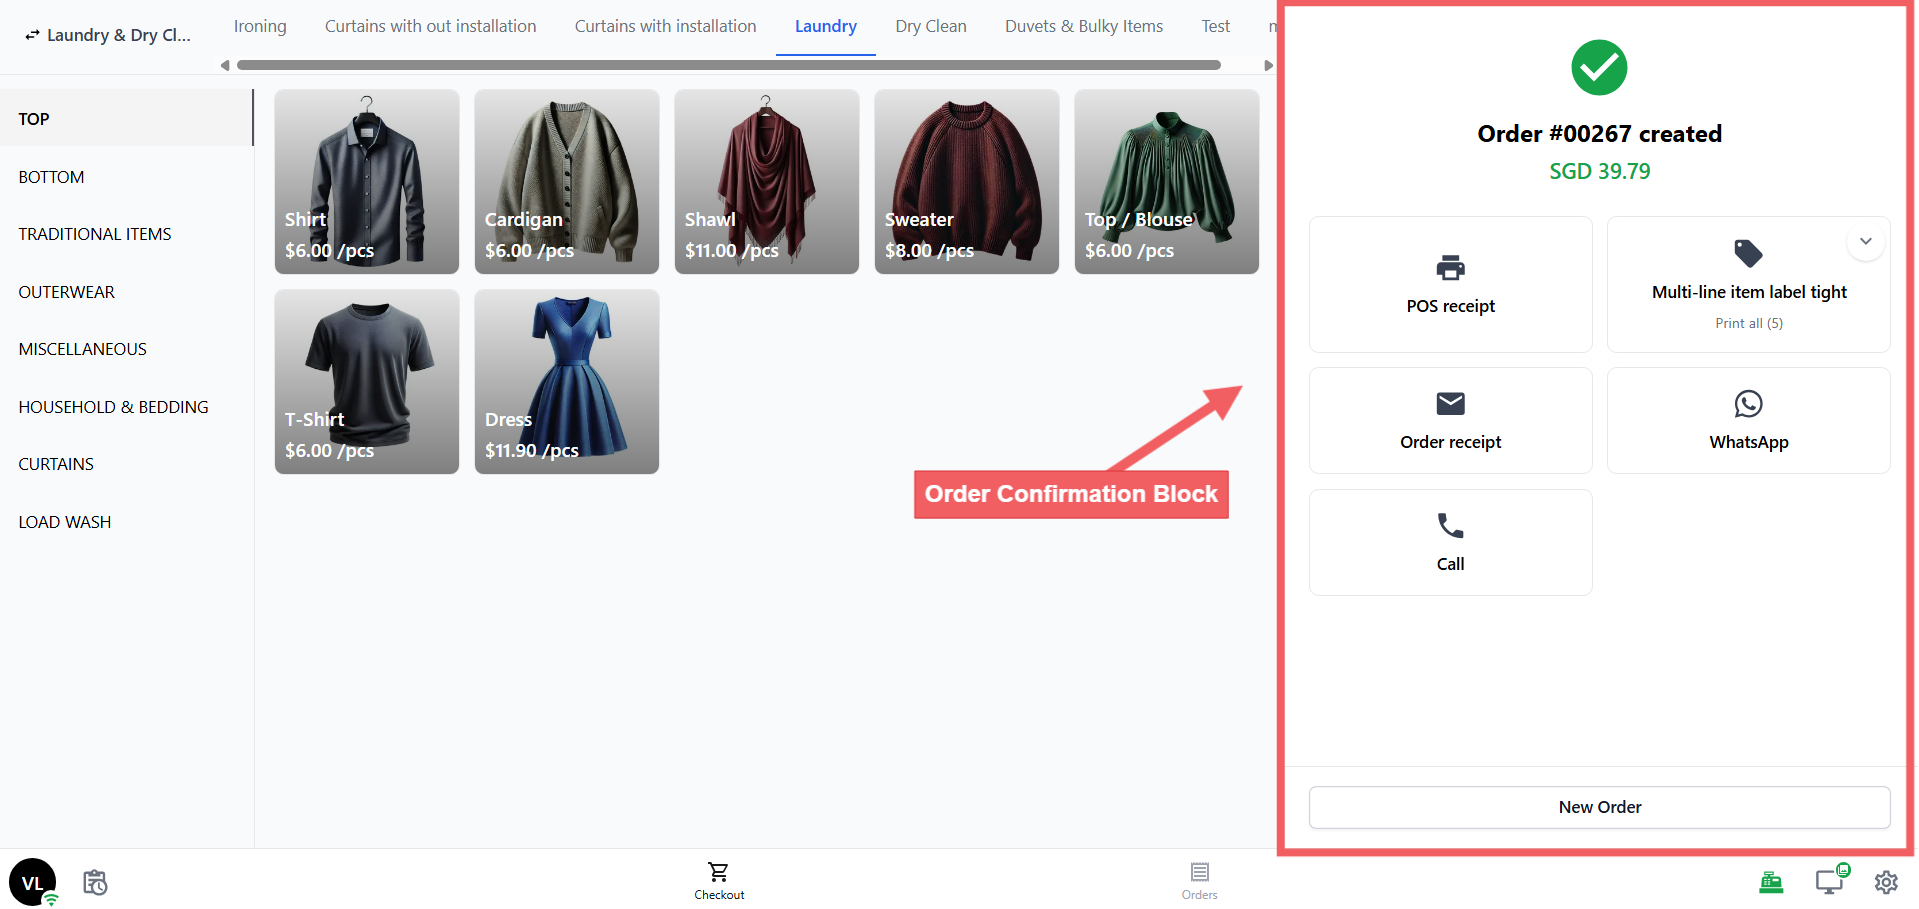
The screen shown right after an order is placed — a green checkmark, the order total, and action buttons.
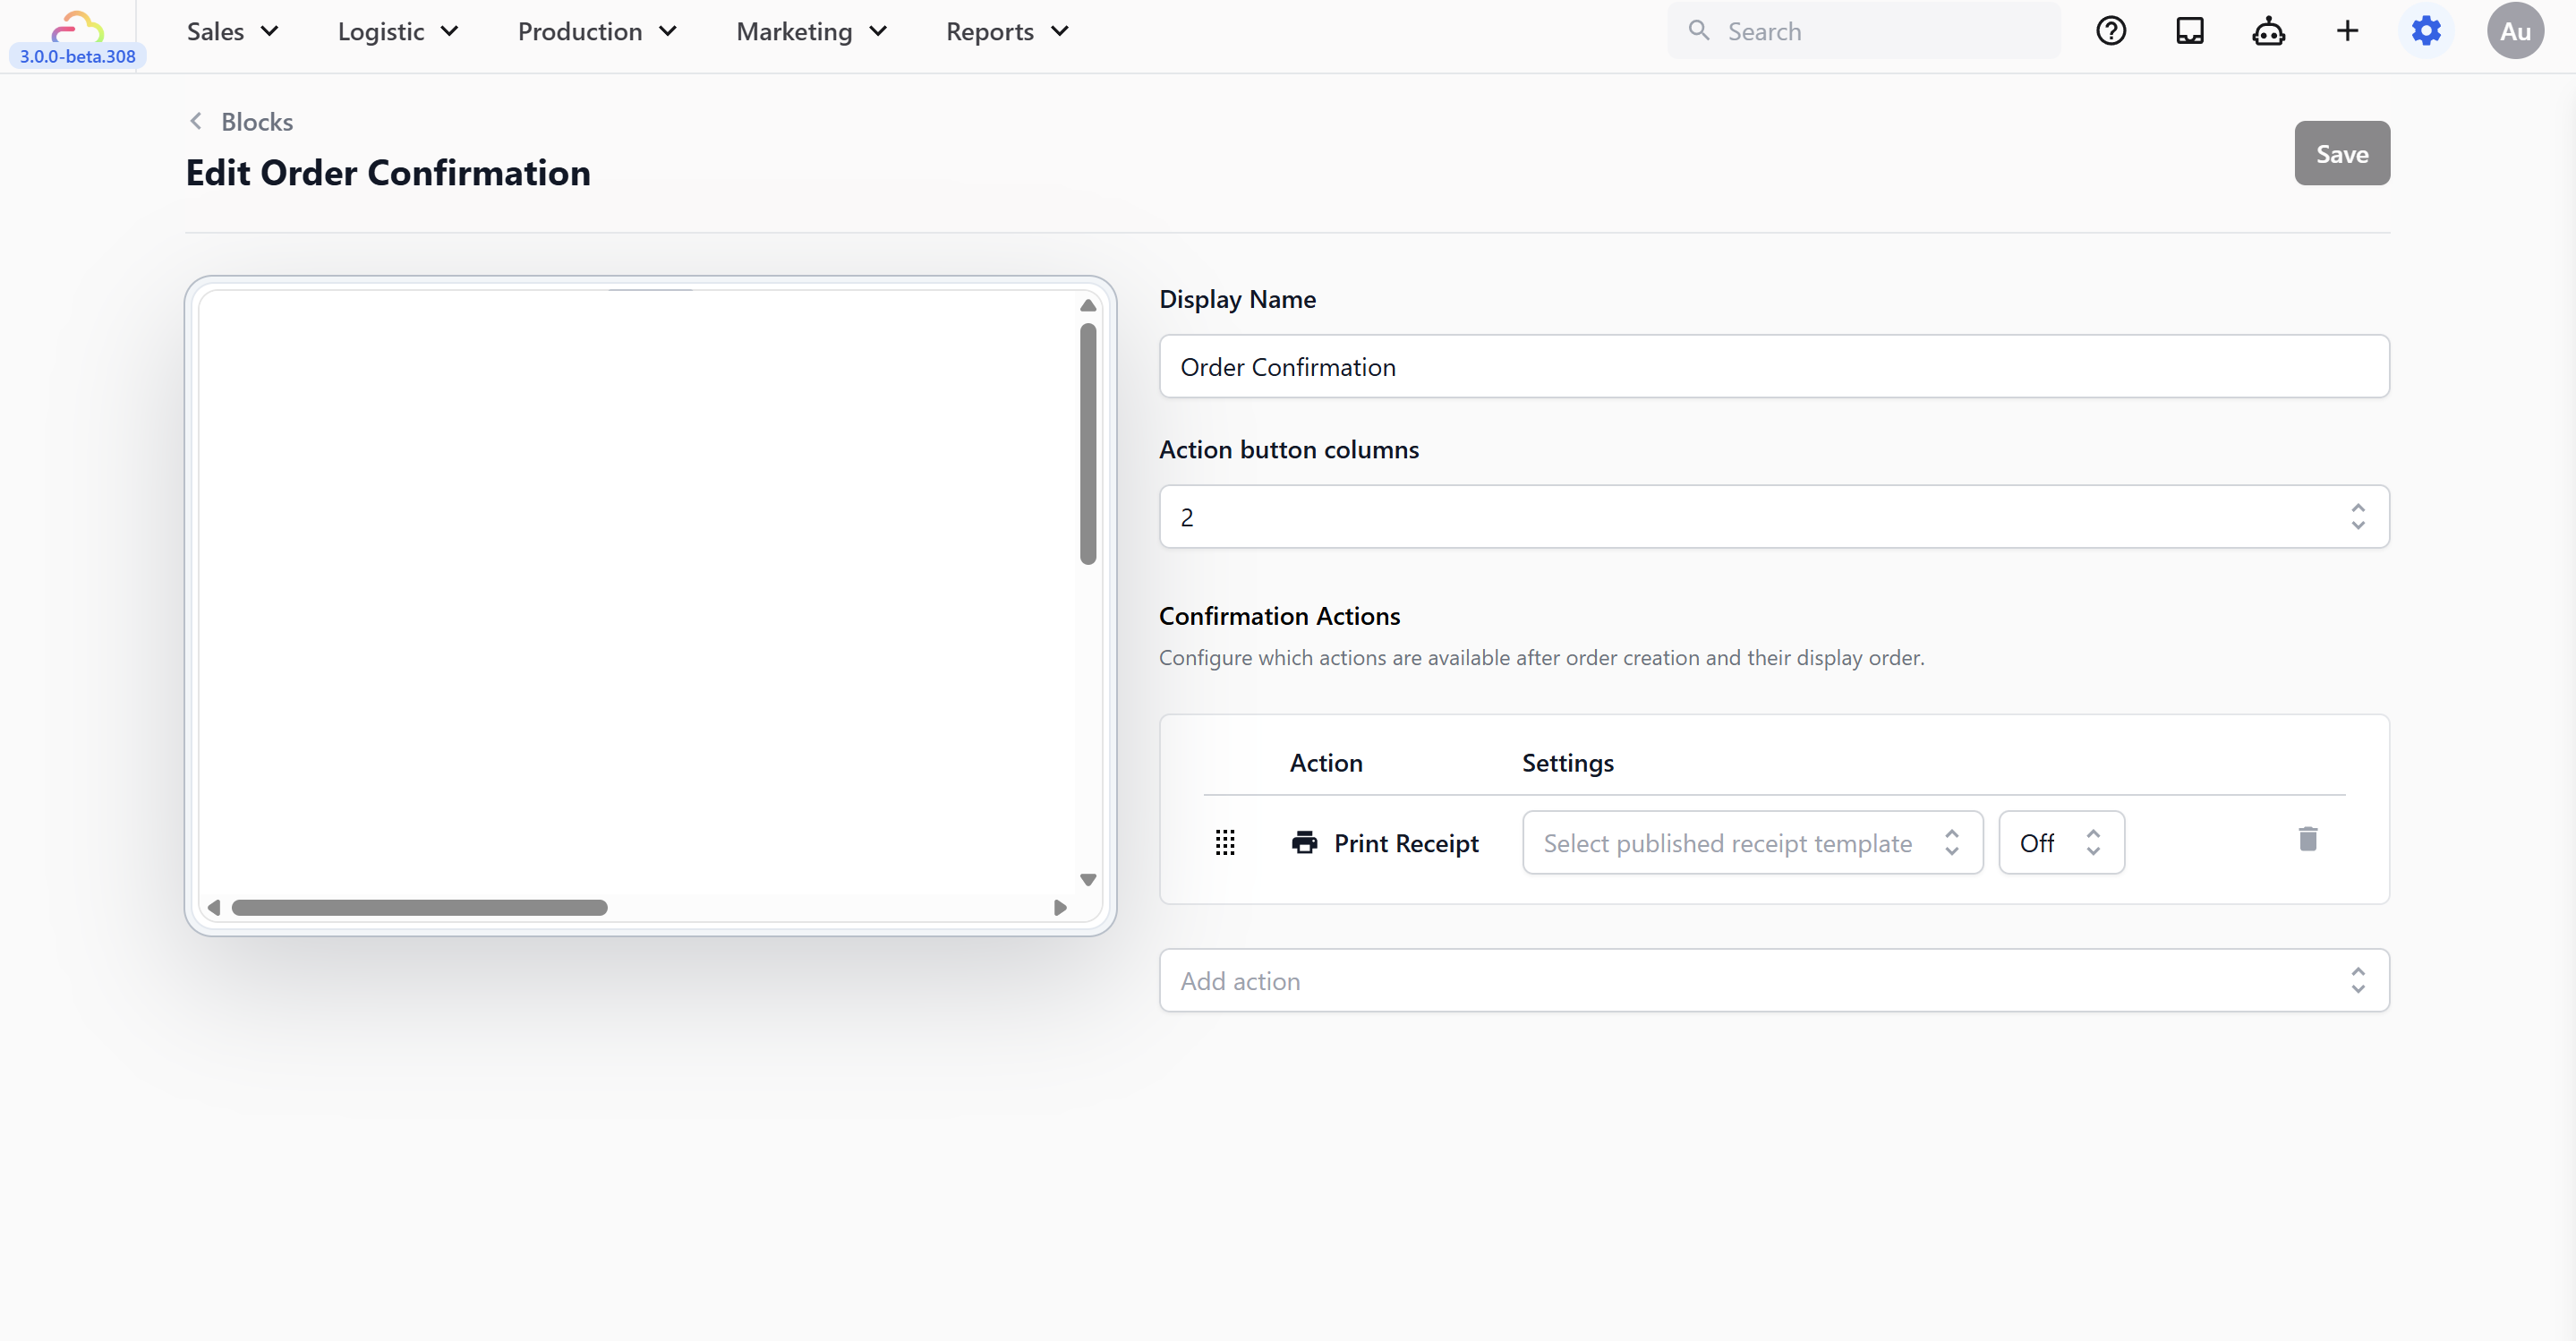
- **Display Name** → the label shown at the top of the order confirmation panel. Leave as "Order Confirmation" or rename it.
- **Action button columns** → choose 1, 2, or 3 columns for the button layout.
- **Confirmation Actions** → buttons shown after an order. Print Receipt is included by default. You can add:
| Action | What it does |
| --- | --- |
| Print Receipt | Prints the order receipt. Select which published receipt template to use. |
| Print Labels | Prints item labels for the order. Select which published label template to use. |
| WhatsApp | Sends a WhatsApp message to the customer. |
| Email | Sends an email to the customer. Select which published email template to use. |
| Call | Opens the phone dialer with the customer's number. |
| Direction | Opens maps with the customer's address. |
| Page Link | Navigates staff to another page in the POS. Most shops don't need this — skip it when getting started. |
Next to the receipt and label template selector, there is a number setting — **Off, 1, 2, or 3**. This controls auto-printing: how many copies print automatically the moment the confirmation screen appears, without staff needing to tap anything.
Set this to **1** so it prints automatically with every order — no tapping needed. Just make sure your printer is connected and your template is selected.
You need a published receipt template before this works. If you haven't set one up yet, see [Setting Up Your Business Unit](/docs/setting-up-your-business-unit-for-laundry) where you created your receipt template in the Documents section. Come back here once it's published and select it from the dropdown.
You can add Print Receipt more than once with different templates — for example, one for customer receipt and another prints an internal receipt for your plant team.
Click Save when done.
---
### Cash Drawer
Tracks all cash in and out each day. Set your **Default Starting Cash** amount (e.g., $100) — if you leave it at $0, staff will type it in each time they open the drawer.
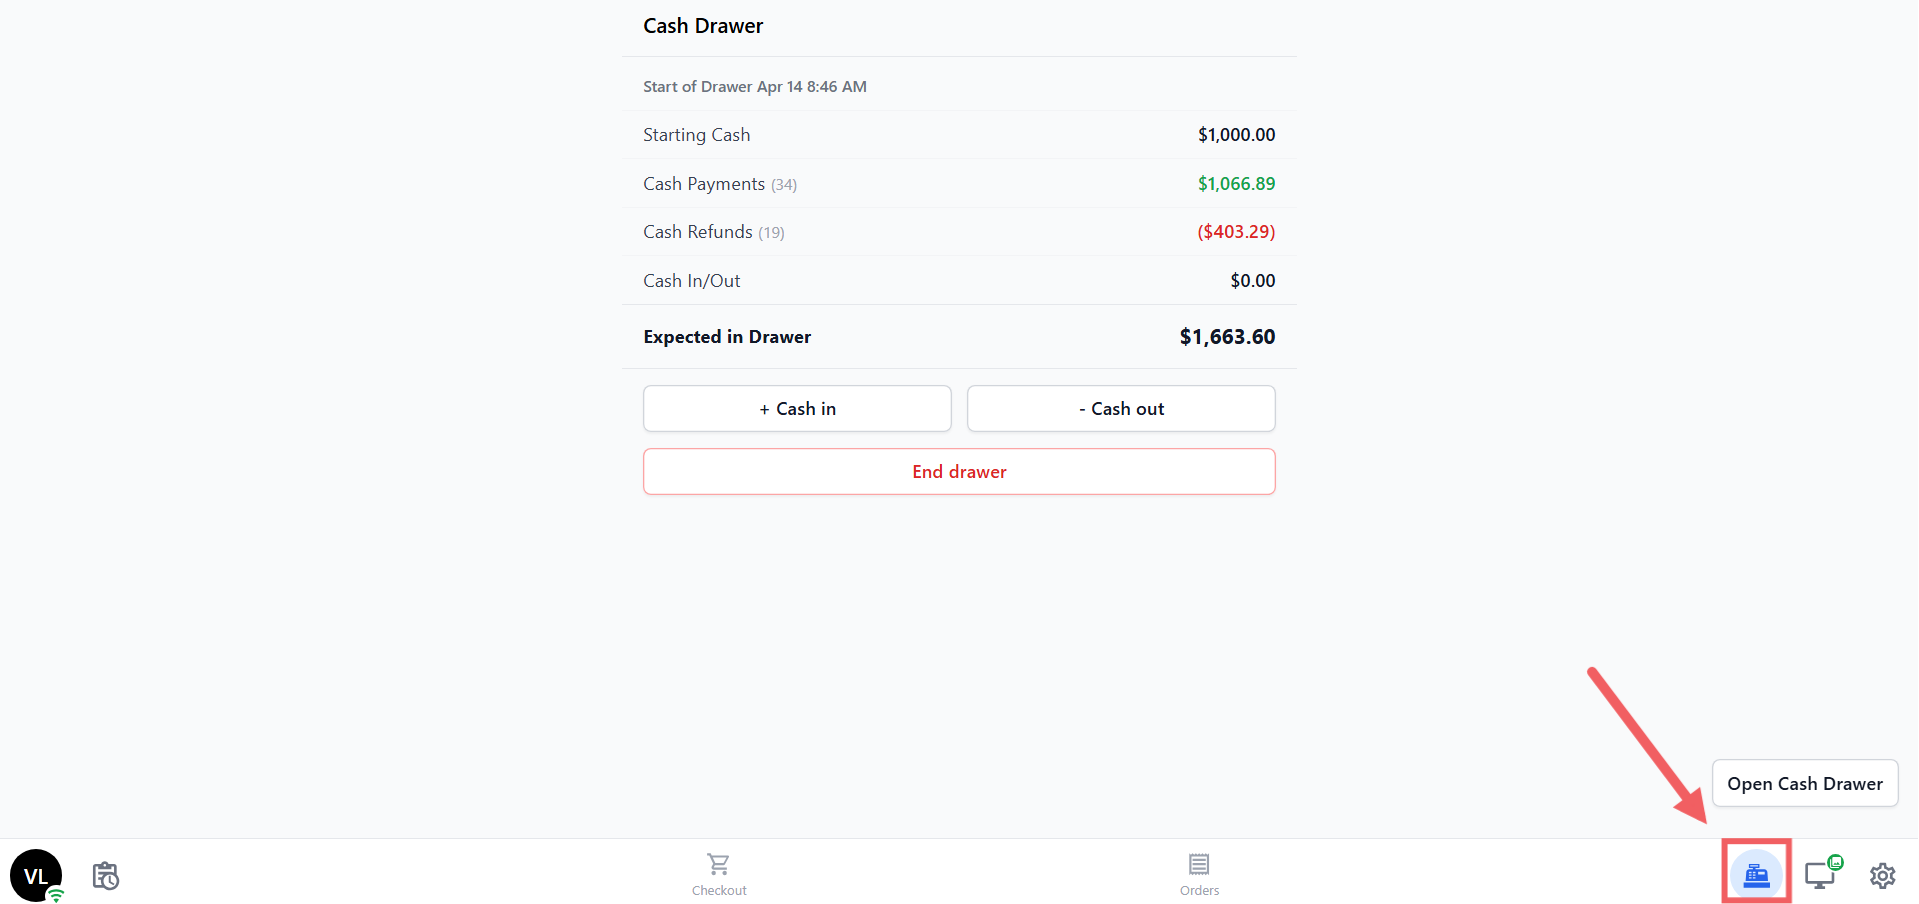
For full setup instructions and how the Cash Drawer works on your POS device, see [Set Up Your Cash Drawer on the POS](/docs/set-cash-drawer-on-your-pos)
---
### Daily Sales
Powers your end-of-day report. You'll need to link a **Close of Day Flow** and a **Close of Day Receipt Template** before your staff can use it.
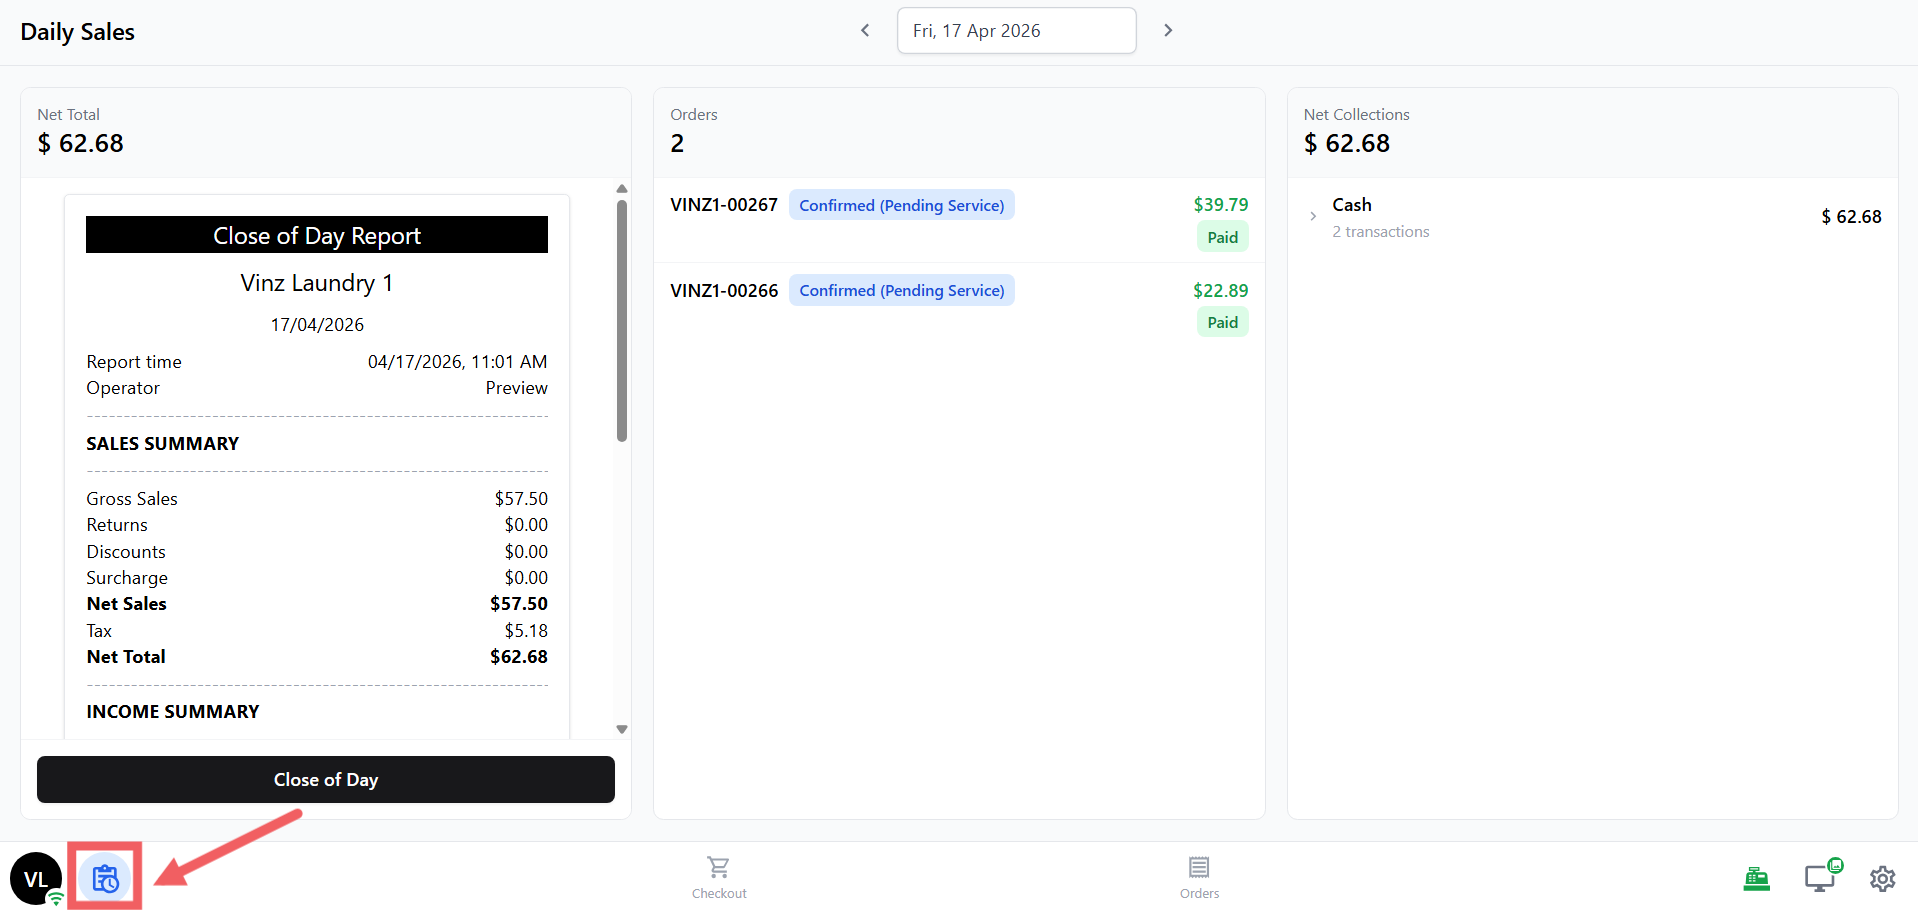
For full setup instructions, see [Set up your Close of Day Report](/docs/setting-up-the-close-of-day-report-template)
---
### Time Clock
Lets your staff clock in and out for their shifts. By default it's optional — change **Clock-in Mode** to Required if you want staff to clock in before they can access the POS.
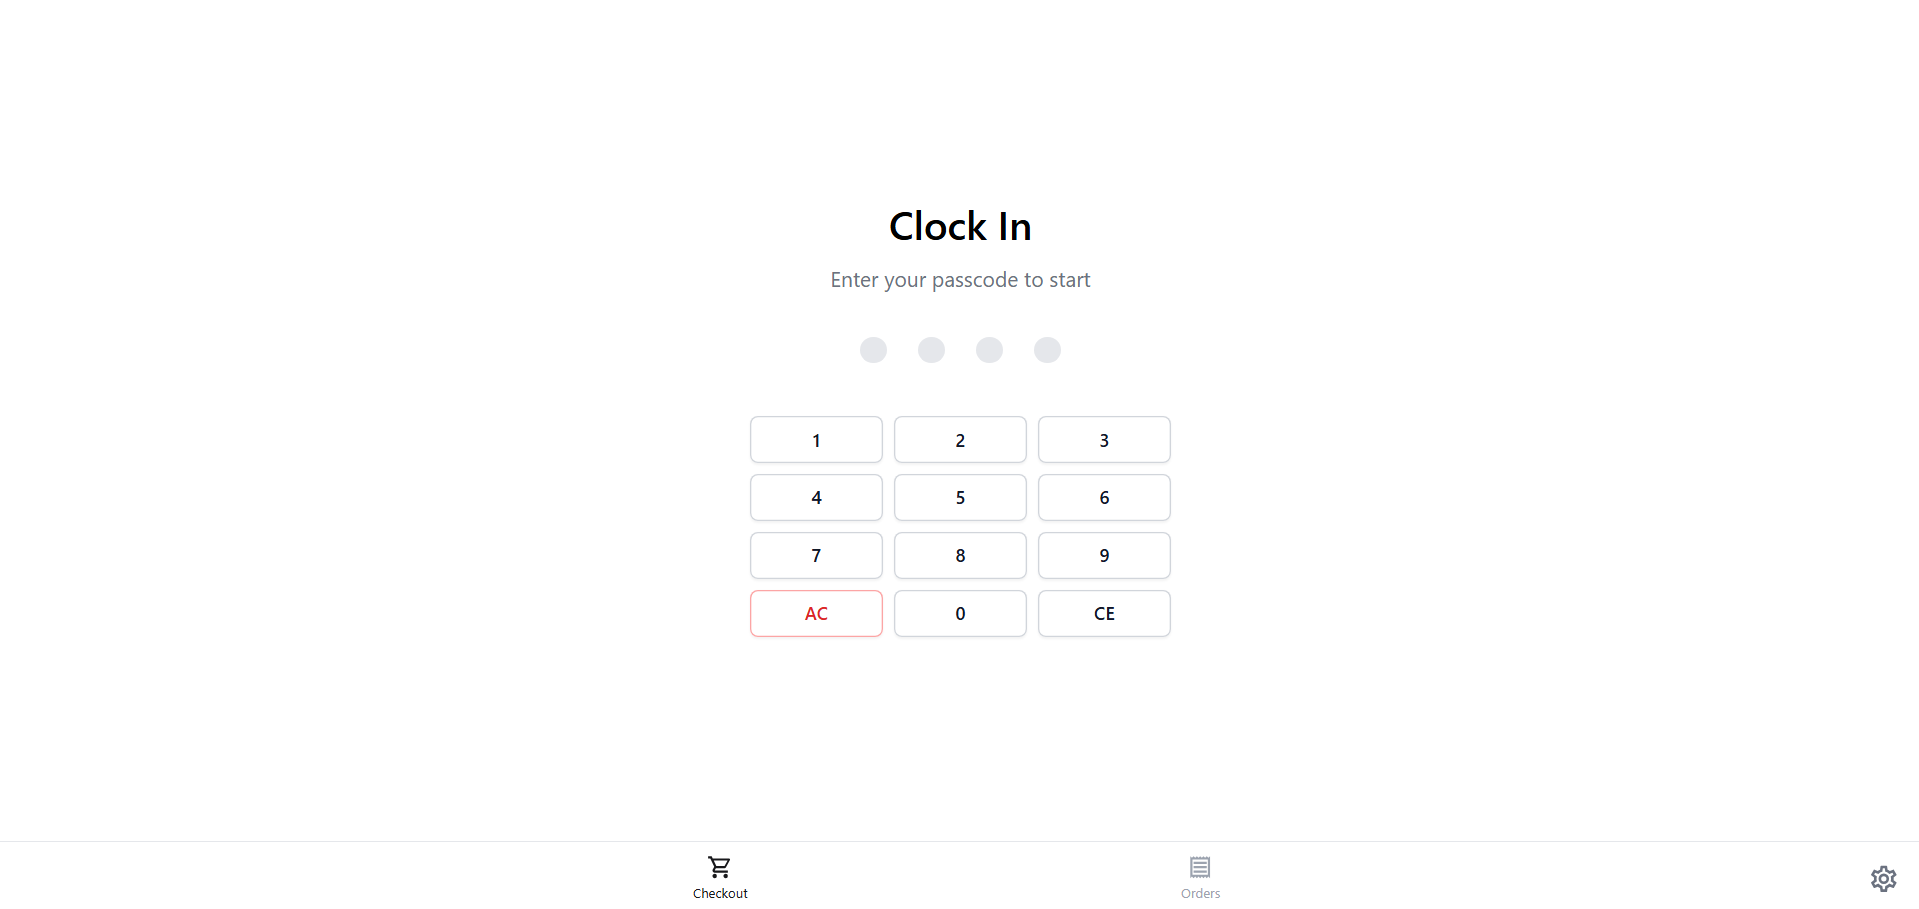
For full setup instructions and how the Time Clock works on your POS device, see [Set up your Time Clock](/docs/set-up-time-clock-on-your-pos)
---
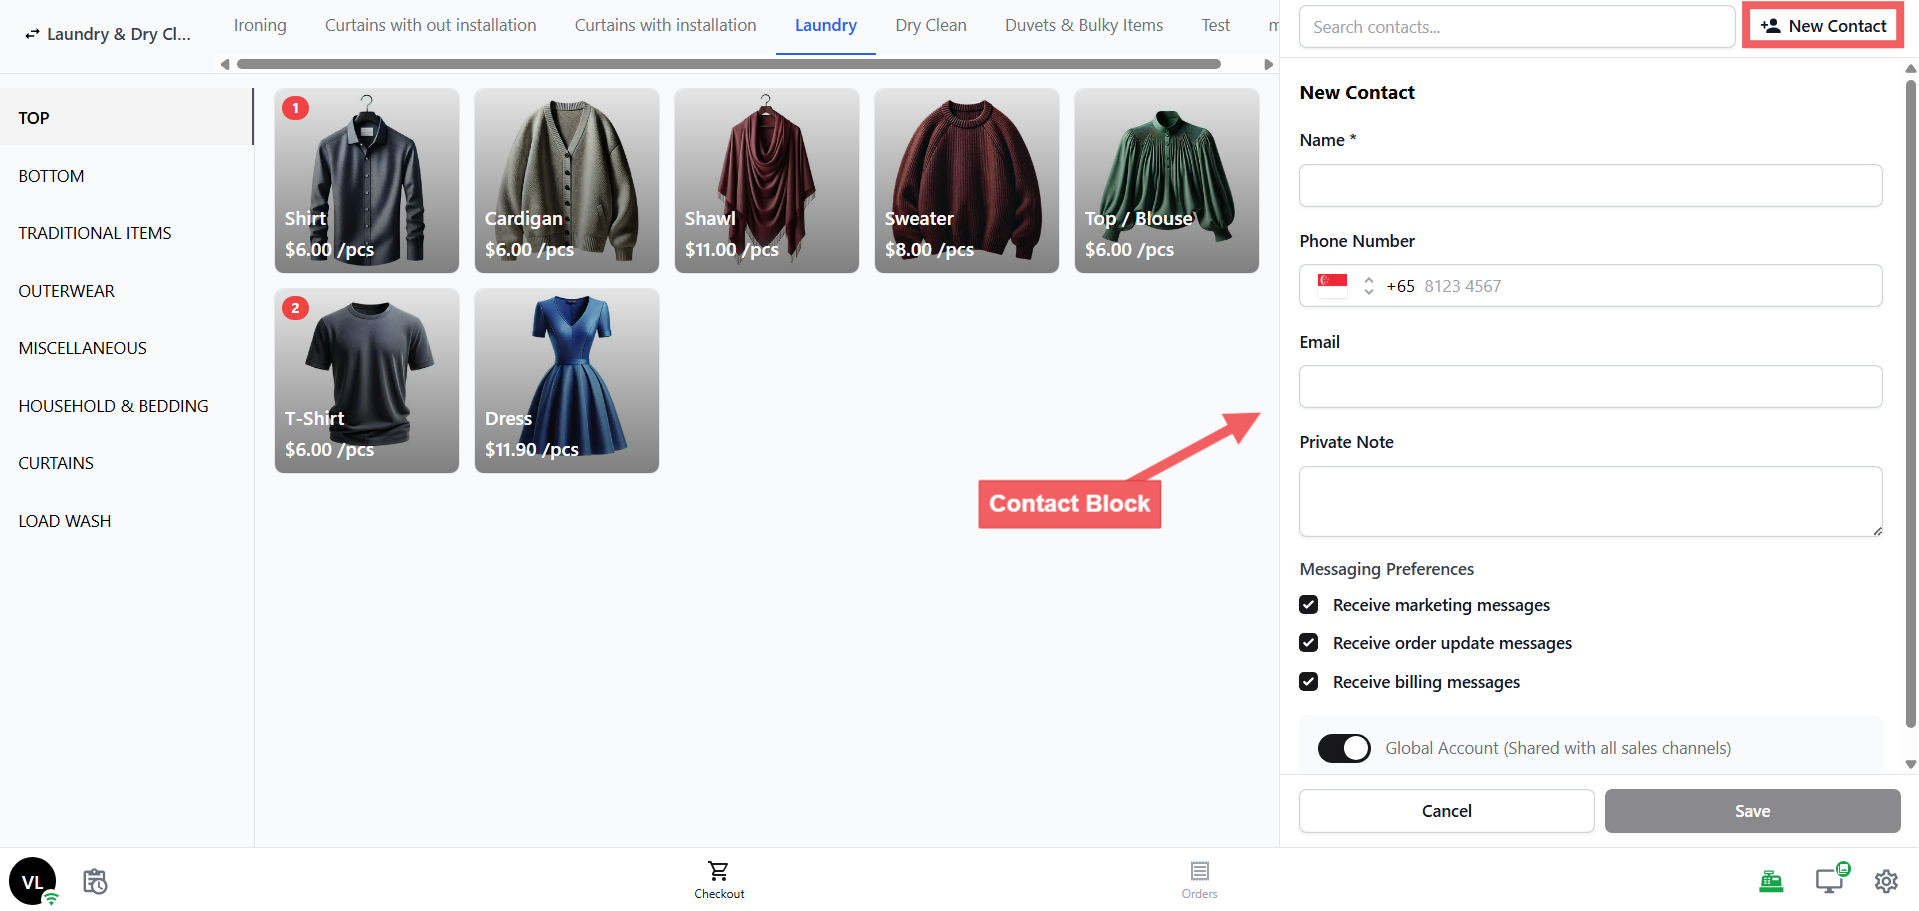
### Contact
The customer form when adding a new contact. Already collects name, phone, and email by default.
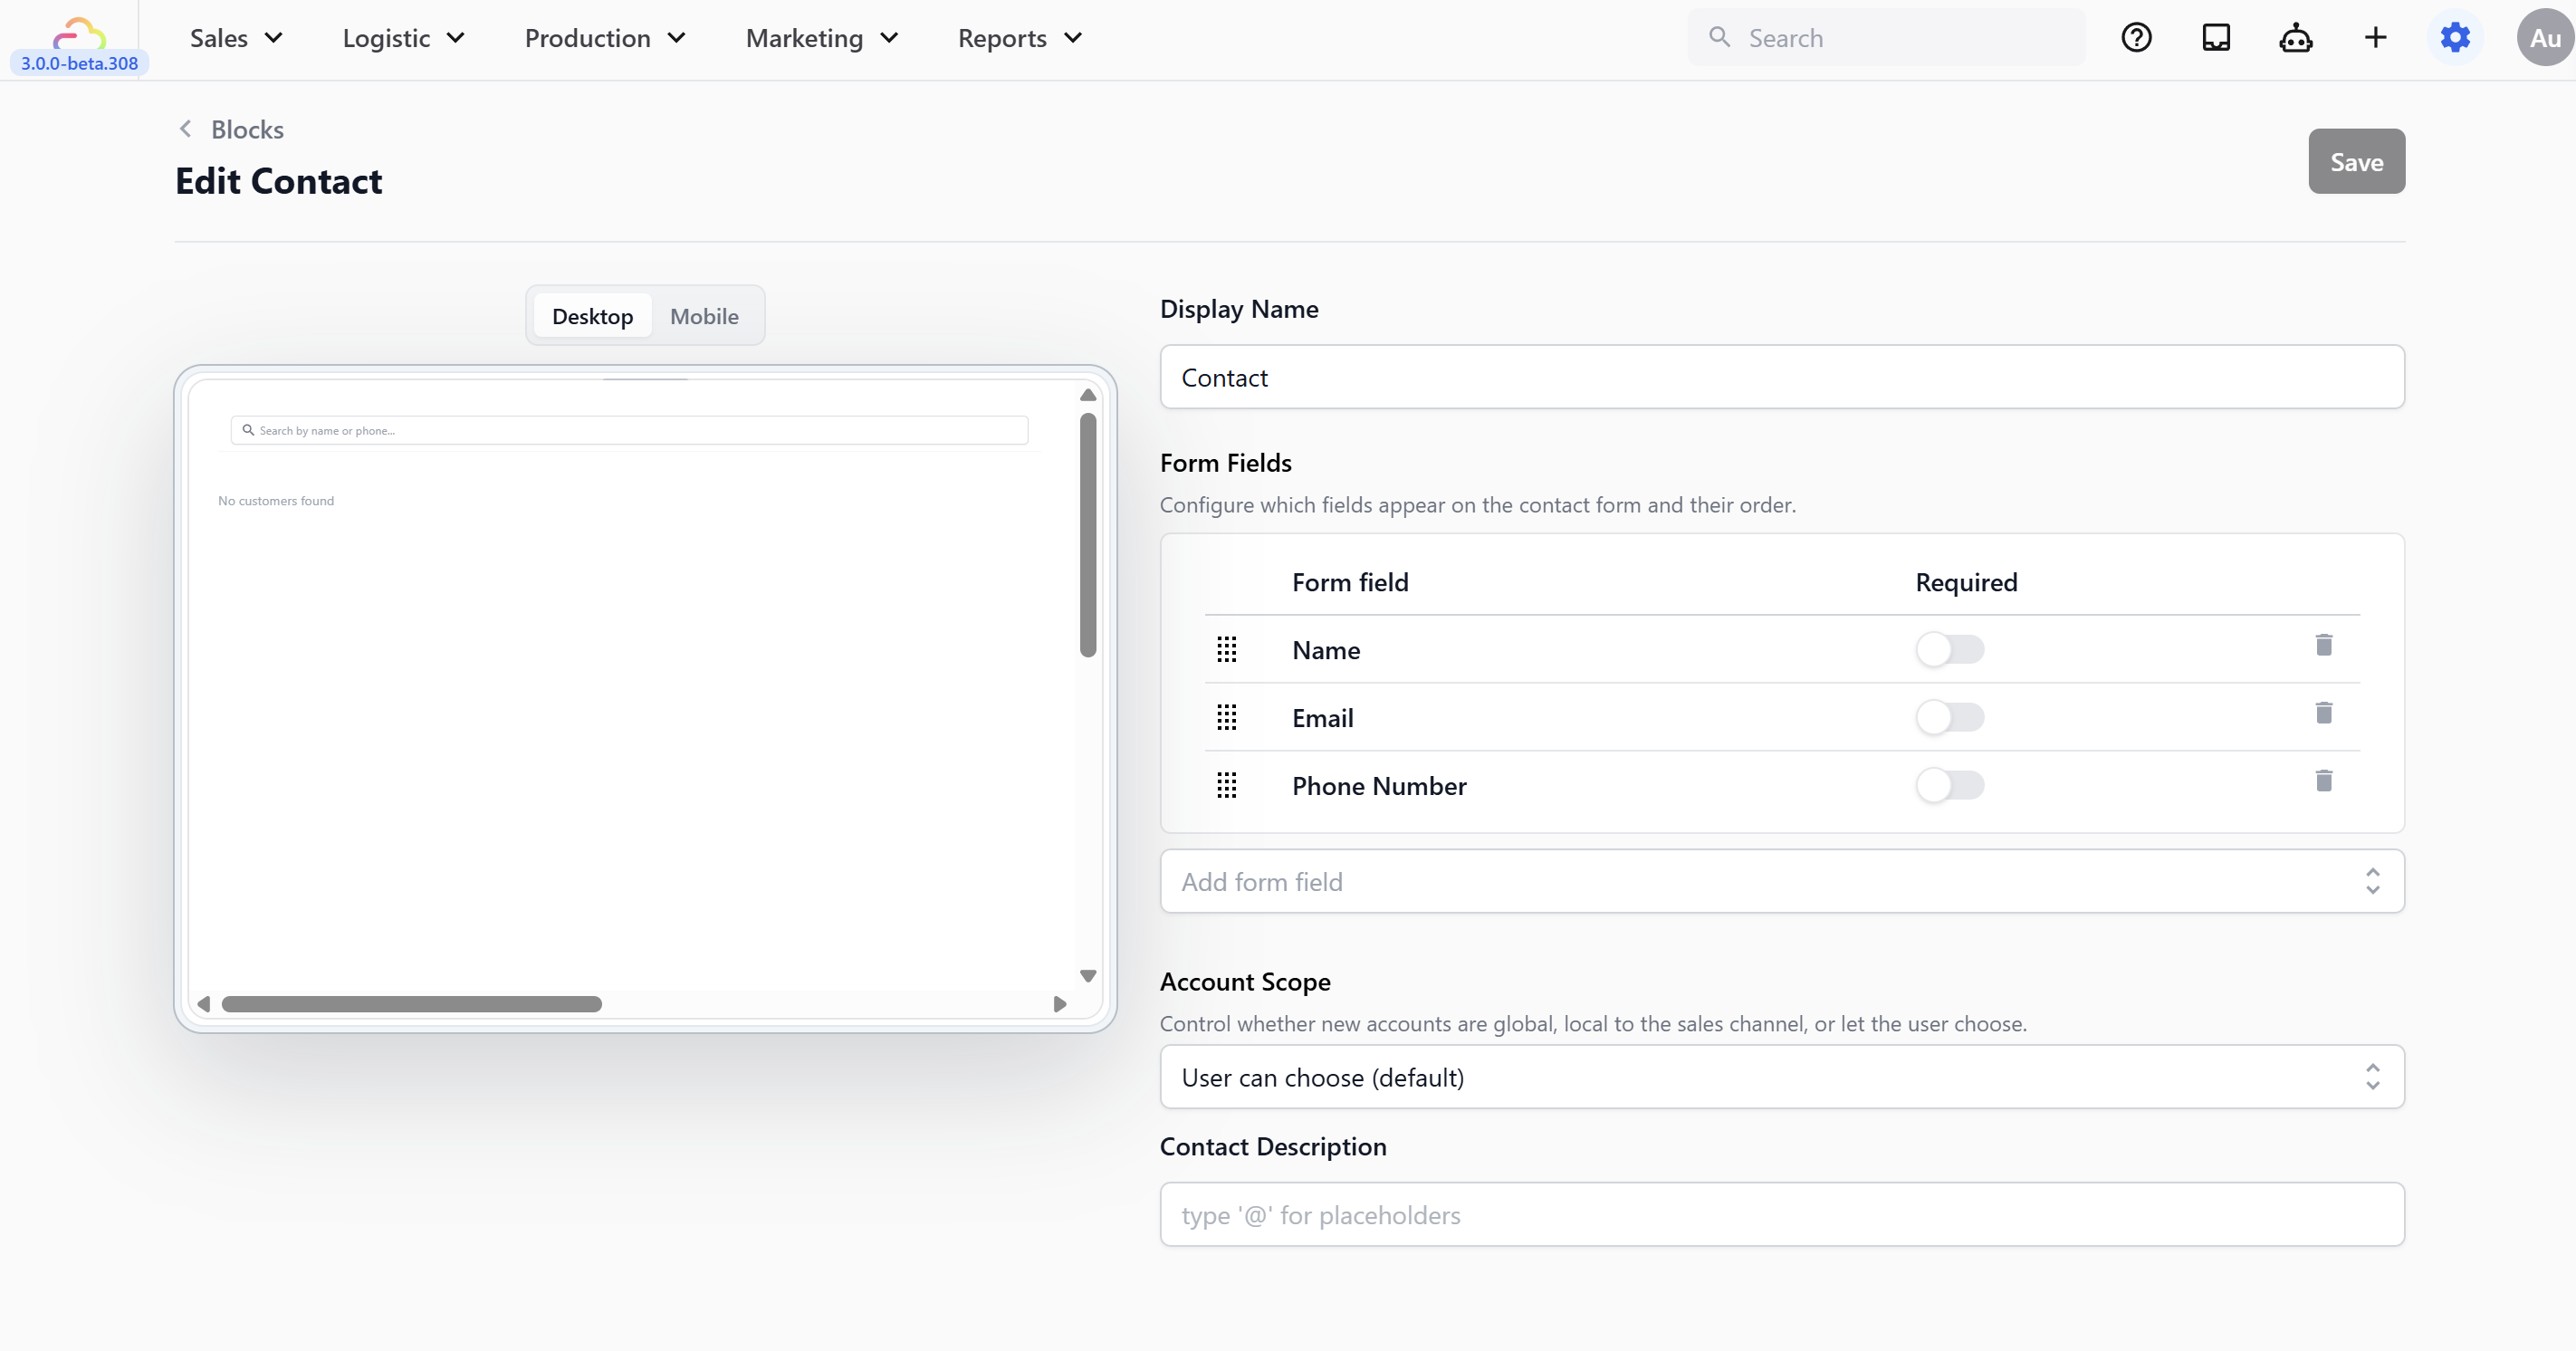
- **Display Name** → the label shown at the top of the contact panel. Leave as "Contact" or rename it.
- **Form Fields** → configure which fields appear (name, phone, email, birthday, remarks).
- **Account Scope** → controls whether new customers are visible across all your locations or only at the current counter. Options: **Always global**, **Always local to sales channel**, or **User can choose** (default).
- **Contact Description** → a short line shown under the customer's name in the cart. Type `@` to insert placeholders (e.g., loyalty tier, outstanding balance).
| Option | What it means |
| --- | --- |
| Always global | New customers are visible across all your locations and channels |
| Always local to sales channel | New customers are only visible at the current counter |
| User can choose (default) | Staff see a toggle when creating a customer and can choose themselves |
For multi-location businesses, **Always global** is usually the right choice — so a customer registered at one branch is visible at all others.
Click Save when done.
---
## FAQs
**Which template should I pick?**
> Pick Service POS — it's the template for all service businesses (laundry, bag repair, tailoring, etc.). EasyBiz automatically sets up 2 screens (Checkout, Orders) and 10 blocks for you.
**Does the app name I enter appear on customer receipts?**
> No. The app name is only for your internal reference in Settings — it helps you tell your apps apart if you run more than one counter. Receipts use the Location name instead.
**Do I need to configure every block before taking my first order?**
> No. At minimum, turn on your payment methods and link your receipt template. Catalog, Cart, Orders, Order Detail, and Contact all work out of the box — you can fine-tune them later.
**Why don't I see Stripe or HitPay in my Payment block?**
> They only appear after connecting the integration in Settings → Integrations. In-House and Custom payment methods are always available regardless.
**Why is my Catalog empty on the POS?**
> The Catalog only shows items if your Business Unit has a price list or product catalog linked. Check your [Business Unit settings](/docs/setting-up-your-business-unit-for-laundry) to make sure the catalog is attached.
---
## What's Next?
Now that your POS app is created, continue to [Sign in to your POS](/docs/sign-in-to-your-pos) to log in for the first time on the device that will live at the counter.