## What You Need Before Starting
- A **HitPay account** (instructions below)
- Access to your EasyBiz Console
---
## Step 1 — Create a HitPay Account
If you already have a HitPay account, skip to Step 2.
1. Go to [HitPay](https://www.hitpayapp.com) and click **Sign Up / Get started for free**
For detailed instructions on creating and verifying your HitPay account, visit HitPay's official getting started guide → [HitPay's official account creation guide](https://docs.hitpayapp.com/setup/account-creation)
2. Enter your email address and create a password
3. Check your email for a verification code and enter it
4. Fill in your business details — select the category that best matches your business (e.g. Retail, Laundry, or use **Other** if nothing fits exactly)
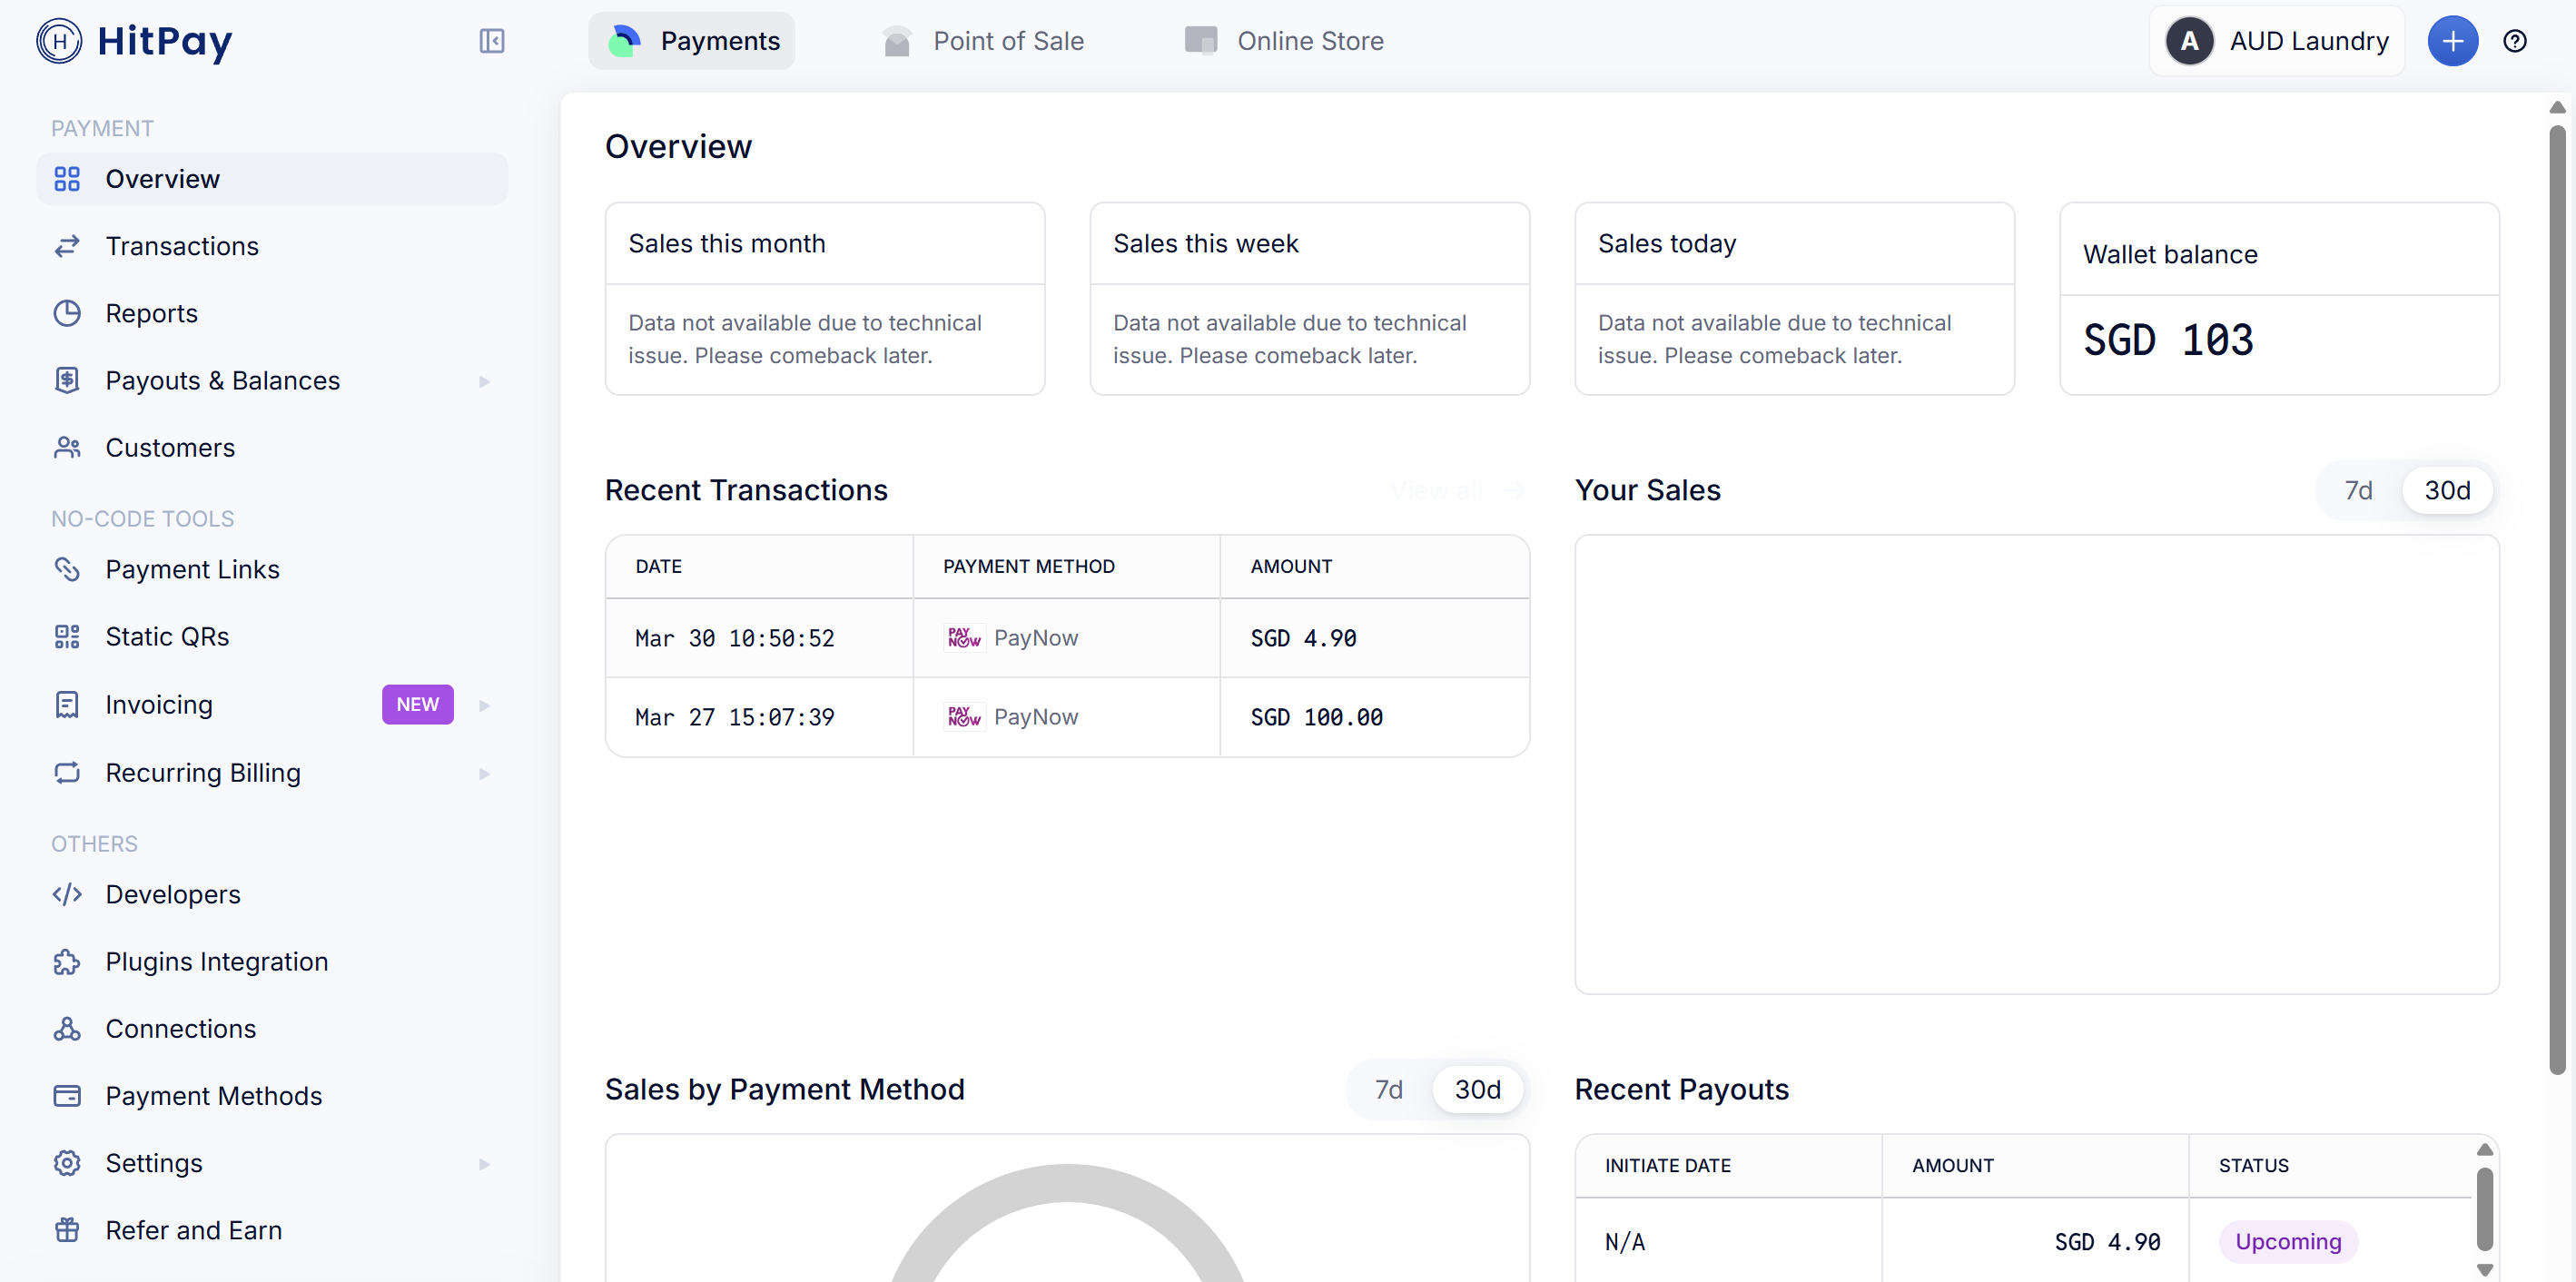
5. Complete the onboarding steps until you reach your HitPay dashboard
---
## Step 2 — Open the Connect Dialog in EasyBiz
Start in EasyBiz so you have the connect dialog open — you will copy values into it from HitPay in the next two steps.
1. In your EasyBiz Console, click the Settings (gear icon), scroll to the **Administration** section, and click Integrations
2. Find the **HitPay** row in the list and click Connect
3. A dialog titled **HitPay API credentials** opens. It has an API Key field, a **Webhook Setup** box showing your webhook URL, and a Webhook Salt field
4. In the **Webhook Setup** box, click Copy next to the webhook URL — you will paste this into HitPay in Step 4
Keep this dialog open while you work through Steps 3 and 4 in your HitPay dashboard.
---
## Step 3 — Get Your HitPay API Key
The API key is what lets EasyBiz communicate securely with your HitPay account.
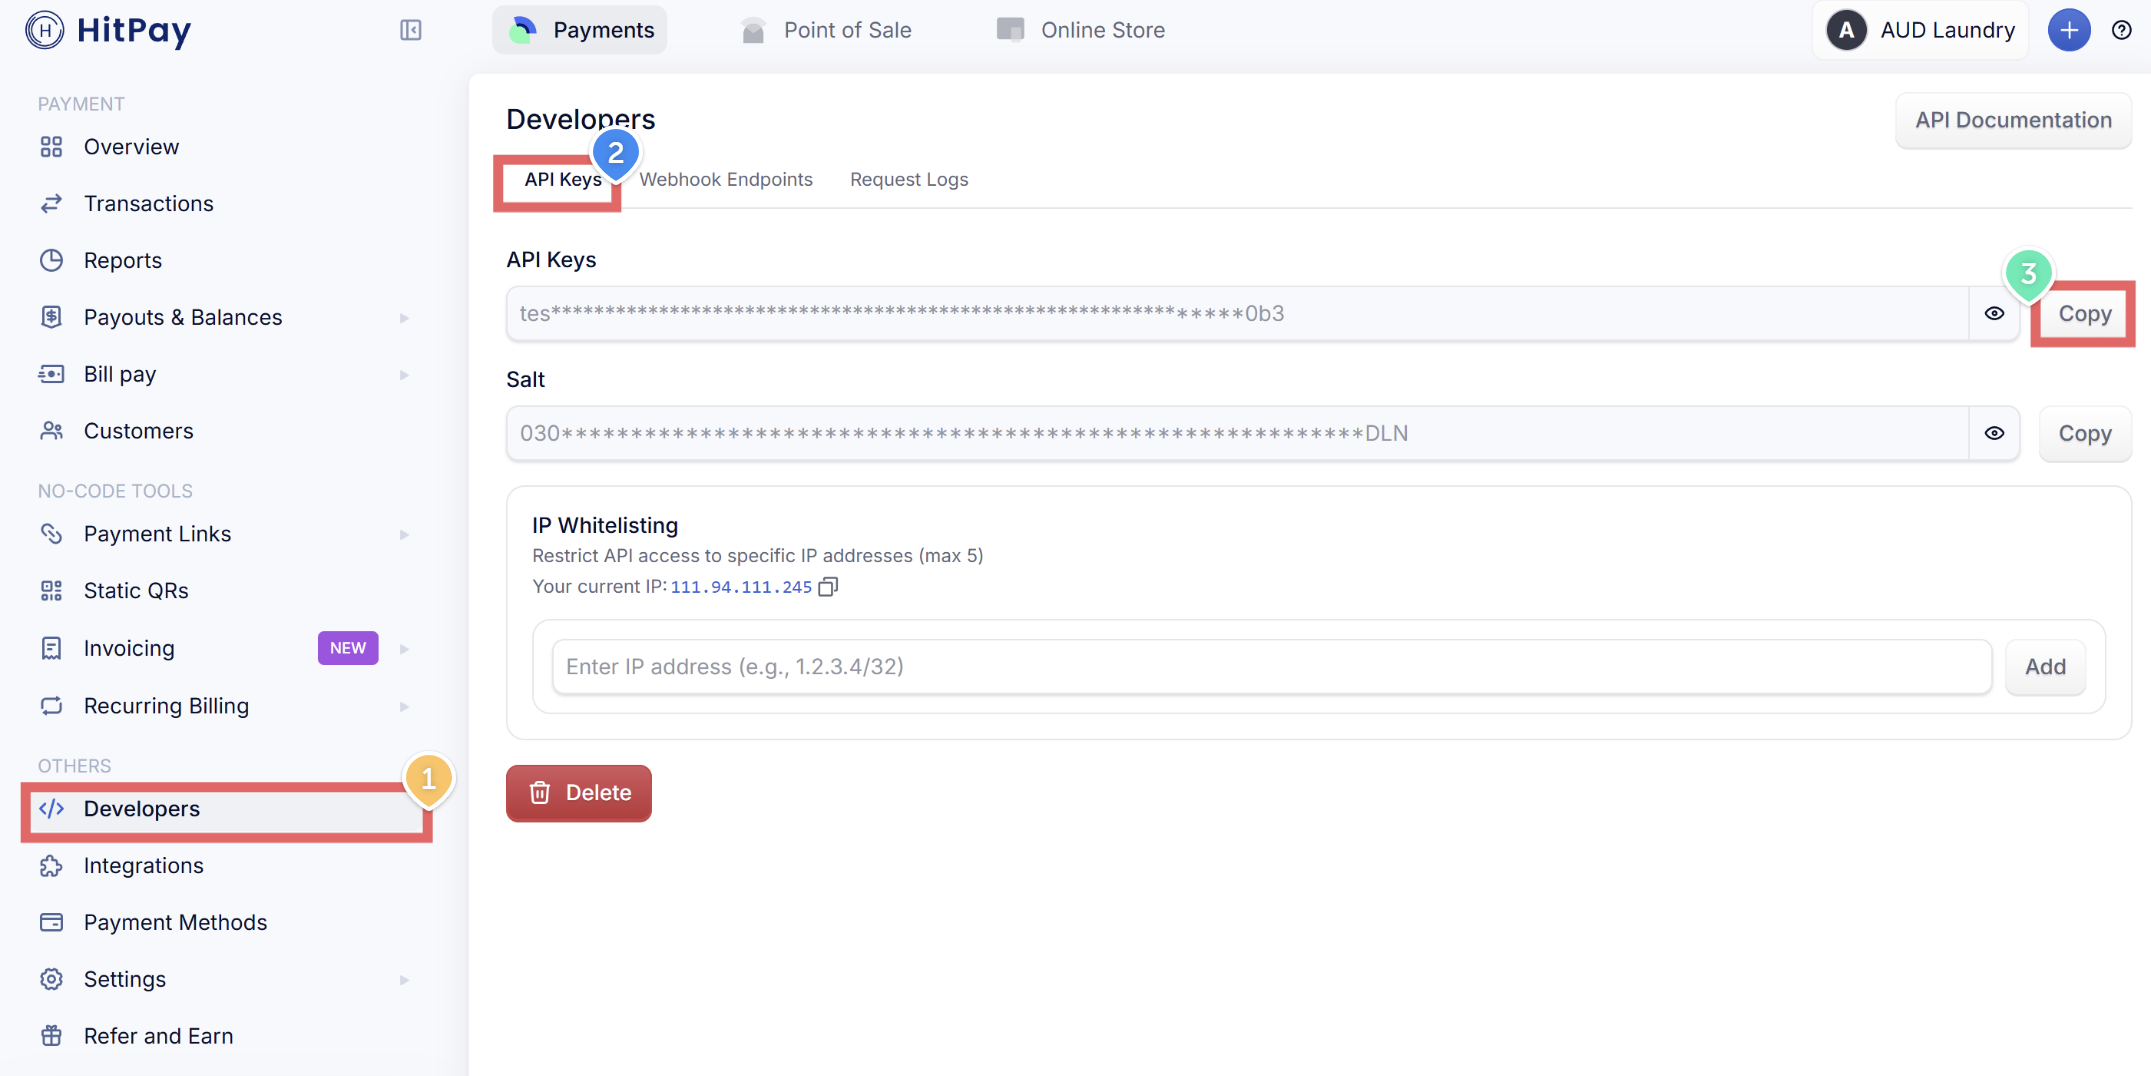
1. In your HitPay dashboard, click Developers in the left menu
2. Click the API Keys tab
3. Click Copy next to your API key
4. Go back to the EasyBiz dialog and paste it into the API Key field
For more details on managing API keys and understanding live vs test keys, see HitPay's API documentation → [HitPay Developer Docs](https://docs.hitpayapp.com/docs)
---
## Step 4 — Set Up a Webhook in HitPay
A webhook is how HitPay notifies EasyBiz when a payment is completed or fails. You need to set this up so EasyBiz knows when a customer has paid.
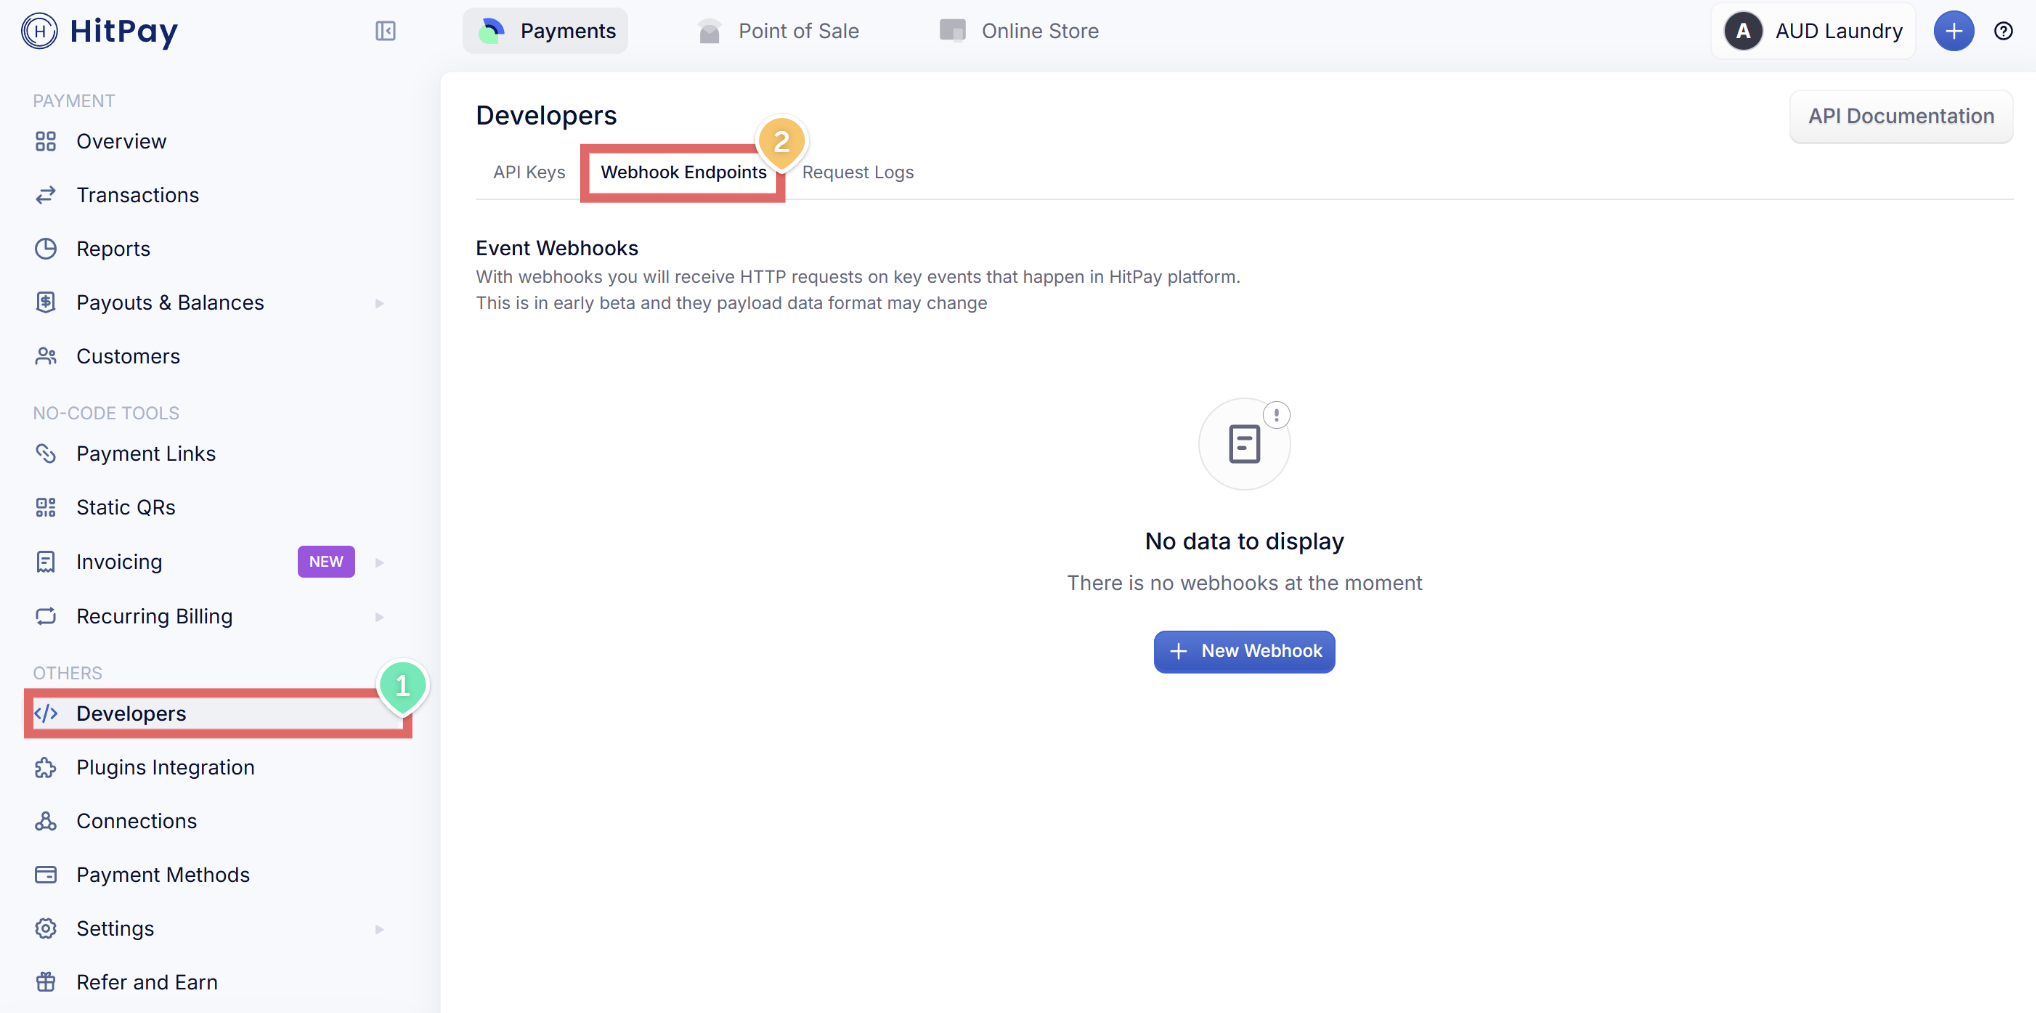
1. In your HitPay dashboard, click Developers → Webhook Endpoints tab
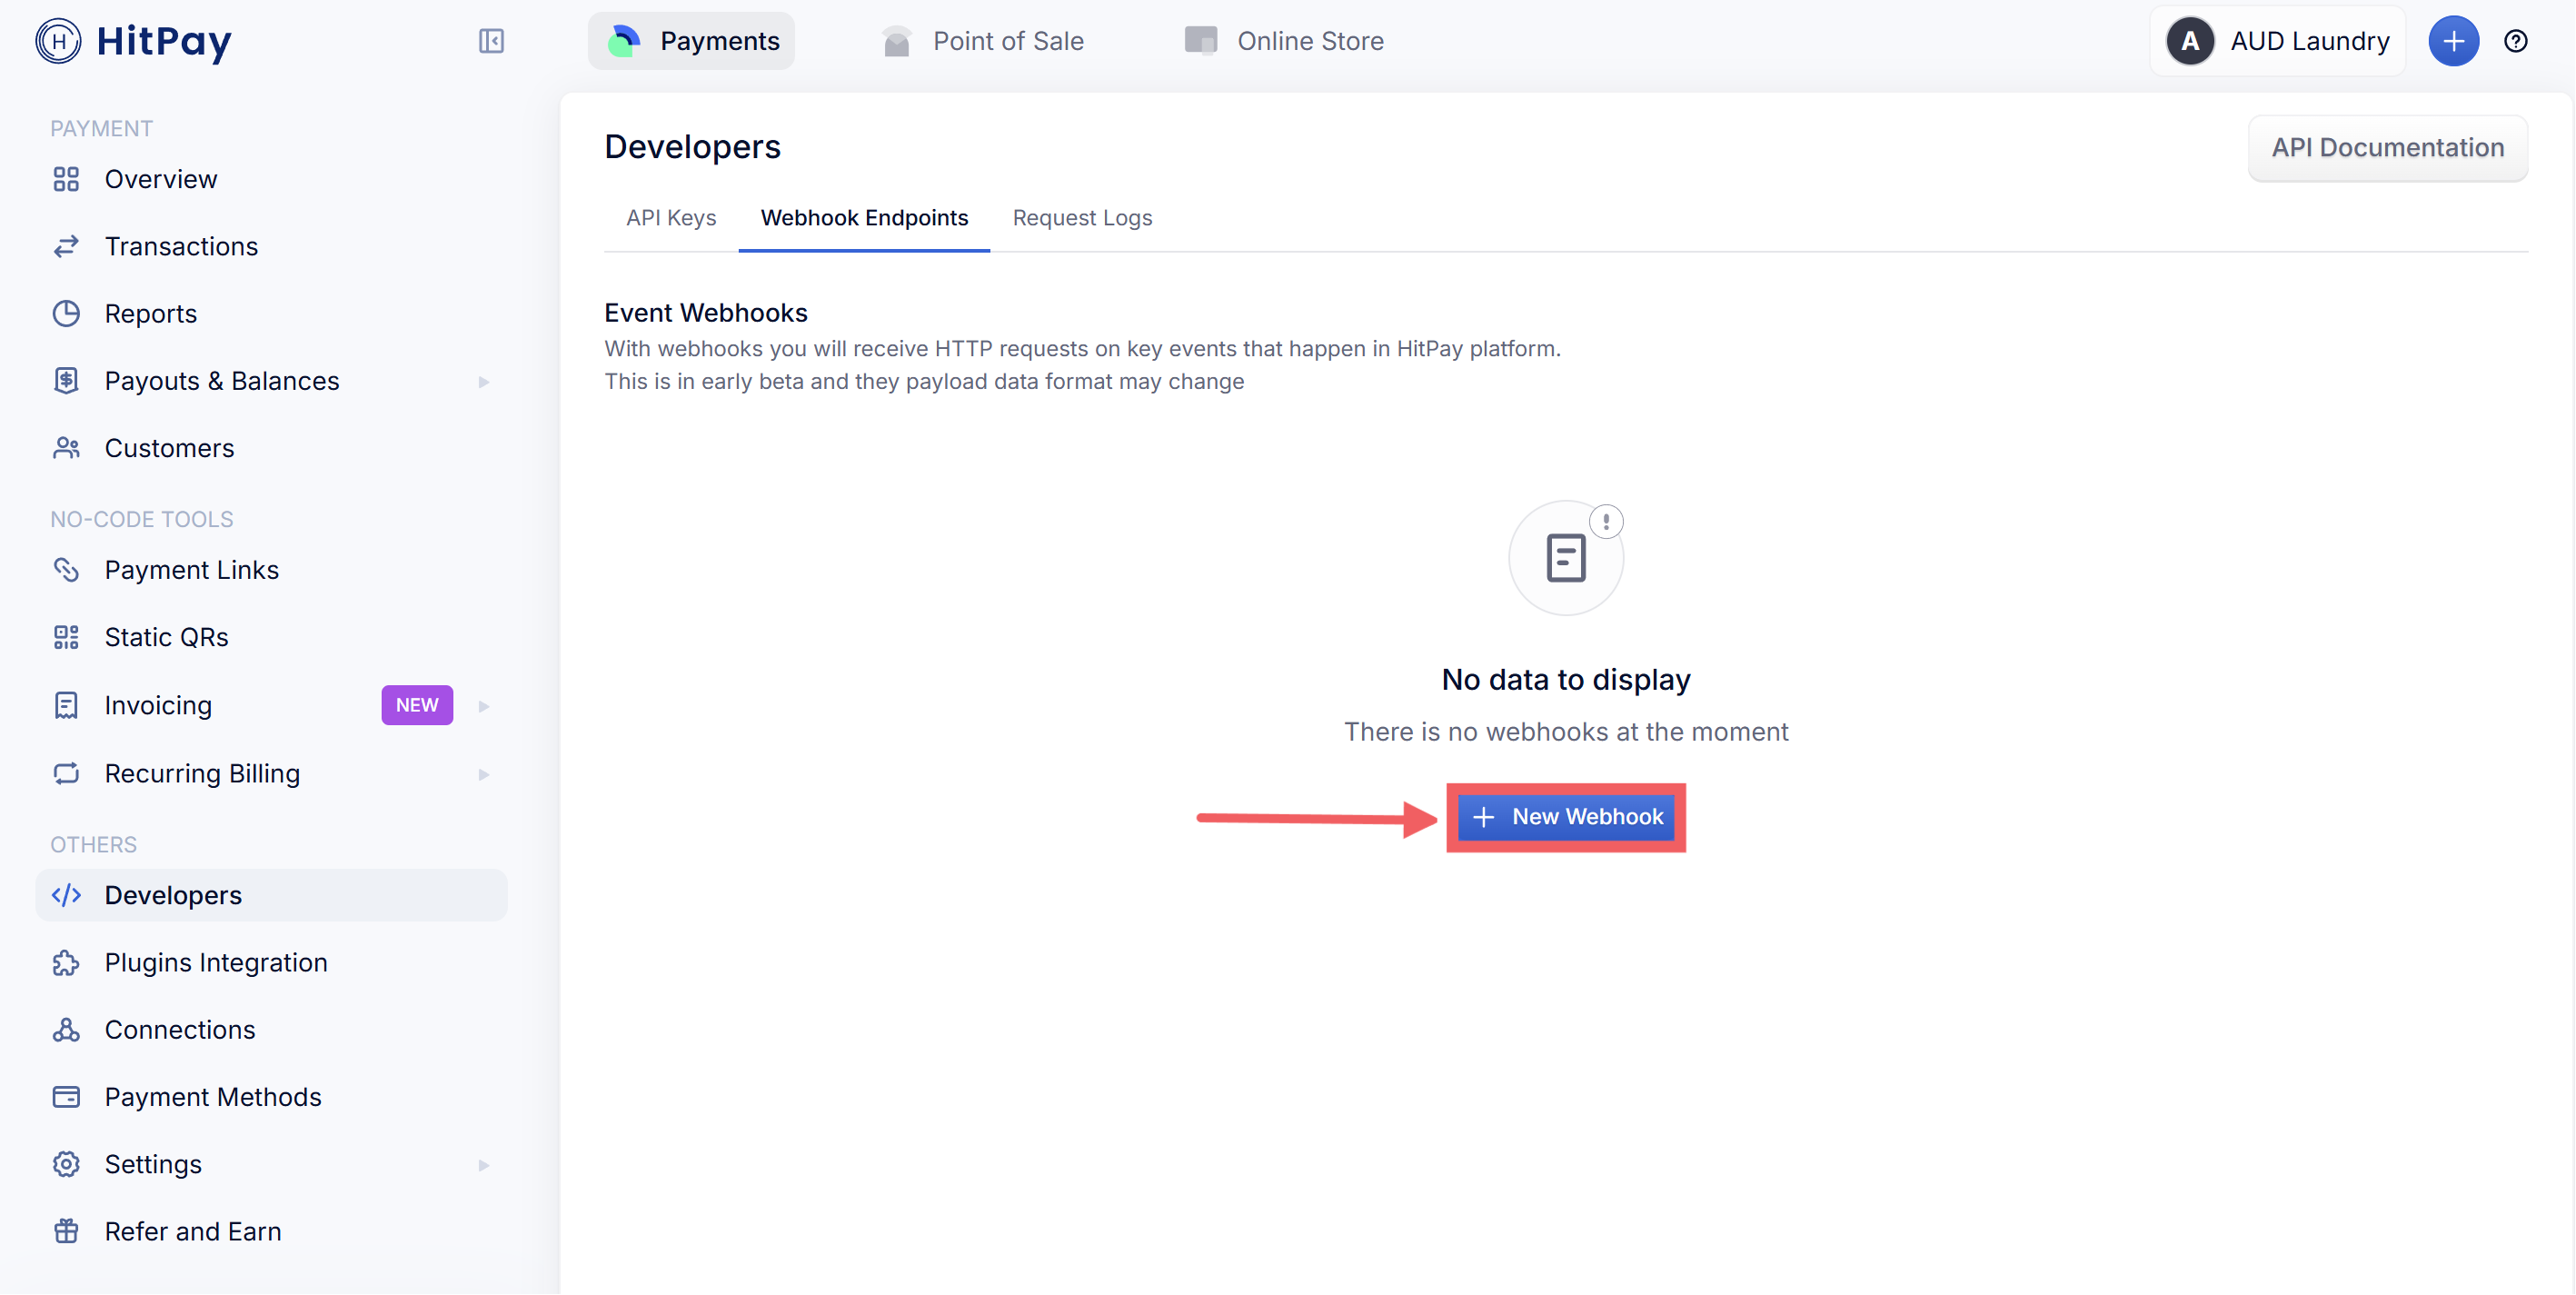
2. Click + New Webhook
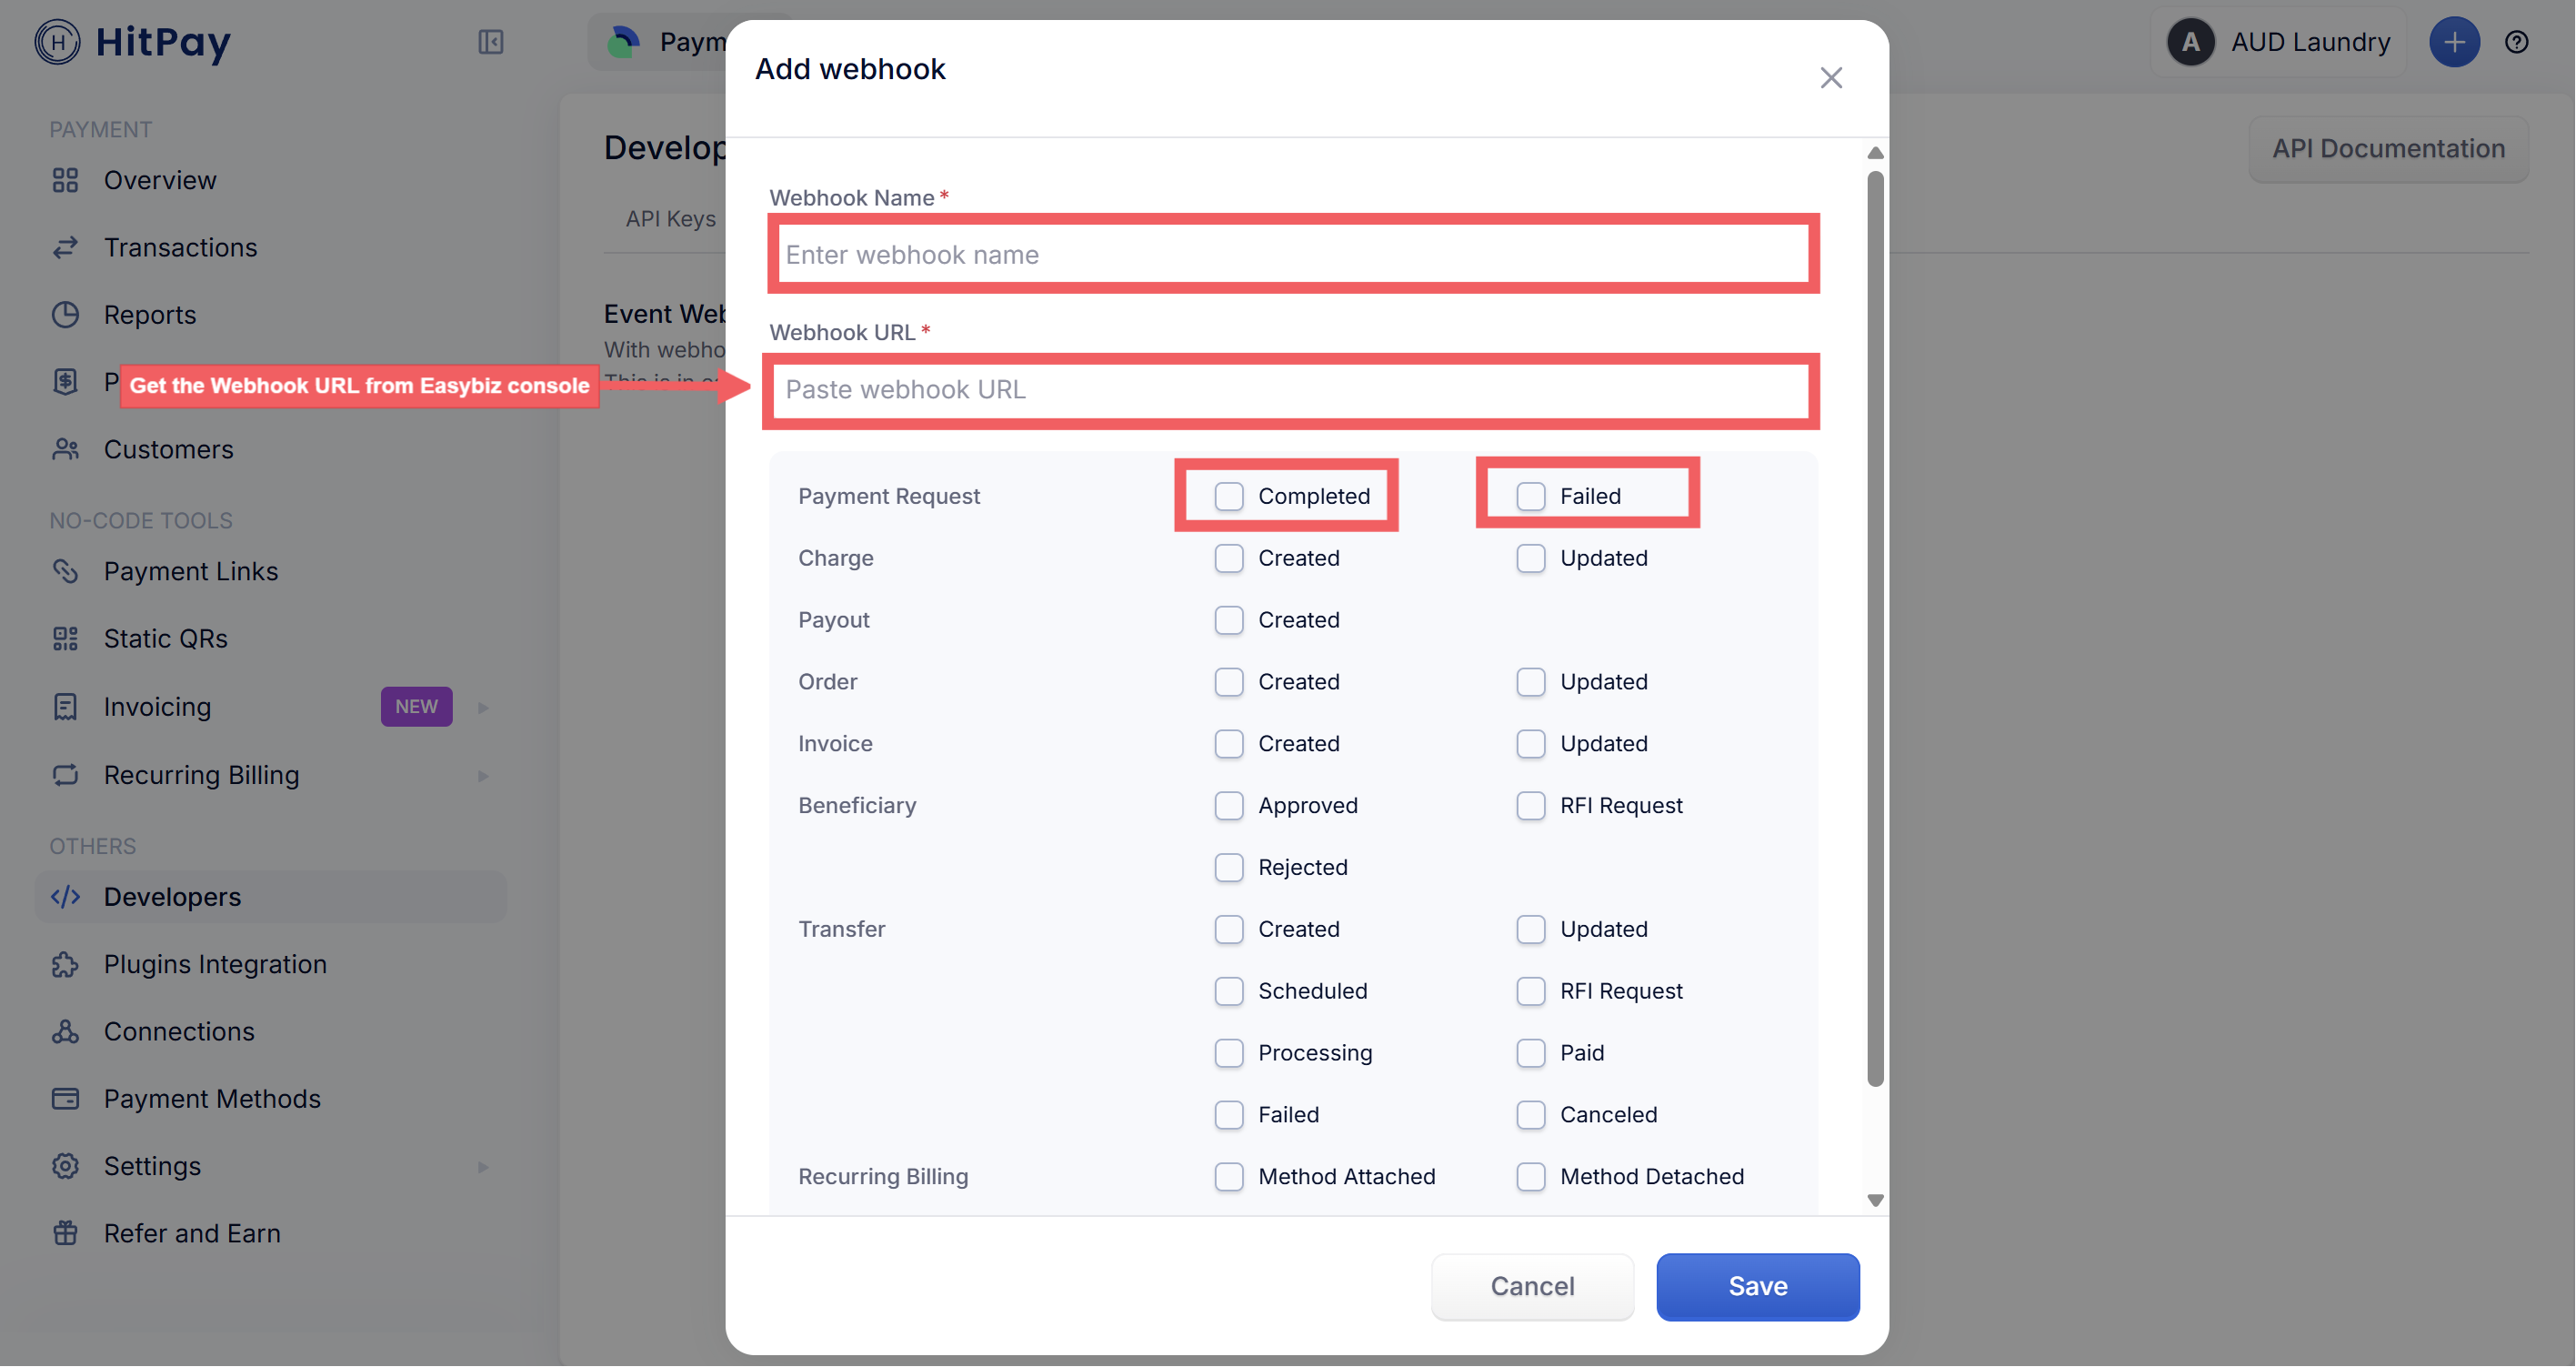
3. Fill in the following:
- **Webhook Name** — enter anything you like, for example: EasyBiz
- **Webhook URL** — paste the webhook URL you copied from the EasyBiz dialog in Step 2
- Under **Payment Request**, tick both **Completed** and **Failed**
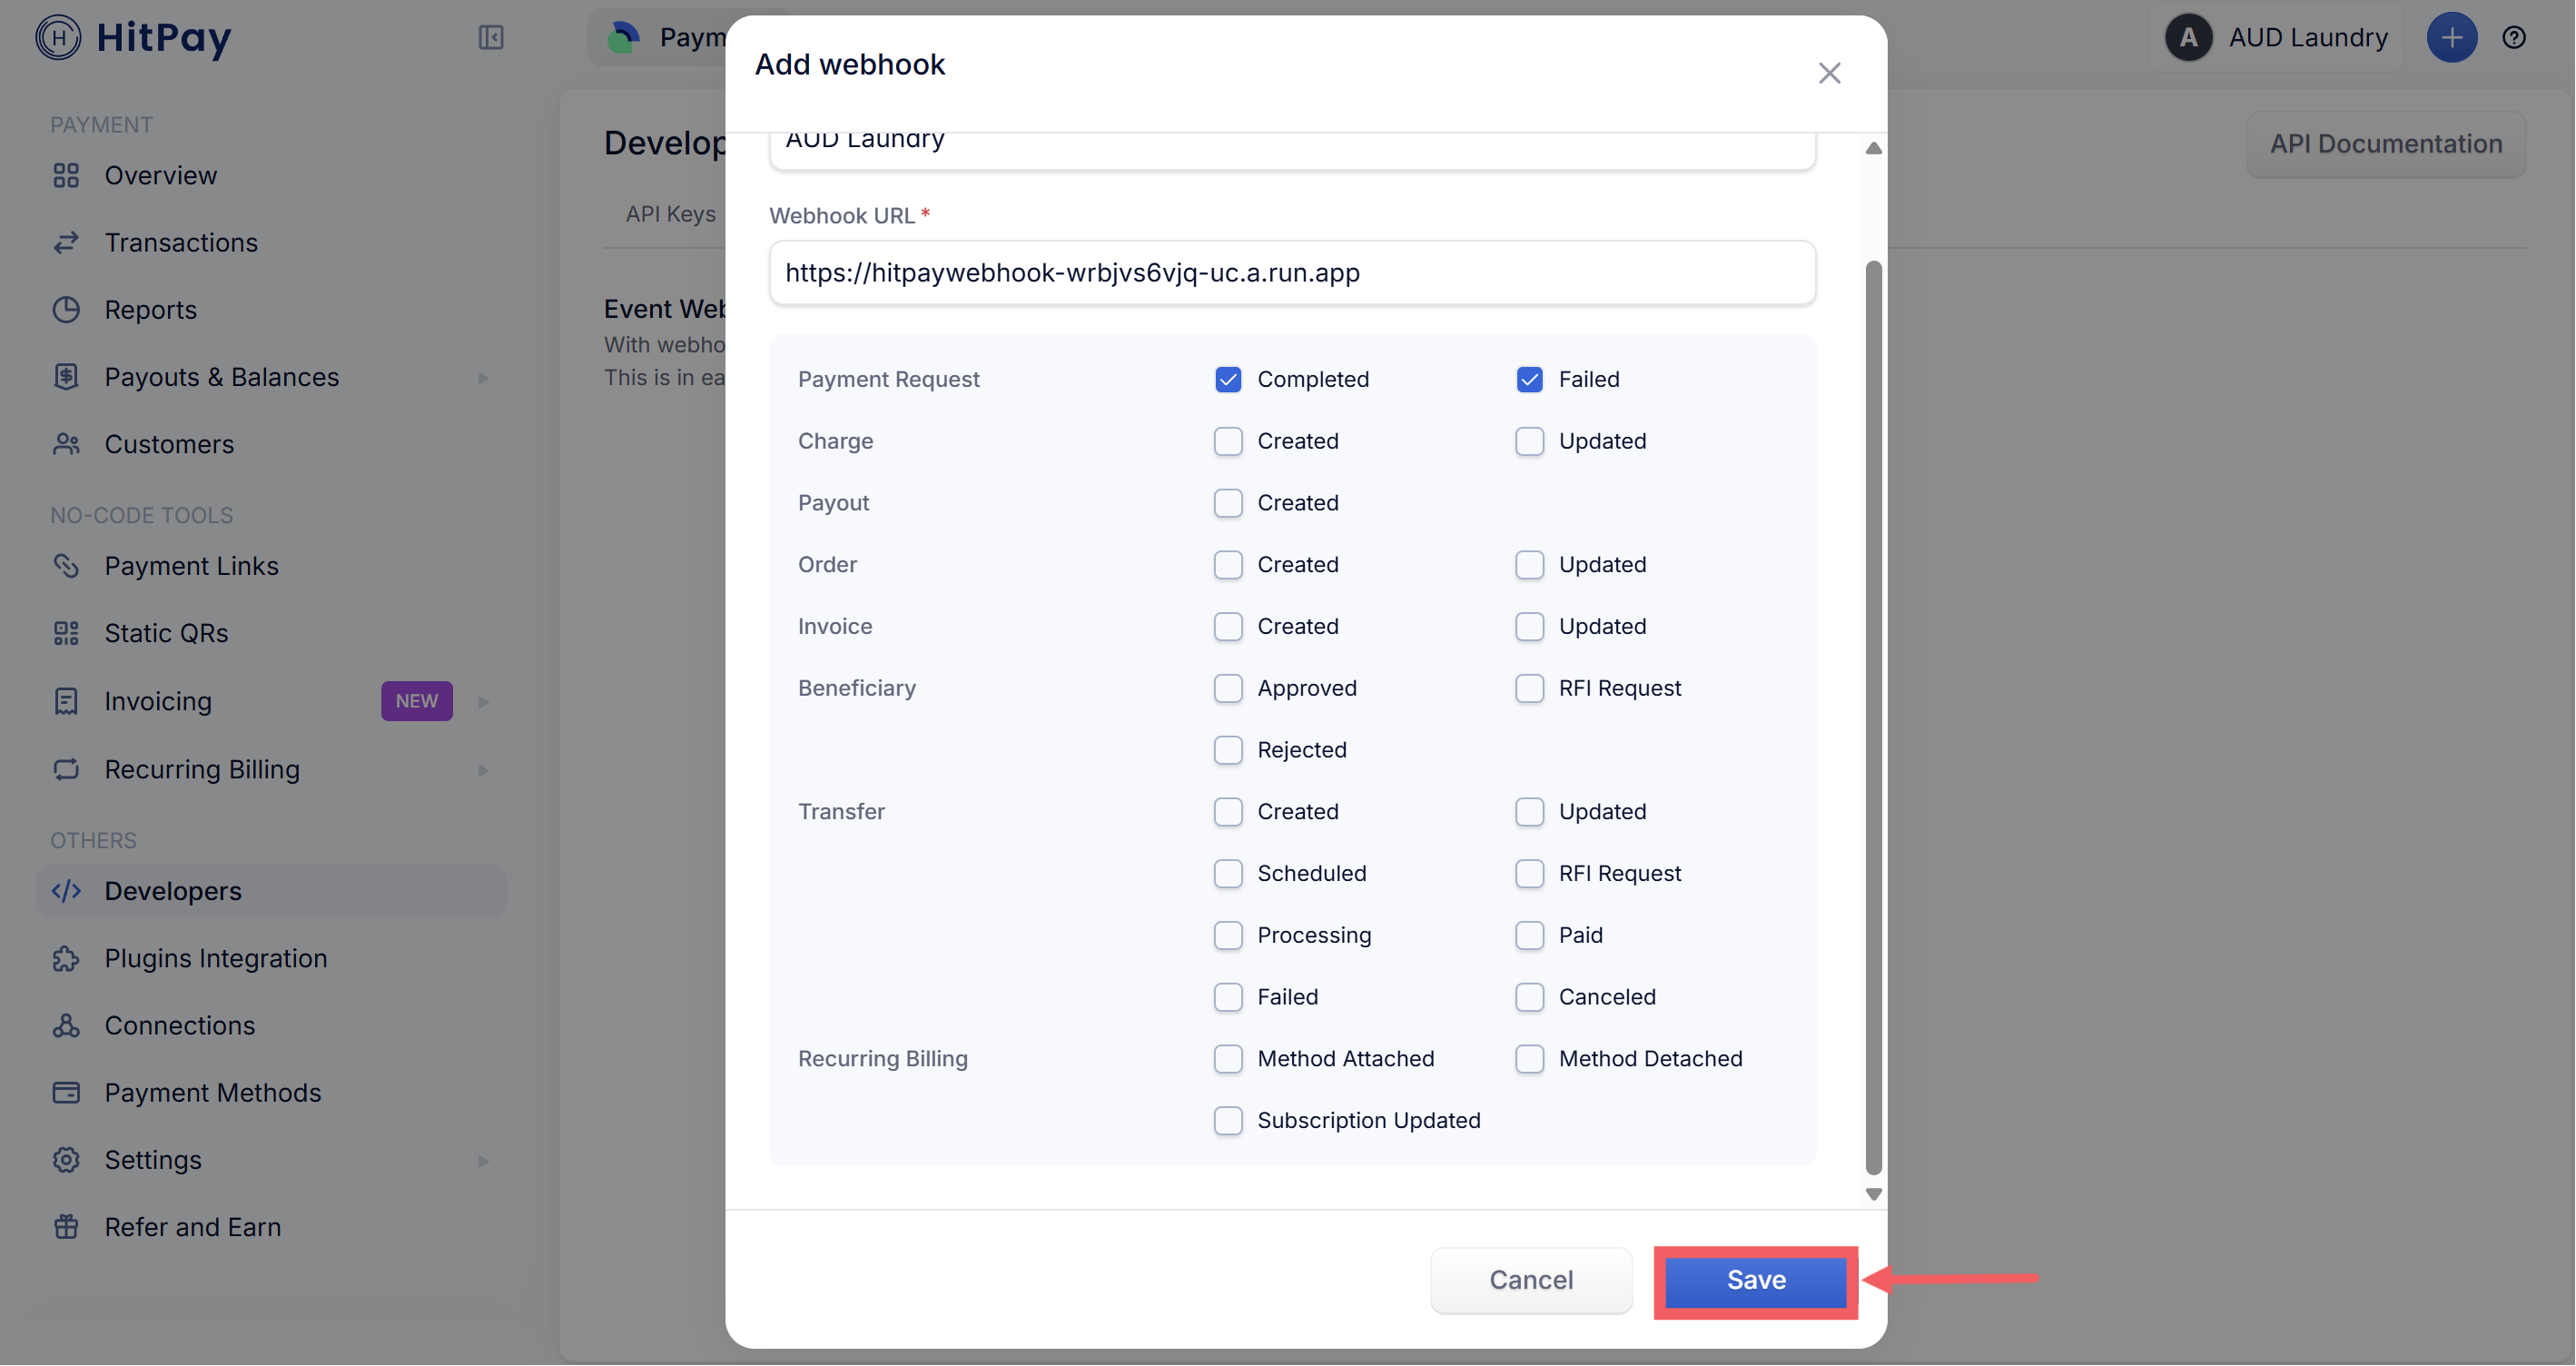
4. Click Save
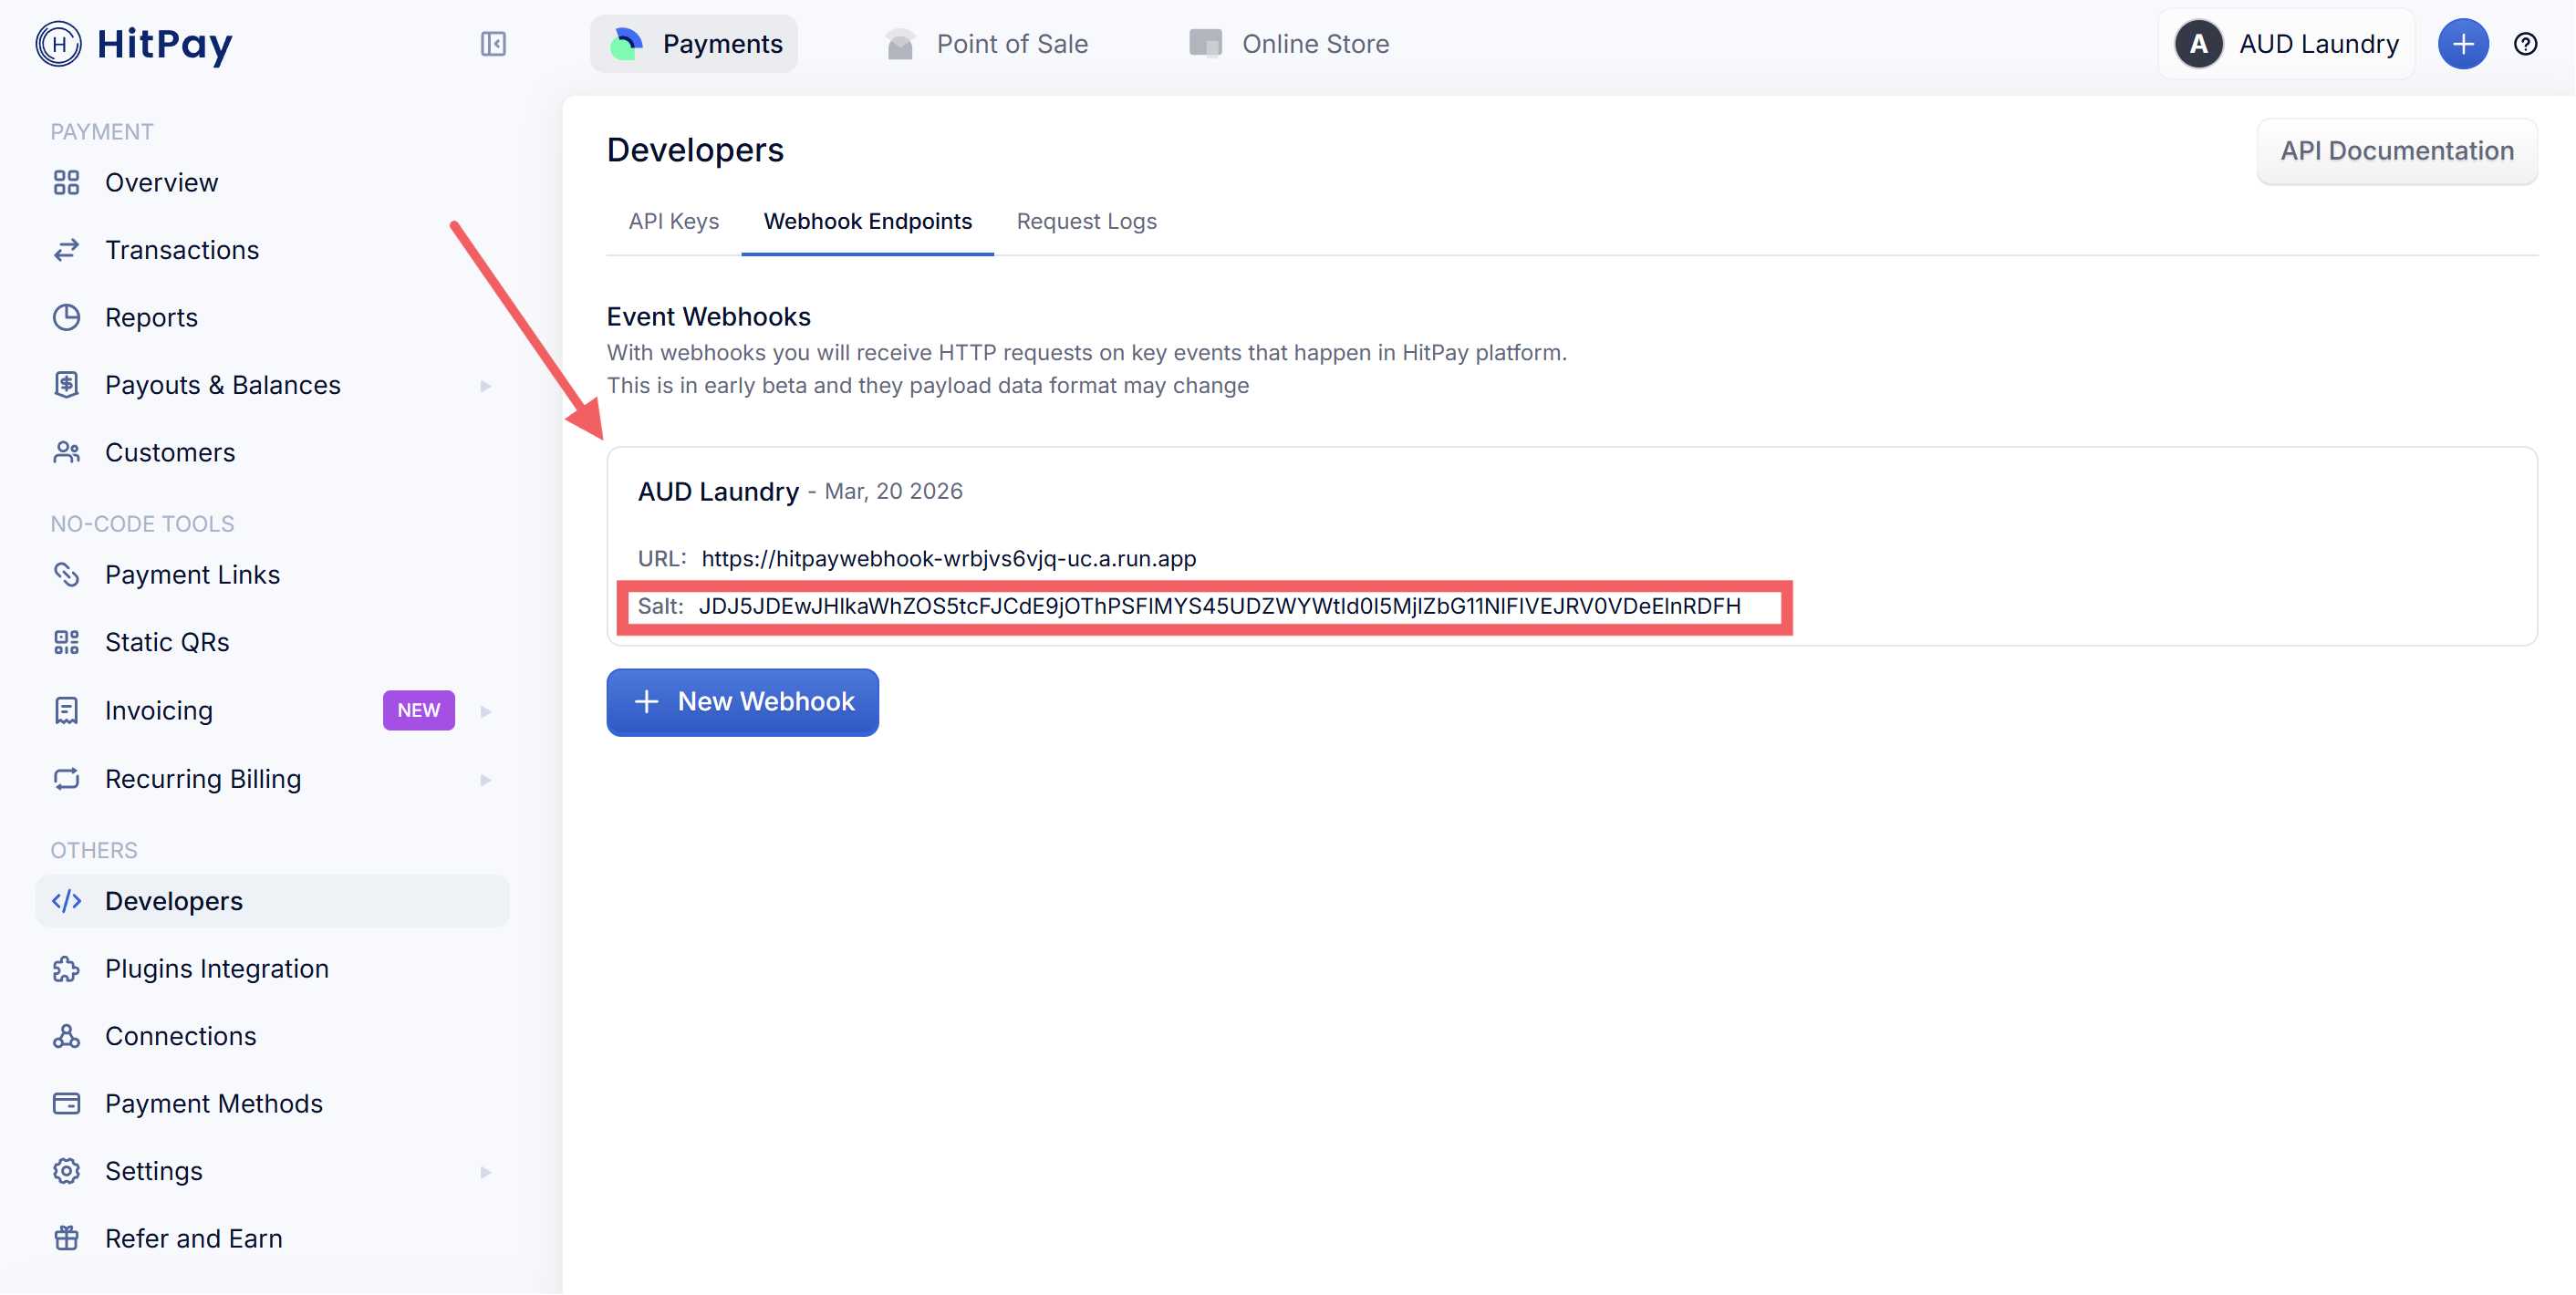
5. Your new webhook now appears in the list with a **Salt** value next to it. Copy this Salt
Make sure you tick **both** Completed and Failed under Payment Request. If you only tick Completed, EasyBiz won't be notified when a payment fails and your staff won't know to follow up with the customer.
---
## Step 5 — Save the Connection in EasyBiz
Go back to the EasyBiz dialog you left open in Step 2. If you closed it, navigate back to Settings → Integrations → **HitPay** → Connect.
1. Check the **API Key** field contains the key you copied in Step 3
2. Paste the **Salt** you copied in Step 4 into the Webhook Salt field
3. Optional: use the Send HitPay receipt email to customer switch to control whether HitPay emails its own payment receipt to your customer
4. Click Save
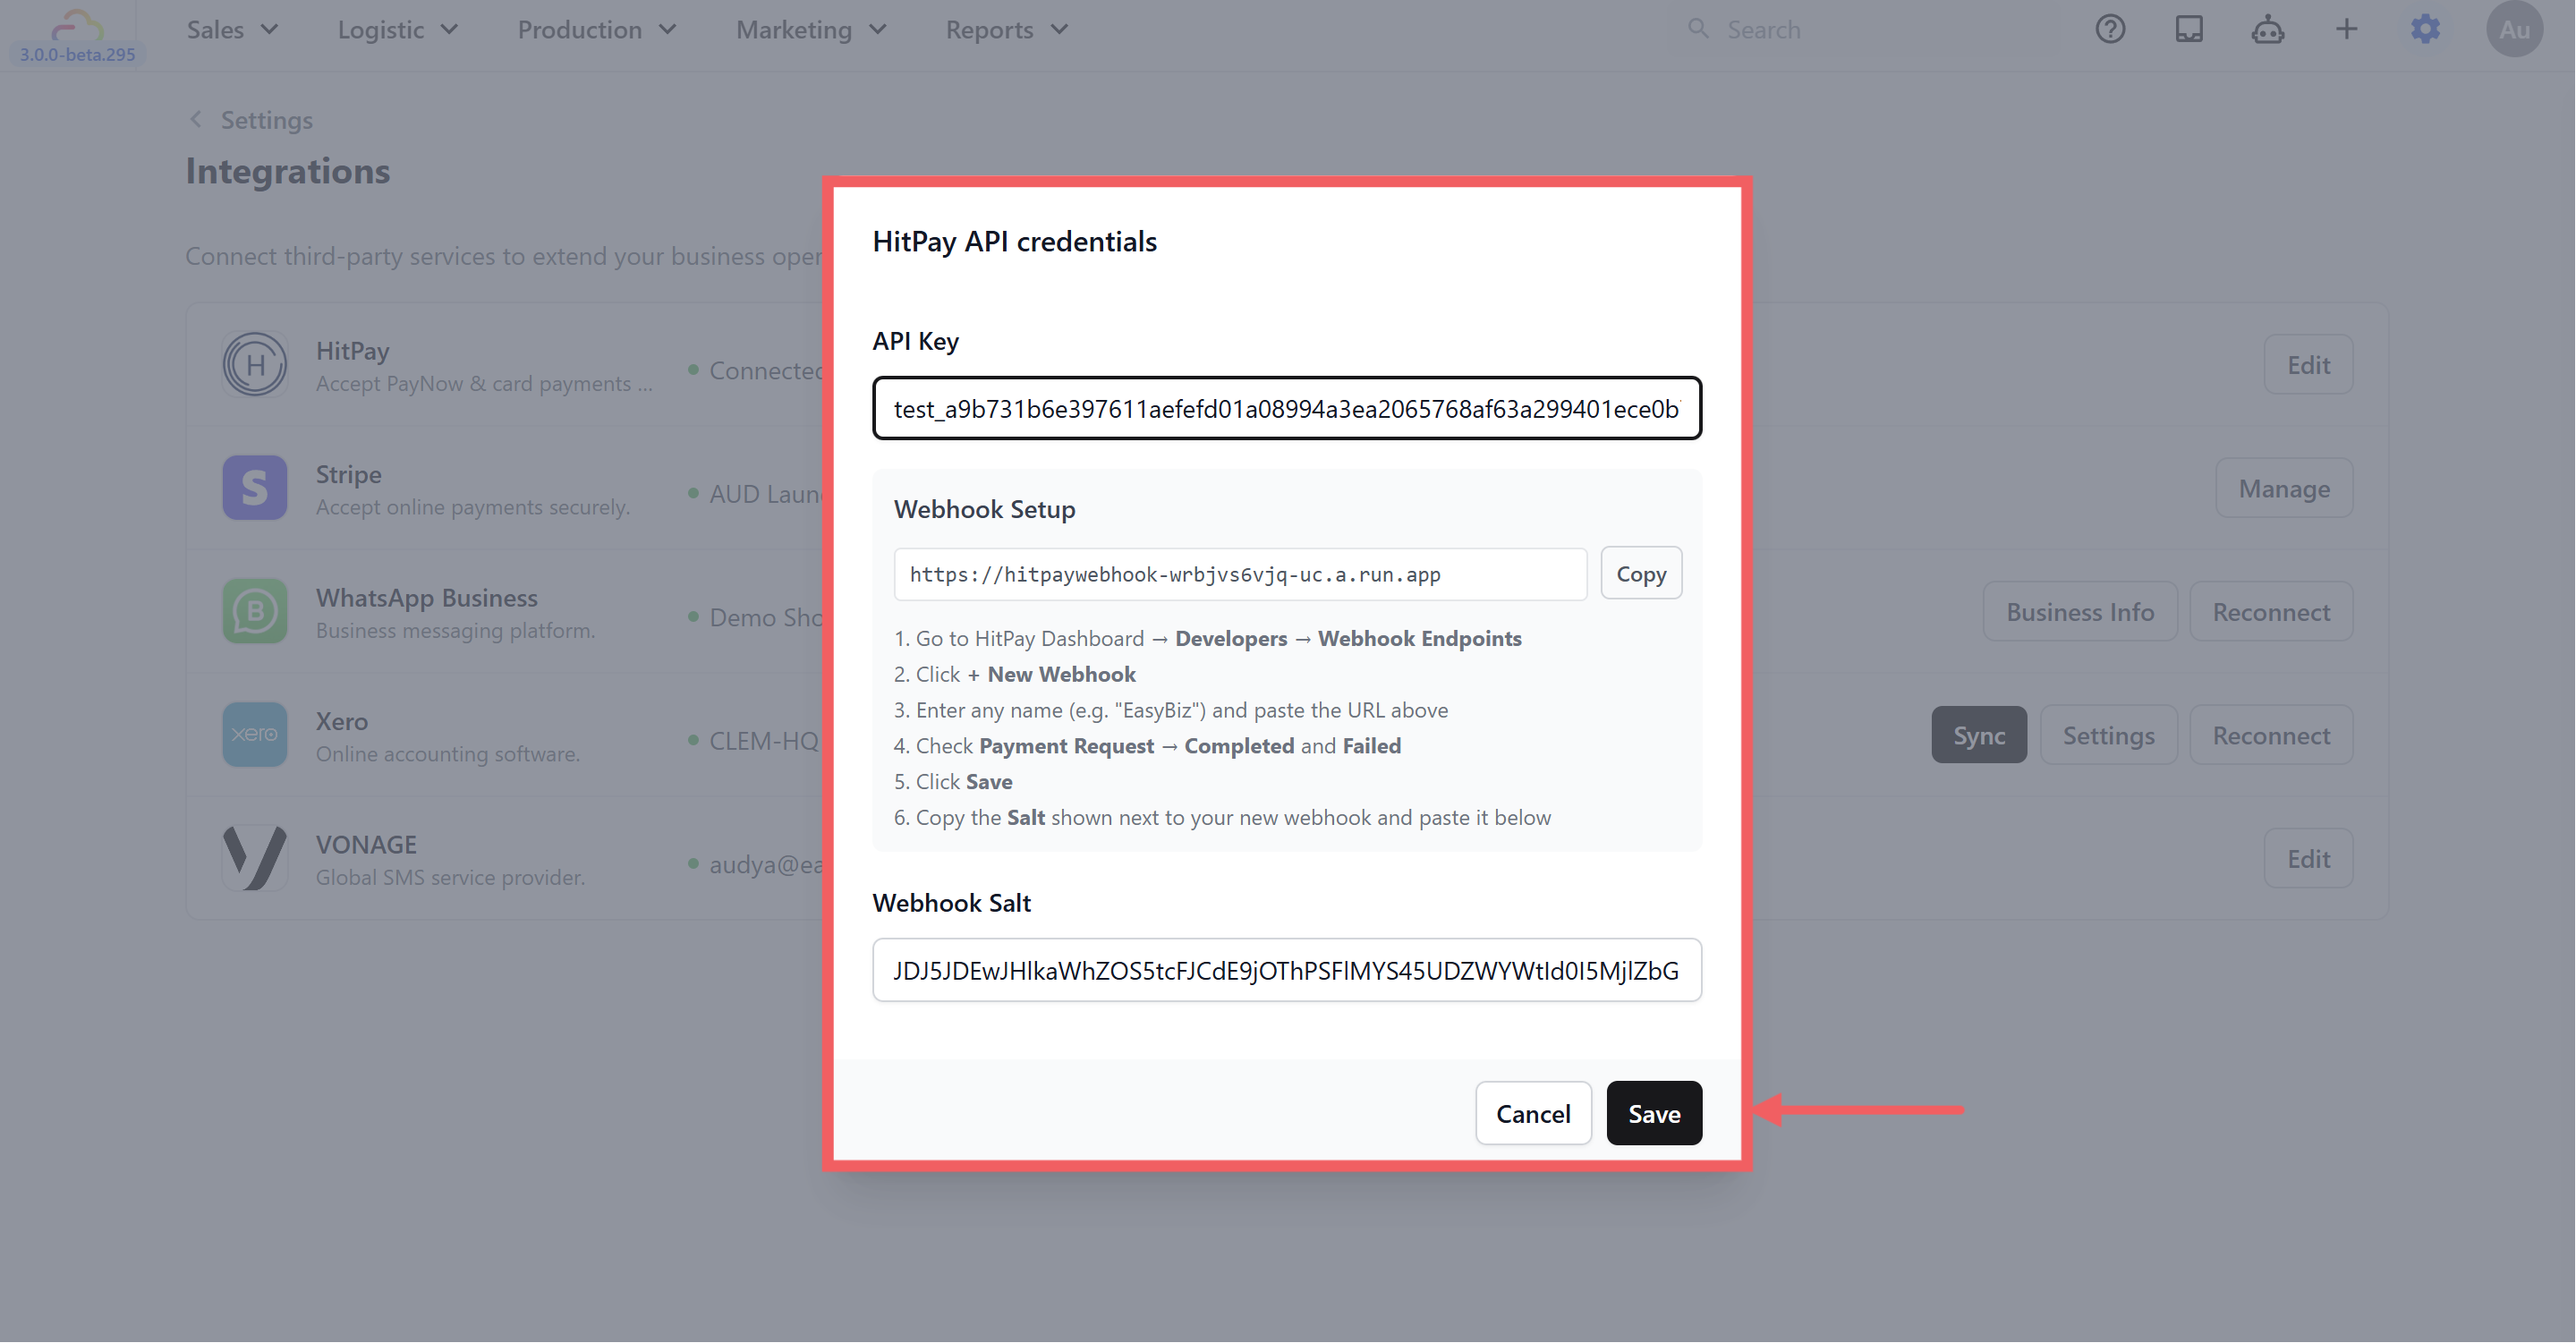
Do not share your API Key or Webhook Salt with anyone. These are private credentials that give access to your HitPay account.
---
## You're All Set
Once you click Save, HitPay is connected to your EasyBiz account — the HitPay row on the Integrations page shows **Connected**. Your POS and online store will now process payments through HitPay.
If you ever need to update your credentials — for example if you rotate your API key — go back to **Settings → Integrations → HitPay** and click Edit.
---
## If It Didn't Work
**A payment was made, but the order in EasyBiz doesn't show it as paid.**
> This almost always means HitPay could not notify EasyBiz. Check three things:
>
> 1. **The webhook URL is correct.** In your HitPay dashboard, go to Developers → Webhook Endpoints and compare the URL character-for-character with the one shown in the EasyBiz **Webhook Setup** box. Use the Copy buttons on both sides — do not retype it.
>
> 2. **Both events are ticked.** The webhook must have **Completed** and **Failed** ticked under Payment Request.
>
> 3. **The Salt matches.** If you created more than one webhook, each has its own Salt. Copy the Salt from the exact webhook that carries the EasyBiz URL, paste it into the Webhook Salt field in EasyBiz, and click Save again.
**EasyBiz shows an error when taking a HitPay payment.**
> Open **Settings → Integrations → HitPay → Edit** and re-paste the API key from HitPay's Developers → API Keys page. A key that was cut off or has an extra space in front or behind will fail. If you regenerated your API key in HitPay, the old key stored in EasyBiz stops working — paste the new one and save.
**Still stuck?**
> In your HitPay dashboard, check the webhook's delivery status on the Webhook Endpoints page — if HitPay shows failed deliveries, delete the webhook, create it again with the copied EasyBiz URL, and update the new Salt in EasyBiz. If payments still don't confirm, contact EasyBiz support with your order number and the approximate payment time.
---
## What's Next?
Now that HitPay is connected, your staff can start accepting payments at the counter and through your online store. To make HitPay available as a payment method at your counter, see [Setting Up Your Payment Methods at POS](/docs/setting-up-your-payment-methods-at-pos).