## Step 1 — Connect Your WhatsApp Account
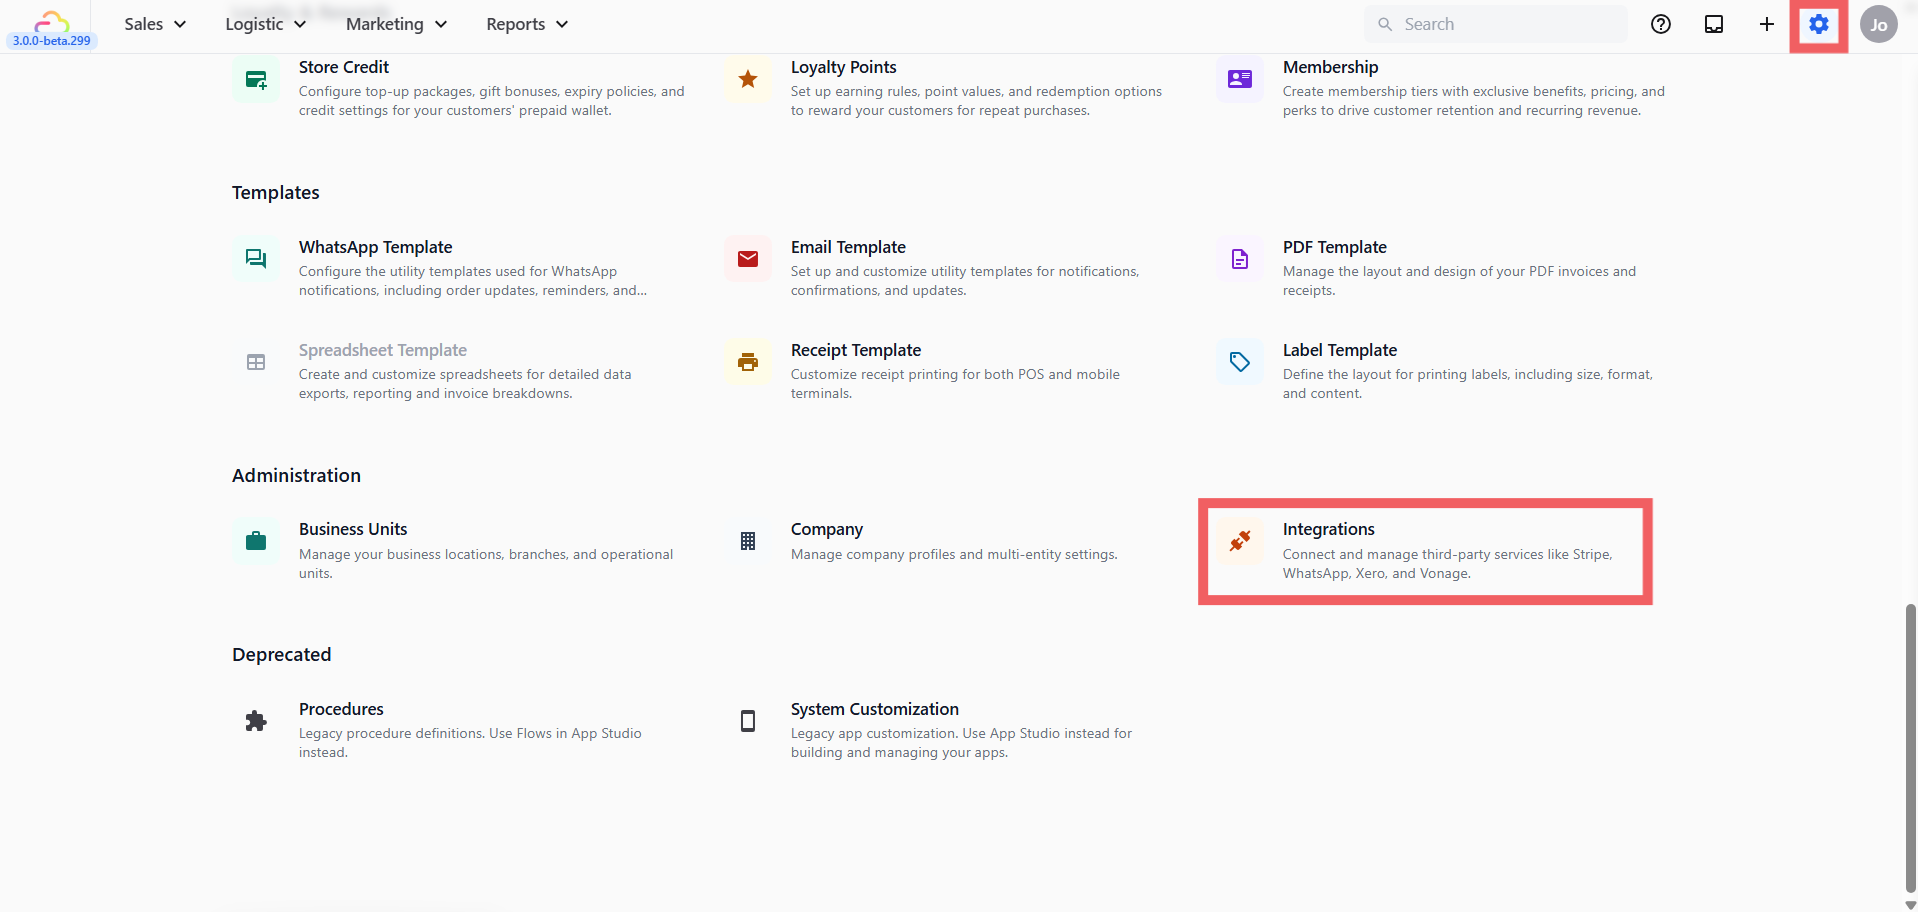
- Go to Settings from the top navigation
- Scroll down to the **Administration** section and click Integrations
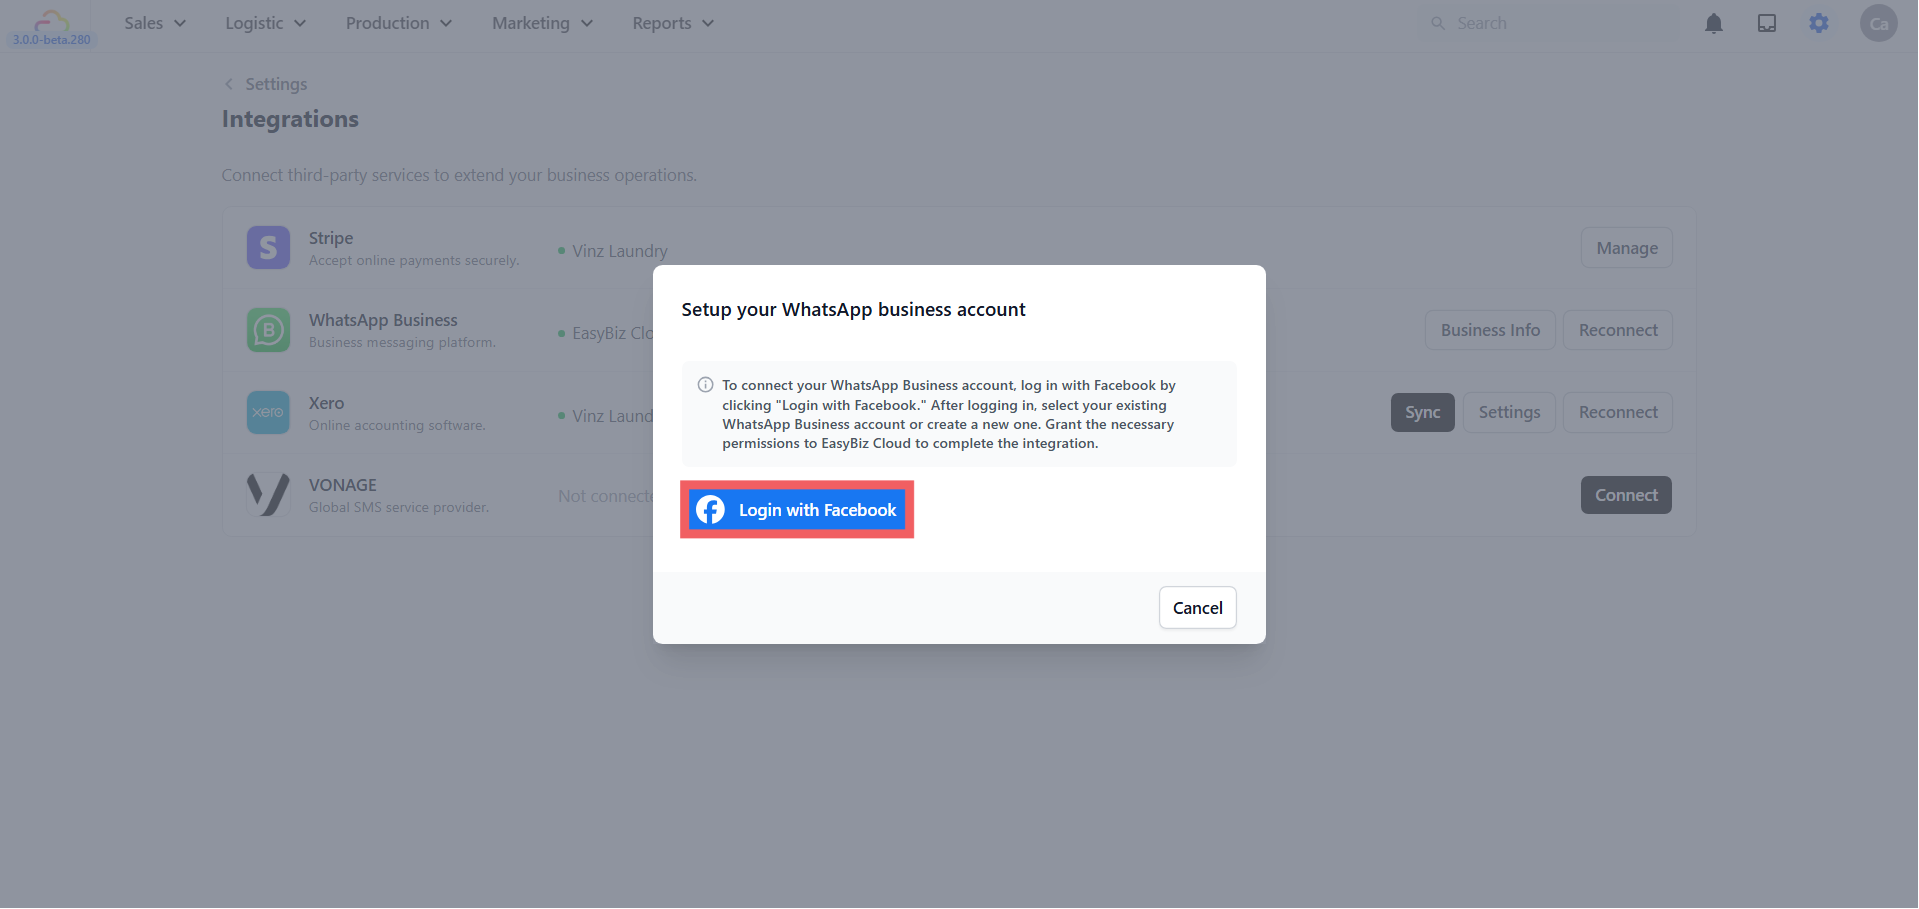
- Find **WhatsApp Business** in the list and click Connect
- In the popup, click Login with Facebook
- A Meta window will open — follow the steps to:
- Select an existing **Business Portfolio** or create a new one by filling in your business name, category, country, and website
- Select an existing **WhatsApp Business account** or create a new one and add your business phone number
- Follow the remaining steps on screen to complete the setup. Meta will ask you to confirm the phone number with a verification code and to grant EasyBiz the requested permissions — accept these to finish
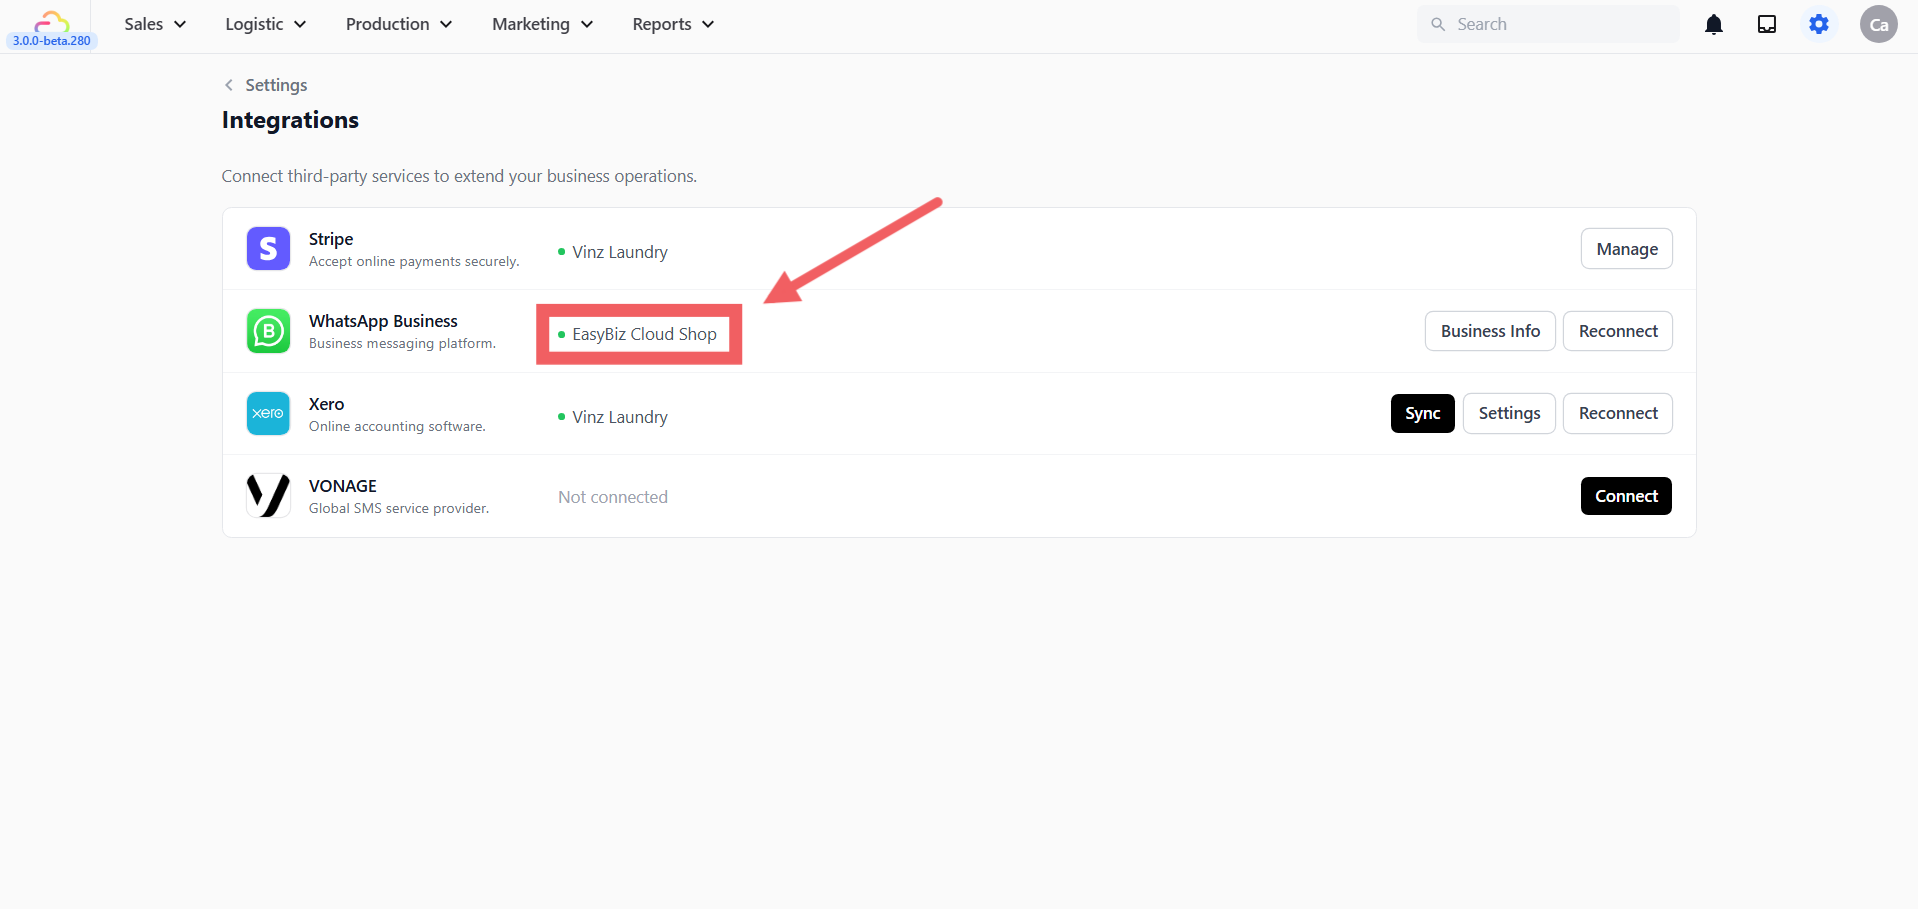
Once done, you'll be redirected back to EasyBiz and WhatsApp will show as connected with a green dot and your business name.
Use a phone number that is **not** currently active on the WhatsApp or WhatsApp Business app on any phone. A number can only be registered in one place. If the number is in use on the app, delete the account from the app first (WhatsApp → Settings → Account → Delete account), wait a few minutes, then connect it here. Deleting the account removes its chat history, so back up anything you need first.
---
## Step 2 — Set Up Your Business Profile
Your business profile is what customers see when they look at your WhatsApp contact — your logo, address, and a short description of your business. This makes your business look professional and trustworthy.
1. On the **Integrations** page, find the **WhatsApp Business** row
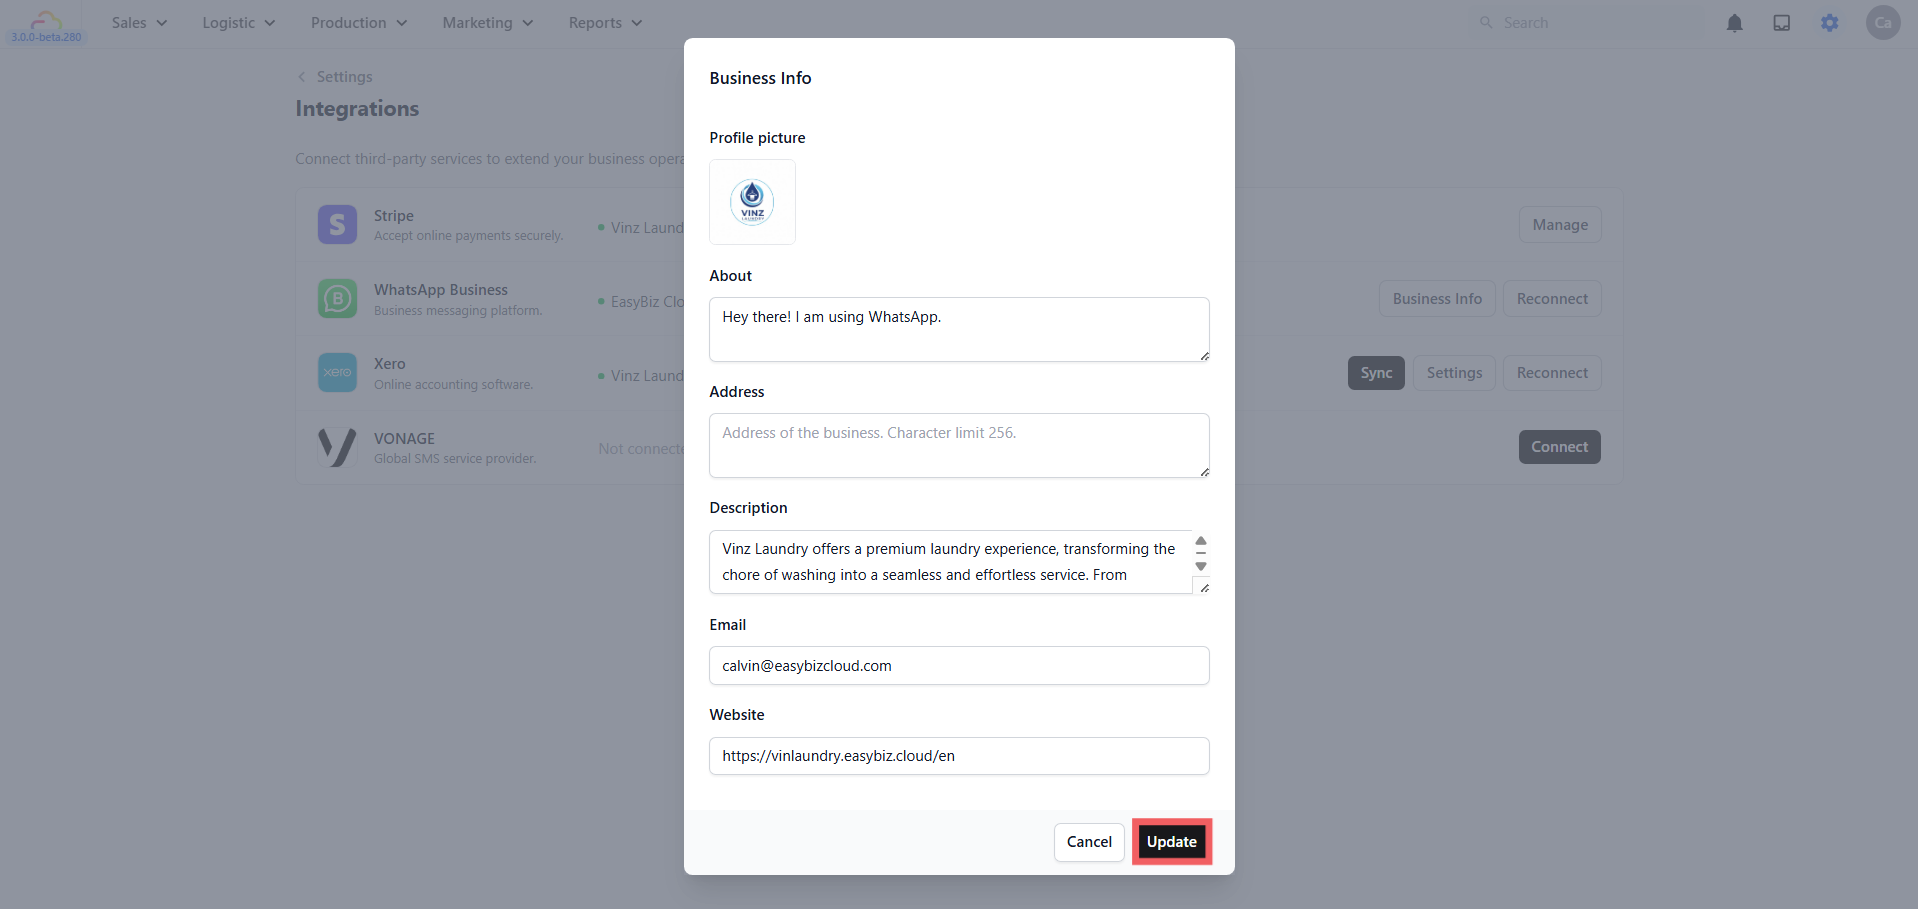
2. Click Business Info**.** Fill in the following:
- **Profile picture** — Upload your business logo
- **About** — A short one-line description (e.g. _Professional laundry and dry cleaning service_)
- **Address** — Your store address
- **Description** — A short paragraph about your business
- **Email** — Your business email
- **Website** — Your online store or website link
3. Click Update to save
---
## Checking Your Connection Status
You can check the state of your WhatsApp connection at any time:
1. Go to Settings → **Administration** → Integrations
2. Look at the **WhatsApp Business** row. You will see:
- Your WhatsApp Business account name with a status badge — Business verified (green) means Meta has verified your business; Not verified (amber) means verification is still pending
- Your connected phone number(s), each with a Connected badge
3. Click Refresh status to pull the latest status from Meta — useful right after you complete verification or add a number
---
## Frequently Asked Questions
- **My account shows "Not verified" — can I still use WhatsApp?** "Not verified" means Meta has not yet completed **business verification** for your company. Verification is done on Meta's side (in your Meta Business Suite / Business Manager, under your business's settings) and usually involves submitting business registration documents. While verification is pending, Meta limits what an account can do — for example how many customers you can message per day and whether your business display name is shown. Complete the verification with Meta, then click Refresh status in EasyBiz. If the badge still doesn't update after verification is approved, click Reconnect and log in with Facebook again.
- **Meta says my phone number is already in use / already registered.** The number is still active on the WhatsApp or WhatsApp Business app, or registered to another WhatsApp Business account. A number can only be registered in one place. Open the WhatsApp app on the phone that uses this number and delete the account (WhatsApp → Settings → Account → Delete account — this removes its chat history, so save anything important first). Wait a few minutes, then try connecting again. If the number belongs to another business account you control, remove it there first.
- **I never received the verification code (OTP).** Check that the country code and number were entered correctly, and that the phone can receive SMS or calls (it must be switched on, with signal, and not blocking unknown senders). When EasyBiz asks "How should we send the verification code?", try Voice call if Text message (SMS) did not arrive — landline numbers can only use the voice option. You can also click Resend code after the wait timer ends. Note that a number still registered on the WhatsApp app may silently fail here — remove it from the app first (see the previous question).
- **The Meta window closed or showed an error partway through.** Nothing is saved until the setup completes. Close the popup, make sure your browser is not blocking popups from Facebook, then click Reconnect (or Connect) on the WhatsApp Business row and go through the Meta steps again.
- **How do I add a second number later?** On the **Integrations** page, find the WhatsApp Business row and click Add phone number. Enter the Country code, Phone number, and Display name, choose how to receive the verification code, then enter the code and click Verify. If EasyBiz rejects the number, check the value and try again — and if the number is active on the WhatsApp app, remove it there first.
- **My messages aren't sending even though the account is connected.** Check the status badge on the Integrations page first. If the account is "Not verified", complete business verification with Meta. If the account is verified and messages still fail, click Refresh status, and contact EasyBiz support if the problem continues.
---
## What's Next?
Now that your WhatsApp number is connected, continue to [Introduction to WhatsApp Message Templates](/docs/introduction-to-whatsapp-message-templates) to learn the different template types you can use to message customers at scale.