## Before You Start
Make sure you've read the [Data Fields](/docs/what-is-data-fields) introduction so you understand the available types (Text, Long Text, Number, Amount, Image, Phone Number, Email Address, Date, and Options) and when to use each one. You'll be choosing a type for every field you create, and it's important to pick the right one upfront.
**Not sure which type to pick?** When in doubt, use **Options** for anything with a fixed set of answers, and **Text** for everything else.
---
## Where to Find Data Fields
From the top navigation bar, click the Settings icon (⚙️). Under the **Operations** section, click Custom Fields.
---
## How to Add a Data Field
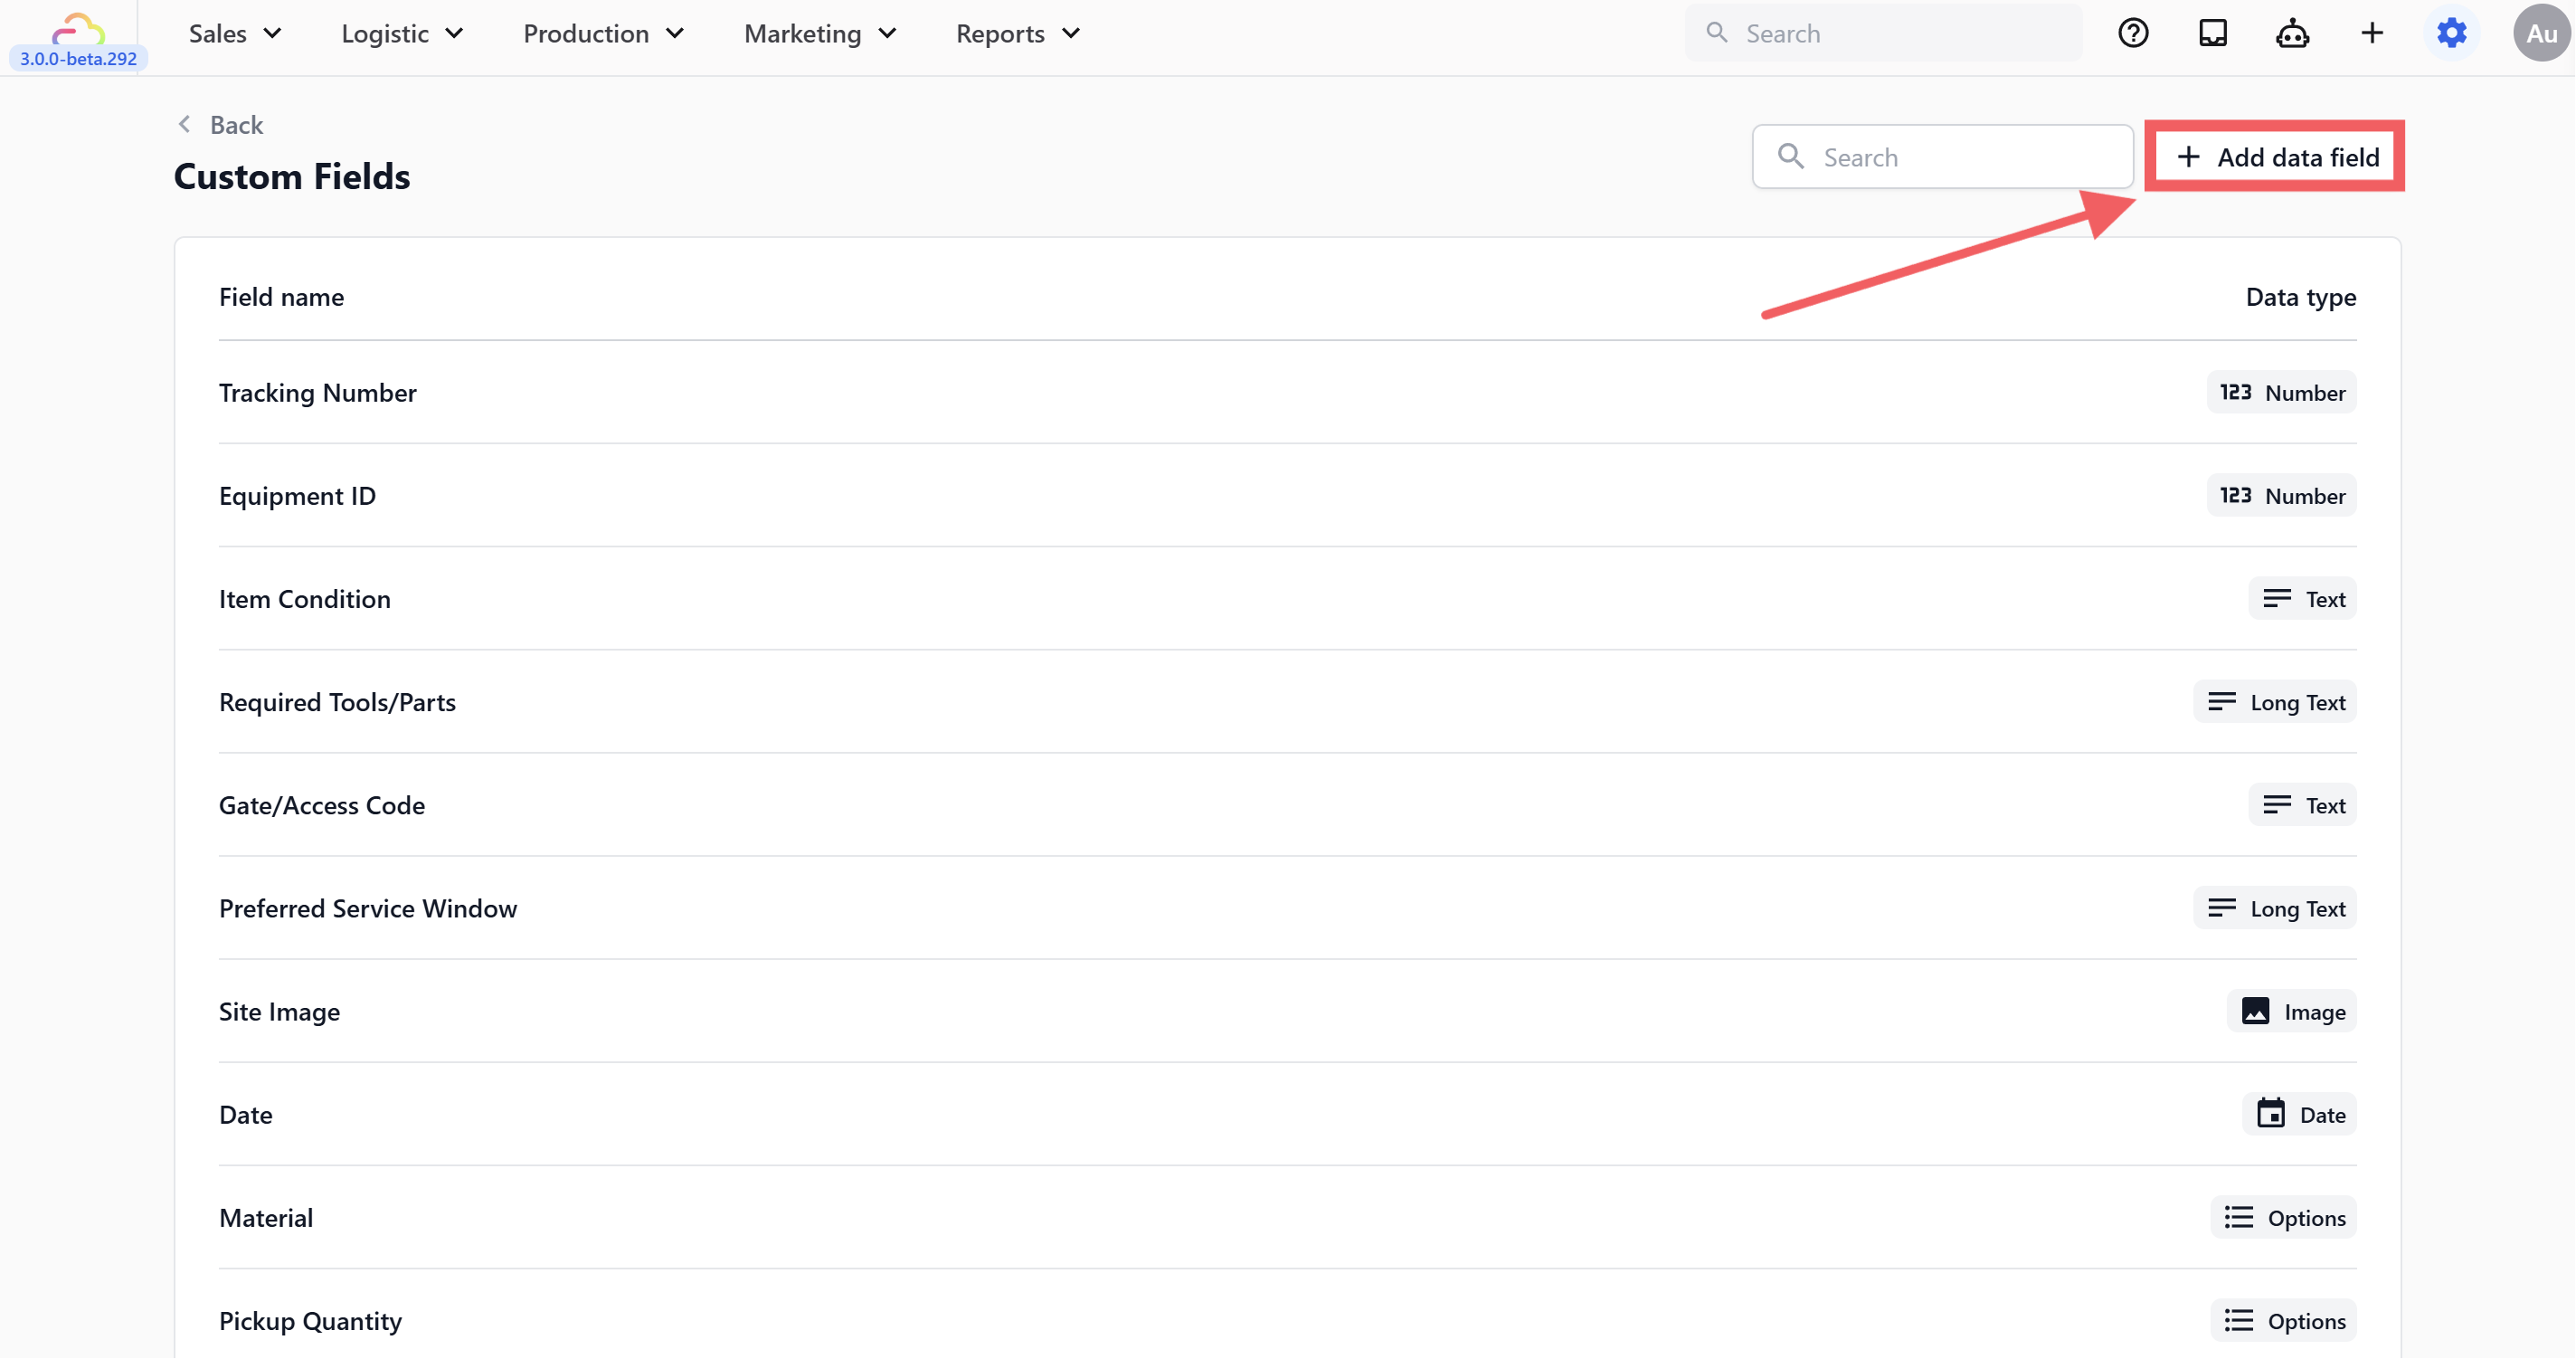
A form will appear with two fields to fill in.
1. Enter a **Field Name** — this is the label your team will see, so be specific. "Service Type" is much clearer than just "Type." If you have similar fields across different services, include the context in the name — for example, "Bag Service Type" and "Bag Issue" are easier to manage than "Service" and "Issue."
2. Choose a **Data Type** from the dropdown. If you're not sure which type to pick, refer to the [Data Fields](/docs/what-is-data-fields) guide for a breakdown of all nine types with examples.
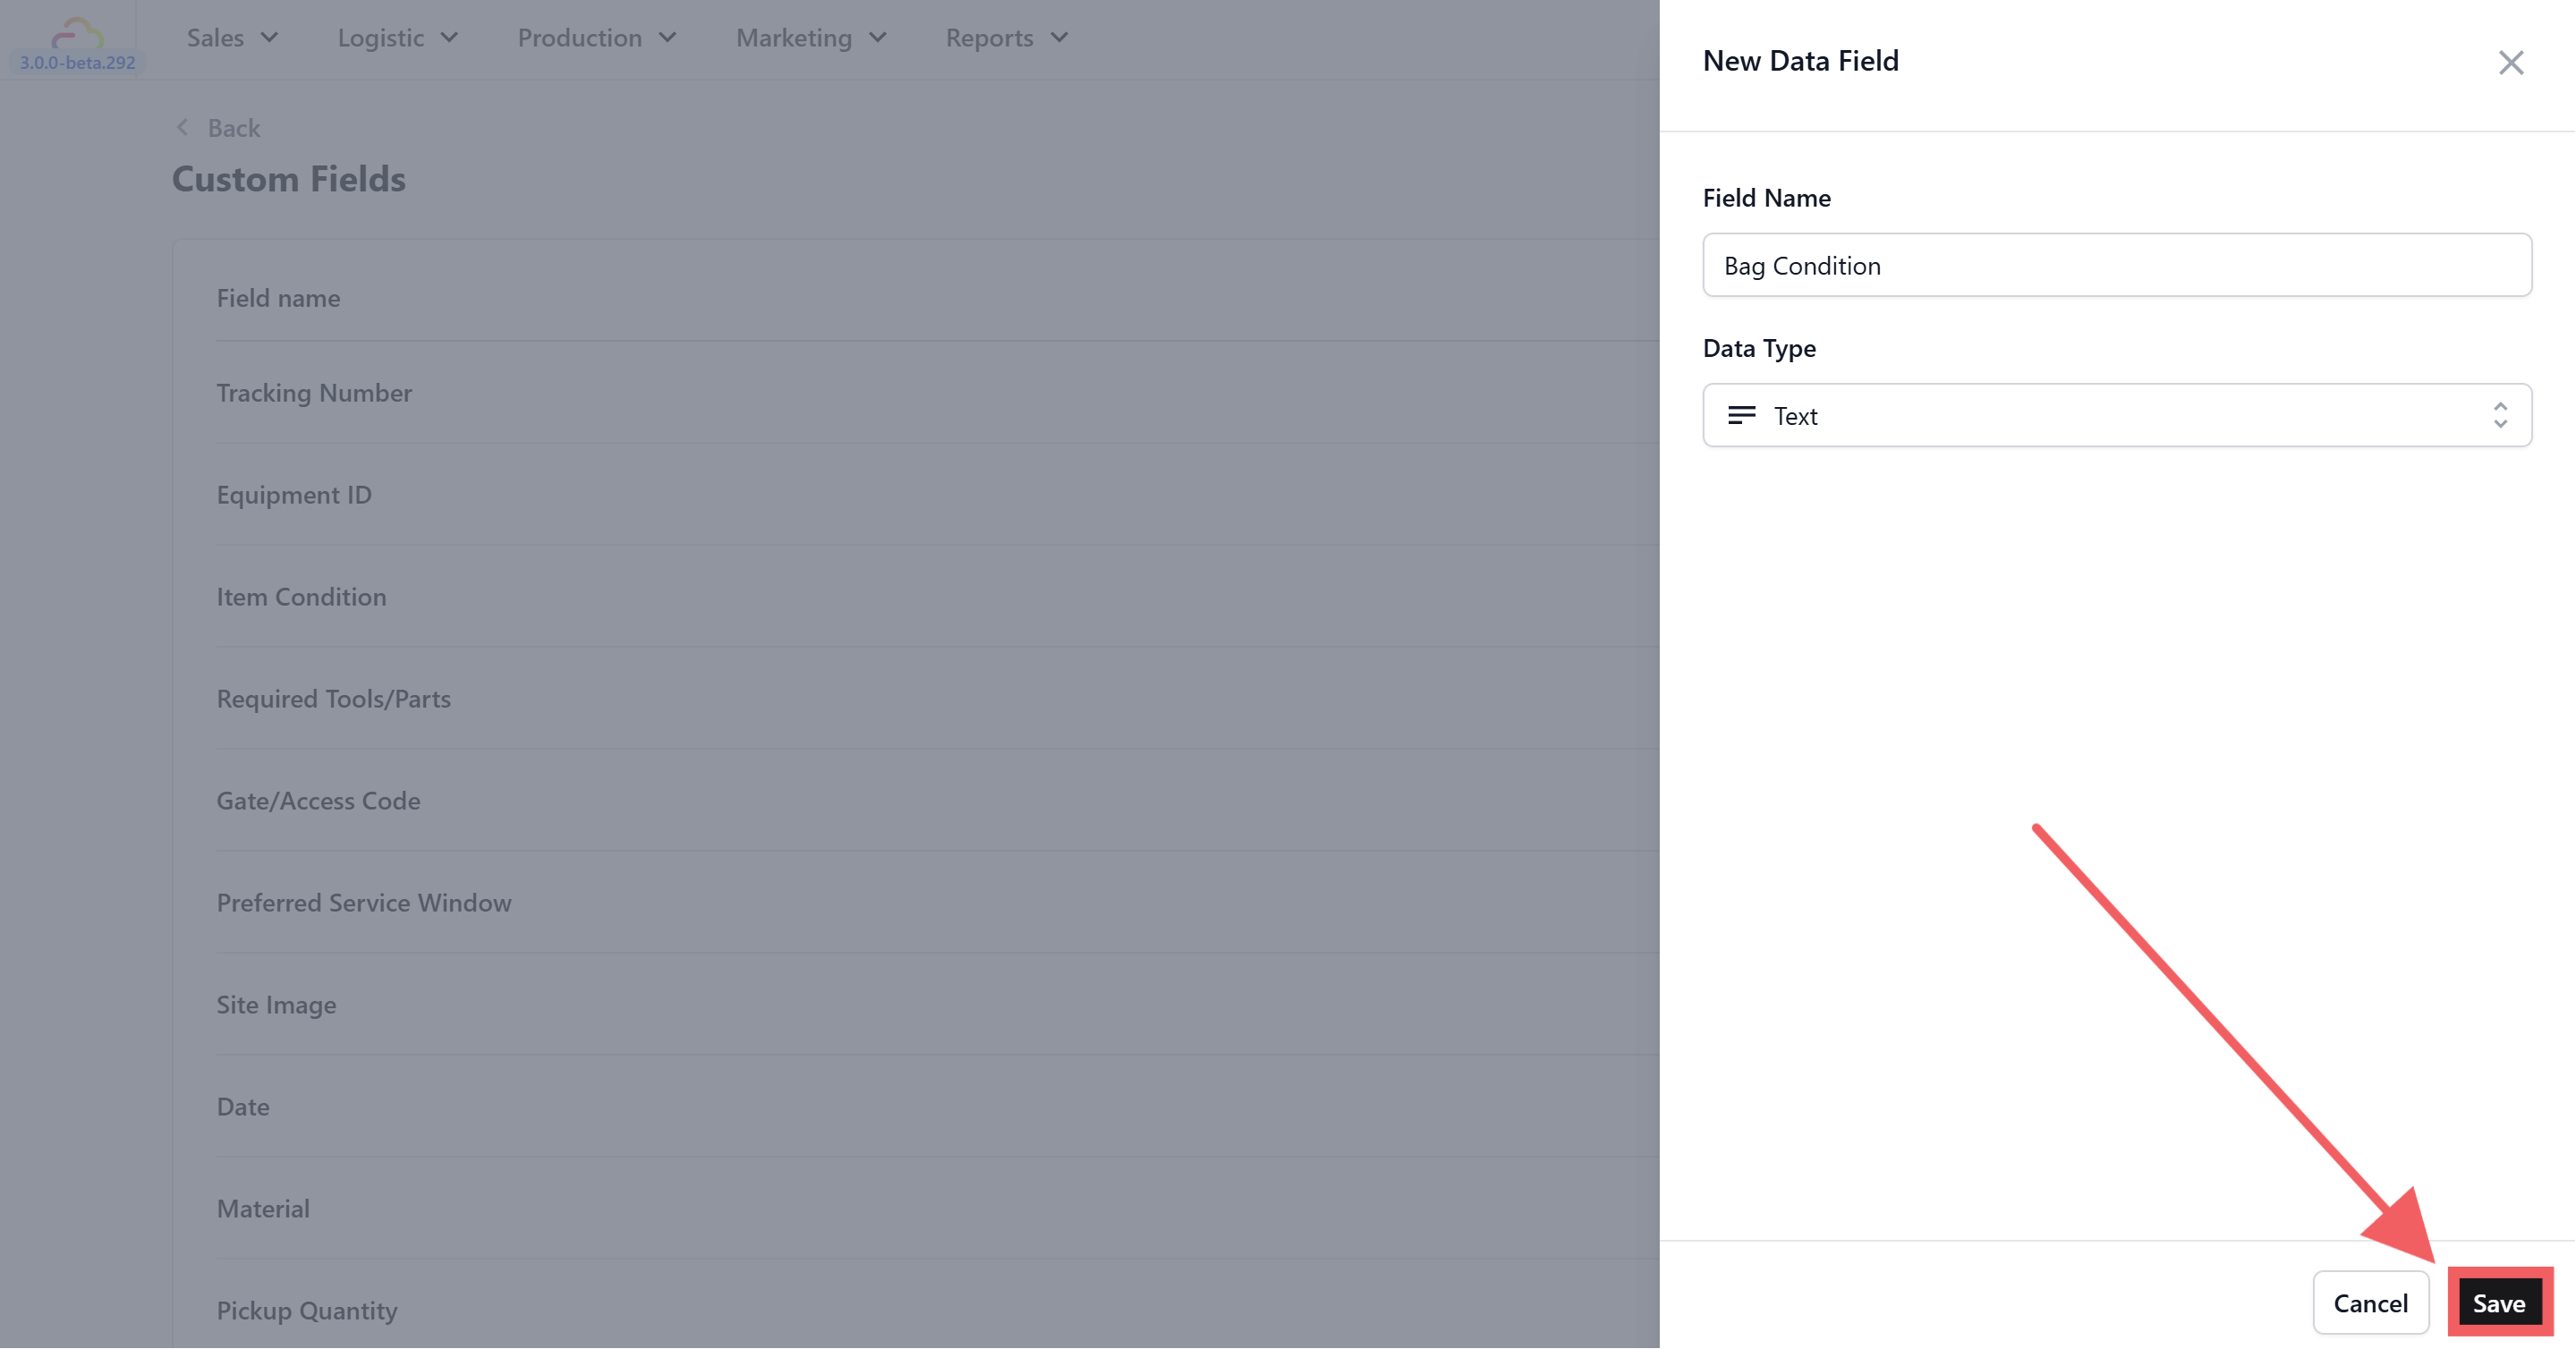
Your new data field will appear in the table and is immediately available to use in your procedures.
Choose your data type carefully. Once a data field is created, changing its type later may affect procedures that already use it.
---
## Working with Options
If you selected **Options** as your data type, you'll see additional settings below the type selector. This is where you define the choices your team can pick from.
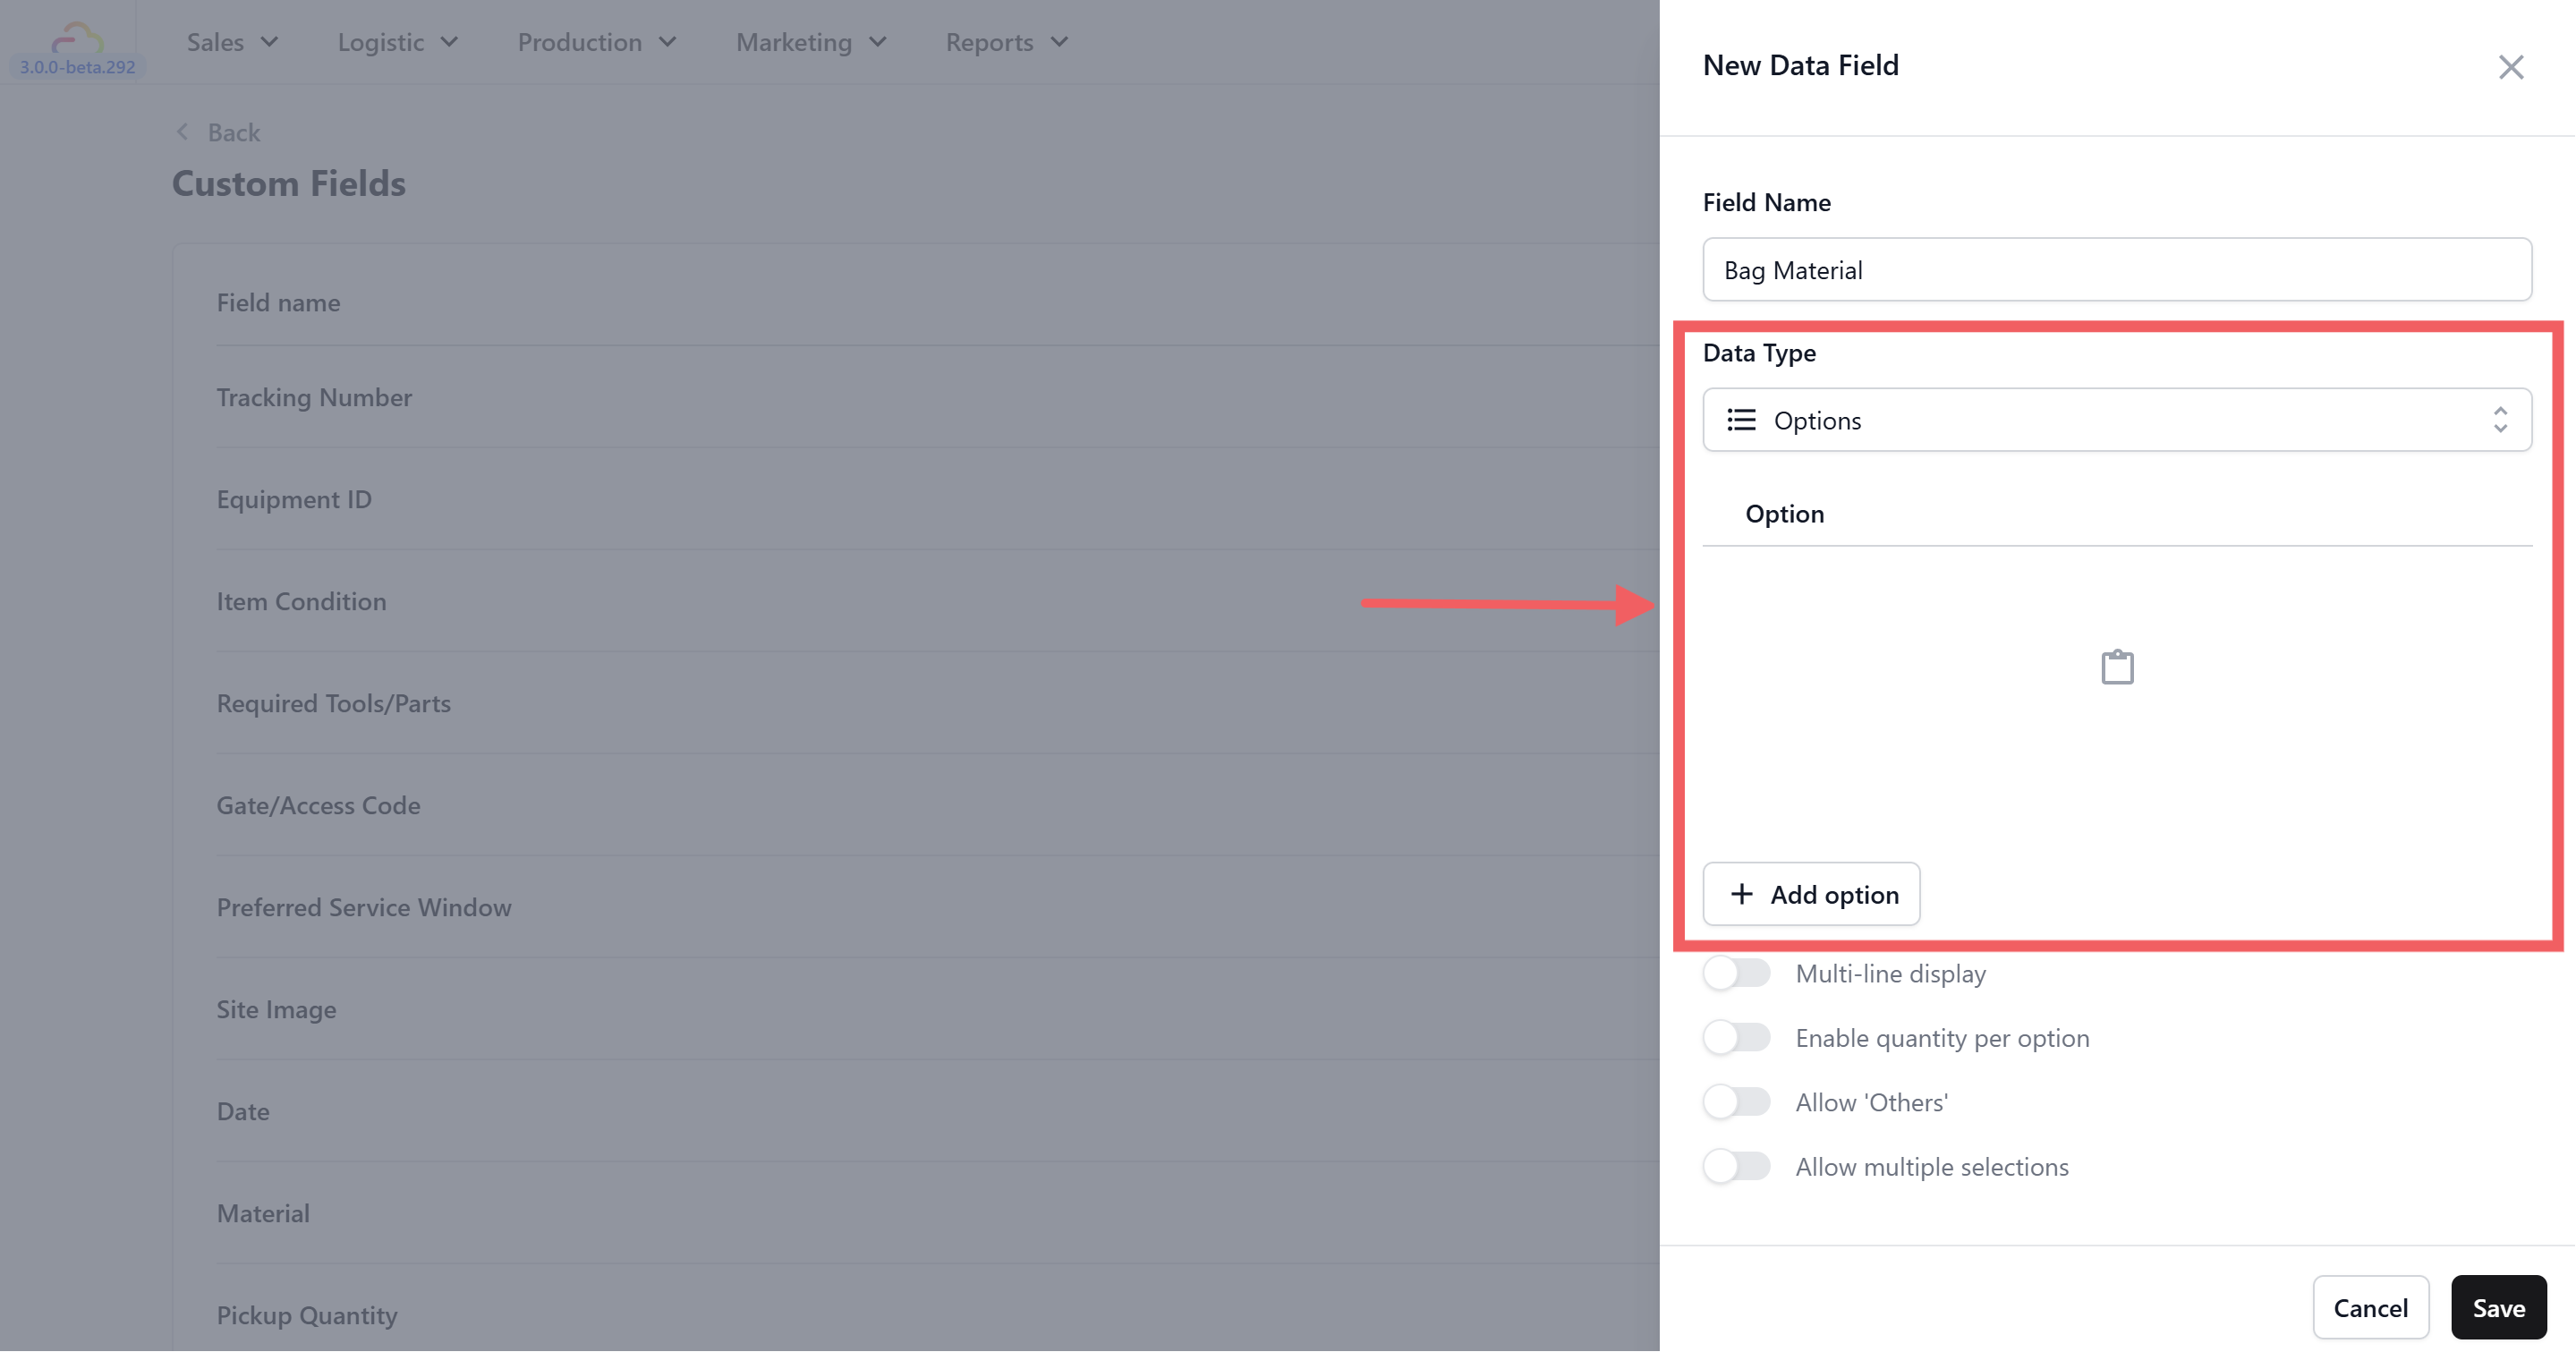
### Adding Option Values
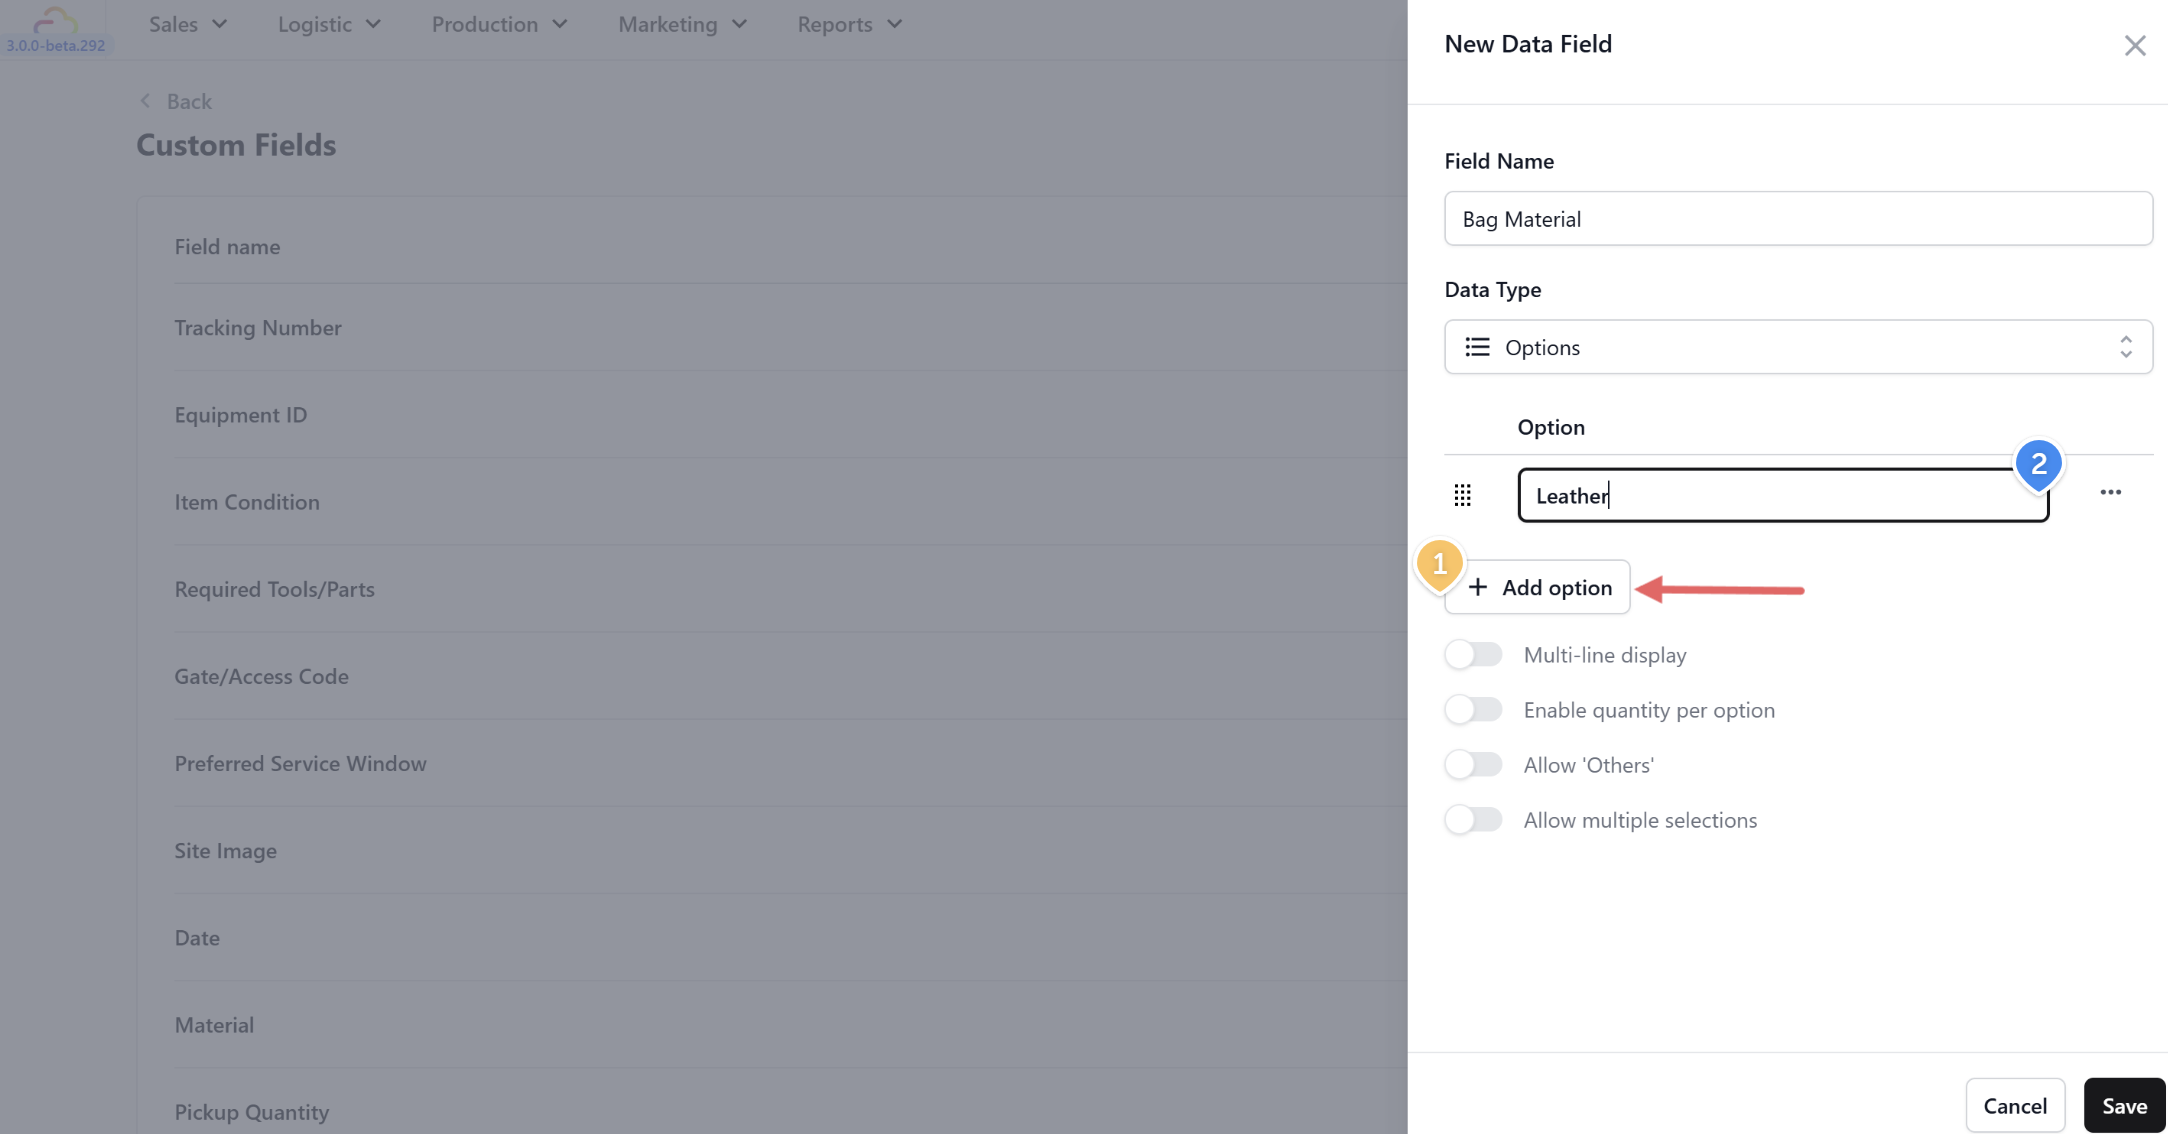
1. Click + Add option to add a new row
2. Type the option value (e.g. "Leather")
3. Repeat for each choice you need
A **Bag Material** field might have options like: Leather, Canvas, Nylon, Suede, Exotic Skin. A **Quality Check** field might have: Pass, Fail, Needs Review.
### Option Toggles
Below the options list, you'll see four toggle switches. All are off by default.
- **Multi-line display** — When turned on, the options display vertically (one per line) instead of in a compact row. Turn this on if you have many options or long option labels, so your staff can read them more easily on the screen.
- **Enable quantity per option** — When turned on, your team can enter a quantity next to each option they select. This is useful for fields like **Pickup Quantity** where a customer might have 3 shirts, 2 pants, and 1 jacket — your staff selects each item type and enters how many.
- **Allow "Others"** — When turned on, an extra free-text field appears at the end of the options list. This lets your team type in a value that isn't on your predefined list. Useful for fields like **Bag Brand** where you can't list every brand — your staff picks from common ones but can type in a rare brand when needed.
- **Allow multiple selections** — When turned on, your team can select more than one option at a time. This is useful for fields like **Bag Issue** where a single bag might have multiple problems — for example, "Broken Zipper" and "Faded Color" and "Torn Lining" all at once.
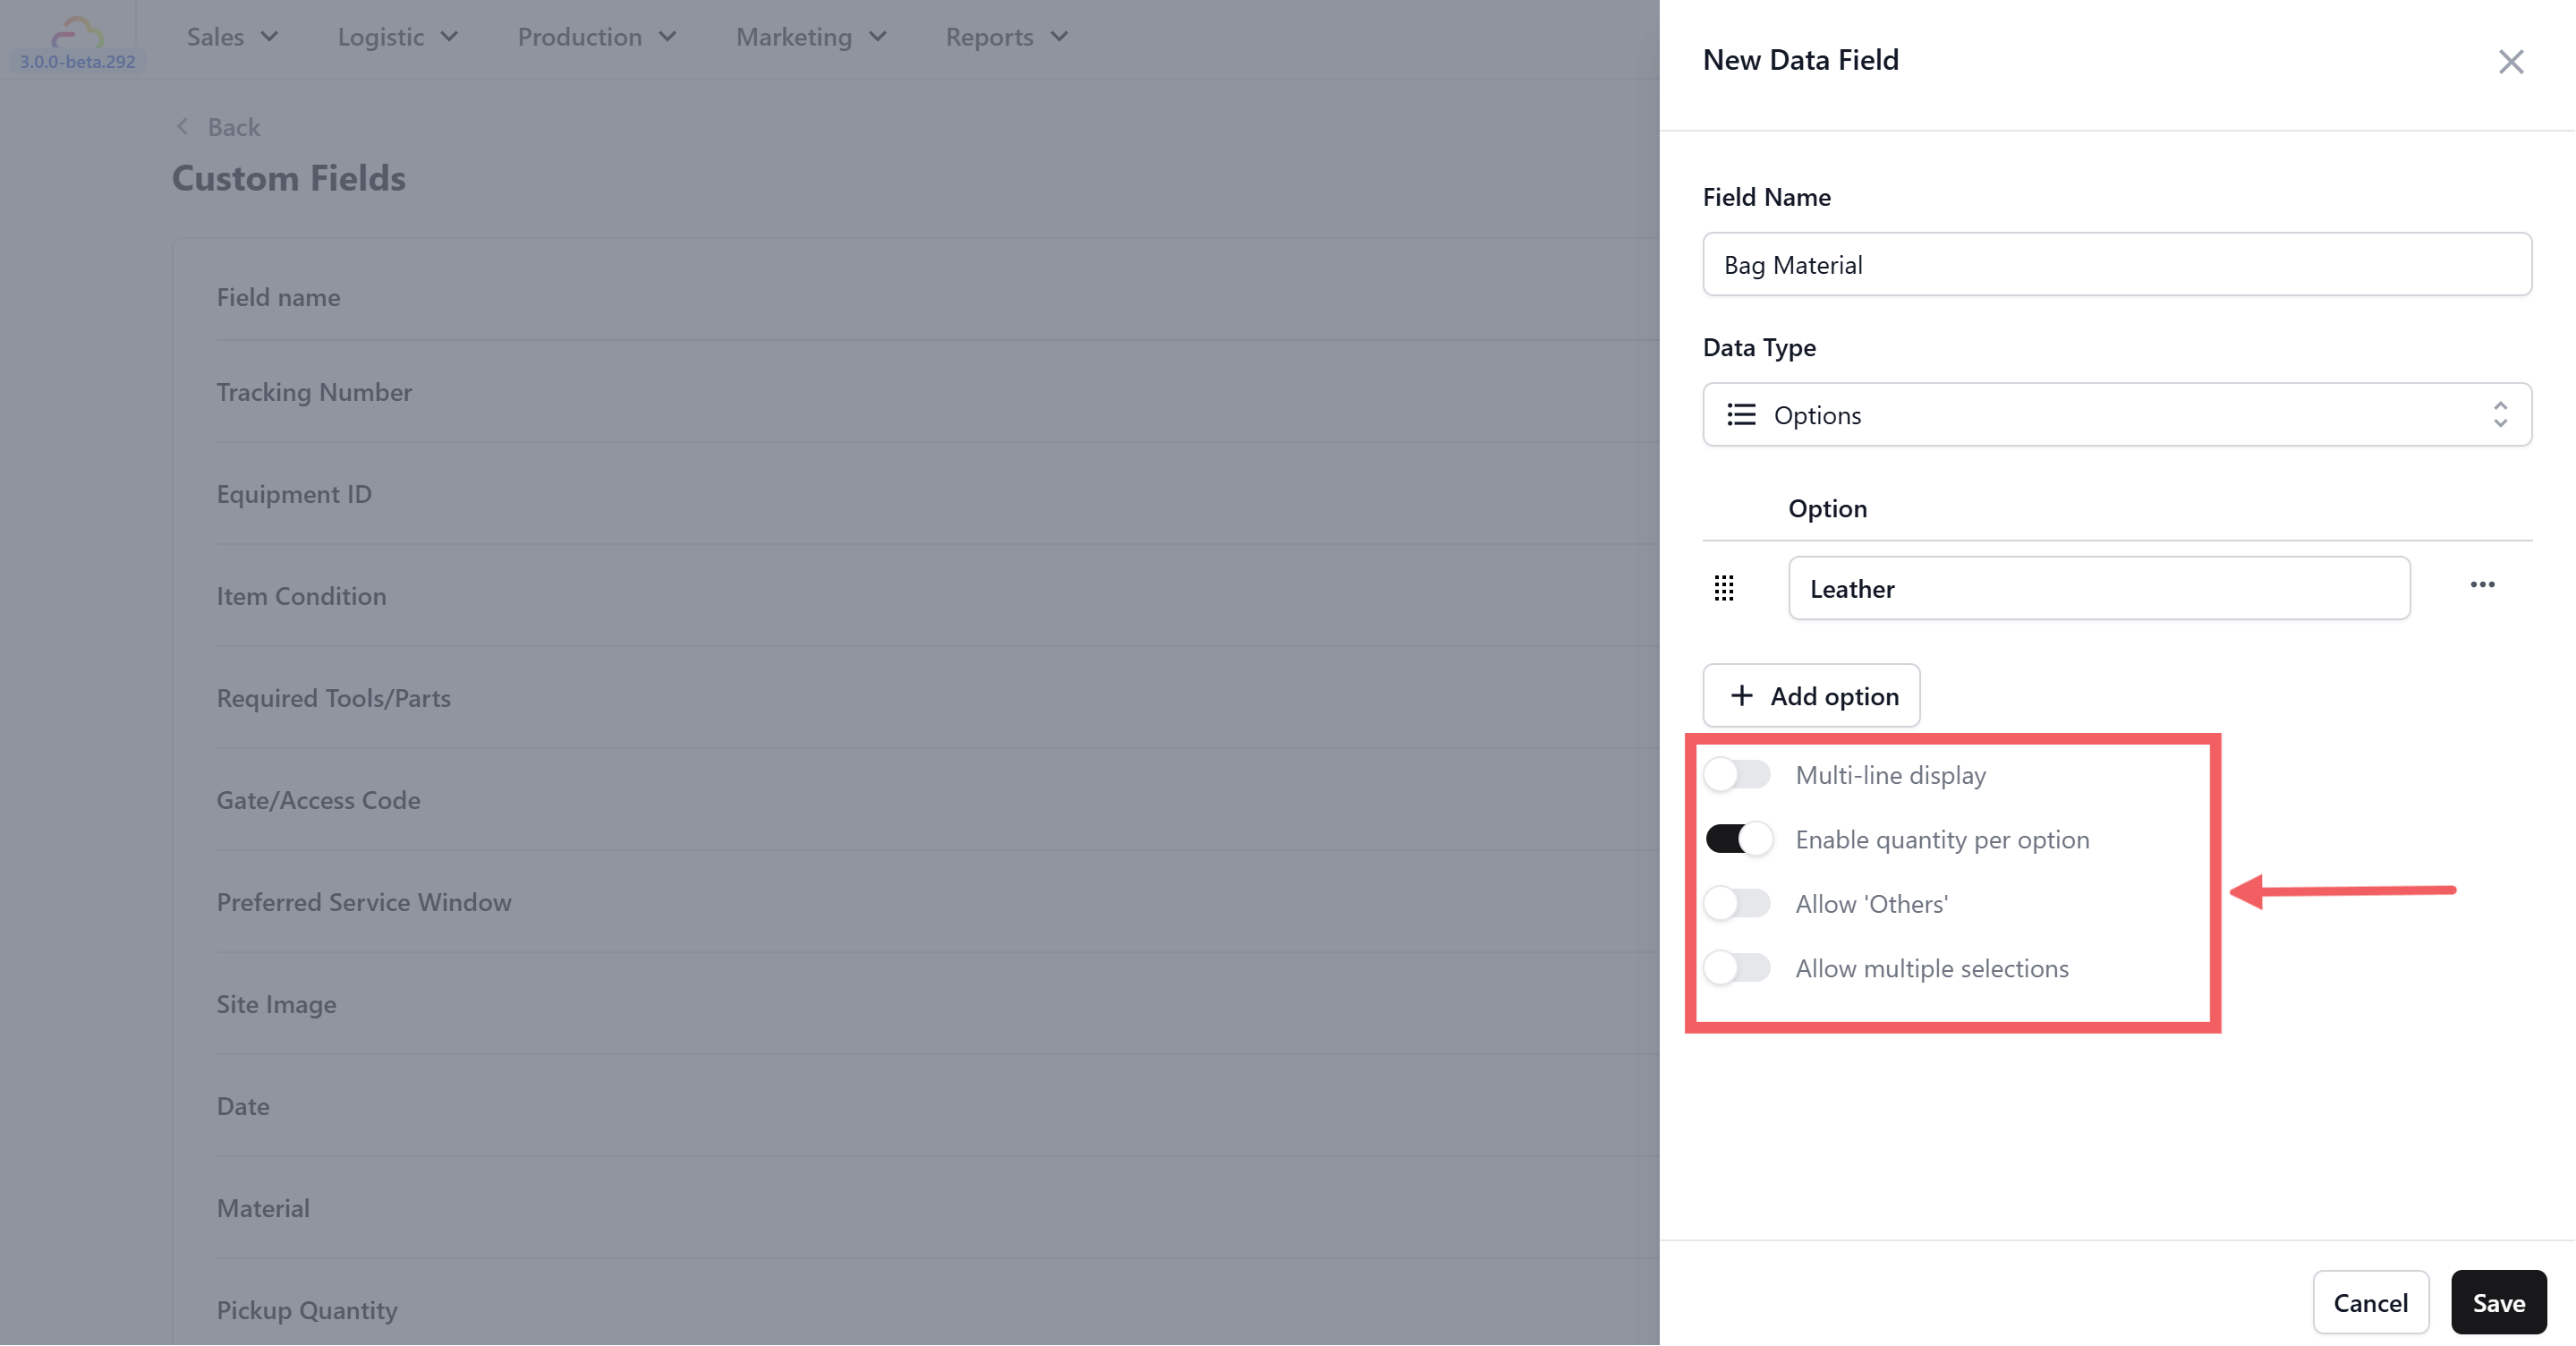
For a field like **Pickup Quantity** (tracking how many items of each type a customer drops off), turn on both **Enable quantity per option** and **Allow multiple selections**. That way your staff can select "Shirt" (qty 3), "Pants" (qty 2), and "Jacket" (qty 1) all in one field.
---
## Managing Your Data Fields
Once you've created your data fields, you can find and manage them from the same Custom Fields page.
### Searching
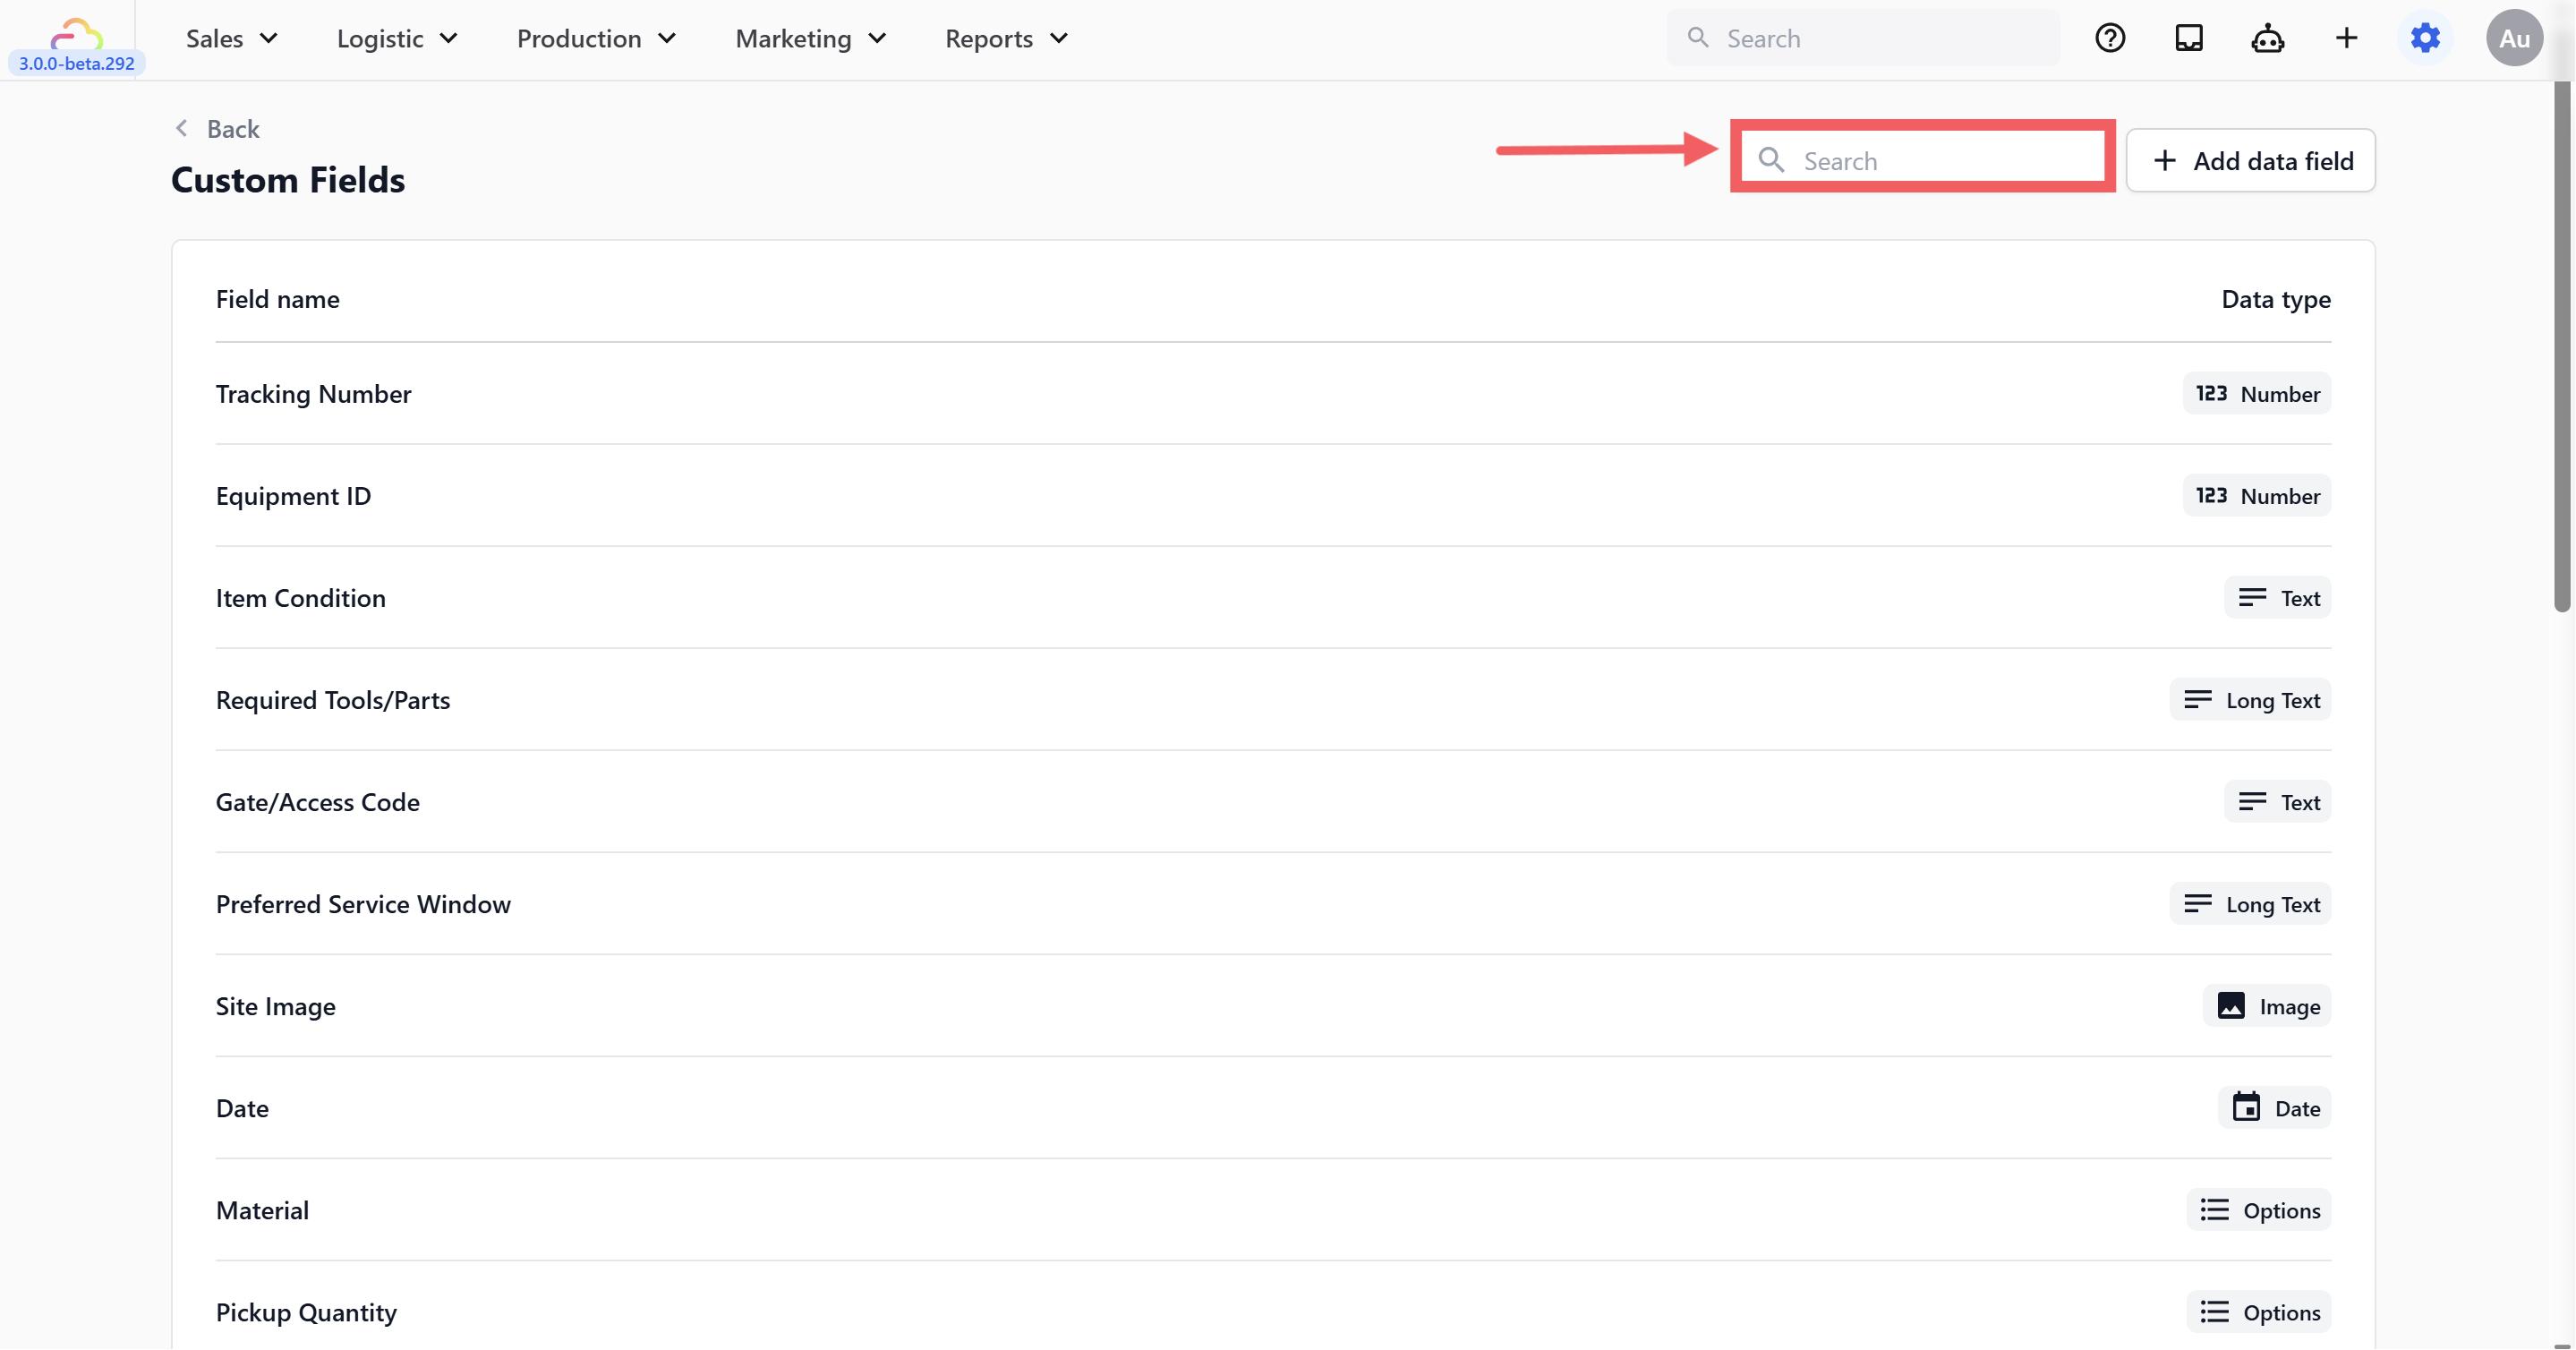
Use the search bar at the top of the page to quickly find a specific field. This is especially helpful once your list grows — just type part of the field name (e.g. "bag" to find all bag-related fields).
### Editing and Deleting
Click on any data field in the table to open it. The **Update Data Field** panel will appear on the right, showing the field's current name, data type, and settings.
From here you can:
- **Edit** — Update the field name, add or remove options (for Options fields), or adjust any toggles. When you're done, click `Save`.
- **Delete** — Click the red `Delete` button at the bottom-left of the panel to permanently remove the field.
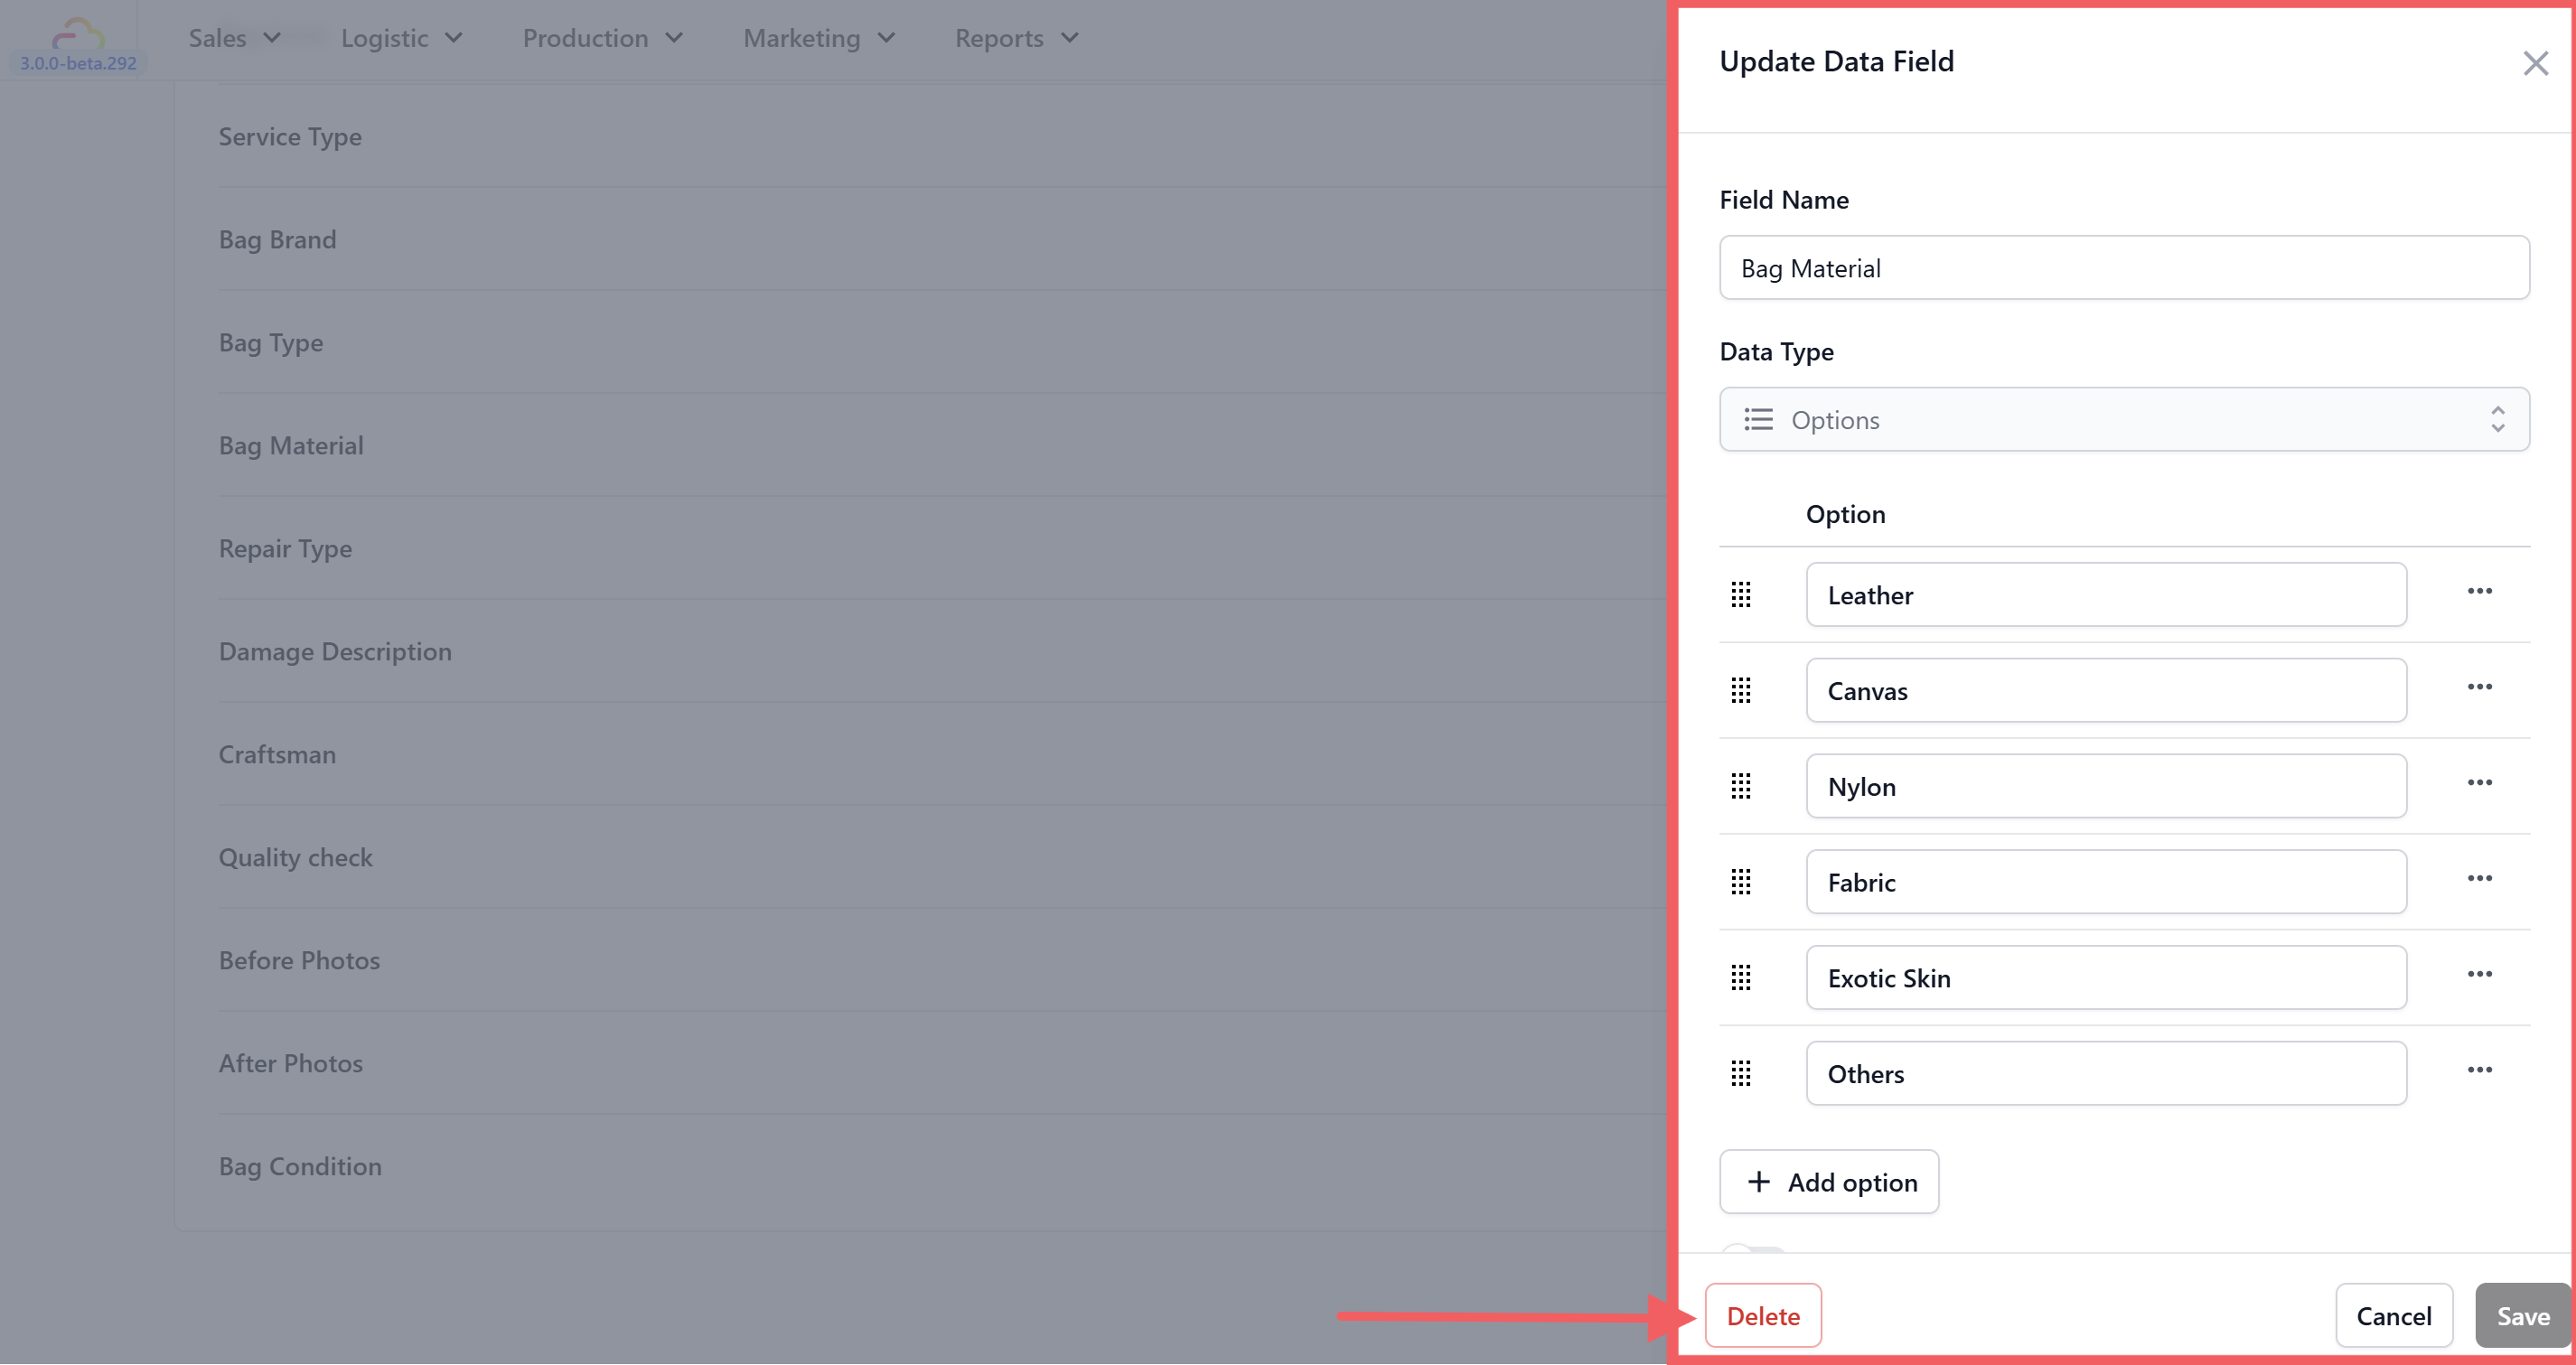
Deleting a data field cannot be undone. Before deleting, check whether the field is used in any of your active procedures. If it is, consider renaming it instead.