## Before You Start
- Your payment methods are set up and turned on. See [Setting Up Your Payment Methods at POS](/docs/setting-up-your-payment-methods-at-pos).
- Your business unit's handover methods, such as **Store pickup** and **Home delivery**, are switched on. See [Getting Finished Orders Back to Customers](/docs/setting-up-completion-and-handover).
- Your drivers have EasyBiz Workflow, the staff app, on their phones. See [Install and Sign In to EasyBiz Workflow](/docs/getting-the-easybiz-app-for-your-team).
- To turn on part payments or back-dated payments, you need the Staff app configuration admin access.
Taking payment for a new order at the POS counter is covered in [Collecting Payment at Checkout](/docs/collecting-payment-at-checkout). This article covers collecting the balance when the order goes back to the customer.
---
## Overview
The balance is what a customer still owes on an order after a deposit or any earlier payment. EasyBiz shows it on the order as **Amount Due** until the order is fully paid. Your staff can collect it in the Console, at the POS or in EasyBiz Workflow, in one payment or several. Handing an order over does not collect the balance by itself, so staff check the order before the items leave. Every payment is saved on the order and counted in your reports.
**Where it works**
- **Console:** staff open the order and click Collect, or send the customer a payment link.
- **POS:** staff open the order and tap Collect Payment.
- **EasyBiz Workflow:** staff and drivers open the order and tap Pay.
- **Online Store and Mobile App:** customers see the **Balance due** on their order and can pay it themselves.
---
## Why collect at handover
The handover is the last time you see the customer for this order. Collecting the balance there means:
- Fewer unpaid bills to chase by phone or WhatsApp later.
- Correct sales and payment records, so your Close of Day and reports match the money you received.
- No awkward calls to customers weeks after they collected their items.
If staff skip it, the order stays **Unpaid** or **Partially Paid** and waits in **Receivables** until someone records the payment.
---
## How to spot an order with money owed
Open the order and look at its **Payment** section.
- **Amount Due** shows in red with the amount still owed. It disappears once the order is fully paid.
- Next to the order amount, a tag shows the payment status.
**Payment status**
| **Status** | **What it means** |
| --- | --- |
| Unpaid | No payment has been recorded yet |
| Partially Paid | Part of the order is paid, such as a deposit |
| Paid | The order is fully paid |
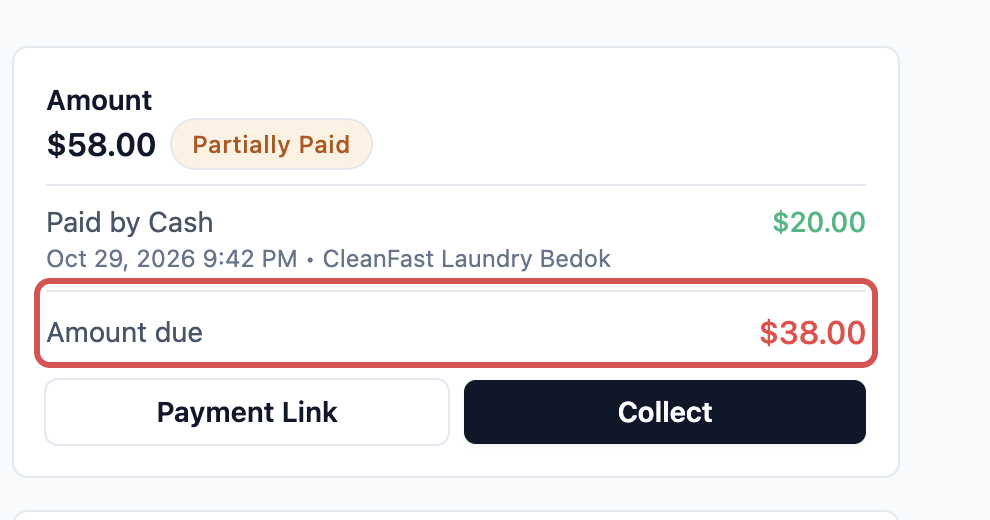
To see every order that still has money owed, click Sales, then Receivables. It lists every confirmed or fulfilled order that is not fully paid. See [Tracking Unpaid Bills in Receivables](/docs/tracking-receivables).
---
## Collect the balance in the Console
1. In the top navigation bar, click Sales, then click Orders.
2. Find the order and open it. See [Finding and Working on an Order](/docs/finding-and-working-on-an-order).
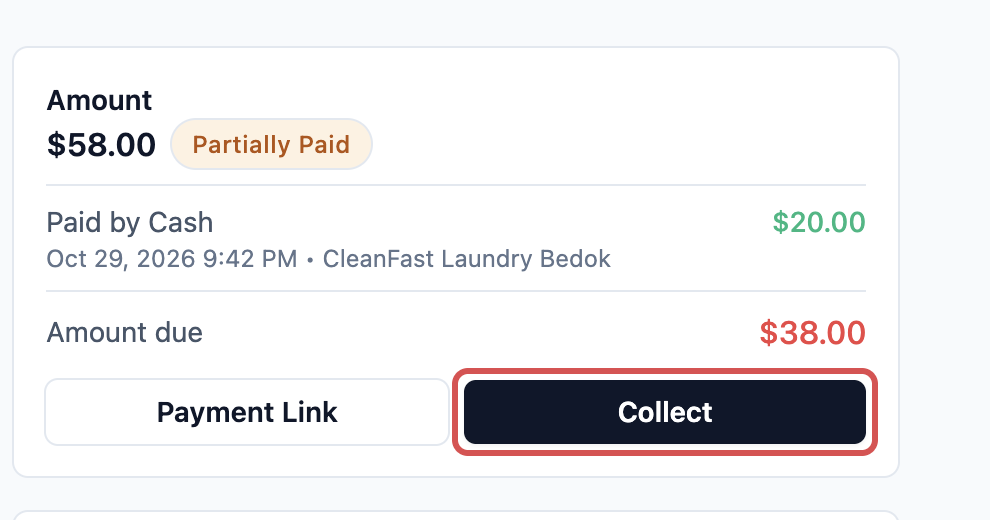
3. In the **Payment** section, check the **Amount Due**.
4. Click Collect.
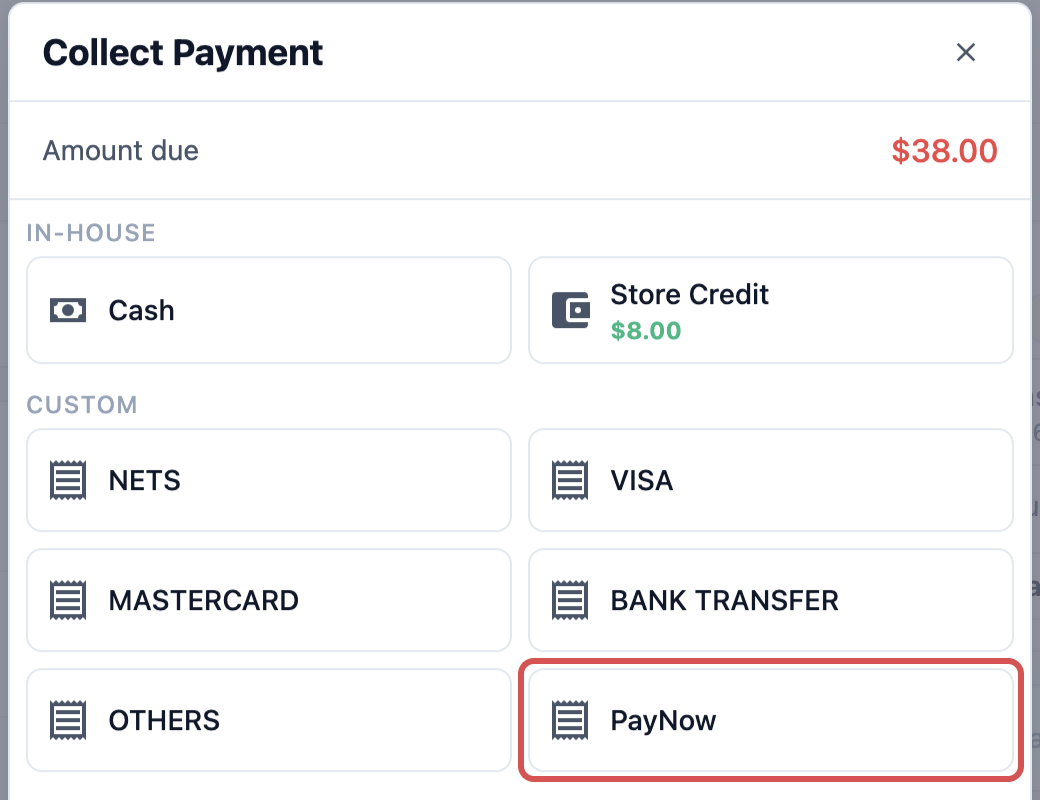
5. The **Collect Payment** window opens with the order number and the **Total** to collect. Click the payment method the customer uses, such as **PayNow** or **Cash**.
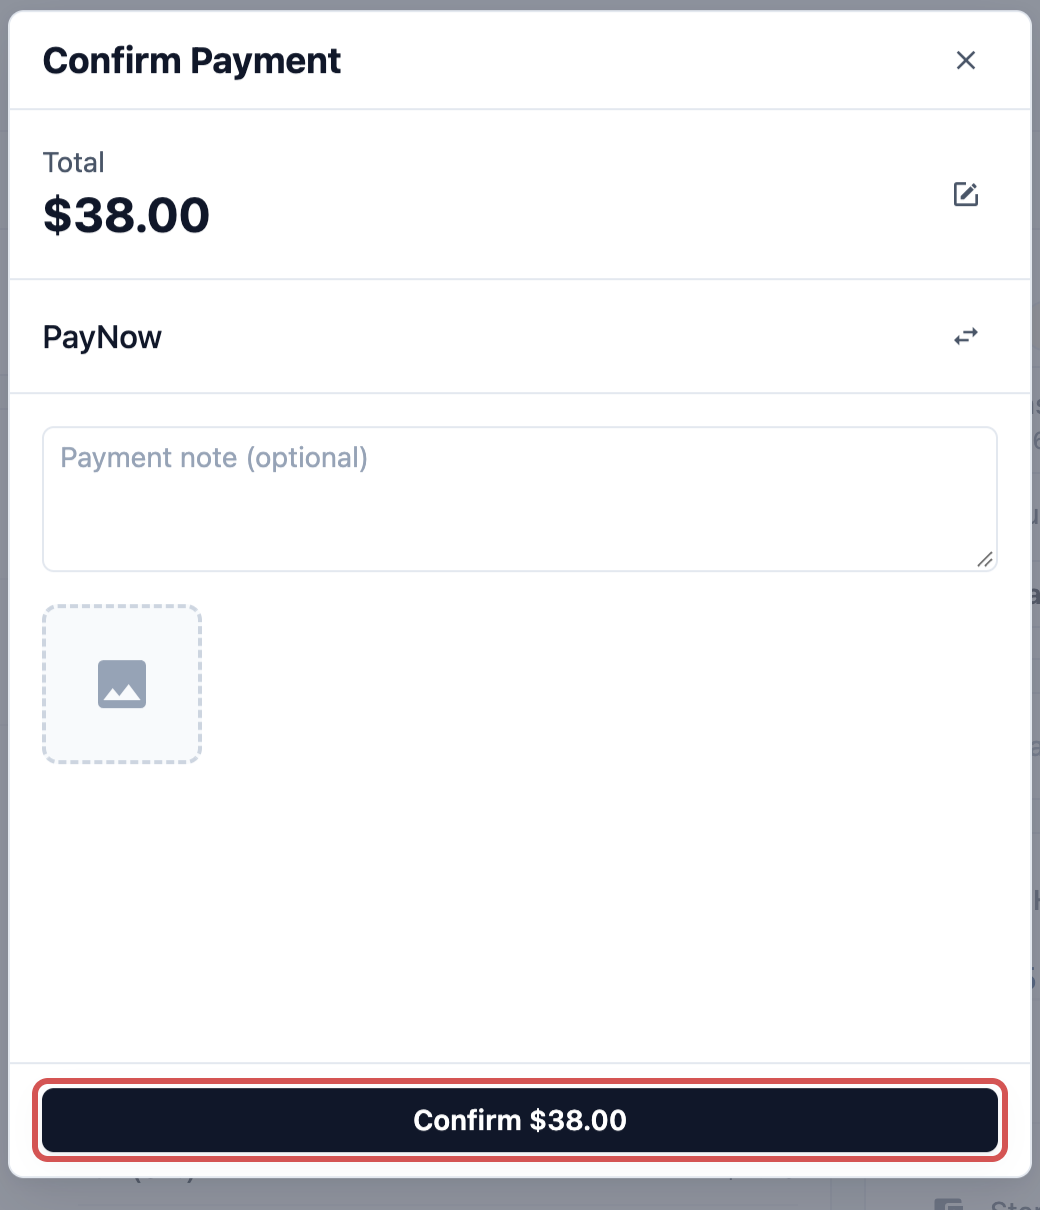
6. Check the amount. Add a **Payment note (optional)** if you need one, such as the last 4 digits of a bank transfer.
7. Click Confirm $38.00. The button always shows the amount you are collecting.
- **Cash:** enter the amount the customer hands you in **Amount Tendered**. The **Change** to give back is worked out for you.
- **PayNow and other QR payments:** the customer scans the QR code, and the screen changes on its own when the money arrives.
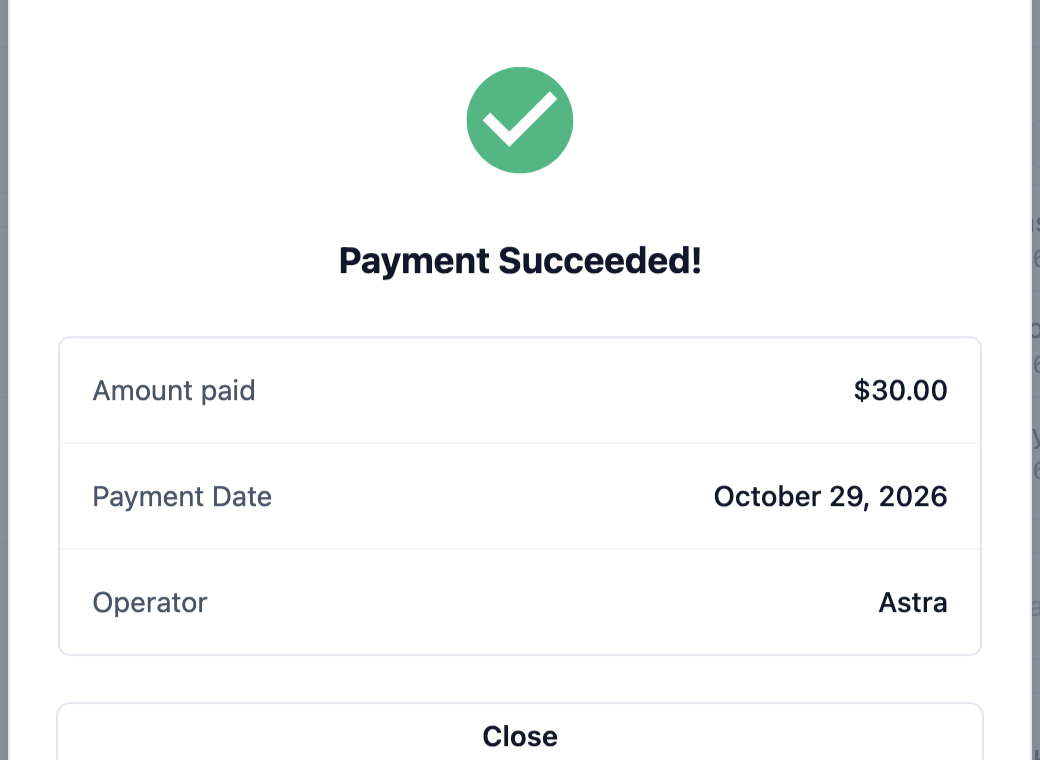
8. You see **Payment Succeeded!** with the **Amount Paid**, **Payment Date** and **Operator**. Click Close.
For deliveries, click Payment Link instead and send the link to the customer before the driver leaves. The customer pays on your Online Store and the order is marked paid, so the driver has nothing to collect.
The payment link needs an Online Store for the order's brand in its market, and the order's price must be confirmed first. See [Taking Payments on Your Online Store](/docs/payments-on-your-online-store).
### Paying with a saved card
If the customer saved a card when paying on your Online Store or Mobile App, or on your old 2.0 website or app, the Collect Payment window lists it under **Saved cards**, with the card's brand, last four digits and expiry, such as a Visa card ending in 4242. Choose it to charge the card. If the order was booked online with a saved card, that card shows first as **Card on file**. Saved cards show in the Console only, not on the POS. Cards saved through HitPay aren't listed under **Saved cards**.
If the bank declines the card or asks the customer to confirm the payment, nothing is charged and the order stays unpaid. Send the customer a **Payment Link** instead.
### Paying with store credit
If the customer has store credit and **Store Credit** is turned on in your payment methods, it shows in the Collect Payment window with the customer's balance. If the balance is less than the amount owed, EasyBiz sets the amount to the whole balance. Collect the rest with another method. See [Offer Store Credit and Bonus Top-Ups](/docs/setting-up-your-store-credit-program).
### Taking part of the balance
Use this only if customers sometimes pay a balance in more than one go, such as part now and the rest next week.
**Enable Partial Payment**
If you turn this on, staff see a pencil next to the **Total** in the Collect Payment window. They click it and type a smaller amount. The order shows **Partially Paid** and keeps the rest as Amount Due. If you leave it off, staff always collect the full balance in one payment. Store credit is the one exception: it can always pay part of the balance.
### Recording a payment on an earlier date
**Enable Back-Date Payment**
If you turn this on, the Collect Payment window shows a **Payment Date** with a pencil next to it. Staff change it to the day the customer actually paid, such as a bank transfer that arrived yesterday. The window shows **Back date payment** as a warning, and the order shows **Back date payment on** with the date. Anyone who can collect payments can change the date while this is on, so turn it on only if you need it.
Both switches can be on together, and each works on its own.
**Turn on part payments or back-dating in the Console**
1. Click the ⚙️ Settings icon in the top-right corner.
2. Under the **Staff app configuration** section, click **EasyBiz Console**.
3. Click Payment.
4. Turn on **Enable Partial Payment**, **Enable Back-Date Payment** or both.
5. Click Publish and confirm. You see "Published. Your team's Consoles have the changes."
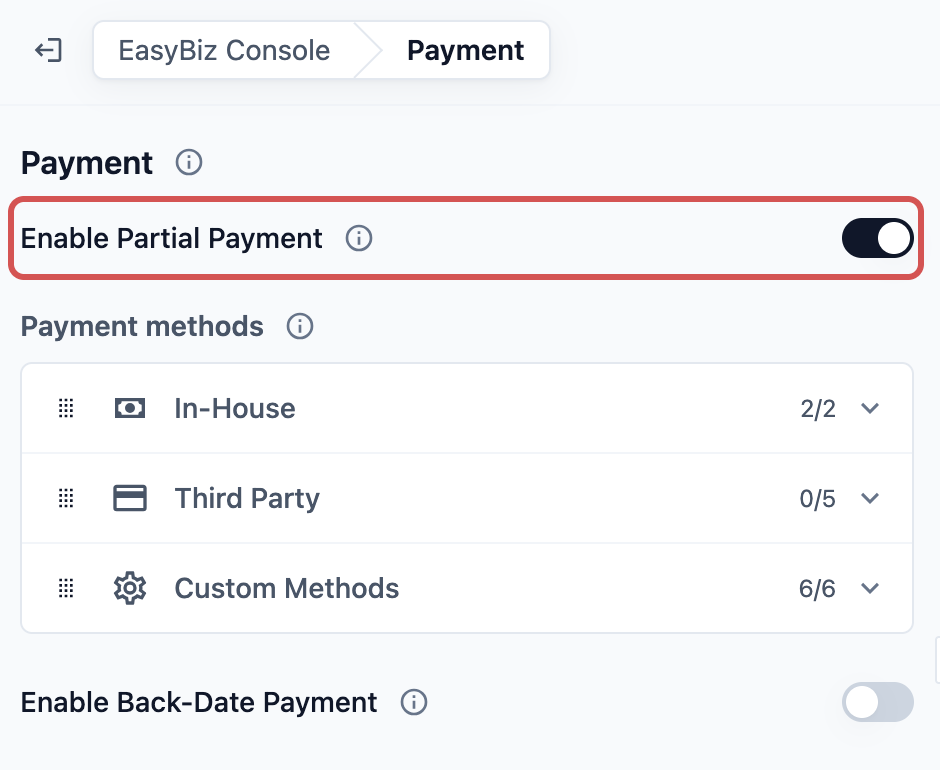
The POS has the same two switches in your POS app's **Payment** feature. See [Setting Up Your Payment Methods at POS](/docs/setting-up-your-payment-methods-at-pos).
---
## At store pickup
When the customer collects at your counter, collect the balance first, then hand the order over.
1. Open the order in the Console or on the POS.
2. If the **Payment** section shows **Amount Due**, click Collect in the Console or tap Collect Payment on the POS, and take the payment.
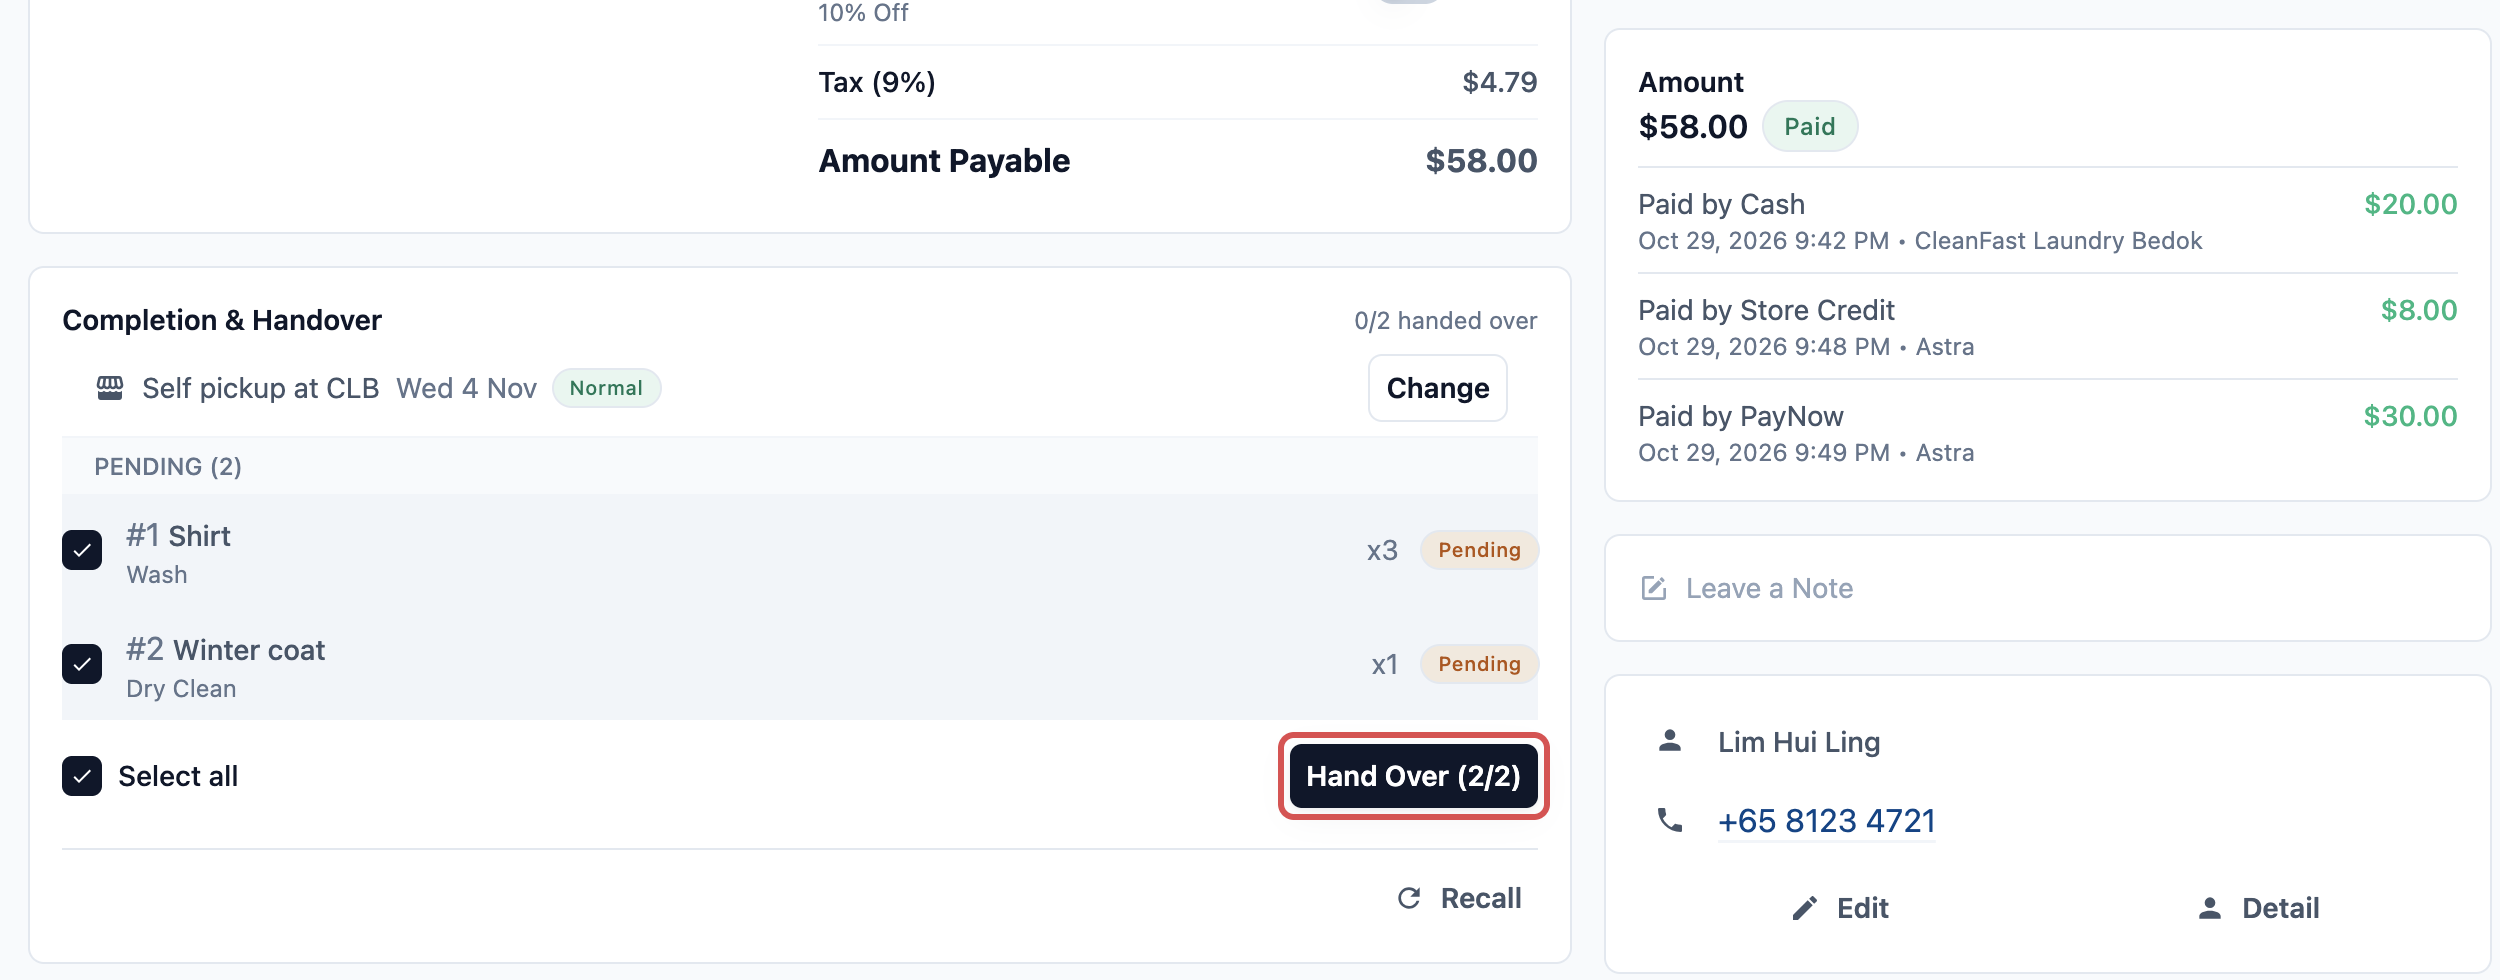
3. In the **Completion & Handover** section, click Hand Over, select the items and click Confirm Handover.
If your staff use the **Delivery** screen in the Console or EasyBiz Workflow, they tap Mark Collected to finish a store pickup.
Handing over does not check the balance. The **Hand Over** button and the Delivery screen let staff finish an unpaid order, so always check **Amount Due** first.
---
## At home delivery
Your driver delivers the order with EasyBiz Workflow. Before completing the delivery, the driver collects the balance.
1. At the customer's door, the driver opens the order in EasyBiz Workflow.
2. If the order still has a balance, the driver taps Pay.
3. The app shows the amount still owed. The driver chooses how the customer pays and confirms.
4. The driver completes the delivery as usual, with any handover steps you set up, such as a photo or a signature.
The Pay button shows only when the order page in the driver's app includes payments and the driver has permission to take them. See [What Your Team Can Do in the EasyBiz Workflow App](/docs/what-your-team-can-do-in-the-workflow-app).
The steps on your business unit's **Handover** tab, such as photos and signatures, can't include a payment. Payment is always taken on the order itself. See [Choosing What Staff and Drivers Do at Handover](/docs/setting-up-handover-steps).
**If the customer can't pay**
Decide your shop's rule and tell your drivers. They have 2 choices:
- **Deliver anyway:** the driver completes the delivery. The order stays **Unpaid** or **Partially Paid** and shows in **Receivables**, so the office can send a payment link or a reminder.
- **Don't deliver:** the driver marks the delivery as failed and enters the reason, such as "Customer unable to pay". The office then books a new delivery.
---
## Overpaid orders
If a customer pays more than the order total, the **Payment** section shows **Amount Overpaid** in green and **Total Outstanding** as **Paid**. To give the extra back, click Refund overpaid. This button shows only if your order page allows refunds. See [Processing Refunds and Returns](/docs/processing-refunds-and-returns).
---
## After the payment
Once the balance is fully paid:
- The order shows the **Paid** tag, and **Amount Due** disappears.
- Each payment is listed on the order, such as "Paid by PayNow", with the date and the staff member who took it.
- You can print or send the customer a receipt from the order.
- The order leaves **Receivables** by itself.
- The payment shows in your Payments report on the day it was taken, or on the back-dated day. See [Reading the Payments Report](/docs/reading-the-payments-report).
---
## Example: CleanFast Laundry, Jurong
Mrs Lim drops off a winter coat and 3 dress shirts at CleanFast Laundry's Jurong shop. The order comes to $58.00, and she pays a $20.00 deposit in cash. 3 days later she comes back to collect. She has $8.00 of store credit left from a top-up and wants to use it, then pay the rest by PayNow.
The counter staff open her order and see **Amount Due** $38.00.
1. They click Collect, choose **Store Credit** and click Confirm $8.00. EasyBiz has already set the amount to her full $8.00 credit.
2. They click Collect again, choose **PayNow** and click Confirm $30.00. Mrs Lim scans the QR code.
3. They hand over her items with Hand Over and Confirm Handover.
Here's how the money adds up:
| **Line** | **Amount** |
| --- | --- |
| Order total | $58.00 |
| Deposit at drop-off, Cash | −$20.00 |
| Amount Due at pickup | $38.00 |
| Store Credit | −$8.00 |
| Amount Due after store credit | $30.00 |
| PayNow | −$30.00 |
| Amount Due | $0.00 |
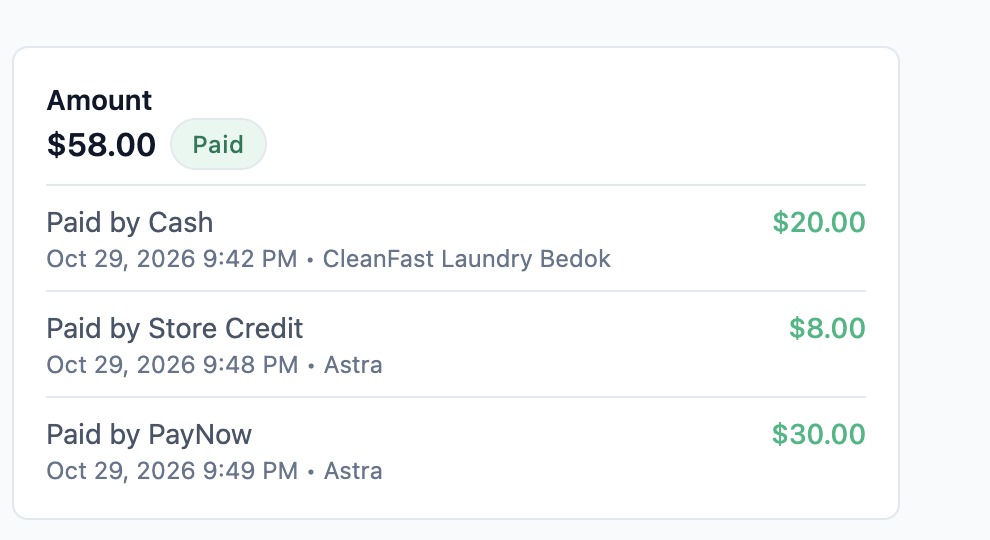
The order now shows **Paid**, with 3 payments listed: Cash $20.00, Store Credit $8.00 and PayNow $30.00.
Take the store credit first. EasyBiz sets it to the customer's full balance, and the next method then collects exactly what is left, even with **Enable Partial Payment** off.
---
## FAQs
**Can my staff hand over an order that isn't paid?**
> Yes. EasyBiz doesn't stop a handover because of an unpaid balance, at the counter or at the door. The order stays in **Receivables** until it is paid, so make checking **Amount Due** part of every handover.
**Can a customer pay part now and the rest later?**
> Yes, if **Enable Partial Payment** is on. The order shows **Partially Paid** and keeps the rest as **Amount Due**. Collect the rest the same way when the customer pays.
**Why isn't Store Credit offered when I collect?**
> Store Credit shows only when it is turned on in your payment methods and the order has a customer with store credit. If the window says "Couldn't load the customer's store credit", try again. The other methods still work while it loads.
**Where do I see every order that still has money owed?**
> In Sales › Receivables. You can filter by age, outlet and customer, and send payment reminders. See [Tracking Unpaid Bills in Receivables](/docs/tracking-receivables).
**Can the customer pay the balance online instead?**
> Yes. Customers see the **Balance due** on their order in your Online Store or Mobile App and can pay it there. In the Console, Payment Link sends them straight to it. The order is marked paid when the payment comes in.
**Can I add a Collect payment step to the Handover tab?**
> No. Handover steps record proof of the handover, such as photos, signatures and notes. Payment is taken on the order, in the Console, at the POS or with Pay in EasyBiz Workflow.
---
## What's Next
You can now collect the balance at the counter, at the door or online, and keep unpaid orders from slipping out. Next, choose what your team sees when they take a new order in [Customize the Console New Order Page](/docs/set-up-the-order-entry-steps).