When you finish, your staff check the day's sales on the POS, close the day in a few taps and hand you a saved, printed report every night.
## Before You Start
- Your POS app must have its pages set up. See [Setting Up the Checkout Page](/docs/setting-up-the-pos-checkout-page).
- If your staff count the cash at closing, turn on the Cash Drawer first. See [Tracking Cash in the Drawer](/docs/set-cash-drawer-on-your-pos).
- To see and print the day's report, you need a published Close of Day template. See [Setting Up the Close of Day Report Template](/docs/setting-up-the-close-of-day-report-template).
- To print the report, connect a receipt printer to the POS. See [Connecting Your Printers to the POS](/docs/connecting-your-printers-to-the-pos).
- You need access to ⚙️ Settings in the Console.
- If you set this up before: Daily Sales is now under **Shift & cash** in the POS app editor, not under **Features**, and you add the Close of Day steps right there. A Close of Day flow you made before is kept.
## Choose your setup
| **Level** | **Fits shops like** | **What you set up** | **Read these sections** |
| --- | --- | --- | --- |
| Easy | One shop where the owner only needs to know who closed the day | **Enabled** and one **Capture Signature** step | [Where to find it](#where-to-find-it), [Setting it up](#setting-it-up), [Close of Day Flow](#close-of-day-flow), [What staff see on the POS](#what-staff-see-on-the-pos) |
| Intermediate | A shop that counts its till every night and prints the day's report for the owner, like CleanFast's Tampines shop | Everything in Easy, plus a **Cash Drawer** step, an **Enter Note** step if you want one, and a **Close of Day Receipt Template** | Everything in Easy, [Close of Day Receipt Template](#close-of-day-receipt-template), [Counting the cash during the close](#counting-the-cash-during-the-close) |
With Easy alone, staff still see the day's sales, orders and payments, and every close is saved with the staff member's signature. You can add the cash count and a printed report later without changing anything else.
## Overview
Daily Sales is the POS screen where staff see one day's sales, orders and payments for their shop. Close of Day is how they finish that day: they go through a few short steps you choose, such as counting the cash and signing, and the POS saves the day's report. Once a day is closed, that shop's POS stops taking new sales and payments for the date, so the report you get stays complete. If staff make a mistake, they can withdraw the close the same day and do it again. Daily Sales is on in a new Service POS app, but the Close of Day button only appears after you add at least one step.
**Where it works**
- **Console:** you turn on Daily Sales, choose the Close of Day steps and the report template in the POS app editor.
- **POS:** staff open Daily Sales from the bottom bar, close the day and print the report.
- **Checkout and Orders pages:** after the day is closed, staff can't charge new orders or collect payments at that shop until the next day.
---
## Why set it up
- **One number at the end of the day.** Staff see Net Total, Net Collections and every payment method on one screen, without adding up receipts.
- **A report for every day.** Each close saves a report with the totals, the cash count and the staff member's signature, so you can check any night later.
- **No sales slipping in after closing.** Once the day is closed, the POS stops new charges for that date, so the report you read in the morning still matches.
If you add no Close of Day steps, staff still see the day's totals on Daily Sales, but there is no Close of Day button and no report is saved.
---
## Where to find it
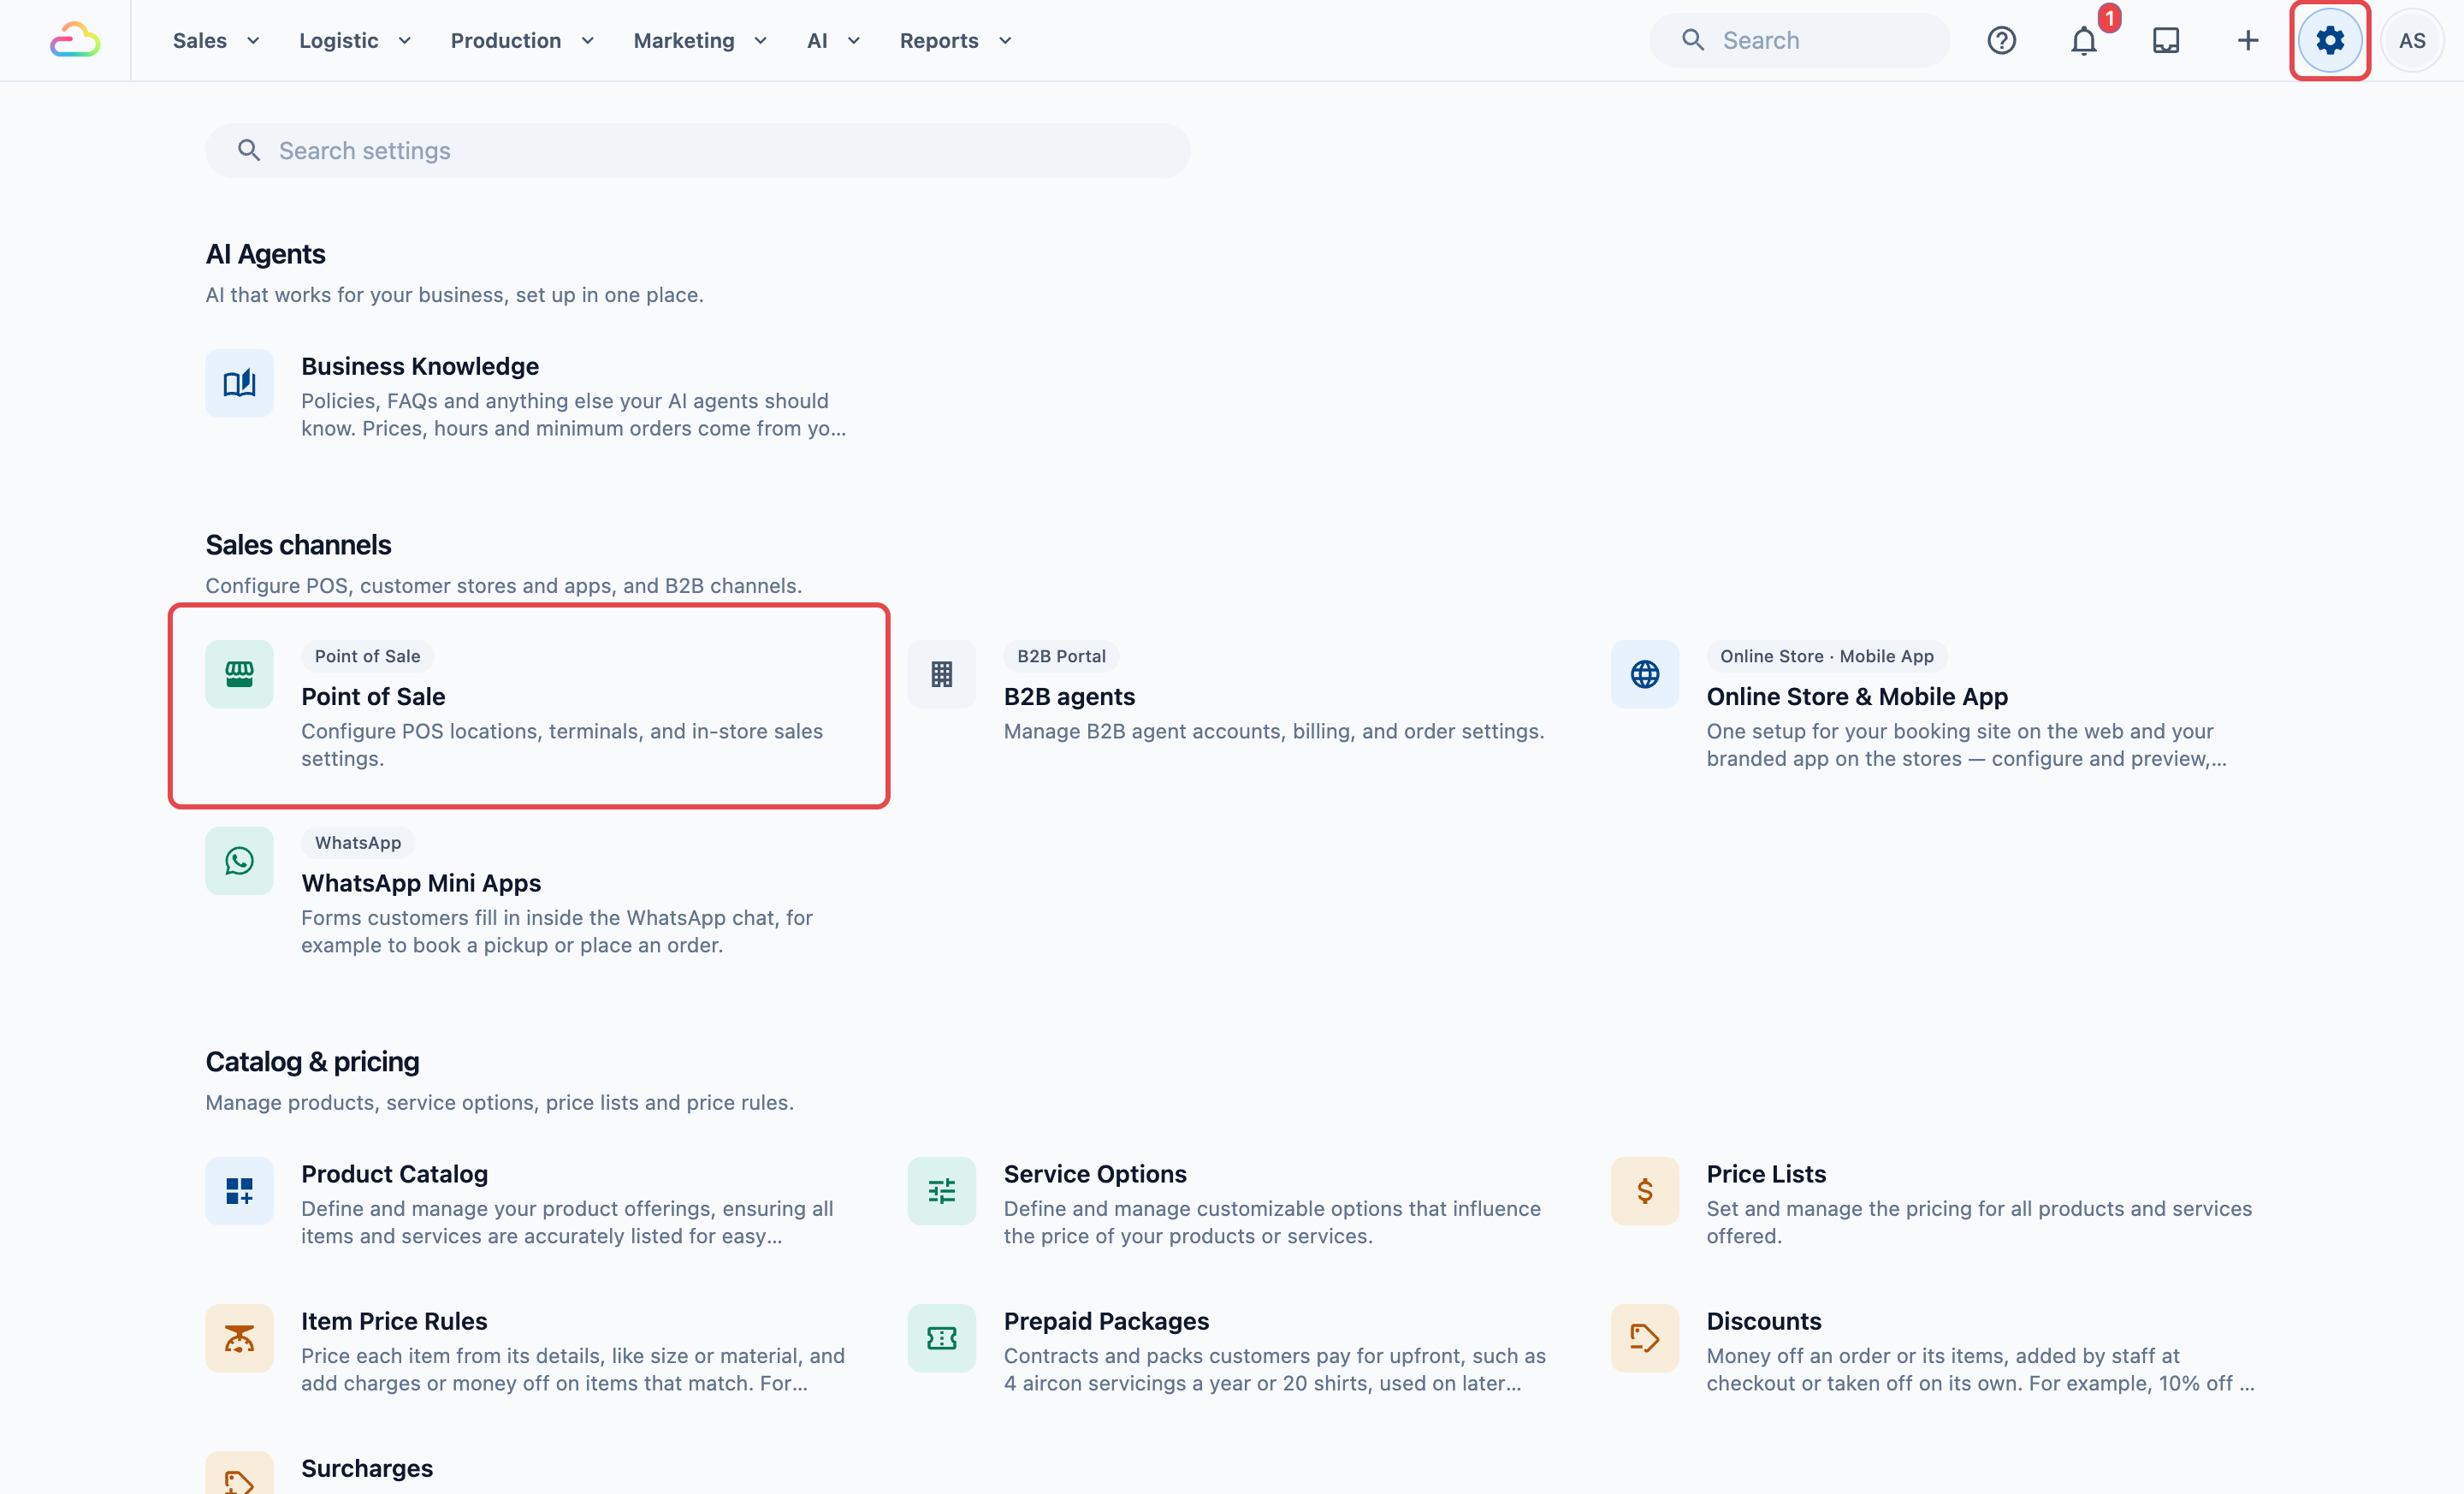
1. Click the ⚙️ Settings icon in the top-right corner.
2. Under the **Sales channels** section, click **Point of Sale**.
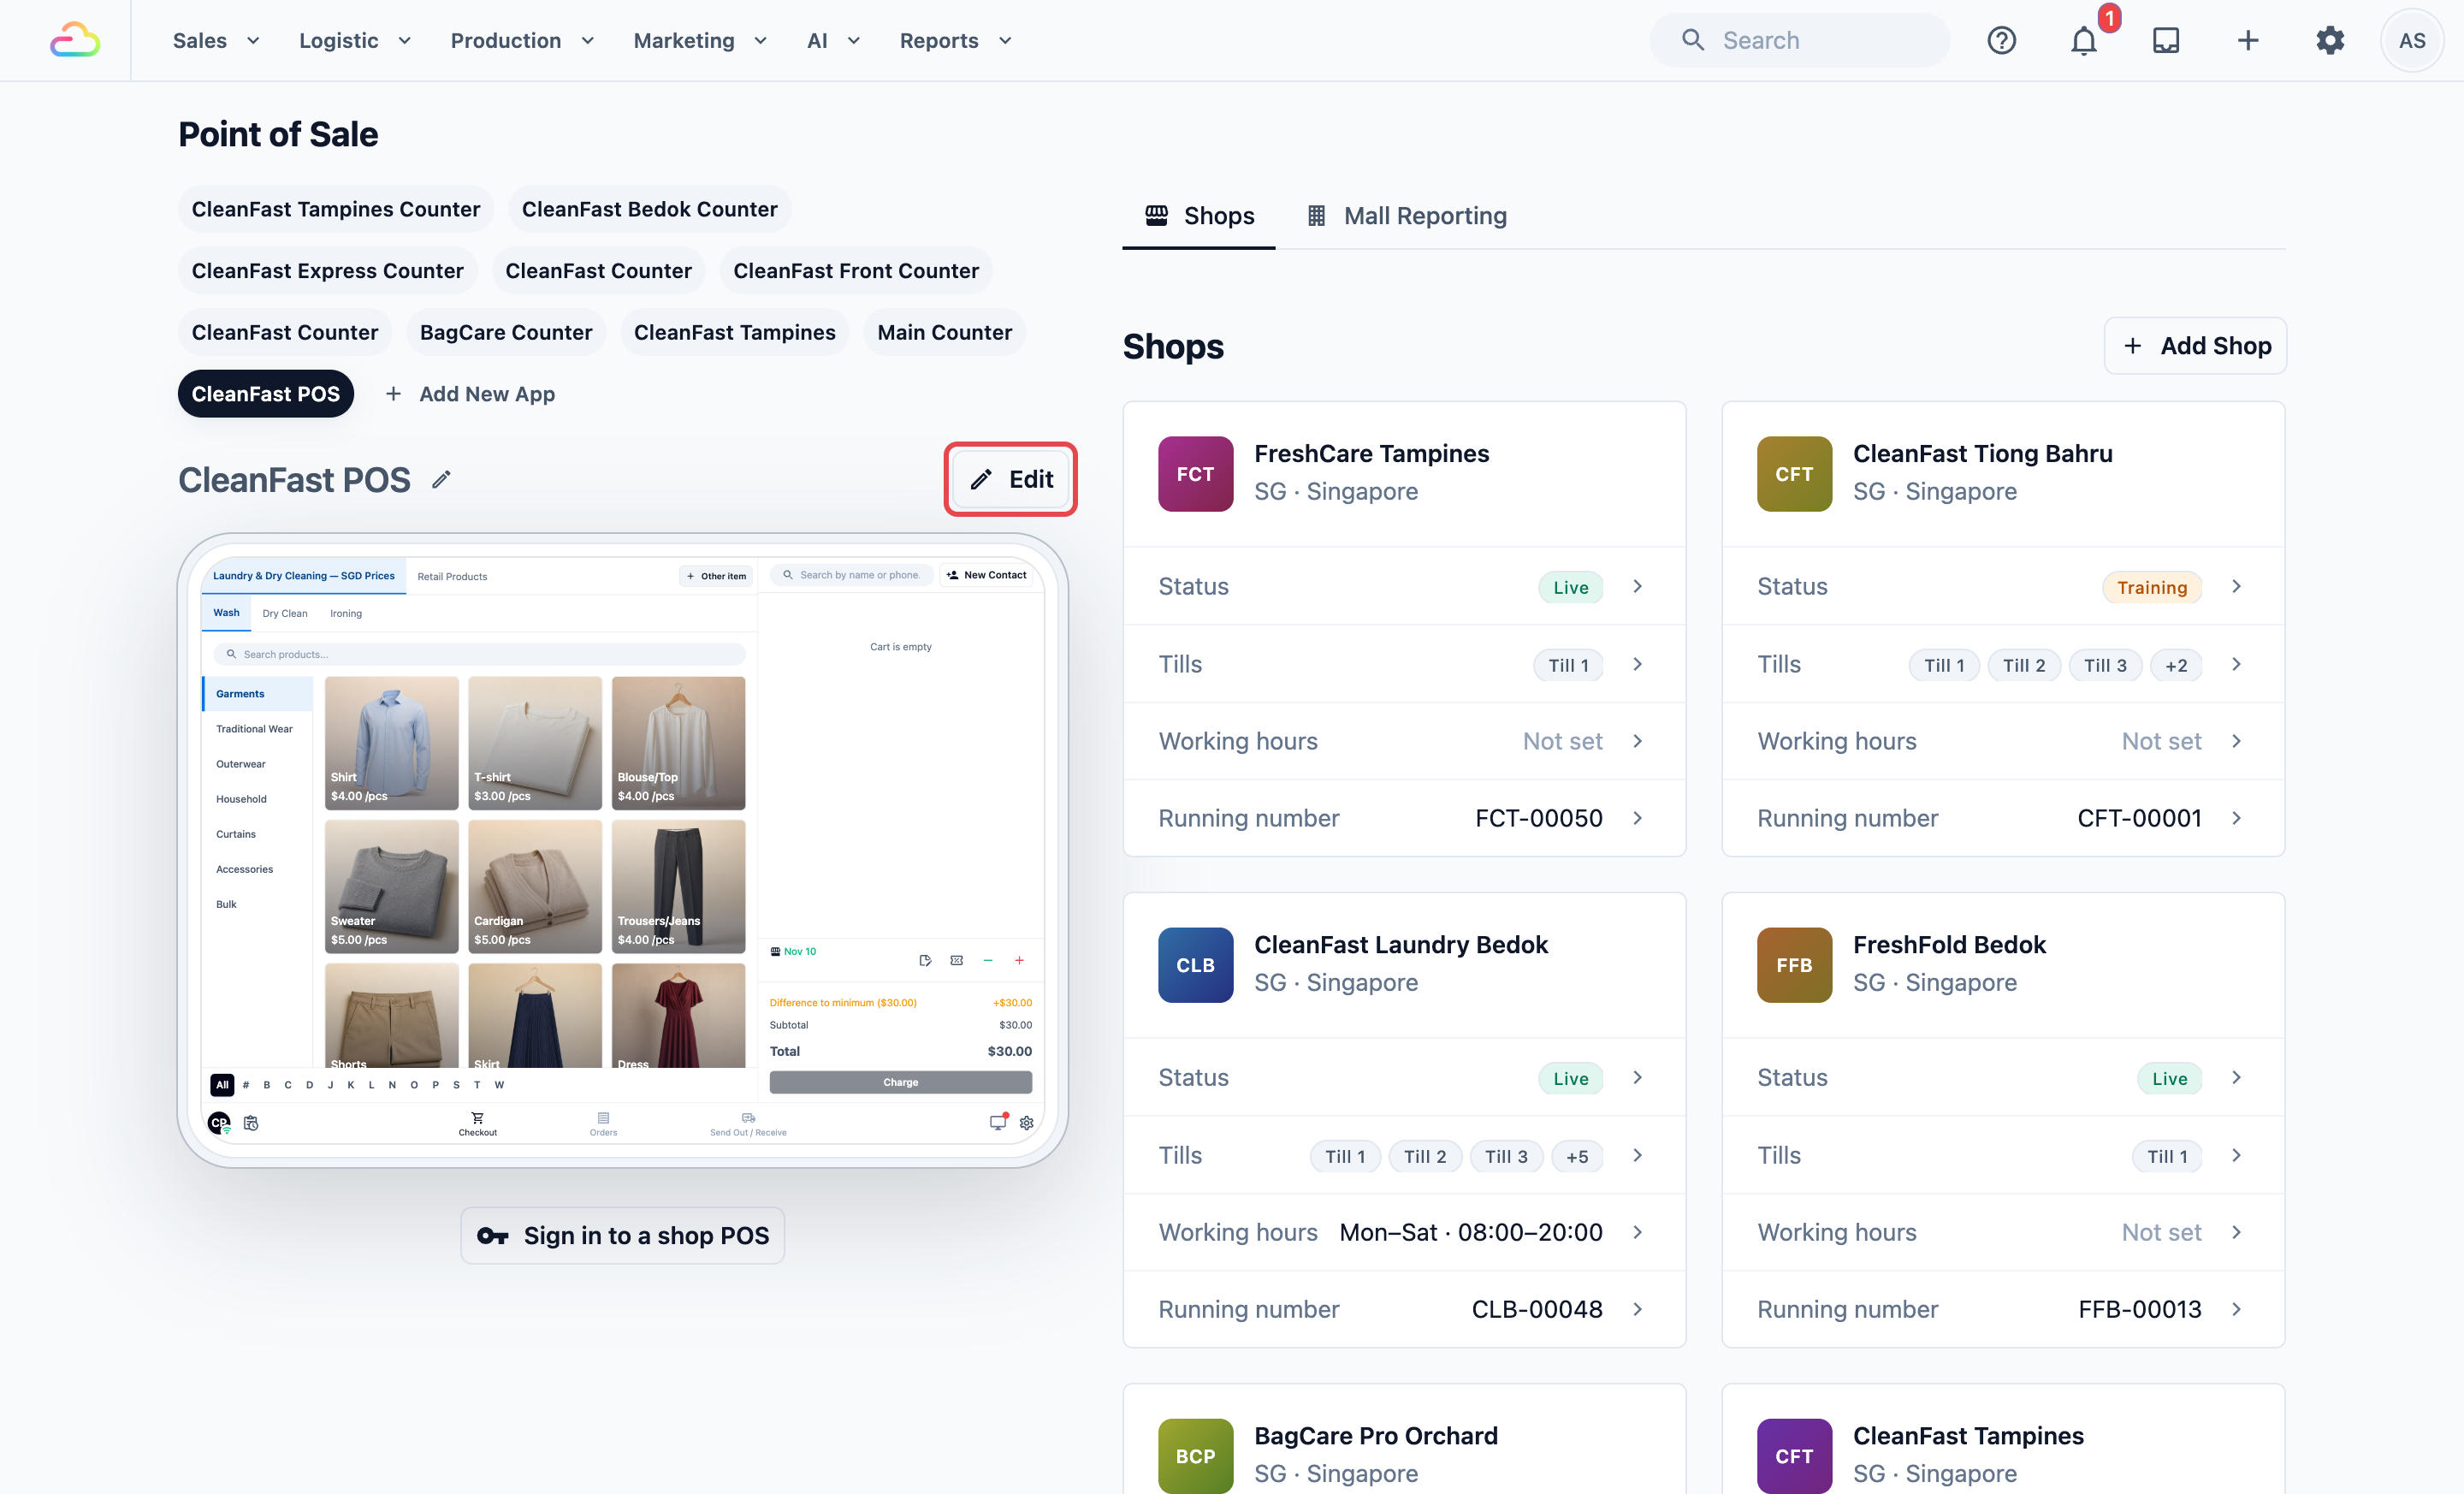
3. Under **POS Apps**, click your app, for example CleanFast POS, then click Edit.
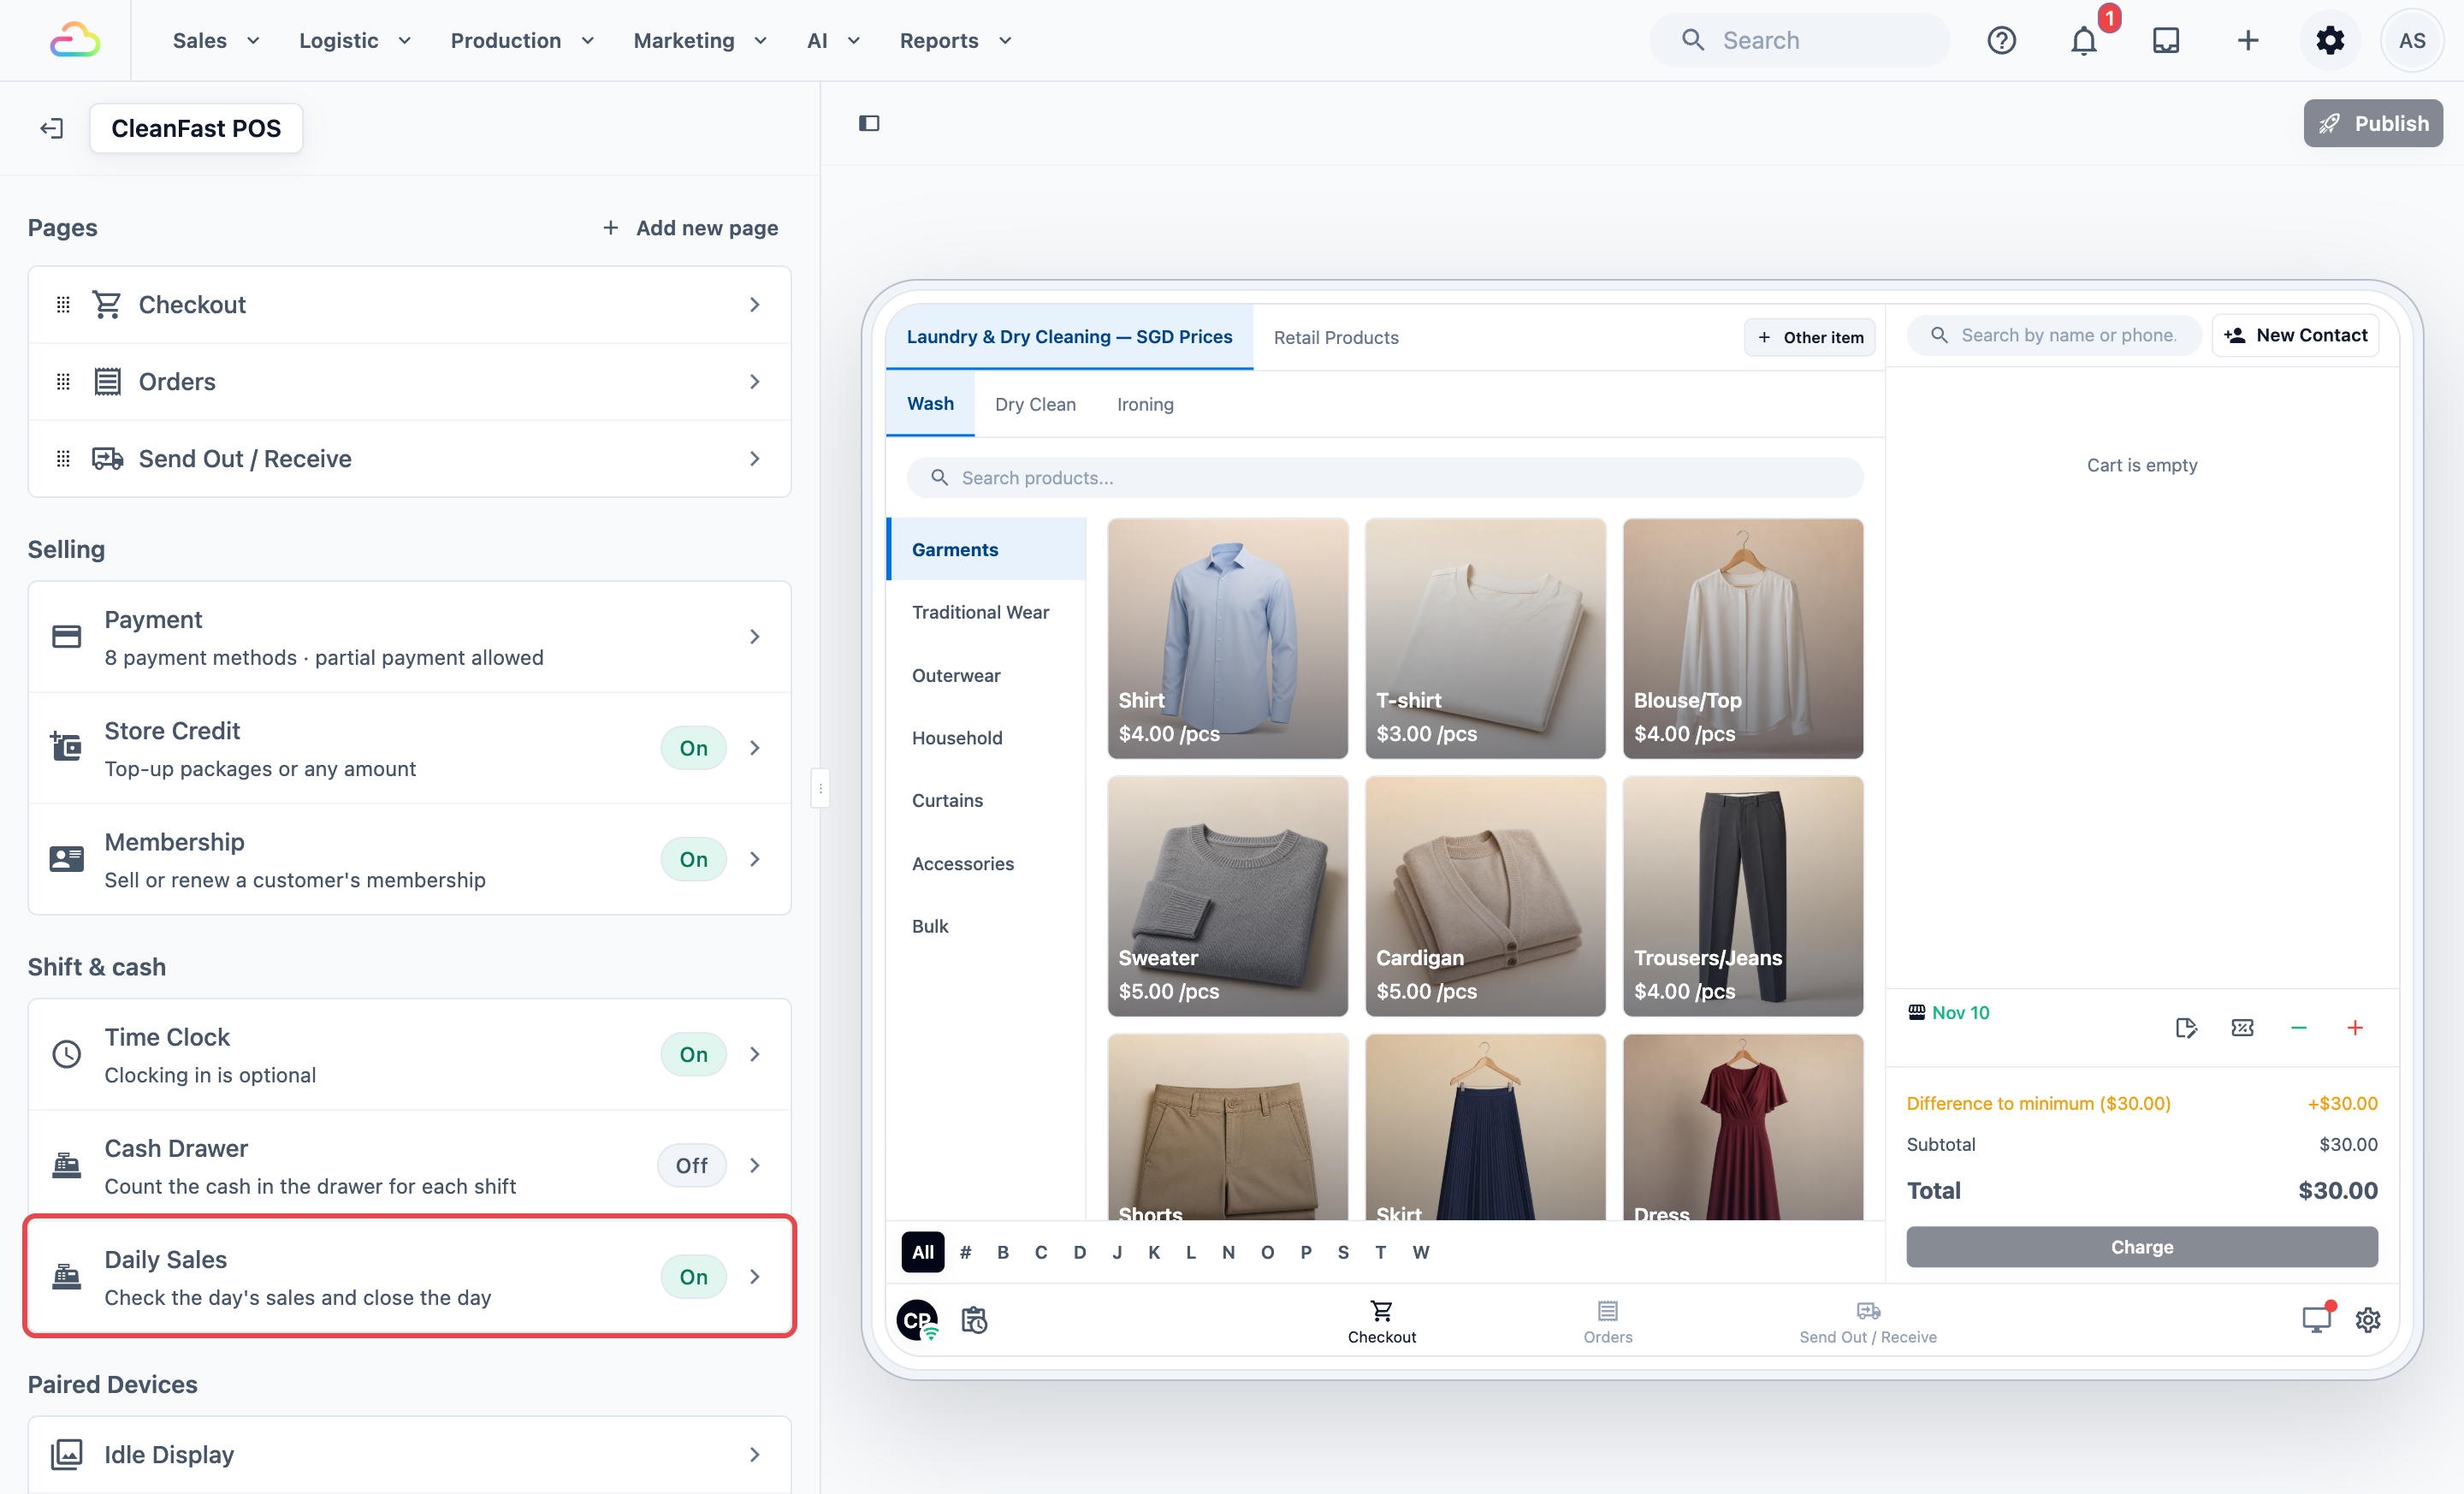
4. Under **Shift & cash**, click **Daily Sales**. Its line reads “Check the day's sales and close the day”, with an **On** or **Off** tag.
---
## Setting it up
These five steps are the short version. Each one is explained in detail below, with screenshots.
1. Turn on **Enabled**, if it is off.
2. Under **Close of Day Flow**, click Add Step and pick a step. Repeat for each step you want.
3. For Intermediate setups, choose your template in **Close of Day Receipt Template**.
4. Click Publish at the top right.
5. In **Review your changes**, check that **Feature settings** is listed, then click Publish.
Each POS app has its own Daily Sales settings, so changing them here changes only the shops that use this app.
**Enabled**
If you turn this on, a Daily Sales icon appears at the bottom left of the POS, and the settings below show. If you turn it off, the icon goes away and staff can't close the day on this app.
### Close of Day Flow
The steps staff go through when they tap Close of Day, in the order you add them. Click Add Step to open **Add a step**, then click the step you want.
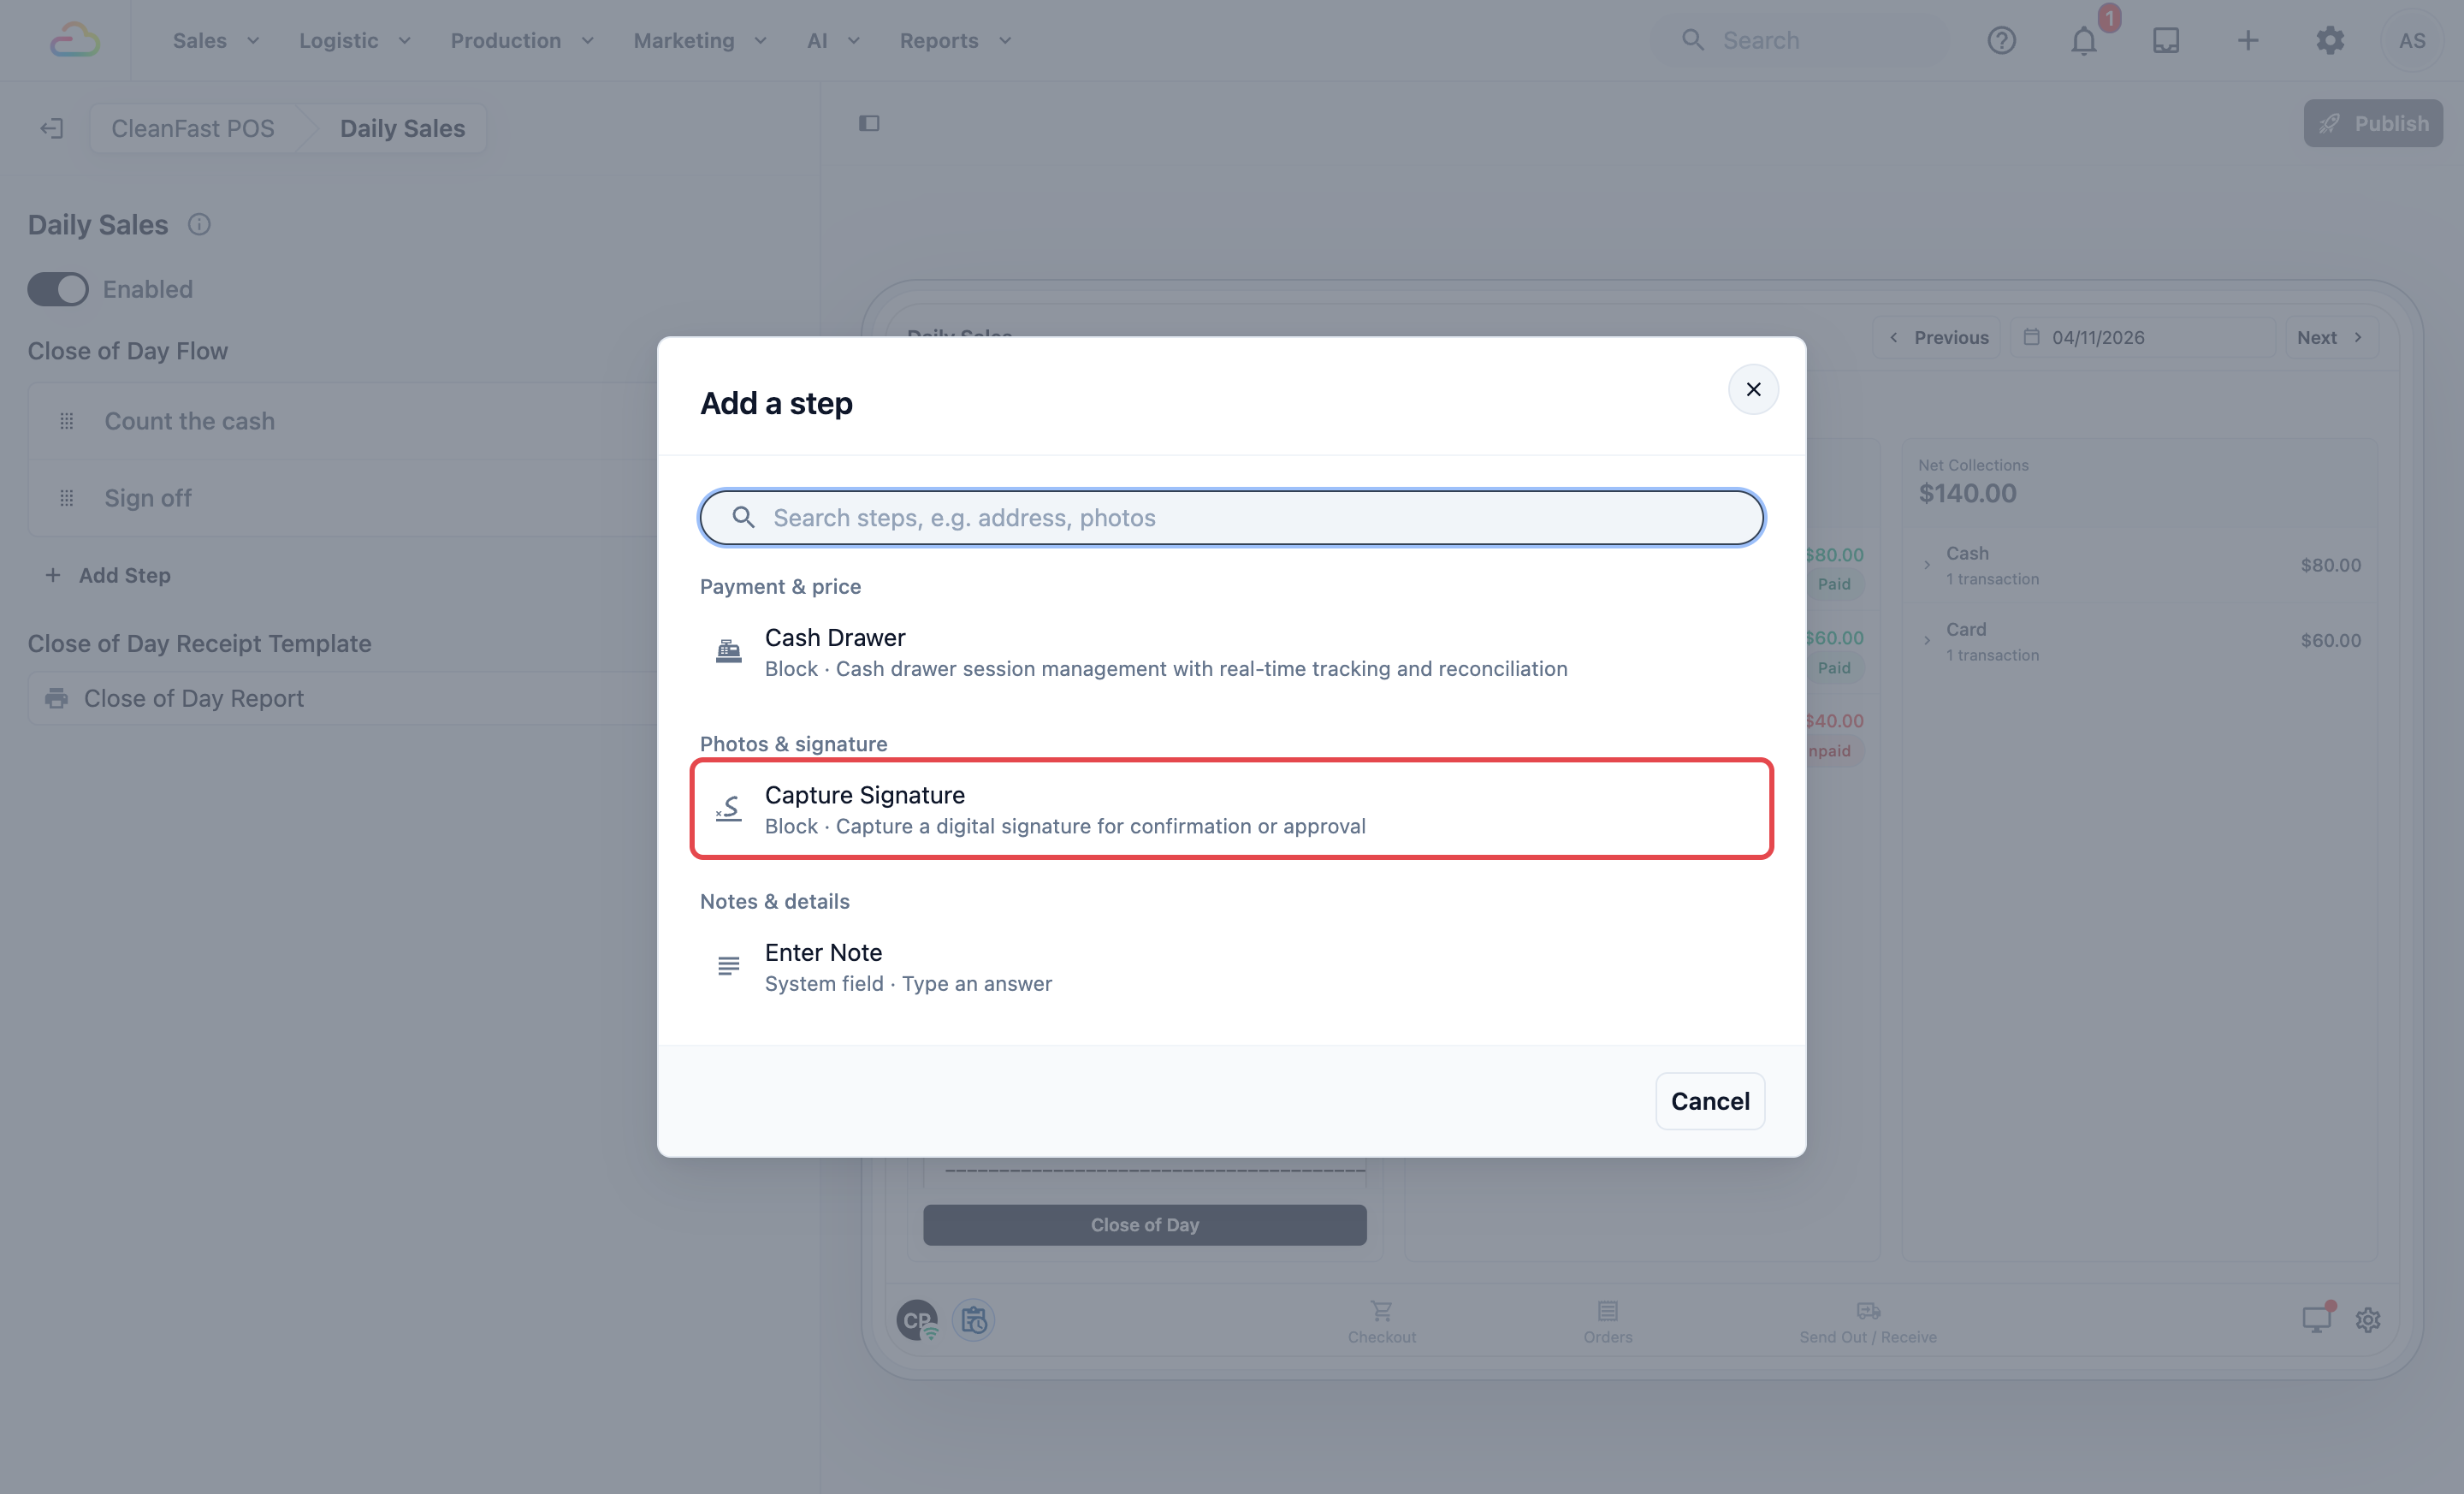
**Add a step**
| **Step** | **What staff do** |
| --- | --- |
| Cash Drawer | Count the cash and end the drawer, or check the drawers already ended that day. Use this only if the Cash Drawer is on. |
| Capture Signature | Sign on the screen to confirm the close. |
| Enter Note | Type a note for you, for example “Coin box short of S$1 coins”. |
| Mix and match | Add any of them, in any order. Each is saved with the day's report. |
Click a step to open its settings:
- **Step Name:** the title staff see for the step. Leave it empty to use the step's own name.
- **Process Method:** whether staff must complete the step.
| **Process Method** | **What it means** |
| --- | --- |
| Required | Staff must complete the step before they can go on. |
| Optional | Staff can tap Next without completing it. |
| On Demand | The step is left out of the close. You don't need it here. |
For **Capture Signature**, you can also type **Acknowledgement text**, such as “I confirm the cash and totals above are correct.” If you turn on **Require acknowledgement**, staff must tick a box before they sign, and **Acknowledgement checkbox label** sets the words beside it.
To remove a step, open it and click Remove step.
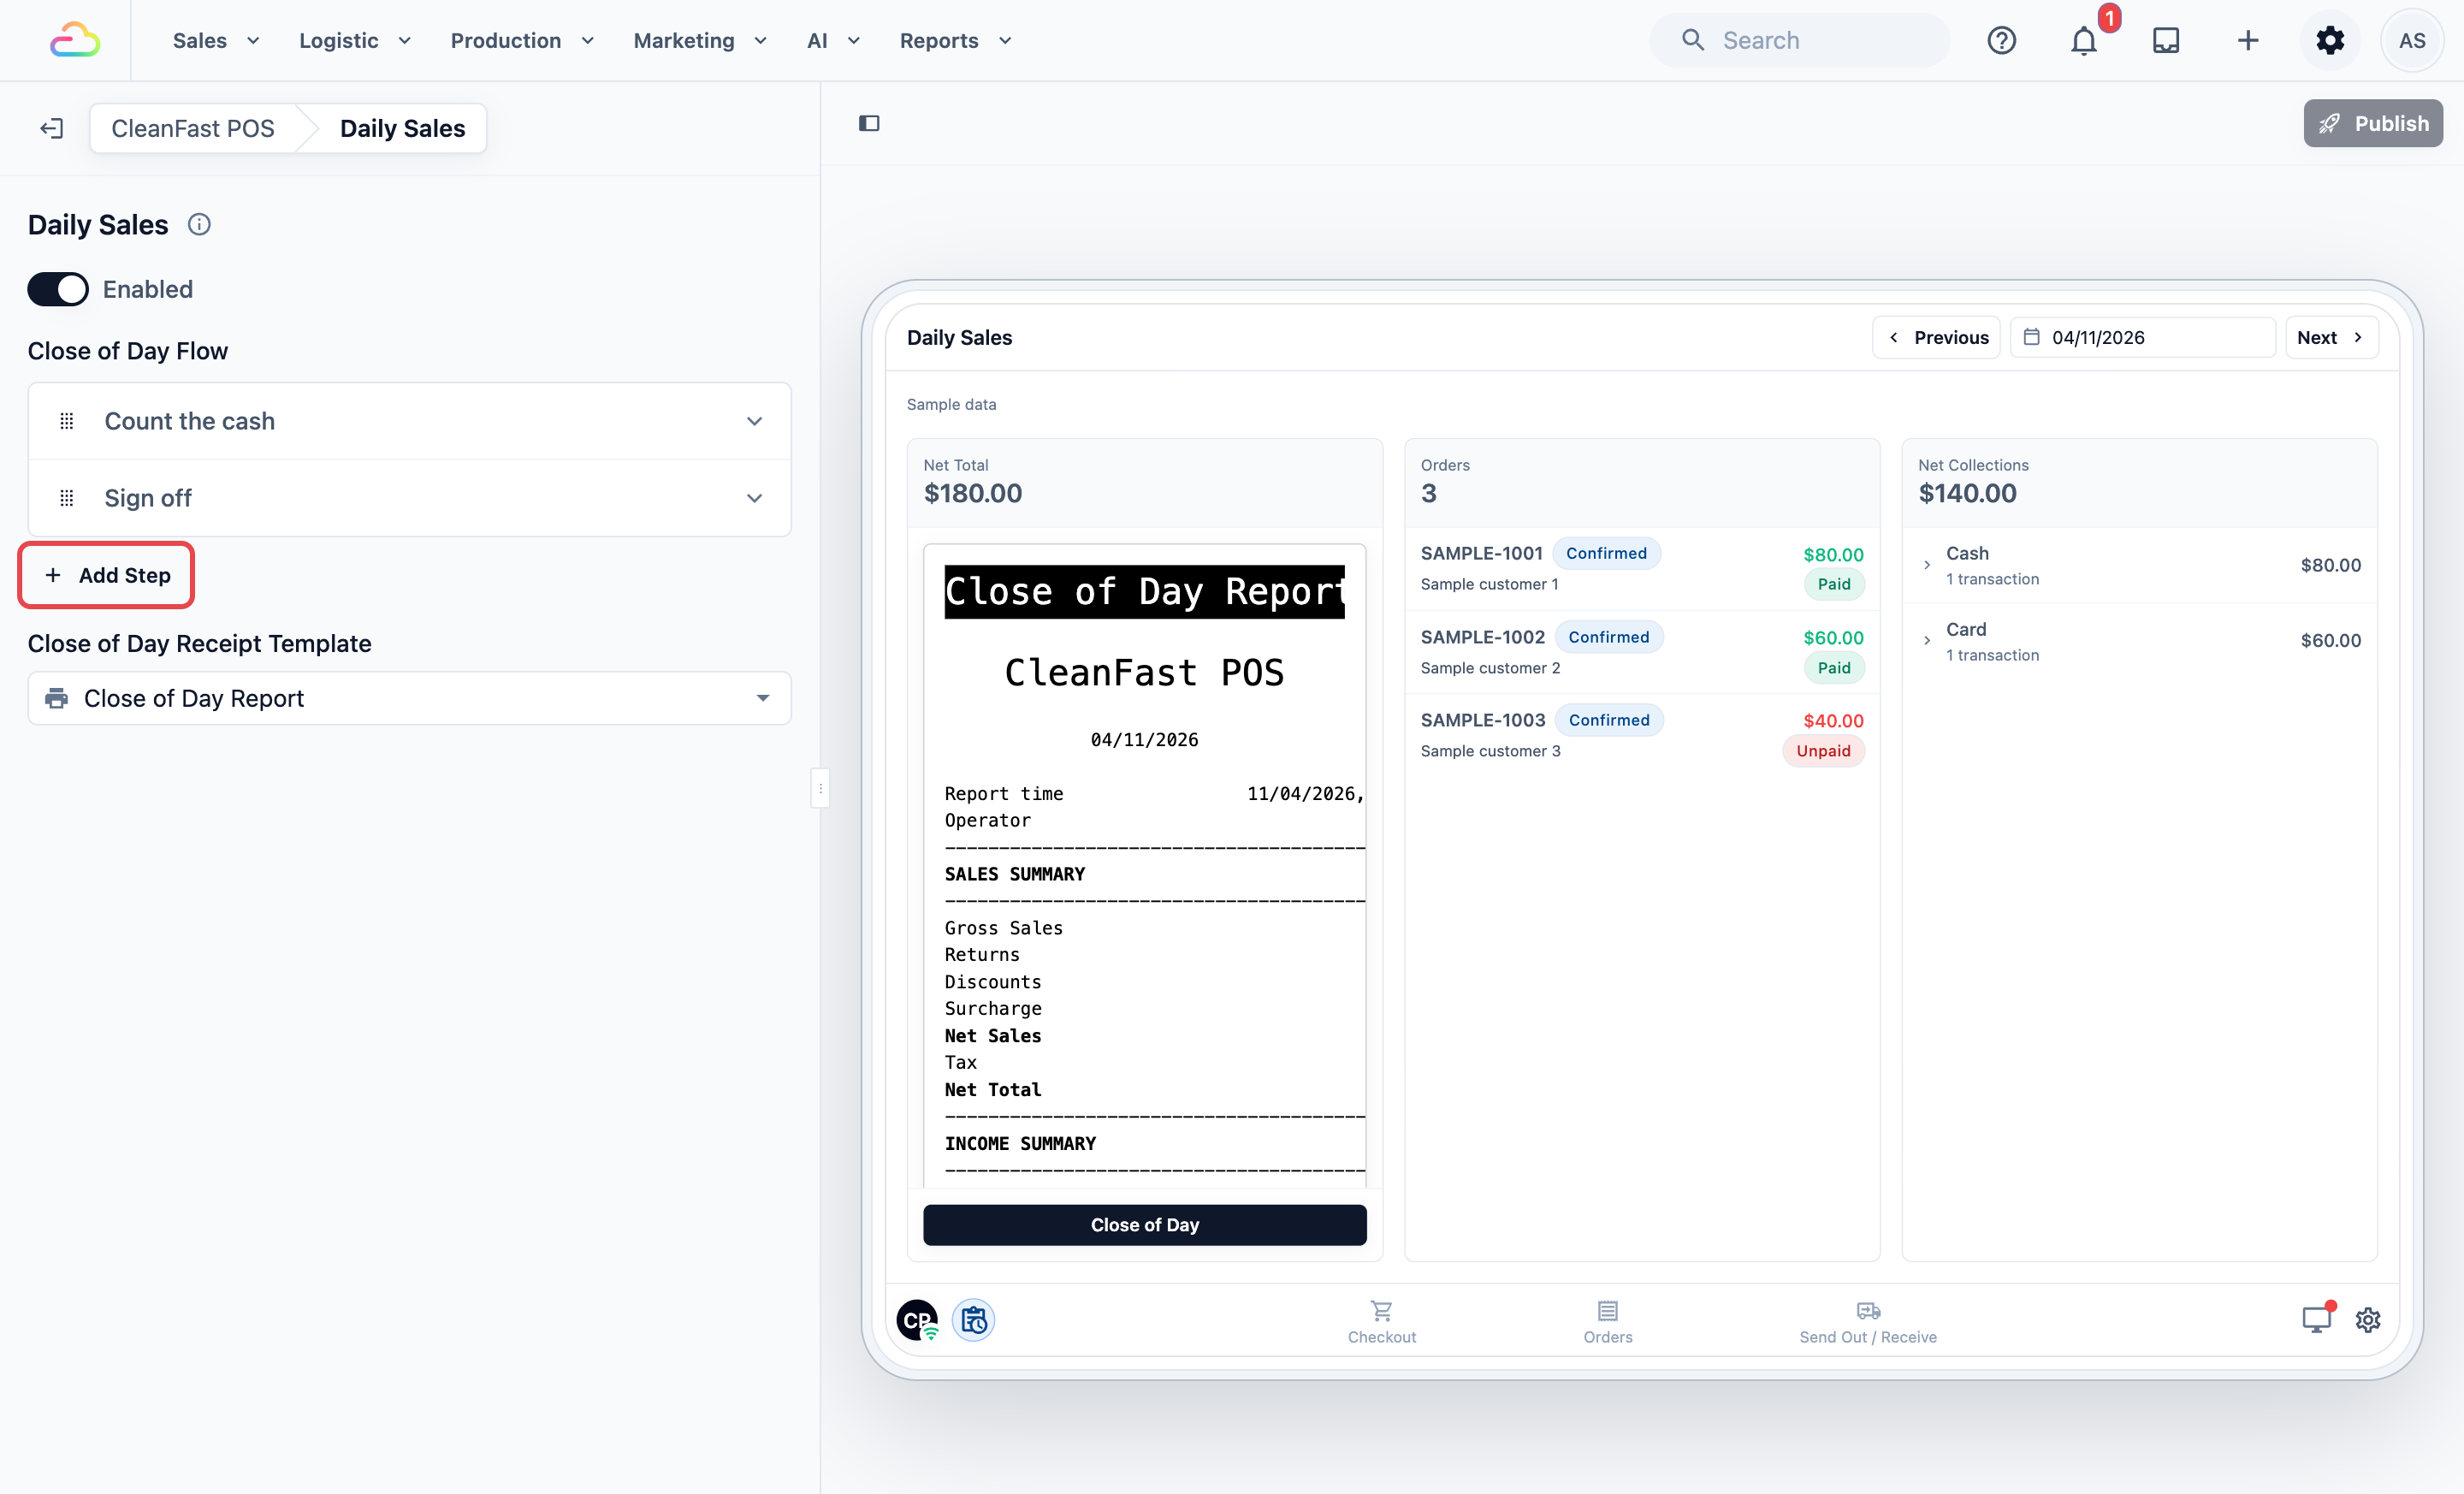
Until the flow has at least one step, staff see the day's totals but no Close of Day button, and no report is saved.
### Close of Day Receipt Template
For Intermediate setups:
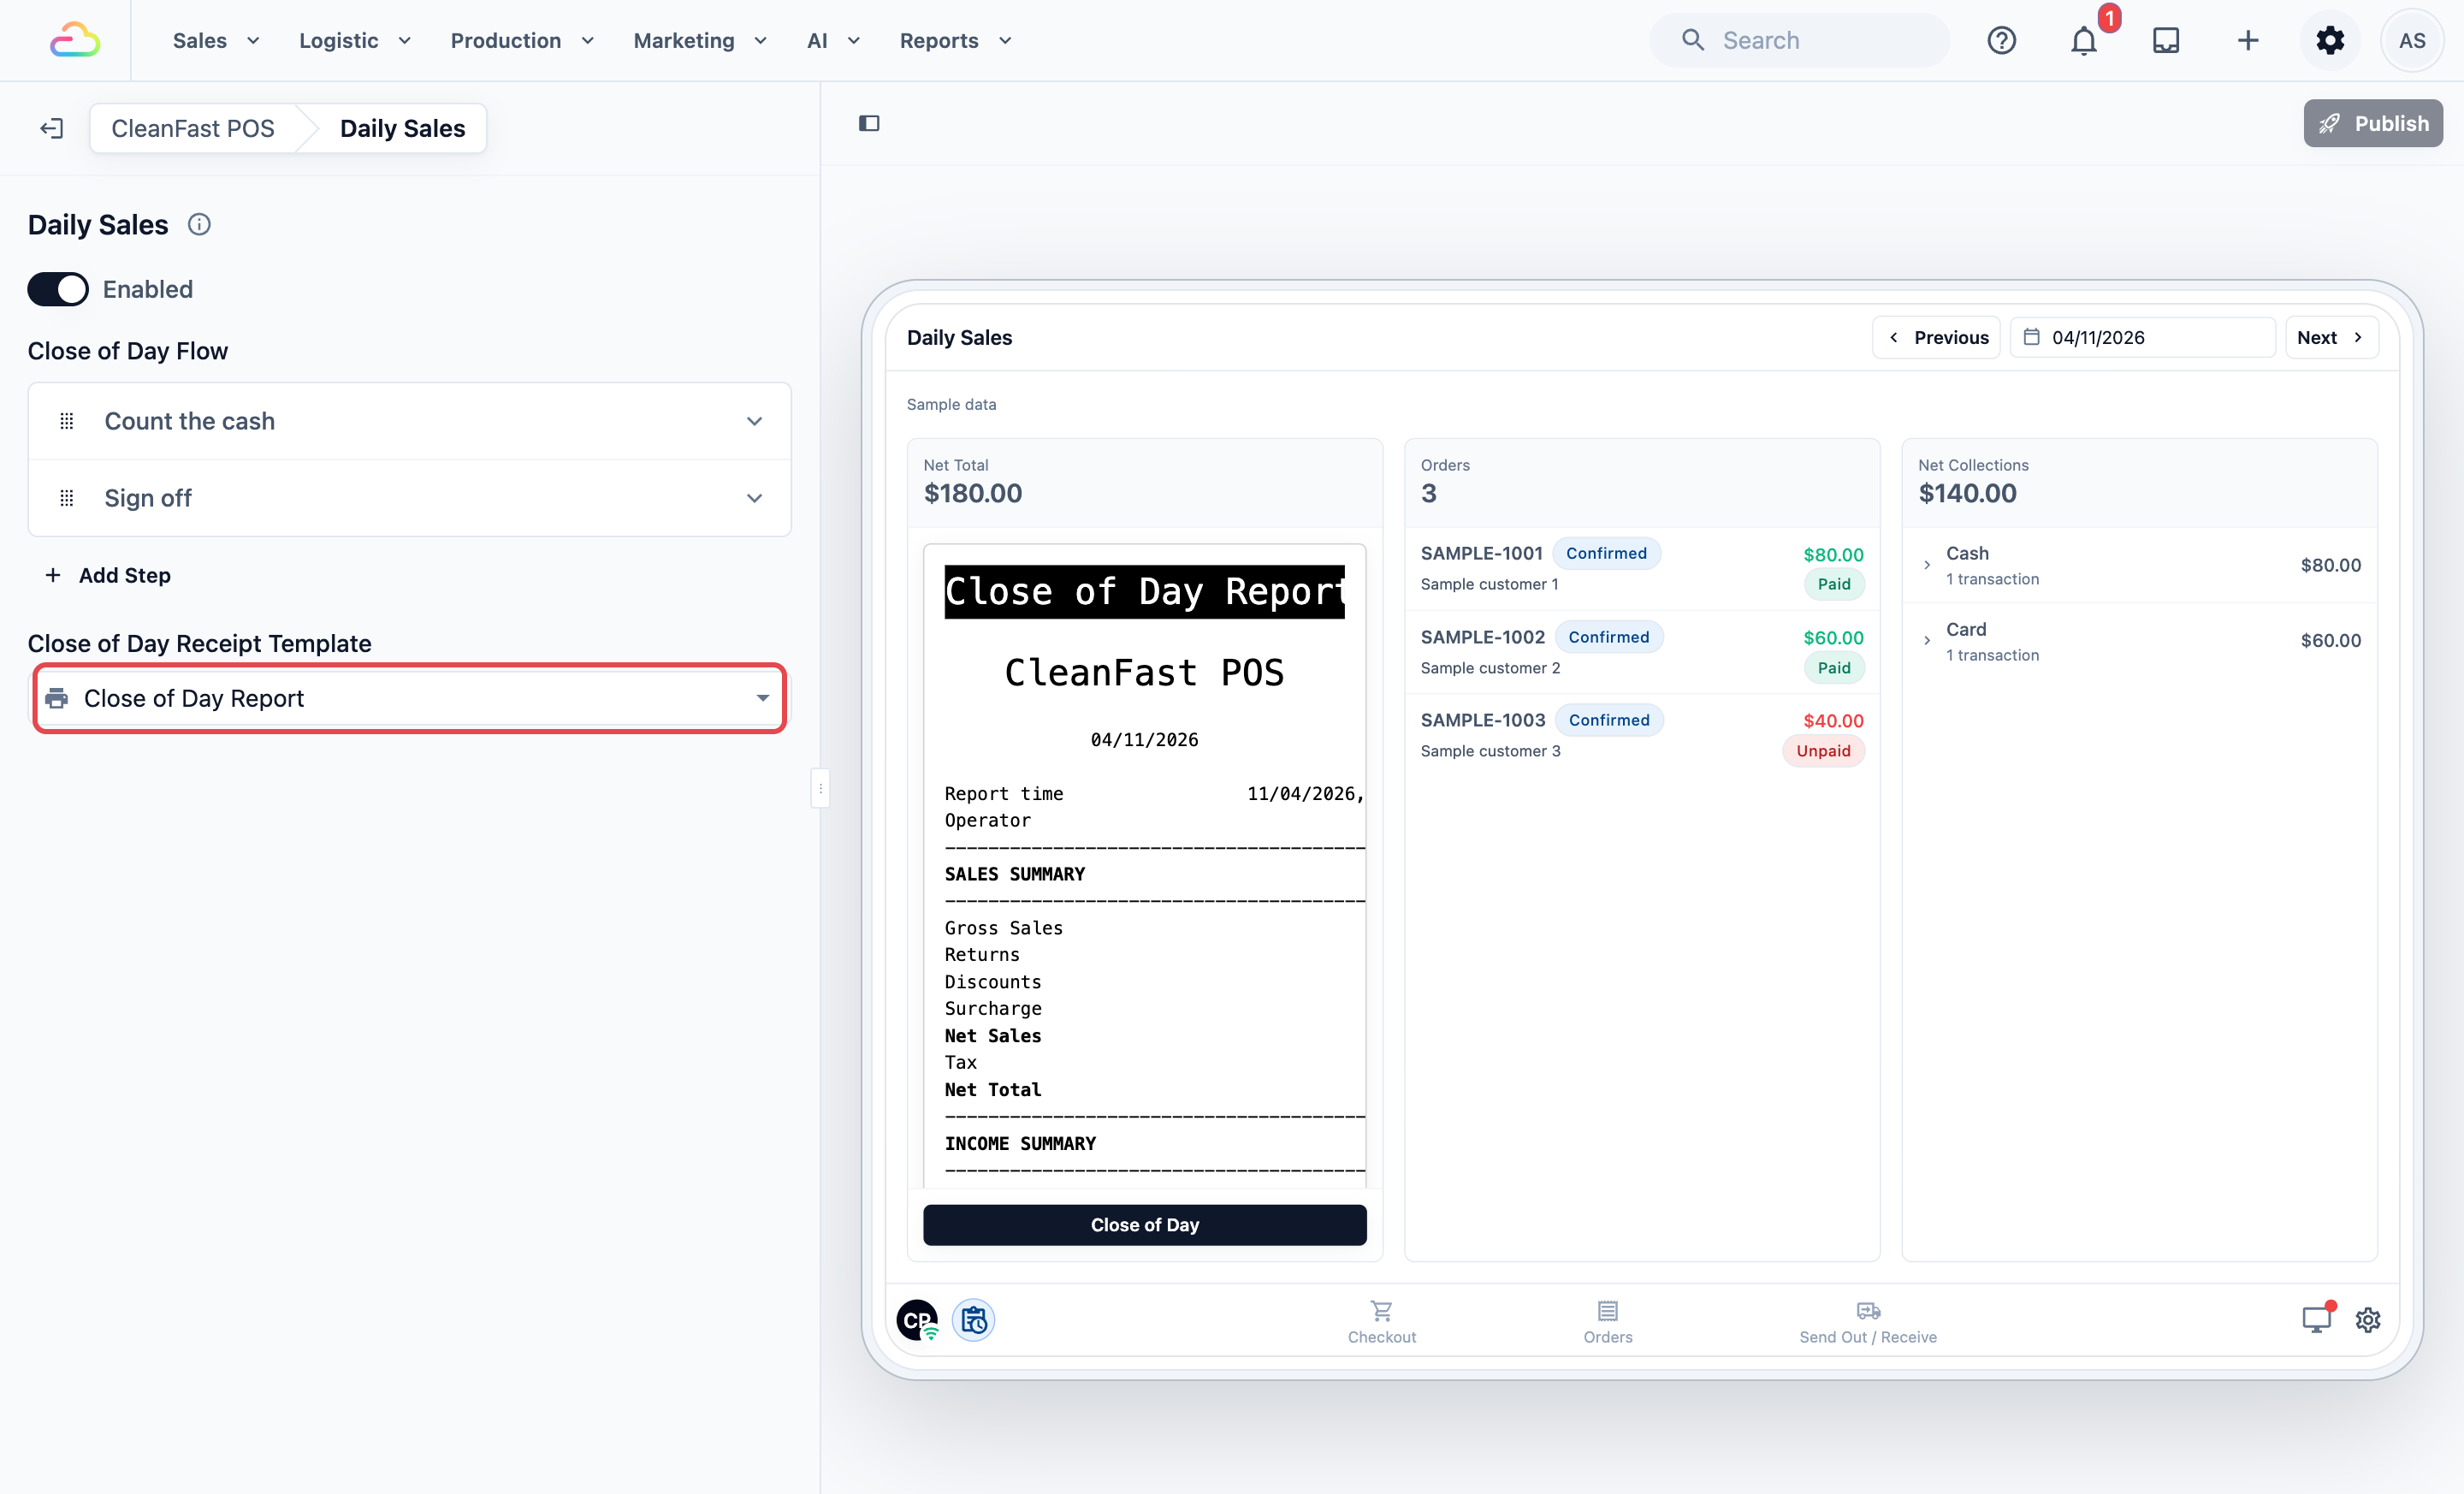
The design of the day's report that staff see on Daily Sales and print after closing. Pick one of your published Close of Day templates from **Select published receipt template**.
| **Close of Day Receipt Template** | **What staff see** |
| --- | --- |
| Leave empty | No report preview on Daily Sales, and Print Report stays grey. The report is still saved. |
| Choose a template | Daily Sales shows the report as it builds through the day, and it prints by itself after the close when a receipt printer is connected. |
---
## Example setup
CleanFast Laundry counts the till at both shops every night, and the owner wants to know who closed. In **Close of Day Flow** she adds **Cash Drawer**, then **Capture Signature**, both **Required**. She chooses her Close of Day template and publishes.
On Saturday at 7pm in Tampines, Priya opens Daily Sales and sees:
- Net Total: S$642.50 from 18 orders
- Net Collections: S$618.50
- Cash: S$233.50 (S$245.50 taken, less a S$12.00 refund)
- PayNow: S$310.00
- Card: S$75.00
- Total: S$233.50 + S$310.00 + S$75.00 = S$618.50
Net Total counts the sales made today, and Net Collections counts the money taken today, so the two rarely match. Here, two customers will pay S$24.00 when they collect.
Priya taps Close of Day. In the **Cash Drawer** step she ends the drawer with S$313.00 counted, S$0.50 short. She signs in the next step and taps Close of Day. The report prints by itself, and the owner reads it the next morning.
---
## What staff see on the POS
### Checking the day's sales
1. Tap the Daily Sales icon at the bottom left of the POS.
2. Use Previous and Next, or tap the date, to see another day.
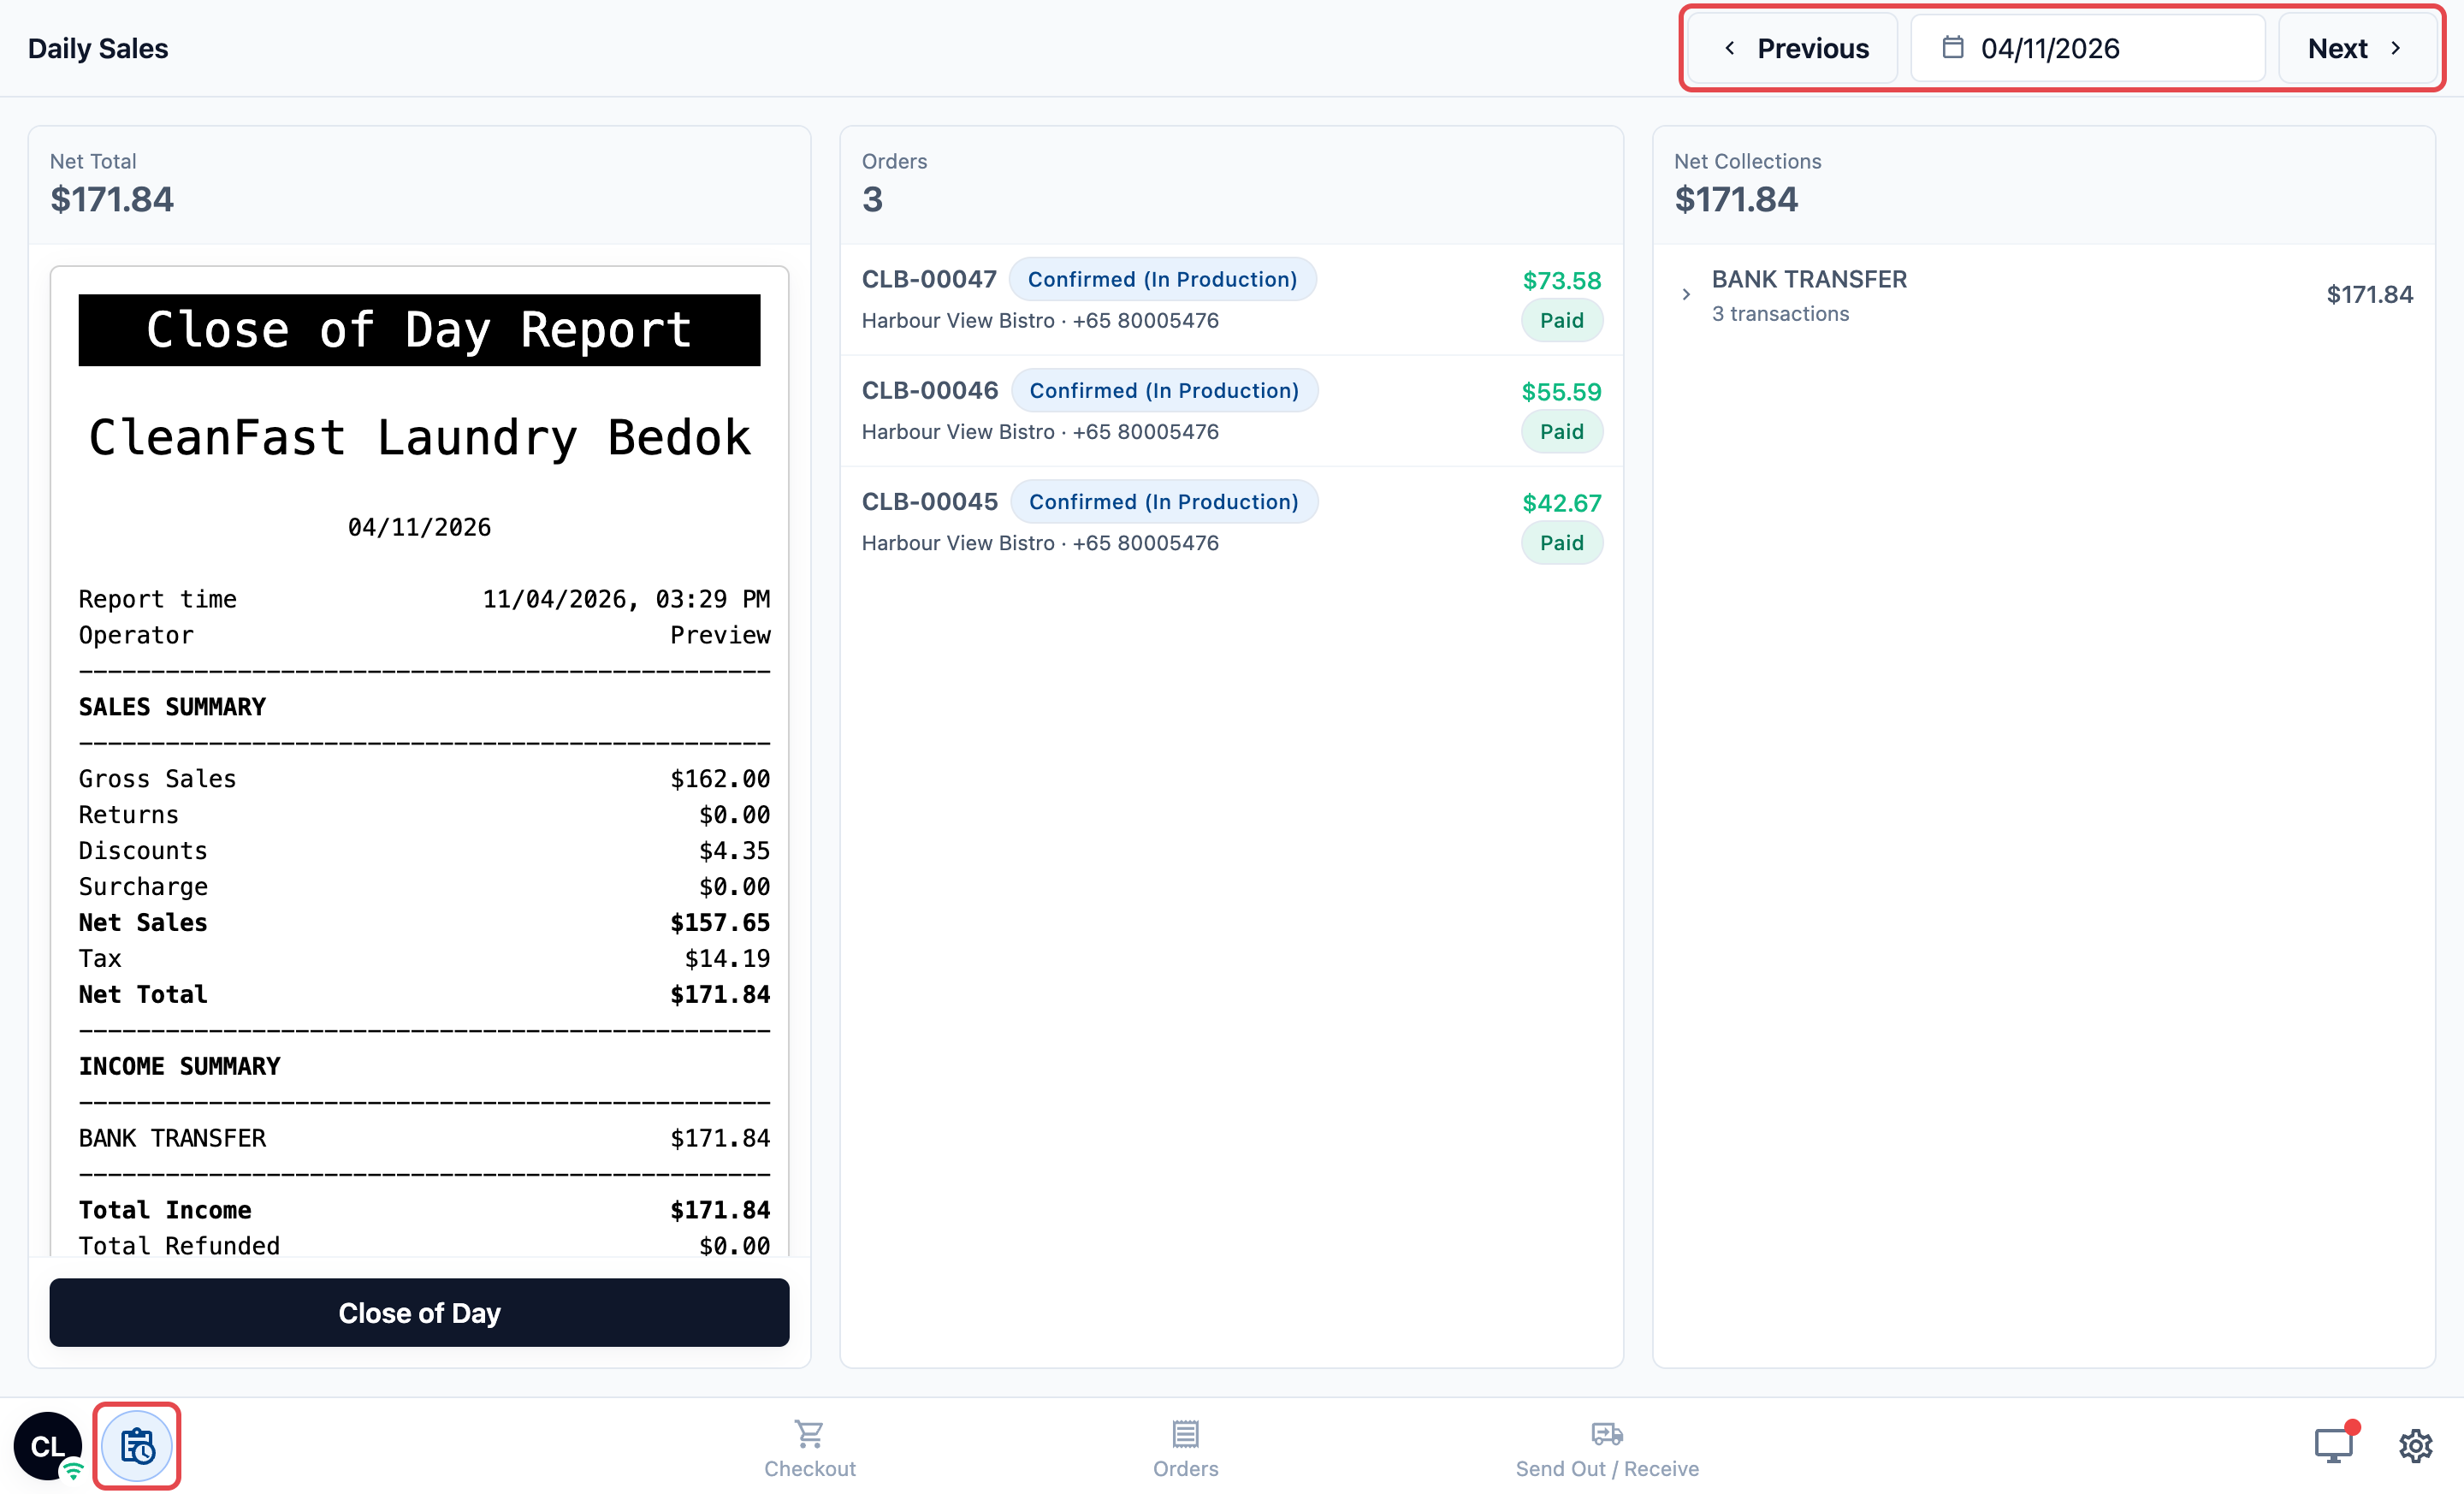
The screen shows three columns for the shop:
- **Net Total:** the day's sales, with the report preview below it when you chose a template.
- **Orders:** how many orders were made, with each one listed. Tap an order to open it on the Orders page.
- **Net Collections:** the money taken, split by payment method.
### Closing the day
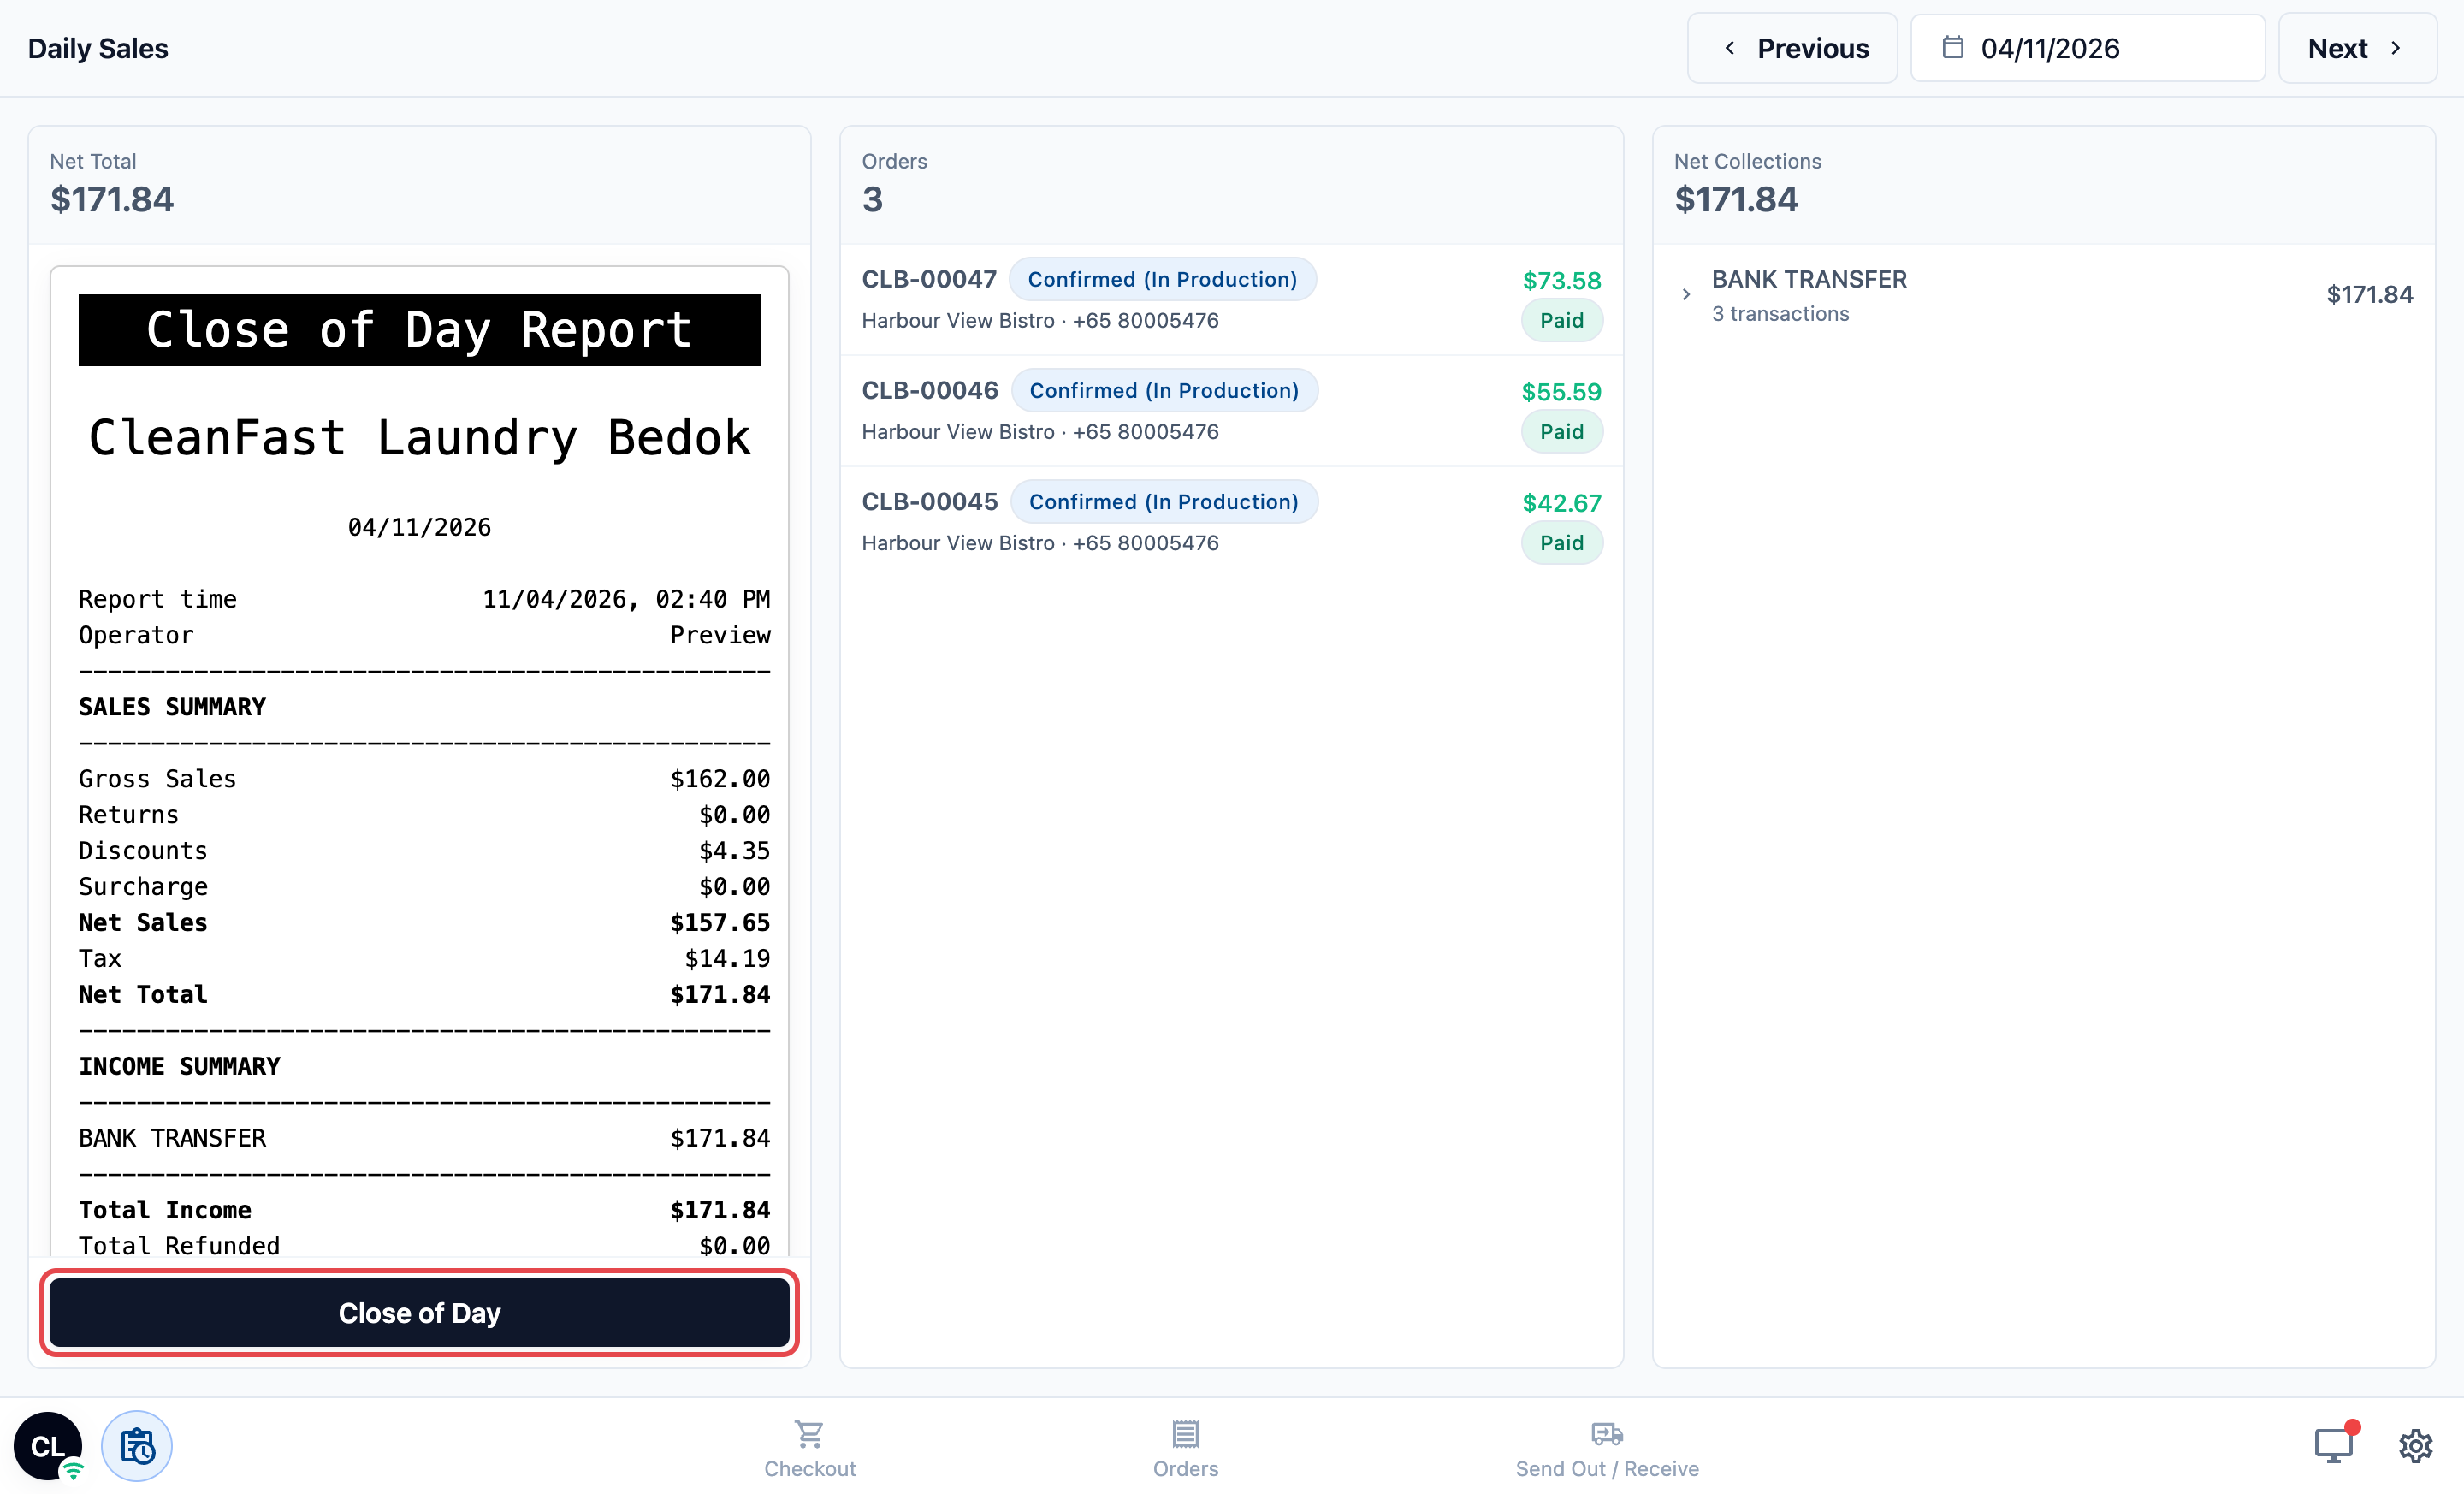
1. On today's date, tap Close of Day at the bottom of the Net Total column.
2. Go through each step and tap Next. Tap Back to return to an earlier step.
3. On the last step, tap Close of Day.
The POS shows “Close of Day completed”. If you chose a template and a receipt printer is connected, the report prints by itself.
### Counting the cash during the close
For Intermediate setups:
In the **Cash Drawer** step, if the drawer is still running, staff see it as they do on the Cash Drawer screen and end it there: tap End drawer, type the **Actual Cash Count** and tap Close Drawer. If the drawer is already ended, the step shows each drawer from that day, with **Opening Float**, **Expected in Drawer**, **Actual in Drawer** and **Discrepancy**.
The POS lets staff tap Next while the drawer is still running. End it first, so the cash count is in the day's report.
### After the day is closed
Every POS at that shop shows “Close of day for {date} has been submitted. Sales operations are blocked for this date.” with the closed date. The Charge button at checkout and Collect Payment on the Orders page are grey for the rest of the day.
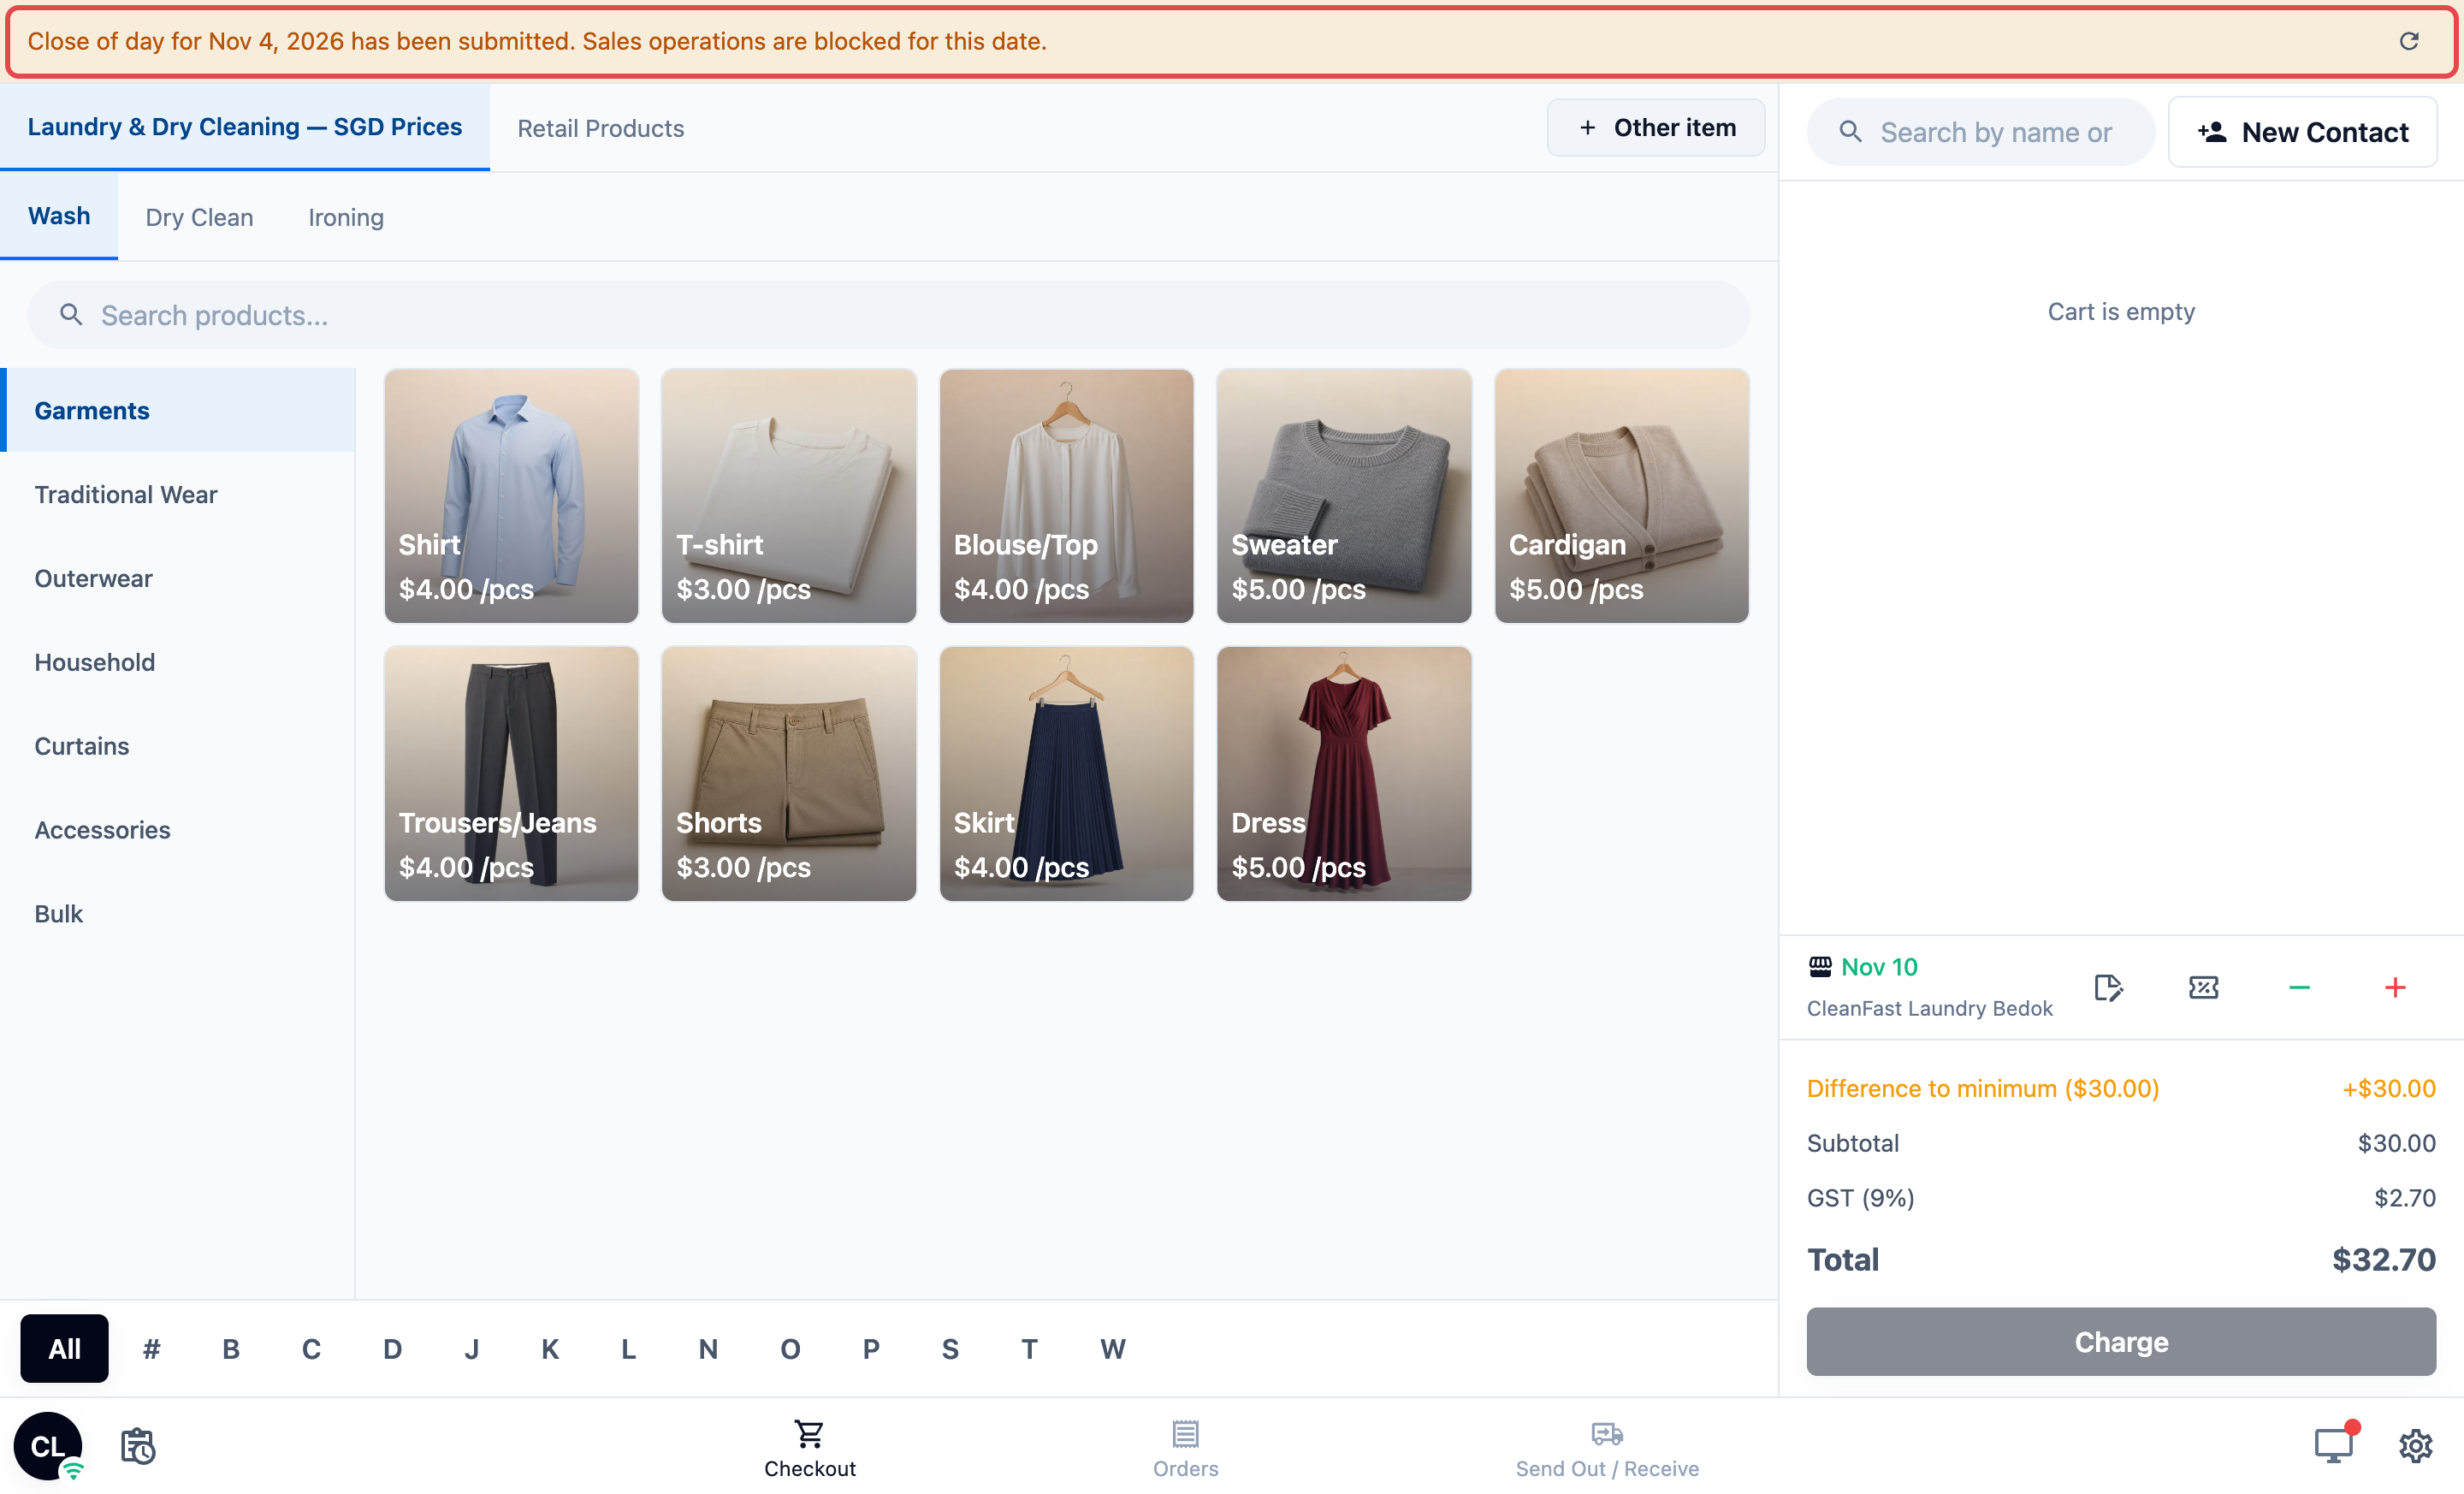
On Daily Sales, the Close of Day button is replaced by Print Report, to print the report again.
### Fixing a mistake with Withdraw
Use this only on the same day, for example when a late customer still needs to pay.
1. On Daily Sales, tap Withdraw.
2. Read the message: it removes today's report so staff can close again, and does not change your sales.
3. Tap Confirm Withdraw, or Cancel to keep the close.
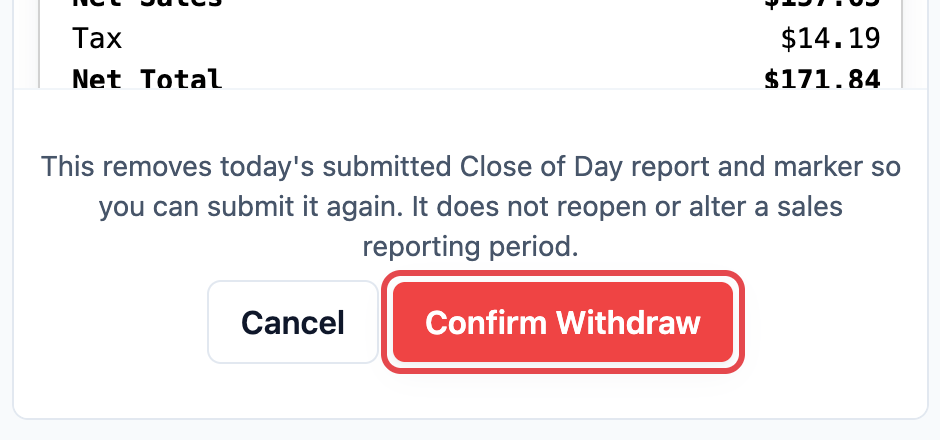
The POS shows “Close of Day withdrawn”, the banner goes away and staff can sell again. When they're done, they close the day again.
---
## FAQs
**Can staff sell after closing the day?**
> Not on that shop's POS. Charge and Collect Payment stay grey for the rest of the day, and open again after midnight. To take a late payment today, withdraw the close first, then close again.
**Staff closed the day too early. What can they do?**
> Tap Withdraw on Daily Sales, then Confirm Withdraw. This works only on the same day. After midnight, the close can't be withdrawn.
**Can I close yesterday if staff forgot?**
> No. Close of Day shows only on today's date. Staff can still look back at a past day's totals, but a day that wasn't closed stays without a report.
**Does Withdraw change my sales report?**
> No. Withdraw only removes that day's Close of Day report so staff can close again. Your sales and payments stay exactly as they were.
**Do I need the Cash Drawer to close the day?**
> No. Without it, use Capture Signature or Enter Note as your steps. Add the Cash Drawer step only if staff count the till.
**We have two shops. Does each close on its own?**
> Yes. Each shop closes its own day with its own totals and report. Two POS devices in the same shop share one close, so staff close once.
**Does closing the day stop my Online Store?**
> No. Only the POS at that shop stops taking new sales and payments. Customers can still order online.
---
## What's Next
Your staff can now check each day's sales and close the day with a saved report. Next, let staff sell store credit top-ups and memberships right from checkout in [Selling Store Credit and Memberships at Checkout](/docs/set-up-store-credit-on-your-pos). Don't sell store credit or memberships? Your POS setup is done. Add a screen for customers in [Connecting a Customer-Facing Display to Your POS](/docs/connect-a-customer-facing-display-to-your-pos), or learn the counter screen in [Getting Around Your POS Screen](/docs/how-to-get-around-your-pos-screen).