## What is an Agent?
In EasyBiz, an Agent is someone who helps bring business to you. They are partners that work with your business to generate orders, and in return, you pay them based on the orders they bring in.
By adding your agents into the system, your team can easily create orders tied to the right agent, keep track of how many orders each agent brings in, and make sure everyone gets paid the right amount. This guide will walk you through how to add an agent and set up their profile.
## Access the B2B Page
Everything related to your agents is managed within the B2B section of your system.
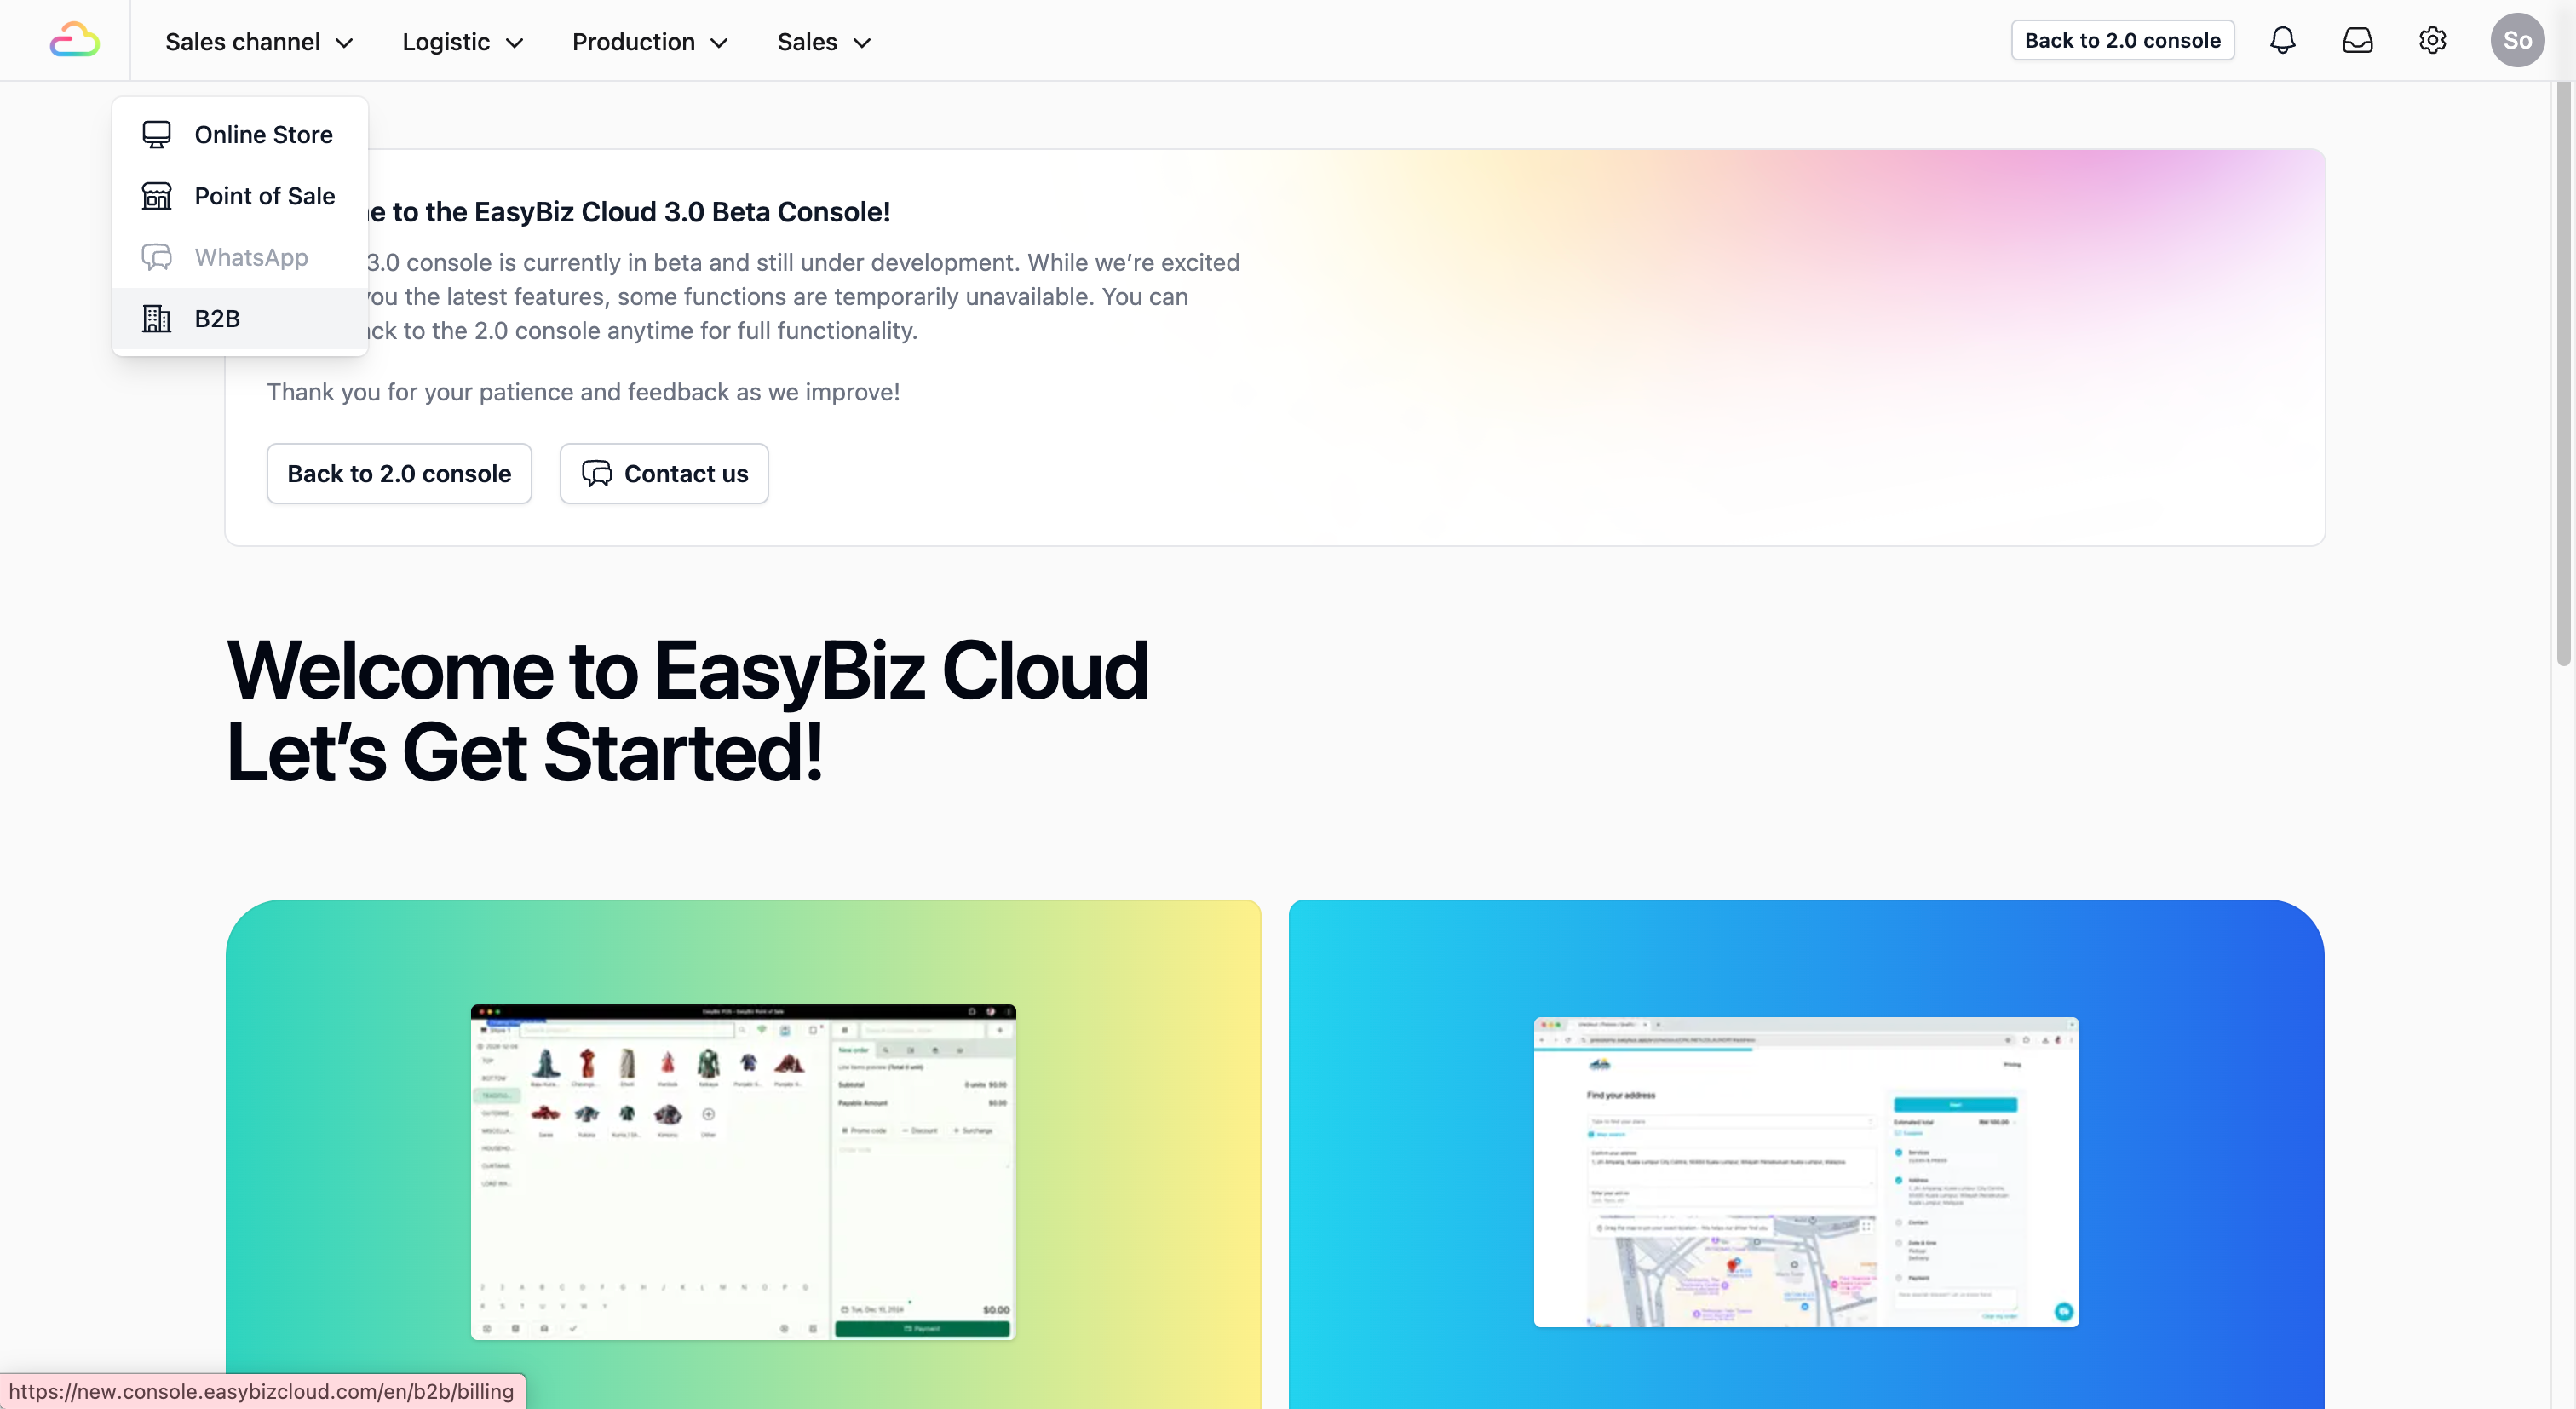
**Navigate to B2B:** On the top navbar, click on Sales Channel. A dropdown list will appear, select B2B.
## Add a New Agent
Once you are on the B2B page, you can begin the registration process for your individual agents.
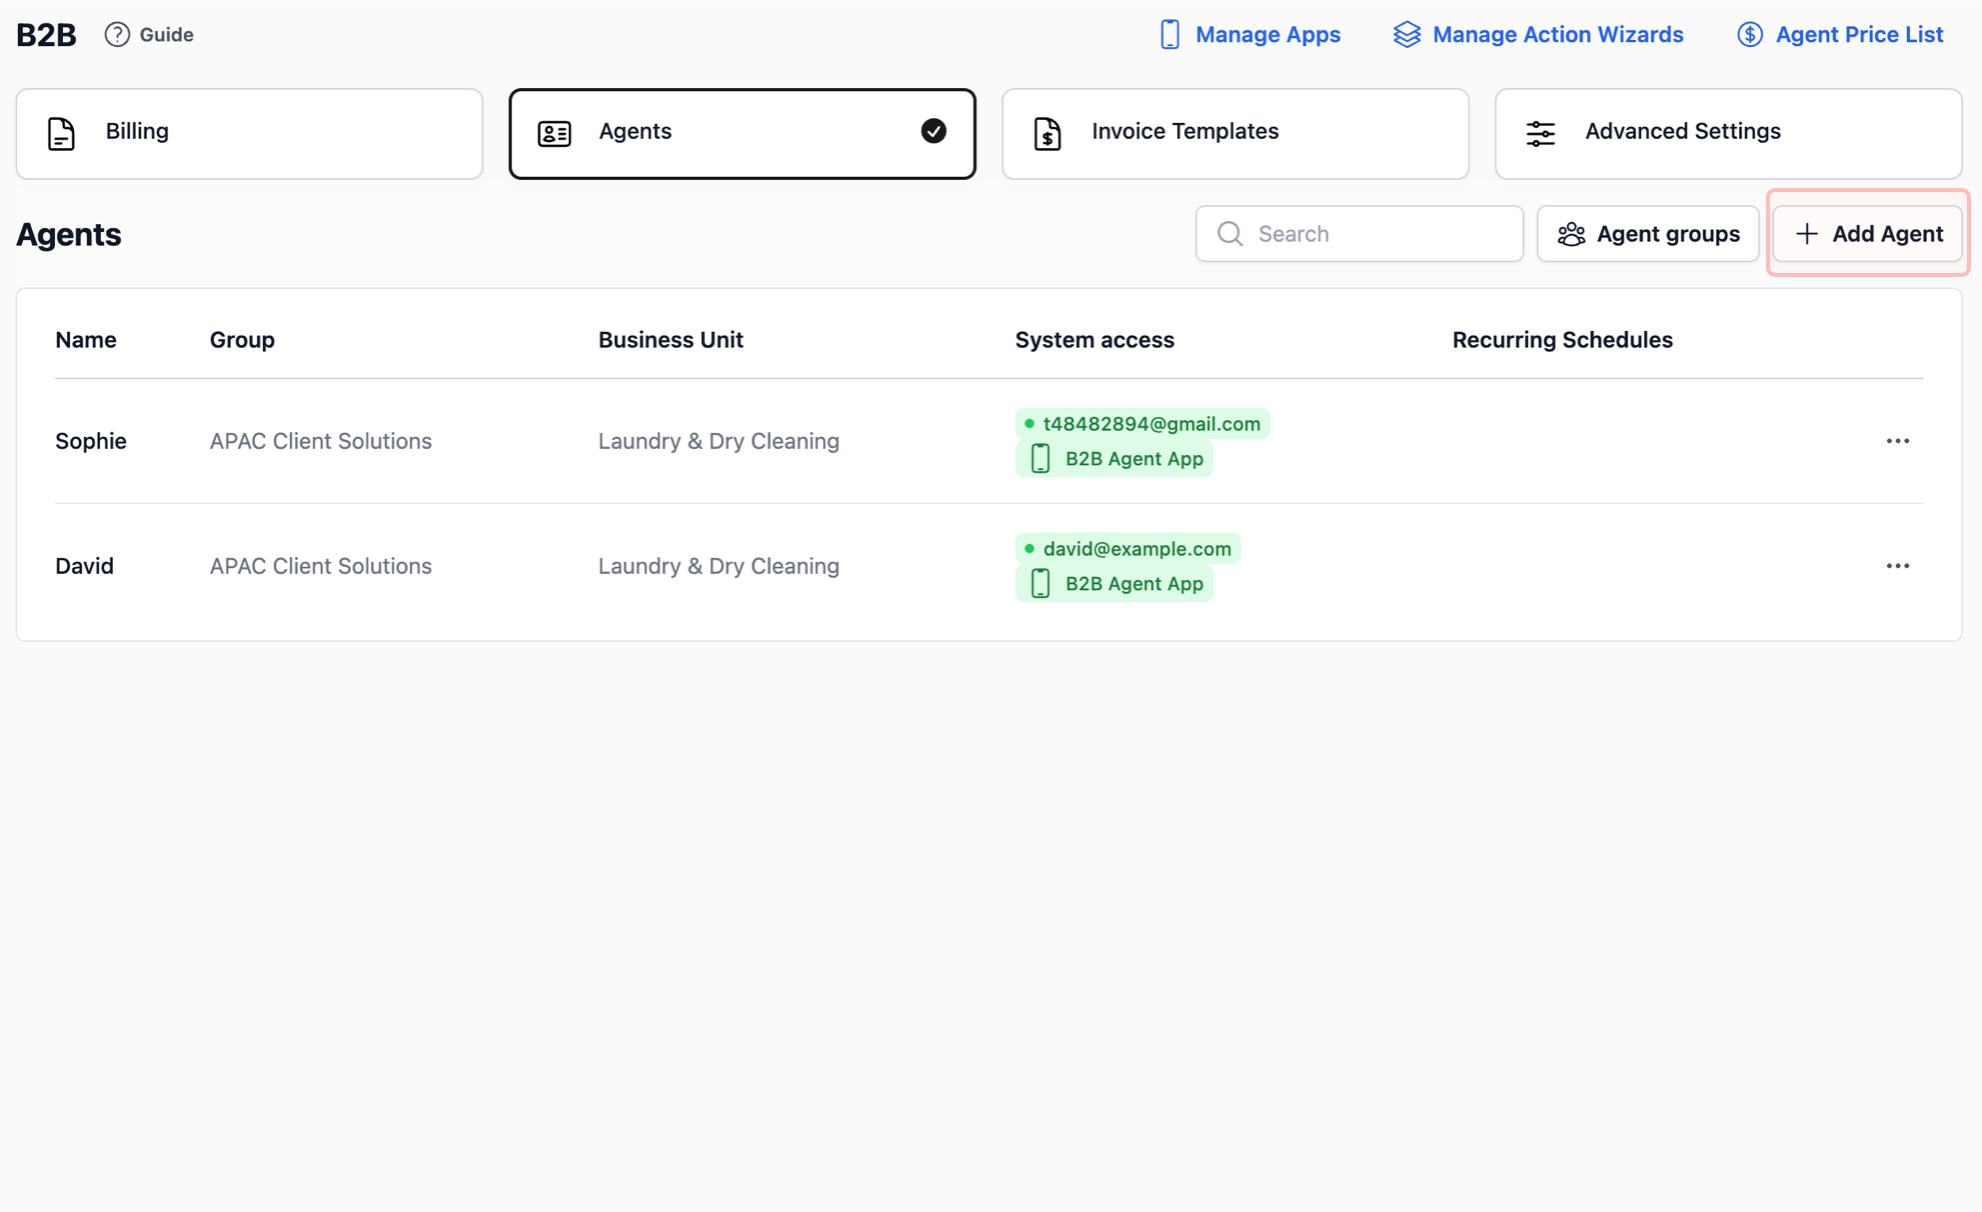
1. **Go to Agents:** Tap on the Agents tab located at the top of the B2B page.
2. **Add an agent:** Click on the + Add Agent button.
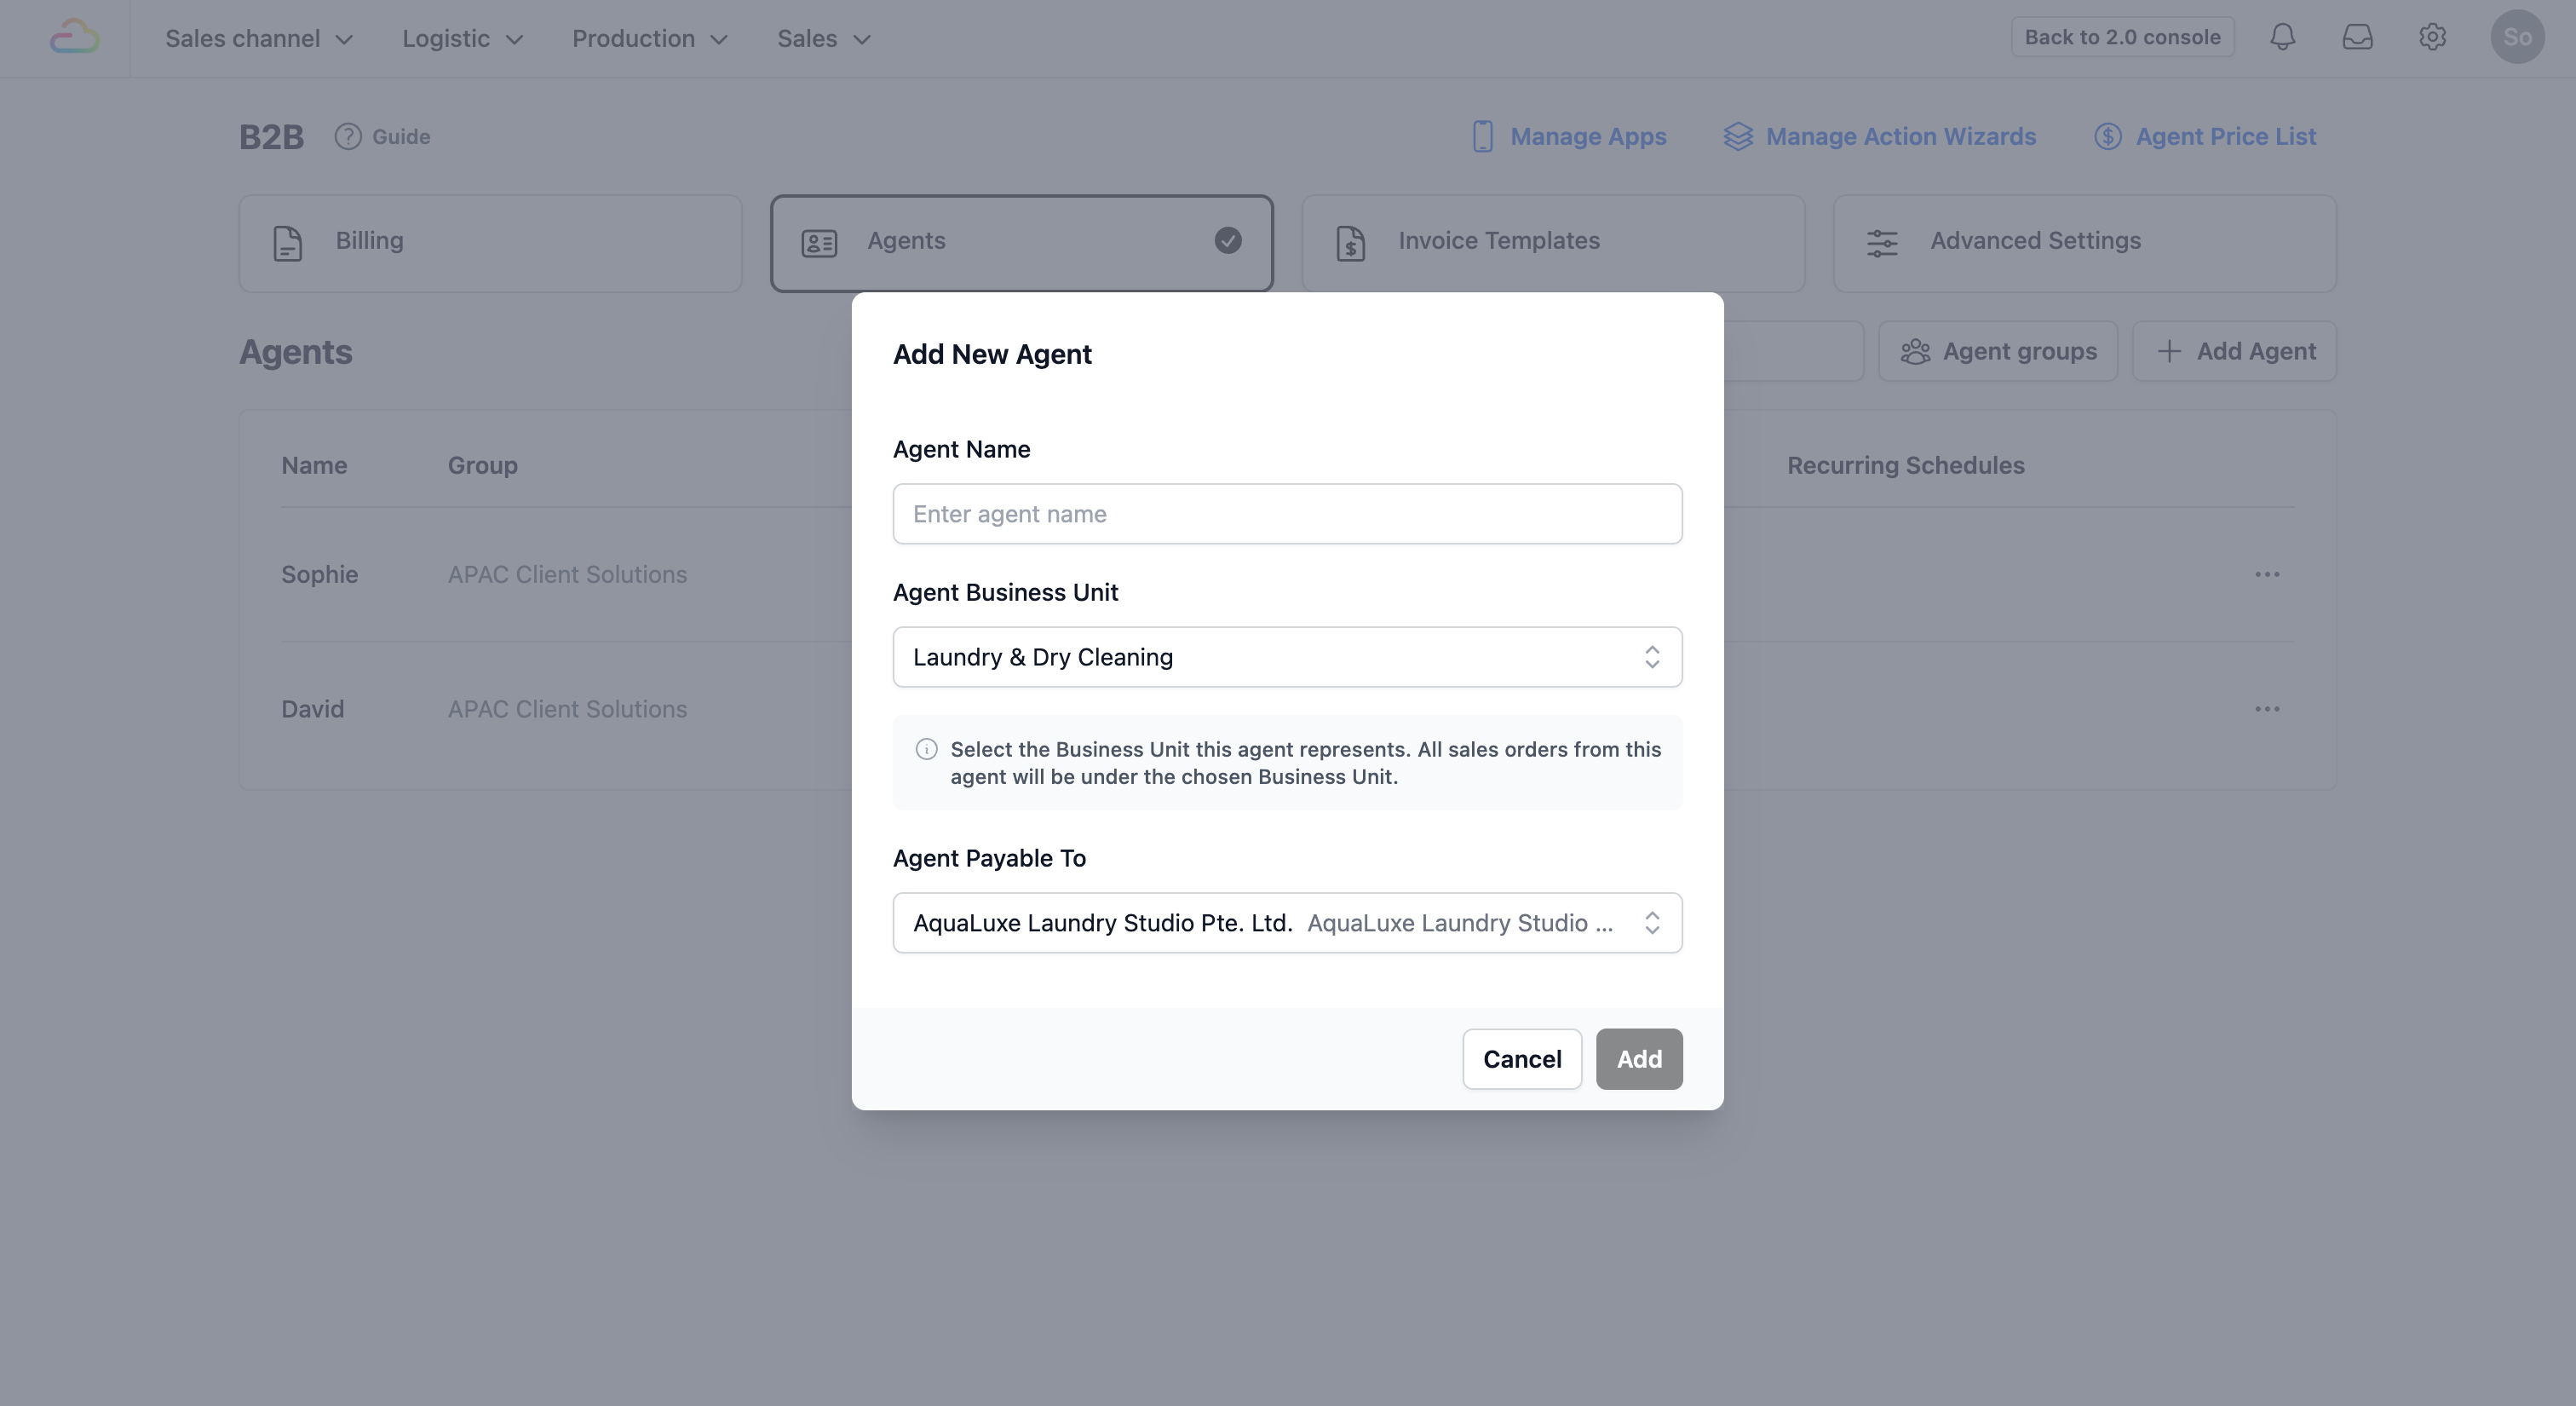
3. **Initial set up:** A pop-up form will appear. Fill in these fields to build the foundation of the agent's profile:
- **Agent Name:** The name of the agent.
- **Agent Business Unit:** This determines which part of your business handles this agent's orders. Click the dropdown icon on the far right to select the correct unit.
- **Agent Payable To:** This defines which business portfolio will bill this agent. If you have multiple portfolios, select the correct one from the dropdown.
You can have multiple Business Units (like different branches or service departments) under one single Business Portfolio.
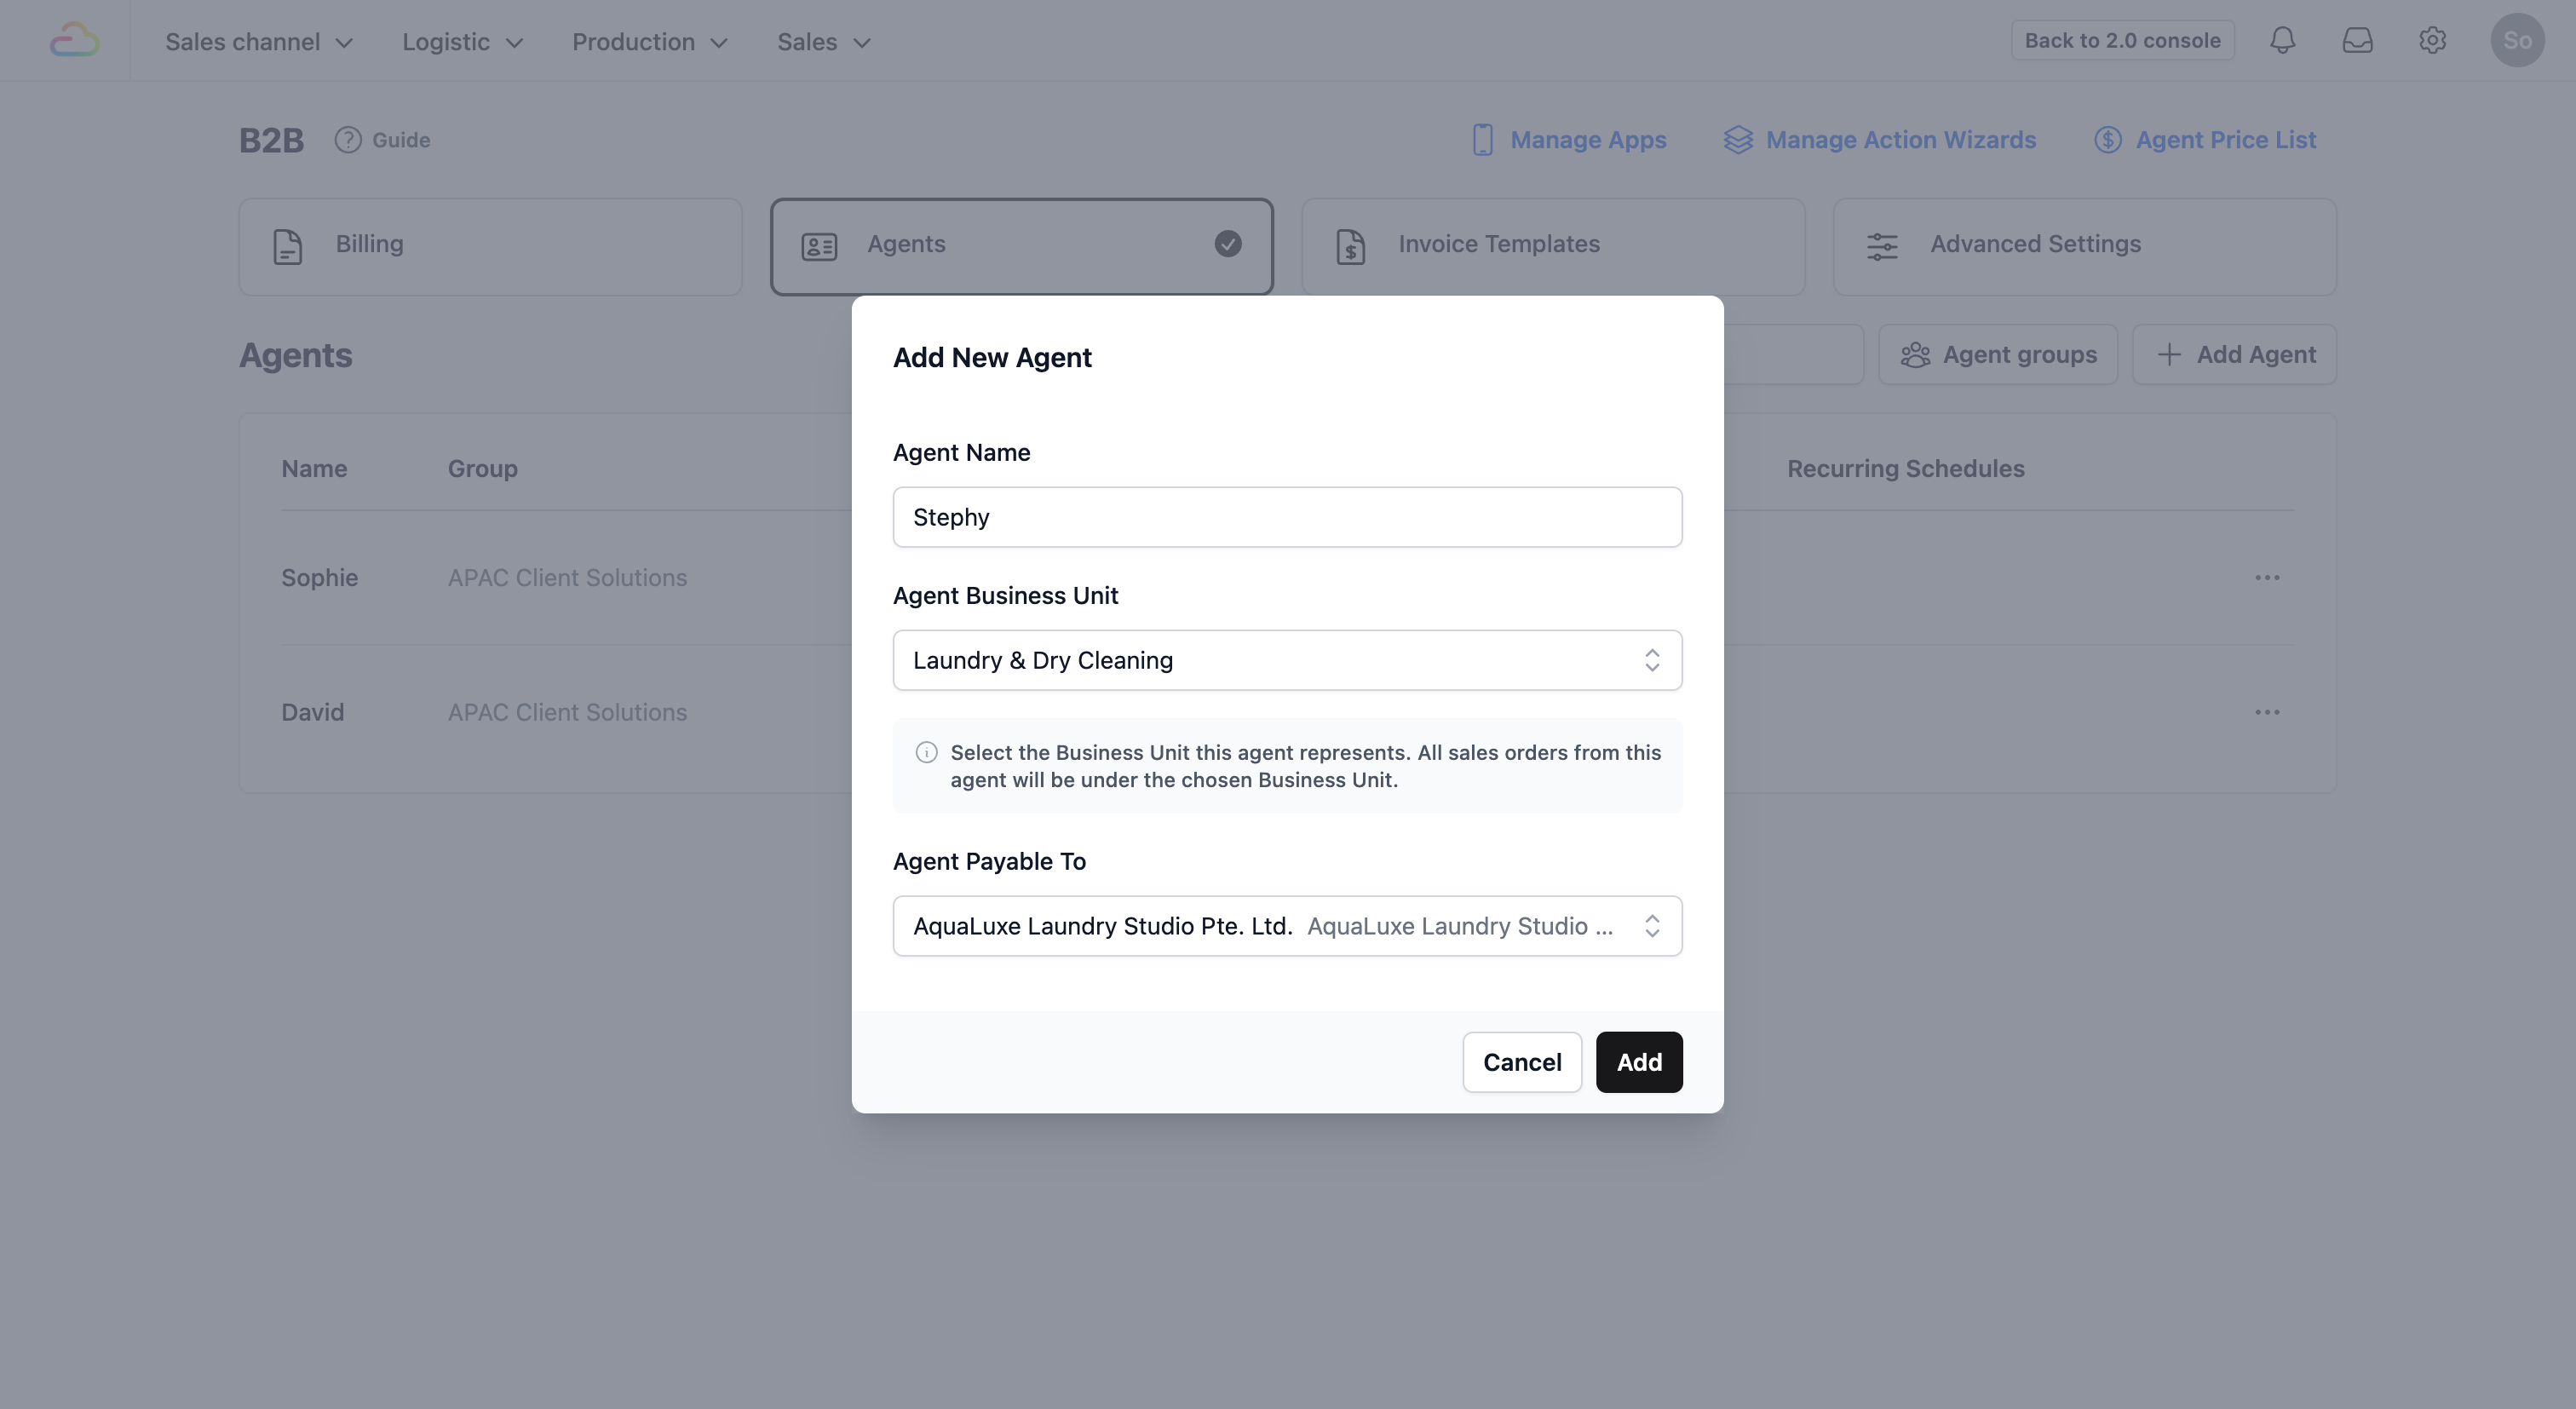
4. **Finalize Pop-up:** Once you have filled out these fields, click the Add button.
## Complete the Agent Profile
After clicking add, the page will refresh to the **Agent Management** area. While there are several settings here, we will focus on the Agent Profile section for now.
Locate the Agent Profile section and fill in the details that apply to your agent:
- Agent Name: The name of the agent.
- Agent Code: The system creates a random unique code for you, but you can change this if you use your own filing system.
- Agent Group: Assign the agent to a specific group.
- _Example Scenario:_ This is helpful when you receive a manual order in the factory. Your factory worker can quickly create an order from their workflow app by identifying the correct **Agent Group** to find the specific agent.
- Phone Number: The agent's mobile number.
- Agent Company UEN: The official registered identification number of the agent’s company.
- Address: The agent's billing address.
The agent code will appear in your main **Sales Order table** under the **Sales Channel Code** column. This allows you to see at a glance which agent is responsible for each record.
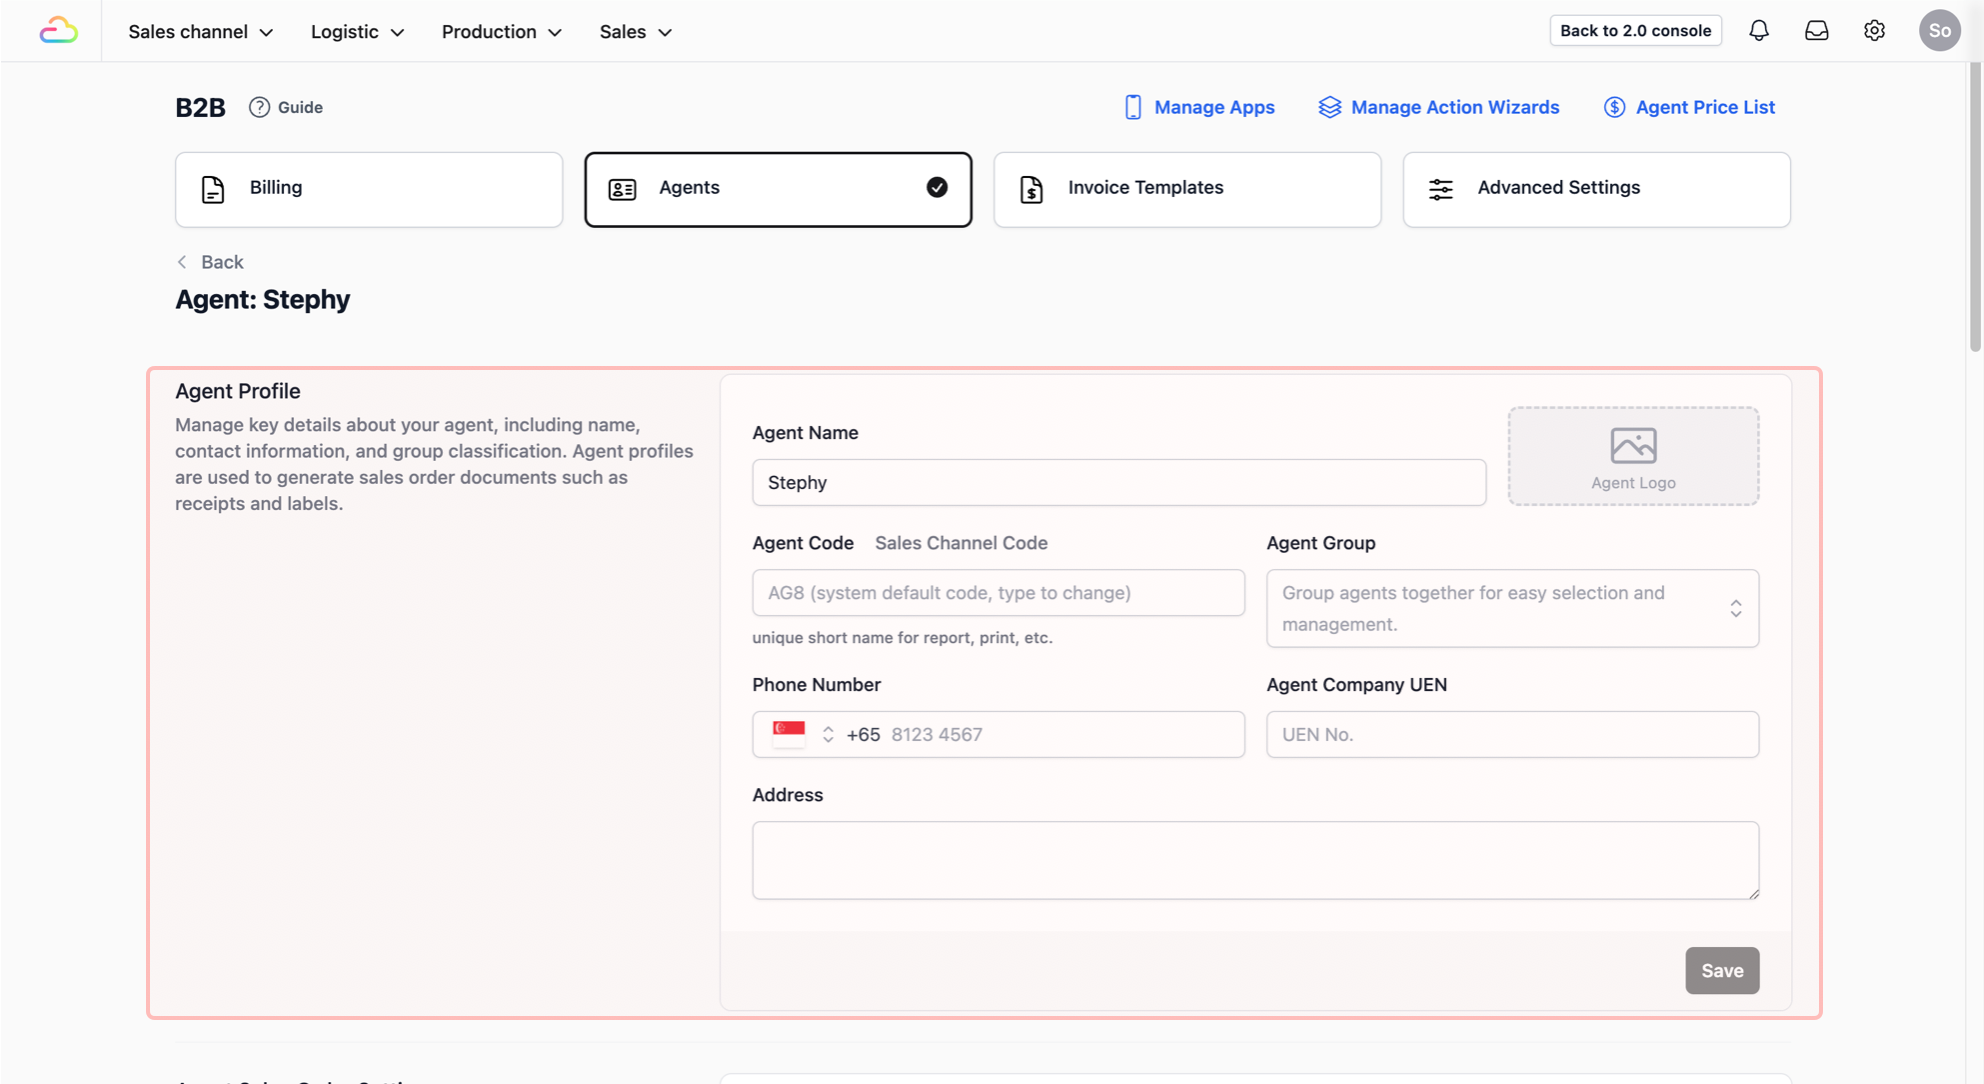
For this example, we will just leave it as it is, though it is generally recommended to fill in the full profile for better record-keeping.
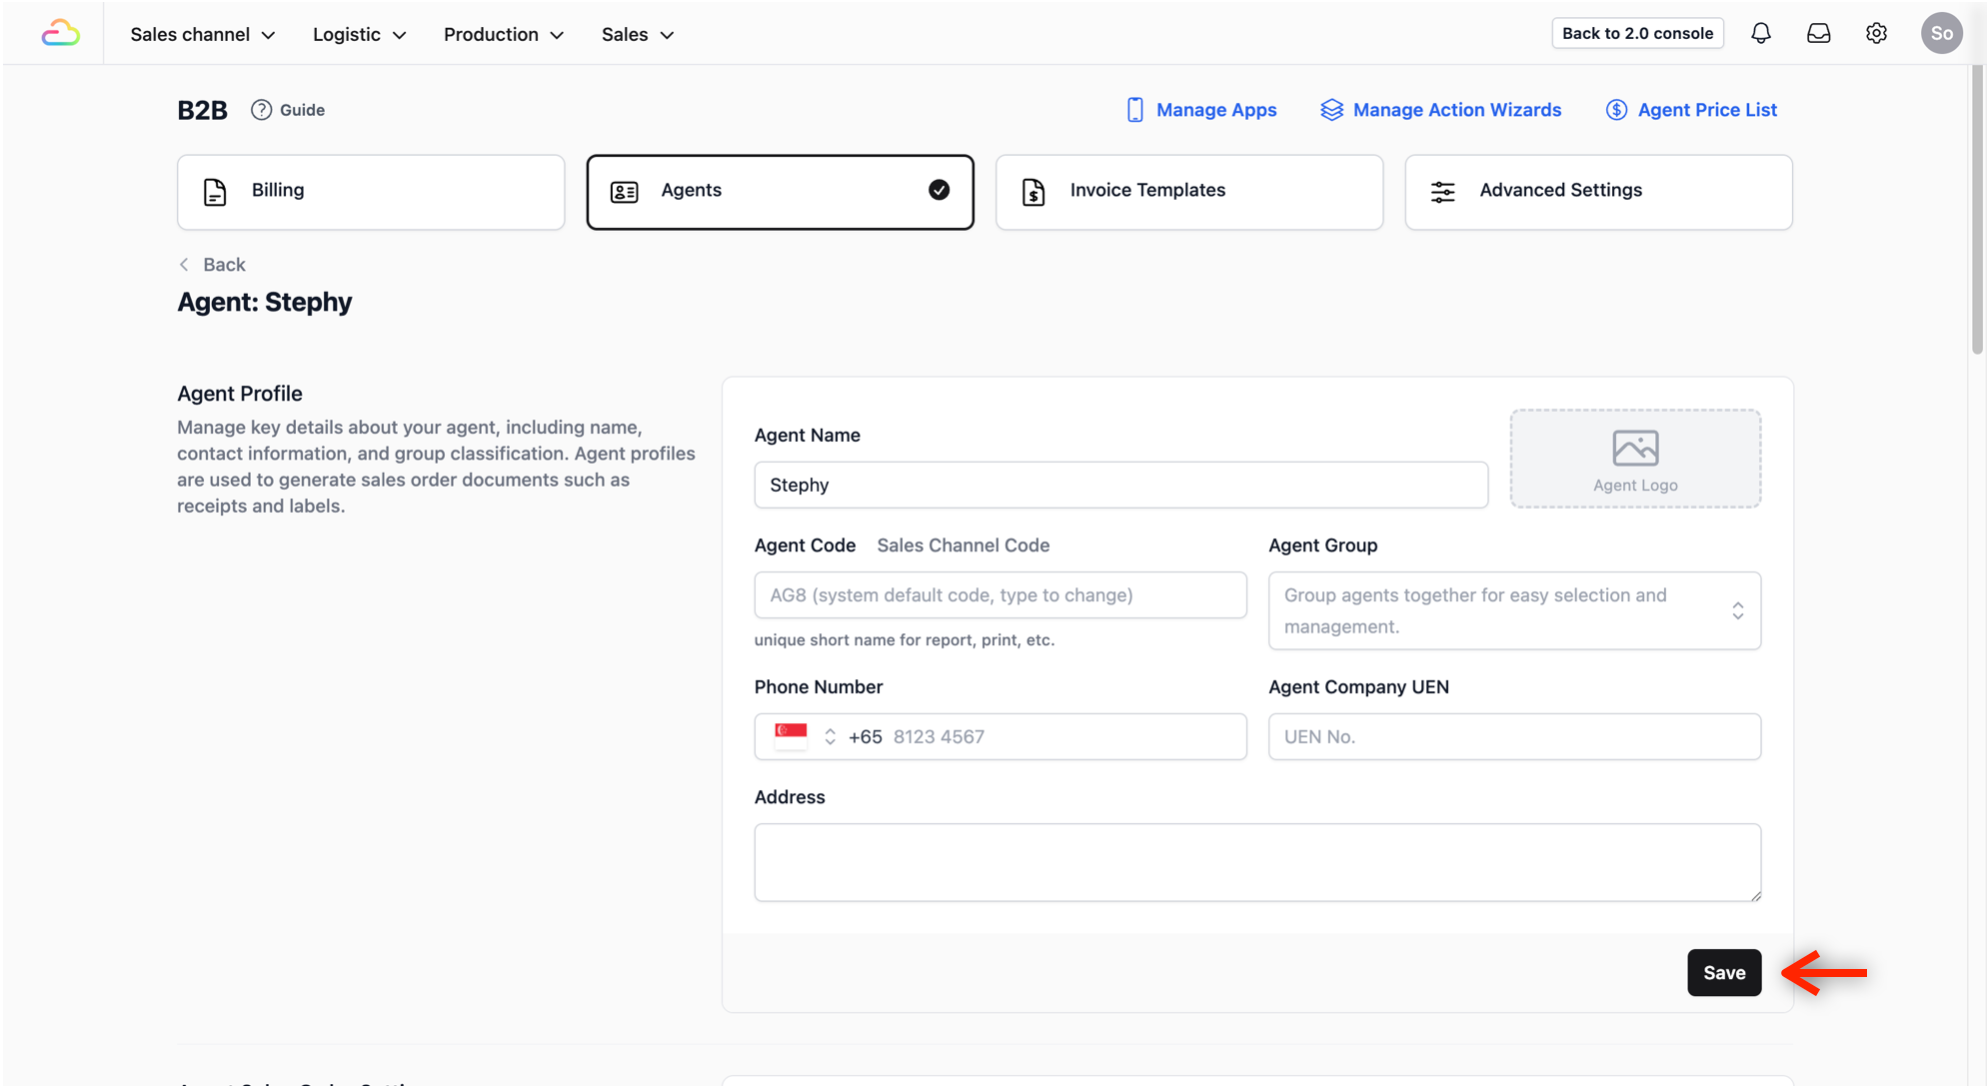
- **Save Changes:** Once you have finished entering the details, click on the Save button to save the changes made to the profile.
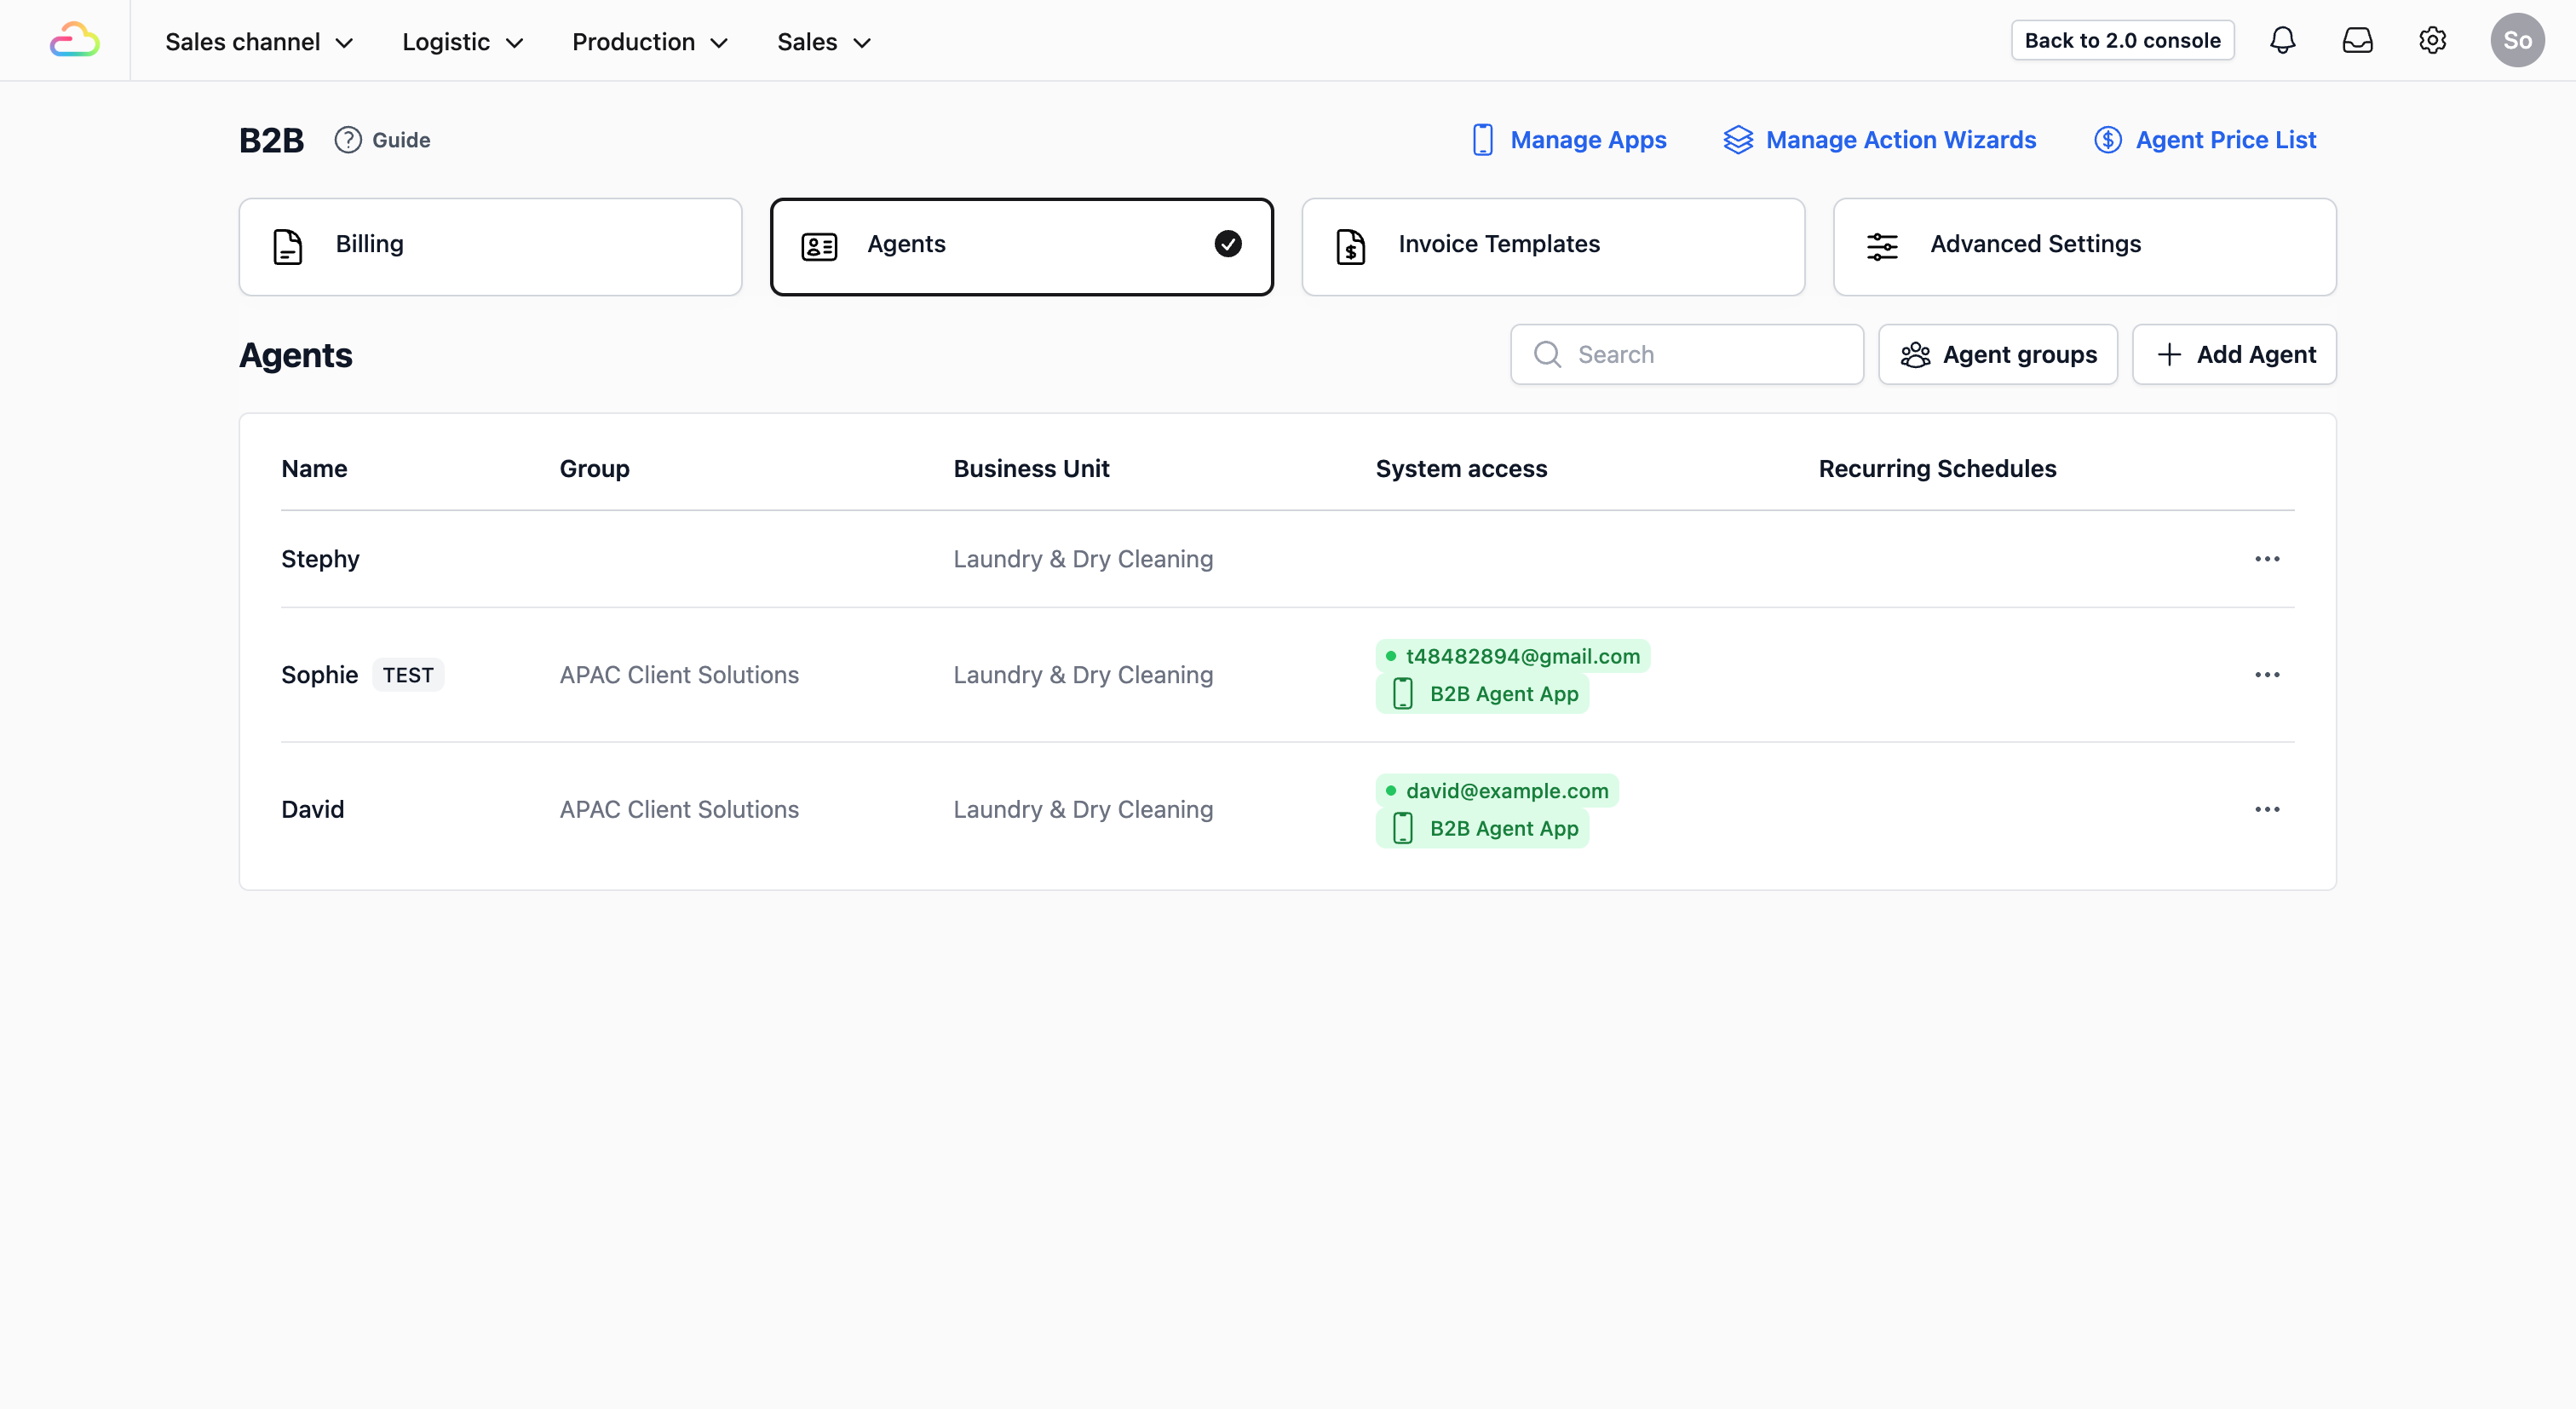
- **Verify:** Click on the Back button. You should now see your new agent appearing in your Agents tab.
**Conclusion:** You have successfully registered your first agent! By taking the time to set up their profile, you've ensured that all future orders and billing will be tracked accurately.