## What are Agent Groups?
Agent Groups are a way to organise your agents into categories. Instead of your team scrolling through a long list of names, they can tap on a group to see only the agents that belong to it. This is especially useful as you add more agents over time.
## Access the B2B Page
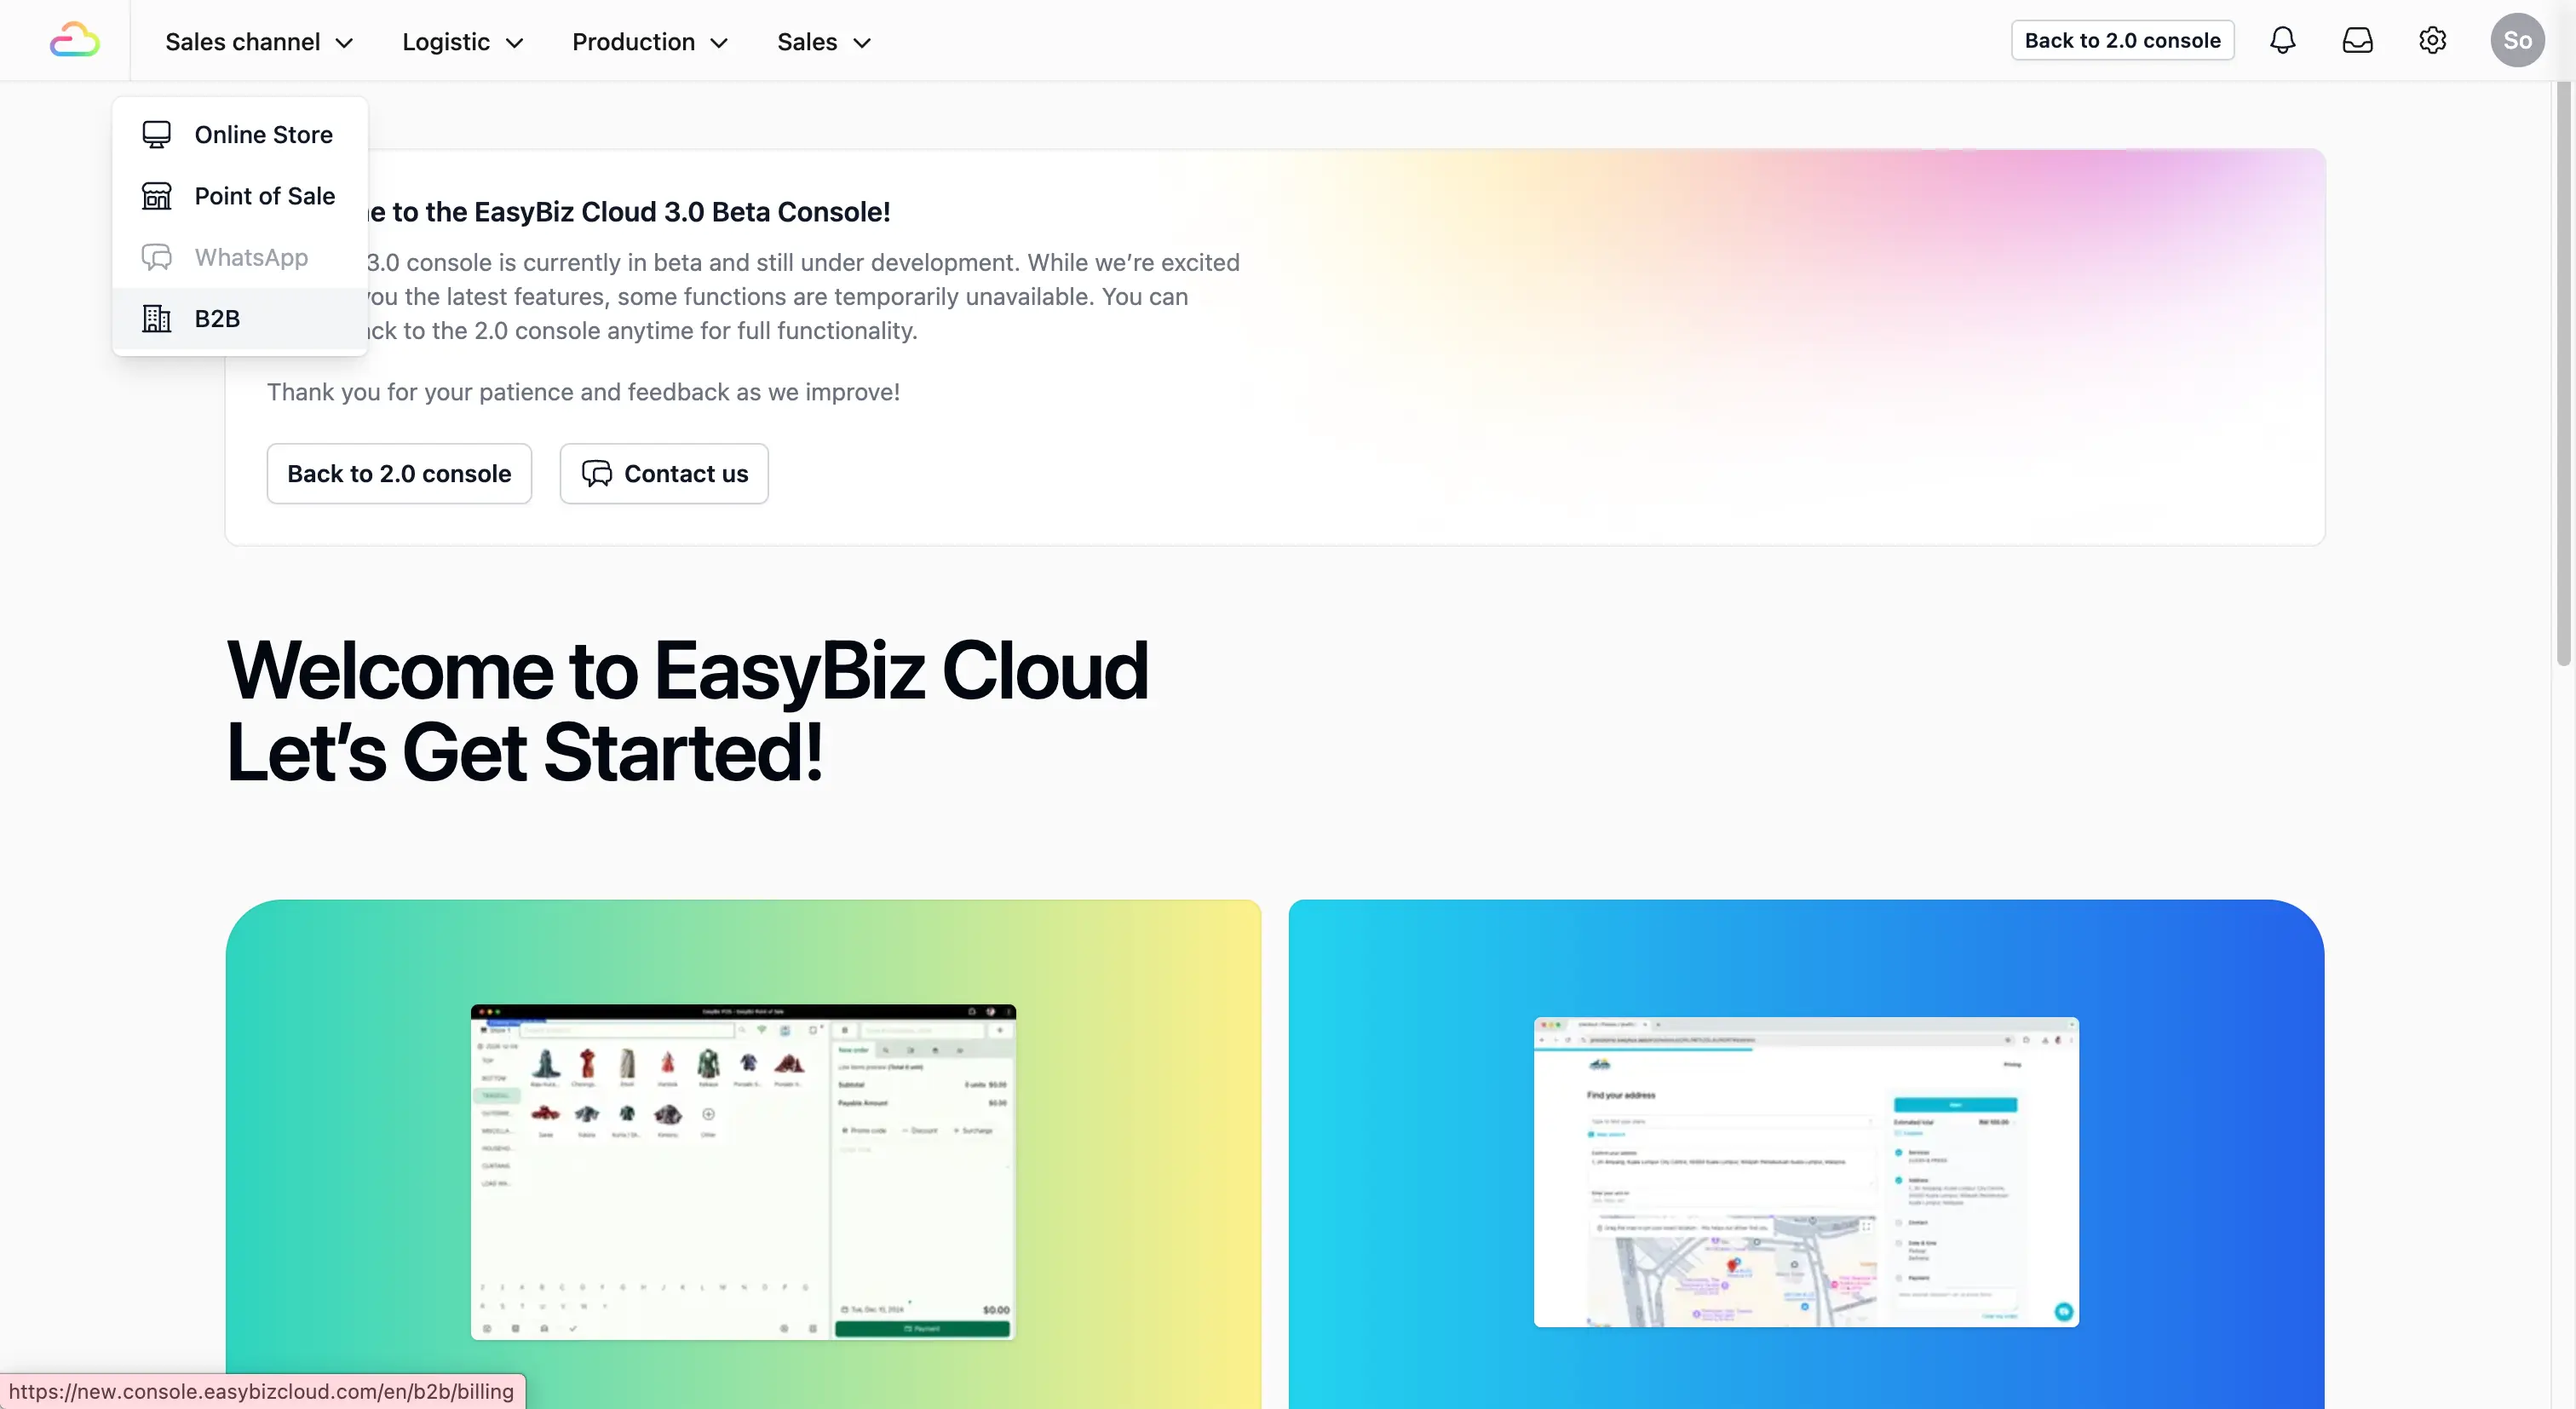
Everything related to your agents is managed within the B2B section of your system.
**Navigate to B2B:** On the top navbar, click on Sales Channel. A dropdown list will appear, select B2B.
## Create an Agent Group
Before you can organize your agents, you need to define the specific agent group.
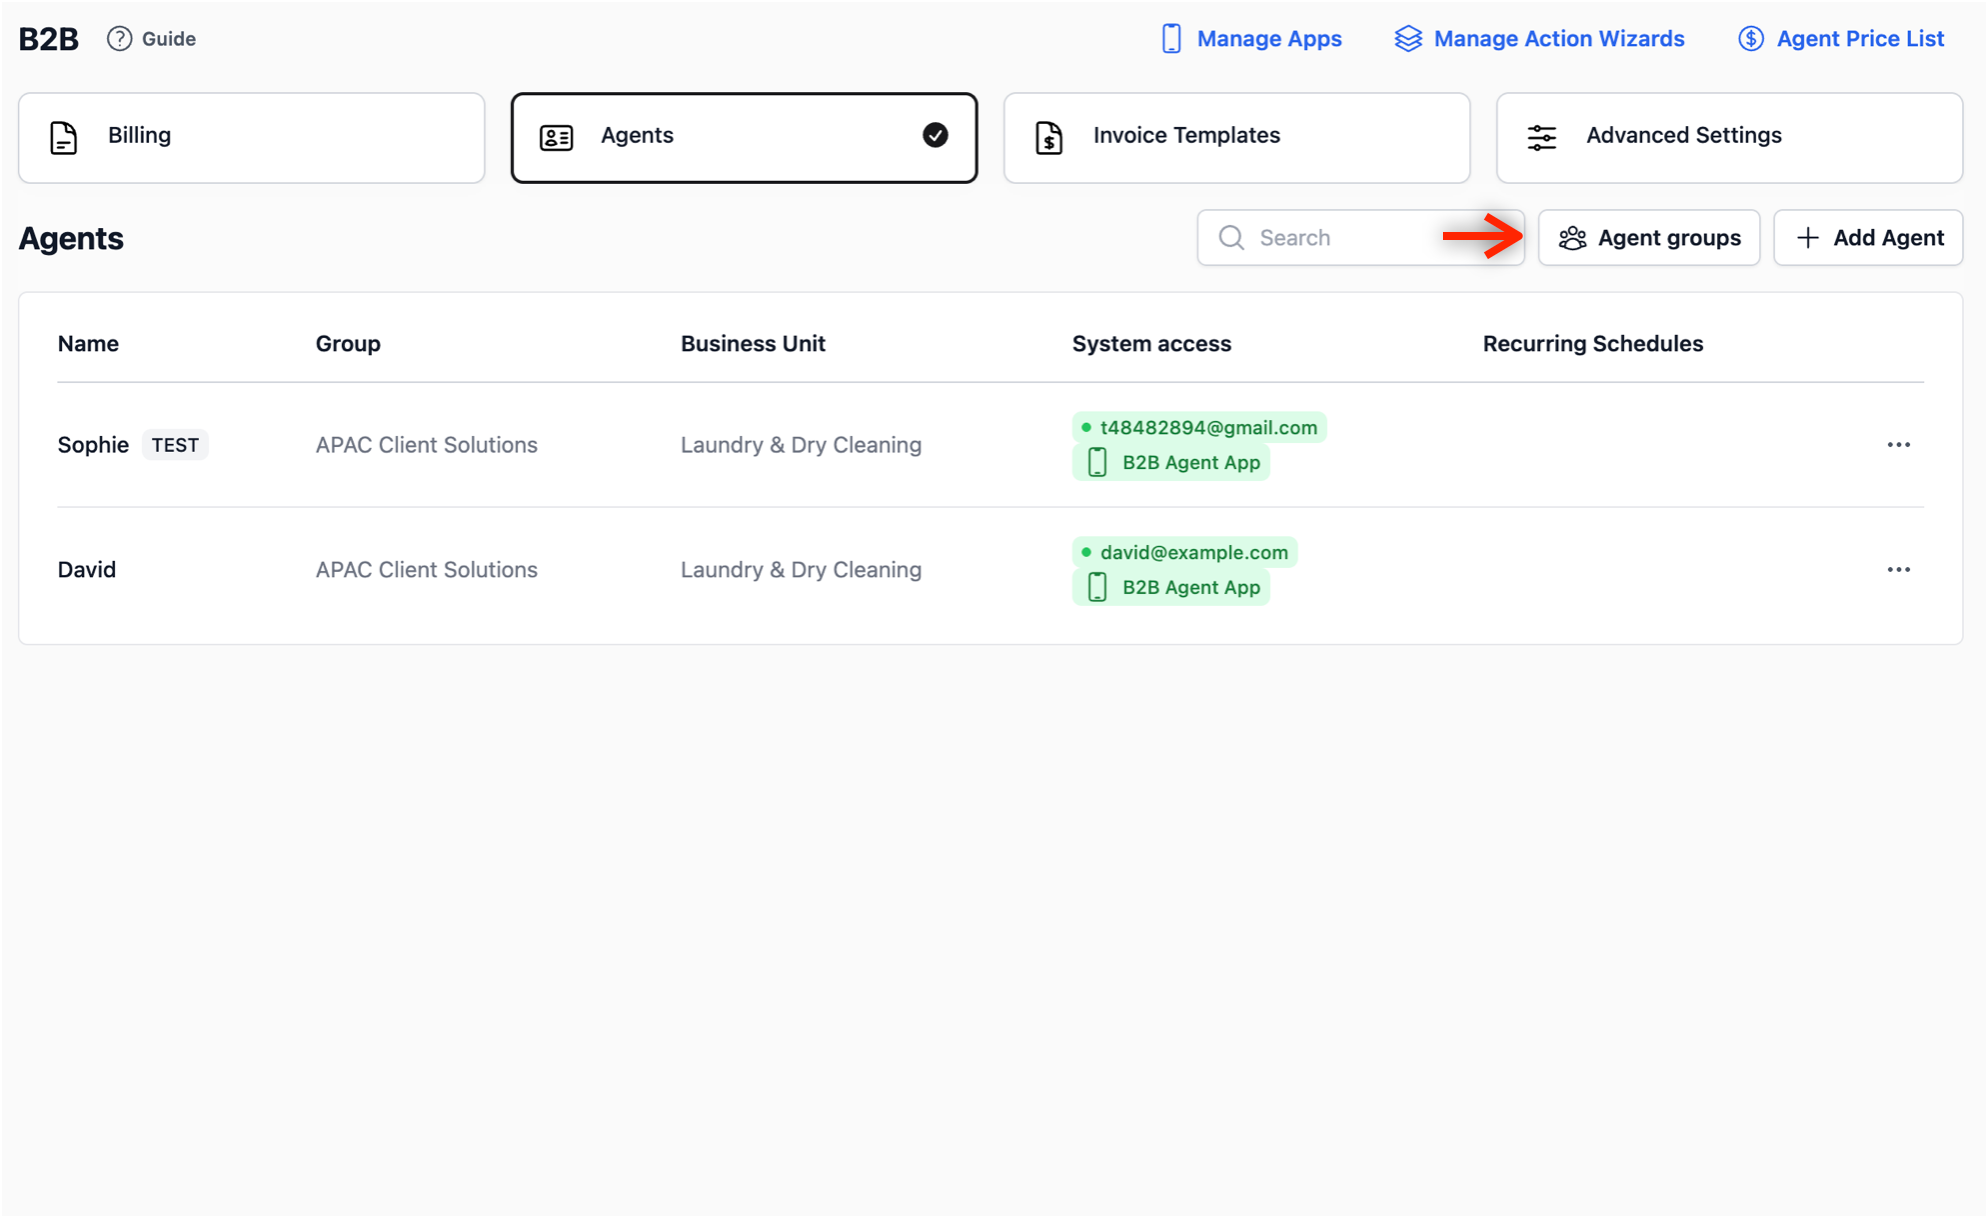
Click on the Agents Tab. This is where you are able to see and manage your agents. Click on the Agent Groups button.
A pop-up window will appear. Click on the + Add Group button to create a new field. Give your agent group a meaningful name and click on the Save button. This creates an agent group.
## Link an Agent to a Group
After defining your agent groups, you can assign each individual agent to their specific agent group. This ensures that the agent is correctly identified throughout your entire system.
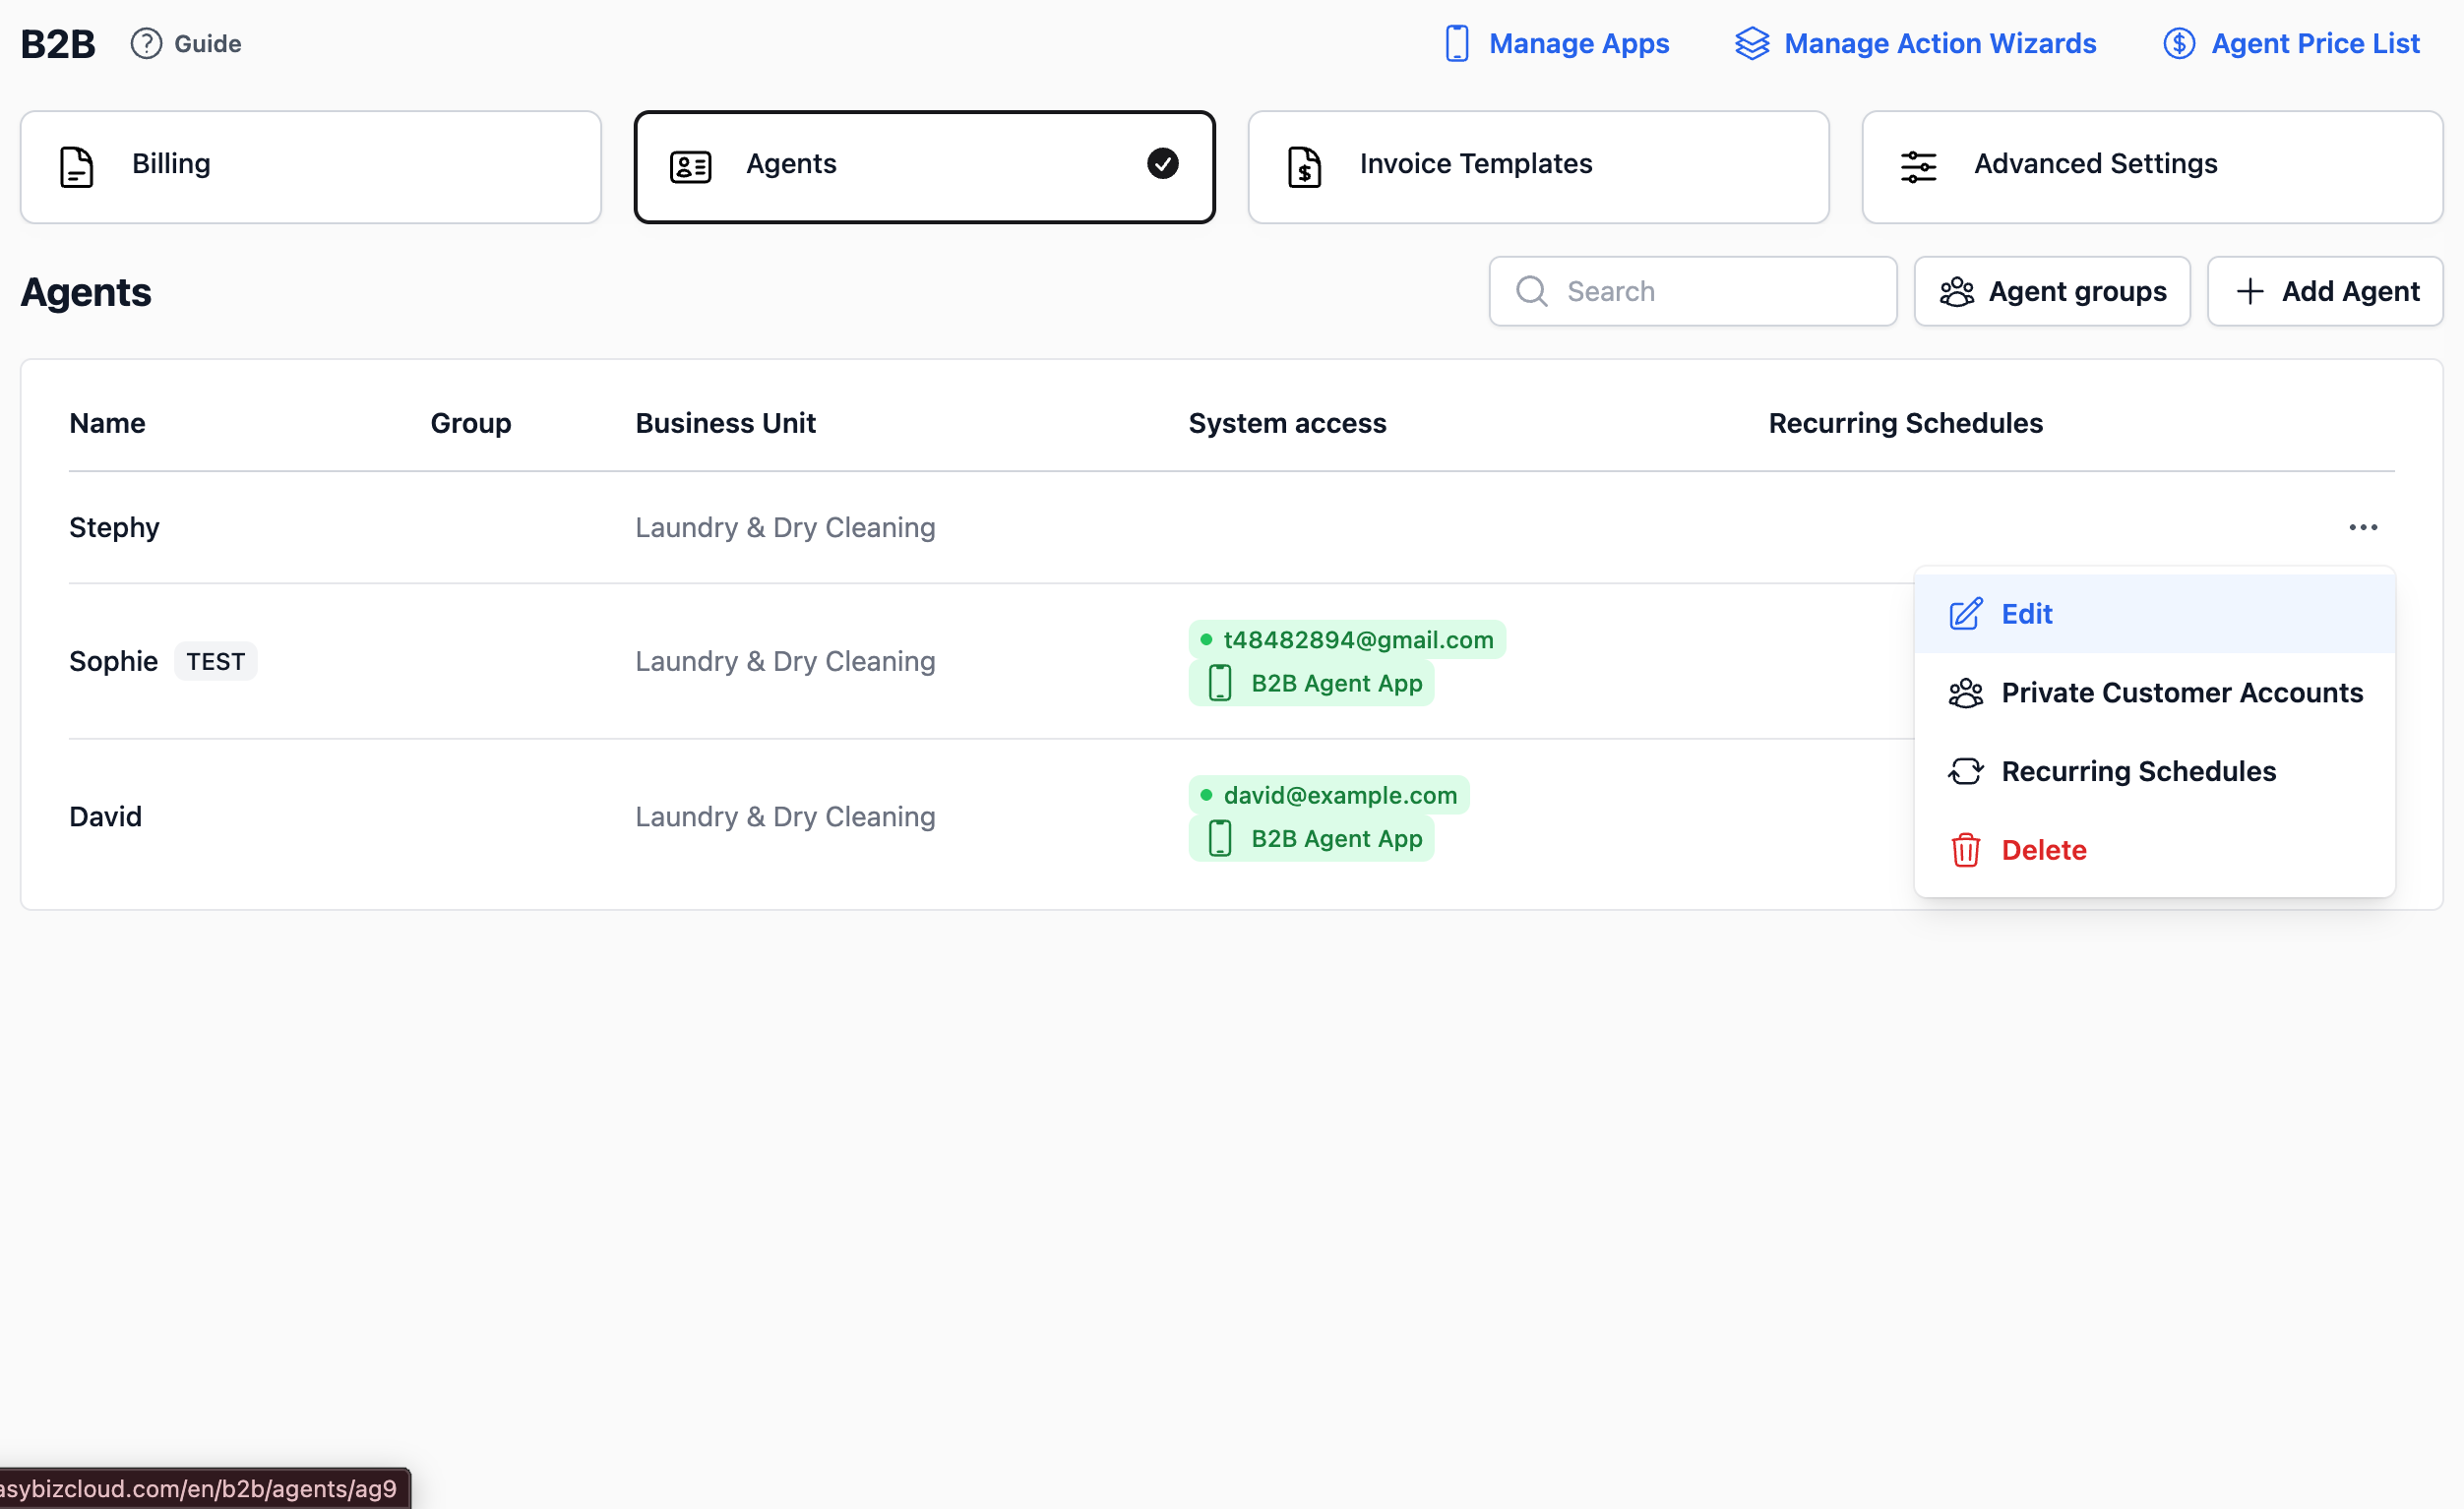
1. **Edit Agent:** On the Agents page, find the agent you want to categorize. Click the ••• and select Edit.
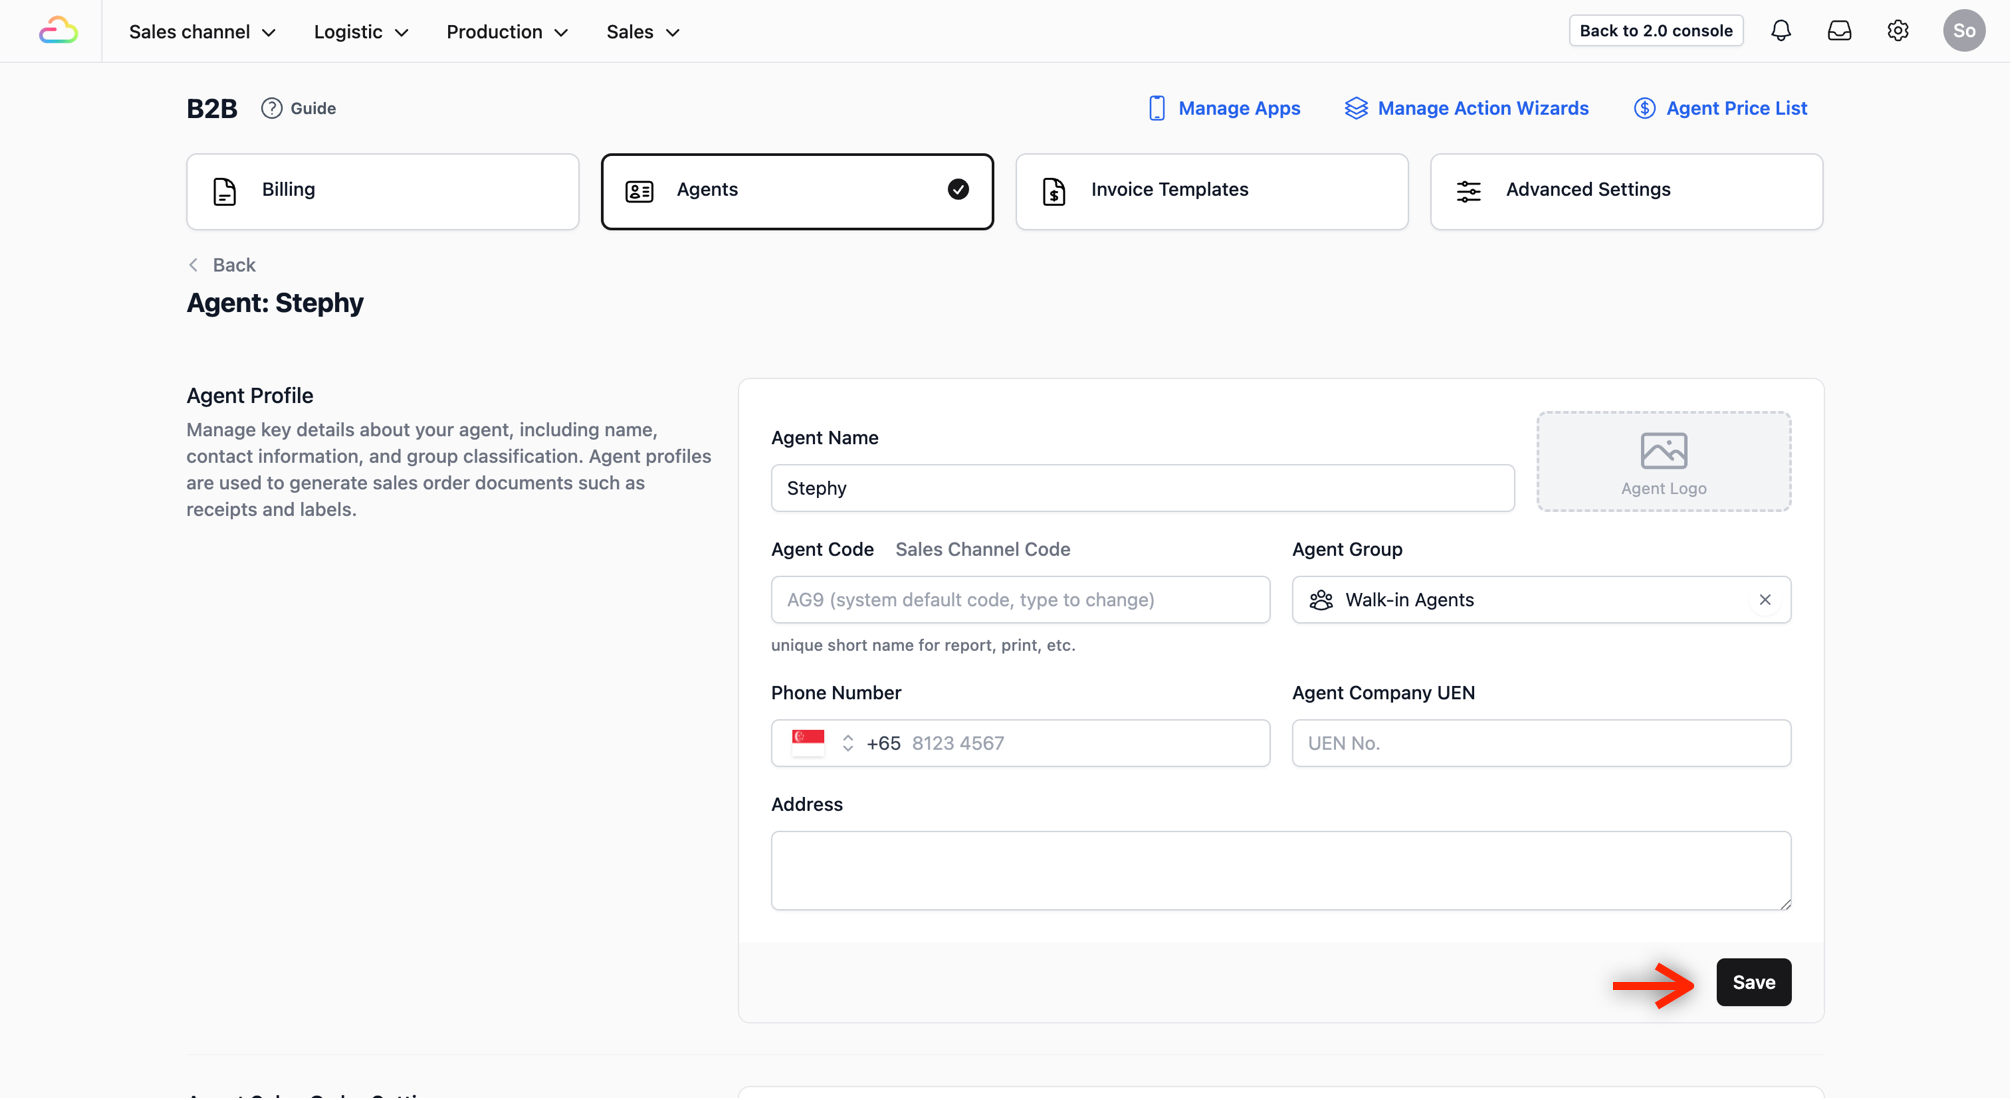
2. **Assign Group:** In the **Agent Profile** section, find the **Agent Group** field. Click the dropdown menu and select the **agent group** you just created.
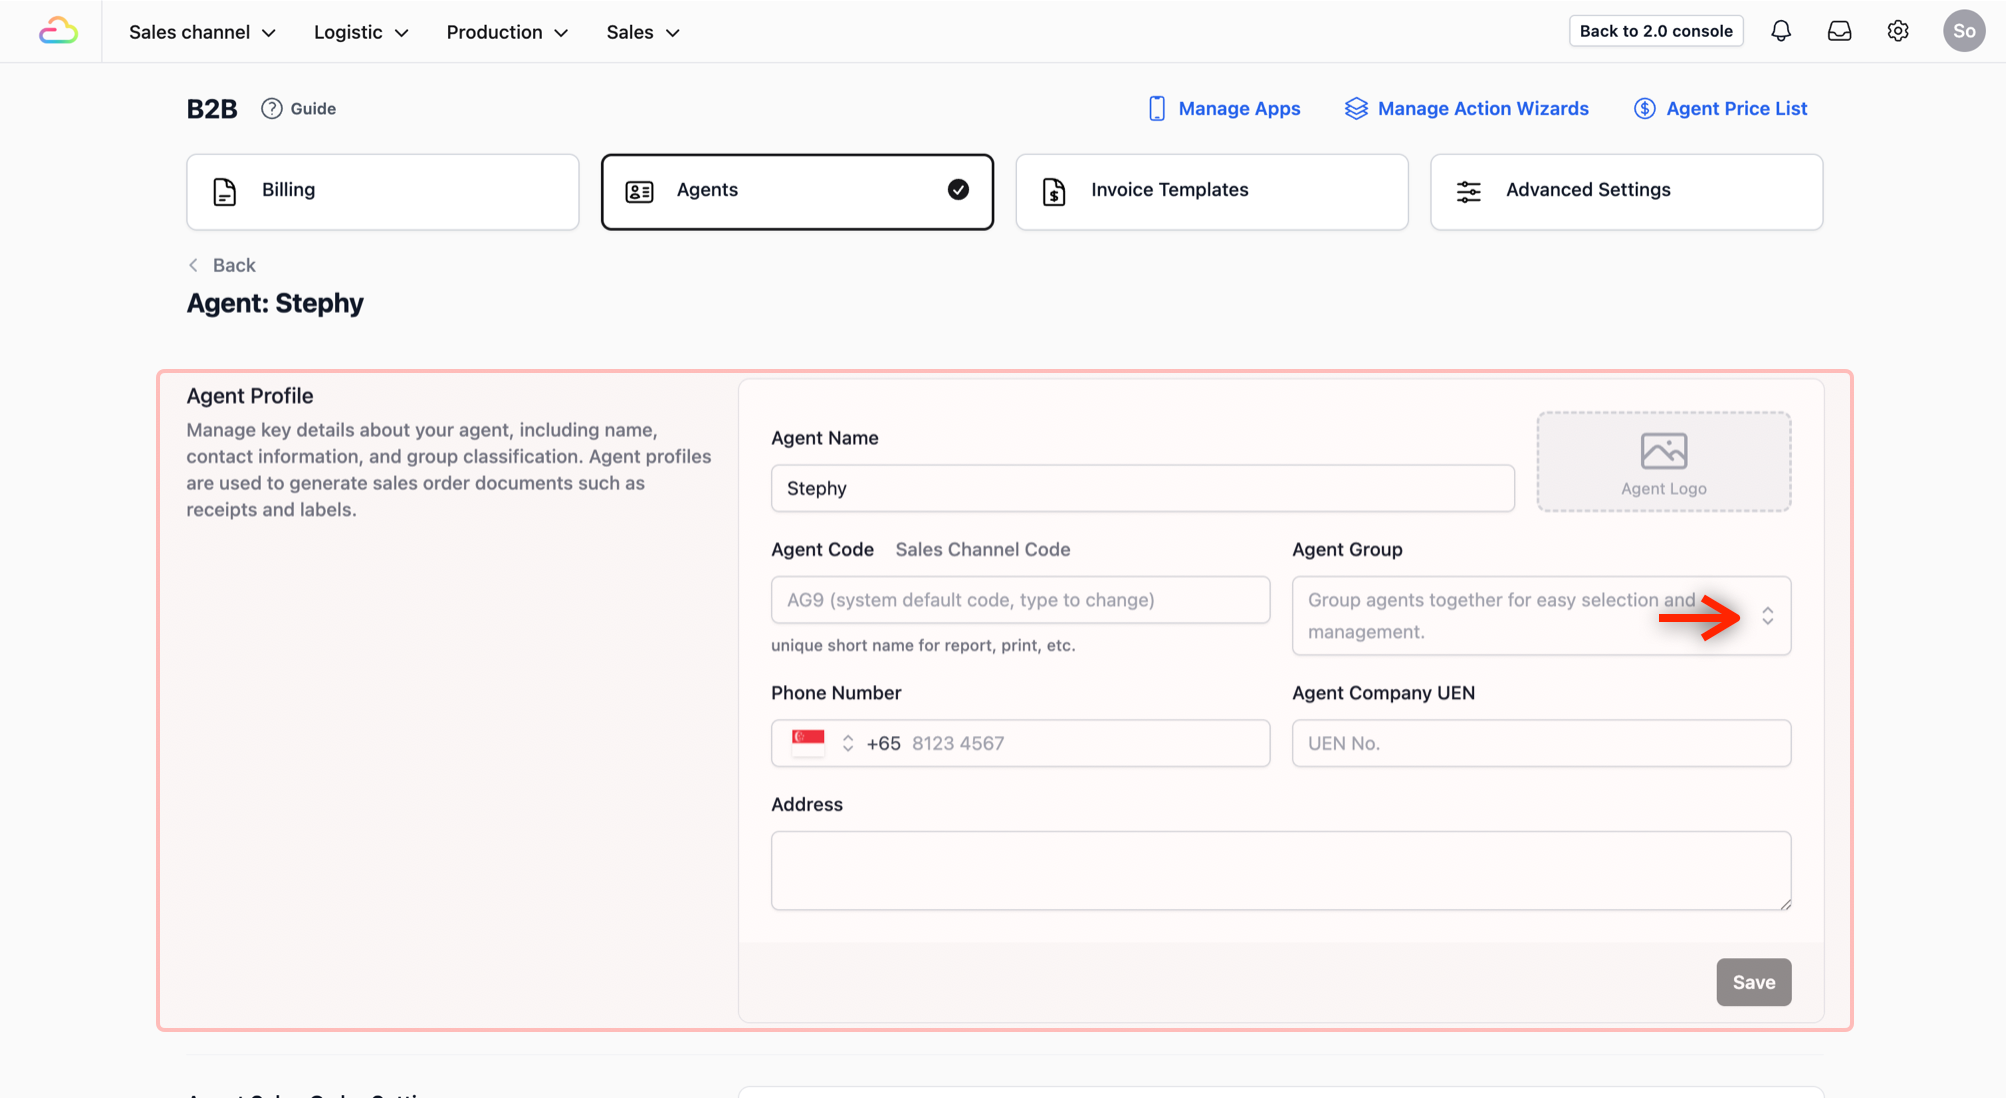
3. **Save:** Click **Save** to apply the changes. Your agent is now linked to an agent group.
## Why We Use Agent Groups
As your network grows, a single long list of agents becomes difficult to navigate. Utilizing **agent groups** allows you to maintain order and ensure that different segments of your business are handled correctly without confusion.
**Real-World Use Case:** Faster On-Site Operations. In a busy factory or warehouse, staff needs to work quickly. **Agent groups** simplify their process:
- **Find Agents Instantly:** As shown in the video, a worker can tap an **agent group** name to instantly see only the relevant agents. They don't have to scroll through hundreds of unrelated names.
- **Prevent Errors:** By narrowing the list to a specific **agent group**, workers are much less likely to select the wrong agent by mistake.
- **Improve Efficiency:** Proper organization through **agent groups** ensures your team spends less time searching and more time processing orders, keeping your production line moving.