## Before You Start
- You need access to ⚙️ Settings to choose the required fields. Staff who only add customers need access to **Contacts** or the POS.
- Your shops (sales channels) should already be set up, because each new customer is registered under one of them.
- If you set this up before: the fields used to be chosen separately in each POS app's **Contact** feature, the Console's and the staff app's. They are now one shop-wide setting in ⚙️ Settings › **Records**, so check it once after this change.
## Overview
A contact is a customer record in EasyBiz: their name, phone number, email and notes, kept in one place. Staff can add one from the Contacts page in the Console, or at the POS while taking an order. You decide which details the form asks for and which ones staff must fill in before they can save. One setting covers the Console, every POS and the staff app, so every counter asks for the same things. This saves your team from chasing a missing phone number when an order is ready for pickup.
**Where it works**
- **Console:** the Add Contact form on the Contacts page, and editing a customer later.
- **POS:** the New Contact form in the cart, while taking an order.
- **Staff app:** the new customer form follows the same setting.
- **Online Store and Mobile App:** not affected. Customers who sign up online use the store's own sign-up form.
---
## Why Set It Up
Without required fields, a busy counter will skip anything optional. A customer saved without a phone number can't get WhatsApp pickup reminders, and staff can't find them later by phone search. If you leave this setting alone, the form shows Name, Phone Number, Email and Private Note, and only the name is required.
---
## Add a Customer in the Console
1. In the top navigation bar, click the **Sales** dropdown, then click **Contacts**.
2. Click Add Contact. A form called **Add Account** opens.
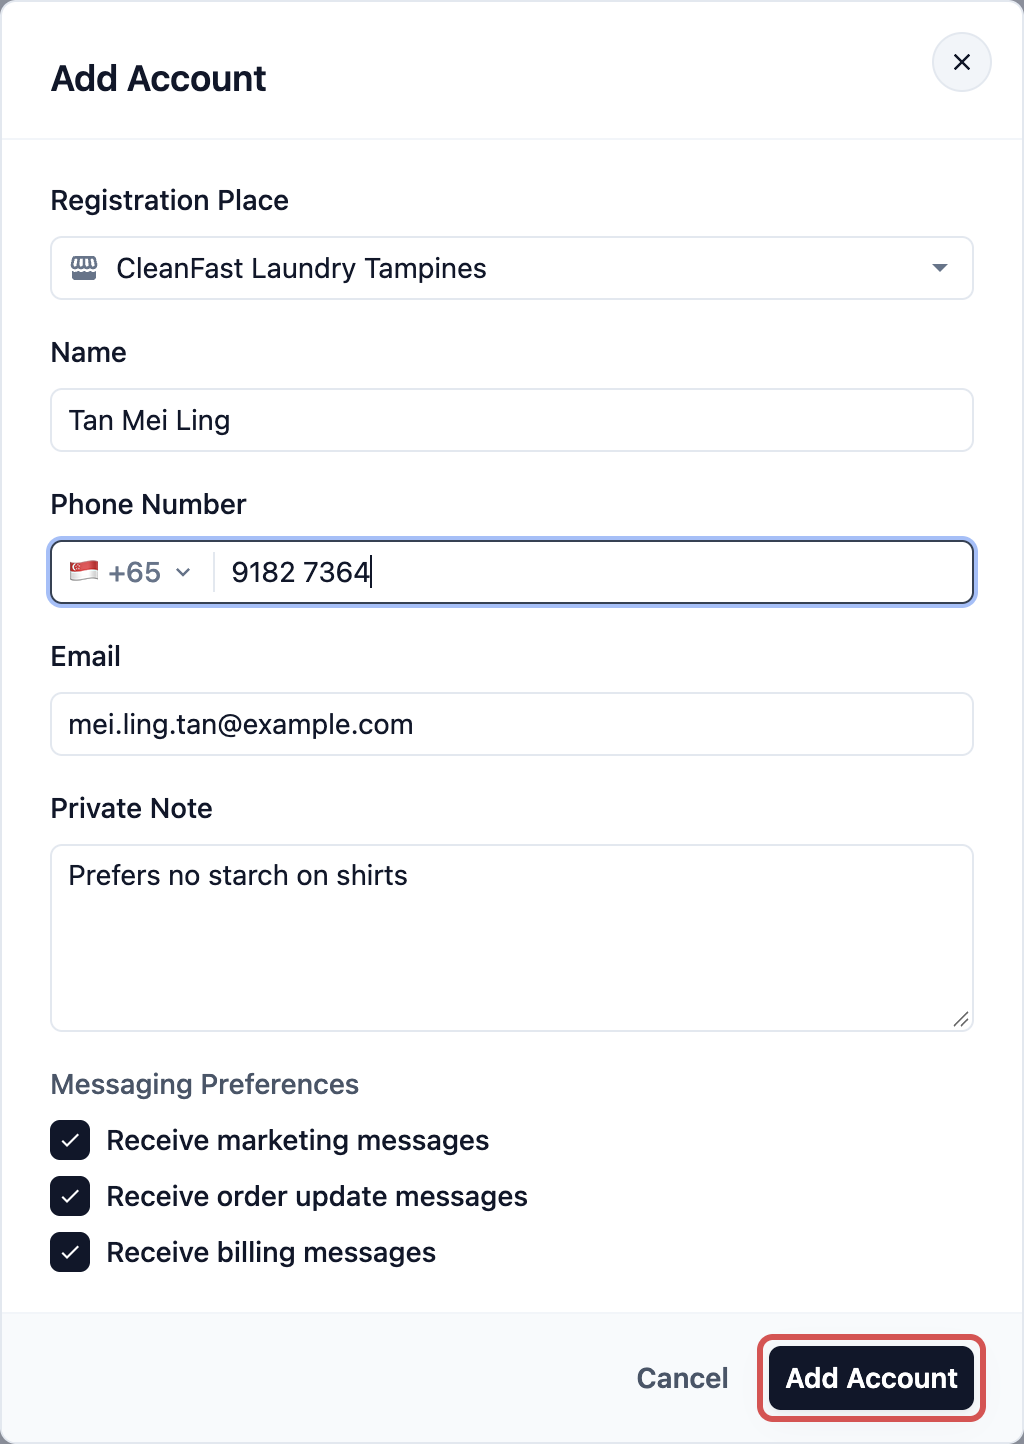
3. Choose the **Registration Place** and fill in the details (each field is explained below).
4. Click Add Account. The button stays grey until you have chosen a registration place and filled in every required field.
The customer now appears in your contact list, ready to be picked at any POS.
---
## Add a Customer at the POS During an Order
1. On the POS order screen, look at the cart on the right.
2. Search for the customer by name or phone number in **Search contacts...** first, so you don't add someone twice.
3. If they are not found, tap New Contact.
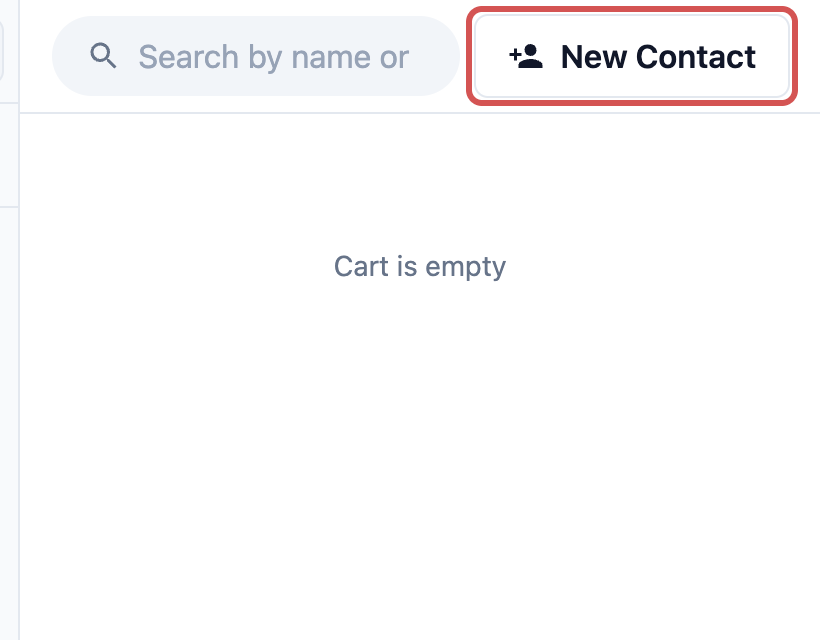
4. Fill in the **New Contact** form, then tap Save. **Save** stays grey until every required field is filled in.
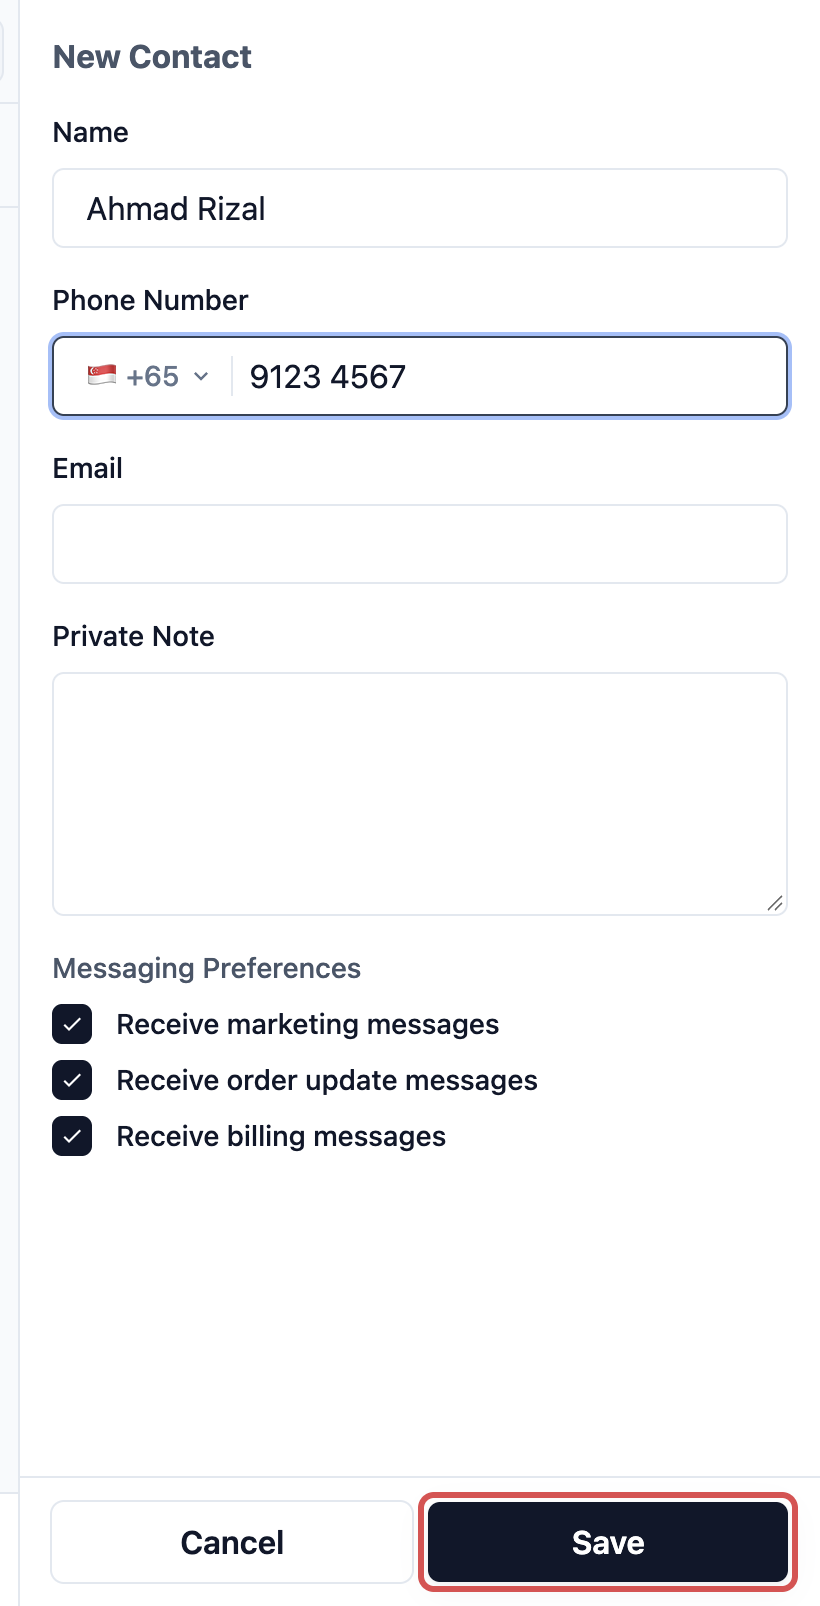
The new customer is attached to the order straight away. At the POS there is no Registration Place to choose: the customer is registered under the shop where they were added.
---
## What Each Field Means
**Registration Place**
The shop or sales channel where this customer first joined, for example CleanFast Laundry Tampines. It appears only when you add a customer in the Console, and it can't be changed later.
**Name**
The customer's name as staff will see it on orders and receipts. Name is always on the form and always required.
**Phone Number**
The customer's mobile number, with a country code picker. It powers phone search, WhatsApp messages and the check for duplicate customers.
**Email**
The customer's email address, used for email receipts and to spot duplicates.
**Private Note**
Notes only your team sees, such as "Prefers no starch on shirts". Customers never see this.
**Birthday** and **Referral Source**
These two are not on the form until you add them in Settings › Records. Birthday is picked from a calendar. Referral Source is free text, for example "Google" or "Friend".
**Messaging Preferences**
Three tick boxes that control what EasyBiz may send this customer. All three are ticked for a new customer.
| **Tick box** | **What it controls** |
| --- | --- |
| Receive marketing messages | Promotions, broadcasts and campaigns |
| Receive order update messages | Automatic updates about their orders |
| Receive billing messages | Payment and billing messages |
---
## Choose What Staff Must Fill In
1. Click the ⚙️ Settings icon in the top-right corner.
2. Under the **Library** section, click **Records**.
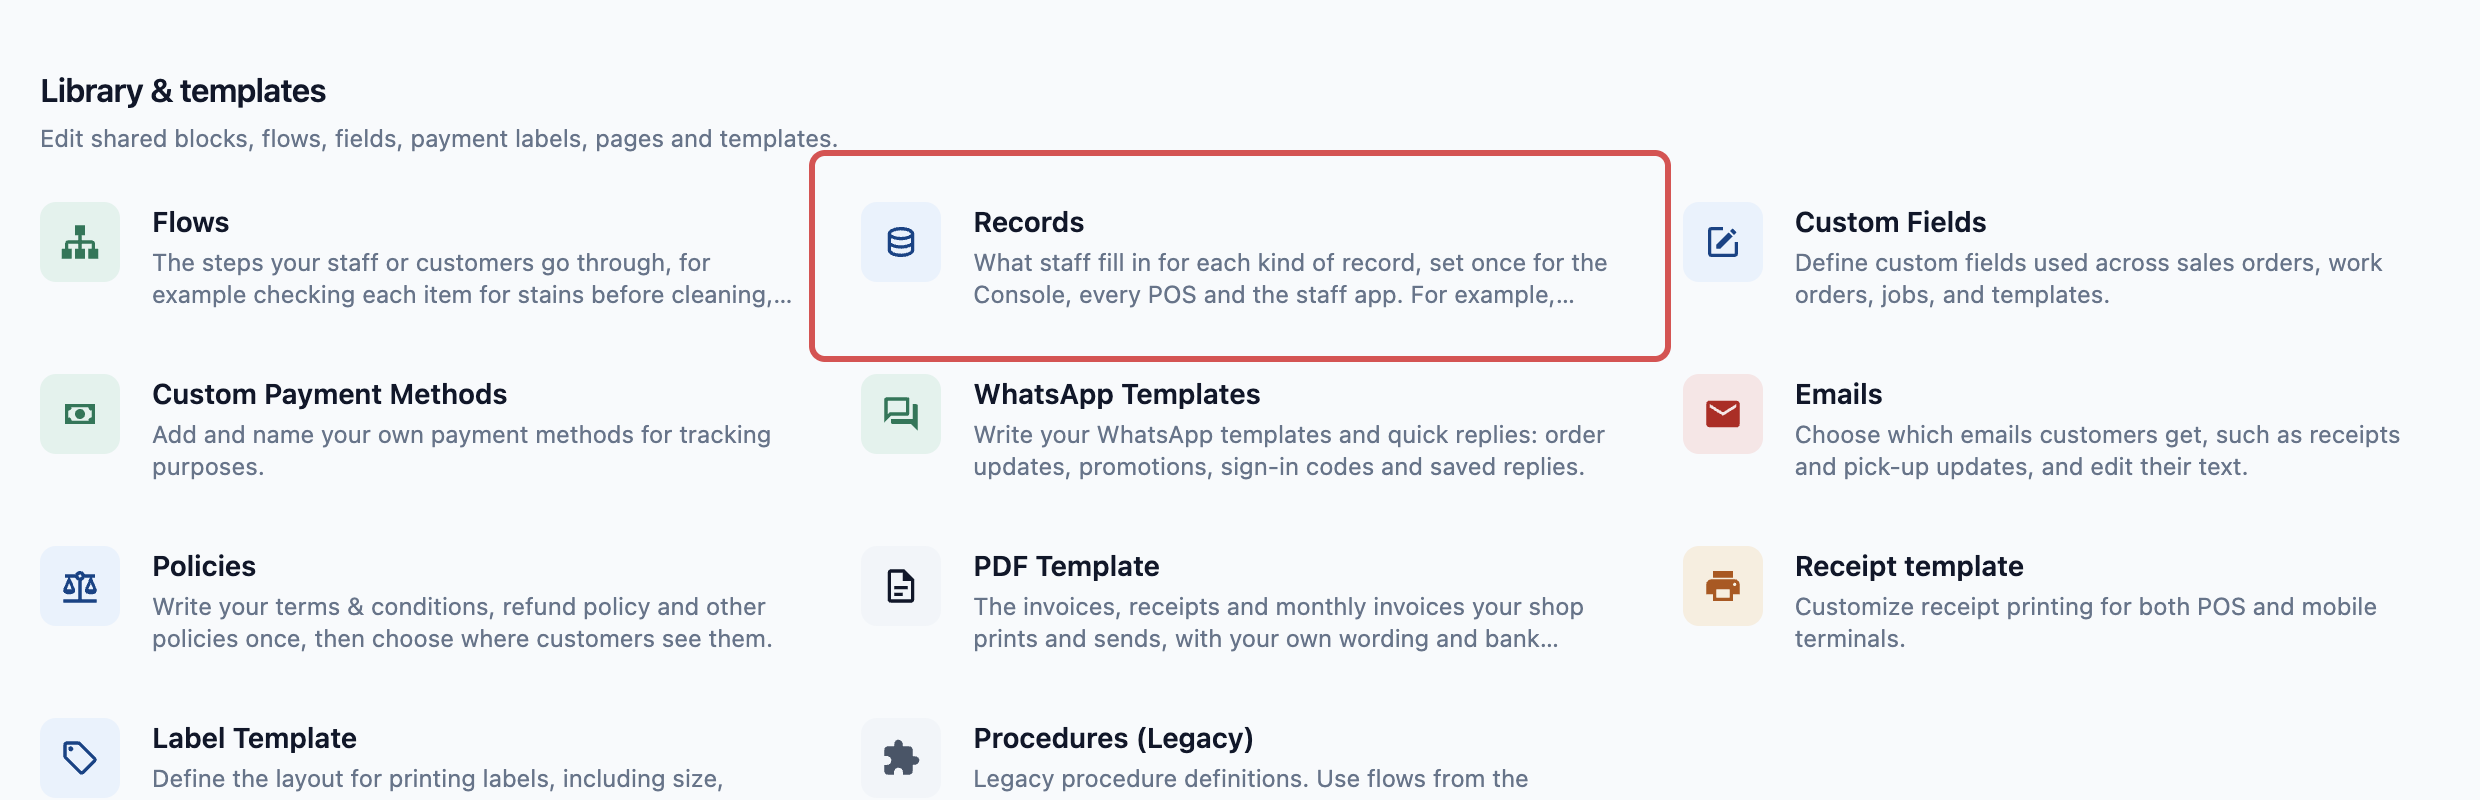
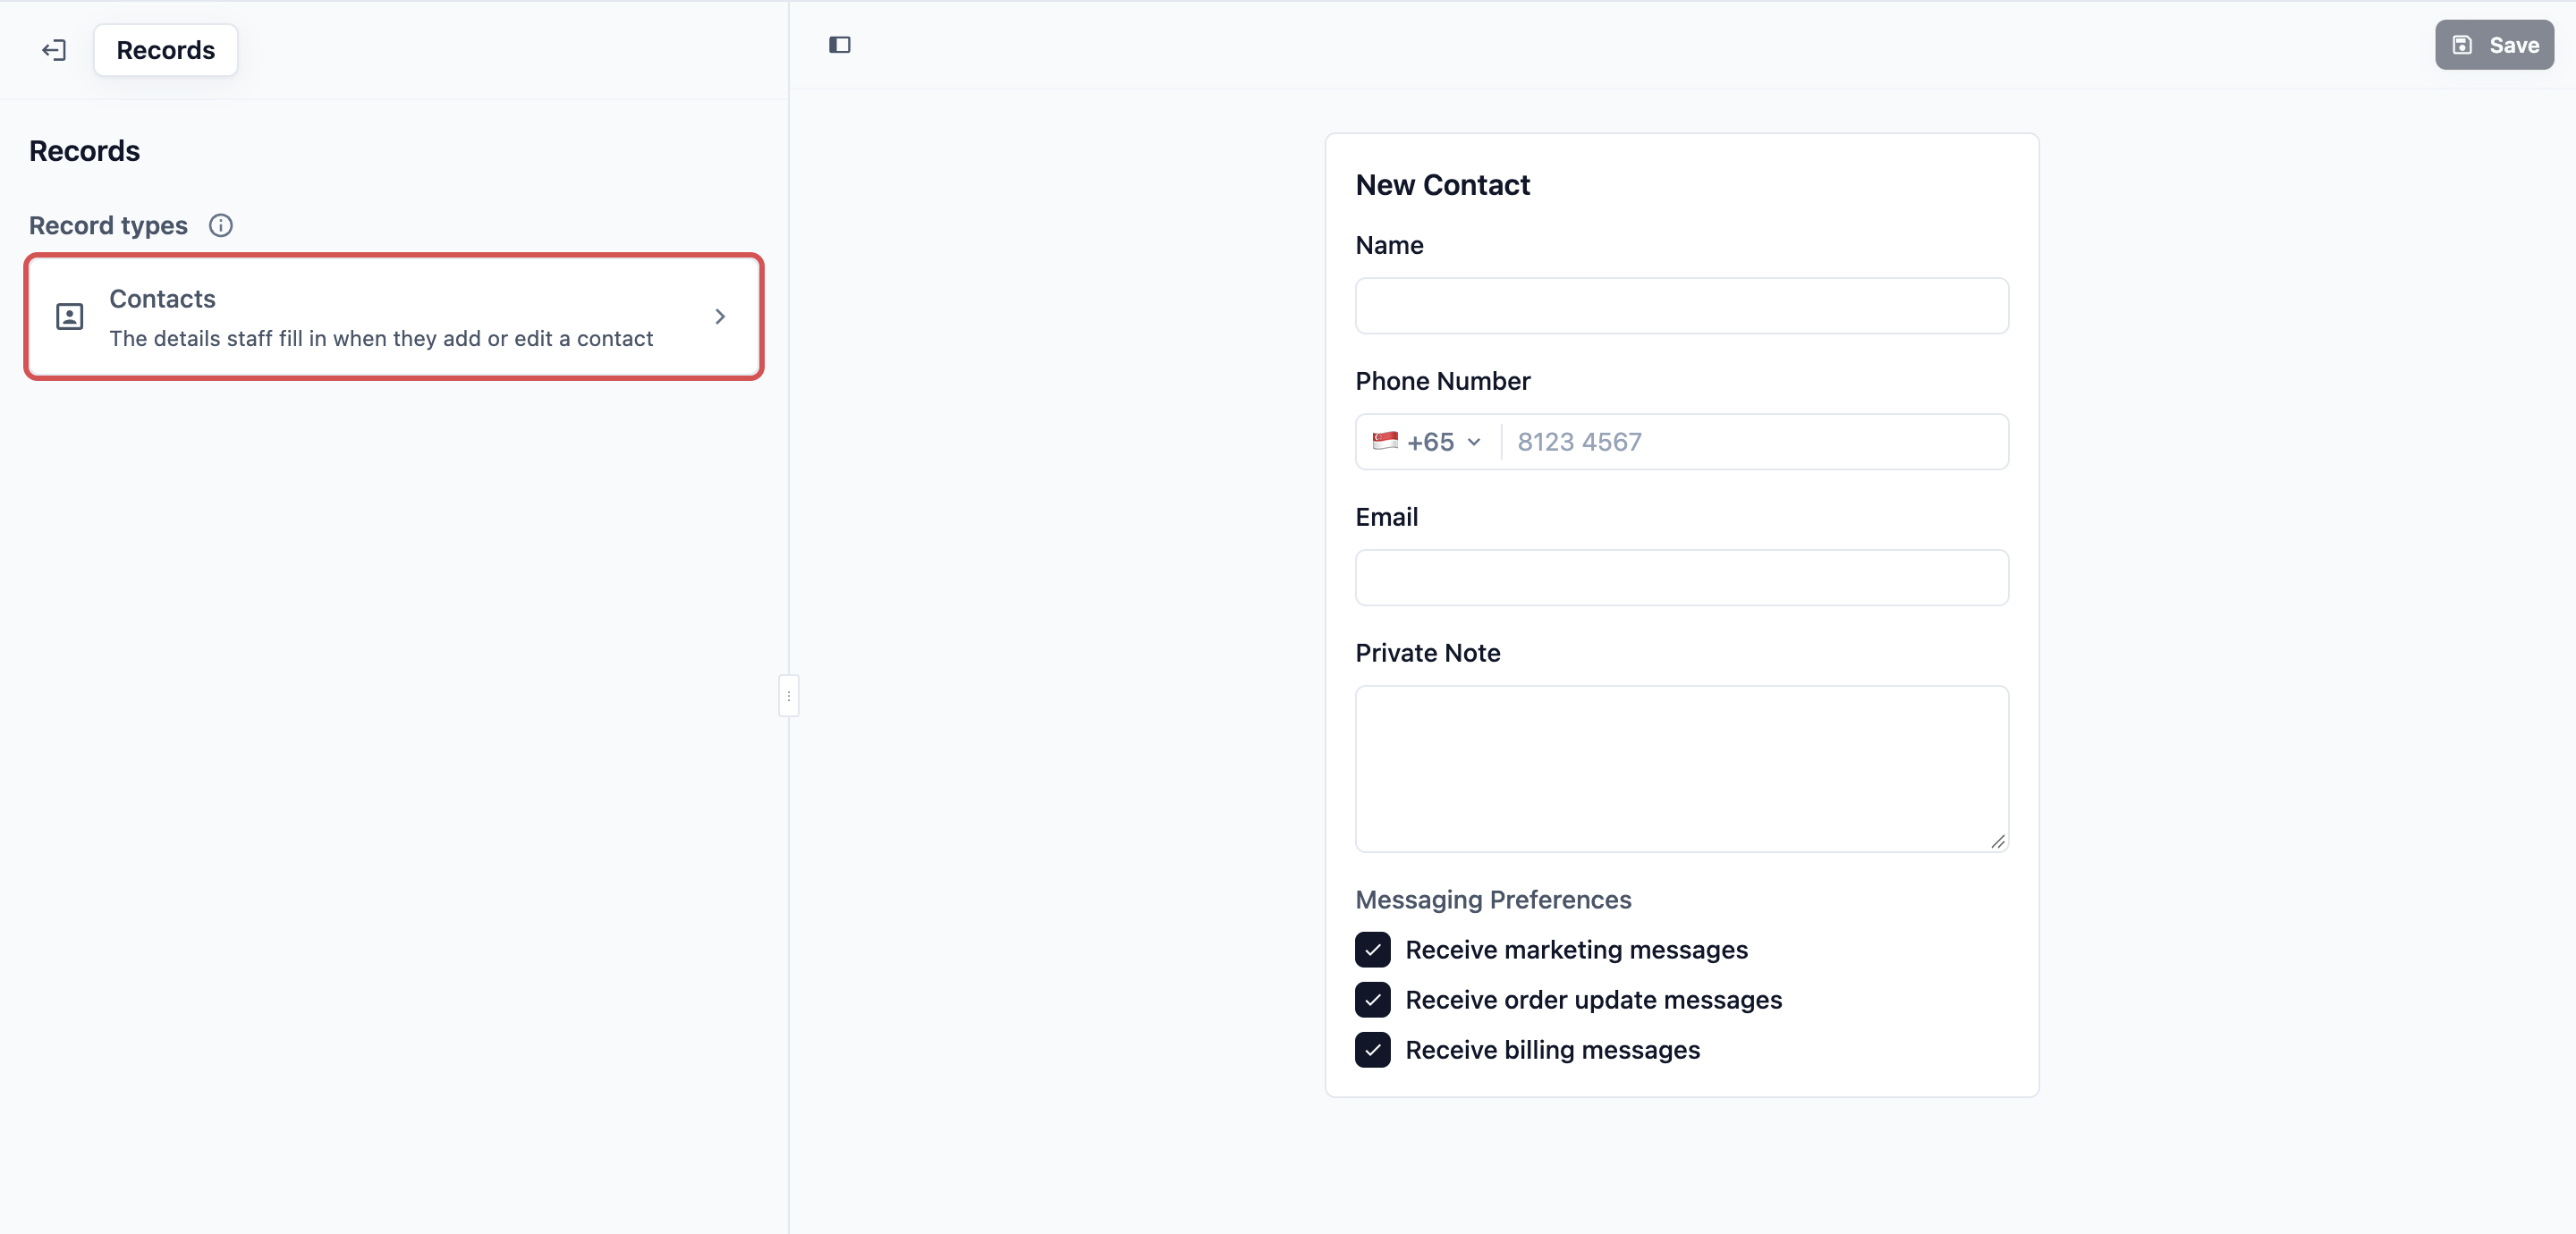
3. Under **Record types**, click **Contacts**.
4. Under **Contact form**, set up the list:
- To add a field, click Add form field and pick **Birthday**, **Referral Source** or any field not yet on the form.
- To change the order staff see, drag the fields into place.
- To take a field off the form, click its bin icon. **Name** can't be removed.
5. Turn on **Required** for each field staff must fill in.
6. Under **Who can find a new contact**, choose an option (see the table below).
7. Click Save at the top right.
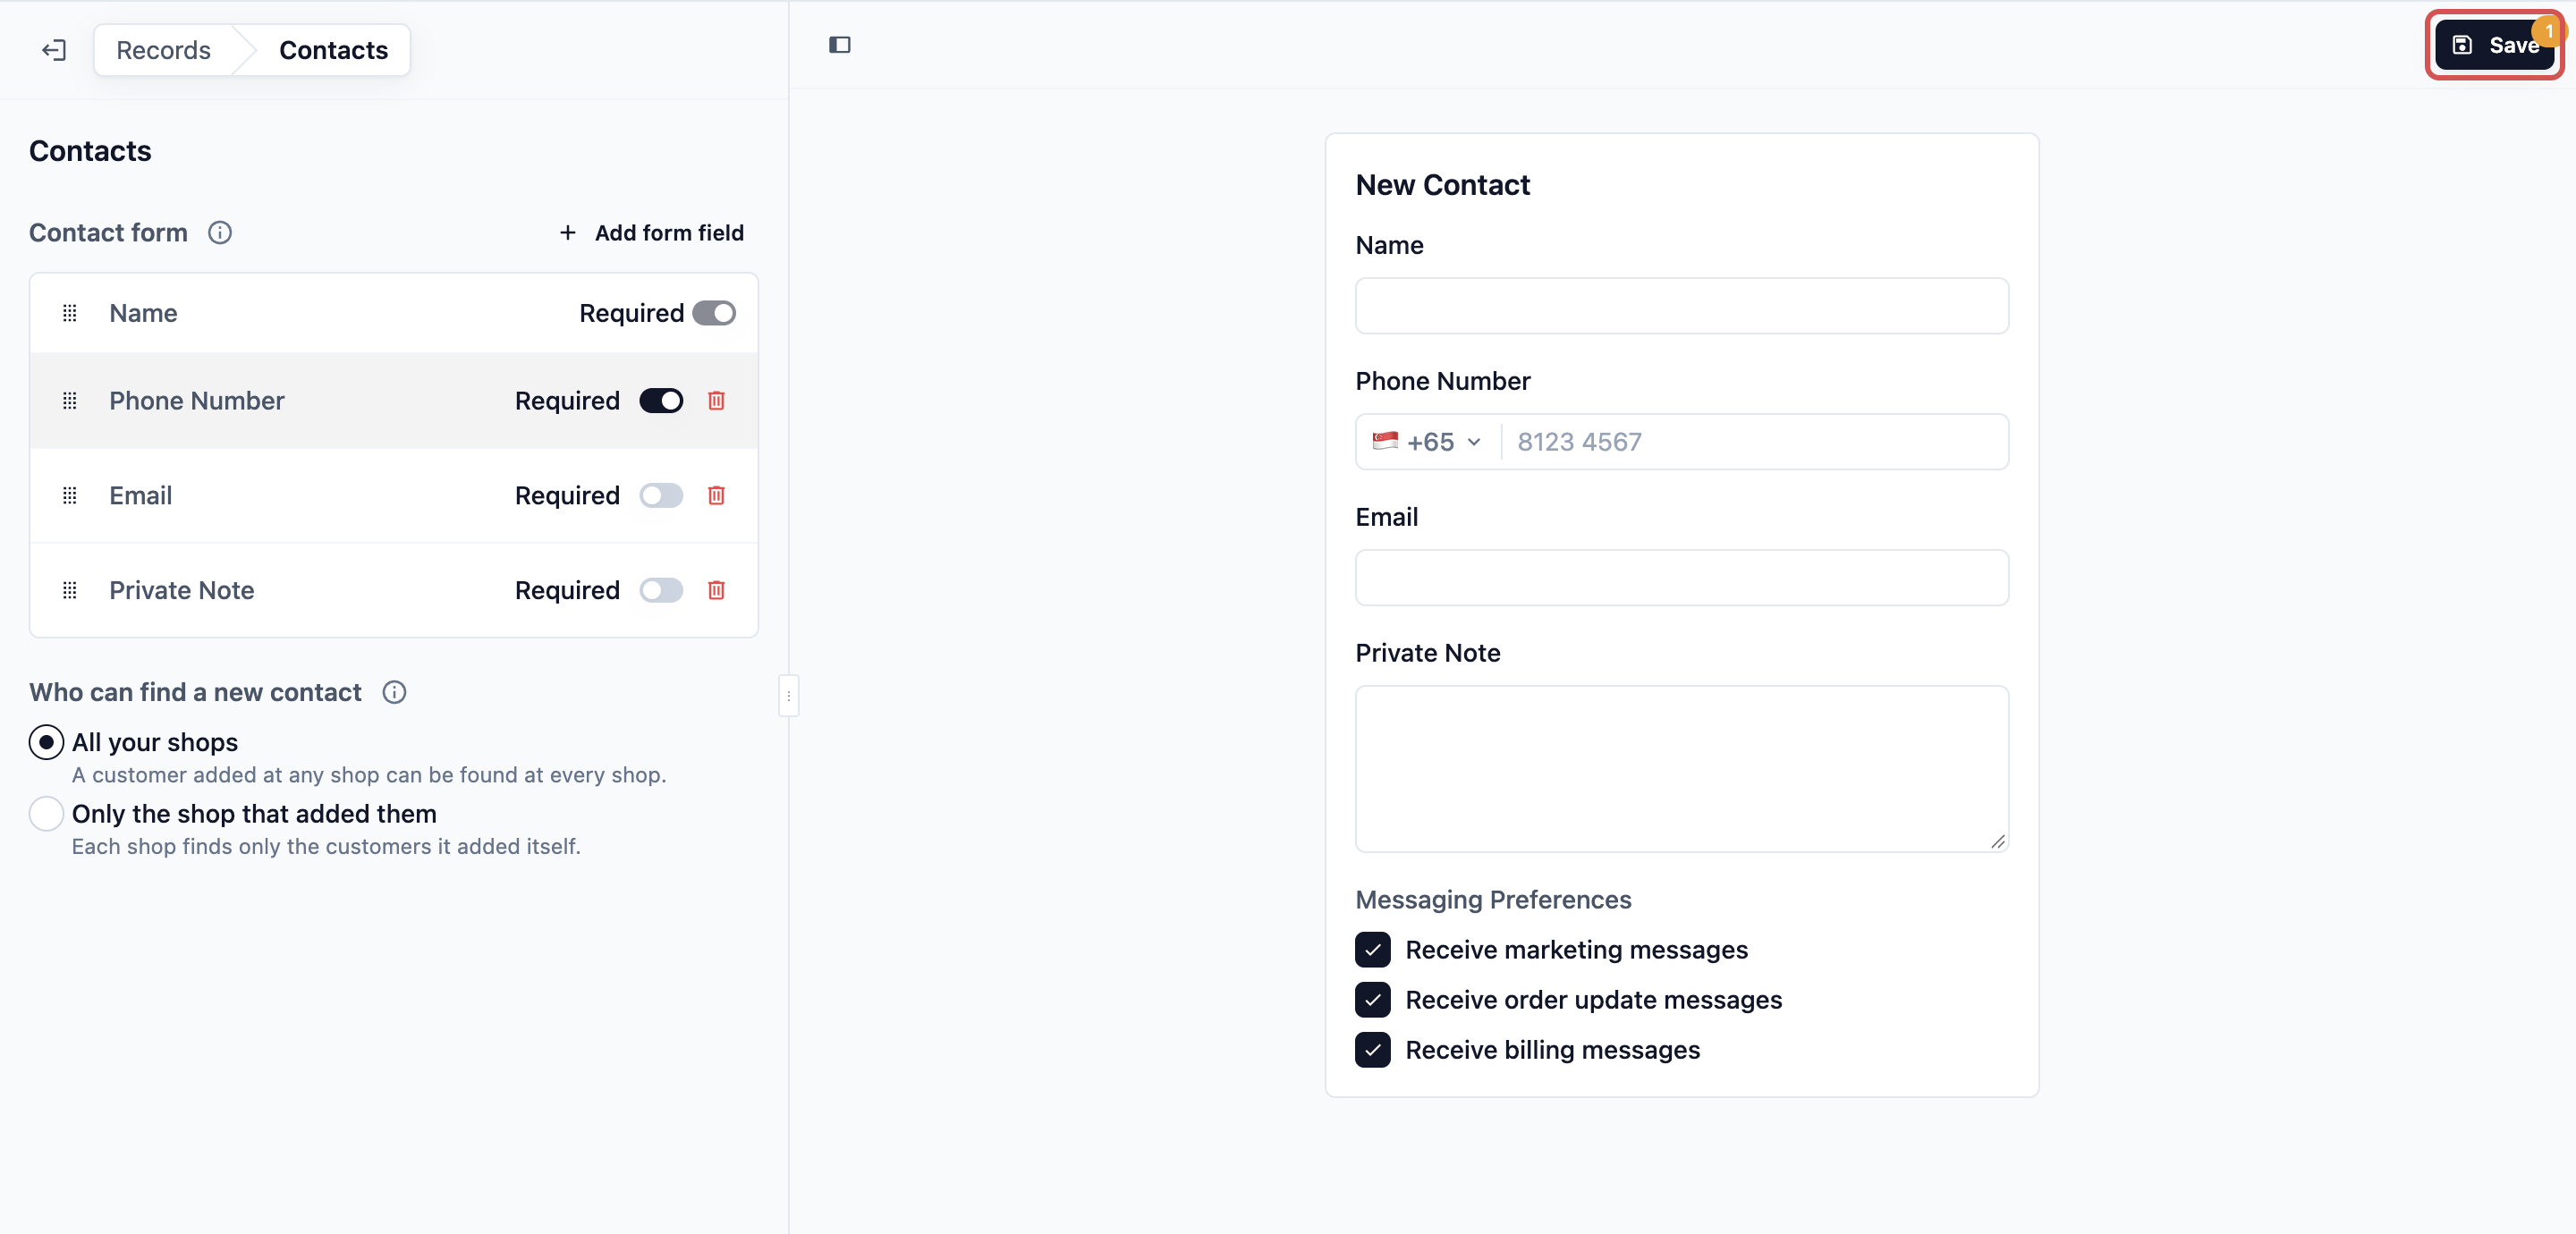
The preview on the right shows the form exactly as staff will see it. You can type in it to try your required fields; nothing is saved.
**Required**
| **Setting** | **What staff see** |
| --- | --- |
| On the form, Required off | The field shows, and staff can leave it empty |
| On the form, Required on | The field shows, and staff can't save until it is filled in |
| Not on the form | Staff don't see the field at all |
If you turn on **Required** for Phone Number, staff can't save a new customer without a number. A number counts once digits are typed in, not only the country code.
**Who can find a new contact**
| **Option** | **What it means** |
| --- | --- |
| All your shops | A customer added at any shop can be found at every shop. This is the default. |
| Only the shop that added them | Each shop finds only the customers it added itself. Useful for franchise outlets that keep their own customers. |
This setting applies to editing as well as adding. When a required field is empty on an older customer, staff must fill it in before they can save any change to that customer.
---
## When a Phone Number or Email Is Already Used
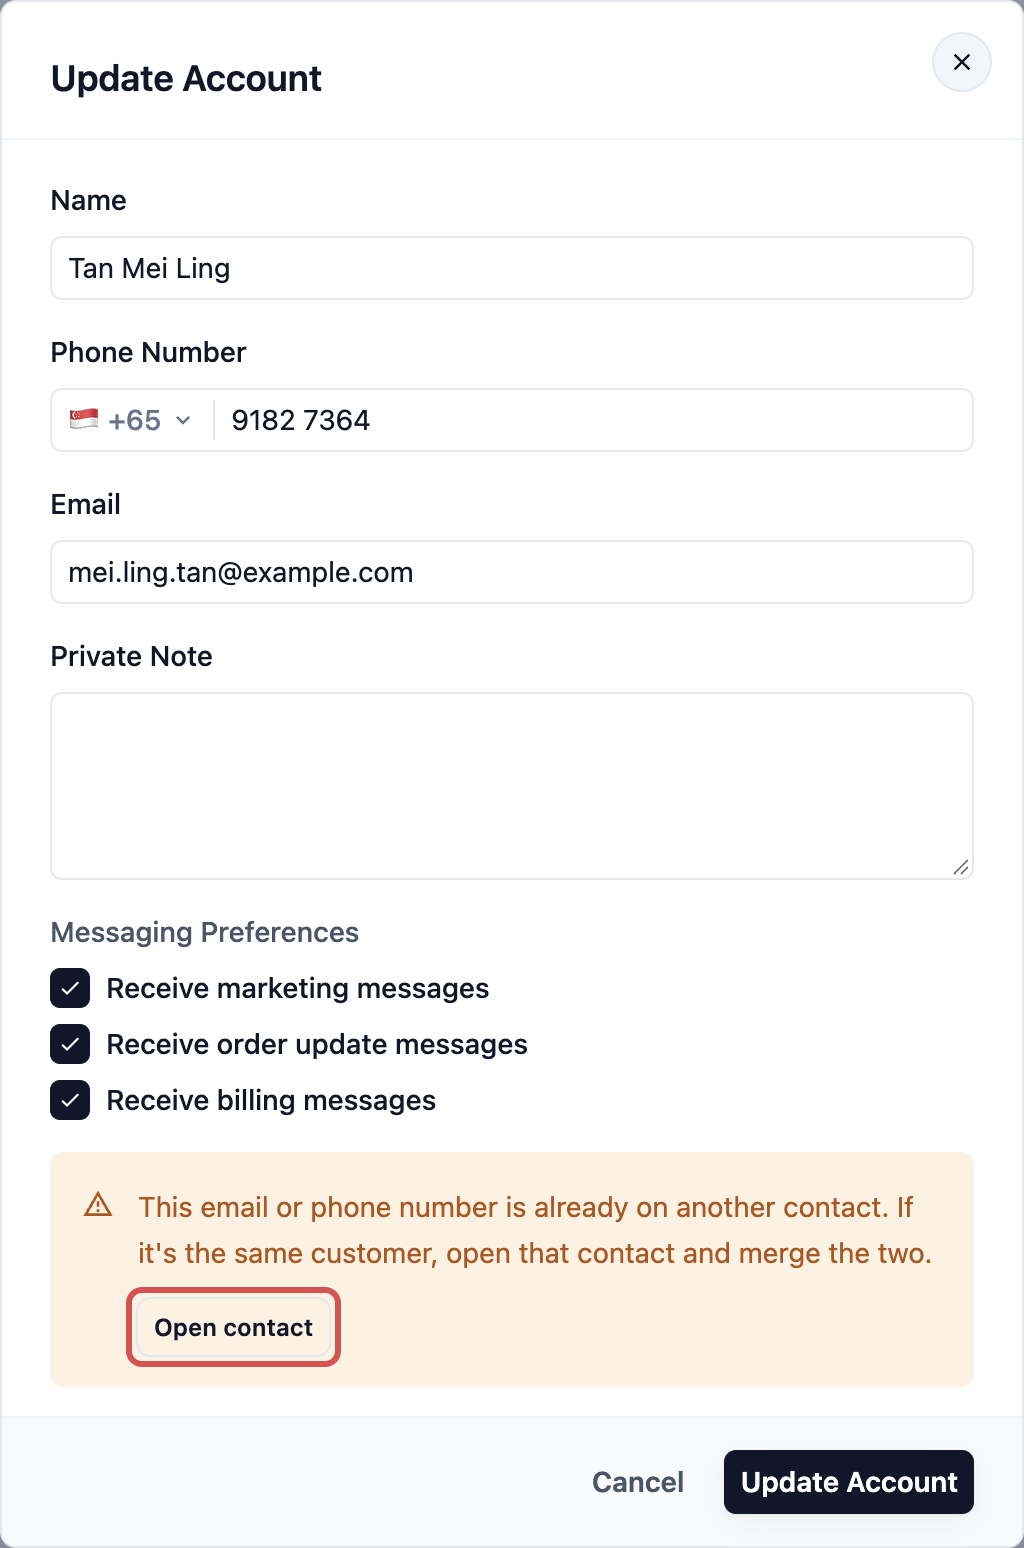
One phone number or email belongs to one customer. If staff type a number or email that is already on another contact, EasyBiz doesn't create a second customer.
- **In the Console,** a warning says the email or phone number is already on another contact. Click Open contact to open the existing customer.
- **At the POS,** a message says the phone number is already on another contact. Close the form, search for the number and pick the existing customer instead.
If the two records really are the same person, merge them. See [Merge or Delete a Contact](/docs/merge-or-delete-a-contact).
---
## Example Setup
CleanFast Laundry sends WhatsApp messages when orders are ready for pickup, so every customer needs a phone number. The owner opens Settings › Records › Contacts and sets:
- Name: Required (always)
- Phone Number: Required on
- Email: Required off
- Private Note: Required off
- Who can find a new contact: All your shops
A walk-in customer, Ahmad Rizal, drops off 6 shirts at the Tampines shop. The cashier taps New Contact and types his name. **Save** stays grey until she adds his number, +65 9123 4567. Email is shown but can be left empty. She taps Save, and Ahmad is attached to the order. Next week, when he visits the Jurong shop, staff there find him by phone number.
---
## Editing Details Later
To change a customer's details or addresses, open them from Contacts. See [See Everything About a Customer](/docs/see-everything-about-a-customer).
---
## FAQs
**Can a customer have two phone numbers?**
> Staff add one phone number when they create a customer. When you merge two contacts, the kept customer keeps the other number too, and it appears as **Other phone** on their form, where staff can edit or remove it.
**What happens to existing customers when I make a field required?**
> Nothing changes on their records, and they still appear in Contacts and at the POS. The rule applies the next time staff edit one of them: they must fill in the missing field before they can save.
**Do customers who sign up online follow the same required fields?**
> No. These settings cover the forms your staff use in the Console, at the POS and in the staff app. Customers who sign up in your Online Store or Mobile App use the store's own sign-up form.
**Do I need to set this up for each POS?**
> No. Settings › Records is one setting for your whole business, and every POS, the Console and the staff app follow it after you click Save.
**Can I make Email required instead of Phone Number?**
> Yes. Turn on **Required** for any field on the form. Keep in mind that WhatsApp updates and phone search need a phone number.
**Where does the address go?**
> Addresses are not on this form. Staff add them from the customer's profile, or at the POS from the address button under the customer's name when an order needs pickup or delivery.
---
## What's Next
You can now add customers from the Console and the POS, and your form asks for exactly what your shop needs. To add more details such as a birthday or billing address, or change the order staff see them in, go to [Choosing What Customer Details Staff Collect](/docs/setting-up-the-pos-customer-form). To find a customer's orders, payments and history in one place, see [See Everything About a Customer](/docs/see-everything-about-a-customer).
Setting up your POS? Carry on with [Adding Counter Staff and Their Clock-In PINs](/docs/set-up-pos-staff-management).